Introduction
Is your ASUS Ultrabook making a loud and bothersome fan noise? If so, you’re not alone. Many Ultrabook users experience this issue due to dust accumulation or a build-up of debris in the fan. Luckily, cleaning the fan can help reduce the noise and keep your Ultrabook running smoothly.
In this guide, we will walk you through the steps to clean the fan noise on your ASUS Ultrabook. It’s essential to perform regular maintenance to prevent any potential damage to your device and ensure optimal performance. So, grab your tools and let’s get started!
Before diving into the cleaning process, it’s essential to take some precautions. Make sure to shut down your Ultrabook and unplug it from the power source to avoid any electrical mishaps. Additionally, gather the necessary tools for the task, such as a screwdriver, compressed air canister, and a soft brush.
Remember, always prioritize your safety and consult the manufacturer’s guidelines if you have any concerns or doubts about the cleaning process specific to your ASUS Ultrabook model.
Checking for Fan Noise
Before proceeding with the cleaning process, it’s essential to confirm that the fan noise is indeed coming from your ASUS Ultrabook’s fan. Sometimes, other components or external factors can cause similar noises that may not require cleaning.
Start by powering on your Ultrabook and listening closely to determine the source of the noise. Is it coming from the fan area, or does it seem to be originating from a different part of the device? Often, a noisy hard drive or a loose component can be mistaken for fan noise.
If you’re certain that the fan is causing the noise, observe the noise level. Is it a constant noise, or does it occur intermittently? A constant noise may indicate a more significant issue, while an intermittent noise is typically associated with dust or debris.
Additionally, pay attention to any other symptoms that may accompany the fan noise, such as overheating, frequent crashes, or a decrease in performance. These could be signs of a more significant problem that might require professional assistance.
If you have determined that the fan noise is persistent, consistent, and directly related to the operation of the fan, it’s time to proceed with the cleaning process to alleviate the issue and restore your Ultrabook’s smooth and quiet performance.
Shutting Down and Unplugging the Ultrabook
Before you start working on cleaning the fan, it’s crucial to shut down your ASUS Ultrabook and unplug it from the power source. This precautionary step ensures your safety and prevents any potential damage to the device during the cleaning process.
First, save any unsaved work and close all open applications. This allows your Ultrabook to shut down properly without any data loss or software conflicts. Take a moment to double-check that everything is saved before proceeding.
Once you have closed all applications and saved your work, click on the “Start” menu or press the designated power button on your Ultrabook to access the shutdown options. Select the “Shutdown” option to begin the shutdown process.
Wait for your Ultrabook to completely power off before proceeding to the next step. This ensures that all internal components are no longer active, minimizing the risk of electrical accidents or damage.
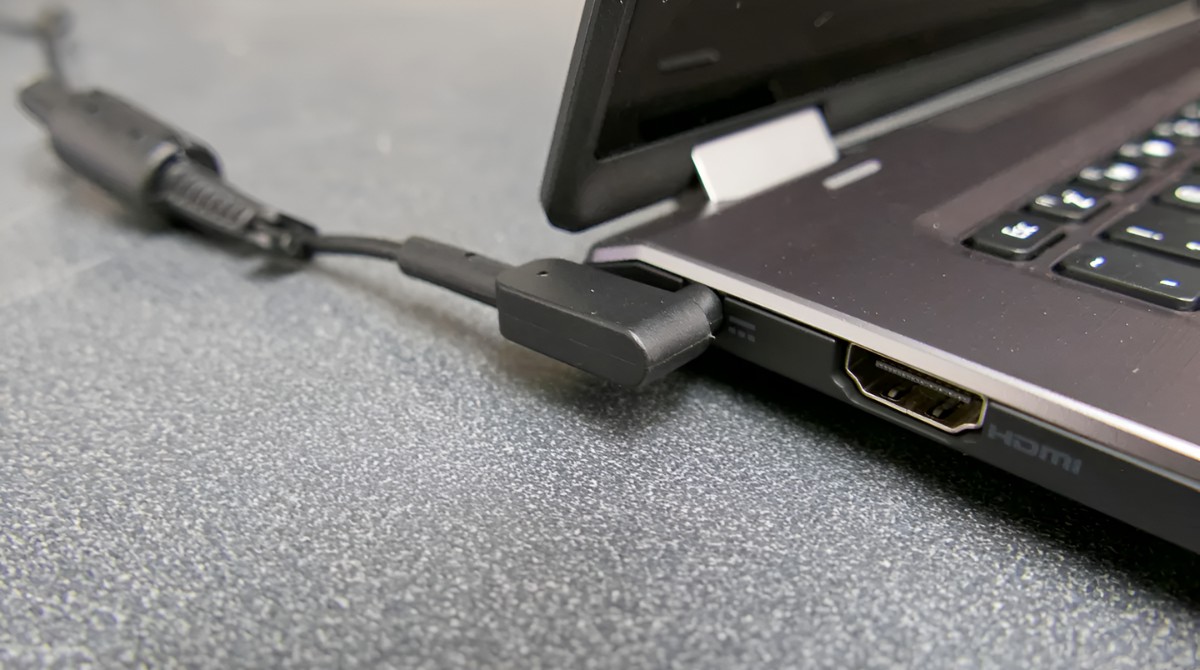
After your Ultrabook has shut down, it’s crucial to unplug it from the power source. Disconnect the power adapter from the Ultrabook and remove any other peripheral devices, such as USB drives or external monitors. This step guarantees that the device is entirely disconnected and safe to work on without any electrical current flowing through it.
Take a moment to organize your workspace and gather all the necessary tools for the cleaning process. Having everything prepared before opening the Ultrabook will streamline the process and ensure that you don’t overlook any essential steps.
With your Ultrabook shut down, unplugged, and the necessary tools at hand, you’re now ready to dig deeper into the cleaning process and resolve the fan noise issue for good.
Opening the Ultrabook
Now that you have safely shut down and unplugged your ASUS Ultrabook, it’s time to open the device to access the internal components, including the fan. Opening the Ultrabook requires some careful handling and precision, so make sure to follow these steps closely.
1. Look for the screws: To open your Ultrabook, you will need to locate and remove the screws that secure the bottom cover. These screws are usually located on the back or sides of the device. Use a screwdriver that fits the screws properly to avoid damaging them.
2. Remove the screws and set them aside: Carefully unscrew each screw and put them in a safe place, ensuring you keep track of their position and size. It’s helpful to use a small container or magnetized tray to avoid losing any screws during the process.
3. Open the bottom cover: Once all the screws are removed, gently pry open the bottom cover using a plastic opening tool or your fingertips. Start by inserting the tool or your fingers in a discreet corner and slowly work your way around the edges, applying gentle pressure. Be cautious not to force or bend the cover, as it could cause damage.
4. Set aside the bottom cover: Once the bottom cover is loose, carefully lift it away from the Ultrabook and set it aside. Take note of any cables or connectors that may be attached to the cover, as you will need to disconnect them to fully access the fan.
Note: Opening your Ultrabook may void its warranty, so proceed with caution. If your device is still under warranty, it’s recommended to consult the manufacturer or seek professional assistance to avoid any warranty-related complications.
With the bottom cover removed, you now have direct access to the internal components of your ASUS Ultrabook, including the fan. In the next section, we will guide you through the process of locating and cleaning the fan to eliminate the noise issue.
Locating the Fan
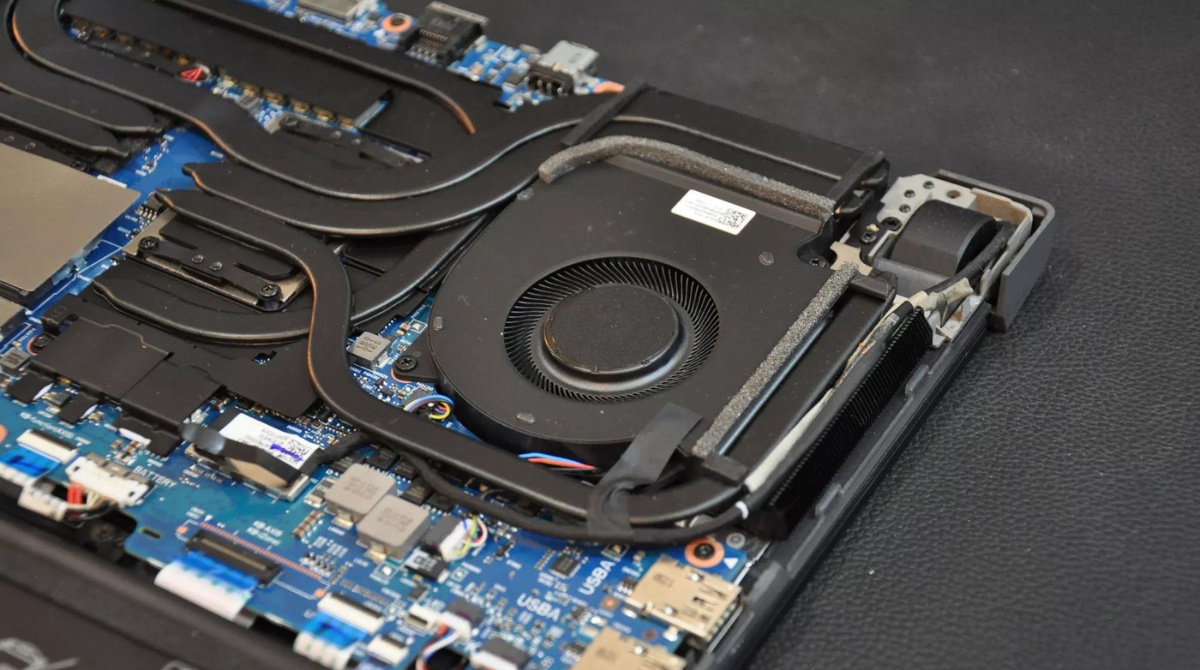
Now that you have successfully opened your ASUS Ultrabook, the next step is to locate the fan. The fan is responsible for cooling the internal components of the device, and it’s often the source of the noise issue.
Before proceeding, take a moment to familiarize yourself with the internal layout of your Ultrabook. Look for the components such as the CPU, motherboard, and other major parts. The fan is typically located near the CPU heatsink.
The fan is a small, circular component with blades that spin to circulate air and cool down the system. It is usually connected to the motherboard with a cable, so locate that connection point as well.
In some Ultrabook models, the fan may be covered by a protective panel or shield. If this is the case, you may need to unscrew or detach the panel to gain direct access to the fan.
Additionally, take note of any nearby components or cables that may obstruct your cleaning process. It’s crucial to be mindful of delicate components and avoid applying excessive force or accidentally damaging any other parts.
If you are uncertain about the exact location of the fan in your Ultrabook, consult the manufacturer’s documentation or search online for specific information about your model. Understanding the fan’s location will enable you to proceed with the cleaning process more efficiently.
With the fan located, it’s time to move on to the next step: removing dust and debris to restore the proper functioning of the fan and eliminate the annoying noise.
Removing Dust and Debris
Now that you have located the fan in your ASUS Ultrabook, it’s time to tackle the main culprit behind the fan noise: dust and debris. Over time, these particles can accumulate and hinder the fan’s performance, leading to increased noise levels. Fortunately, removing the dust and debris is a relatively straightforward process.
1. Compressed air: Start by using a canister of compressed air to blow away the dust and debris from the fan area. Hold the canister upright and position the nozzle a few inches away from the fan. Be gentle and avoid blowing the air directly into the fan, as this could damage the fan’s delicate components. Instead, aim for the surrounding areas to dislodge the dust and debris.
2. Soft brush: If there are stubborn dust or debris particles that the compressed air cannot remove, you can use a soft brush to carefully brush them away. Ensure that the brush’s bristles are soft and clean, as rough bristles may cause damage to the fan or other components. Gently brush the fan area, taking care not to apply excessive pressure.
3. Cleaning wipes: For more thorough cleaning, you can use specialized cleaning wipes that are safe for electronic components. These wipes are designed to remove dust and grime without leaving any residue behind. Carefully wipe the fan area and surrounding components to eliminate any remaining dust or debris particles.
Remember, always use caution when working with delicate electronic components. Avoid using any liquids directly on the fan or other internal parts, as this could cause damage or electrical issues. Stick to dry cleaning methods and be gentle throughout the process.
Once you have removed the dust and debris from the fan area, it’s time to move on to cleaning the fan blades to ensure optimal performance and noise reduction.
Cleaning the Fan Blades
Now that you have removed the dust and debris from the fan area of your ASUS Ultrabook, it’s important to clean the fan blades themselves. Over time, fan blades can accumulate dirt and grime, which can further impede the fan’s performance and contribute to the noise issue. Follow these steps to effectively clean the fan blades:
1. Hold the fan blades in place: To prevent the fan from spinning while you clean the blades, gently hold them in place with your finger or a small object. This will ensure that you can clean each blade thoroughly without accidentally damaging the fan or injuring yourself.
2. Brush off loose debris: Using a soft brush or a clean, dry cloth, gently brush or wipe away any loose debris or dirt from the fan blades. Be careful not to apply excessive force or use rough materials that could scratch or damage the blades. Take your time to clean each blade individually, reaching all areas to remove any trapped dust.
3. Remove stubborn grime: If there are any stubborn stains or grime on the fan blades that cannot be removed with brushing alone, you can dampen a cloth slightly with isopropyl alcohol or electronic cleaning solution. Make sure to wring out any excess liquid and avoid dripping it onto other components. Gently wipe the affected areas of the fan blades with the damp cloth, being cautious not to get any liquid into the fan or other internal parts.
4. Allow the fan blades to dry: After cleaning the fan blades, allow them to air dry completely before reassembling your Ultrabook. Ensure that there is no moisture left on the blades or in the fan area to prevent any potential damage or electrical issues.
Cleaning the fan blades is an essential step in reducing fan noise and maintaining proper airflow within your Ultrabook. By removing dirt and grime from the blades, you can improve the fan’s efficiency and overall performance.
With the fan blades cleaned, it’s time to move on to reassembling your ASUS Ultrabook and taking precautions to ensure that everything is properly secured and back in place.
Reassembling the Ultrabook
After completing the cleaning process for your ASUS Ultrabook’s fan, it’s time to reassemble the device. Follow these steps to ensure that everything is properly secured and back in place:
1. Attach the bottom cover: Carefully align the bottom cover with the Ultrabook’s body, making sure all the screw holes line up. Gently press down on the cover to secure it in place.
2. Screw in the screws: Retrieve the screws that you set aside earlier and begin screwing them back into their respective holes. Start by tightening each screw partially, working your way around the Ultrabook in a diagonal pattern. Once all screws are in place, go back around and tighten them fully. Be cautious not to overtighten as it may damage the screws or the Ultrabook’s casing.
3. Reconnect any cables or connectors: If you disconnected any cables or connectors during the disassembly process, make sure to reconnect them to their respective ports on the Ultrabook. Take note of the labeling or markings on the connectors and match them accordingly. Ensure that each connection is secure and properly seated.
4. Double-check everything: Before powering on your Ultrabook, double-check that all screws are tightened, cables are securely connected, and no tools or loose objects are left inside. It’s crucial to ensure that everything is in its proper place to prevent any potential damage or malfunctions.
Once you have reassembled your Ultrabook, it’s time to plug it back into the power source and power it on. Observe the fan’s operation and listen for any changes in noise levels. If the fan noise persists or if you encounter any other issues, it is recommended to reach out to ASUS support or seek professional assistance for further troubleshooting.
By following these steps to reassemble your ASUS Ultrabook, you have completed the cleaning process and taken an important step towards maintaining optimal performance and reducing fan noise. Regular maintenance and cleaning will prolong the lifespan of your Ultrabook and ensure that it continues to run smoothly for years to come.
Conclusion
Cleaning the fan noise on your ASUS Ultrabook is a simple yet crucial task to maintain optimal performance and reduce bothersome noise levels. By following the steps outlined in this guide, you can effectively remove dust and debris from the fan area, clean the fan blades, and reassemble your Ultrabook with confidence.
Remember to exercise caution throughout the cleaning process, ensuring that your Ultrabook is shut down, unplugged, and that you have the necessary tools at hand. Take your time and be gentle when handling delicate components to avoid any damage.
Regularly cleaning the fan and maintaining your Ultrabook will not only reduce fan noise but also help prevent overheating and extend the lifespan of your device. It’s recommended to perform this cleaning process every few months or whenever you notice an increase in fan noise or reduced performance.
If, after cleaning the fan, the noise persists or you encounter any other issues with your Ultrabook, it’s best to seek assistance from ASUS support or consult a professional technician for further diagnosis and repair.
By taking care of your ASUS Ultrabook and keeping the fan in optimal condition, you can enjoy a quieter and more efficient computing experience. Say goodbye to annoying fan noise and hello to a smooth, reliable performance!


