Introduction
Welcome to our guide on how to clean a drawing tablet screen! Whether you’re a professional artist or a hobbyist, keeping your drawing tablet screen clean is essential for optimal performance and a clear drawing experience. Over time, dust, fingerprints, and smudges can accumulate on the screen, affecting visibility and potentially hindering your artistic creations.
In this article, we’ll walk you through the step-by-step process of cleaning your drawing tablet screen. We’ll provide you with tips and techniques to ensure your tablet remains clean and in top condition. By following these simple steps, you can maintain a pristine screen and enjoy a seamless drawing experience.
Before we dive into the cleaning process, it’s important to gather the necessary supplies. Having the right tools at hand will help you effectively remove dirt and debris without damaging the screen. Don’t worry, the required supplies are readily available and easy to access.
Now, let’s gather our supplies and get ready to clean that drawing tablet screen!
Gather the necessary supplies
Before you begin cleaning your drawing tablet screen, it’s important to gather the necessary supplies. Having the right tools will ensure that you can effectively remove dirt, grime, and smudges without causing any damage to the screen. Here’s a list of supplies you’ll need:
- Microfiber cloth: This should be a lint-free cloth specifically designed for cleaning screens. Avoid using any rough or abrasive materials that can potentially scratch the screen.
- Cleaning solution: In some cases, you may need a cleaning solution to tackle stubborn smudges or fingerprints. Opt for a screen cleaning solution that is specifically meant for electronic devices and avoid using harsh chemicals.
- Cotton swabs or soft-bristled brush: These will be handy for reaching tight corners and cleaning hard-to-reach areas on the tablet.
- Distilled water: If you prefer using a homemade cleaning solution, distilled water can be used along with rubbing alcohol or a gentle soap.
It’s important to note that different drawing tablet models may have specific cleaning recommendations. Before gathering your supplies, refer to the user manual or manufacturer’s guidelines for any specific instructions or precautions.
Now that you have your cleaning supplies ready, it’s time to power off and disconnect your drawing tablet before starting the cleaning process.
Power off and disconnect the tablet
Before you begin cleaning your drawing tablet screen, it’s important to power off the device and disconnect it from any power source or cables. This step is crucial to ensure your safety and prevent any accidental damage to the tablet. Here’s how to proceed:
- Save your work: If you have any ongoing projects or unsaved work on your tablet, make sure to save and back them up before shutting down the device.
- Power off the tablet: Locate the power button on your drawing tablet and press and hold it until the device powers off. This may take a few seconds.
- Disconnect the tablet: Once the tablet is powered off, unplug any cables or accessories connected to it, such as USB cables, HDMI cables, or charging cords.
By following these steps, you ensure that no electricity is running through the device, minimizing the risk of electrical damage during the cleaning process. It’s important to wait a few minutes after powering off the tablet to let it cool down before proceeding with the next steps.
Now that your tablet is powered off and disconnected, let’s move on to the next section, where we’ll learn how to remove dust and debris from the screen.
Remove dust and debris
Now that your drawing tablet is powered off and disconnected, it’s time to get rid of any dust and debris that may have accumulated on the screen. Dust particles can affect the tablet’s performance and hinder your drawing experience. Here’s how you can remove dust and debris from the tablet’s screen:
- Inspect the screen: Take a close look at the screen of your drawing tablet and identify any visible dust or debris. This could include tiny particles, lint, or loose dirt.
- Use a soft-bristled brush or a clean cotton swab: Gently brush or swipe the screen using a soft-bristled brush or a clean cotton swab. Start from the center of the screen and move in a circular motion towards the edges. This will help to dislodge any loose debris without scratching the screen’s surface.
- Blow away the dust: If you have a small handheld air blower or compressed air canister, you can use it to blow away any remaining dust particles from the screen. Ensure that the pressure is not too high to avoid damaging the screen or pushing debris deeper into the tablet.
- Repeat the process if necessary: If you notice any stubborn dust or debris still present on the screen, repeat the above steps until the surface is clean.
It’s important to be gentle during this process to avoid any potential damage to the sensitive screen. Avoid using excessive force or sharp objects that can scratch or leave marks on the surface. Once you have successfully removed the dust and debris, it’s time to move on to the next step: cleaning the screen with a microfiber cloth.
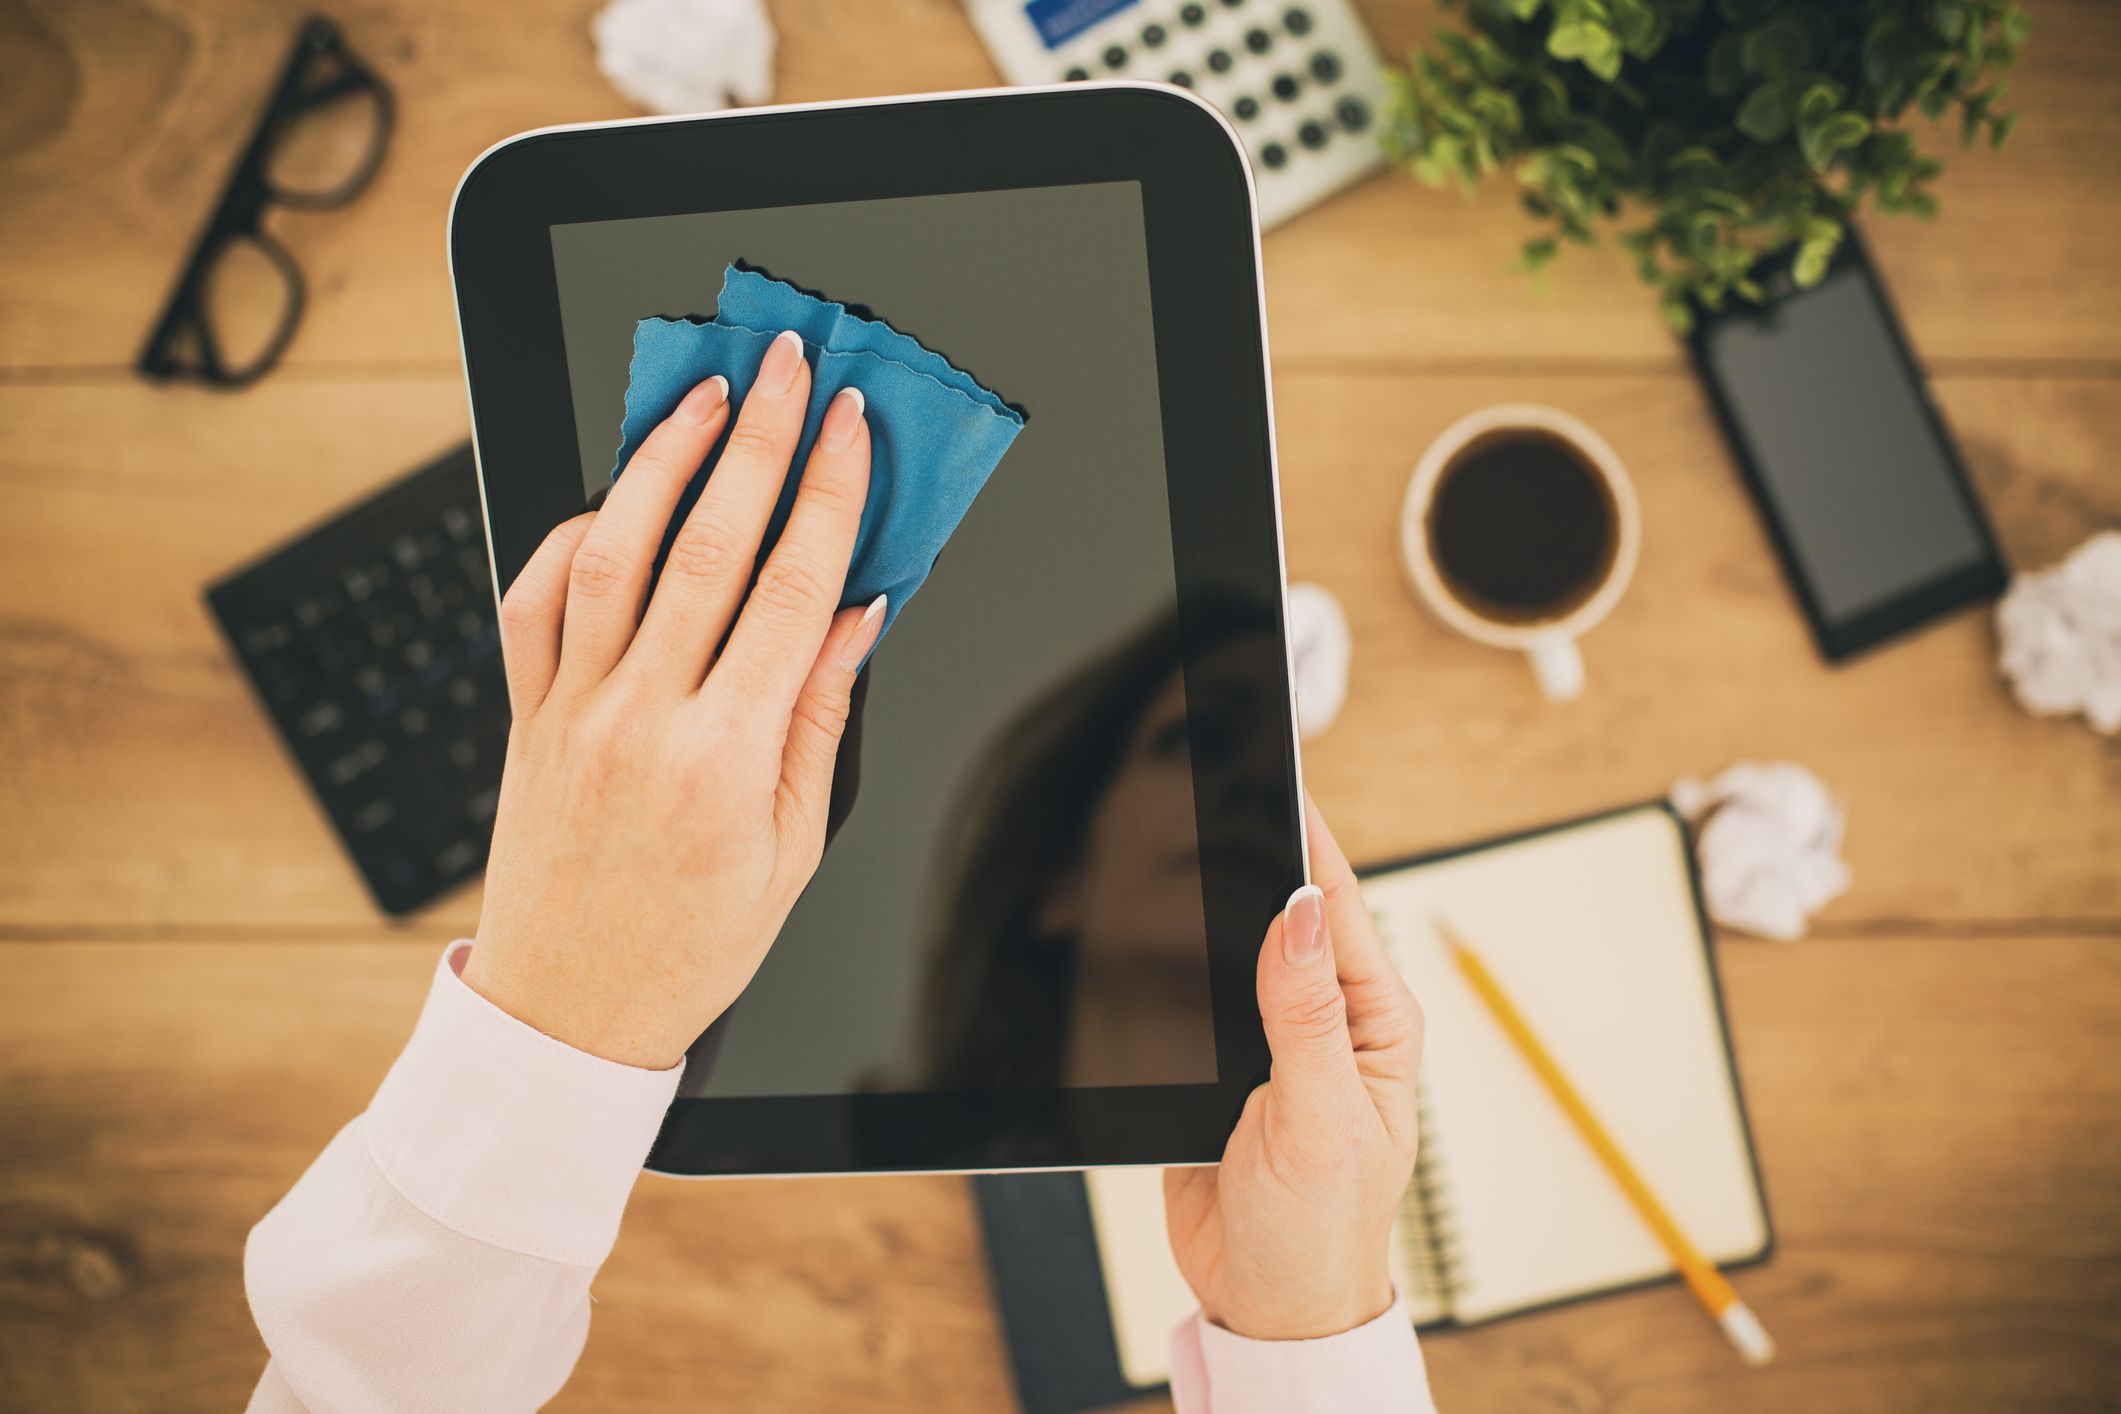
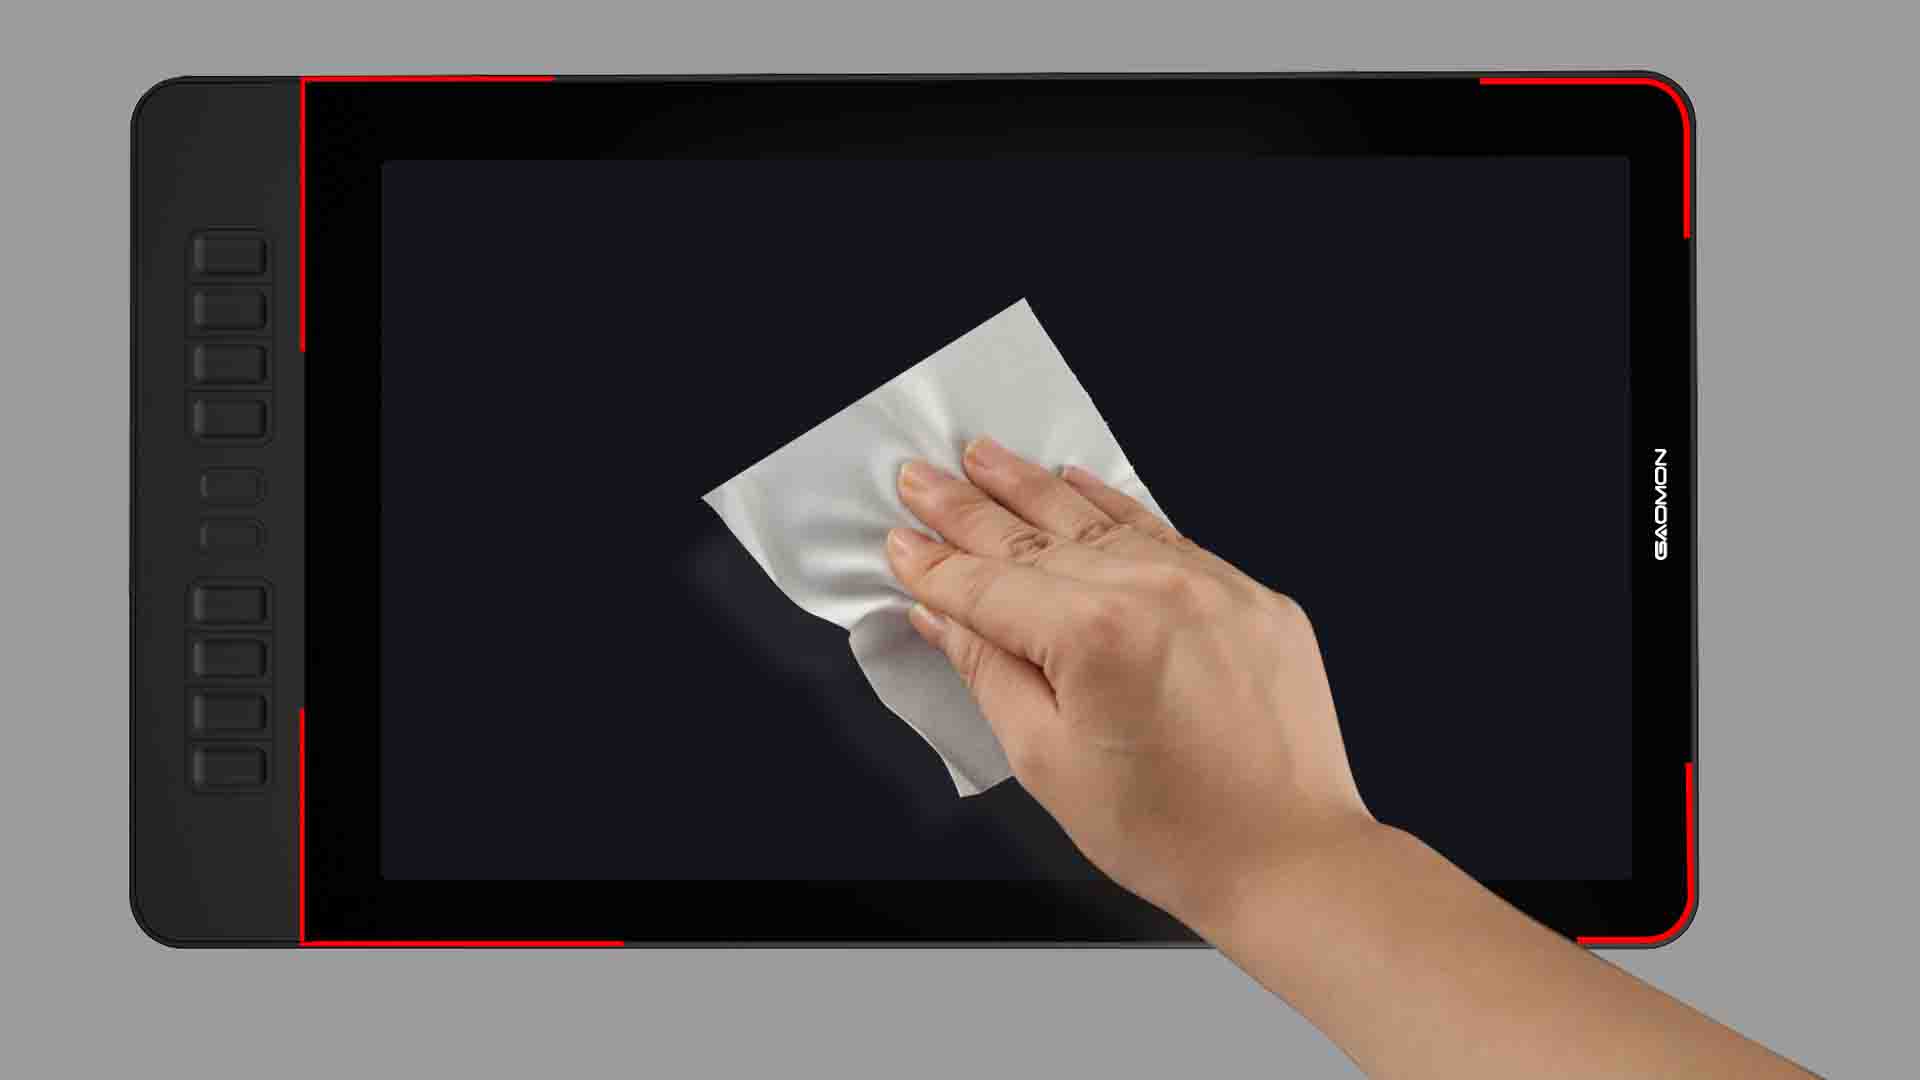
Clean the screen with a microfiber cloth
Now that you have removed the dust and debris from your drawing tablet screen, it’s time to clean it using a microfiber cloth. A microfiber cloth is designed to gently clean delicate surfaces without leaving behind scratches or streaks. Follow these steps to clean the screen:
- Dampen the microfiber cloth: Moisten the microfiber cloth slightly with distilled water or a screen cleaning solution. Make sure the cloth is not dripping wet; it should be damp enough to clean the screen without causing damage.
- Gently wipe the screen: Take the damp microfiber cloth and start wiping the screen in a gentle, circular motion. Begin from the center and move outward towards the edges. This ensures that you cover the entire screen surface and remove any fingerprints, smudges, or residue.
- Apply light pressure if needed: If there are stubborn marks or smudges on the screen, you can apply slightly more pressure, but make sure to avoid excessive force. Be gentle to prevent any damage to the screen.
- Continue wiping until clean: Keep wiping the screen until it appears clean and free of fingerprints and smudges. You may need to repeat the process a few times, especially if there are stubborn marks that are not easily coming off.
Remember, it’s crucial to use a microfiber cloth specifically designed for cleaning screens. Avoid using ordinary cloths, paper towels, or tissues, as they can leave behind lint or scratch the screen’s surface. Once you’re satisfied with the cleanliness of the screen, it’s time to move on to the next step: using a cleaning solution (if necessary).
Use a cleaning solution (if necessary)
In some cases, stubborn smudges or fingerprints may require more than just a microfiber cloth to clean. If you’re faced with tough-to-remove marks on your drawing tablet screen, using a cleaning solution can help. Here’s how to do it:
- Check the manufacturer’s guidelines: Before using any cleaning solution on your drawing tablet, refer to the manufacturer’s guidelines to ensure compatibility and avoid potential damage. Some tablets may have specific recommendations for cleaning solutions.
- Choose an appropriate screen cleaning solution: Opt for a screen cleaning solution that is specifically designed for electronic devices. Avoid using harsh chemicals or household cleaners as they may damage the screen.
- Dampen a corner of the microfiber cloth: Apply a small amount of the screen cleaning solution to a corner of the microfiber cloth. Make sure it is not soaked but damp enough to use for cleaning the screen.
- Gently wipe the screen: Using the damp corner of the cloth, gently wipe the affected areas of the screen with a circular motion. Apply light pressure if necessary, but be cautious not to apply excessive force.
- Continue wiping and reapply if needed: Repeat the process until the stubborn marks are removed. If necessary, dampen the cloth again with the cleaning solution and continue wiping until the screen is clean.
After using the cleaning solution, it’s crucial to thoroughly dry the screen to prevent any liquid from seeping into the tablet. Remember, always follow the manufacturer’s guidelines when it comes to using cleaning solutions to ensure the longevity and performance of your drawing tablet.
Now that you’ve successfully cleaned your drawing tablet screen, let’s move on to the next section, where we’ll learn how to dry the screen thoroughly.
Dry the screen thoroughly
After cleaning your drawing tablet screen with a microfiber cloth and, if necessary, a cleaning solution, it’s crucial to dry the screen thoroughly. This step will ensure that no moisture or liquid residue remains, preventing any potential damage to the device. Here’s how to dry the screen effectively:
- Use a clean, dry microfiber cloth: Take a separate, clean microfiber cloth that is dry and free of any moisture. This cloth should be used specifically for drying the screen.
- Gently wipe the screen: Use the dry microfiber cloth to gently wipe the entire screen, ensuring that all areas are dried. Use light, circular motions to absorb any residual moisture.
- Focus on edges and corners: Pay extra attention to the edges and corners of the screen, as these areas can often collect excess moisture. Thoroughly dry these areas to prevent any liquid from seeping into the tablet.
- Let the screen air dry: If there are still small traces of moisture remaining, allow the screen to air dry naturally. Avoid using heat sources such as hair dryers or direct sunlight, as these can damage the screen.
- Double-check for moisture: Once you believe the screen is completely dry, double-check for any remaining moisture or streaks. If necessary, give it a final wipe with the dry microfiber cloth.
It’s crucial to ensure that the screen is completely dry before reconnecting and powering on your drawing tablet. Any residual moisture can lead to damage or malfunctioning of the device. Taking the time to thoroughly dry the screen is an important step in maintaining the longevity of your drawing tablet.
Now that the screen is dry, let’s move on to the next section, where we’ll learn how to clean the body of the drawing tablet.
Clean the tablet’s body
While cleaning the screen is essential, don’t forget to give some attention to the body of your drawing tablet as well. Over time, the surface of the tablet can accumulate dirt, oils, and smudges, which can affect its appearance and grip. Here’s how you can clean the tablet’s body:
- Disconnect the tablet: Ensure that the tablet is still powered off and disconnected from any power source or cables before proceeding with cleaning the body.
- Use a soft, damp cloth: Moisten a soft cloth with water or a mild soap solution. Make sure the cloth is not dripping wet, as excess moisture can damage the tablet.
- Gently wipe the body: Carefully wipe the surface of the tablet’s body using the damp cloth. Pay attention to areas that are prone to fingerprints or smudges, such as buttons, edges, and the back of the device.
- Be cautious with ports and connectors: When cleaning around ports, connectors, and buttons, take extra care not to introduce any moisture or liquid into these areas. Use gentle motions and avoid excessive pressure.
- Dry off any moisture: After wiping the body, use a dry cloth to remove any remaining moisture from the tablet’s surface. Ensure that the entire body is dry before reconnecting and powering on the device.
By regularly cleaning the body of your drawing tablet, you can maintain its appearance and ensure a comfortable grip while drawing. It’s important to use gentle cleaning methods and avoid harsh chemicals or abrasive materials that can cause damage.
Now that your drawing tablet’s body is clean, it’s time to reconnect and power on the device. Let’s proceed to the next section for the final steps on how to properly reconnect and power on your tablet.
Reconnect and power on the tablet
Now that you’ve successfully cleaned both the screen and the body of your drawing tablet, it’s time to reconnect and power on the device. Following the proper steps will ensure that your tablet is functioning optimally and ready for your next artistic endeavors. Here’s what you need to do:
- Ensure the tablet is dry: Before reconnecting the tablet, double-check that both the screen and the body are completely dry. Any residual moisture can cause damage to the internal components.
- Reconnect the tablet: Plug in any necessary cables or accessories, such as USB cables or charging cords, to the appropriate ports on the tablet. Make sure the connections are secure.
- Power on the tablet: Locate the power button on your tablet and press and hold it until the device powers on. Wait for the tablet to boot up completely before using it.
- Check the screen: Once the tablet has powered on, carefully inspect the screen to ensure that it’s clean and free of any streaks or smudges. If necessary, give it a final wipe with a dry microfiber cloth.
By following these steps, you have now successfully cleaned your drawing tablet and prepared it for immediate use. The combination of a clean screen and body will enhance your drawing experience and allow you to work with precision and clarity.
Now that your tablet is reconnected and powered on, it’s essential to follow some tips on how to maintain a clean screen and body in the long run. Let’s move on to the next section for some valuable maintenance tips.
Tips for maintaining a clean screen
Keeping your drawing tablet screen clean is not a one-time task; it requires ongoing maintenance to ensure optimal performance and visibility. By following these tips, you can maintain a clean screen and prolong the lifespan of your drawing tablet:
- Regularly wipe the screen: Make it a habit to clean the screen regularly, even if it doesn’t appear visibly dirty. Regular wiping with a microfiber cloth can prevent the buildup of dust and smudges.
- Avoid using excessive pressure: When cleaning the screen, use gentle pressure. Excessive force can damage the screen or cause distortion, so be cautious and handle the tablet with care.
- Use a screen protector: Consider using a screen protector for added protection against scratches, dust, and fingerprints. This can also make the cleaning process easier, as you can simply remove and replace the screen protector as needed.
- Avoid harsh cleaning solutions: Stick to gentle cleaning solutions that are specifically designed for electronic screens. Harsh chemicals or abrasive substances can damage the screen and compromise its usability.
- Protect the tablet when not in use: When you’re not using your drawing tablet, keep it in a dust-free and protected environment. Consider using a protective case or cover to shield the screen and body from dirt and debris.
- Keep your hands clean: Wash and dry your hands before using the tablet to minimize the transfer of oils, dirt, and other substances onto the screen. Clean hands can help prevent unnecessary smudges and marks.
By implementing these tips into your routine, you can ensure that your drawing tablet screen remains clean and in optimal condition. Regular maintenance is key to preserving the longevity and performance of your device.
With these tips in mind, you are now equipped to maintain a clean screen and body on your drawing tablet. The next section will provide a brief recap of the key points discussed in this article.
Conclusion
Cleaning your drawing tablet screen is an essential task that ensures optimal performance and a clear drawing experience. By following the step-by-step process outlined in this guide, you can effectively remove dust, fingerprints, and smudges from the screen, as well as maintain the cleanliness of the tablet’s body. Here’s a brief recap of what we’ve covered:
We started by gathering the necessary supplies, including a microfiber cloth, cleaning solution (if necessary), cotton swabs or a soft-bristled brush, and distilled water. We then proceeded to power off and disconnect the tablet from any power source or cables. This step ensured our safety and prevented accidental damage.
We then learned how to remove dust and debris from the drawing tablet screen using a soft-bristled brush or cotton swab, and by blowing away remaining particles with gentle air pressure. Afterward, we cleaned the screen with a dampened microfiber cloth, using gentle circular motions to remove fingerprints and smudges.
If necessary, a cleaning solution was employed to tackle stubborn marks, always making sure to follow manufacturer guidelines and avoiding harsh chemicals. The screen was then thoroughly dried using a separate dry microfiber cloth, ensuring no moisture remained.
We also covered the importance of cleaning the tablet’s body, using a soft, damp cloth and gentle motions. Finally, we reconnected and powered on the tablet, inspected the screen for cleanliness, and provided tips for maintaining a clean screen in the long run.
By implementing these cleaning techniques and following the maintenance tips, you can ensure that your drawing tablet remains in peak condition, allowing you to create art with precision and clarity. Regular cleaning and maintenance will not only improve your drawing experience but also extend the lifespan of your tablet.
Remember, take care when cleaning the screen and the body, using the recommended tools and techniques. Always refer to the manufacturer’s guidelines for specific cleaning instructions and precautions.
So, go ahead and give your drawing tablet the attention it deserves by cleaning it regularly. Enjoy a clean screen and a flawless drawing experience!