Introduction
Welcome to the world of 3D printing, where you can turn your imagination into reality. However, as with any technology, 3D printing is not without its challenges. One common issue that many 3D printer enthusiasts encounter is a clogged nozzle. A clogged nozzle can significantly impact the print quality and even prevent the printer from functioning altogether. But fear not! In this article, we will guide you through the process of cleaning a clogged nozzle on a 3D printer.
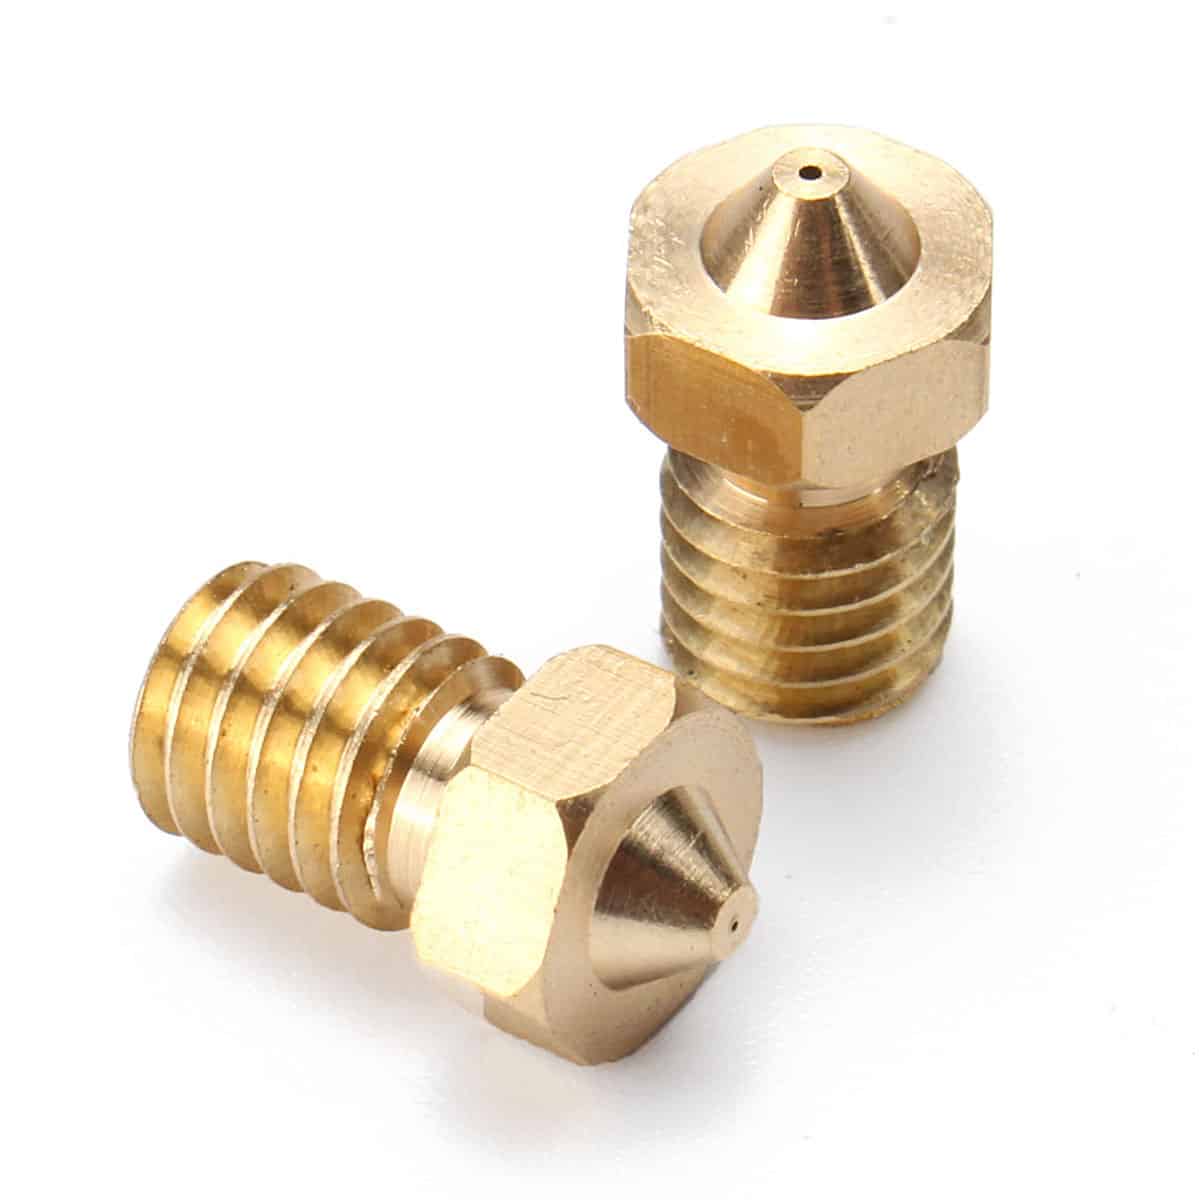
Before we dive into the specifics of cleaning a clogged nozzle, it’s essential to understand why a clogged nozzle can be problematic. The nozzle is responsible for extruding the filament, layer by layer, to create the 3D print. When the nozzle gets clogged, it hampers the flow of filament, resulting in irregular extrusion or no extrusion at all. This can lead to incomplete prints, distorted shapes, or failed prints. Therefore, it’s crucial to keep your printer’s nozzle clean regularly.
To clean a clogged nozzle, you don’t need any specialized tools or expertise. With a few simple steps and some readily available materials, you can get your 3D printer back up and running in no time. Here’s what you’ll need:
- A needle or pin
- A filament cleaning tool or wire brush
- Isopropyl alcohol or acetone
- Safety gloves
Now that you have your tools ready, let’s walk through the step-by-step process of cleaning a clogged nozzle on a 3D printer. By following these steps, you’ll be able to maintain the quality and performance of your printer.
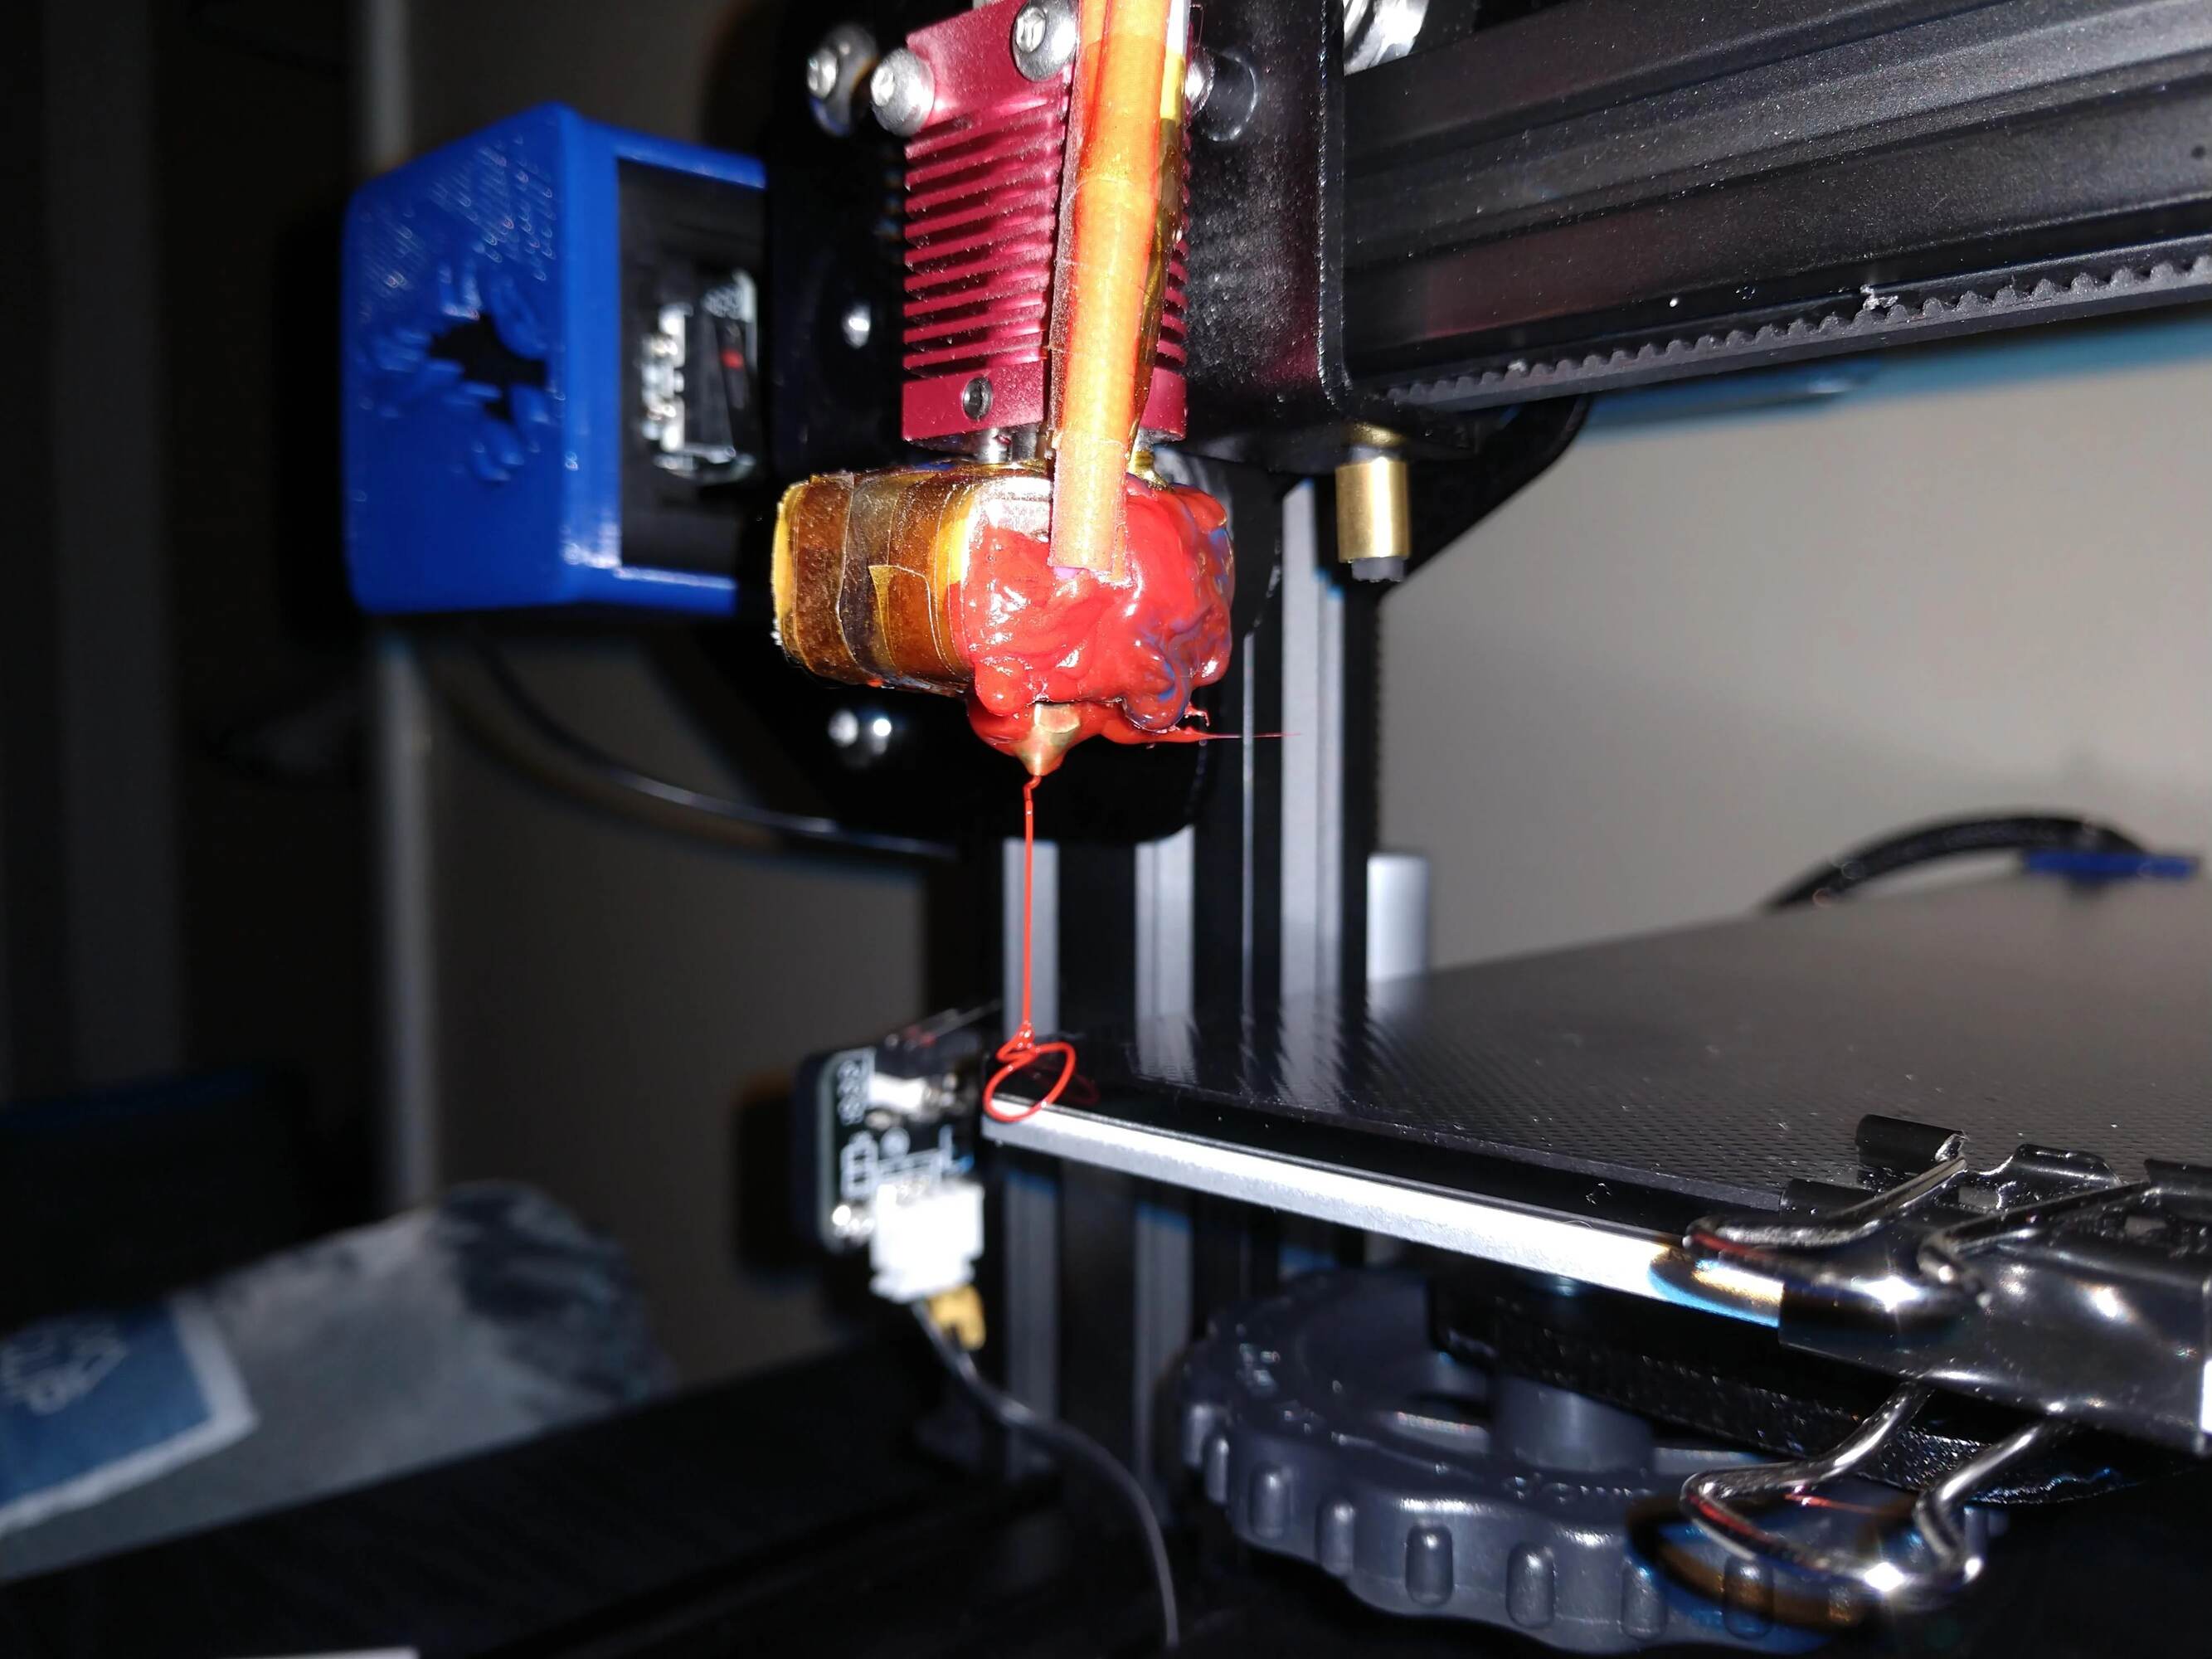
Why is a Clogged Nozzle a Problem?
A clogged nozzle can quickly become a headache for 3D printer enthusiasts. It can lead to a host of issues that negatively impact print quality and disrupt the printing process. Here are a few reasons why a clogged nozzle is a problem:
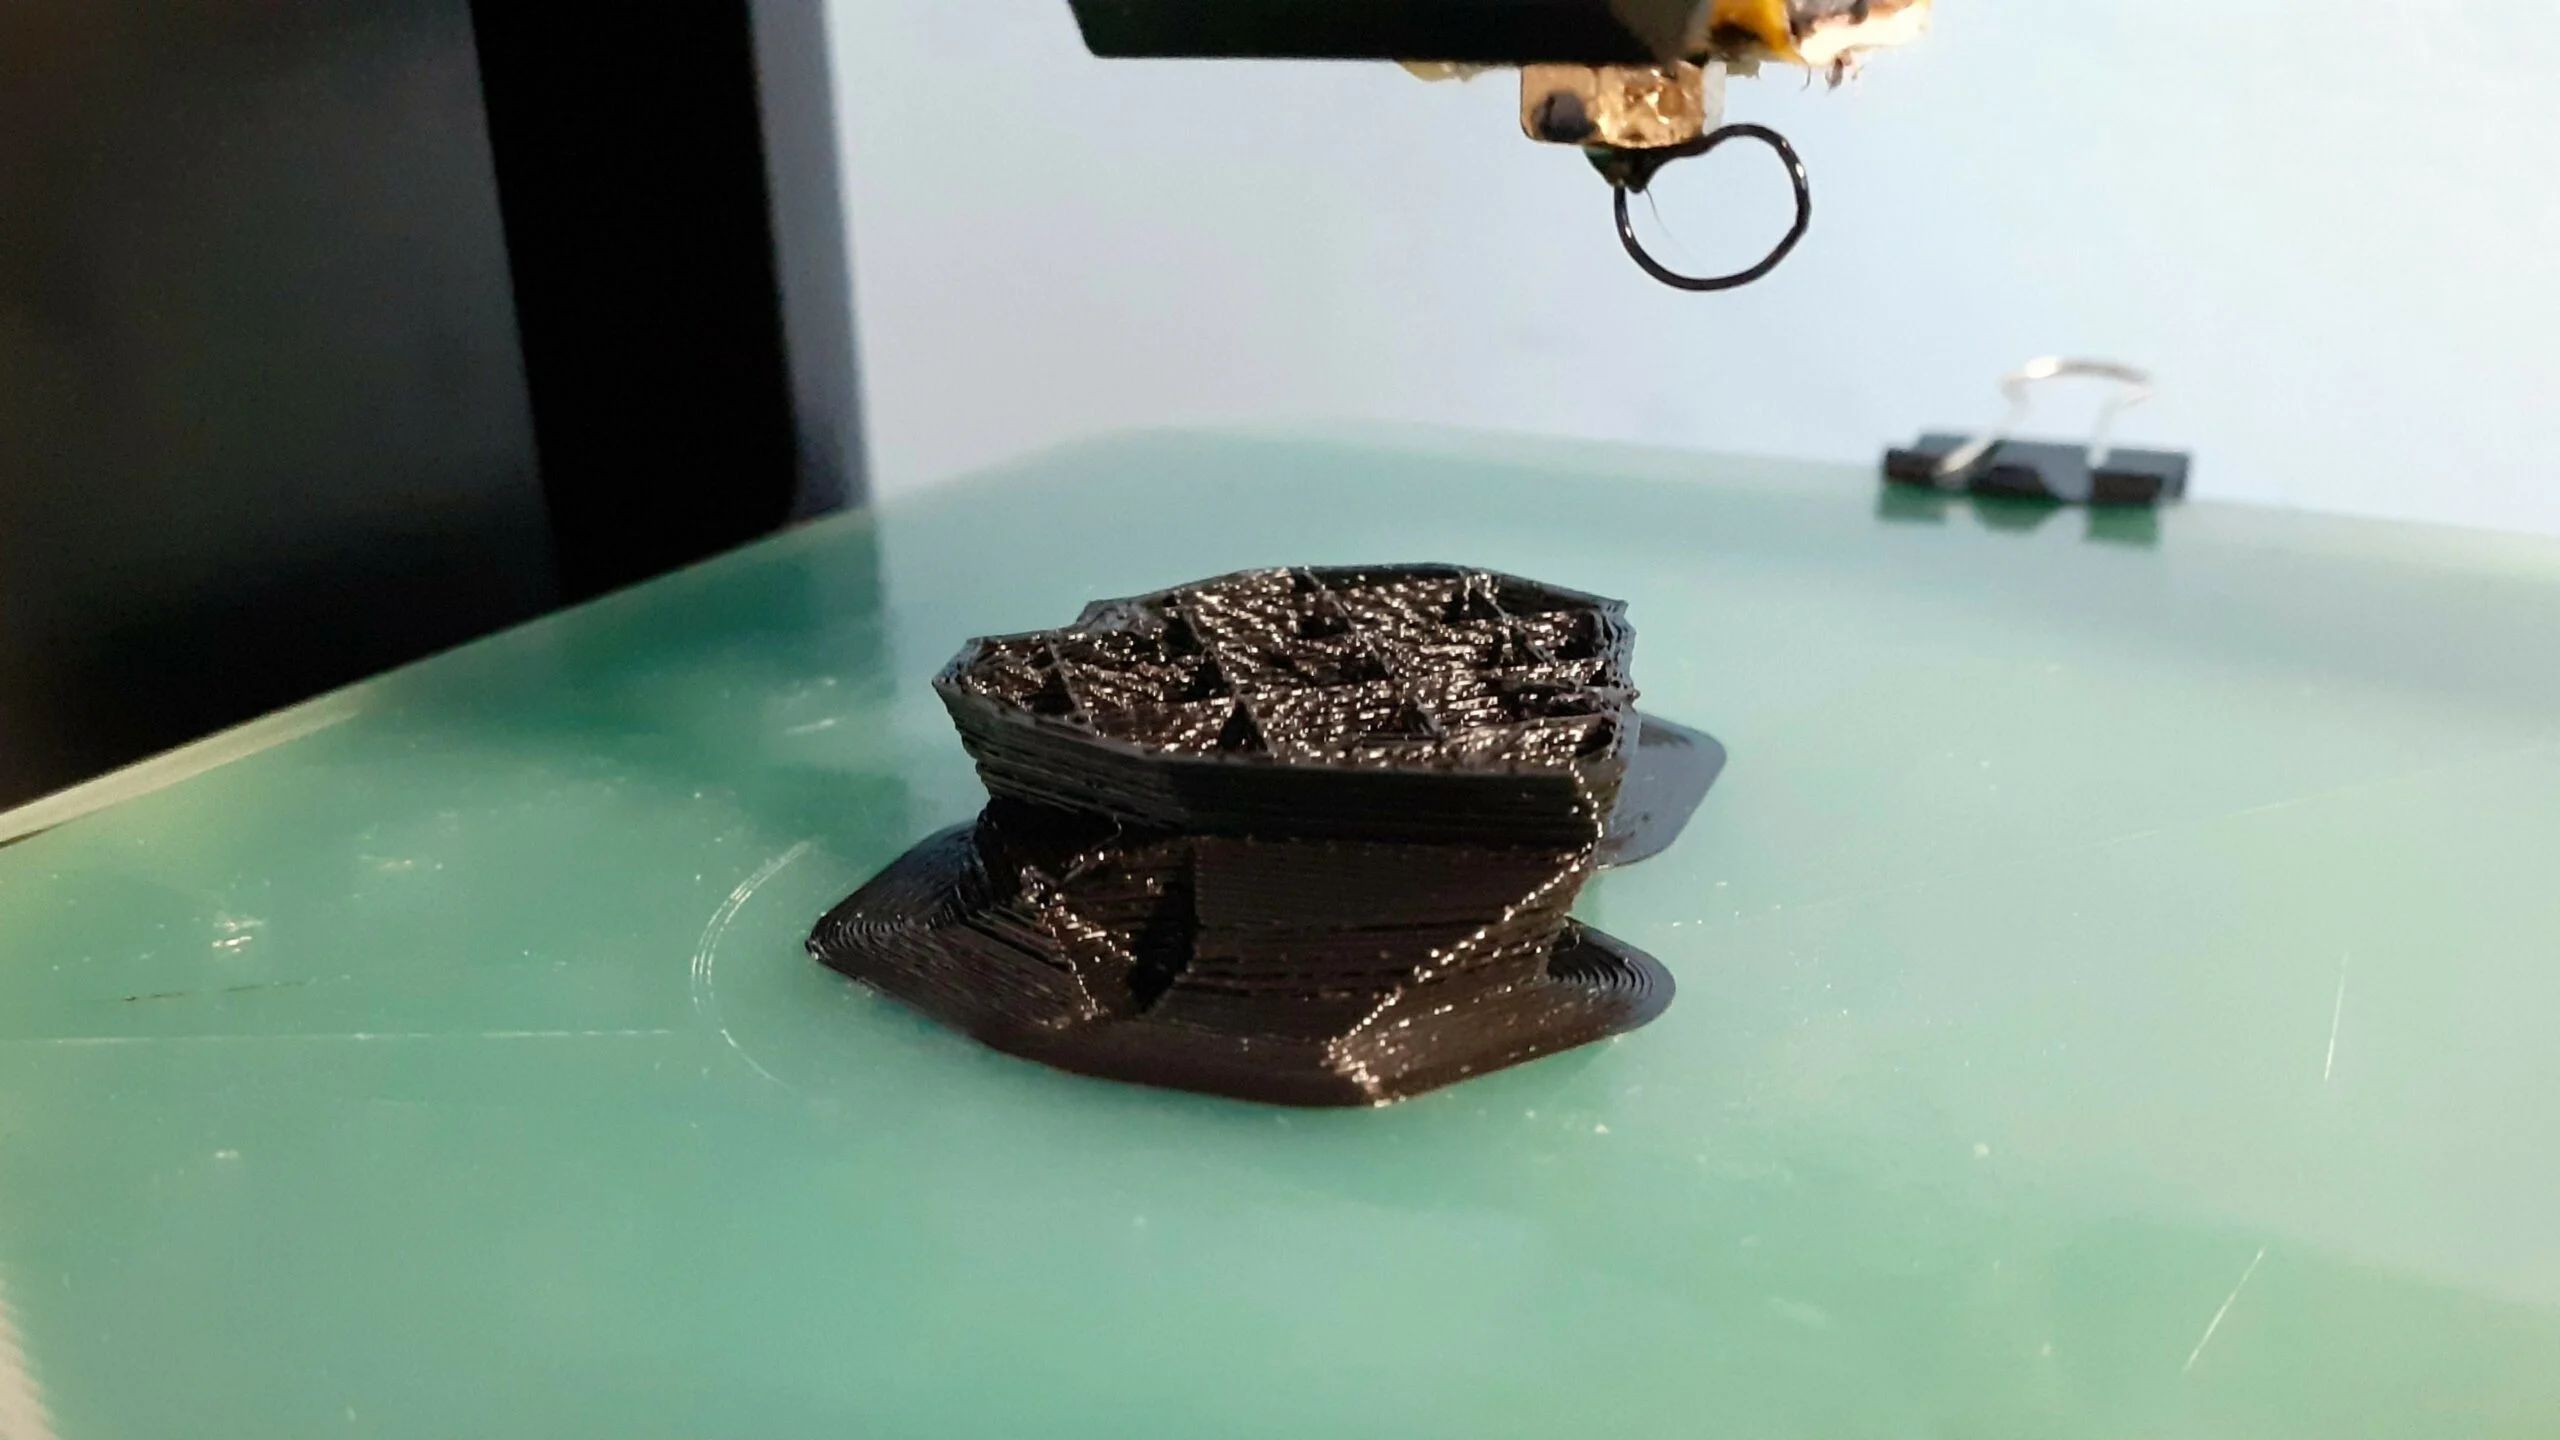
1. Poor Print Quality: When the nozzle is clogged, the extrusion of filament becomes inconsistent. This can result in uneven layers, gaps, or blobs in the print. The precision and details of the model may be compromised, leading to a subpar final product.
2. Failed Prints: A severely clogged nozzle can cause prints to fail altogether. If the filament cannot pass through the nozzle properly, it may result in no filament extrusion at all. This can leave you with an incomplete or aborted print, wasting both time and material.
3. Filament Jams: A clogged nozzle can contribute to filament jams. As the filament encounters resistance due to the blockage, it can get trapped or tangled inside the printer’s extruder system. This can be frustrating to resolve and may even require disassembling the printer to clear the jam.
4. Damage to the Printer: Ignoring a clogged nozzle can have long-term consequences for your 3D printer. The increased back pressure caused by a blockage can strain the printer’s motor, extruder, and other components. Over time, this can lead to premature wear and tear or even permanent damage to the printer.
5. Inconsistent Extrusion: A clogged nozzle can result in inconsistent filament flow during the print. This can lead to variations in layer thickness, resulting in a model with compromised structural integrity. Inconsistent extrusion can also cause layer adhesion issues, making the print more prone to delamination or breakage.
By understanding the impact of a clogged nozzle on print quality and the overall printing process, you can see why it’s essential to address the issue promptly. Regular nozzle maintenance and cleaning will help you avoid these problems and ensure smooth and successful 3D printing experiences. Now, let’s move on to the tools and steps required for cleaning a clogged nozzle on a 3D printer.
Tools and Materials Needed for Cleaning
Before you can start cleaning a clogged nozzle on your 3D printer, it’s important to gather the necessary tools and materials. Having everything prepared beforehand will make the cleaning process smoother and more efficient. Here are the tools and materials you will need:
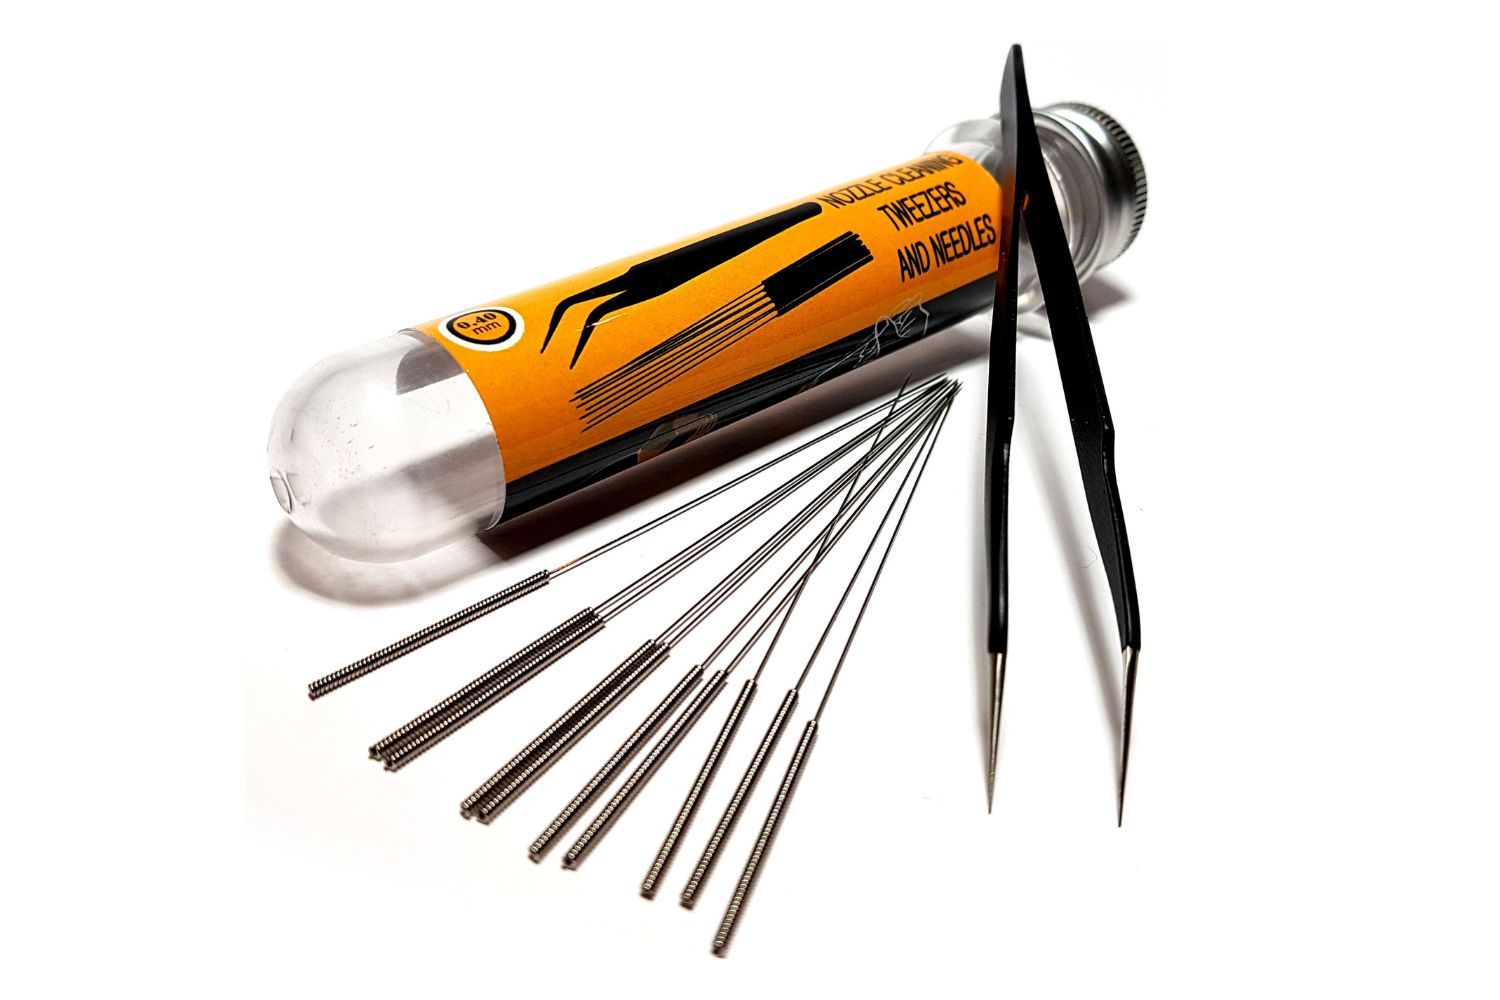
- Needle or Pin: A thin needle or pin will be used to manually unclog the nozzle. Make sure it has a fine tip and is not too thick to fit into the nozzle opening.
- Filament Cleaning Tool or Wire Brush: A filament cleaning tool, specifically designed for nozzle cleaning, or a small wire brush can be used to remove stubborn filament residue from the nozzle.
- Isopropyl Alcohol or Acetone: These solvents are effective for cleaning the nozzle and removing any residual filament. Make sure to use them in a well-ventilated area and follow safety precautions.
- Safety Gloves: It’s always a good idea to wear safety gloves to protect your hands during the cleaning process. This is particularly important when working with solvents or sharp tools.
These tools and materials are commonly available and can be easily obtained from your local hardware store or online. By having them ready, you can efficiently clean your clogged nozzle without any delays.
Now that we have our tools and materials prepared, it’s time to move on to the step-by-step process of cleaning a clogged nozzle on a 3D printer. We will guide you through each stage, ensuring that you have a clear understanding of the process. Continue reading to learn how to clean your nozzle effectively to restore your printer’s performance.
Step 1: Preparation
Before diving into the process of cleaning a clogged nozzle on your 3D printer, it’s essential to prepare properly. By following these preparation steps, you’ll ensure a smooth and hassle-free cleaning experience:
1. Safety first: Put on your safety gloves to protect your hands during the cleaning process. Some solvents and tools can be sharp or cause skin irritation, so it’s important to take precautions.
2. Heat up the printer: Turn on your 3D printer and allow it to warm up to the recommended printing temperature for the filament you most frequently use. Heating up the printer will make it easier to remove the filament and unclog the nozzle.
3. Disable stepper motors: Most 3D printers have an option to disable the stepper motors. This is crucial to prevent accidental movements of the printer’s motors during the cleaning process. Check your printer’s manual or settings to locate and enable this feature.
4. Secure the printer: Ensure that your printer is on a stable surface and that there is enough space around it for you to work comfortably. A secure setup will prevent any accidents or printers from tipping over during the cleaning process.
5. Gather tools and materials: Double-check that you have all the necessary tools and materials, such as a needle or pin, filament cleaning tool or wire brush, and isopropyl alcohol or acetone. Having everything within reach will save you time during the cleaning process.
By following these preparation steps, you’ll have everything set up and ready to dive into the cleaning process. Remember, taking the time to prepare will ensure a more efficient and successful nozzle cleaning experience. Now, let’s move on to the next step: removing the filament from the printer.
Step 2: Removing the Filament
Once you’ve prepared your 3D printer for nozzle cleaning, the next step is to remove the filament from the printer. Removing the filament will allow you to access the clogged nozzle and clean it effectively. Follow these steps to remove the filament:
1. Heat up the nozzle: Ensure that your printer is heated to the printing temperature for the filament currently loaded. This softens the filament, making it easier to remove from the extruder and nozzle. Refer to the filament manufacturer’s recommendations for the appropriate temperature.
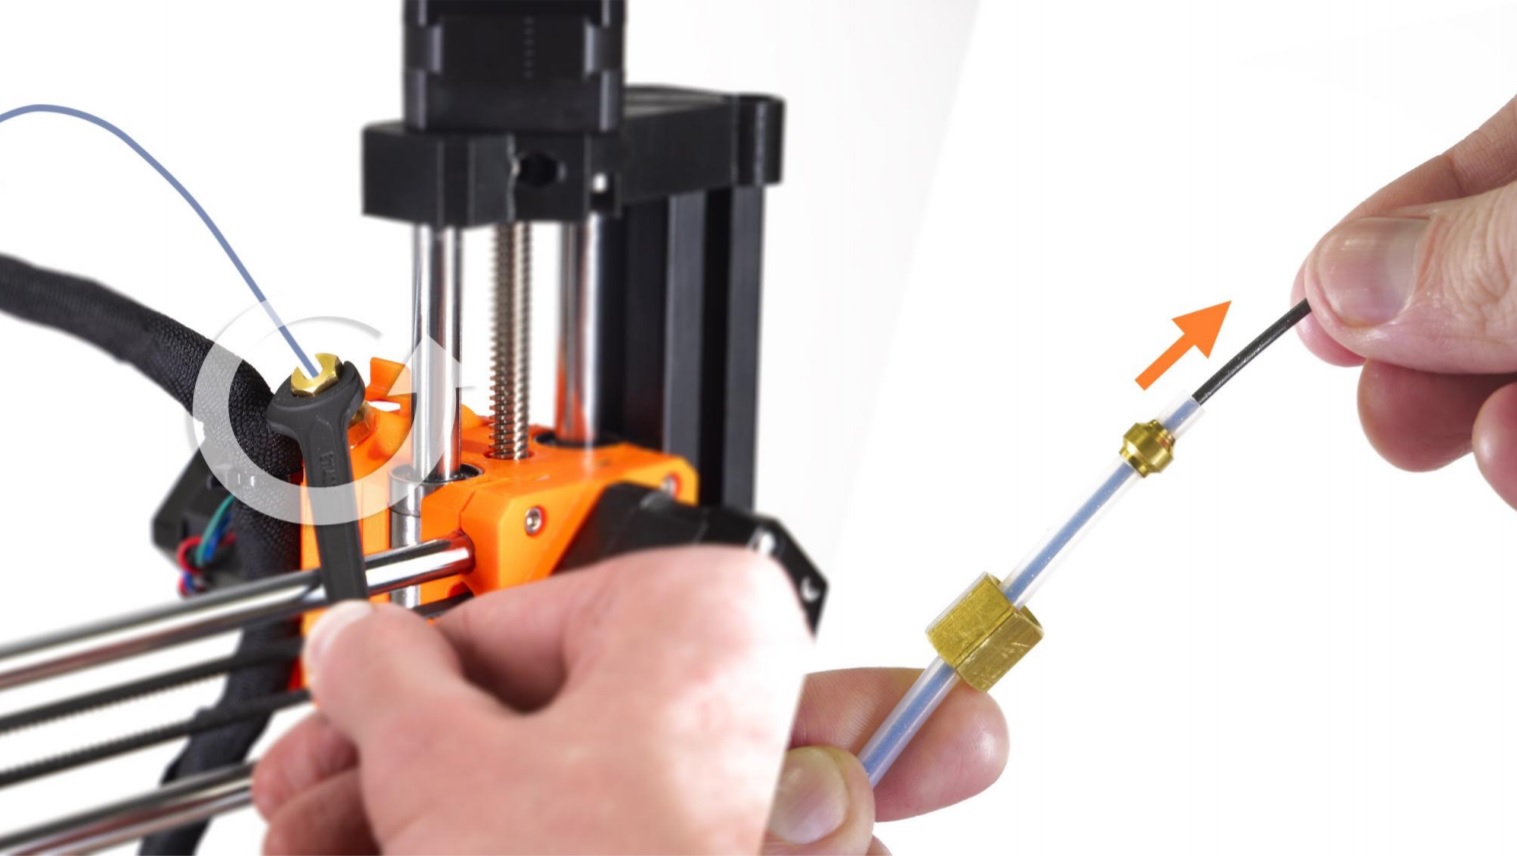
2. Disconnect the filament: Locate the filament feeding mechanism or extruder and disconnect it from the filament spool or feeder. This step will prevent any filament from being fed into the printer during the cleaning process.
3. Retract the filament: Use your printer’s software interface or control panel to retract the filament. This action pulls the filament back, gradually retracting it from the extruder and removing it from the nozzle.
4. Remove the filament: Once the filament is retracted, gently pull it out from the extruder. Be careful not to force it, as excessive force can damage the filament or nozzle. If the filament encounters resistance, pause and consult your printer’s manual for further guidance.
5. Clean the filament: If the filament tip appears dirty or has excess residue, you can use a cloth or paper towel to wipe it clean. Ensuring a clean tip will prevent any residual debris from entering the nozzle during the cleaning process.
By accurately following these steps, you’ll successfully remove the filament from your printer, preparing it for the next stage: heating up the nozzle to facilitate cleaning. With the filament removed, you’ll be able to access the clogged nozzle more easily, ensuring a thorough cleaning process. Now, let’s move on to Step 3: heating up the nozzle.
Step 3: Heating up the Nozzle
After removing the filament from your 3D printer, the next crucial step in cleaning a clogged nozzle is to heat up the nozzle itself. Heating up the nozzle softens any residual filament inside, making it easier to remove and clear the blockage. Follow these steps to heat up the nozzle:
1. Preheat the printer: Use your printer’s software interface or control panel to initiate the preheating process. Select the option to preheat the nozzle to the recommended temperature for the filament you most commonly use. Refer to the filament manufacturer’s guidelines for the appropriate temperature.
2. Monitor the temperature: Keep an eye on the temperature as it rises. Depending on your printer, it may take some time for the nozzle to reach the desired temperature. Take note of any fluctuations and wait until the nozzle reaches a stable temperature before proceeding.
3. Maintain safety precautions: As the nozzle heats up, it will become extremely hot and pose a burn risk. It is crucial to exercise caution and not touch the nozzle or any other hot components of the printer during this process. Use safety gloves and avoid any unnecessary contact with heated parts.
4. Ensure stability: Confirm that your printer is on a stable surface and that there are no loose cables or obstructions near the nozzle. This will ensure that the printer remains secure and that you can perform the cleaning process without any accidents or mishaps.
5. Wait for the desired temperature: Once the nozzle reaches the recommended temperature, allow it to stabilize for a few moments. This ensures that the heat is evenly distributed and that the filament inside the nozzle is fully softened.
By properly heating up the nozzle, you prepare it for effective cleaning in the next steps. The softened filament will be easier to remove, making it simpler to clear the clog and restore optimal functionality to your 3D printer. Now, let’s move on to Step 4: cleaning the nozzle with a needle.
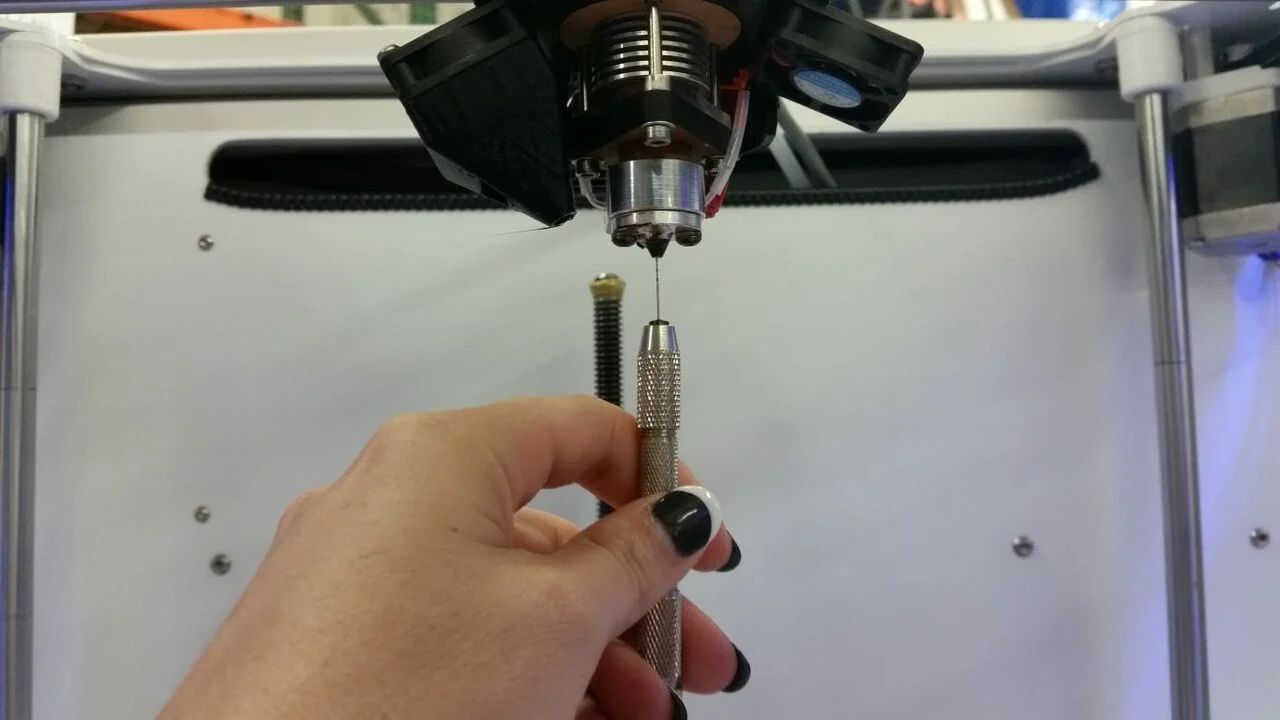
Step 4: Cleaning the Nozzle with a Needle
With the nozzle properly heated up, it’s time to clean the clogged nozzle using a needle. This step allows you to manually remove any filament residue or debris that is obstructing the nozzle. Here’s how you can clean the nozzle with a needle:
1. Prepare the needle: Take a thin needle or pin and ensure that it has a fine tip. This will allow you to navigate the small opening of the nozzle more easily. It’s important to use a needle that is not too thick, as it could damage or enlarge the nozzle opening.
2. Approach the nozzle: Carefully position the needle near the nozzle opening. Gently insert the needle into the nozzle, applying slight pressure. Begin by using a back-and-forth or circular motion to break up any filament clogs or residues inside the nozzle.
3. Remove the debris: As you manipulate the needle, you may notice filament debris being dislodged from the nozzle. Slowly pull the needle out of the nozzle, allowing any debris to be extracted with it. Repeat this process a few times to ensure thorough cleaning.
4. Inspect the nozzle: After cleaning with the needle, inspect the nozzle for any remaining debris or blockages. Use a flashlight or magnifying glass to check for any obstructions that may have been missed. If necessary, repeat the needle cleaning process until the nozzle appears clear.
5. Be cautious: While cleaning with a needle, it’s essential to be gentle and avoid applying excessive force or pressure. The goal is to remove the blockage without causing any damage to the nozzle. If you encounter resistance or experience difficulty, pause and readjust your approach before proceeding.
By following these steps, you can effectively clean a clogged nozzle using a needle. This method allows for manual extraction of filament residue, ensuring that the nozzle is clear for proper filament flow. In the next step, we will explore an alternative method to clean the nozzle using a filament cleaning tool or wire brush.
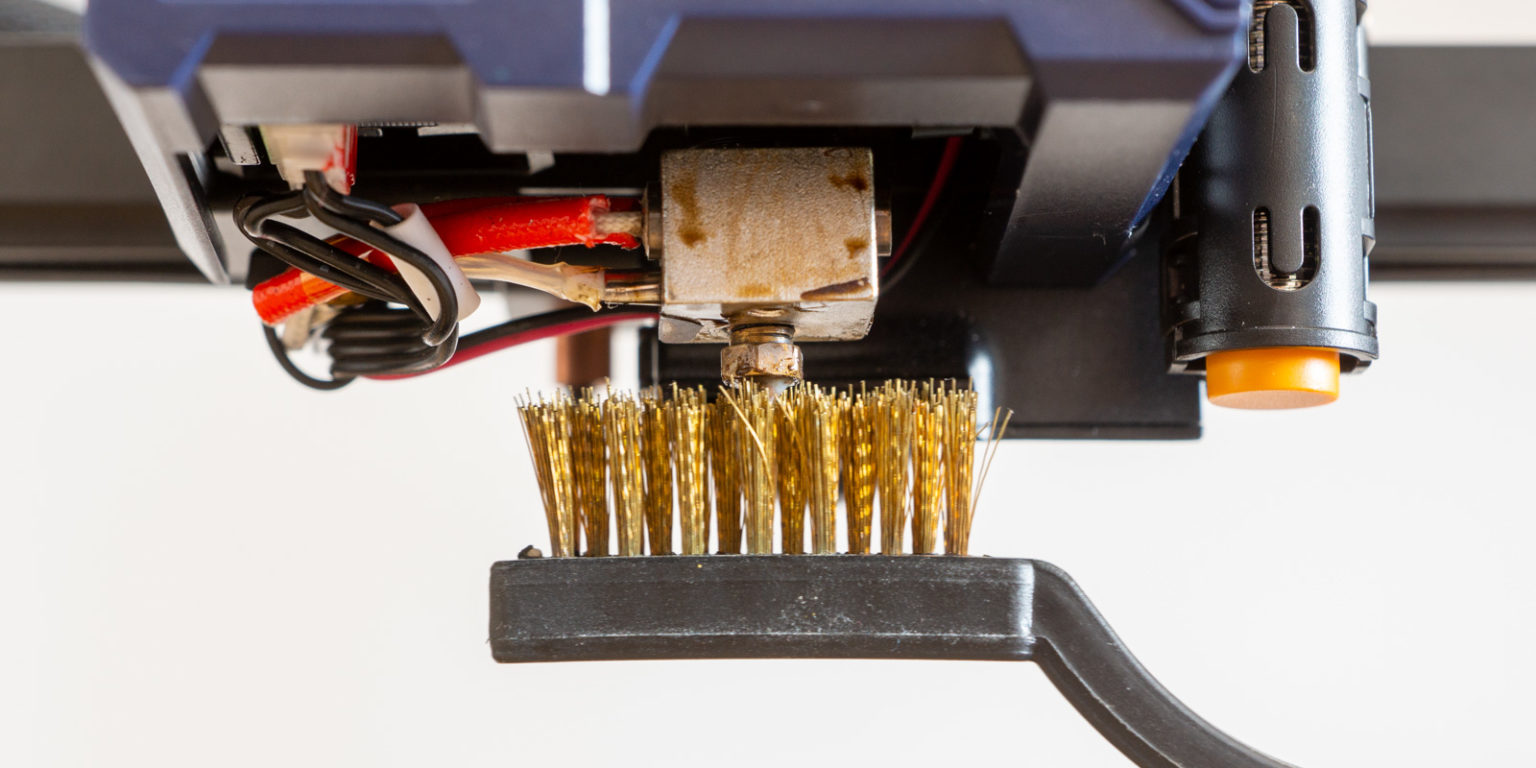
Step 5: Cleaning the Nozzle with a Filament Cleaning Tool
If cleaning the nozzle with a needle wasn’t completely effective, or if you prefer an alternative approach, you can use a filament cleaning tool or a small wire brush to clear the clogged nozzle. This method can help dislodge stubborn debris and provide a more thorough cleaning. Follow these steps to clean the nozzle with a filament cleaning tool:
1. Select a filament cleaning tool: Choose a filament cleaning tool specifically designed for nozzle cleaning. These tools usually have a small, pointed tip and a handle that allows for easy maneuvering.
2. Heat up the nozzle: Ensure that your printer’s nozzle is still heated to the recommended temperature. As in previous steps, refer to the filament manufacturer’s guidelines for the appropriate temperature.
3. Approach the nozzle: Position the filament cleaning tool near the opening of the nozzle. Gently insert the tool into the nozzle, applying gentle pressure. Use a back-and-forth or circular motion to dislodge any remaining filament residue inside the nozzle.
4. Remove the debris: As you maneuver the filament cleaning tool, you may see debris being pushed out of the nozzle. Slowly withdraw the tool, allowing any dislodged debris to come out with it. Repeat this process a few times until the nozzle appears clean.
5. Check for completeness: After cleaning with the filament cleaning tool, inspect the nozzle to ensure that there are no remaining blockages or debris. Use a flashlight or magnifying glass to check for any obstructions that may have been missed. If necessary, repeat the cleaning process until the nozzle is clear.
6. Safety first: Remember to exercise caution during this process, as the nozzle will still be hot. Avoid touching the nozzle or any other hot components with your bare hands. Use safety gloves and take other necessary precautions to protect yourself from burns.
By following these steps, you can effectively clean a clogged nozzle using a filament cleaning tool. This method provides an alternative to using a needle and can be more effective in dislodging stubborn debris. Once you’re satisfied with the cleaning, you’re ready to move on to the final step: reassembling the nozzle.
Step 6: Reassembling the Nozzle
After successfully cleaning the clogged nozzle on your 3D printer, the final step is to reassemble the nozzle. Proper reassembly ensures that the printer functions smoothly and that the nozzle is securely in place. Follow these steps to reassemble the nozzle:
1. Confirm the nozzle is clear: Before reassembling, double-check the nozzle to ensure that it is free from any debris or blockages. Use a flashlight or magnifying glass to inspect the opening.
2. Turn off the printer: It’s important to turn off the printer before proceeding with the reassembly process. This ensures that there is no power running to the printer and minimizes the risk of accidents.
3. Handle the nozzle carefully: The nozzle may still be warm, so use caution when handling it. Avoid touching the hot nozzle directly and use safety gloves if necessary to protect your hands.
4. Insert the nozzle: Align the nozzle with the designated slot on the printer’s extruder assembly. Gently insert the nozzle, making sure it is securely seated in place. Apply slight pressure if needed, but be careful not to overtighten.
5. Secure any nozzle fixing screws: Some printers may have screws that hold the nozzle in place. If applicable, ensure these screws are tightened to secure the nozzle firmly in position. Consult your printer’s manual for specific instructions.
6. Reconnect the filament: Once the nozzle is reassembled, it’s time to reconnect the filament. Ensure that the filament feeding mechanism is properly aligned with the extruder, and carefully insert the filament into the feeding tube or spool holder.
7. Power on the printer: After reassembling the nozzle and reconnecting the filament, turn on the printer. Allow it to go through the startup process and ensure that everything is functioning correctly before attempting a print.
By following these steps, you can safely and effectively reassemble the nozzle on your 3D printer. Take your time to ensure that the nozzle is securely in place and that all connections are properly restored. Now that the nozzle is successfully reassembled, you can resume your 3D printing projects with confidence.
Conclusion
Cleaning a clogged nozzle is a crucial maintenance task for 3D printer enthusiasts. By following the steps outlined in this guide, you can effectively clean a clogged nozzle and keep your printer running smoothly.
We began by understanding why a clogged nozzle is a problem, affecting print quality, potentially causing failed prints, and even damaging the printer itself. Then, we discussed the tools and materials needed for cleaning, including a needle or pin, filament cleaning tool, isopropyl alcohol or acetone, and safety gloves.
We then walked through the step-by-step process, starting with the preparation phase to ensure safety and optimal conditions. We proceeded to remove the filament, heat up the nozzle, and clean the nozzle using a needle or filament cleaning tool. Finally, we concluded with reassembling the nozzle to complete the cleaning process.
Regular nozzle maintenance and cleaning will not only improve print quality but also prolong the lifespan of your 3D printer. It is recommended to incorporate nozzle cleaning as part of your routine maintenance to prevent clogs and ensure consistent and reliable printing performance.
Remember to refer to your printer’s manual for specific instructions and safety guidelines. Each printer may have unique variations in the cleaning process, so it’s important to follow manufacturer recommendations.
By keeping your nozzle clean and maintaining your printer, you can unleash its full potential for creating high-quality 3D prints. Happy printing!