Introduction
Welcome to our guide on how to clean the nozzle of your 3D printer. If you’re a 3D printing enthusiast or a professional, you already know the importance of maintaining a clean and clog-free nozzle. The nozzle is a crucial component of your printer, responsible for extruding the filament and shaping your prints. Over time, residue, charred filament, and debris can accumulate in the nozzle, leading to poor print quality, clogs, and even damage to the printer.
Cleaning the nozzle regularly ensures smooth and uninterrupted 3D printing. It improves filament flow, prevents clogs, reduces the risk of failed prints, and extends the lifespan of your printer. While the process may sound daunting, with the right tools and techniques, you can clean your nozzle quickly and effectively.
In this guide, we will walk you through a step-by-step process of nozzle cleaning, providing you with valuable tips and insights along the way. By following these instructions, you will be able to maintain optimal performance and achieve high-quality prints with your 3D printer.
Why is it important to clean the nozzle?
Maintaining a clean nozzle is essential for ensuring optimal performance and print quality with your 3D printer. Here are some key reasons why regular nozzle cleaning is important:
- Preventing clogs: Over time, residue, charred filament, and other debris can build up in the nozzle. This can lead to clogs, which obstruct the smooth flow of filament and disrupt the printing process. Cleaning the nozzle regularly helps remove any accumulated debris and prevents clogs from occurring.
- Ensuring filament flow: A clean nozzle ensures proper filament flow during printing. Any obstructions or partially blocked nozzles can disrupt the consistent extrusion of filament, resulting in uneven or poor print quality. Regular cleaning helps maintain a smooth flow of filament and improves the overall printing experience.
- Improving print quality: A dirty or clogged nozzle can adversely affect the quality of your prints. It may lead to under-extrusion, stringing, or poor layer adhesion. By cleaning the nozzle, you remove any obstacles that can hinder the proper deposition of filament, resulting in cleaner, smoother, and more precise prints.
- Extending the lifespan of your printer: Neglecting regular nozzle cleaning can have long-term consequences for your 3D printer. A clogged nozzle can put additional strain on the printer’s extruder motor and heating element, potentially leading to premature wear and tear. By keeping the nozzle clean, you can extend the life of your printer and avoid costly repairs or replacements.
- Preparing for different filaments: If you frequently switch between different types of filament, a clean nozzle is crucial. Residual filament from previous prints can contaminate the new filament, affecting its composition or causing unwanted color mixing. Cleaning the nozzle ensures that you start each print with a clean slate, maintaining the integrity and quality of your chosen filament.
As you can see, cleaning the nozzle is not just about maintaining the overall performance of your 3D printer, but it also directly impacts the final outcome of your prints. By incorporating regular nozzle cleaning into your maintenance routine, you can ensure consistent print quality, minimize downtime due to clogs, and prolong the lifespan of your printer.
Tools and materials needed
Before diving into the process of cleaning your 3D printer nozzle, it’s essential to gather the necessary tools and materials. While the specific equipment may vary depending on your printer model, here are the general items you will need for this task:
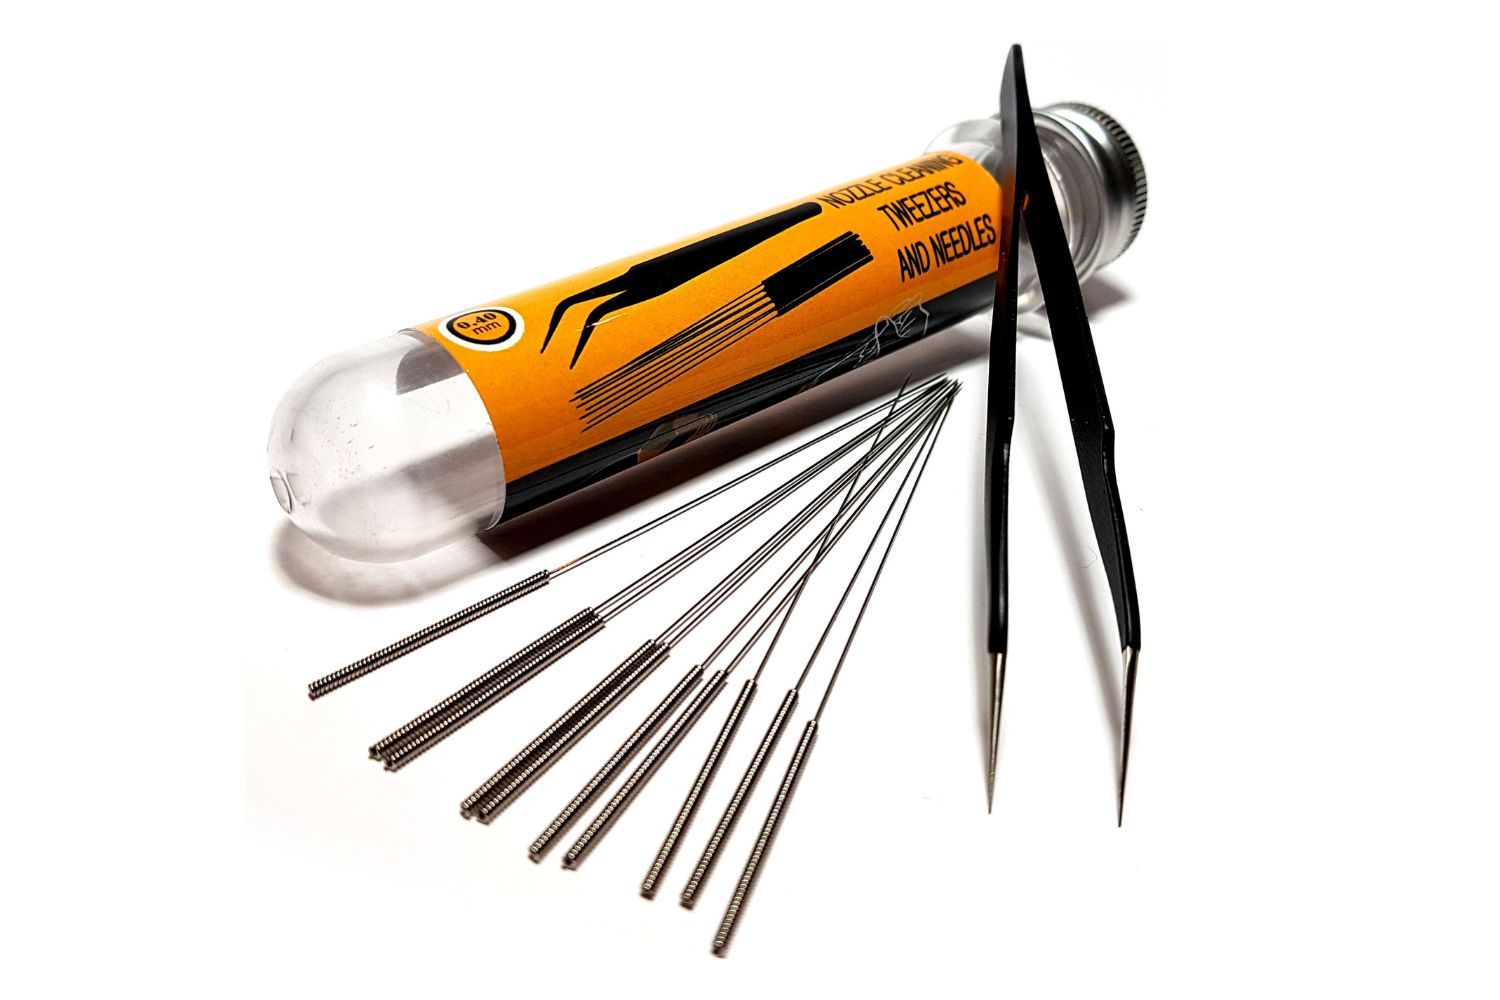
- 0.4mm nozzle cleaning kit: This specialized kit typically includes a set of small, precision wire brushes designed for cleaning different nozzle sizes. Make sure to choose a cleaning kit that matches the size of your printer’s nozzle.
- Needle or sewing pin: A fine needle or sewing pin can be used to manually remove any obstinate debris or clogs from the nozzle.
- Tweezers: A pair of fine-tipped tweezers will come in handy for removing larger pieces of debris or filament from the nozzle.
- Isopropyl alcohol: Isopropyl alcohol is an excellent cleaning agent for removing filament residue and buildup from the nozzle. Look for a high concentration (90% or higher) for the best results.
- Clean cloth or paper towels: To wipe away excess residue, it’s essential to have a clean cloth or paper towels on hand.
- Heat-resistant gloves: Since the nozzle can become hot during the cleaning process, it’s advisable to wear heat-resistant gloves to protect your hands from accidental burns.
These tools and materials will facilitate the nozzle cleaning process and help you achieve the best results. Ensure that you have them readily available before you start cleaning your 3D printer nozzle.
Step 1: Prepare your 3D printer for cleaning
Before you begin the nozzle cleaning process, it’s important to properly prepare your 3D printer. Follow these steps to ensure a safe and effective cleaning procedure:
- Turn off the printer: Start by turning off your 3D printer and unplugging it from the power source. This will prevent any accidental movements or heat buildup during the cleaning process.
- Let the nozzle cool down: It’s crucial to allow the nozzle to cool down completely before attempting to clean it. Hot nozzles can cause burns or damage to the printer components. For safety, wait at least 15-20 minutes after turning off the printer to ensure the nozzle has cooled down.
- Remove the filament: If there is any filament loaded in the printer, unload it by following the manufacturer’s instructions. This will prevent any filament from interfering with the nozzle cleaning process.
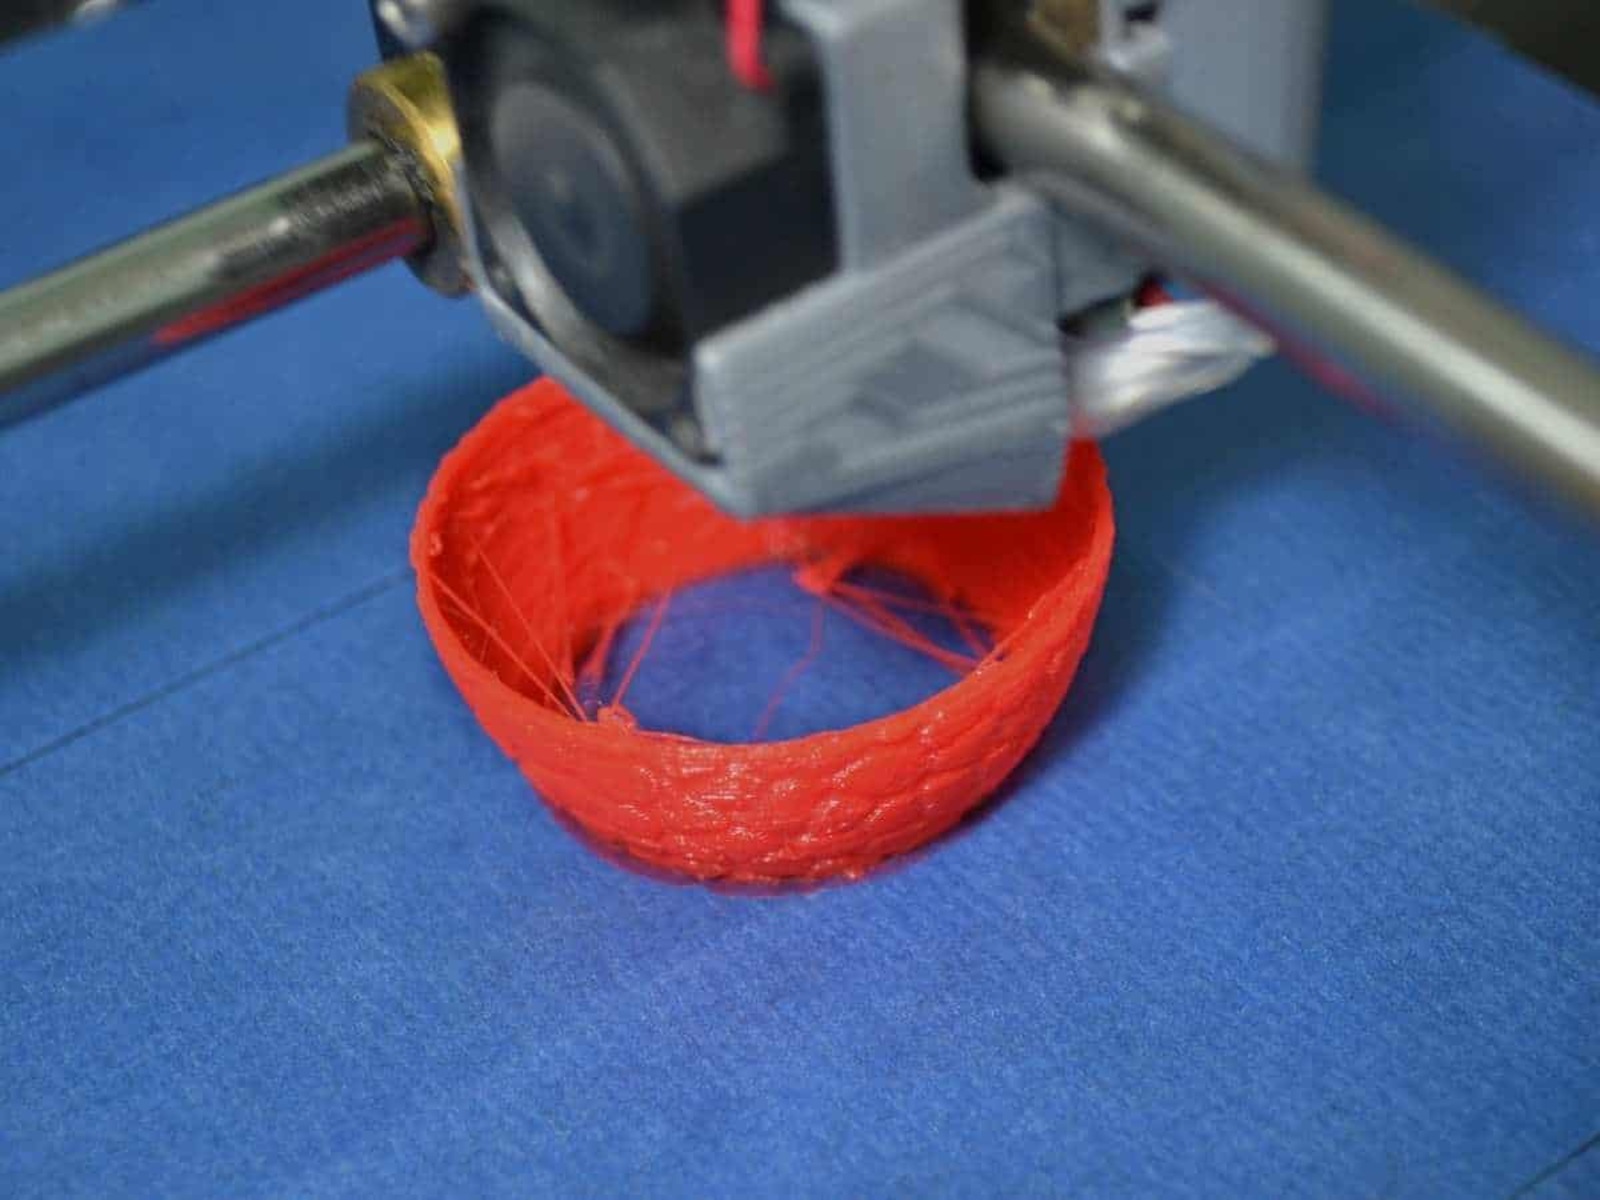
- Inspect the nozzle: Take a moment to visually inspect the nozzle for any visible signs of residue, charred filament, or clogs. This will give you an idea of the level of cleaning required and help you determine the appropriate method for cleaning.
- Secure the printer’s components: As you clean the nozzle, it’s important to ensure that other printer components, such as the bed or extruder assembly, are secure and won’t interfere with the cleaning process. This will prevent accidental damage to these components while cleaning the nozzle.
By properly preparing your 3D printer before cleaning the nozzle, you reduce the risk of accidents and ensure a smooth and efficient cleaning process. Take your time to follow these steps carefully, and proceed to the next step once you have completed the preparation process.
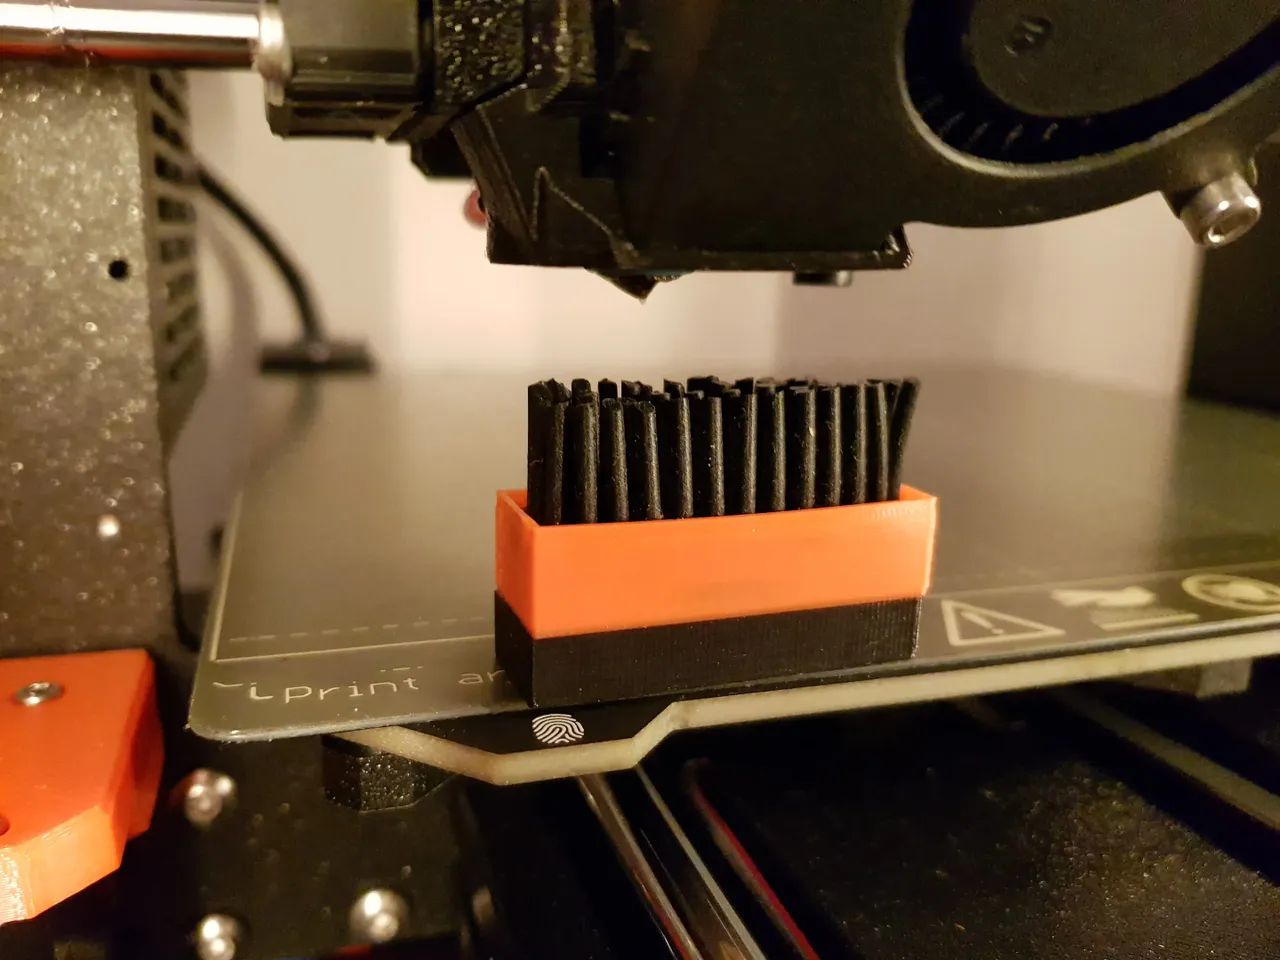
Step 2: Remove any excess filament from the nozzle
Before you start cleaning the nozzle of your 3D printer, it’s important to remove any excess filament that may be present. This will help in preventing any potential clogs and ensure a more effective cleaning process. Follow these steps to remove excess filament from the nozzle:
- Heat up the nozzle: Turn on your 3D printer and set the nozzle temperature to the filament’s recommended printing temperature. Allowing the nozzle to heat up will soften the filament and make it easier to remove.
- Manually extrude filament: Once the nozzle has reached the desired temperature, use your printer’s controls to manually extrude a small amount of filament. This will help clear any filament that might be stuck in the nozzle or extruder assembly. Be careful not to extrude too much filament, as the goal is to remove excess material, not waste filament.
- Use tweezers or pliers: After extruding a small amount of filament, use fine-tipped tweezers or pliers to gently pull and remove any remaining filament from the nozzle. Be cautious not to put too much force or damage the nozzle while doing this.
- Clean the extruder assembly: Along with removing excess filament from the nozzle, also check the extruder assembly for any filament that might have accumulated. Use tweezers or pliers to remove any filament remnants, being careful not to damage the assembly components.
By removing any excess filament from the nozzle, you ensure a clean and unobstructed pathway for the filament during the cleaning process. This step sets the foundation for a more effective and thorough nozzle cleaning experience.
Step 3: Heat up the nozzle
After removing any excess filament from the nozzle, the next step in cleaning your 3D printer nozzle is to heat it up. Heating up the nozzle will help soften any residual filament and make it easier to remove during the cleaning process. Follow these steps to heat up the nozzle:
- Turn on the printer: Ensure that your 3D printer is turned on and connected to a power source.
- Access the nozzle temperature settings: Depending on your printer model, navigate to the printer’s control panel or menu to access the nozzle temperature settings. Each printer has a different interface, so consult the user manual if needed.
- Set the nozzle temperature: Adjust the temperature setting to the appropriate temperature for the filament you typically use. The recommended nozzle temperature can usually be found on the filament spool or in the manufacturer’s documentation. Common temperatures range from 180°C to 250°C.
- Allow the nozzle to heat up: Give the nozzle some time to reach the desired temperature. This can take a few minutes, depending on your printer. Keep an eye on the temperature display to ensure the nozzle reaches the correct temperature.
- Check the nozzle temperature: Once the nozzle has reached the desired temperature, verify the temperature reading on your printer’s display. It’s important to wait until the nozzle has fully heated to ensure effective cleaning.
Heating up the nozzle softens any residual filament and makes it easier to clean. This step prepares the nozzle for the subsequent cleaning process, allowing for more efficient removal of any debris or clogs that may be present.
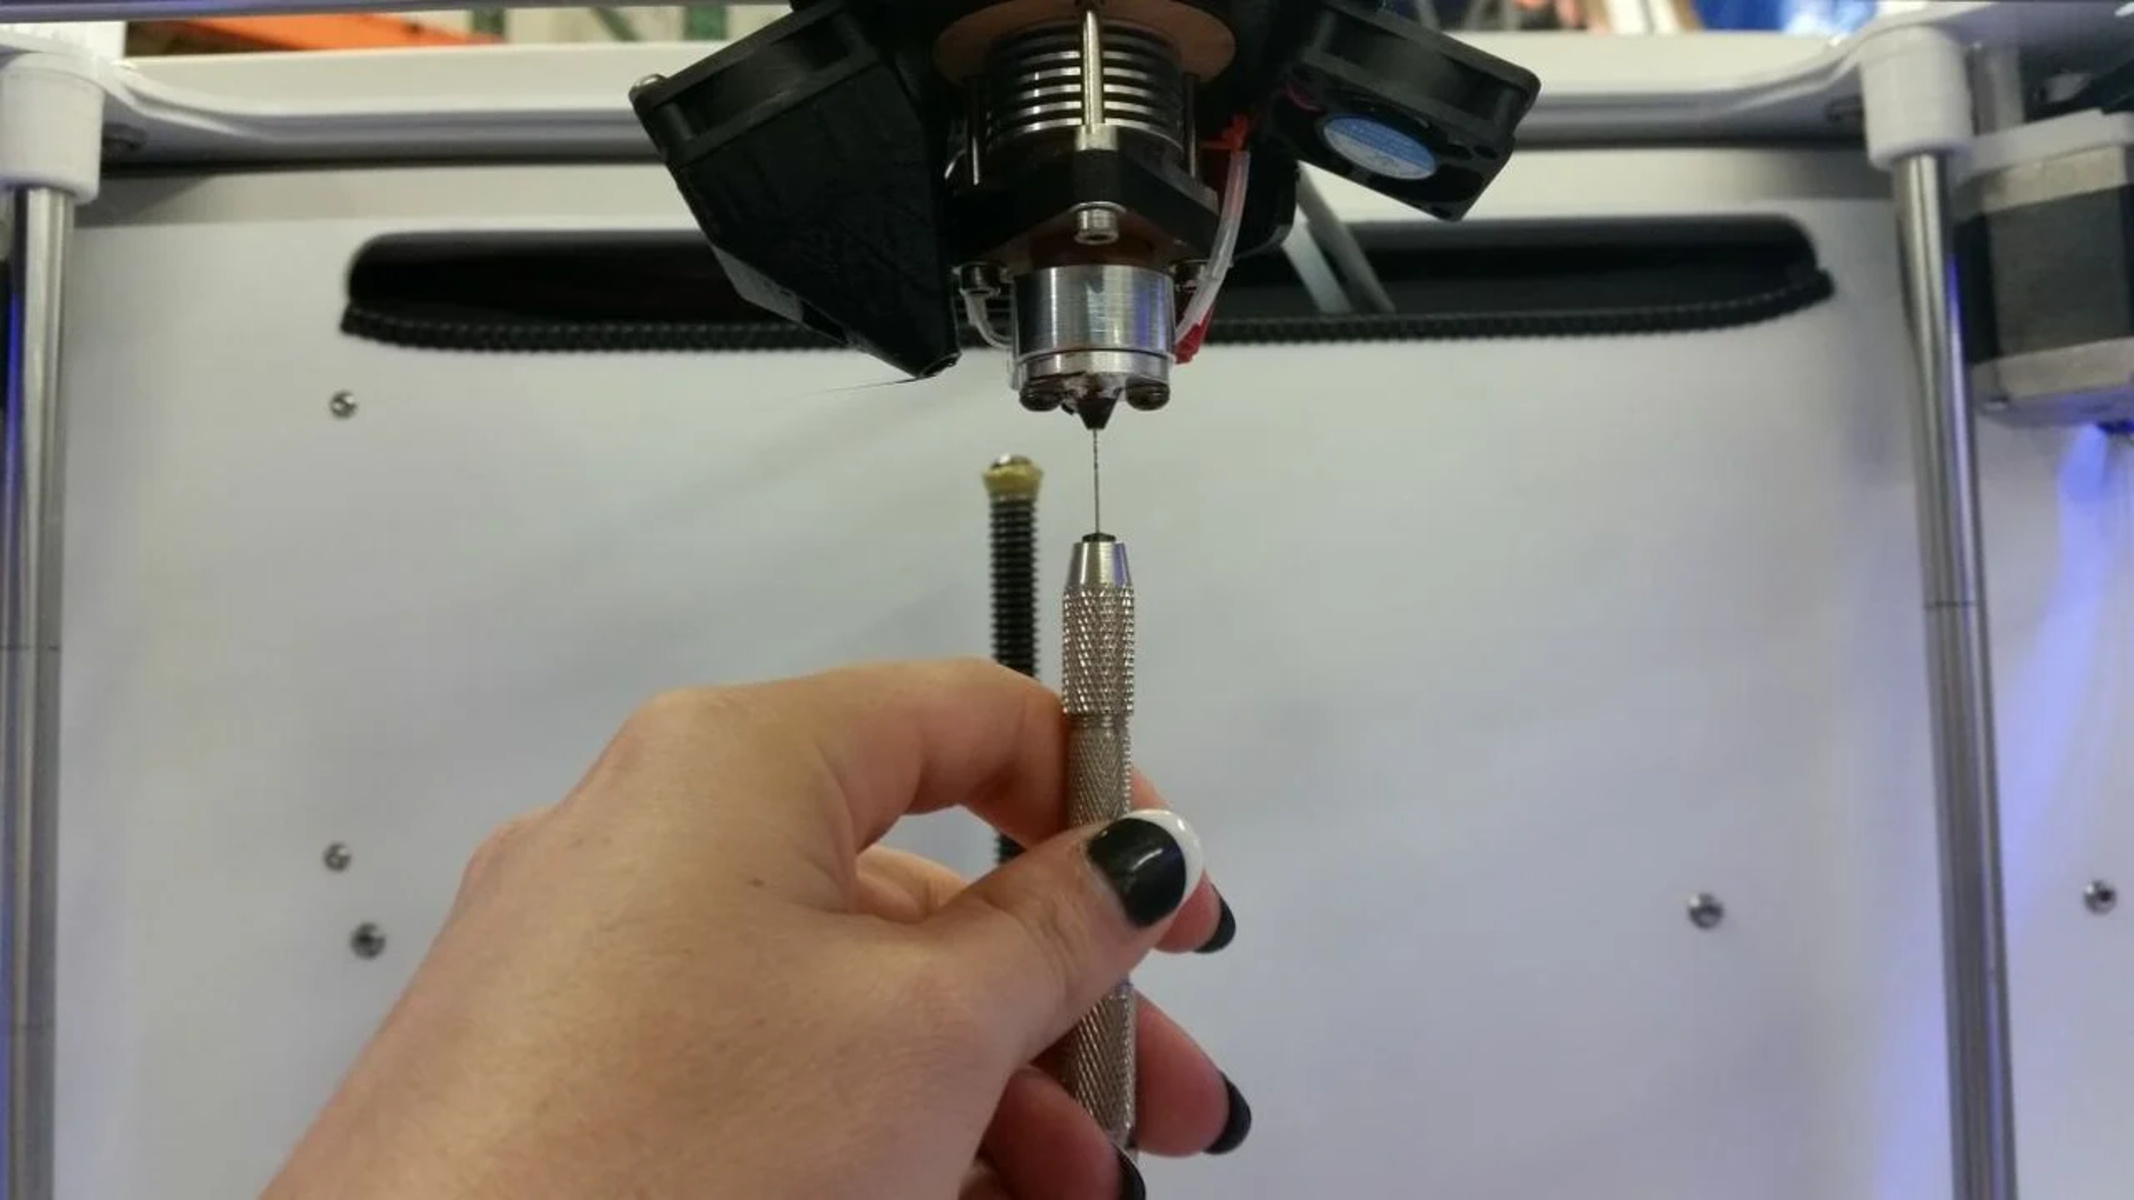
Step 4: Use a nozzle cleaning kit or a needle
Once the nozzle is properly heated, it’s time to clean it using a specialized cleaning kit or a fine needle. This step will help remove any stubborn residue, clogs, or debris from the nozzle. Follow these steps to clean the nozzle effectively:
- Nozzle cleaning kit: If you have a dedicated nozzle cleaning kit, select the appropriate-sized wire brush from the kit that matches the size of your nozzle. Insert the brush carefully into the nozzle and gently twist it back and forth. This will help dislodge any filament buildup or debris from the nozzle. Repeat this process several times to ensure thorough cleaning.
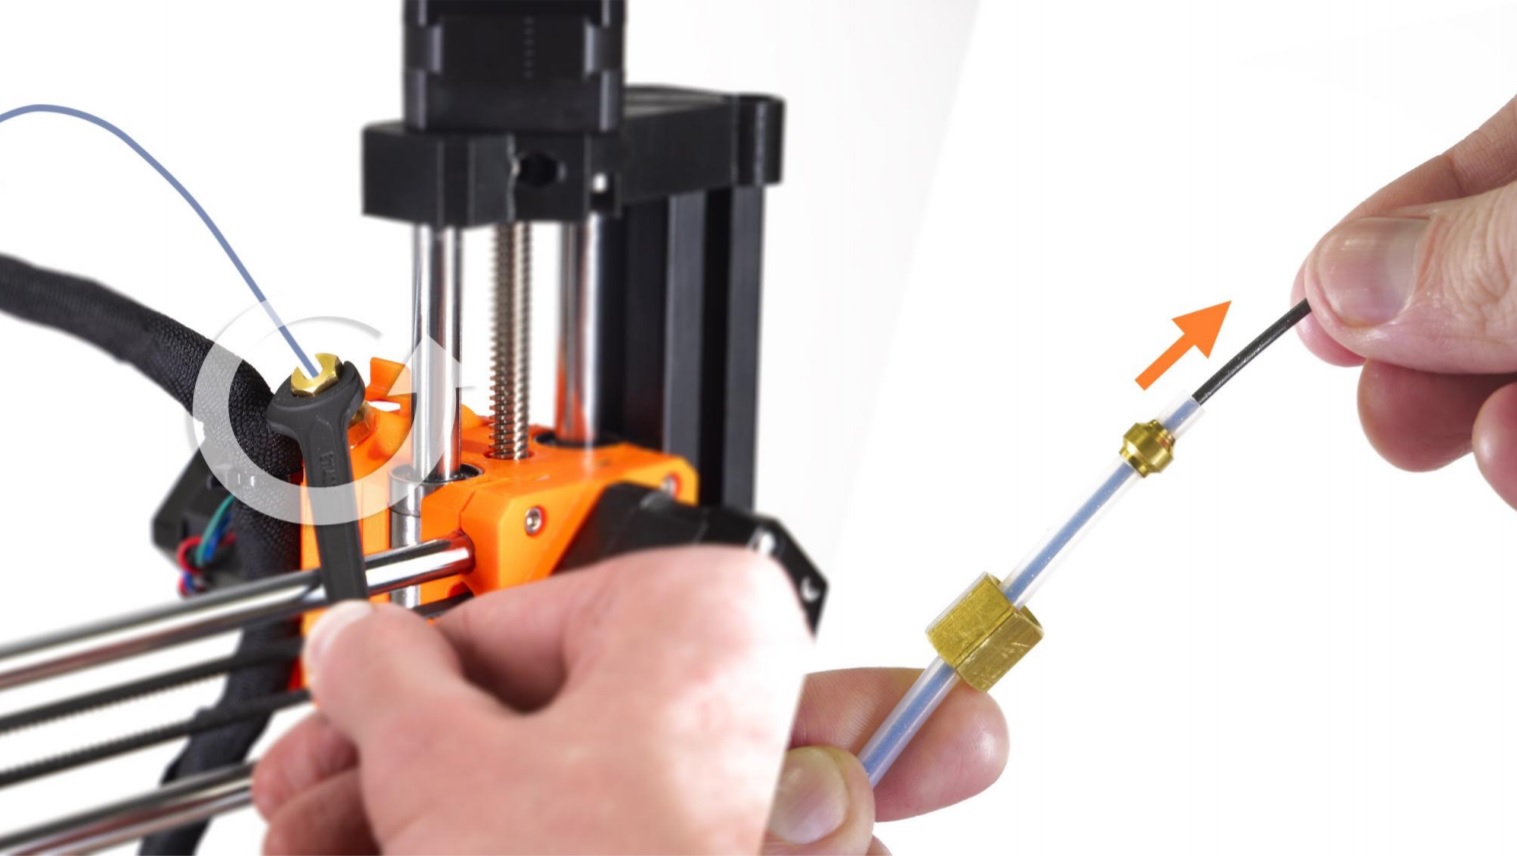
- Needle or sewing pin: If you don’t have a dedicated cleaning kit, a fine needle or sewing pin can be used as an alternative. Heat the nozzle slightly to make it easier to clean. Once heated, carefully insert the needle or pin into the nozzle and gently move it around to dislodge any clogs or debris. Be cautious not to scratch or damage the nozzle in the process.
- Flush with isopropyl alcohol: To further clean the nozzle, soak a small piece of cloth or paper towel with isopropyl alcohol. Gently insert it into the heated nozzle and move it back and forth to flush out any remaining residue or dirt. The alcohol will dissolve any leftover filament and help sanitize the nozzle.
- Repeat if necessary: Depending on the condition of your nozzle, you may need to repeat the cleaning process multiple times to ensure a thorough cleaning. Take your time and be patient while working on stubborn residue or clogs.
Cleaning the nozzle using a dedicated kit or a needle helps restore proper functionality and filament flow, leading to better print quality. By following these steps diligently, you’ll ensure that your nozzle is clean and ready for the next print job.
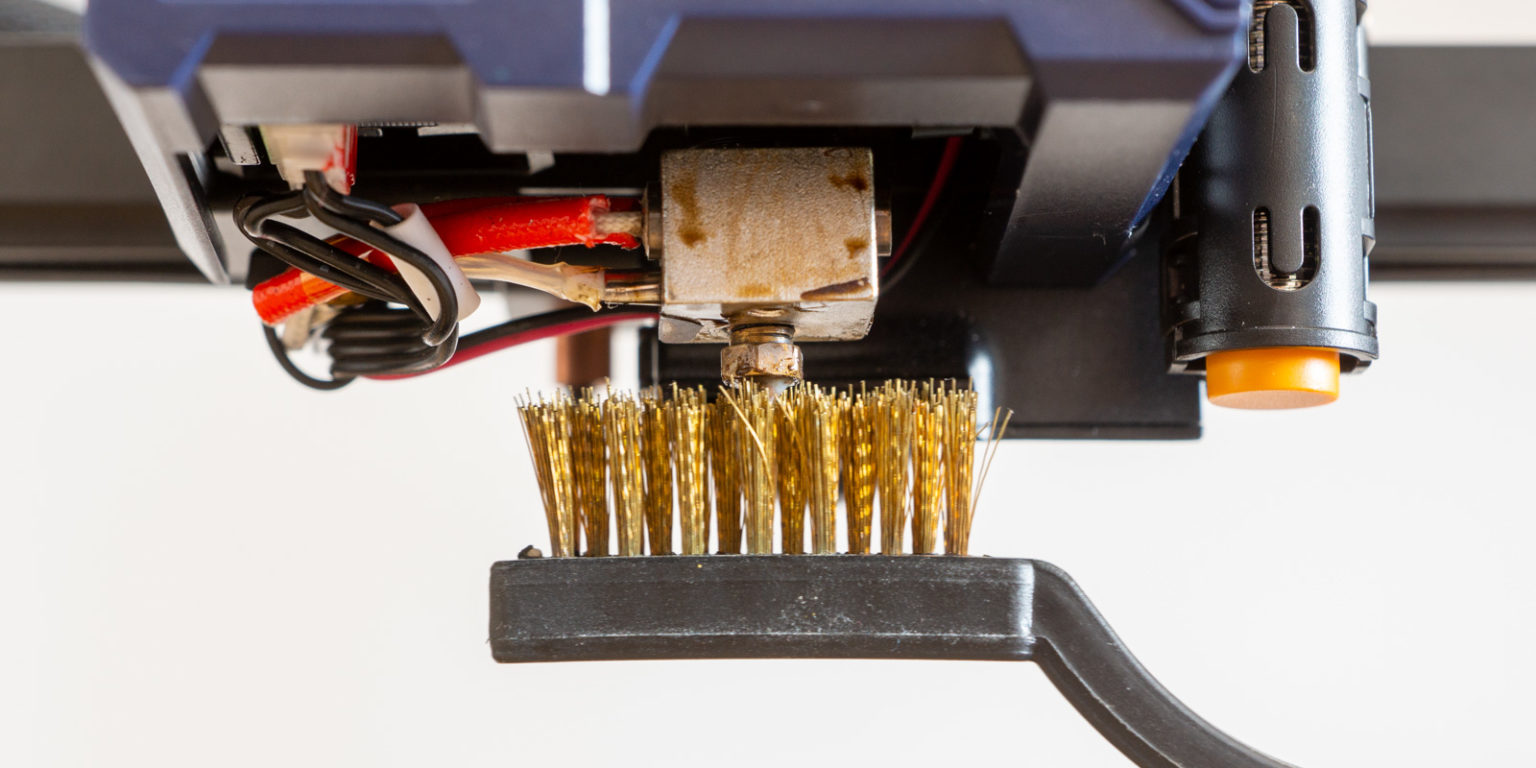
Step 5: Clean the nozzle with a wire brush
After using a cleaning kit or a needle to dislodge any residue or debris, it’s time to thoroughly clean the nozzle using a wire brush. The wire brush helps remove any remaining filament buildup and ensures a clean and unclogged nozzle. Follow these steps to clean the nozzle with a wire brush:
- Select the appropriate wire brush: Choose a wire brush from your cleaning kit that matches the size of your nozzle. The wire bristles should be soft enough to avoid any damage to the nozzle, but firm enough to effectively remove any residue.
- Heat up the nozzle: Turn on your 3D printer and set the nozzle temperature to a low temperature, typically around 100°C. Heating up the nozzle slightly makes it easier to clean and prevents any filament from hardening and causing further clogs.
- Gently scrub the nozzle: With the wire brush in hand, gently scrub the surface of the heated nozzle. Use circular motions or back and forth motions to remove any remaining filament or debris. Be careful not to apply too much pressure, as it may damage the nozzle.
- Inspect the brush: After each scrubbing action, inspect the wire brush for any buildup or debris that may have been removed from the nozzle. Clean the brush if necessary to prevent reintroducing the residue back into the nozzle.
- Repeat the process: Depending on the condition of your nozzle, you may need to repeat the scrubbing process a few times to ensure a thorough cleaning. Take your time and be thorough in your approach to achieve optimal results.
By cleaning the nozzle with a wire brush, you remove any remaining filament residue, ensuring a clean and unclogged nozzle. This step is crucial in maintaining the performance and print quality of your 3D printer.
Step 6: Reassemble the nozzle and test print
After thoroughly cleaning the nozzle, it’s time to reassemble it and perform a test print to ensure that the cleaning process was successful. Follow these steps to reassemble the nozzle and get your 3D printer ready for printing again:
- Cool down the nozzle: Allow the nozzle to cool down completely before handling it. This will prevent any burns or accidental damage while reassembling.
- Inspect the components: Take a moment to inspect the nozzle, extruder assembly, and any other components you may have removed during the cleaning process. Ensure everything is clean, free from any residue, and in proper working condition.
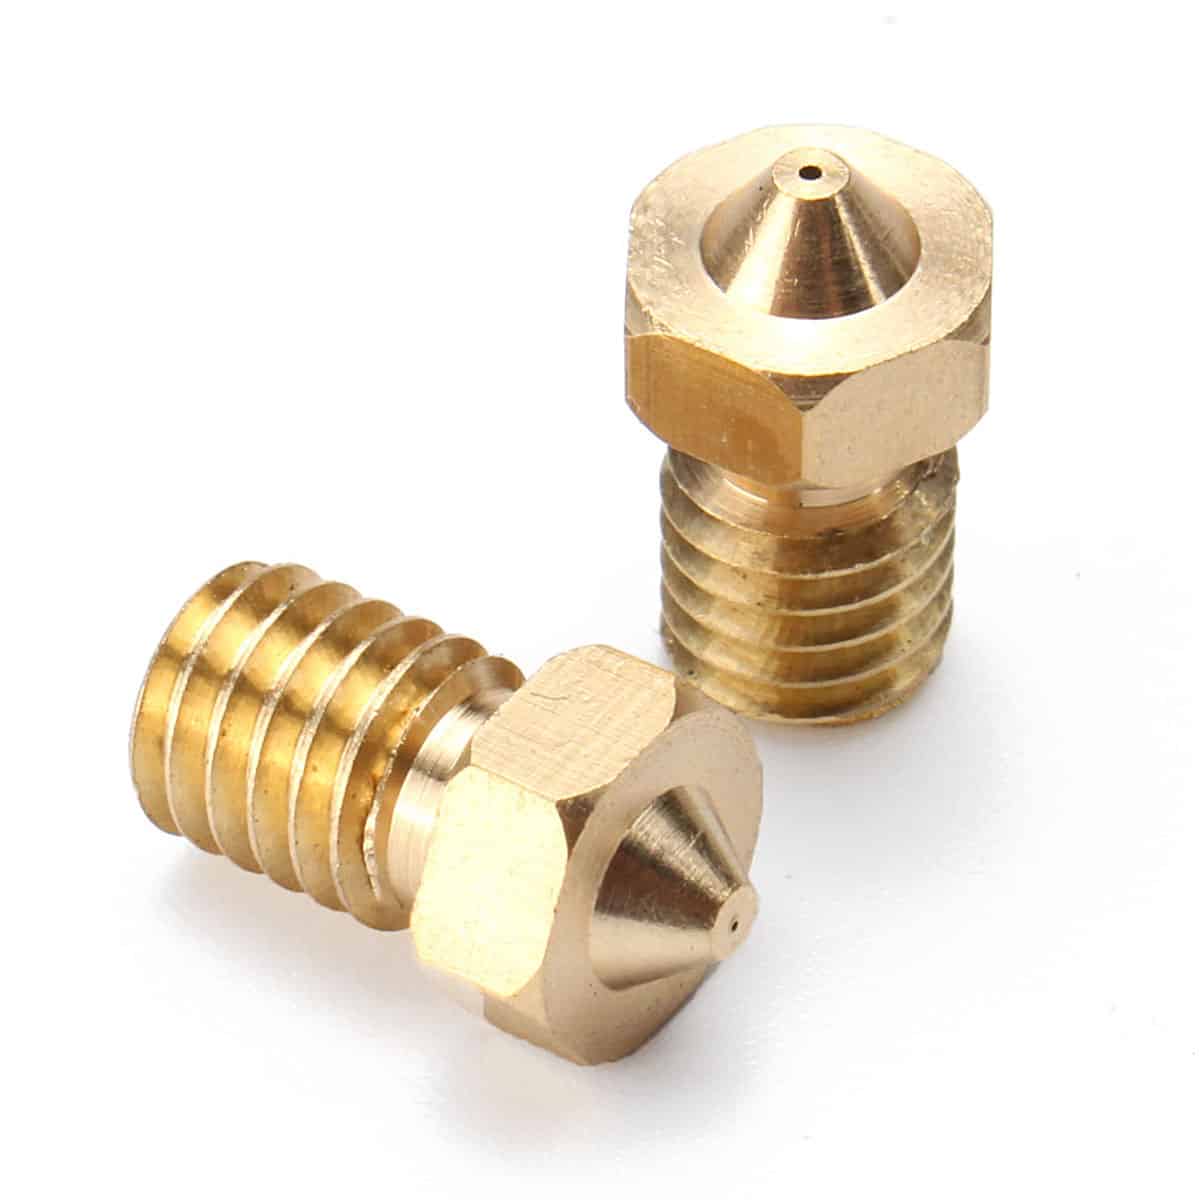
- Reattach the nozzle: Carefully attach the cleaned nozzle back onto the extruder assembly, following the manufacturer’s instructions. Make sure it is securely fastened but avoid overtightening, as it can lead to damage or leaks.
- Load filament: Load a small amount of filament into the printer’s extruder. Follow the regular filament loading procedure as specified by your printer’s manufacturer. This helps verify that the filament is flowing smoothly through the cleaned nozzle.
- Perform a test print: Choose a simple print model or use a calibration test print to ensure that the cleaned nozzle is functioning properly. Observe the print quality, extrusion consistency, and any signs of clogs or issues. If necessary, make any adjustments or repeat the cleaning process if you encounter any problems.
- Monitor the print: Keep a close eye on the test print and monitor its progress. Ensure that the filament is correctly extruding and adhering to the print bed, and that there are no signs of under-extrusion, stringing, or other print defects. Make note of any issues that may arise for further troubleshooting if needed.
By reassembling the nozzle and performing a test print, you can verify that the cleaning process was successful and that your 3D printer is ready to produce high-quality prints once again. If any issues persist, consult your printer’s manufacturer or seek additional guidance for troubleshooting specific problems.
Conclusion
Cleaning the nozzle of your 3D printer is an essential maintenance task that ensures optimal performance and print quality. By following the step-by-step process outlined in this guide, you can effectively remove filament residue, clogs, and debris from the nozzle, helping to prevent print failures and extend the lifespan of your printer. Here’s a quick recap of the cleaning process:
- Prepare your 3D printer by turning it off, allowing the nozzle to cool down, and removing any excess filament.
- Heat up the nozzle to soften any remaining filament.
- Use a dedicated nozzle cleaning kit or a fine needle to dislodge any residue or clogs.
- Clean the nozzle with a wire brush to remove any remaining filament buildup.
- Reassemble the nozzle and perform a test print to verify successful cleaning.
Regular nozzle cleaning is vital for maintaining smooth filament flow, preventing clogs, and improving the overall print quality of your 3D printer. By incorporating nozzle cleaning into your routine maintenance, you can enjoy consistent, high-quality prints and prolong the life of your printer.
Remember to always refer to your printer’s manufacturer guidelines and instructions when performing maintenance or cleaning tasks. Each printer model may have slightly different procedures and requirements, so it’s important to follow the specific recommendations for your 3D printer. With proper care and maintenance, you can continue to create amazing 3D prints for a long time to come.