Introduction
Checking the RAM usage on your Mac is an essential task to understand how your system is performing and to diagnose any potential issues. RAM, or random-access memory, is the temporary storage space that your computer uses to run applications and load data. Monitoring your Mac’s RAM usage can help you identify if there is a need for additional memory or if any applications are consuming an excessive amount of resources.
Monitoring RAM usage is especially important for Mac users who often run resource-intensive tasks such as graphic design, video editing, or gaming. When your Mac’s RAM is heavily utilized, it can lead to decreased performance, slower application launches, and even system crashes.
In this article, we will explore two methods to check the RAM usage on your Mac: using the built-in Activity Monitor and utilizing the Terminal. These methods will allow you to monitor your Mac’s memory usage, understand the data provided, and aid in optimizing performance.
By regularly checking your Mac’s RAM usage, you can make informed decisions about managing your system’s resources and improve overall performance. So, let’s dive in and learn how to check the RAM usage on your Mac!
Why is Checking RAM Usage Important?
Checking the RAM usage on your Mac is crucial for several reasons. Let’s explore why monitoring your Mac’s RAM usage is important and the benefits it provides:
1. Optimizing Performance: By regularly checking your Mac’s RAM usage, you can identify any bottlenecks or memory-hogging applications. This information enables you to optimize your system’s performance by closing unnecessary programs or upgrading your RAM if needed.
2. Preventing System Slowdowns: When your Mac’s RAM is overwhelmed with data, it can result in system slowdowns and unresponsive behavior. By checking the RAM usage, you can address high-resource-consuming applications and alleviate the strain on your system, preventing sluggishness and improving overall responsiveness.
3. Diagnosing Issues: If you experience frequent crashes, freezes, or unexpected errors on your Mac, monitoring RAM usage can help diagnose the root cause of these problems. It allows you to identify if your system’s memory is being fully utilized or if certain applications are causing excessive memory usage.
4. Managing Resource-Intensive Tasks: If you regularly engage in memory-intensive activities such as video editing, 3D rendering, or running virtual machines, monitoring your RAM usage is essential. It helps you ensure you have enough available memory to maintain smooth performance during these tasks.
5. Identifying Upgrade Needs: Checking your Mac’s RAM usage can aid in determining if you need to upgrade your system’s memory capacity. If you frequently reach or exceed maximum memory capacity, it may be time to consider upgrading your RAM to improve overall performance and accommodate resource-intensive applications.
Overall, monitoring the RAM usage on your Mac is a proactive approach to maintain optimal performance, prevent system slowdowns, and diagnose potential issues. It empowers you to take control of your system’s resources, make informed decisions, and ensure a smooth and efficient computing experience.
How to Check RAM Use Using Activity Monitor
Activity Monitor is a built-in utility on your Mac that provides detailed information about the processes and resources your system is using. It allows you to monitor CPU usage, disk activity, network utilization, and most importantly, RAM usage. Here’s a step-by-step guide on how to check your Mac’s RAM use using Activity Monitor:
Step 1: Accessing Activity Monitor
To open Activity Monitor, you can either go to Spotlight and search for “Activity Monitor” or navigate to “Applications” > “Utilities” > “Activity Monitor.”
Step 2: Navigating to the Memory Tab
In the Activity Monitor window, click on the “Memory” tab located at the top. This tab displays the detailed information about your Mac’s RAM usage.
Step 3: Understanding the RAM Information
In the Memory tab, you will see various sections providing information about your Mac’s RAM usage:
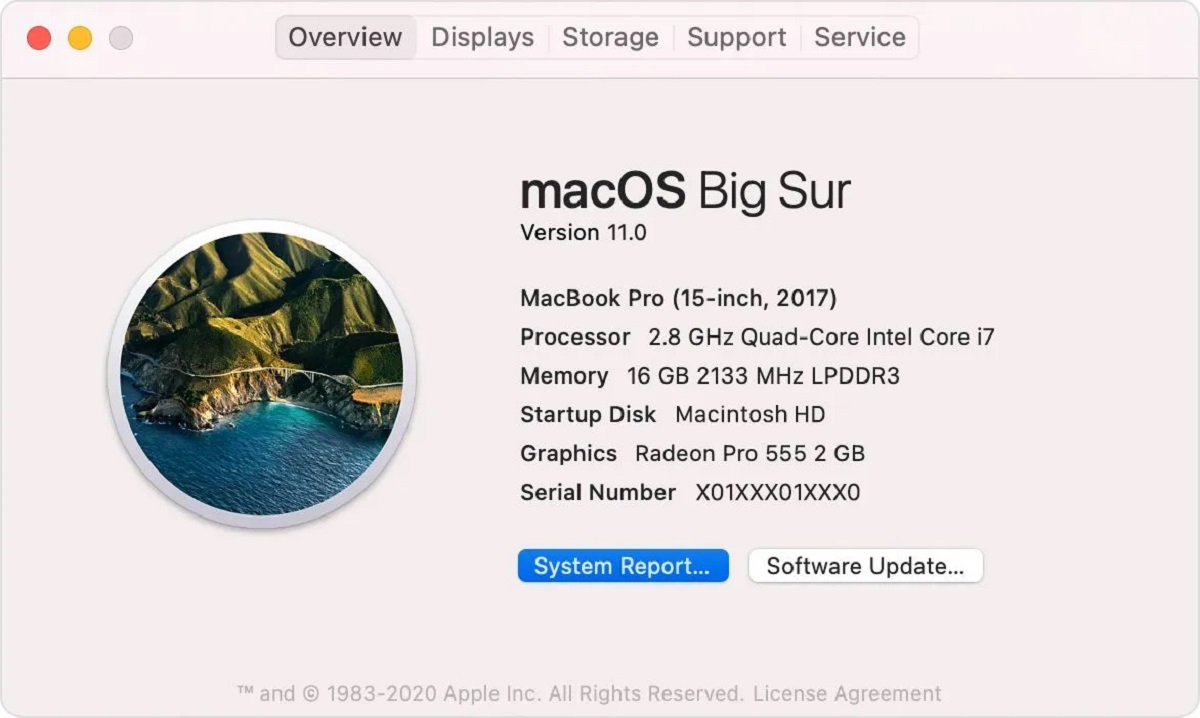
- Physical Memory: This displays the total amount of physical RAM installed on your Mac.
- Memory Used: Indicates the current amount of RAM being utilized by active processes.
- Cache: Represents the amount of RAM used by the file system cache.
- App Memory: Shows the total memory used by applications.
- Wired Memory: Represents the memory that macOS cannot move to disk and is used by system processes.
- Compressed: Displays the amount of memory that is compressed to save space.
- Swap Used: Indicates the amount of disk space used as virtual memory.
Step 4: Monitoring RAM Usage in Real-Time
While on the Memory tab, you can observe real-time changes in RAM usage. Keep an eye on the “Memory Used” graph and values to track any sudden spikes or consistently high usage.
Step 5: Closing Activity Monitor
Once you have checked the RAM usage and gathered the necessary information, you can close the Activity Monitor window.
Activity Monitor is a powerful tool for monitoring RAM usage on your Mac. By regularly checking the Memory tab, you can stay informed about your system’s resource utilization and take necessary actions to optimize performance and resolve any issues related to excessive memory consumption.
Step 1: Accessing Activity Monitor
Accessing Activity Monitor on your Mac is the first step in checking the RAM usage. Follow these instructions to open Activity Monitor:
Method 1: Using Spotlight
- Click on the magnifying glass icon in the top-right corner of your screen or press Command + Spacebar to open Spotlight.
- Type “Activity Monitor” in the search bar and press Enter.
- From the search results, click on the Activity Monitor application to launch it.
Method 2: Using Finder
- Click on the “Finder” icon in your Dock to open a Finder window.
- In the menu bar at the top of the screen, click on “Go” and select “Utilities” from the drop-down menu.
- In the Utilities folder, scroll down or search for “Activity Monitor” and double-click on it to open the application.
Method 3: Using Launchpad
- Click on the “Launchpad” icon in your Dock, which is a gray rocket ship.
- Scroll through the list of applications until you find the “Utilities” folder.
- Click on the “Utilities” folder, and then click on the “Activity Monitor” icon to open the application.
Once Activity Monitor is open, you will see various tabs at the top of the window, including CPU, Memory, Energy, Disk, Network, and more. To check the RAM usage, we will navigate to the Memory tab in the next step.
Accessing Activity Monitor is the first step to gain insights into your Mac’s performance and check the RAM usage. By understanding how to open this utility, you can now proceed to the next step and learn how to navigate to the Memory tab to monitor your Mac’s RAM usage effectively.
Step 2: Navigating to the Memory Tab
Once Activity Monitor is open on your Mac, the next step is to navigate to the Memory tab, where you will find detailed information about your Mac’s RAM usage. Follow these instructions to reach the Memory tab:
- In the Activity Monitor window, you will see several tabs positioned at the top of the window, including CPU, Memory, Energy, Disk, Network, and more.
- Click on the “Memory” tab to switch the view to the Memory-related information.
After selecting the Memory tab, you will now have access to extensive details about your Mac’s RAM usage. This information is categorized into various sections, providing insights into different aspects of memory utilization.
The Memory tab in Activity Monitor displays the following key information:
- Pressure: This section provides an overview of the memory pressure on your system. Green indicates healthy memory conditions, while yellow or red indicates higher memory pressure.
- Physical Memory: This section displays the total amount of physical RAM installed on your Mac.
- Memory Used: Shows the current memory usage by active processes on your Mac.
- Cache: Indicates the amount of RAM used by the file system cache, which helps improve system performance by storing frequently accessed data.
- App Memory: This section shows the total amount of memory currently consumed by applications.
- Wired Memory: Represents the memory used by essential system processes that cannot be moved to disk.
- Swap Used: Indicates the amount of virtual memory used from your storage drive.
Navigating to the Memory tab allows you to have a detailed overview of how your Mac is utilizing its RAM resources. This knowledge is essential for understanding if your memory usage is within normal limits or if there are any potential issues that need attention. In the next step, we will explore how to interpret the RAM information provided in Activity Monitor.
Step 3: Understanding the RAM Information
Once you have accessed the Memory tab in Activity Monitor, it is crucial to understand the information presented about your Mac’s RAM usage. Familiarizing yourself with these details will help you make informed decisions regarding memory management. Here’s a breakdown of the RAM information provided:
- Physical Memory: This section displays the total amount of physical RAM installed on your Mac. It represents the hardware capacity of your system’s memory.
- Memory Used: Indicates the current memory usage by active processes on your Mac. It represents the amount of RAM being utilized by running applications and system operations.
- Cache: Shows the amount of RAM being used by the file system cache. The file system cache stores frequently requested data to improve system performance and speed up access to files.
- App Memory: This section displays the total amount of memory currently consumed by applications on your Mac. It provides insights into how much RAM individual apps are using, helping you identify memory-hungry applications that may be impacting system performance.
- Wired Memory: Represents the memory used by essential system processes that cannot be moved to disk. Wired memory is always active and cannot be reclaimed unless the associated process is terminated.
- Swap Used: Indicates the amount of virtual memory being utilized from your storage drive. When your Mac runs out of physical memory, inactive data is transferred to the hard drive or SSD, which is referred to as swap space.
By understanding these different sections of the RAM information in Activity Monitor, you can monitor and track how your Mac’s memory resources are being utilized. This knowledge allows you to identify areas of concern, such as high memory usage or excessive swapping, which may impact your system’s performance.
Now that you have a grasp of the RAM information in Activity Monitor, let’s move on to the next step and explore how to monitor real-time RAM usage.
Step 4: Monitoring RAM Usage in Real-Time
In Activity Monitor, you can monitor the real-time RAM usage of your Mac, allowing you to observe any fluctuations or spikes in memory usage. Here’s how you can monitor RAM usage in real-time:
While on the Memory tab in Activity Monitor, you will find various graphical representations and numerical values that provide insights into your Mac’s RAM utilization. The key elements to monitor include:
- Memory Used Graph: This graph visually represents the current RAM usage on your Mac. The graph shows the memory utilization in real-time, allowing you to track any sudden spikes or consistently high memory usage. The Y-axis represents the amount of RAM used, while the X-axis represents the time.
- Total Memory Used Value: Located below the graph, this numerical value displays the current amount of RAM being utilized by active processes on your Mac. It provides a precise measurement of memory usage in Megabytes (MB) or Gigabytes (GB).
Monitoring the real-time RAM usage is beneficial for identifying applications or processes that excessively consume memory resources. If you notice memory usage consistently hitting high levels or sudden spikes, it might indicate a memory-hogging application that requires attention.
Additionally, continuous monitoring of RAM usage allows you to analyze how memory-intensive tasks or resource-heavy applications impact your system’s performance. It helps you evaluate if your Mac’s RAM capacity is sufficient for your computing needs or if an upgrade might be necessary.
Now that you know how to monitor your Mac’s RAM usage in real-time, let’s move on to the final step and learn how to close Activity Monitor when you’re done.
Step 5: Closing Activity Monitor
Once you have finished checking and monitoring the RAM usage on your Mac using Activity Monitor, it’s time to close the application. Here’s how you can do it:
- In the Activity Monitor window, go to the menu bar at the top of the screen.
- Click on the “Activity Monitor” option.
- A drop-down menu will appear.
- From the drop-down menu, click on the “Quit Activity Monitor” option.
Alternatively, you can also use the keyboard shortcut Command + Q to quickly quit Activity Monitor.
By closing Activity Monitor, you are conserving system resources and ensuring that the application is no longer actively monitoring your Mac’s processes and memory usage.
Now that you have successfully closed Activity Monitor, you have completed the process of checking and monitoring the RAM usage on your Mac. Remember to periodically check your Mac’s RAM usage to maintain optimal performance and address any issues related to excessive memory consumption.
Congratulations! You now have the knowledge and tools to effectively monitor and manage your Mac’s RAM usage using Activity Monitor.
How to Check RAM Use Using Terminal
If you prefer using the Terminal on your Mac, you can also check the RAM usage through a command-line interface. The Terminal provides a more technical and text-based approach to monitoring your system’s memory. Follow these steps to check the RAM use using Terminal:
Step 1: Opening Terminal
To open Terminal, you can use one of the following methods:
- Navigate to “Applications” > “Utilities” > “Terminal” to open Terminal from the Finder.
- Use Spotlight by clicking on the magnifying glass icon in the top-right corner of your screen, searching for “Terminal,” and selecting it from the search results.
- Use the keyboard shortcut Command + Spacebar to open Spotlight, type “Terminal,” and press Enter.
Step 2: Running the Memory Usage Command
In the Terminal window, type the following command and press Enter to check the RAM usage:
top -l 1 | grep PhysMemThis command will provide you with detailed information about your Mac’s physical memory, including the total amount of RAM installed and how it is being utilized.
Step 3: Interpreting the RAM Information
After running the command, you will see the output displayed in the Terminal window. The RAM information provided includes:
- PhysMem: This section displays the total physical memory installed on your Mac, the amount currently used, free memory available, and memory used by the file system cache.
- mem: Represents the memory usage values in kilobytes (KB), including wired memory, active memory, inactive memory, and free memory.
- Purgeable: Shows the amount of memory that can be freed up by the macOS purge process if needed.
Step 4: Continuing to Monitor RAM Usage
To continuously monitor the RAM usage in real-time within the Terminal, you can use the following command:
top -s 2This command continuously updates the RAM usage every 2 seconds. Press Control + C to stop the monitoring process.
Step 5: Exiting Terminal
When you have finished checking the RAM usage and no longer need Terminal, you can simply close the Terminal window or use the keyboard shortcut Command + Q to exit Terminal.
Using Terminal to check the RAM usage offers a more advanced and command-line focused approach. It provides you with specific memory details and the ability to continue monitoring in real-time. By utilizing Terminal, you can gain a deeper understanding of your system’s memory usage and make informed decisions regarding memory management.
Step 1: Opening Terminal
To check the RAM usage on your Mac using Terminal, you need to open the Terminal application. Follow these steps to access Terminal:
- Click on the “Finder” icon in your Dock to open a Finder window.
- In the menu bar at the top of the screen, click on “Go” and select “Utilities” from the drop-down menu.
- In the Utilities folder, scroll down or search for “Terminal” and double-click on it to open the Terminal application.
Alternatively, you can also use Spotlight to open Terminal. Here’s how:
- Click on the magnifying glass icon located in the top-right corner of your screen or press Command + Spacebar.
- In the search bar that appears, type “Terminal” and press Enter.
- From the search results, click on the Terminal application to launch it.
Once Terminal is open, you will see a black window with a blinking cursor, indicating that you are now ready to enter commands and interact with your system.
Opening Terminal is the first step towards checking your Mac’s RAM usage using the command line interface. By following the instructions above, you can easily access Terminal and proceed to the next steps in monitoring your system’s memory.
Step 2: Running the Memory Usage Command
Once you have opened Terminal on your Mac, the next step is to run a memory usage command that will provide you with information about your system’s RAM usage. Follow these steps to execute the memory usage command:
- In the Terminal window, type the following command:
- Press Enter to execute the command.
top -l 1 | grep PhysMemAfter running the command, you will see the output displayed in the Terminal window. The command retrieves memory-related information from your system and outputs it in a readable format.
The command top -l 1 runs the top utility, which gathers various system statistics, for one iteration (-l 1). The pipe symbol (|) allows you to filter the output and pass it to the grep command.
The grep PhysMem part of the command filters the output to only show the lines containing the keyword “PhysMem,” which stands for Physical Memory.
The output will provide you with information about your Mac’s RAM usage, including the total physical memory installed, the amount currently used, free memory available, and memory used by the file system cache.
Running the memory usage command in Terminal allows you to quickly retrieve important information about your system’s RAM usage, helping you monitor and manage memory resources effectively.
Now that you have executed the memory usage command successfully, let’s move on to the next step and learn how to interpret the RAM information provided in the Terminal output.
Step 3: Interpreting the RAM Information
After running the memory usage command in Terminal, it’s important to understand and interpret the information provided about your Mac’s RAM usage. Here’s how you can interpret the RAM information displayed in the Terminal:
- PhysMem: This section displays various details about your Mac’s physical memory. It includes the total amount of physical memory installed, the amount currently used, the amount of free memory available, and the memory used by the file system cache.
- mem: The
memsection represents the memory usage values in kilobytes (KB). It includes wired memory, which is memory used by essential system processes; active memory, which is memory actively in use; inactive memory, which is memory that is no longer being used; and free memory, which is memory available for immediate use. - Purgeable: The
purgeablesection indicates the amount of memory that can be freed up by the macOS purge process if needed. The operating system purges this memory automatically when necessary.
Interpreting the RAM information provided in the Terminal output allows you to gain insight into your system’s memory usage. It helps you understand how much memory is being utilized, how much is available, and how various memory components contribute to the overall usage.
By monitoring and interpreting this information, you can identify if your Mac’s memory is under heavy load, observe any memory-related bottlenecks or issues, and make informed decisions about managing memory resources effectively.
Now that you can interpret the RAM information displayed in Terminal, let’s proceed to the next step and learn how to continue monitoring RAM usage in real-time.
Step 4: Continuing to Monitor RAM Usage
After checking the RAM usage on your Mac using Terminal, you may want to continue monitoring the memory usage in real-time to track any fluctuations or changes. Luckily, you can use a command to continuously monitor the RAM usage in Terminal. Here’s how:
- In the Terminal window, type the following command:
- Press Enter to execute the command.
top -s 2The top -s 2 command runs the top utility in interactive mode, continuously updating the output every 2 seconds. This allows you to monitor the real-time RAM usage and other system statistics in Terminal.
As the command executes, you will see the updated RAM usage values and other system information displayed in the Terminal window. You can observe changes in memory usage, identify any memory-intensive processes, and keep an eye on system resource utilization.
To stop monitoring the RAM usage, you can simply press Control + C in the Terminal window. This will terminate the continuous monitoring and return you to the command prompt.
Continuing to monitor the RAM usage in real-time using Terminal provides you with valuable insights into your system’s memory performance. By observing any spikes, high usage patterns, or trends, you can pinpoint resource-heavy applications or processes and optimize memory allocation for smoother overall performance.
Now that you know how to continue monitoring RAM usage, let’s move on to the final step and learn how to exit Terminal.
Step 5: Exiting Terminal
Once you have completed checking and monitoring the RAM usage using Terminal, it’s time to exit the Terminal application. Here’s how you can do it:
- Ensure that you’re done monitoring the RAM usage and no longer need Terminal.
- To exit Terminal, you have a couple of options:
- Click on the red dot in the top-left corner of the Terminal window to close it.
- Use the keyboard shortcut Command + Q to quit Terminal.
- Once you exit Terminal, the application will close, and you will return to your macOS desktop environment or any other applications you had open.
It is important to note that closing Terminal will not affect your system or memory usage. Terminal is simply a tool that allows you to execute commands and interact with your Mac at a more technical level. Once you exit Terminal, it no longer actively monitors or affects your system’s RAM usage.
By exiting Terminal, you conclude the process of checking and monitoring the RAM usage. You have successfully gained insights into your Mac’s memory utilization, identified any potential memory-related issues, and made informed decisions regarding memory management.
Now that you have learned how to exit Terminal, you can close the application when you are finished using it.
Conclusion
Checking the RAM usage on your Mac is essential for optimizing performance and ensuring smooth system operation. Whether you choose to use the Activity Monitor or Terminal, monitoring your Mac’s RAM usage allows you to identify any resource-heavy applications, diagnose performance issues, and make informed decisions about memory management.
The Activity Monitor provides a user-friendly graphical interface that allows you to check RAM usage, view real-time statistics, and understand resource utilization. By accessing the Memory tab, you can gather valuable information about your Mac’s physical memory, overall memory usage, and the memory consumption of individual applications.
On the other hand, Terminal offers a more technical approach to monitoring RAM usage. With the use of command-line tools, you can retrieve detailed information about your Mac’s physical memory, active processes, and memory statistics. Terminal allows for continuous monitoring, helping you observe real-time changes in RAM utilization.
Whichever method you choose, regularly checking your Mac’s RAM usage empowers you to optimize performance, prevent system slowdowns, and diagnose any potential issues. By understanding the RAM information provided, you can make informed decisions about memory management, consider upgrading your RAM if necessary, and ensure a smooth and efficient computing experience.
So, take advantage of the built-in tools on your Mac, whether it’s Activity Monitor or Terminal, to dive into the world of RAM monitoring. By staying proactive in monitoring your Mac’s memory usage, you can ensure that your system runs smoothly, allowing you to work or play without productivity interruptions.