Introduction
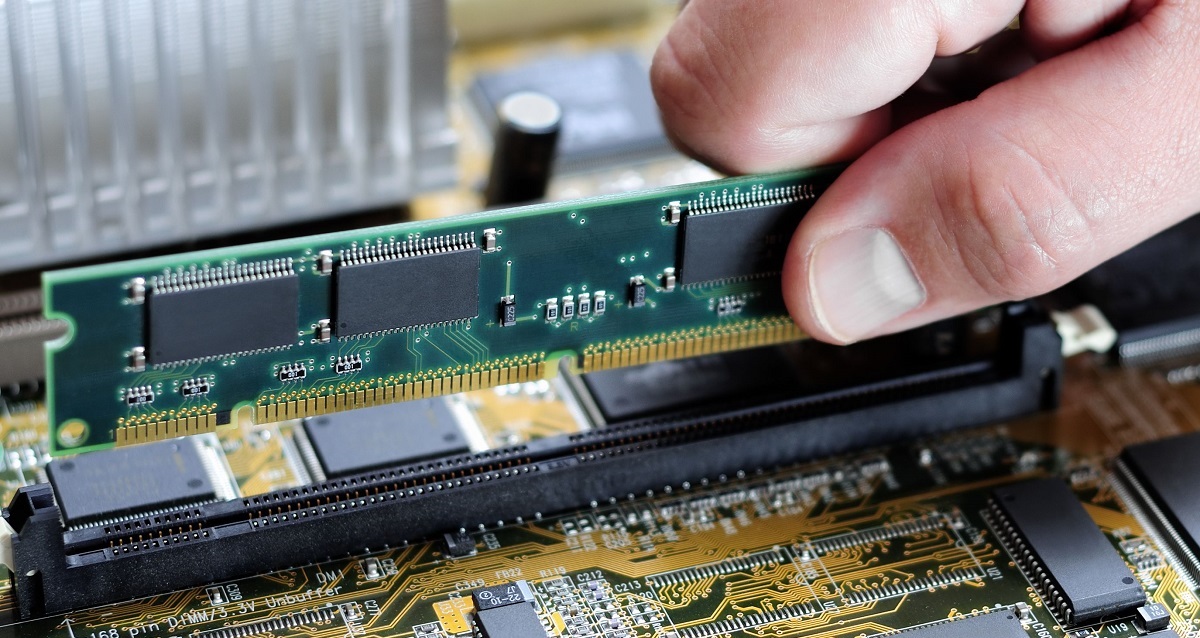
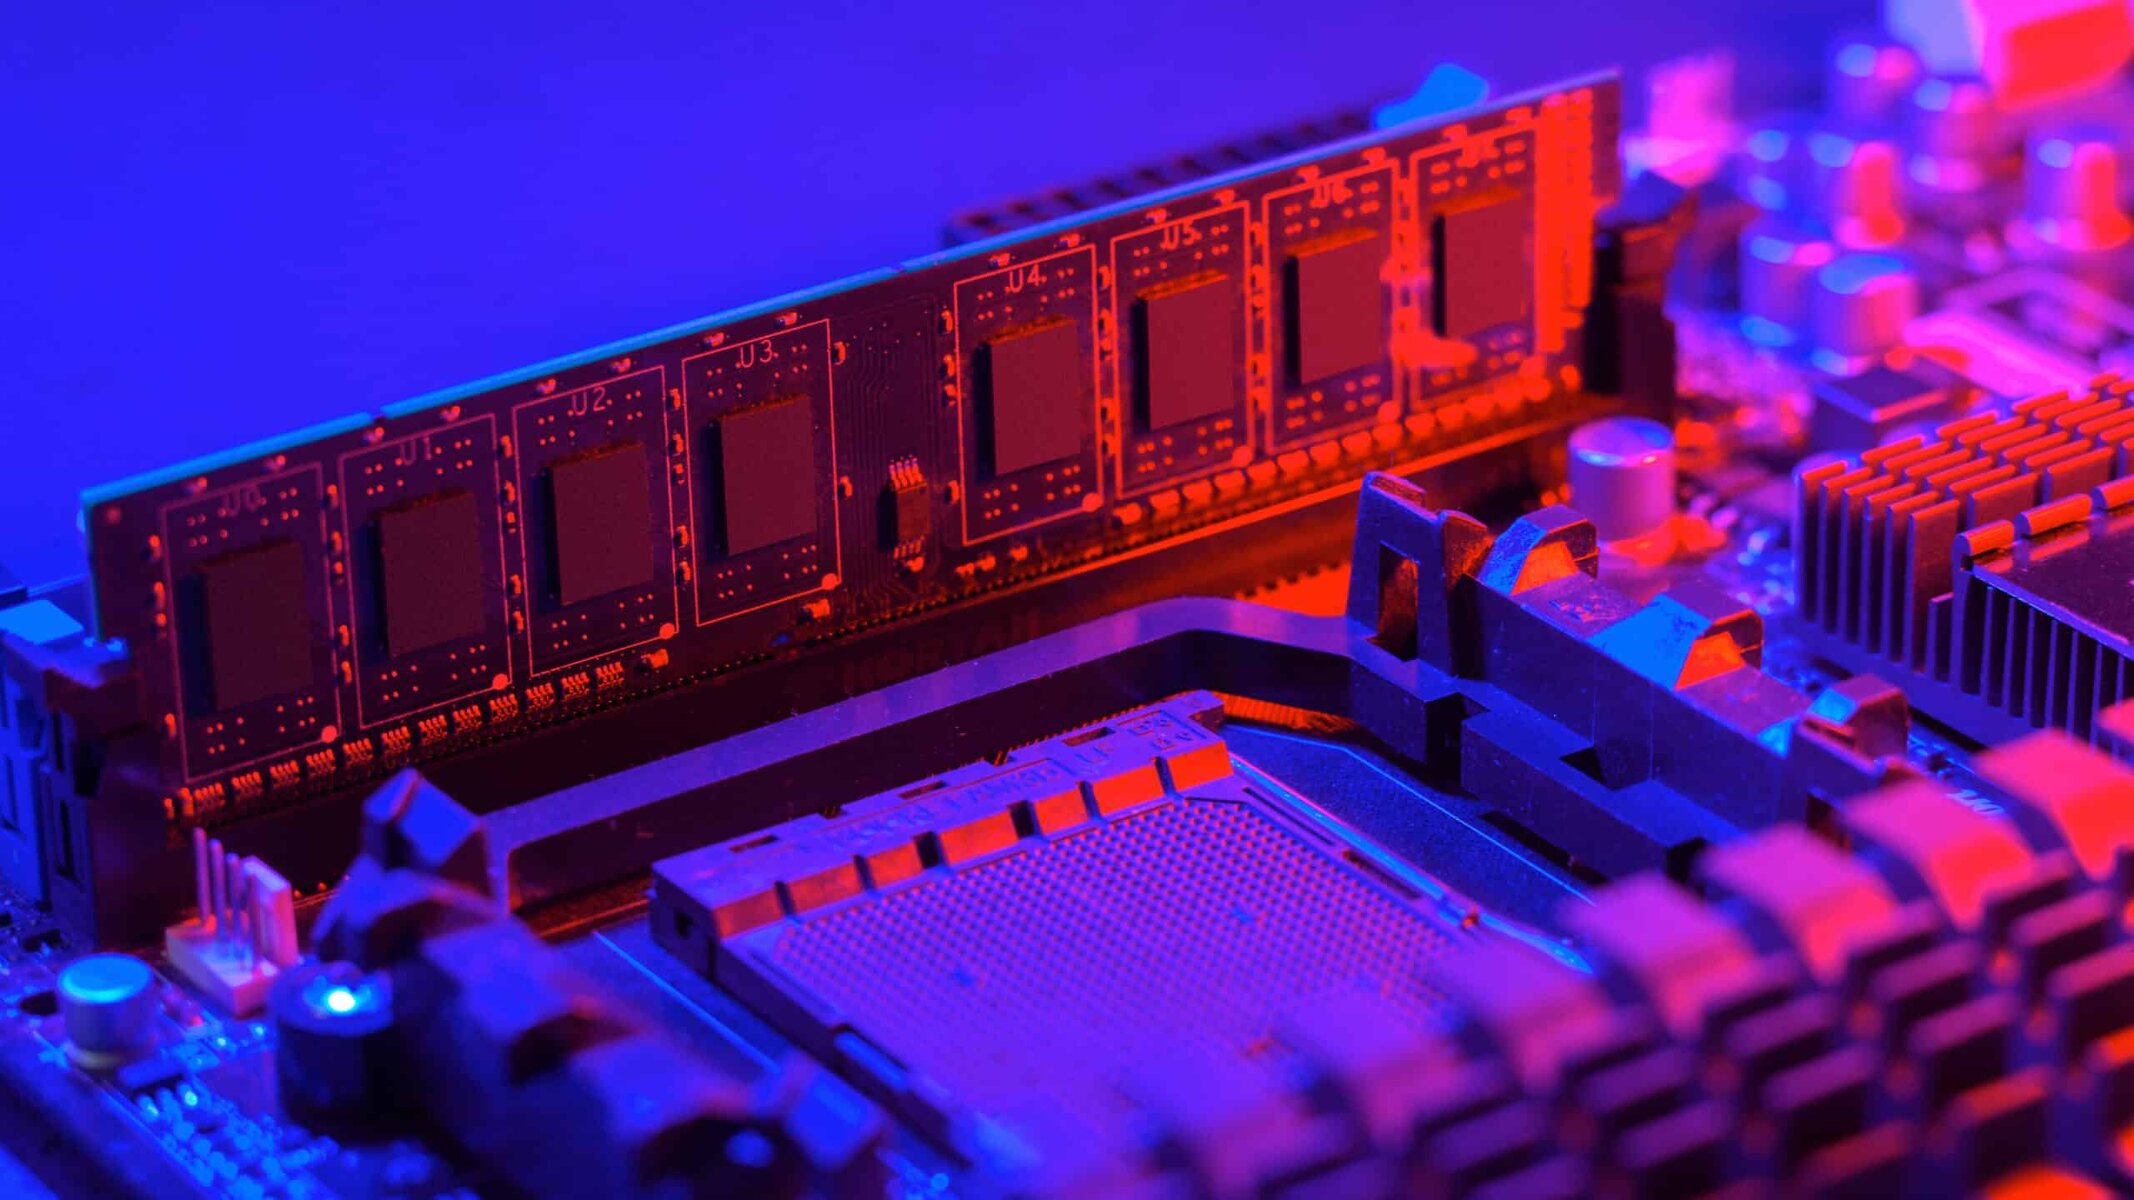
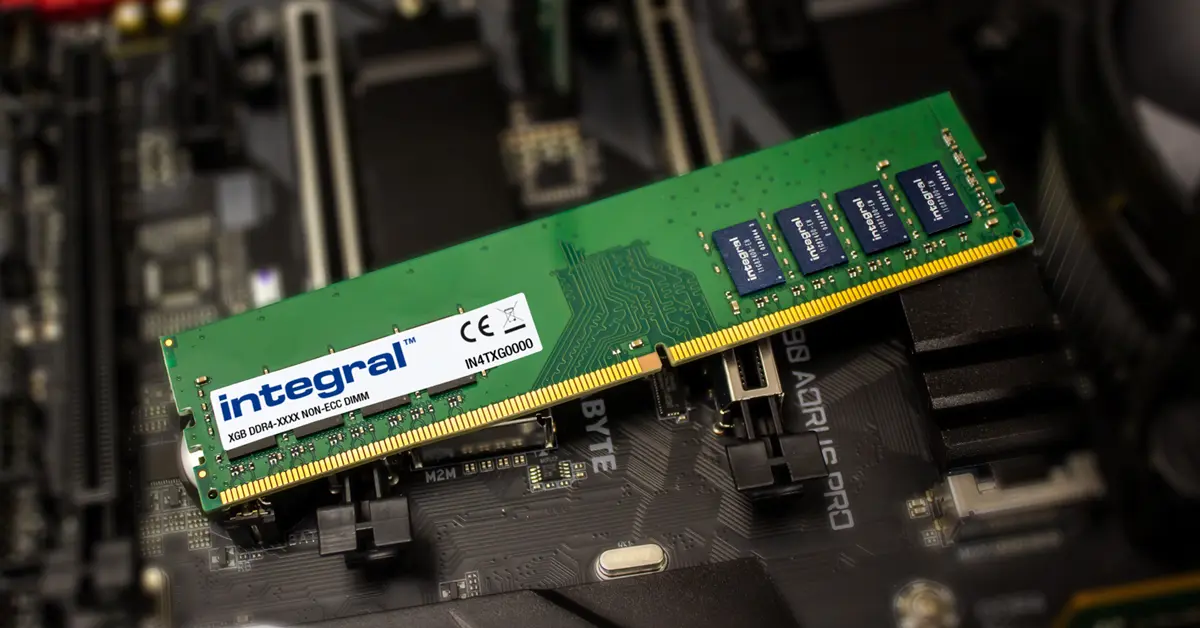
Checking the RAM (Random Access Memory) on your computer is an essential task for optimizing its performance. RAM is a crucial component of your system that temporarily stores data for quick access by the CPU. Insufficient RAM can lead to sluggish performance, system crashes, and overall reduced efficiency. Therefore, it is important to determine how much RAM your computer has and whether it is meeting your needs.
Knowing the amount of RAM installed on your computer is particularly crucial when running memory-intensive applications, such as graphic design software, video editing programs, or resource-intensive games. By understanding your RAM capacity, you can identify any potential bottlenecks and decide whether an upgrade is necessary.
In this article, we will explore different methods for checking the RAM on your computer, whether you are using a Windows, Mac, or Linux operating system. We will also discuss how to use third-party software for more detailed RAM analysis. Let’s dive in and discover the various ways to check your computer’s RAM to ensure it is running at its peak performance.
Why Check RAM on Your Computer?
Checking the RAM on your computer is important for several reasons. Understanding the amount of RAM your system has can help you assess its performance and determine if it meets your requirements. Here are a few reasons why checking your computer’s RAM is essential:
- Optimizing Performance: RAM plays a critical role in the overall performance of your computer. Insufficient RAM can lead to slow system response times, frequent freezes, and an overall decrease in efficiency. By checking your RAM, you can identify if you have enough memory to handle your everyday tasks and heavy-duty applications.
- Identifying Bottlenecks: If your computer is running slow or experiencing frequent crashes, it could be due to insufficient RAM. By checking your RAM, you can determine if it is the cause of these issues. Knowing your system’s RAM capacity can help you identify potential bottlenecks and take appropriate steps, such as upgrading your RAM, to improve performance.
- Planning for Upgrades: Checking your computer’s RAM is especially crucial if you use resource-intensive applications like video editing software or gaming. These programs require a significant amount of RAM for smooth operation. Knowing your current RAM capacity allows you to evaluate whether an upgrade is necessary to meet the demands of your tasks or applications.
- Troubleshooting Issues: RAM-related issues can cause various problems, including system crashes and program errors. By checking your RAM, you can determine if any issues are related to its performance. This information can be helpful when troubleshooting and seeking assistance from technical support or online forums.
In summary, checking your computer’s RAM provides valuable insights into its performance, allows you to identify potential bottlenecks, plan for necessary upgrades, and troubleshoot any related issues. It empowers you to optimize your computer’s performance and ensure it meets your requirements for both basic and resource-intensive tasks. Now, let’s explore how to check the RAM on different operating systems.
How Much RAM Do You Have?
Determining how much RAM is installed on your computer is an important step in assessing its performance capabilities. By knowing the amount of RAM, you can evaluate whether it aligns with your computing needs. Here are several methods to check the RAM on different operating systems.
Windows: To check your RAM on a Windows computer, you can follow these steps:
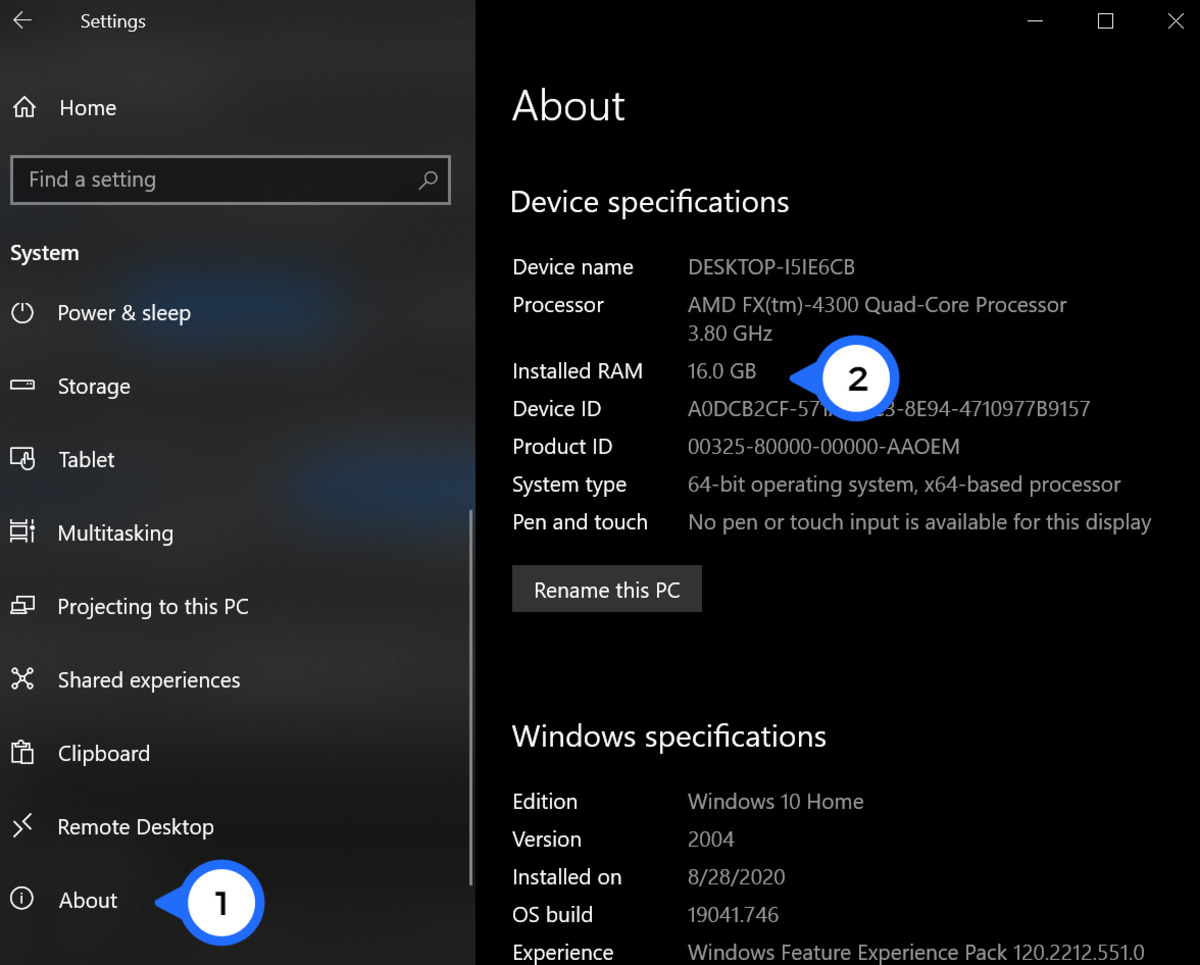
- Press the Windows key + R to open the Run dialog box.
- Type “msinfo32” and press Enter.
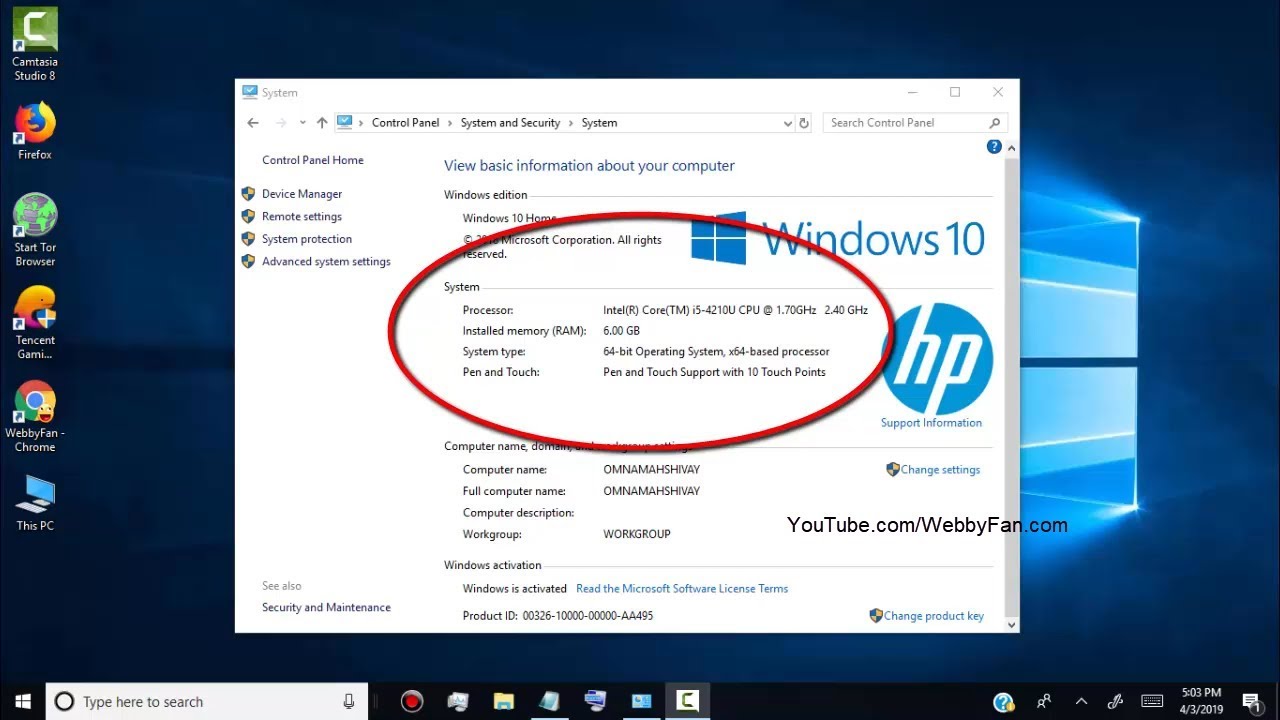
- In the System Information window, under the “System Summary” section, you will find the “Installed Physical Memory (RAM)” information, which displays the total amount of RAM installed on your computer.
Mac: Checking your RAM on a Mac is straightforward as well. Here’s how you can do it:
- Click on the Apple menu and select “About This Mac.”
- In the “Overview” tab, you will see the total amount of RAM displayed under the “Memory” or “Installed Memory” section.
Linux: Different Linux distributions have varying methods to check RAM, but most offer a command-line interface. Here’s a general way to check RAM in Linux:
- Open the Terminal.
- Enter the command “
free -h” or “cat /proc/meminfo” and press Enter. These commands will display detailed information about your system’s memory, including the total amount of RAM.
Checking RAM may also involve looking at specific specifications provided by the manufacturer for your computer model. This information can typically be found on the manufacturer’s website or in the user manual that came with your computer or motherboard.
Knowing the amount of RAM installed on your computer is invaluable for optimizing performance, determining if upgrades are necessary, and troubleshooting potential issues. By following the steps specific to your operating system, you can easily check your RAM and gain insight into your computer’s capabilities.
Checking RAM on Windows
If you are using a Windows operating system, there are a few methods you can use to check the RAM on your computer. Here are two commonly used ways:
-
Using System Information:
One way to check your RAM on Windows is by using the System Information utility. Here’s how to do it:
- Press the Windows key + R to open the Run dialog box.
- Type “msinfo32” and press Enter.
- In the System Information window, under the “System Summary” section, you will find the “Installed Physical Memory (RAM)” information, which displays the total amount of RAM installed on your computer.
-
Using Task Manager:
Another way to check your RAM on Windows is by using the Task Manager. Here’s how to do it:
- Right-click on the taskbar and select “Task Manager” from the context menu.
- In the Task Manager window, click on the “Performance” tab.
- Under the “Performance” tab, you will see the memory usage graph and the amount of RAM installed on your computer.
These methods provide a quick and easy way to check the amount of RAM installed on your Windows computer. By knowing your available RAM, you can evaluate whether it is sufficient for your computing needs or if an upgrade might be beneficial.
Additionally, there are third-party software applications available that provide more detailed information about your RAM, such as its speed, type, and usage. These applications can be helpful for advanced users or those who require in-depth analysis. Examples of popular third-party software include CPU-Z, HWiNFO, and Speccy.
Remember, having enough RAM is crucial for smooth system performance, especially when multitasking or running resource-intensive applications. By checking your RAM on Windows, you can ensure your computer is running optimally and make informed decisions regarding upgrades if needed.
Checking RAM on Mac
If you are using a Mac computer, checking the amount of RAM installed is a straightforward process. Here’s how you can check your RAM on a Mac:
-
About This Mac:
One of the easiest ways to check your RAM on a Mac is by using the “About This Mac” feature. Follow these steps:
- Click on the Apple menu located on the top-left corner of your screen.
- From the drop-down menu, select “About This Mac.”
- In the “Overview” tab, you will see the total amount of RAM displayed under the “Memory” or “Installed Memory” section.
-
System Report:
Another method is to use the System Report utility to obtain detailed information about your Mac’s hardware, including RAM. Here’s how you can access it:
- Click on the Apple menu and select “About This Mac.”
- In the window that appears, click on the “System Report” button.
- In the left navigation pane of the System Report window, select “Memory.”
- On the right side, you will find detailed information about your RAM, including the type, speed, and the total number of memory slots used.
These methods provide an easy way to check the amount of RAM installed on your Mac. By knowing the RAM capacity, you can evaluate whether it meets your computing needs or if you should consider upgrading.
In addition to the built-in tools, there are also third-party software applications available for Mac that offer more advanced memory analysis. Applications like iStat Menus, Memory Clean, and Macs Fan Control provide in-depth insight into your RAM usage and performance. These tools can be useful for power users or those who require detailed monitoring and optimization.
Having sufficient RAM is crucial for optimal performance on your Mac, especially when working with resource-intensive applications or multitasking. By checking your RAM on a Mac, you can ensure that your system runs smoothly and efficiently, ultimately enhancing your overall computing experience.
Checking RAM on Linux
If you are using a Linux operating system, checking the amount of RAM installed on your computer can be done using various methods. Here’s a general way to check your RAM on Linux:
-
Terminal Commands:
The most common method to check your RAM on Linux is by using terminal commands. Here are two commonly used commands:
- Open the Terminal.
- Enter the command “
free -h” and press Enter. This command provides a summary of your system’s memory usage, including the total amount of RAM and its utilization. - Alternatively, you can use the command “
cat /proc/meminfo” to display detailed information about your system’s memory, including the total amount of RAM.
Different Linux distributions may have additional methods or graphical tools to check your RAM. For example, Ubuntu and other Debian-based distributions offer graphical system monitors like GNOME System Monitor or KDE System Guard. These tools provide a user-friendly interface to view various system resource usage, including RAM.
Additionally, Linux users have several third-party software options available for more detailed RAM analysis. Applications like HTOP and Glances display real-time system information, including memory usage, in a more visually appealing manner. These tools can be handy for monitoring your RAM usage and identifying any potential bottlenecks or excessive resource consumption.
By checking your RAM on Linux, you can ensure that your system has sufficient memory to handle your everyday tasks and resource-intensive applications. Whether you use terminal commands or graphical tools, understanding your RAM capacity allows you to make informed decisions about system optimization or upgrading if necessary.
Checking RAM Using Third-Party Software
In addition to the built-in methods provided by operating systems, there are several third-party software applications available that offer more detailed analysis of your computer’s RAM. These applications can provide valuable insights into your RAM usage and performance. Here are a few examples:
-
CPU-Z:
CPU-Z is a popular third-party software that provides detailed information about various hardware components, including RAM. It displays information such as the RAM type, size, frequency, and the number of RAM modules installed. CPU-Z is available for both Windows and Linux systems and is a valuable tool for advanced users or those interested in in-depth hardware analysis.
-
HWiNFO:
HWiNFO is a comprehensive hardware information and diagnostic tool that supports various operating systems, including Windows and Linux. It provides detailed reports on hardware components, including RAM, offering information about the manufacturer, size, speed, and other technical specifications. HWiNFO is especially useful for users who require advanced hardware analysis and troubleshooting.
-
Speccy:
Speccy is a user-friendly software developed by CCleaner that provides detailed system information, including RAM analysis. It displays information such as the total amount of RAM, the number of memory slots used, and the RAM speed. Speccy is available for Windows and offers an intuitive interface, making it easily accessible for users with varying levels of technical expertise.
Using third-party software for RAM analysis can be beneficial if you require more detailed information or if you are troubleshooting specific issues related to your system’s memory. These applications provide insights into your RAM usage, allowing you to monitor performance, identify potential bottlenecks, and make informed decisions about potential upgrades.
It is important to note that when using third-party software, always ensure that you download from reputable sources and verify the software’s authenticity. Additionally, exercise caution and follow any recommended security practices to protect your computer and data.
By using third-party software applications, you can gain a deeper understanding of your computer’s RAM and optimize its usage for better performance. Whether you choose CPU-Z, HWiNFO, Speccy, or other trusted applications, these tools can provide valuable insights into your RAM and contribute to a smoother and more efficient computing experience.
Conclusion
Checking the RAM on your computer is an important task for optimizing performance, identifying bottlenecks, and making informed decisions about necessary upgrades. By knowing how much RAM your system has, you can assess if it meets your computing needs or if it’s time for an upgrade.
On Windows, you can use the System Information utility or the Task Manager to check your RAM. Mac users can easily check the amount of installed RAM through the “About This Mac” feature or the System Report utility. Linux users can utilize terminal commands like “free -h” or “cat /proc/meminfo” to get information on their RAM.
In addition to the built-in methods, third-party software applications like CPU-Z, HWiNFO, and Speccy can provide more detailed RAM analysis, allowing you to monitor usage, identify issues, and optimize performance.
Remember, having sufficient RAM is crucial for smooth system operation, especially when using memory-intensive applications or multitasking. By checking your RAM, you can ensure that your computer is running optimally and make informed decisions about upgrades if necessary.
Now that you are familiar with various methods to check RAM on different operating systems, you can take control of your computer’s performance and make informed decisions to enhance your computing experience.