Introduction
Welcome to our comprehensive guide on how to check the power supply board on an LED TV. If you’ve encountered issues with your TV not turning on, experiencing unusual power fluctuations, or suspect a faulty power supply, this article is for you. The power supply board is a vital component of any electronic device, including LED TVs, as it regulates and distributes power to various internal components.
Understanding the functionality of the power supply board is crucial in troubleshooting and determining whether it’s the source of the problem. In this guide, we will walk you through the signs of a faulty power supply board, the tools you will need for testing, and a step-by-step approach to checking the power supply board on your LED TV. By following these steps, you can identify any issues with the power supply board and take appropriate actions to resolve them.
It’s important to note that while this guide aims to provide you with a basic understanding of how to check your LED TV’s power supply board, complex issues might require professional assistance. If you’re uncomfortable with doing the tests yourself or if your TV is under warranty, it’s best to reach out to a certified technician.
Before we dive in, keep in mind that safety should always be your top priority. Make sure to disconnect your TV from the power source before conducting any tests or opening the back panel. Additionally, avoid touching any exposed circuits or components to prevent electric shocks or damage to the TV.
What is a power supply board?
The power supply board, also known as the PSU (Power Supply Unit), is a critical component in an LED TV that converts the incoming AC (alternating current) voltage from the power outlet into the DC (direct current) voltage required by the TV’s internal circuits. This DC voltage is used to power various components like the mainboard, backlighting system, and audio amplifiers. Essentially, the power supply board acts as the “heart” of the TV, ensuring that all other components receive the proper voltage and current to function correctly.
The power supply board consists of several key elements, including diodes, capacitors, transformers, and voltage regulators. Diodes allow the current to flow in only one direction, ensuring the correct polarity of the DC voltage. Capacitors store electric charge to provide stable power delivery and filter out any noise or voltage spikes coming from the external power source. Transformers handle the primary and secondary voltage conversion, while voltage regulators ensure that the output voltage remains constant, regardless of variations in the input voltage.
One crucial aspect of the power supply board is its ability to handle voltage fluctuations and protect the TV’s internal components from damage. Many power supply boards are designed with over-voltage protection, under-voltage protection, and surge protection features. These safety mechanisms help safeguard the TV against sudden spikes or drops in voltage that could potentially harm the circuits.
It’s worth noting that power supply boards can vary in design and complexity across different TV models and brands. Some TVs may have separate power supply boards, while others may integrate the power supply functionality directly onto the mainboard. However, regardless of the specific configuration, the primary function of the power supply board remains consistent – to provide stable and regulated power to ensure the optimal performance of the TV.
Now that we have a basic understanding of what a power supply board is and its importance within an LED TV, let’s move on to exploring the signs that indicate a faulty power supply board.
Signs of a faulty power supply board
When a power supply board malfunctions, it can result in various issues that affect the performance and functionality of your LED TV. By recognizing the signs of a faulty power supply board, you can determine if it’s the cause of your TV’s problems. Here are some common indicators to look out for:
- No power: If your TV refuses to turn on or shows no signs of power, a faulty power supply board could be to blame. This could be due to a blown fuse, defective components, or a complete failure of the power supply board itself.
- Intermittent power: If your TV turns on and off randomly or experiences sudden power losses while in use, it could indicate an issue with the power supply board. Fluctuating voltages or inconsistent power delivery can cause these intermittent power problems.
- Overheating: A malfunctioning power supply board can generate excess heat, leading to overheating issues in your LED TV. If you notice that your TV feels unusually hot to the touch or if it shuts down unexpectedly, it could be due to the power supply board overheating.
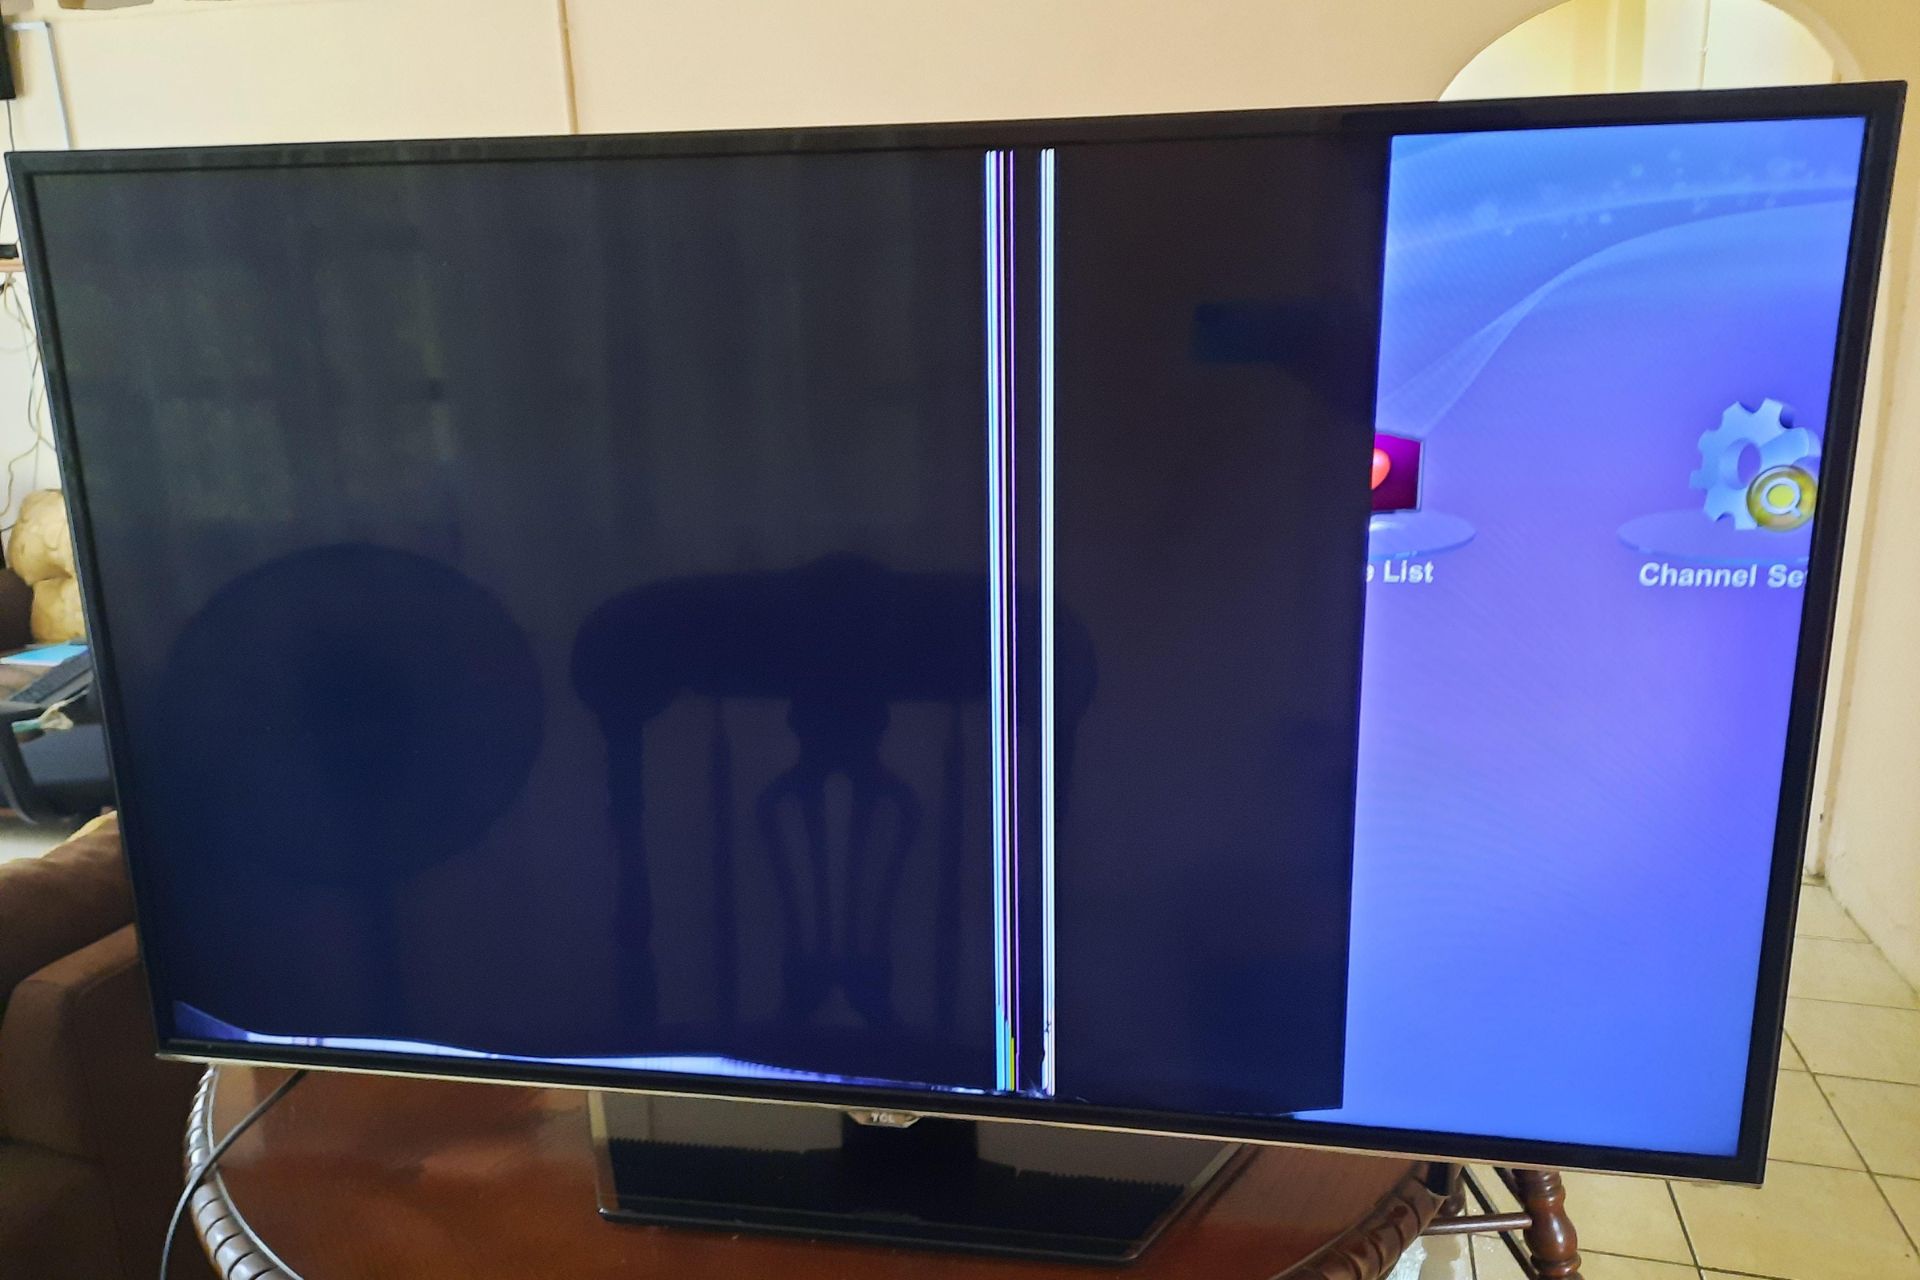
- Screen issues: While screen-related issues can stem from various causes, a faulty power supply board can be a contributing factor. Symptoms like flickering screens, distorted images, or backlight problems may point towards a power supply issue affecting the display components.
- Audio problems: Problems with the TV’s audio, such as no sound, distorted sound, or low volume, can also be attributed to a faulty power supply board. This is because the power supply board powers the audio amplifiers, and any irregularities in power delivery can affect the audio output.
It’s important to note that these signs can also be indicative of other issues with your LED TV. Therefore, it’s essential to perform a thorough diagnosis to pinpoint the exact cause of the problem. By knowing these common signs of a faulty power supply board, you can narrow down the troubleshooting process and determine if further testing or repairs are necessary.
Now that you’re aware of the signs to look out for, let’s move on to discussing the tools you will need to check the power supply board on your LED TV.
Tools needed to check the power supply board
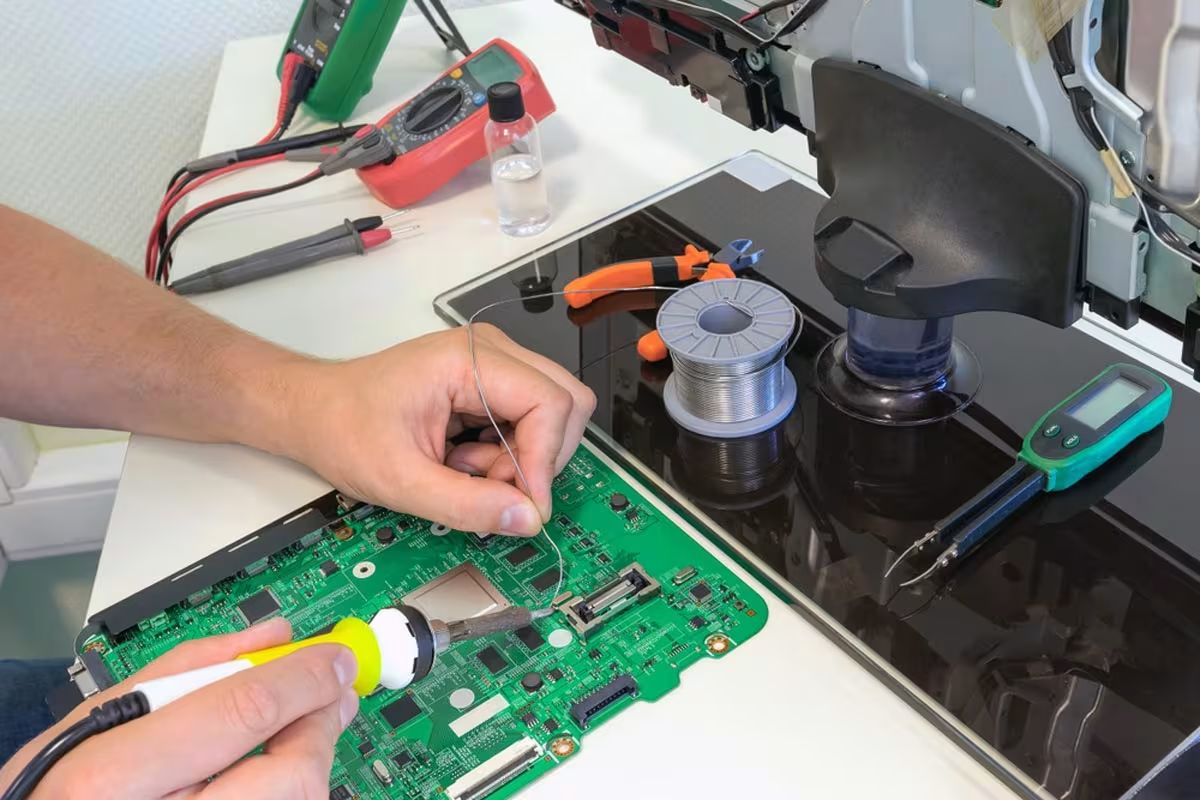
Before you begin testing the power supply board on your LED TV, it’s important to gather the necessary tools to ensure an accurate diagnosis. Here are the essential tools you will need:
- Multimeter: A multimeter is a versatile device used to measure voltage, current, and resistance. It will be your primary tool for testing the power supply board. Make sure the multimeter is set to the appropriate voltage range for your TV.
- Screwdriver set: A set of screwdrivers with various head types and sizes will be needed to open the back panel of your TV and access the power supply board. Make sure to choose the correct screwdriver that fits the screws on your TV model.
- Anti-static wristband (optional): An anti-static wristband is not essential but can be beneficial during the testing process. It helps prevent static discharge that could potentially damage sensitive electronic components.
- Work gloves (optional): Work gloves can provide additional protection for your hands while handling the TV components and may come in handy when removing sharp edges or handling fragile parts.
- Pen and paper: Keeping track of your test results, measurements, and observations is important for troubleshooting purposes. Have a pen and paper ready or use a digital note-taking device to record your findings.
- Replacement components (if necessary): Depending on your findings during the testing process, you may need to replace faulty components on the power supply board. Having replacement components on hand, such as fuses or capacitors, can help expedite the repair process if needed.
It’s essential to ensure that your workspace is clean, well-lit, and free from any potential hazards before you begin testing. Additionally, follow all safety precautions and guidelines provided by the TV manufacturer during the testing process to protect yourself and avoid any damage to the TV.
With the necessary tools gathered, you’re now ready to proceed with the step-by-step guide to check the power supply board on your LED TV.
Step-by-step guide to checking the power supply board
Now that you have the necessary tools ready, let’s dive into the step-by-step process of checking the power supply board on your LED TV. Follow these instructions carefully to ensure an accurate diagnosis and avoid any damage to your TV or yourself:
- Turn off and unplug the TV: Disconnect the TV from the power source to ensure your safety during the testing process.
- Remove the back panel: Use the appropriate screwdriver to remove the screws securing the back panel of your TV. Keep track of the screws and place them in a safe location to avoid misplacement.
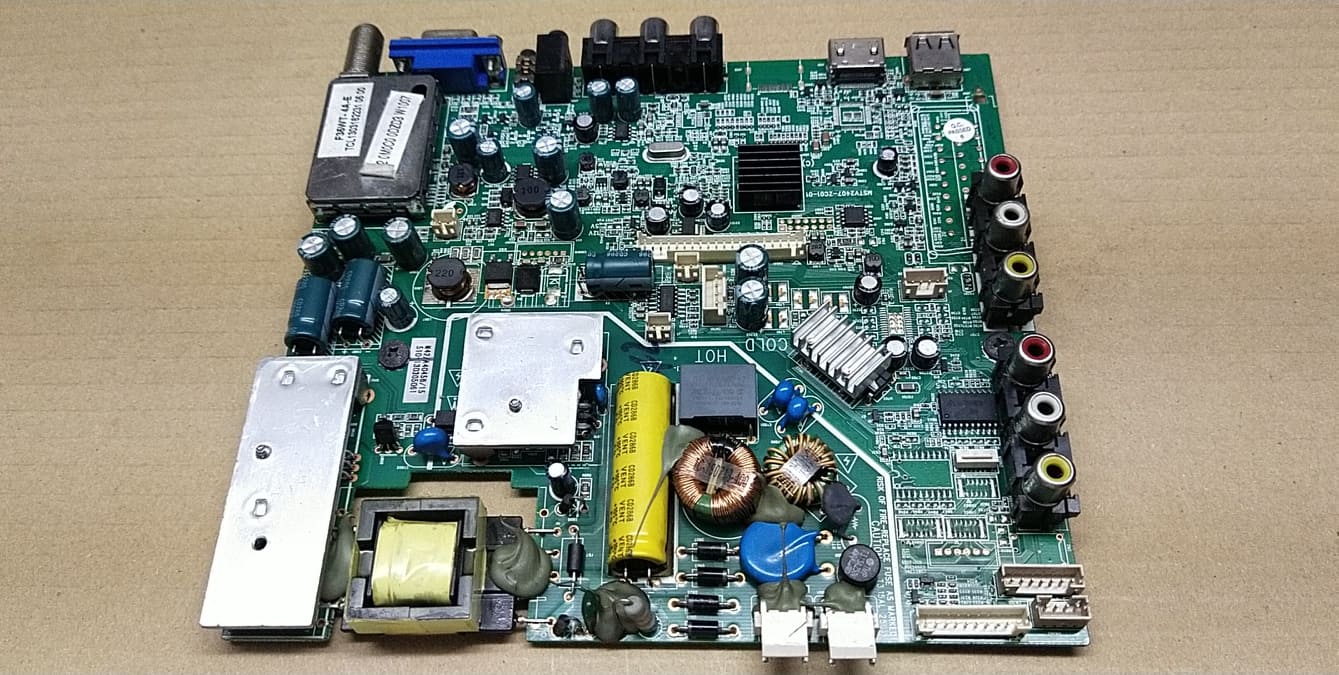
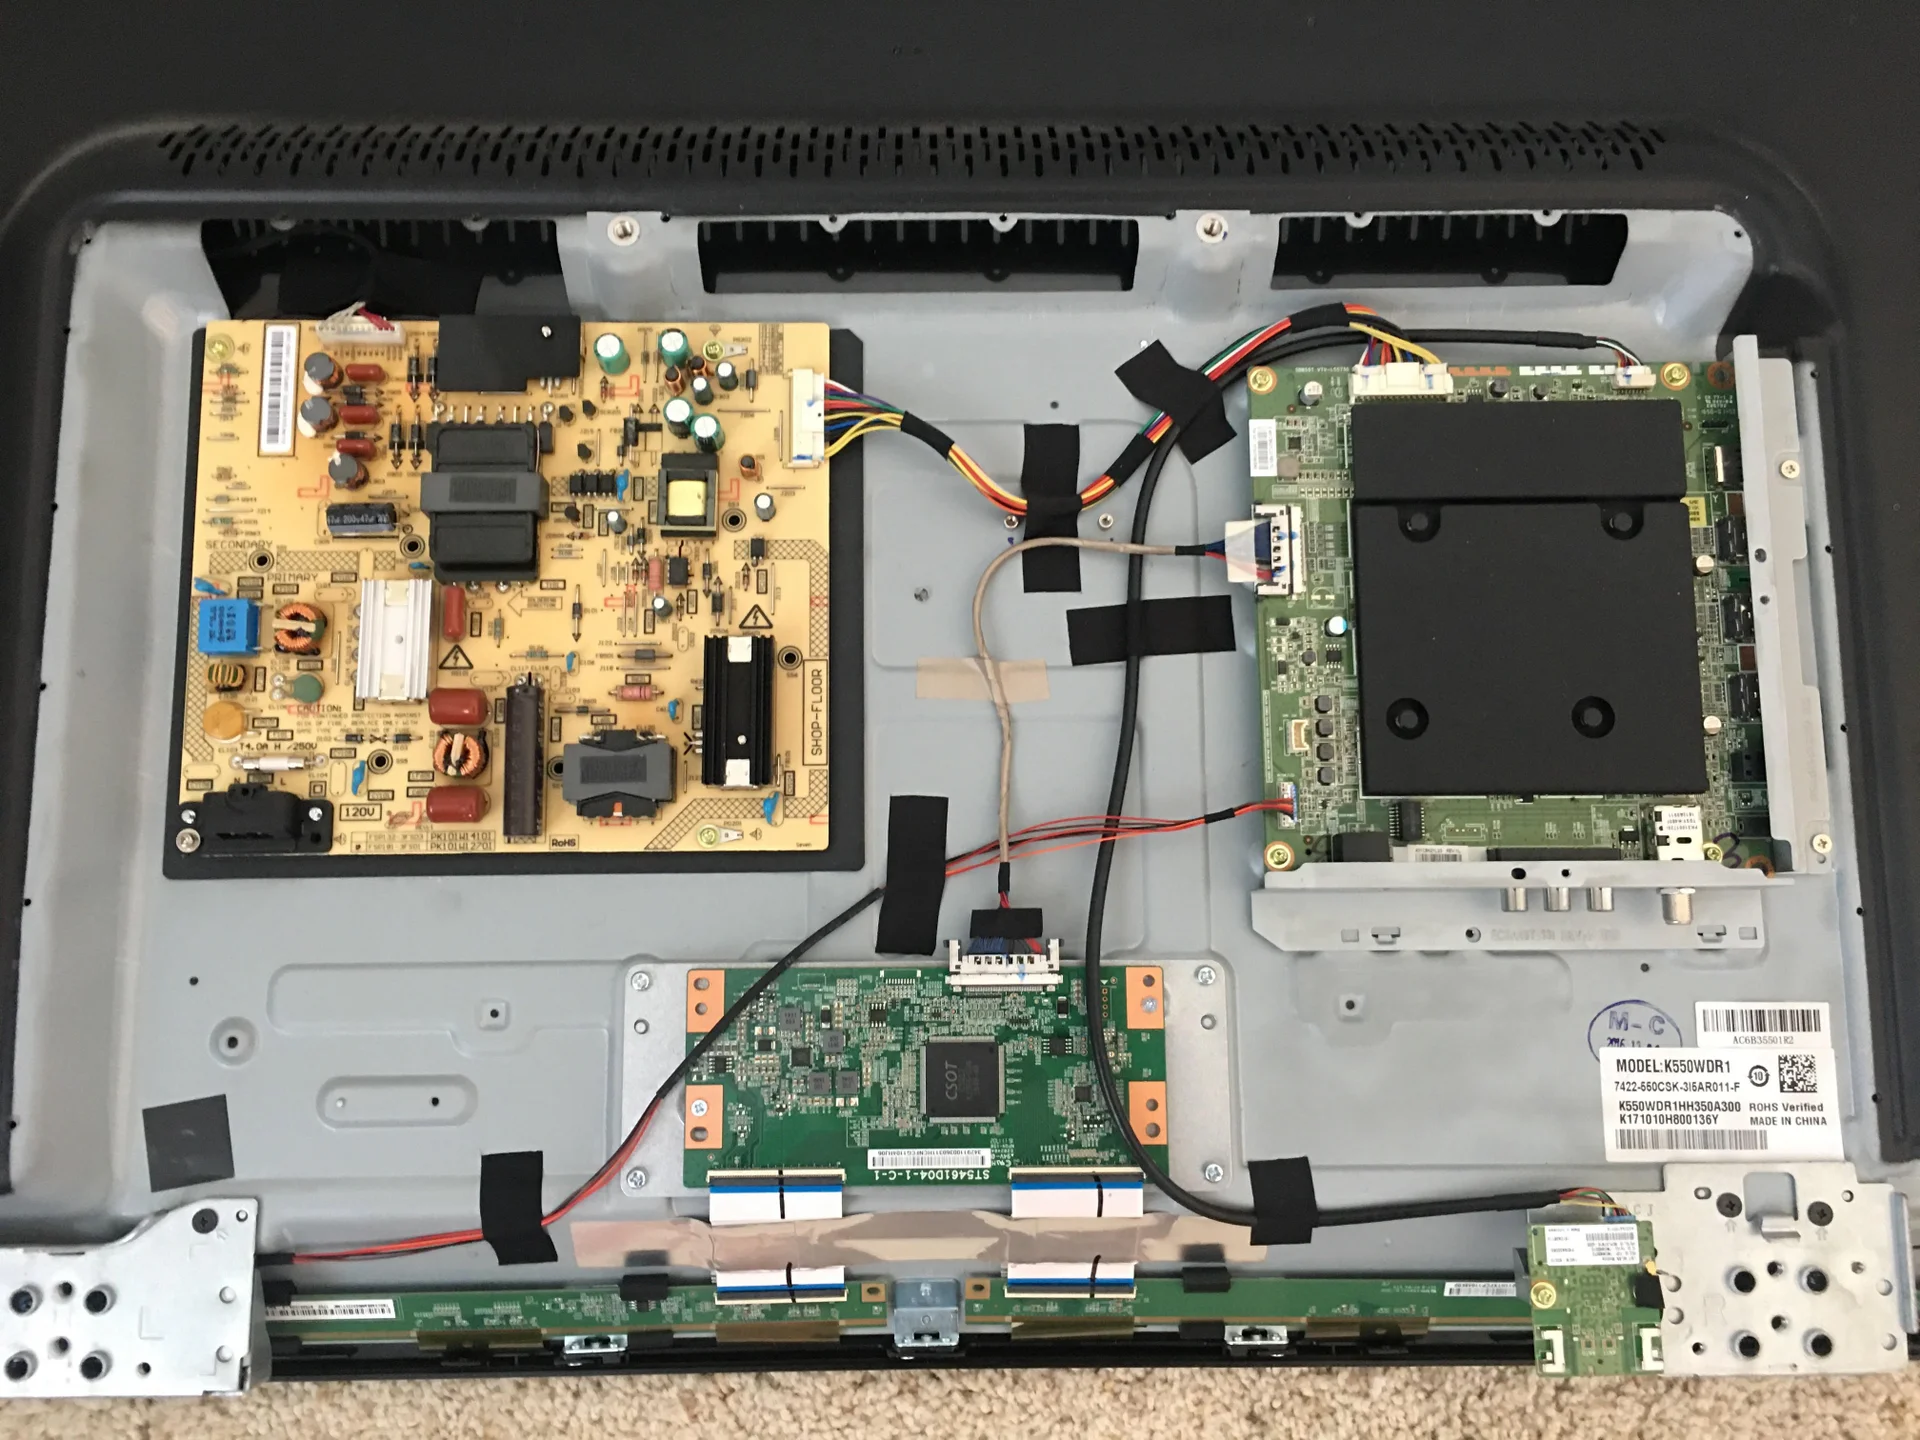
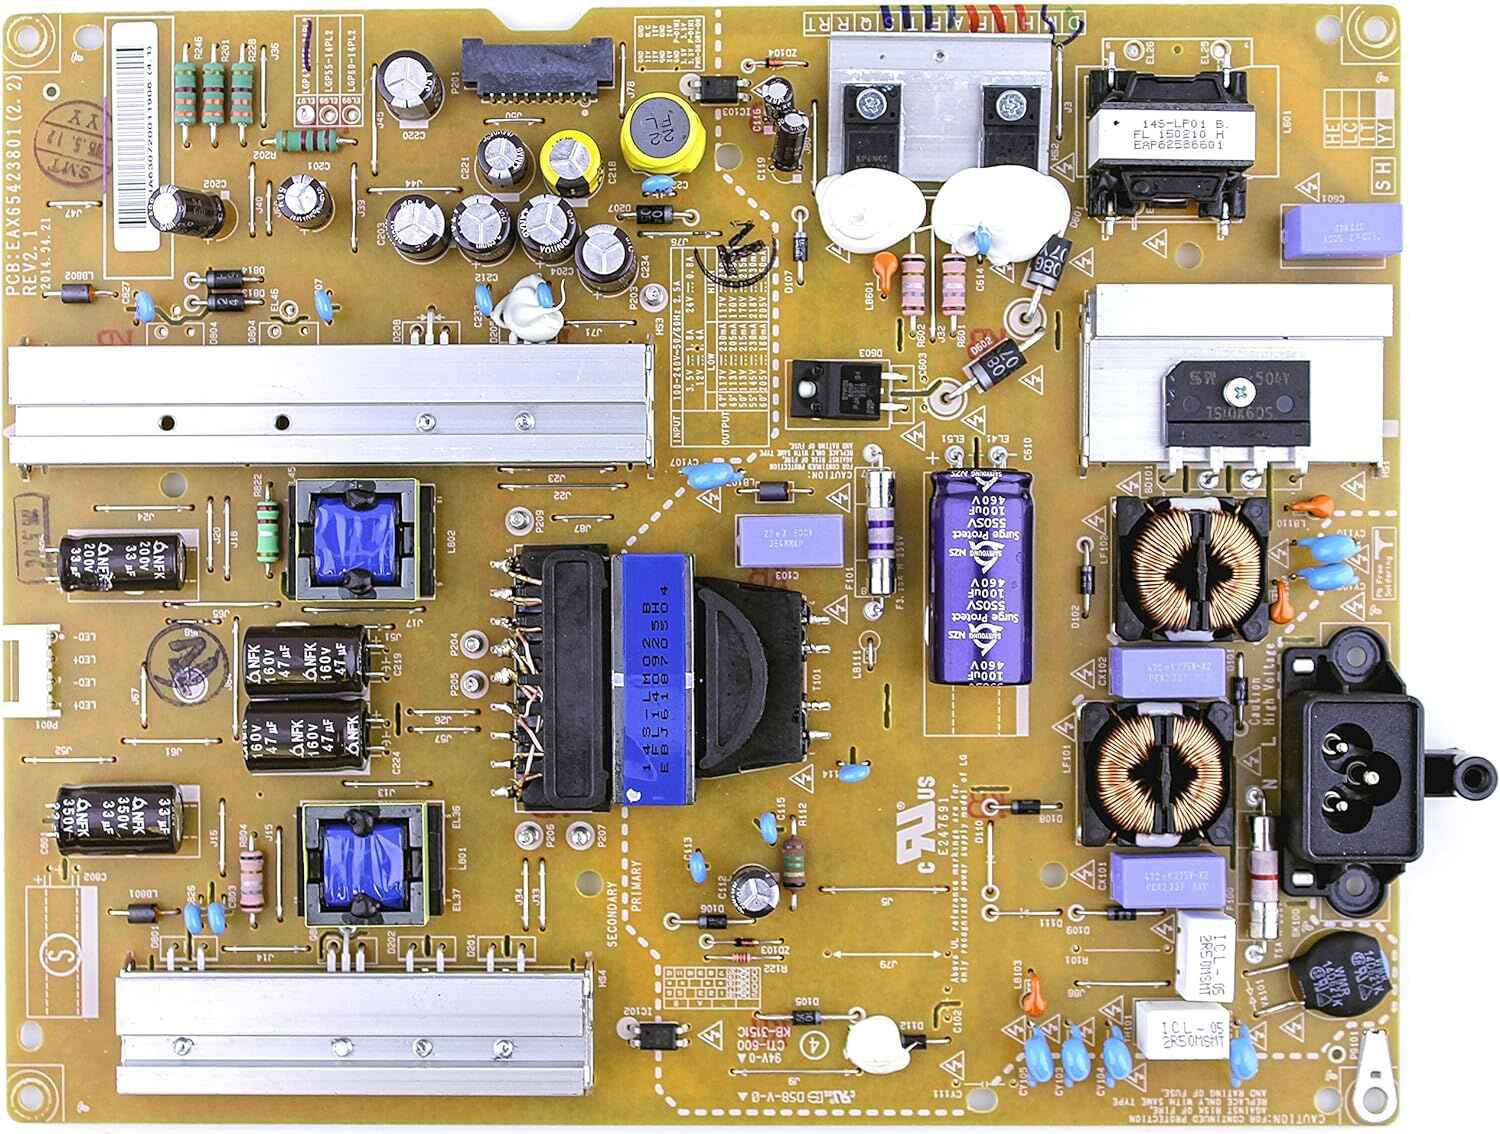
- Locate the power supply board: Identify the power supply board, usually mounted near where the power cord connects to the TV. It will be a circuit board with various components and connectors.
- Inspect the power supply board: Carefully examine the power supply board for any visibly damaged components, such as bulging capacitors, burnt marks, or broken connections. Take note of any abnormalities you find.
- Prepare the multimeter: Set your multimeter to the appropriate voltage range for your TV. Ideally, use the DC voltage range that matches or exceeds the expected voltage output of the power supply board.
- Perform voltage tests: Carefully connect the multimeter probes to the relevant test points on the power supply board. Refer to the TV’s service manual or schematic diagram to identify the correct test points for voltage output measurements. Take note of the measured voltages and compare them to the expected values. Any significant deviations may indicate a problem with the power supply board.
- Check for short circuits: Use the multimeter’s continuity or resistance mode to check for any short circuits on the power supply board. Place one probe on a ground point, such as the TV chassis, and then touch the other probe to various components and traces on the power supply board. A reading of zero or very low resistance indicates a short circuit.
- Test components: If you suspect a specific component on the power supply board is faulty, you can perform component-level tests using the multimeter. For example, you can check the continuity of fuses, measure the capacitance of capacitors, or test diodes and transistors for proper functionality.
- Record your findings: Document all your test results, measurements, and observations for future reference and troubleshooting purposes.
- Reassemble the TV: Once you have completed the testing process, carefully reattach the back panel of your TV using the screws you removed earlier.
Remember, if you encounter any difficulties during the testing process or are unsure about any steps, it’s best to seek professional assistance to avoid causing further damage. With the test results in hand, you will be better equipped to make informed decisions about repair or replacement options for the power supply board in your LED TV.
In the next section, we will conclude this guide by summarizing the key takeaways and providing some final tips to keep in mind when dealing with power supply board issues on your LED TV.
Conclusion
In conclusion, checking the power supply board on an LED TV is an essential step in troubleshooting power-related issues and ensuring the optimal performance of your television. By following the step-by-step guide outlined in this article and using the necessary tools, you can identify problems with the power supply board and take appropriate action to resolve them.
We covered the importance of the power supply board, its role in converting and distributing power to other components, and the signs that indicate a faulty power supply board. Recognizing these signs can help you narrow down the issue and determine if further testing and repairs are required.
We also discussed the tools needed for checking the power supply board, such as a multimeter, screwdriver set, and optional accessories like an anti-static wristband and work gloves. Having these tools on hand will enable you to open up your TV safely and perform accurate tests.
The step-by-step guide provided clear instructions on how to check the power supply board, including inspecting components, performing voltage tests, checking for short circuits, and testing individual components. By documenting your findings along the way, you can refer back to them when seeking professional assistance or proceeding with repairs.
However, it’s important to remember that some power supply board issues may be complex and require the expertise of a qualified technician. If you’re uncomfortable performing tests yourself or if your TV is still under warranty, it’s best to seek professional help.
Lastly, always prioritize safety when working with electronics. Ensure your TV is unplugged before conducting any tests, follow safety guidelines provided by the manufacturer, and exercise caution to prevent injuries or damage to your TV.
We hope this guide has been helpful in understanding how to check the power supply board on an LED TV. By being proactive in diagnosing and addressing power-related issues, you can enjoy uninterrupted TV viewing and prolong the lifespan of your television.