Introduction
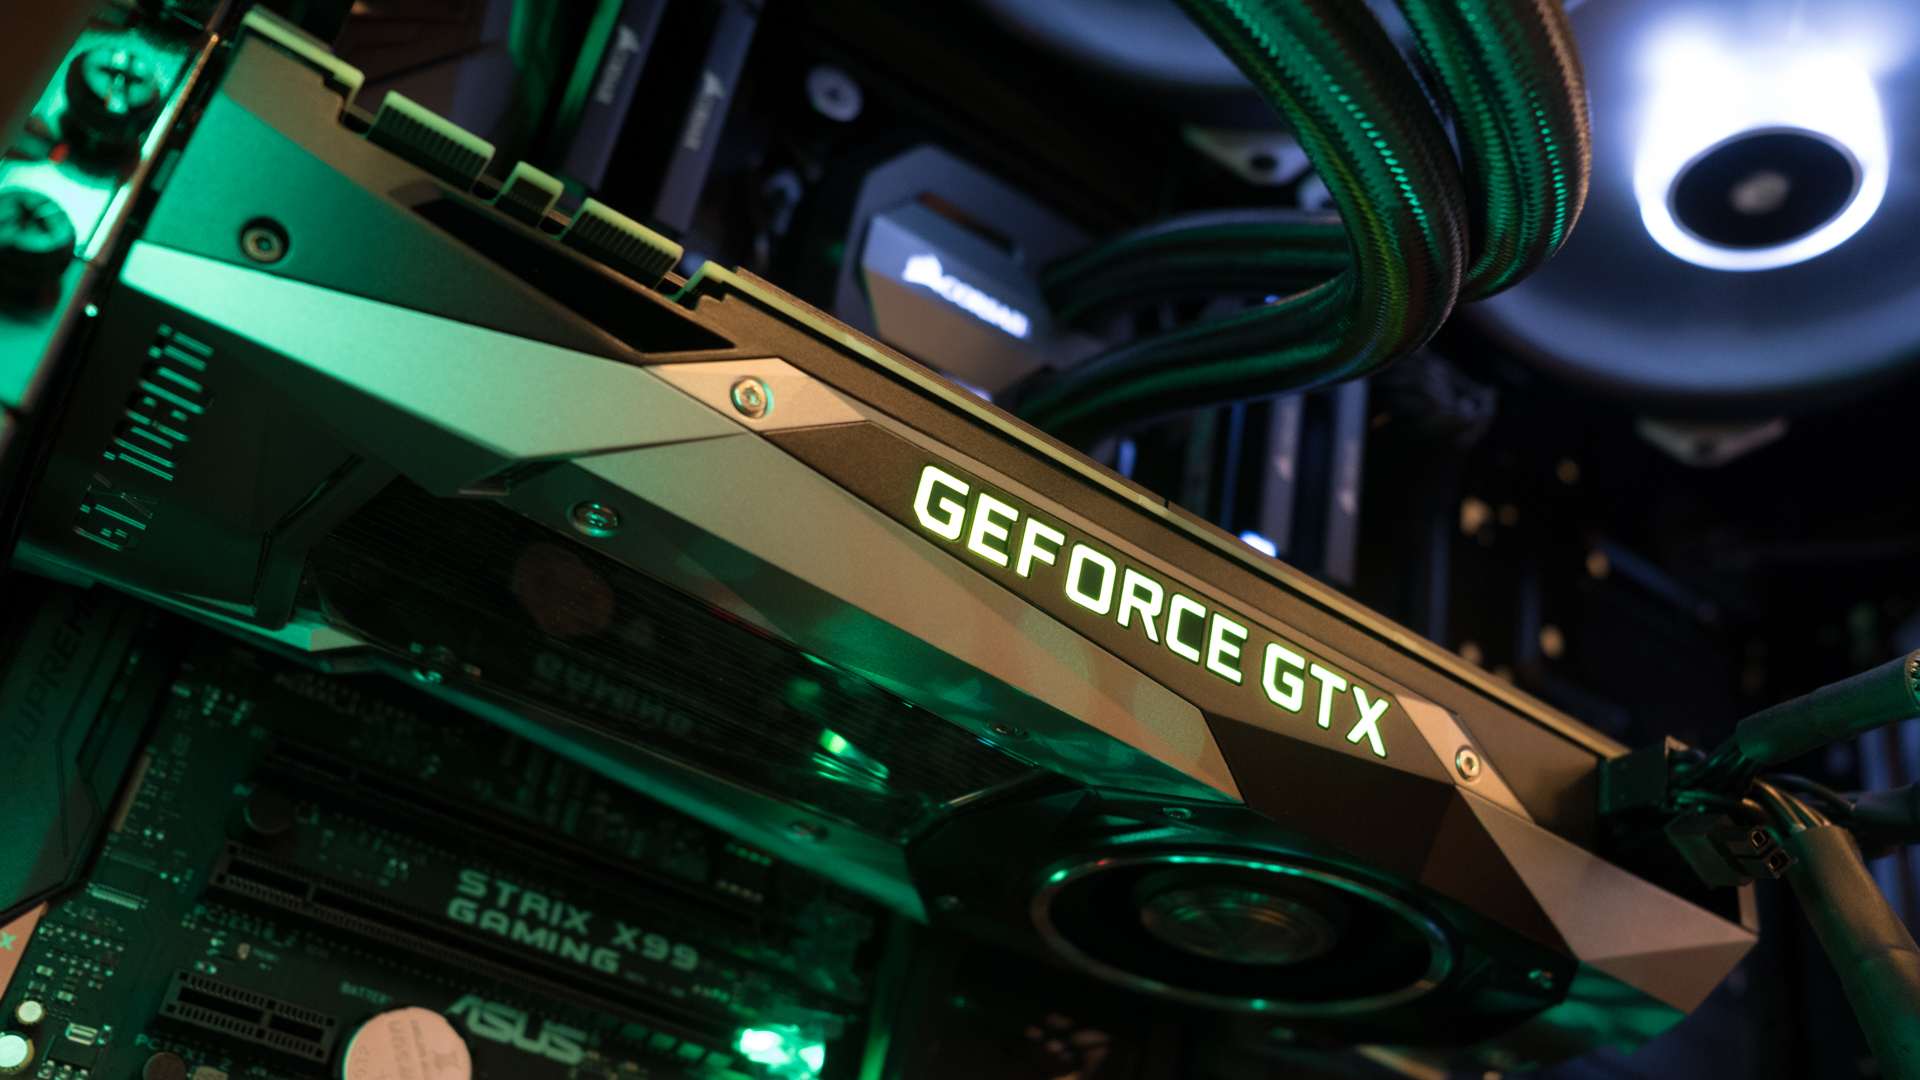
Checking your graphics card is an essential task for PC users, whether you’re a gamer, a video editor, or simply curious about the capabilities of your computer’s hardware. Your graphics card is responsible for rendering high-quality images, videos, and animations on your screen, so it’s important to know what you have installed.
In this tutorial, we will guide you on how to check your graphics card on different operating systems, including Windows, Mac, Linux, and Chromebook. You don’t need any technical expertise to carry out these steps, as we’ll provide easy-to-follow instructions that will help you identify the make and model of your graphics card.
Knowing your graphics card details can be useful in various situations. If you’re a gamer, you can check the compatibility of new games with your current hardware. Video editors can ensure their graphics card meets the requirements for editing and rendering high-resolution videos. Graphic designers can optimize their workflow based on the capabilities of their graphics card. And if you’re considering upgrading your graphics card, knowing the current specifications will help you make an informed decision.
Without further ado, let’s delve into the step-by-step guides for checking your graphics card on different platforms. Whether you’re using a Windows PC, Mac, Linux system, or Chromebook, we’ve got you covered with easy and effective methods to obtain your graphics card information. So, let’s get started!
Why Check Your Graphics Card?
Checking your graphics card is important for several reasons. Let’s explore why it is essential to know the details of your graphics card:
- Compatibility: Checking your graphics card helps ensure compatibility with the latest software and games. Many games and applications have specific requirements, and knowing the capabilities of your graphics card will help you determine if it meets those requirements.
- Optimal Performance: Different graphics cards have varying performance levels. By checking your graphics card, you can assess if it is delivering the performance you expect. This knowledge can be particularly useful if you’re experiencing issues with graphics-intensive tasks such as gaming or video editing.
- Upgrades: If you’re planning to upgrade your graphics card, it’s essential to know the current specifications of your graphics card. This information will help you determine what upgrades are compatible with your system and make an informed decision when purchasing a new graphics card.
- Troubleshooting: When encountering graphical issues or glitches, checking your graphics card can provide crucial insights into the source of the problem. By identifying your graphics card model, you can search for specific troubleshooting techniques or driver updates that may resolve the issue.
- Warranty: Knowing the details of your graphics card is important for warranty purposes. If you encounter any hardware-related issues, you may need to provide the make and model of your graphics card when seeking assistance from the manufacturer.
With so many reasons to check your graphics card, it’s evident that having knowledge about your computer’s hardware is crucial. Whether you’re a gamer, a designer, or a casual user, understanding the capabilities and limitations of your graphics card empowers you to make informed decisions regarding software compatibility, performance optimization, and upgrades.
Now that we understand the importance of checking your graphics card, let’s dive into the step-by-step instructions for different operating systems.
How to Check Graphics Card on Windows
If you’re using a Windows PC, checking your graphics card is a straightforward process. Follow the step-by-step instructions below:
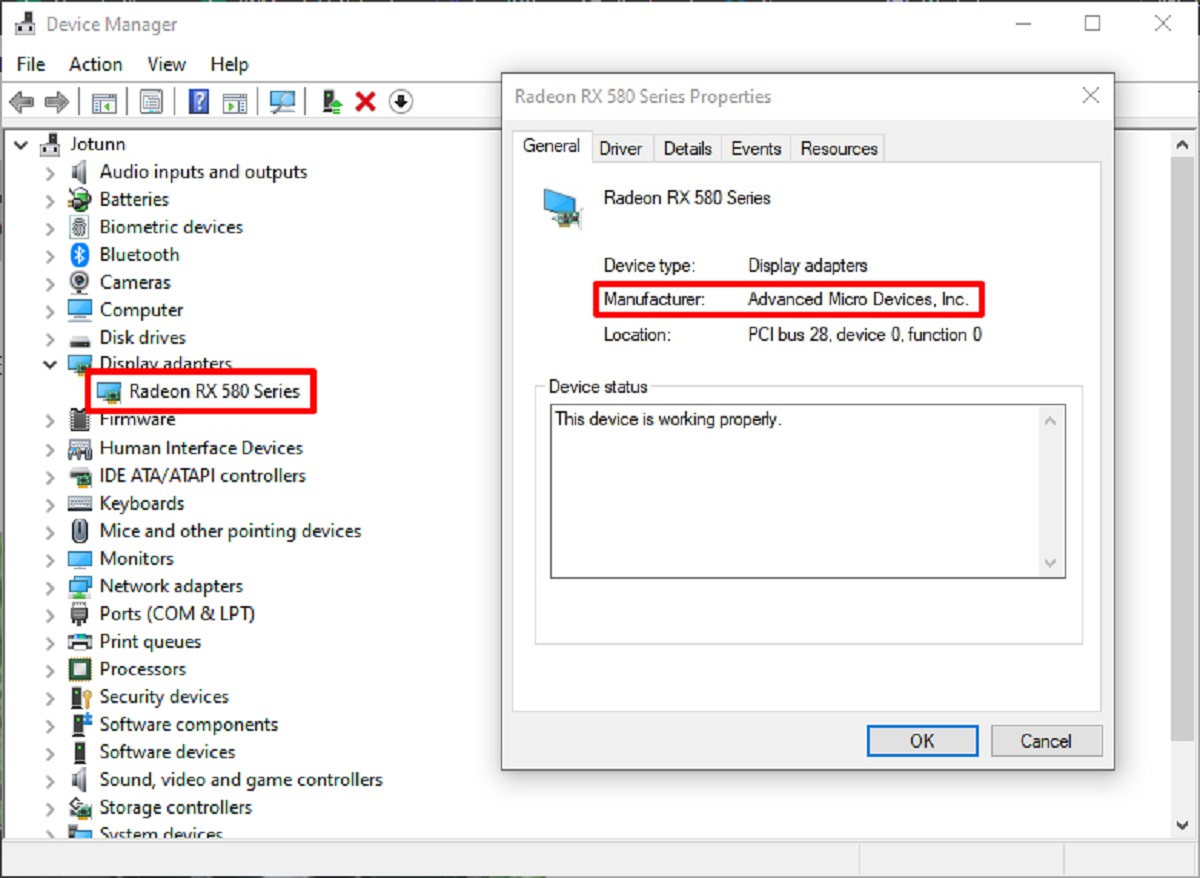
- Step 1: Open the Device Manager
- Step 2: Expand the Display Adapters Category
- Step 3: Identify Your Graphics Card Model
Press the Windows key + X on your keyboard and select “Device Manager” from the menu that appears. Alternatively, you can search for “Device Manager” in the Windows search bar and open it from the search results.
In the Device Manager window, locate and expand the “Display adapters” category. This will display the graphics card(s) installed on your system.
Under the “Display adapters” category, you will see the name(s) of your installed graphics card(s). The name will typically include the brand and model number. Make a note of this information for future reference or troubleshooting purposes.
That’s it! You have successfully checked your graphics card on a Windows PC. You can now use this information to ensure software compatibility, optimize performance, or consider upgrading your graphics card if needed.
Remember to periodically update your graphics card drivers to ensure optimal performance and compatibility with the latest software releases. You can usually find driver updates on the manufacturer’s official website or through Windows Update.
Keep in mind that the steps may vary slightly depending on your Windows version. But in general, accessing the Device Manager and locating the “Display adapters” category should allow you to identify your graphics card on any Windows PC.
Step 1: Open the Device Manager
To begin the process of checking your graphics card on a Windows PC, you will need to open the Device Manager. The Device Manager is a built-in Windows utility that allows you to view and manage hardware devices connected to your computer.
Here’s how you can open the Device Manager:
- Press the Windows key + X on your keyboard. This will open a menu with various options.
- From the menu that appears, select “Device Manager.” Alternatively, you can search for “Device Manager” in the Windows search bar and click on it from the search results.
Once you click or select “Device Manager,” a new window will open, displaying a hierarchical list of all the hardware devices installed on your computer.
It’s worth noting that you may need administrative privileges to access the Device Manager. If you’re using a user account without administrative rights, you may be prompted to enter the administrator password or provide confirmation to proceed.
The Device Manager window provides an organized view of devices by category. You’ll find categories such as “Display adapters,” “Network adapters,” “Sound, video, and game controllers,” and many more.
Now that you have successfully opened the Device Manager, you’re ready to move on to the next step: expanding the “Display adapters” category to identify your graphics card.
Step 2: Expand the Display Adapters Category
After opening the Device Manager in Windows, the next step is to expand the “Display adapters” category. This category contains information about the graphics cards installed on your computer.
Follow these simple steps to expand the Display adapters category:
- Locate the “Display adapters” category in the Device Manager window. It is typically found near the top or in the list of hardware categories.
- Click on the small arrow or plus sign next to the “Display adapters” category. This action will expand the category, revealing the graphics card(s) installed on your system.
By expanding the “Display adapters” category, you will be able to see the specific graphics card(s) present in your computer. The name of the graphics card will be listed under the expanded category, generally showing the brand and model number.
It’s important to note that if your computer has multiple graphics cards or integrated graphics, you will see all of them listed under the “Display adapters” category. Each graphics card will be displayed as a separate entry.
Now that you have successfully expanded the “Display adapters” category, you’re ready to move on to the next step: identifying your graphics card model.
Remember to make a note of the graphics card model for future reference and troubleshooting purposes. This information can be useful when checking for driver updates or determining compatibility with software and games.
Step 3: Identify Your Graphics Card Model
Once you have expanded the “Display adapters” category in the Device Manager on your Windows PC, the final step is to identify your graphics card model. The graphics card model provides specific information about the make and model of the graphics card installed in your computer.
Follow these steps to identify your graphics card model:
- Look for the name(s) of the graphics card(s) listed under the “Display adapters” category in the Device Manager window.
- The name will typically include both the brand and the model number of the graphics card.
- Make a note of the graphics card model for future reference or troubleshooting purposes.
Knowing the make and model of your graphics card is essential for various reasons. It helps ensure compatibility with software applications and games, allows you to retrieve the latest driver updates from the manufacturer’s website, and aids in troubleshooting graphics-related issues.
For example, if you’re experiencing performance problems while gaming or encountering graphical glitches, knowing your graphics card model will allow you to search for specific troubleshooting solutions that are specific to your graphics card.
If you have multiple graphics cards or integrated graphics, each one will be listed separately under the “Display adapters” category. Make sure to identify and note the model of each graphics card installed in your system.
Congratulations! You have now successfully identified your graphics card model using the Device Manager in Windows. This information will be valuable when determining compatibility for software upgrades, optimizing performance, or troubleshooting any graphics-related issues you may encounter in the future.
How to Check Graphics Card on Mac
If you’re using a Mac, checking your graphics card is a straightforward process. Here’s how you can do it:
- Step 1: Open the Apple Menu
- Step 2: Select About This Mac
- Step 3: View Graphics Card Information
Click on the Apple menu in the top-left corner of your screen. A drop-down menu will appear with various options.
From the drop-down menu, select “About This Mac.” A new window will open displaying general information about your Mac.
In the “About This Mac” window, click on the “System Report” button. This will open the System Information application, providing detailed information about the hardware components of your Mac.
In the System Information window, click on “Graphics/Displays” listed under the “Hardware” section in the sidebar. This will display information about the graphics card(s) installed in your Mac.
Under the Graphics/Displays section, you’ll find the make and model of the graphics card(s), as well as other relevant details such as VRAM (Video RAM) capacity and driver versions.
Now you have successfully checked your graphics card on your Mac. You can use this information to ensure compatibility with software applications, troubleshoot graphical issues, or consider upgrading your graphics card if necessary.
To close the System Information application, simply click on the red “X” button in the top-left corner of the window.
Keep in mind that the steps may vary slightly depending on your macOS version. However, the general procedure of accessing the System Information and navigating to the Graphics/Displays section remains the same.
Step 1: Open the Apple Menu
To check your graphics card on a Mac, the first step is to open the Apple menu. The Apple menu is located in the top-left corner of your screen and provides access to various settings and options for your Mac.
Here’s how you can open the Apple menu on your Mac:
- Position your cursor in the upper-left corner of your screen.
- Click on the Apple icon. This will open a drop-down menu with a list of options.
Alternatively, you can use the keyboard shortcut by pressing the Command (⌘) key and the Space bar simultaneously. This will bring up the Spotlight search bar, where you can type “Apple menu” and hit Enter to open it.
Once you have successfully opened the Apple menu, you’re ready to move on to the next step: selecting “About This Mac” to access the system information.
It’s worth noting that these steps apply to all versions of macOS, including macOS Big Sur, macOS Catalina, and previous versions.
Now that you have opened the Apple menu, let’s proceed to the next step and discover how to access the system information of your Mac.
Step 2: Select About This Mac
After opening the Apple menu on your Mac, the next step is to select “About This Mac” from the drop-down menu. This will provide you with general information about your Mac and serve as a gateway to access the system information, including details about your graphics card(s).
Follow these simple steps to select “About This Mac”:
- Position your cursor over the “About This Mac” option in the drop-down menu.
- Click on “About This Mac.” A new window will appear displaying general information about your Mac.
By selecting “About This Mac,” you will be able to access important details about your Mac’s hardware, software, and more.
This window provides a summary of your Mac’s information, including the macOS version, processor, memory, and storage capacity. However, to delve into specific details about your graphics card(s), you need to proceed to the next step: viewing the system information.
Now that you have successfully selected “About This Mac,” let’s move forward and explore how to access the system information where the vital graphics card details are waiting.
Note: The steps provided in this section are applicable to different versions of macOS, including macOS Big Sur, macOS Catalina, and previous versions. Although the interface may vary slightly, the location and access to “About This Mac” remains consistent.
Step 3: View Graphics Card Information
After selecting “About This Mac” on your Mac, the next step is to view the graphics card information within the System Information application. This is where you can find specific details about the graphics card(s) installed in your Mac.
Follow these steps to view the graphics card information:
- In the “About This Mac” window, locate and click on the “System Report” button. This will open the System Information application, which provides detailed information about your Mac’s hardware.
- Once in the System Information window, you will see a sidebar on the left side of the screen. Scroll down and click on “Graphics/Displays” under the “Hardware” section in the sidebar.
- The right side of the window will display information about your graphics card, including the brand, model, VRAM (Video RAM) capacity, and driver versions.
The “Graphics/Displays” section provides an overview of the graphics cards installed in your Mac, whether integrated or external. You may see multiple entries if your Mac has multiple graphics cards or if you’re using an eGPU (external graphics processing unit).
By viewing this information, you can determine the make and model of your graphics card, which is essential for various purposes. For example, if you want to check for driver updates or ensure compatibility with specific software applications or games, knowing your graphics card details is crucial.
Once you have obtained the necessary information, you can close the System Information window by clicking on the red “X” button in the top-left corner.
That’s it! You have successfully checked your graphics card and obtained valuable information about it using the “About This Mac” and System Information features on your Mac.
Remember, the steps outlined in this section apply to various versions of macOS, such as macOS Big Sur, macOS Catalina, and previous versions.
How to Check Graphics Card on Linux
Checking your graphics card on Linux is a straightforward process that can be done using the command line interface. Here’s how you can do it:
- Step 1: Open the Terminal
- Step 2: Run the lspci Command
- Step 3: Locate Your Graphics Card
To begin, open the Terminal on your Linux system. You can do this by searching for “Terminal” in the applications menu or by using the shortcut Ctrl+Alt+T.
In the Terminal window, type the following command and press Enter: lspci. This command lists all the PCI devices connected to your system, including your graphics card.
Scroll through the output of the lspci command and look for the entry that corresponds to your graphics card. The entry will typically contain the name of your graphics card manufacturer and model.
In some cases, you may need to look for specific keywords such as “VGA compatible controller” or “Display controller” to identify the graphics card information.
By following these steps and running the lspci command in the Terminal, you can easily identify your graphics card on Linux. You’ll be able to see the manufacturer and model information, which is important for determining compatibility, driver installation, and troubleshooting purposes.
Once you have collected the necessary information, you can use it to search for specific driver packages or make any necessary configuration changes to optimize your graphics card performance on Linux.
Remember that the Terminal interface in Linux provides users with powerful command-line capabilities, and the lspci command is just one of the many useful commands available for gathering hardware information.
Now that you know how to check your graphics card on Linux, you can proceed with confidence in exploring the capabilities and potential enhancements of your graphics card on your Linux system.
Step 1: Open the Terminal
To check your graphics card on Linux, the first step is to open the Terminal. The Terminal is a command line interface where you can execute various commands to interact with your Linux system.
Here’s how you can open the Terminal on most Linux distributions:
- Look for the Terminal application in your applications menu. It is often found in the “System” or “Accessories” section. Clicking on the Terminal icon will open a new Terminal window.
- If you prefer using keyboard shortcuts, you can press Ctrl+Alt+T to quickly open the Terminal on many Linux distributions.
Once the Terminal window is open, you can proceed to the next step and run the appropriate commands to check your graphics card.
It’s important to note that the steps may vary slightly depending on your Linux distribution. However, the process of accessing the Terminal remains consistent across different distributions and desktop environments.
Now that you have successfully opened the Terminal, you’re ready to move on to the next step: running the appropriate command to check your graphics card.
Keep in mind that the Terminal is a powerful tool that allows you to interact with your Linux system at a deeper level. It provides a flexible and efficient way to execute commands and perform various system tasks.
Step 2: Run the lspci Command
Once you have opened the Terminal on your Linux system, the next step is to run the lspci command. This command lists all the PCI devices connected to your system, including your graphics card.
Follow these steps to run the lspci command:
- In the Terminal window, type the command
lspci. - Press Enter to execute the command.
After running the lspci command, you will see a list of all the PCI devices detected by your Linux system. This list includes your graphics card, along with other devices connected to your computer’s PCI bus.
The lspci command output provides valuable information about each device, including the manufacturer, model, and respective identifiers. By examining this output, you can easily identify your graphics card among the listed devices.
In some cases, the output of the lspci command may be lengthy and difficult to navigate. To make the process easier, you can use the pipe and grep commands to filter the results. For example, you can use lspci | grep -i vga to display only the graphics card-related information.
By running the lspci command, you gain access to comprehensive information about your graphics card in Linux. This includes the make, model, and other details necessary for driver installation, compatibility checks, and troubleshooting.
Once you have obtained the necessary information, you can proceed to the next step and utilize it to optimize your graphics card’s performance or troubleshoot any graphics-related issues you may encounter on your Linux system.
Now that you have successfully run the lspci command, let’s move on to the final step and locate your graphics card information from the command output.
Step 3: Locate Your Graphics Card
After running the lspci command in the Terminal on your Linux system, the next step is to locate your graphics card within the command output. This will help you identify the make and model of your graphics card, allowing you to gather essential information for driver installation, compatibility checks, and troubleshooting purposes.
Follow these steps to locate your graphics card:
- Examine the output of the
lspcicommand in the Terminal. - Scroll through the list of PCI devices until you find the entry that corresponds to your graphics card.
- Look for keywords related to graphics cards such as “VGA compatible controller” or “Display controller.” These keywords indicate the presence of a graphics card.
- Note the manufacturer and model information provided in the command output.
By locating your graphics card in the lspci command output, you can gather specific details about the device. This information is crucial when installing appropriate drivers, ensuring compatibility with software applications and games, and troubleshooting any graphics-related issues on your Linux system.
It’s important to keep in mind that the exact format of the lspci command output may vary depending on your Linux distribution and hardware configuration. However, the relevant details about your graphics card, including the manufacturer and model, should still be present.
Once you have identified your graphics card, make a note of the manufacturer and model information for future reference. This information will enable you to search for specific driver packages or perform further research regarding the compatibility and performance optimizations of your graphics card on Linux.
Now that you have successfully located your graphics card within the lspci command output, you have acquired valuable information about your graphics card on your Linux system. This information will assist you in ensuring optimal functionality and troubleshooting any graphics-related issues you may encounter.
How to Check Graphics Card on Chromebook
Checking the graphics card on a Chromebook is a bit different from other operating systems. Chrome OS doesn’t provide a built-in system utility like Device Manager or System Information. However, you can still find information about your graphics card on a Chromebook through the Chrome OS settings.
Here’s how you can check your graphics card on a Chromebook:
- Step 1: Open the Chrome Browser
- Step 2: Enter chrome://system in the Address Bar
- Step 3: Locate Graphics Card Information
Click on the Chrome browser icon in the taskbar or open it from the app launcher. This will launch the Chrome browser on your Chromebook.
In the address bar of the Chrome browser, type chrome://system and hit Enter. This will open the Chrome OS system information page.
Scroll down the page until you find the “Graphics” section. Here, you will find detailed information about your graphics card, including the make, model, driver version, and other relevant details.
By following these steps, you can access the system information page on your Chromebook and locate the graphics card information. This information can be useful for determining compatibility with certain applications or troubleshooting graphics-related issues.
While Chrome OS doesn’t offer as many options as other operating systems for checking graphics card information, the above method allows you to gather the relevant details about your graphics card on your Chromebook.
Now that you know how to check your graphics card on a Chromebook, you can use this information to ensure compatibility with software and make informed decisions regarding graphics-intensive tasks.
Step 1: Open the Chrome Browser
To check your graphics card on a Chromebook, the first step is to open the Chrome browser. The Chrome browser is the default web browser on Chrome OS and serves as the gateway to accessing various system settings and information.
Here’s how you can open the Chrome browser on your Chromebook:
- Locate the Chrome browser icon in the taskbar at the bottom of the screen or find it in the Chrome OS app launcher.
- Click on the Chrome browser icon to open the browser.
Once the Chrome browser is open, you can proceed to the next step and enter the necessary address to access the system information page.
It’s important to note that Chrome OS is designed to be a simplistic and streamlined operating system, and its user interface reflects that. As such, the steps to access system information on a Chromebook may differ from those on other operating systems like Windows or macOS.
Now that you have successfully opened the Chrome browser, you’re ready to move on to the next step: entering the required address to access the system information page.
Keep in mind that the Chrome browser on a Chromebook operates similarly to the Chrome browser on other platforms. So, if you’re already familiar with using Chrome, navigating through the browser on your Chromebook should be a familiar experience.
Step 2: Enter chrome://system in the Address Bar
After opening the Chrome browser on your Chromebook, the next step is to enter chrome://system in the address bar. This will take you to the Chrome OS system information page, where you can find detailed information about your Chromebook’s hardware, including the graphics card.
Follow these steps to enter chrome://system in the address bar:
- Click on the address bar at the top of the Chrome browser window. It is the text field where you usually enter website URLs.
- Type
chrome://systemin the address bar. - Press Enter or Return on your keyboard, or click the Go button or press the right arrow icon next to the address bar.
By entering chrome://system in the address bar, you will be redirected to the Chrome OS system information page.
The Chrome OS system information page provides a detailed overview of various hardware and software components of your Chromebook, including the graphics card. It includes information such as the make, model, driver version, and other relevant details.
It’s worth noting that the system information page on Chrome OS is designed to be informative and user-friendly. It presents system details in a straightforward manner, making it easy to find and locate information about your graphics card.
Now that you have successfully entered chrome://system in the address bar, you’re ready to move on to the next step and locate the graphics card information on the system information page of your Chromebook.
Remember, the process of accessing system information on a Chromebook is unique to the Chrome OS environment and differs from other operating systems.
Step 3: Locate Graphics Card Information
After entering chrome://system in the address bar of the Chrome browser on your Chromebook, the next step is to locate the graphics card information on the Chrome OS system information page. This page provides detailed information about your Chromebook’s hardware, including the graphics card.
Follow these steps to locate the graphics card information:
- Scroll down the Chrome OS system information page until you find the “Graphics” section.
- The “Graphics” section provides essential details about your graphics card, such as the make, model, driver version, and other relevant information.
- Take note of the graphics card information for future reference or compatibility checks with software applications or games.
By locating the “Graphics” section on the Chrome OS system information page, you can access valuable information about your Chromebook’s graphics card. This information is essential for determining compatibility with specific applications or troubleshooting graphics-related issues on your Chromebook.
Chrome OS aims to provide a user-friendly and intuitive interface, making it easy to navigate through system settings and hardware information. The Chrome OS system information page presents hardware details in a clear and organized manner, allowing you to quickly find the information you need.
Once you have gathered the necessary information about your graphics card, you can use it for various purposes, such as checking for driver updates, ensuring compatibility with software applications, or optimizing graphics performance on your Chromebook.
Now that you have successfully located the graphics card information on the Chrome OS system information page, you have acquired valuable insights into your graphics card on your Chromebook. This information will assist you in optimizing your graphics experience and troubleshooting any graphics-related issues that may arise.
Conclusion
Checking your graphics card is an important step for PC users, as it allows you to understand the capabilities and limitations of your hardware. Whether you’re a gamer, a video editor, or simply want to ensure compatibility with software applications, knowing your graphics card information is crucial.
In this guide, we have explored how to check your graphics card on different operating systems. For Windows users, opening the Device Manager and expanding the Display Adapters category will reveal the graphics card model. Mac users can access the System Information page through the Apple menu to find graphics card details. Linux users can utilize the Terminal and the lspci command to view their graphics card information. Chromebook users can access the Chrome OS system information page by entering chrome://system in the Chrome browser.
By following the step-by-step instructions outlined in this guide, you can easily check your graphics card on the operating system of your choice. Understanding your graphics card details empowers you to make informed decisions regarding compatibility, performance optimizations, and troubleshooting.
Remember to keep your graphics card drivers up to date for optimal performance and compatibility with the latest software releases. If you encounter any graphics-related issues, knowing your graphics card model will help you search for specific solutions or seek assistance from the manufacturer.
Now that you have the knowledge and tools to check your graphics card, you can make the most out of your computer’s capabilities and ensure an enhanced user experience for various tasks, from gaming to video editing to graphic design.