Introduction
Welcome to the world of PC performance checking! As a PC user, it’s crucial to regularly assess the performance of your computer to ensure optimal functionality and productivity. Whether you use your PC for work, gaming, or simply browsing the web, a slow and sluggish system can be frustrating and detrimental to your overall experience.
By following a few simple steps, you can gain valuable insights into how your PC is performing and identify any areas that may need improvement. This article will guide you through the process of checking your PC’s performance, covering important aspects such as CPU performance, RAM usage, hard drive health, graphics card performance, network speed, system temperature, and overall system performance.
Before we dive into the details, it’s essential to understand that every PC is unique, with different hardware configurations and software setups. Therefore, it’s crucial to customize your approach based on your specific requirements and goals.
Regularly monitoring and assessing your PC’s performance not only helps identify potential issues but also allows you to optimize your system for maximum efficiency. So, let’s get started with step one – ensuring your PC meets the minimum requirements.
Ensure Your PC Meets the Minimum Requirements
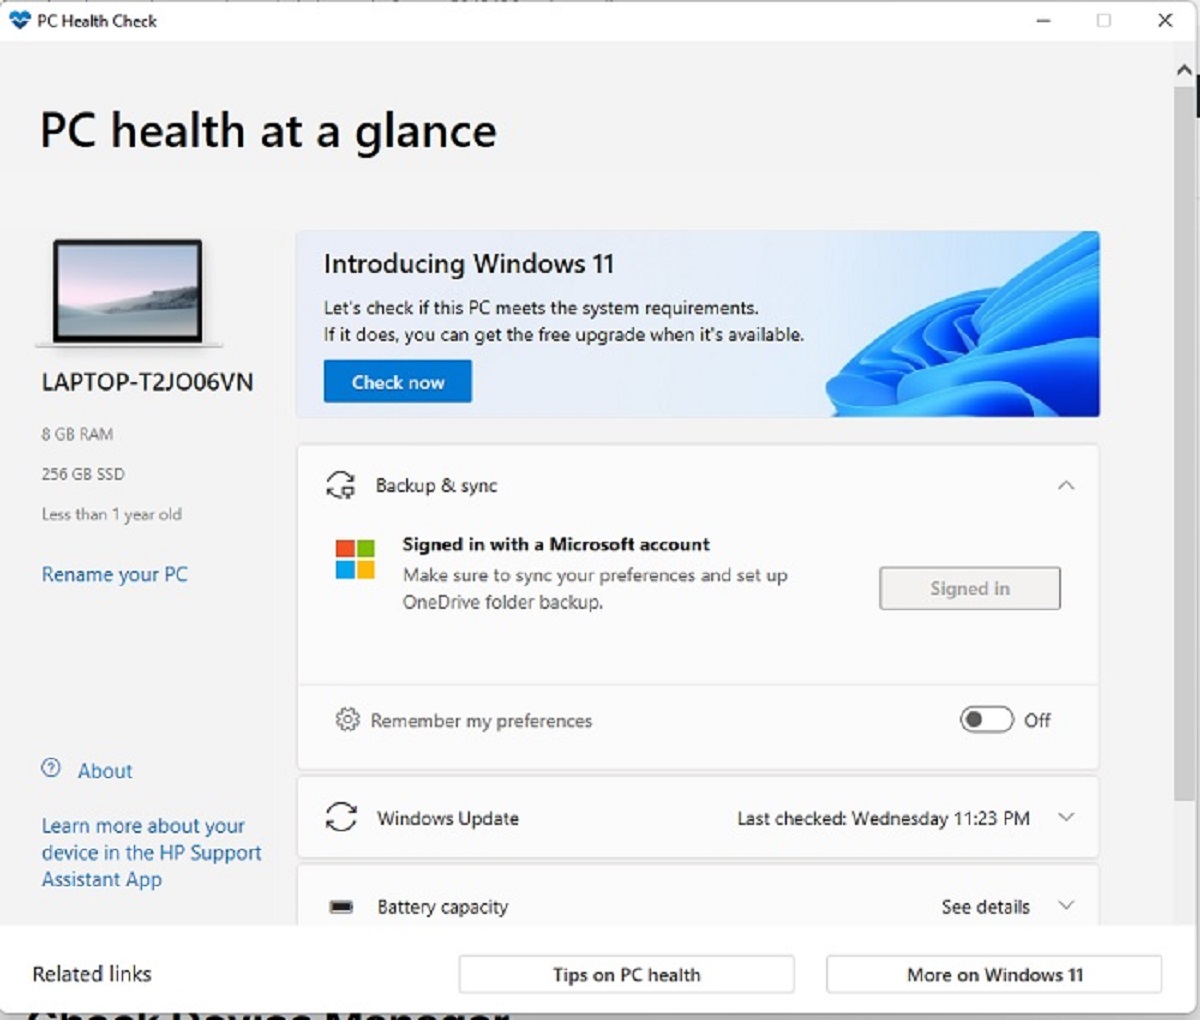
Before delving into the performance checking process, it’s crucial to confirm that your PC meets the minimum requirements for the tasks you intend to perform. Different software, applications, and games have specific hardware and operating system requirements, and failing to meet these requirements can significantly impact performance.
Start by checking the system requirements of the software or game you are using. These requirements can usually be found on the official website or documentation. Pay attention to factors such as the minimum CPU speed, RAM capacity, available storage space, and compatible operating systems.
Compare the requirements with your PC’s specifications. Check the model and speed of your CPU, the amount of RAM installed, and the available storage space on your hard drive. If your PC falls short of the minimum requirements, you might need to consider upgrading certain components to optimize performance.
It’s important to note that meeting the minimum requirements does not guarantee smooth and seamless performance. If you frequently use resource-intensive applications or games, it’s advisable to aim for hardware that exceeds the minimum requirements. This ensures a more efficient and enjoyable computing experience.
Additionally, keep your operating system and software up to date. Software updates often include performance improvements and bug fixes that can enhance overall system stability and efficiency.
By ensuring your PC meets the minimum requirements and keeping your system up to date, you establish a solid foundation for assessing and maximizing your PC’s performance. Now, let’s move on to the next step – checking the CPU performance.
Check the CPU Performance
The CPU (Central Processing Unit) is often considered the brain of your computer, responsible for executing instructions and performing calculations. Assessing the CPU performance is crucial as it directly impacts the speed and efficiency of your PC.
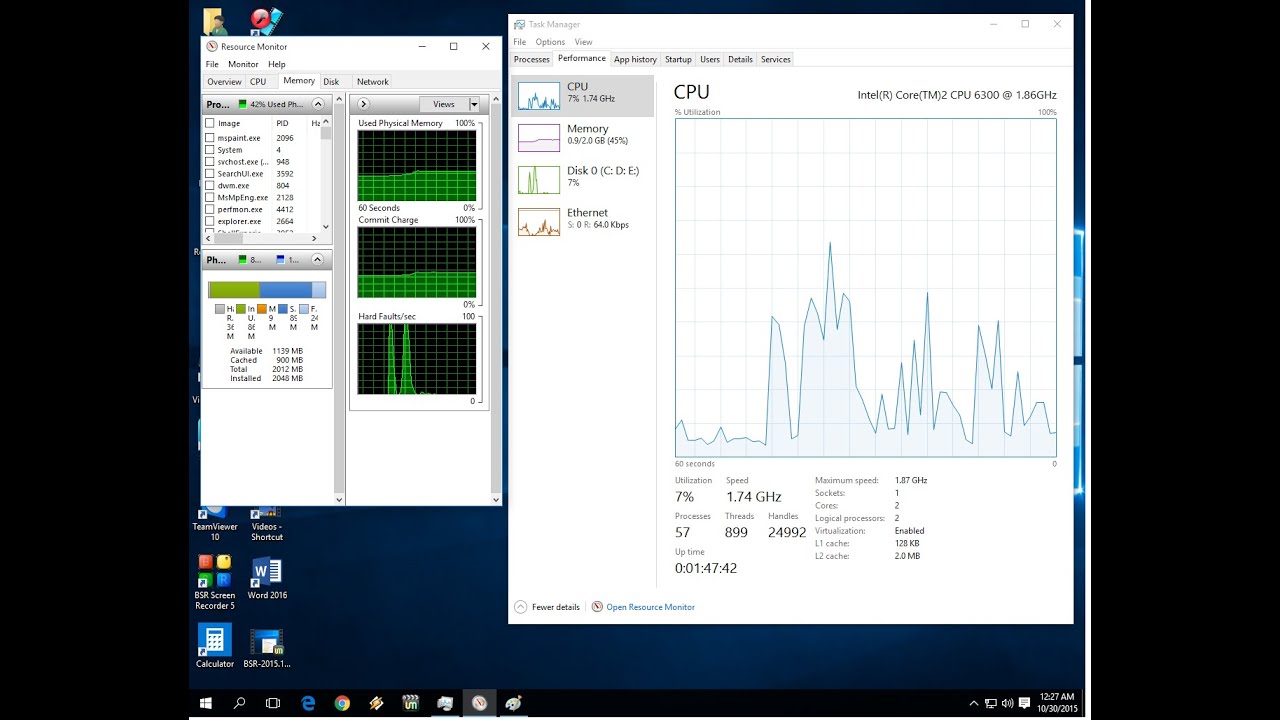
To check your CPU performance, you can use various tools and methods. One commonly used tool is the Task Manager in Windows or the Activity Monitor in macOS. These utilities provide real-time information about the CPU usage of different processes and applications running on your system.
In the Task Manager, navigate to the Performance tab and focus on the CPU section. Here, you can observe the CPU usage percentage, as well as the number of cores and threads your CPU has. Ideally, you want to see a balanced usage across all the cores, with low to moderate usage during normal tasks and higher usage during CPU-intensive activities.
For more detailed information, you can use third-party CPU benchmarking tools like CPU-Z or Geekbench. These tools provide comprehensive reports on CPU performance, including clock speed, multi-core efficiency, and comparisons to other CPUs. By running these benchmarks, you can evaluate how your CPU stacks up against similar models and identify any potential bottlenecks or performance issues.
If you notice consistently high CPU usage during normal tasks or experience frequent system slowdowns, it may indicate that your CPU is underpowered for demanding applications or that there might be underlying issues. In such cases, you may need to consider upgrading your CPU or optimizing your system by limiting resource-intensive background processes.
Remember, CPU performance testing should be done in conjunction with other performance checks to get a comprehensive view of your PC’s overall capabilities. Let’s move on to the next step now – evaluating the RAM usage.
Evaluate the RAM Usage
RAM (Random Access Memory) plays a crucial role in the performance of your PC. It is responsible for temporarily storing data that your computer actively uses, ensuring quick access and smooth multitasking. Evaluating the RAM usage on your PC helps determine if you have sufficient memory to handle your tasks efficiently.
To check the RAM usage, you can again utilize the Task Manager in Windows or the Activity Monitor in macOS. Navigate to the Performance tab and focus on the Memory section. Here, you can see how much RAM is being used by different applications and processes.
It’s important to note that some amount of RAM usage is normal for system processes and background applications. However, if you consistently experience high RAM usage close to the maximum capacity, it could lead to performance issues like system lag and unresponsiveness.
If you find that your RAM usage is constantly close to or reaching its maximum capacity, there are a few possible solutions. Firstly, check if any unnecessary background applications are using a significant amount of memory and consider closing them. You can also disable unnecessary startup programs that consume RAM resources.
If you frequently work with resource-intensive applications or multitask extensively, upgrading your RAM may be beneficial. Adding more memory modules or replacing existing modules with higher capacity ones can significantly improve your PC’s performance, allowing for smoother multitasking and faster application response times.
When considering a RAM upgrade, make sure to check your motherboard’s specifications and compatibility with the desired RAM modules. Opt for reputable brands and ensure that the modules are properly installed according to the manufacturer’s recommendations.
By evaluating your RAM usage, you can identify any potential bottlenecks and take appropriate steps to optimize your PC’s performance. Next on our checklist is monitoring the health of your hard drive – an essential component for data storage and retrieval.
Monitor the Hard Drive Health
Your hard drive is where all your data is stored, including the operating system, applications, documents, and media files. Monitoring the health of your hard drive is crucial to ensure data integrity and prevent unexpected failures that can result in data loss.
There are several tools available to monitor hard drive health, such as CrystalDiskInfo for Windows and DriveDx for macOS. These tools provide detailed information about the condition of your hard drive, including temperature, S.M.A.R.T (Self-Monitoring, Analysis, and Reporting Technology) attributes, and any potential issues or warnings.
When using these tools, pay attention to the S.M.A.R.T. attributes, as they provide valuable insights into the overall health of your hard drive. Look for any indications of imminent failures, such as excessive bad sectors, high spin-up times, or increasing error rates.
In addition to specialized tools, your operating system may also provide built-in utilities for checking hard drive health. For example, Windows has the built-in utility chkdsk (check disk) that scans and repairs file system errors, while macOS includes Disk Utility for verifying and repairing disk issues.
Regularly scanning and monitoring the health of your hard drive allows you to proactively address any potential problems before they escalate. If you come across any warnings or errors, consider backing up your data immediately and consulting a professional to assess the severity of the issue.
If your hard drive is showing signs of degradation or frequent errors, it might be a good idea to replace it with a new one. Upgrading to solid-state drives (SSDs) can significantly improve your PC’s performance, as they offer faster boot times, quicker data transfer rates, and improved overall responsiveness compared to traditional mechanical hard drives.
Remember to back up your important data regularly, either to an external hard drive or cloud storage, to safeguard against unexpected hard drive failures.
Now that we’ve covered hard drive health monitoring, let’s move on to another critical performance aspect – evaluating the graphics card performance.
Analyze the Graphics Card Performance
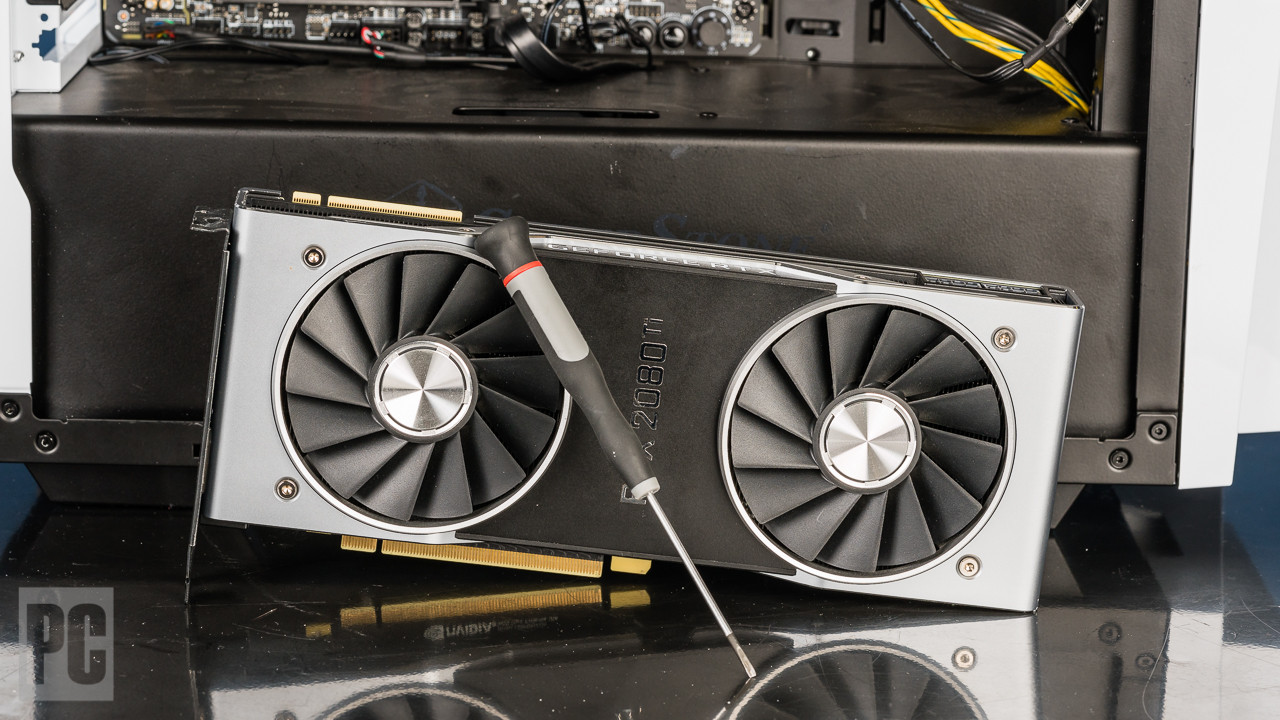
Your graphics card, also known as a GPU (Graphics Processing Unit), is responsible for rendering and displaying graphics on your computer screen. It plays a vital role in delivering smooth visuals, especially in gaming, video editing, and graphic design applications. Analyzing the performance of your graphics card helps ensure optimal graphics rendering and performance.
To analyze the graphics card performance, you can use various benchmarking tools specifically designed for GPUs, such as 3DMark or Unigine Heaven. These tools stress-test your graphics card by running intensive graphics simulations and provide detailed reports on various performance metrics, including frame rates, temperature, and power consumption.
By running these benchmarks, you can assess your graphics card’s performance against industry standards or compare it to similar graphics cards. This can help you identify any potential hardware or software limitations that might be affecting your gaming or graphics-intensive tasks.
In addition to dedicated benchmarking tools, you can also monitor your graphics card performance in real-time using software like MSI Afterburner or GPU-Z. These utilities provide information on GPU utilization, temperature, clock speeds, and fan speeds. Keeping an eye on these metrics during intense graphic-intensive tasks can help you identify any potential performance issues or overheating problems.
If you find that your graphics card is underperforming or struggling to handle graphics-intensive applications, there are a few steps you can take to optimize its performance:
- Update your graphics card drivers regularly. Graphics card manufacturers release driver updates to improve compatibility, performance, and stability with the latest games and applications.
- Ensure that your graphics card is not overheating by maintaining proper airflow within your PC case and dusting off any accumulated dust on the graphics card’s fans and heat sinks.
- Adjust graphics settings in games and applications to lighter options if you experience frame drops or lag. Lowering settings such as anti-aliasing, shadow quality, and texture resolution can help improve performance.
- Consider upgrading your graphics card if you frequently work with demanding graphics applications or if you want to enhance your gaming experience.
Monitoring and optimizing your graphics card performance can significantly enhance your visual experience and ensure smoother graphics rendering during demanding tasks. With the graphics card covered, let’s move on to assessing your network speed and connectivity.
Assess Network Speed and Connectivity
A fast and reliable network connection is crucial for a seamless online experience, whether you’re browsing the web, streaming media, or playing online games. Assessing your network speed and connectivity helps identify any potential issues that may be impacting your internet performance.
To assess your network speed, you can use online speed test tools, such as Ookla’s Speedtest, Fast.com, or Google’s Internet Speed Test. These tools measure key network parameters like download speed, upload speed, and ping (latency). A higher download and upload speed indicates faster data transfer, while a lower ping indicates a more responsive connection.
Perform speed tests at different times of the day to get a broader picture of your network’s performance. Note that the speed you achieve may be influenced by various factors, including your internet plan, network congestion, and the distance between your computer and the Wi-Fi router or modem.
If you notice significantly slower speeds than what you are paying for, you can try a few troubleshooting steps:
- Restart your router and modem to refresh the network connection.
- Temporarily disable any background downloads or uploads that might be consuming bandwidth.
- Ensure your Wi-Fi signal is strong by positioning your device closer to the router or using a Wi-Fi range extender if necessary.
- If you’re using a wired Ethernet connection, check the cables for any damage or loose connections.
- Contact your internet service provider (ISP) to investigate any potential issues on their end.
In addition to network speed, assessing network connectivity is equally important. Check for any intermittent or dropped connections that might disrupt your online activities. If you frequently experience unstable connections, consider the following steps:
- Update your network adapter drivers to the latest version.
- Ensure that your Wi-Fi router or modem firmware is up to date.
- Reduce interference by placing your Wi-Fi router away from other electronic devices and walls.
- Consider upgrading your router to a newer model with better range and performance capabilities.
By regularly assessing your network speed and connectivity, you can identify any potential bottlenecks or issues and take steps to optimize your internet performance. With network speed and connectivity covered, let’s move on to the next step – monitoring system temperature.
Monitor System Temperature
Maintaining optimal system temperature is vital for the longevity and performance of your PC components. High temperatures can lead to thermal throttling, system instability, and ultimately, hardware failure. Monitoring the system temperature allows you to ensure that your PC is running within safe temperature ranges.
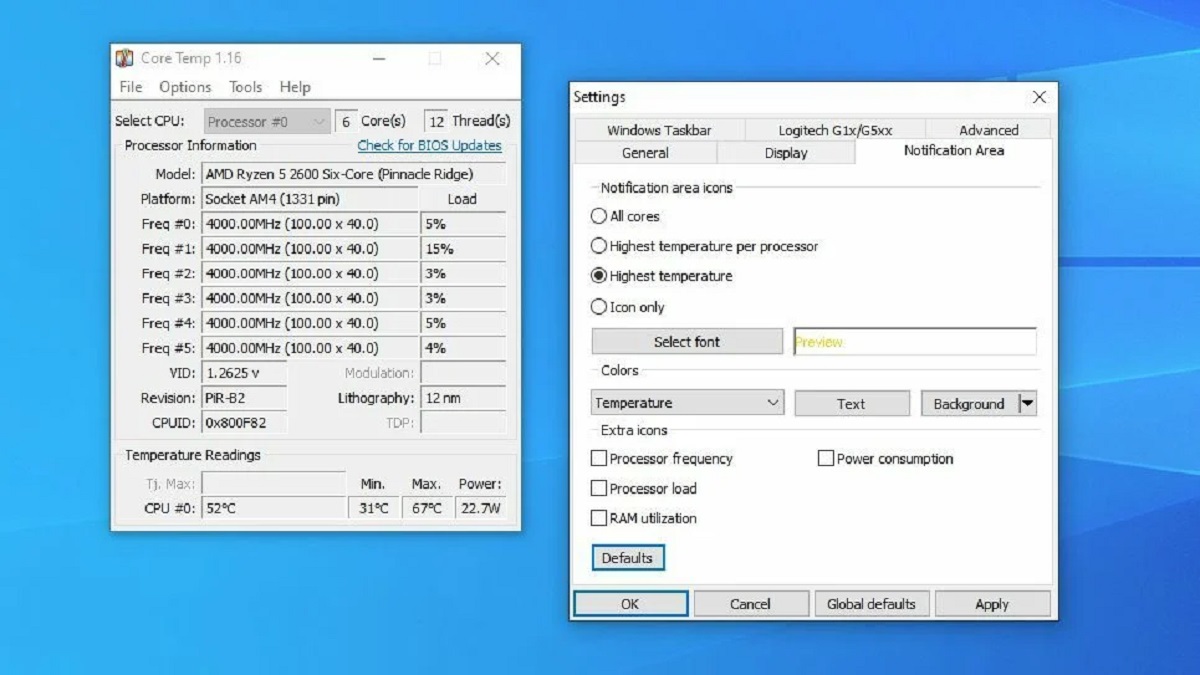
There are several software tools available to monitor the system temperature, such as HWMonitor, Core Temp, or SpeedFan. These tools provide real-time temperature readings for various components, including CPU, GPU, and motherboard sensors.
It’s important to keep an eye on the temperature readings while your PC is under load, such as during gaming sessions or CPU-intensive tasks. Monitor the temperatures over an extended period to see if they remain within acceptable ranges or if they spike to concerning levels.
Acceptable temperature ranges vary depending on the specific hardware components, but as a general guideline, you should aim for CPU temperatures below 80°C (176°F) and GPU temperatures below 85°C (185°F) under heavy load. However, it is recommended to check the manufacturers’ specifications for the exact temperature limits of your components.
If you notice that your system temperatures are consistently exceeding safe thresholds, consider the following tips to improve cooling:
- Ensure proper airflow within your PC case by positioning fans in strategic locations and organizing cables to avoid blocking airflow.
- Clean dust and debris from the cooling fans, heat sinks, and vents to prevent heat buildup and maximize airflow.
- Consider installing additional fans or upgrading to more efficient cooling solutions, such as liquid cooling systems or larger heat sinks.
- Ensure that your PC is not placed in a cramped or poorly ventilated area that restricts air circulation.
Monitoring and maintaining optimal system temperatures not only prevent hardware damage but also contribute to overall system stability and performance. With system temperature covered, the next step is to evaluate the overall system performance of your PC.
Evaluate Overall System Performance
Assessing the overall system performance of your PC involves considering all the previously mentioned factors together to get a comprehensive view of how your computer is functioning. This step allows you to identify any bottlenecks or areas that may be impacting your PC’s performance.
Start by observing the performance of your PC during regular tasks and activities such as web browsing, document editing, or multimedia playback. Pay attention to the responsiveness of the system, launch times of applications, and overall smoothness of the user interface. If you notice delays, lags, or frequent system freezes, it might indicate a performance issue that requires further investigation.
Additionally, test your PC’s performance during more demanding tasks, such as running resource-intensive applications or playing graphics-intensive games. Evaluate factors like frame rates, load times, and overall system stability. If you encounter significant performance issues or inconsistencies, it may be worth considering hardware upgrades or software optimizations.
Keep in mind that benchmarking tools can provide objective measurements and comparisons of your PC’s performance against standardized metrics. Running comprehensive benchmarks like PCMark or PassMark can help you gauge your system’s performance in various scenarios and identify any areas that need improvement.
In addition to hardware and software optimizations, consider organizing and optimizing your data storage drives. Fragmented files and cluttered drives can impact system performance. Perform regular disk cleanup activities to remove unnecessary files, and defragment your hard drive to ensure efficient data retrieval.
Lastly, don’t overlook the importance of regular system updates and maintenance. Keeping your operating system, drivers, and software up to date ensures you have the latest performance enhancements, bug fixes, and security patches.
By evaluating the overall system performance and addressing any bottlenecks or issues, you can optimize your PC’s performance for smoother and more efficient operations.
Now that we’ve explored different aspects of PC performance checking, you’re equipped with the knowledge to ensure your computer runs at its best. Regularly monitoring and optimizing your PC’s performance will enhance your overall computing experience and productivity.
Conclusion
Checking your PC’s performance is an essential task to ensure optimal functionality, productivity, and longevity of your computer. By following the steps outlined in this article, you can evaluate various aspects of your PC’s performance, including meeting minimum requirements, monitoring CPU and RAM usage, assessing hard drive health, analyzing graphics card performance, evaluating network speed and connectivity, monitoring system temperature, and evaluating overall system performance.
Regularly assessing these factors allows you to identify potential bottlenecks, performance issues, or hardware limitations. By taking appropriate actions such as upgrading hardware components, optimizing software settings, or performing maintenance tasks, you can optimize your PC’s performance for a seamless and enjoyable computing experience.
Remember to customize the performance checking process based on your specific requirements and goals. Every PC is unique, with different hardware configurations and software setups, so it’s essential to tailor your approach accordingly.
In conclusion, monitoring and improving your PC’s performance is an ongoing process. As technology advances and new software and applications emerge, it’s crucial to stay updated and adapt to changing requirements. By regularly assessing your PC’s performance and making necessary adjustments, you can ensure that your computer operates at its best and meets your needs for work, gaming, or any other tasks you rely on it for.