Introduction
Welcome to the world of Apple Watch 7, a cutting-edge wearable device that keeps you connected, active, and stylish. With its sleek design and advanced features, the Apple Watch 7 is a must-have for tech enthusiasts and fitness enthusiasts alike. One crucial aspect of owning an Apple Watch 7 is knowing how to charge it properly to ensure uninterrupted usage and optimal performance.
In this guide, we will walk you through the step-by-step process of charging your Apple Watch 7. Whether you’re a new Apple Watch owner or upgrading to the latest version, understanding the charging process is essential for maintaining the longevity of your device battery.
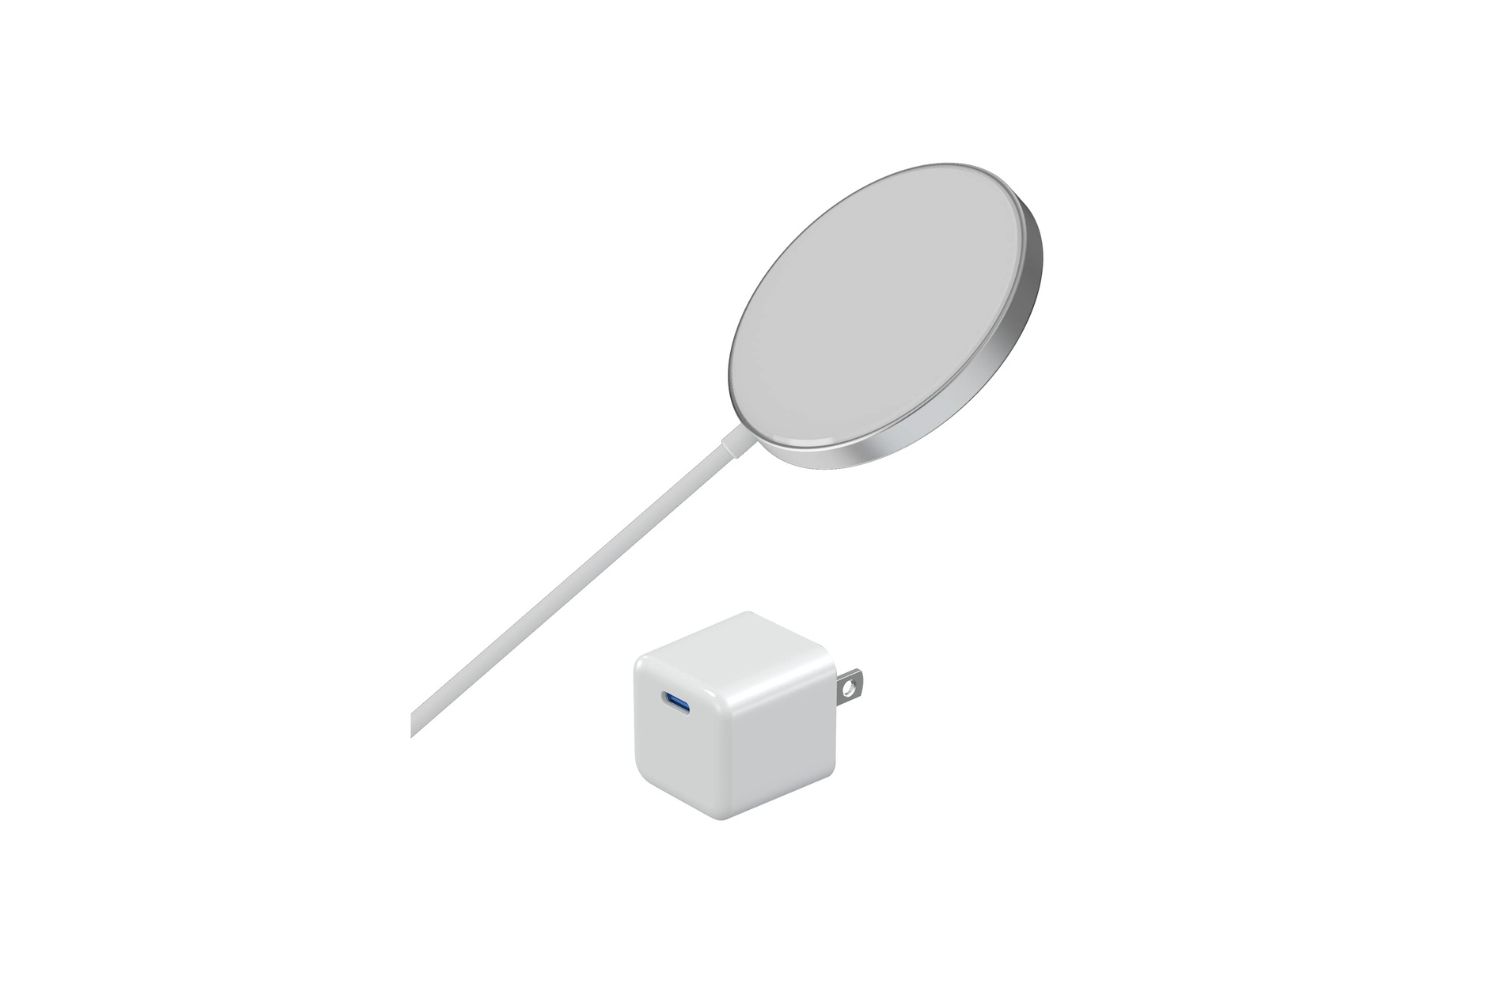
The Apple Watch 7 comes with a proprietary magnetic charging cable that attaches magnetically to the back of the watch, ensuring a secure connection during charging. Before we dive into the specifics of the charging process, let’s familiarize ourselves with the Apple Watch 7 charging cable and its components.
The charging cable for the Apple Watch 7 consists of a USB connector on one end and a magnetic charging module on the other end. The USB connector allows you to plug the cable into a power source, while the magnetic charging module attaches to the back of the Apple Watch 7, providing a seamless charging experience.
In the next sections, we will explore how to connect the charging cable to your Apple Watch 7, connect it to a power source, and monitor the charging status. Additionally, we will discuss how to adjust the charging settings to suit your preferences.
Now that we have an overview of what to expect in this guide, let’s delve into the details of charging your Apple Watch 7. By the end of this guide, you will be equipped with the knowledge and confidence to keep your watch powered up and ready for any adventure that comes your way.
Understanding your Apple Watch 7 charging cable
In order to charge your Apple Watch 7 effectively, it’s important to have a clear understanding of the charging cable that comes with it. The Apple Watch 7 charging cable features a unique design that allows for easy and efficient charging.
The charging cable consists of two main components: a USB connector and a magnetic charging module. The USB connector is used to connect the cable to a power source, such as a wall adapter or a computer. The magnetic charging module, on the other hand, is responsible for attaching to the back of your Apple Watch 7.
The magnetic charging module is specifically designed to align magnetically with the back of your watch, ensuring a secure and stable connection throughout the charging process. This magnetic connection not only simplifies the charging process but also minimizes the risk of accidentally disconnecting the cable while your watch is charging.
Another notable feature of the charging cable is its flexible and durable construction. The cable is designed to be tangle-free, which means you won’t have to deal with annoying knots and twists when you’re trying to charge your Apple Watch 7. Additionally, the cable is built to withstand regular use without succumbing to wear and tear, making it a reliable accessory for long-term use.
It’s also worth mentioning that the charging cable is relatively compact and easy to carry around. Its lightweight design makes it convenient to toss into your bag or pocket, ensuring you can charge your Apple Watch 7 wherever you go. This portability is especially useful for travelers or individuals who are constantly on the move.
Now that we have examined the various components and features of the Apple Watch 7 charging cable, the next step is to understand how to identify and locate the charging port on your Apple Watch 7. This will enable you to connect the charging cable and begin the charging process effortlessly.
Identifying the charging port on your Apple Watch 7
Before you can start charging your Apple Watch 7, you need to locate the charging port on the device. The charging port is where the magnetic charging module of the cable will connect to your watch.
The charging port on the Apple Watch 7 is located on the back of the watch itself. Flip your Apple Watch 7 over so that you can see the backside. You will notice a circular indentation in the center of the back. This circular indentation is the charging port.
The charging port on the Apple Watch 7 is specifically designed to align with the magnetic charging module of the charging cable. The circular shape of the port matches the shape of the magnetic charging module, ensuring a proper and secure connection when charging your device.
Once you have identified the charging port, you are ready to connect the charging cable to your Apple Watch 7. The magnetic connection ensures that the cable attaches easily and stays in place during the charging process. The strong magnetic connection also facilitates efficient charging, allowing for a quick and reliable power boost to your watch.
It is worth noting that the Apple Watch charging cable is designed to be reversible, meaning you can connect it to your Apple Watch 7 in either orientation. This feature adds convenience to the charging process, as it eliminates the need to fumble with the cable to determine the correct orientation for connecting.
Now that you have identified the charging port on your Apple Watch 7 and understand how it aligns with the magnetic charging module of the cable, you can proceed to the next step, which is connecting the charging cable to your watch. This step will ensure that you can provide power to your Apple Watch 7 and keep it fully charged for your daily activities.
Connecting the charging cable to your Apple Watch 7
Now that you’ve identified the charging port on your Apple Watch 7, it’s time to connect the charging cable to your device. Follow these simple steps to ensure a secure and proper connection:
- Take the magnetic charging module of the cable and align it with the circular charging port on the back of your Apple Watch 7.
- Gently bring the magnetic charging module close to the charging port.
- Allow the magnetic attraction to guide the module into place, ensuring that it attaches securely to the back of your watch.
- You should feel a satisfying click or snap as the charging module attaches to the charging port. This indicates a successful and properly aligned connection.
Once the charging cable is securely connected to your Apple Watch 7, you can proceed to the next step, which is connecting the cable to a power source to initiate the charging process.
It’s important to note that while connecting the charging cable to your Apple Watch 7, it’s best to handle the cable with care and avoid applying excessive force. The magnetic connection is designed to be strong enough to hold the cable in place during charging, without needing you to push or force it. Gentle handling will minimize the risk of any damage to the charging cable or your Apple Watch 7.
Now that the charging cable is connected to your Apple Watch 7, and the magnetic connection is secure, you are ready for the next step: connecting the cable to a power source. This step will provide the necessary electrical current to charge your Apple Watch 7 and ensure that it remains powered up and ready for all your activities.
Connecting the charging cable to a power source
Now that you’ve successfully connected the charging cable to your Apple Watch 7, it’s time to connect the other end of the cable to a power source. This step is crucial as it provides the electrical current necessary to charge your device. Follow these steps to connect the charging cable to a power source:
- Locate a power source such as a wall adapter or a USB port on your computer.
- If you are using a wall adapter, plug the USB connector of the charging cable into the adapter.
- If you are using a USB port on your computer, insert the USB connector directly into the port.
- Ensure that the connection is secure by ensuring that the USB connector is fully inserted into the power source.
Once you have connected the charging cable to a power source, you should see a small lightning bolt symbol on the display of your Apple Watch 7. This symbol indicates that your watch is now charging.
It’s important to choose a reliable power source to ensure efficient and safe charging. Using a wall adapter that is specifically designed for charging devices or a USB port on your computer are both suitable options. Avoid using low-quality or unreliable power sources, as they may not provide a stable electrical current and could potentially damage your Apple Watch 7.
One important thing to note is that the charging speed of your Apple Watch 7 may vary depending on the power source you are using. Charging with a wall adapter generally provides faster charging compared to a USB port on a computer. If you require a quick charge, it’s recommended to use a wall adapter that supports the charging requirements of your Apple Watch 7.
Now that the charging cable is connected to a power source, and your Apple Watch 7 is receiving power, you can move on to the next section: checking the charging status on your watch. This will allow you to monitor the progress of the charging process and ensure that your watch is charging efficiently.
Checking the charging status on your Apple Watch 7
While your Apple Watch 7 is charging, it’s helpful to be able to check the charging status to ensure that it’s progressing as expected. Here’s how you can check the charging status on your Apple Watch 7:
- Wake up your Apple Watch 7 by tapping the screen or pressing the Digital Crown.
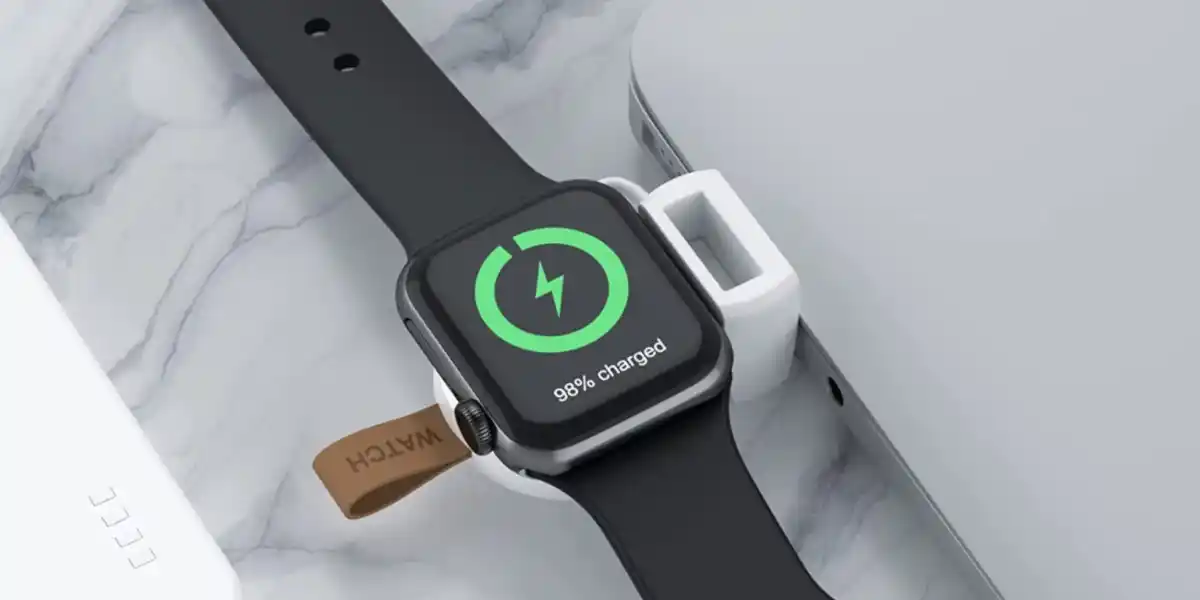
- Look for the charging icon on the screen. It appears as a green lightning bolt inside a green circular battery icon.
- If you see the charging icon, it means that your Apple Watch 7 is currently charging.
- Depending on the charging progress, you may see a percentage displayed next to the charging icon, indicating how much of the battery is charged.
- If you don’t see the charging icon, double-check that the charging cable is properly connected to your Apple Watch 7 and the power source. Also, ensure that the power source is functional.
It’s worth noting that the charging icon may not be displayed continuously on the screen. Your Apple Watch 7 may enter a sleep mode after a period of inactivity to preserve battery life. However, you can easily wake it up again to check the charging status by following the steps above.
Monitoring the charging status is important, especially if you have a limited amount of time available or if you need your Apple Watch 7 to be fully charged for a specific activity. By regularly checking the charging status, you can ensure that your watch is charging at an appropriate rate and estimate how long it will take to reach a full charge.
Once your Apple Watch 7 has reached a full charge, you can disconnect the charging cable from both your watch and the power source. It’s important to promptly disconnect the charging cable once your Apple Watch 7 is charged to avoid unnecessary battery drain.
Now that you know how to check the charging status on your Apple Watch 7, let’s move on to the final section: adjusting the charging settings on your watch. This will allow you to customize the charging behavior and optimize the charging experience according to your preferences.
Adjusting the charging settings on your Apple Watch 7
Your Apple Watch 7 offers various settings that allow you to customize the charging behavior and optimize the charging experience. These settings can help you maximize battery life and ensure efficient charging. Here’s how you can adjust the charging settings on your Apple Watch 7:
- On your Apple Watch 7, navigate to the Home screen by pressing the Digital Crown.
- Tap on the Settings app icon, which resembles a gear.
- Scroll down and tap on the Battery option.
- Inside the Battery settings, you will find several options to adjust the charging behavior:
- Optimize Battery Charging: This feature helps prevent battery aging by learning your charging patterns and minimizing the time your Apple Watch 7 spends fully charged.
- Low Power Mode: Enabling this mode reduces battery usage on your Apple Watch 7 by disabling certain features and limiting background activities.
- Toggle the switch next to each setting to turn them on or off, depending on your preferences.
It’s recommended to keep the “Optimize Battery Charging” feature enabled to ensure long-term battery health. This feature intelligently manages the charging process by avoiding prolonged exposure to high battery levels, which can cause battery aging over time.
In addition to the charging settings on your Apple Watch 7, you can also adjust the charging behavior by using the Power Reserve mode. Activating this mode can help conserve battery power by temporarily disabling most features of your watch.
To activate Power Reserve mode, press and hold the Side button until the Power Off screen appears. Then, swipe the Power Reserve slider to the right. This will put your Apple Watch 7 into a low-power state, only displaying the time when you press the Digital Crown or the Side button.
Remember that using Power Reserve mode will limit the functionality of your Apple Watch 7, but it can be handy when you need to conserve battery power in emergency situations or for extended periods of inactivity.
By adjusting these charging settings and utilizing Power Reserve mode when needed, you can personalize the charging experience on your Apple Watch 7 and ensure that it meets your specific needs while optimizing battery life.
With all the necessary information covered in this guide, you are now equipped with the knowledge and understanding to effectively charge your Apple Watch 7. Enjoy the seamless charging experience and make the most of your Apple Watch 7’s impressive features!
Conclusion
Charging your Apple Watch 7 is a simple and essential process to keep your device powered up and ready for your daily activities. By following the steps outlined in this guide, you can ensure a seamless and efficient charging experience.
We started by understanding the components of the Apple Watch 7 charging cable, including the USB connector and the magnetic charging module. Next, we learned how to locate the charging port on the back of the Apple Watch 7, allowing for a secure connection between the cable and the device.
We then explored the process of connecting the charging cable to both the Apple Watch 7 and a power source, ensuring a stable connection and optimal charging conditions. Checking the charging status became easy with the use of the charging icon on the Apple Watch 7’s screen, allowing us to monitor the progress of the charging process.
Finally, we discussed the various charging settings available on the Apple Watch 7, including the “Optimize Battery Charging” feature and the option to enable Low Power Mode. By utilizing these settings, you can customize the charging behavior and extend the battery life of your device.
As a proud owner of an Apple Watch 7, knowing how to charge it properly is essential for optimal performance. By following the guidelines in this guide, you can confidently charge your Apple Watch 7 and ensure that it remains powered up and ready to assist you throughout your day.
Now, go ahead and charge your Apple Watch 7 with ease, knowing that you have the knowledge to keep it running smoothly. Enjoy the convenience, connectivity, and style that your Apple Watch 7 brings to your wrist!