Introduction
Welcome to our guide on how to change the Wi-Fi name on an AT&T router. The Wi-Fi network name, also known as the Service Set Identifier (SSID), is what you see when you search for available Wi-Fi networks on your devices. Changing the Wi-Fi name can be useful for personalizing your network or increasing security by minimizing the visibility of your network’s manufacturer or default name.
AT&T provides a range of routers to their customers, and the process of changing the Wi-Fi name may vary slightly based on the specific model. However, the general steps remain consistent across most AT&T routers. In this guide, we’ll walk you through the process, ensuring you can easily change your Wi-Fi name and secure your network.
Please note that changing the Wi-Fi name will not affect your internet service or any connected devices. However, you will need to reconnect your devices to the newly named Wi-Fi network using the updated SSID.
Without further ado, let’s dive into the step-by-step process of changing the Wi-Fi name on an AT&T router.
Step 1: Accessing the Router Settings
The first step in changing your Wi-Fi name on an AT&T router is to access the router settings. To do this, you’ll need to connect your device, such as a laptop or smartphone, to the router’s network.
Here’s how you can access the router settings:
- Open a web browser on your device. It can be any browser, such as Google Chrome, Mozilla Firefox, or Safari.
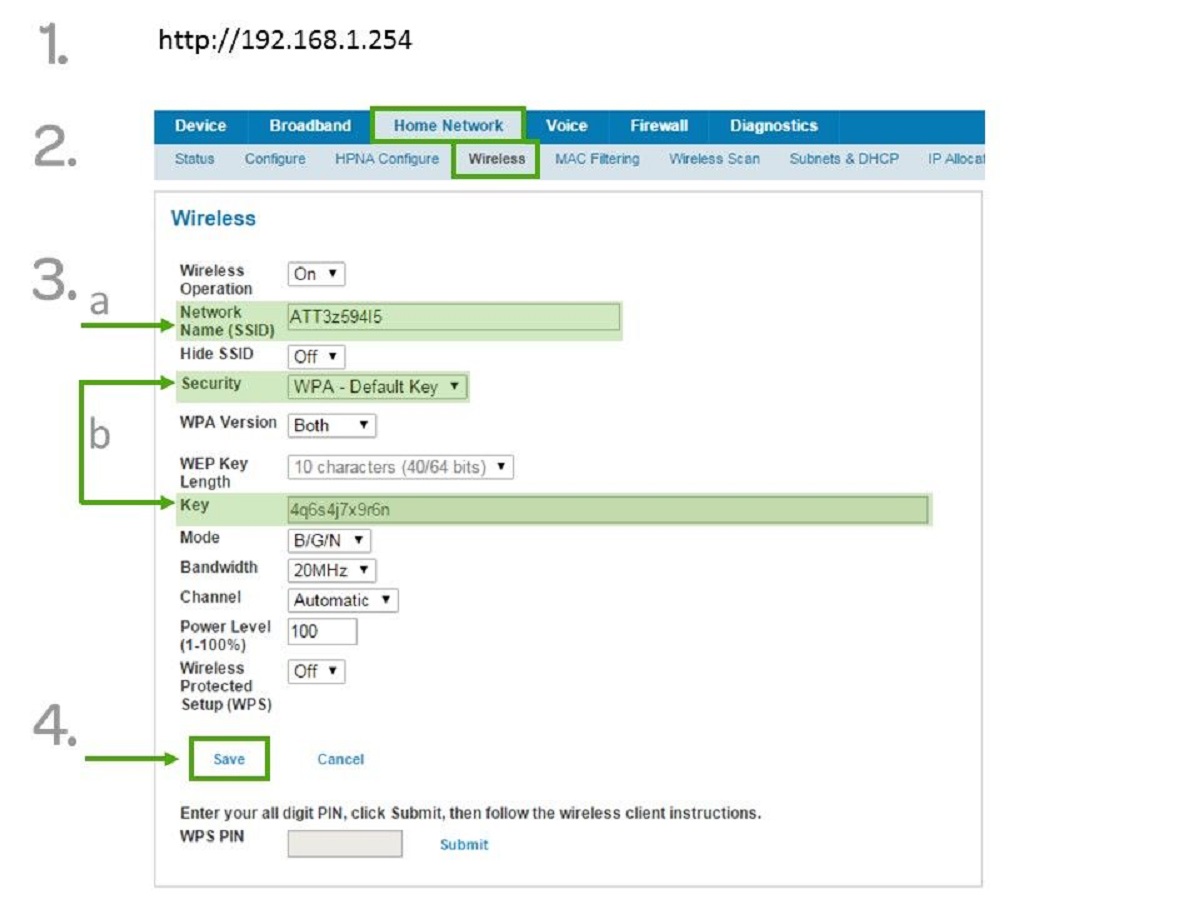
- In the browser’s address bar, type in the default IP address for your AT&T router. The most common default IP addresses for AT&T routers are 192.168.1.254 or 192.168.0.1. If none of these IP addresses work, you can find the correct one in the router’s manual or by contacting AT&T customer support.
- Press Enter on your keyboard or click on the Go button to access the router’s login page.
By following these steps, you should be able to access the router’s settings page. In the next step, we will guide you through the process of logging in to the router.
Step 2: Logging in to the Router
Once you have accessed the router’s settings page, you will need to log in to make changes to the Wi-Fi name. The login process requires entering the router’s username and password, which are typically provided by AT&T. If you haven’t changed the default login credentials, you can find them on the router or in the router’s manual.
Here’s how you can log in to your AT&T router:
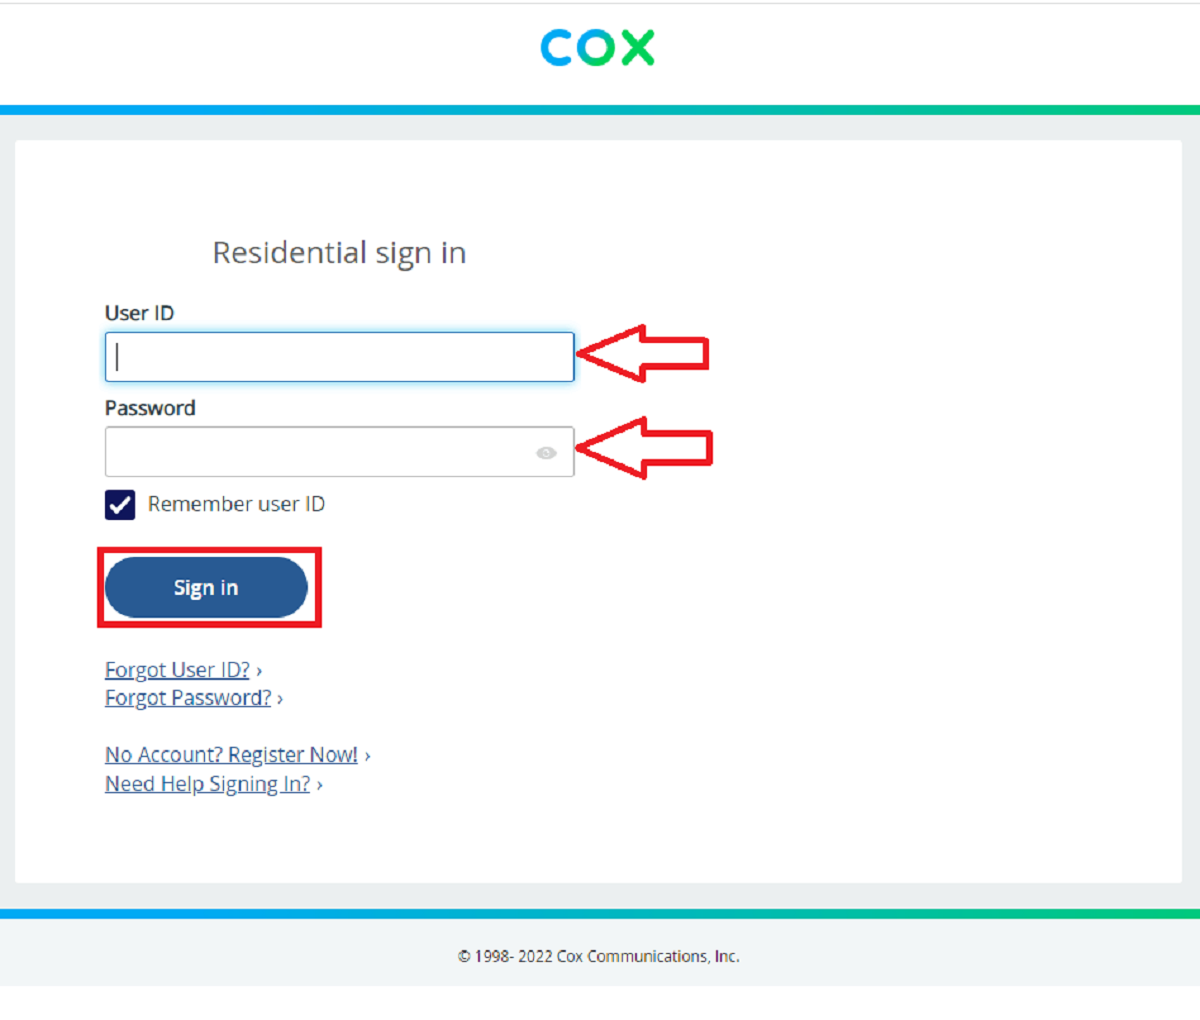
- On the router’s login page, you will see fields to enter your username and password. Enter the correct login credentials in the respective fields. If you’re unsure about the default username and password, you can try using the combination of “admin” for both fields.
- After entering the login details, click on the Login or Sign In button to proceed.
- If the login information is correct, you will be redirected to the router’s settings page. Congratulations, you have successfully logged in to your AT&T router!
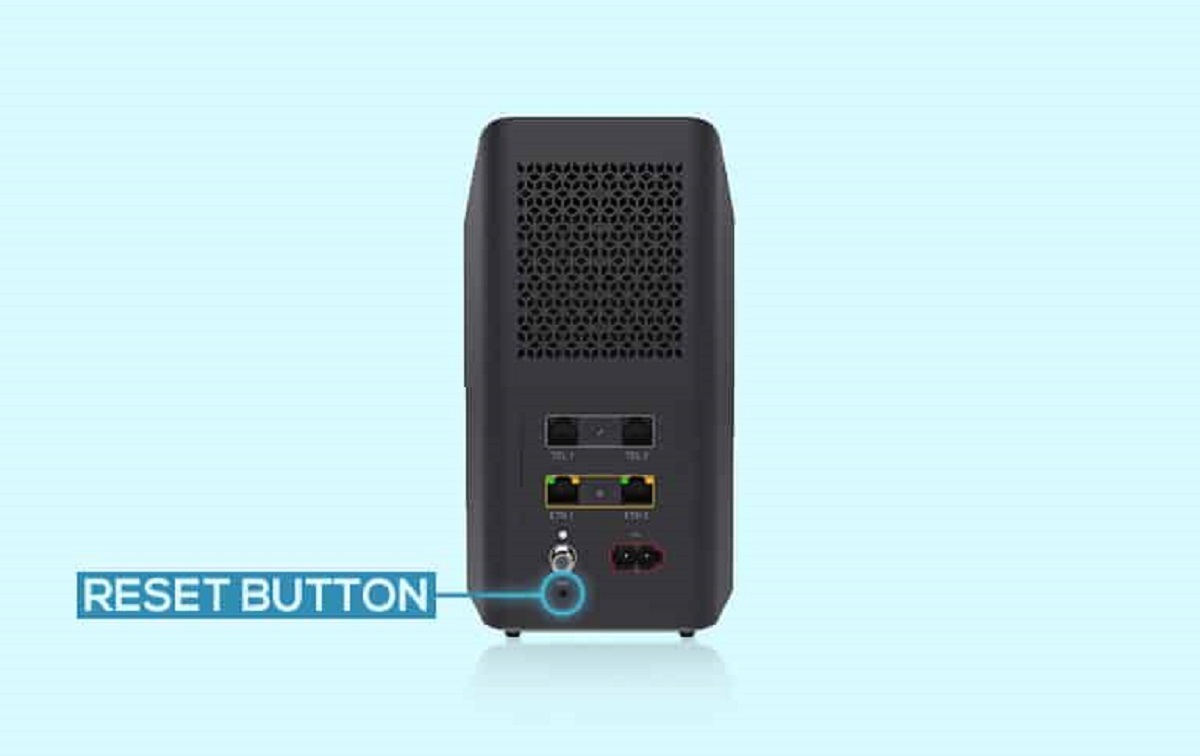
It is important to note that if you have changed the default username and password, you will need to enter your custom login credentials during this step. If you are unable to recall or locate your login information, you may need to reset the router to its factory settings or contact AT&T for assistance.
In the next step, we will guide you on how to navigate to the Wi-Fi settings in order to change the Wi-Fi network name.
Step 3: Navigating to the Wi-Fi Settings
Once you have successfully logged in to your AT&T router, the next step is to navigate to the Wi-Fi settings. This is where you will find the option to change the Wi-Fi network name.
Follow these steps to navigate to the Wi-Fi settings:
- On the router’s settings page, look for a tab or menu option labeled “Wi-Fi” or “Wireless”. Click on this tab to access the Wi-Fi settings.
- Within the Wi-Fi settings, you may find additional options or submenus. Look for options related to the network configuration or SSID settings.
- Depending on the model of your AT&T router, the exact location and labeling of the Wi-Fi settings may vary. However, most routers will have a section dedicated to wireless network settings.
- Click on the appropriate option or link that takes you to the Wi-Fi network settings page.
By following these steps, you should be able to navigate to the Wi-Fi settings page on your AT&T router. In the next step, we will guide you through the process of changing the Wi-Fi network name.
Step 4: Changing the Wi-Fi Network Name
Now that you have reached the Wi-Fi settings page on your AT&T router, you can proceed with changing the Wi-Fi network name, also known as the SSID.
Here’s how you can change the Wi-Fi network name:
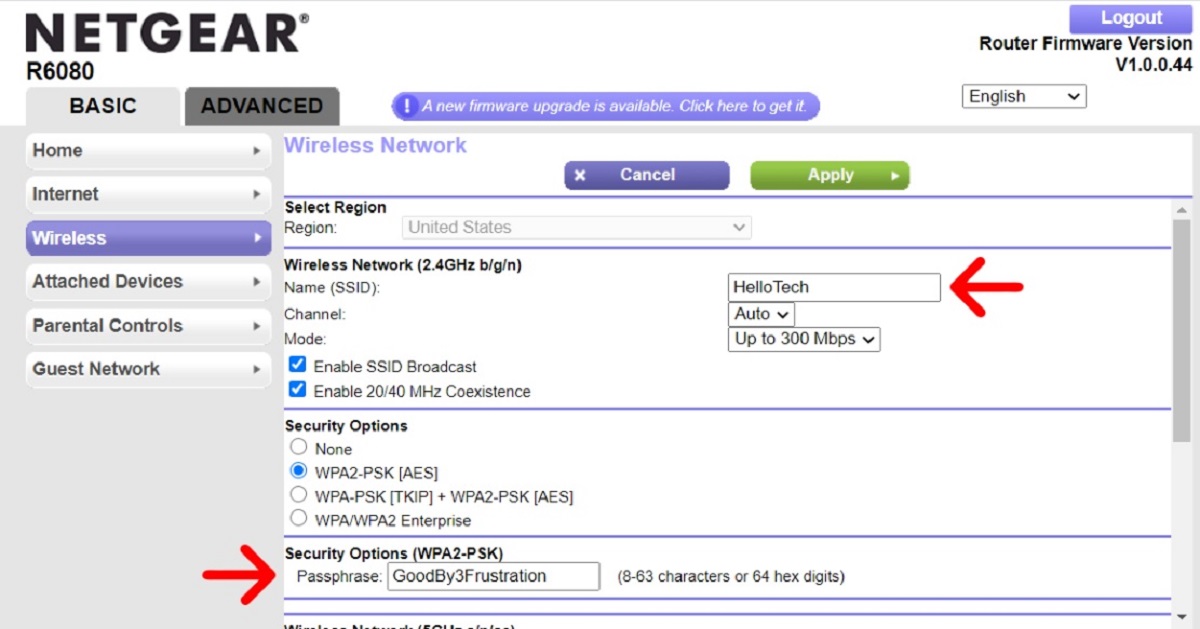
- Look for the field or input box labeled “Network Name”, “SSID”, or similar. This is where you can enter the new name for your Wi-Fi network.
- Click on the field or input box to select it, then delete the existing network name. Type in the desired new name for your network.
- Make sure to choose a unique and easily identifiable name for your Wi-Fi network. Avoid using any personally identifiable information or sensitive data in the network name for security reasons.
- Take note of any character limitations or restrictions imposed by the router. Some routers may have a maximum limit on the number of characters or specific character types that can be used.
Once you have entered the new Wi-Fi network name, double-check to ensure it is spelled correctly and reflects the desired network identification. This is important as the new name will be displayed when other devices search for available Wi-Fi networks.
Remember, the new Wi-Fi network name should be unique and easy to identify among other nearby networks. Choosing a distinct name can help you and your devices easily recognize and connect to the correct network.
In the next step, we will guide you on how to save the new Wi-Fi name and apply the changes to your AT&T router.
Step 5: Saving the New Wi-Fi Name
After you have entered the new Wi-Fi network name on your AT&T router, it’s important to save the changes to ensure that the new name is applied successfully.
Here’s how you can save the new Wi-Fi name on your AT&T router:
- Look for a “Save” or “Apply” button on the Wi-Fi settings page. This button is typically located at the bottom or top of the page, or it may be displayed as an option within a menu.
- Click on the “Save” or “Apply” button to save the new Wi-Fi network name.
- Wait for the changes to be applied. This may take a few moments as the router updates its settings and restarts the Wi-Fi network with the new name.
- During this time, avoid manually restarting the router or disconnecting any devices from the network, as it can interrupt the saving process and delay the changes from being implemented.
Once the changes are saved and the Wi-Fi network is restarted, the new network name should be visible when you search for available Wi-Fi networks on your devices. Make sure to reconnect any connected devices to the newly named Wi-Fi network using the updated network name (SSID).
In the next step, we’ll guide you on how to confirm whether the Wi-Fi name change has been successfully applied to your AT&T router.
Step 6: Confirming the Wi-Fi Name Change
After saving the new Wi-Fi name on your AT&T router, it’s important to confirm that the name change has been successfully applied. This step will ensure that your devices can connect to the newly named Wi-Fi network without any issues.
Here’s how you can confirm the Wi-Fi name change:
- On your device, such as a laptop, smartphone, or tablet, open the list of available Wi-Fi networks by accessing the Wi-Fi settings.
- Look for the newly named Wi-Fi network on the list. It should reflect the changes you made in the previous steps.
- If you can see the new Wi-Fi network name, click on it to connect your device to the network.
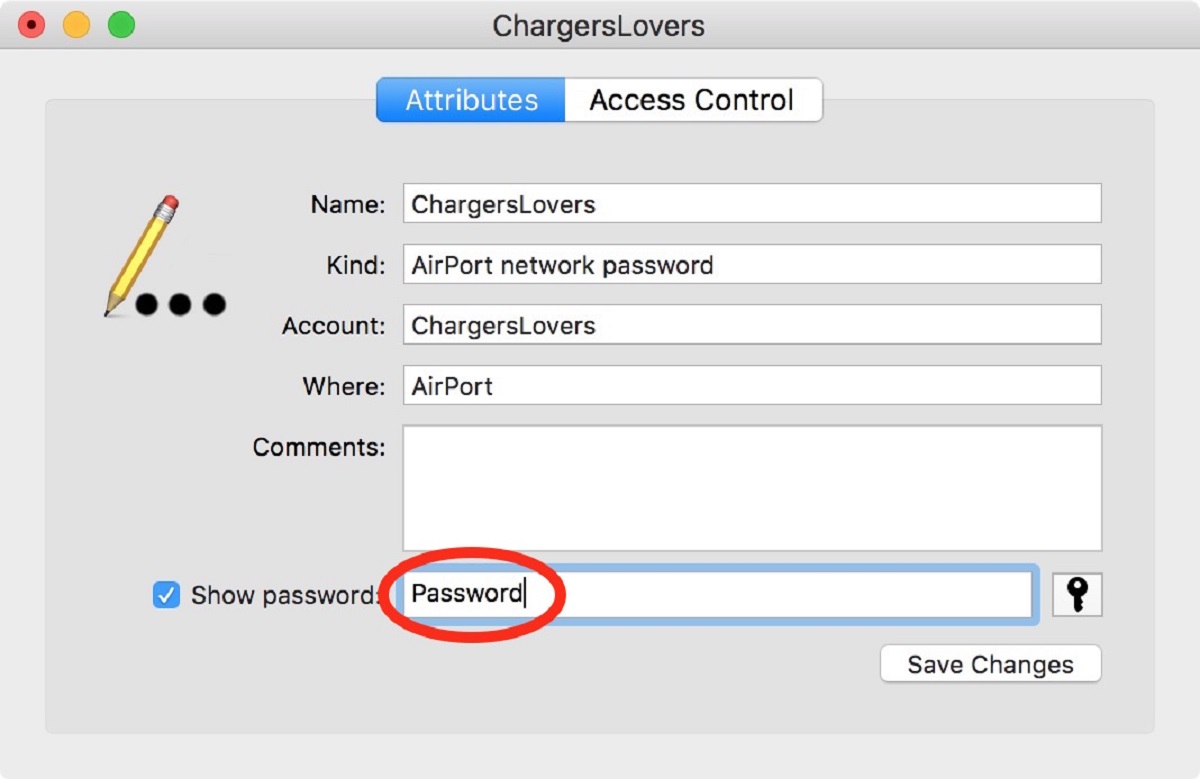
- Enter the Wi-Fi password if prompted. If you haven’t changed your Wi-Fi password, you can find it on the router or in the router’s manual.
- Wait for your device to connect to the newly named Wi-Fi network. Once connected, you can start using the internet and accessing online services.
- If you cannot see the new Wi-Fi network name on your device, double-check that the changes were saved on the router and that the router has restarted properly. If necessary, repeat the steps from the previous sections to enter and save the new Wi-Fi name.
By following these steps and confirming the Wi-Fi name change, you can be confident that your devices are connected to the correct network and enjoying a personalized and secure Wi-Fi experience.
Conclusion
Changing the Wi-Fi network name on an AT&T router is a simple process that allows you to personalize your network and enhance its security. By following the step-by-step guide outlined above, you can easily navigate the router settings, log in to the router, and access the Wi-Fi settings page. From there, you can change the Wi-Fi network name to a unique and identifiable one of your choice.
Remember, the Wi-Fi network name (SSID) change will not disrupt your internet service or connected devices. However, you will need to reconnect your devices to the newly named network using the updated SSID and, if necessary, the Wi-Fi password.
It’s essential to choose a new Wi-Fi name that is distinct and easy to recognize among other networks to ensure a seamless connection experience for you and your devices. Avoid using any personally identifiable information or sensitive data in the network name for security reasons.
Should you encounter any difficulties during the process or if the Wi-Fi name change doesn’t reflect as expected, referring to the router’s manual or reaching out to AT&T customer support can provide additional assistance.
Now that you have successfully changed your Wi-Fi network name, enjoy a personalized and secure wireless experience with your AT&T router!