Introduction
Netflix has revolutionized the way we watch television shows and movies. With its extensive library of content and user-friendly interface, it has become the go-to streaming platform for millions of people around the world. One of the key factors that contribute to the overall streaming experience is video quality.
Video quality refers to the resolution and clarity of the video playback. It determines how sharp and detailed the images appear on your screen. Netflix offers a range of video quality options to suit different internet connection speeds and preferences. By adjusting the video quality, you can ensure optimal viewing experience without buffering or lagging issues.
Changing the video quality on your Netflix Smart TV is a simple yet essential step to enhance your streaming experience. Whether you want to enjoy your favorite TV show in stunning high definition or reduce data consumption while streaming, adjusting the video quality settings can make a significant difference.
In this guide, we will walk you through the step-by-step process of changing the video quality on your Netflix Smart TV, allowing you to customize your streaming experience to suit your needs.
What is Video Quality?
Video quality encompasses the technical aspects that determine the visual experience while watching videos. It refers to the resolution, frame rate, and overall clarity of the images and is crucial in determining the level of detail and realism in the content.
The resolution of a video is determined by the number of pixels it contains. The higher the resolution, the more detailed and sharp the images will appear. Common video resolutions include Standard Definition (SD), High Definition (HD), and Ultra High Definition (UHD or 4K).
Frame rate, on the other hand, refers to the number of individual frames or images displayed per second. A higher frame rate results in smoother and more fluid motion, especially during fast-paced scenes or action sequences.
In addition to resolution and frame rate, video quality is also influenced by factors such as color accuracy, contrast, and brightness. These elements contribute to the overall visual experience and can make a noticeable difference in how immersive and engaging the content is.
Netflix, as a leading streaming platform, offers a variety of video quality options to accommodate different preferences and internet connection speeds. The available options range from basic SD quality to the more advanced UHD quality, delivering stunning visuals for those with compatible devices and strong internet connections.
It’s important to note that the video quality you can enjoy may vary depending on your device, internet connection, and the specific content being streamed. Some older devices or slower internet connections may not support higher resolutions or smooth playback at higher frame rates.
Understanding video quality allows you to make informed decisions when it comes to adjusting the settings on your Netflix Smart TV. Whether you prefer a balance between visual quality and data usage or aim for the best possible viewing experience, having control over video quality empowers you to tailor your streaming experience to your liking.
Why Change Video Quality on Netflix?
There are several reasons why you might want to change the video quality on Netflix. Let’s take a closer look at the key benefits of adjusting the video quality settings:
1. Internet Connection: Not everyone has access to a high-speed internet connection. By reducing the video quality, you can prevent buffering issues and ensure smooth playback, even with a slower internet connection. This is particularly important for users who experience frequent interruptions or have limited data allowances.
2. Data Consumption: Streaming videos in higher quality can use a significant amount of data. For users with data caps or limited bandwidth, adjusting the video quality to a lower setting can help conserve data and prevent excessive usage charges. This is especially relevant when streaming on mobile devices or in areas with restricted data plans.
3. Device Compatibility: Not all devices support the highest video quality options. Older or less powerful devices may struggle with higher resolutions or frame rates, resulting in stuttering or lagging playback. By choosing an appropriate video quality setting, you can ensure optimal performance and smooth streaming on your specific device.
4. Enhanced Viewing Experience: On the flip side, if you own a high-end Smart TV or a device that supports 4K resolution, changing the video quality to the highest setting can provide a truly immersive viewing experience. With vibrant colors, sharp details, and smooth motion, you can enjoy your favorite movies and TV shows as if you were in a theater.
5. Battery Life: When streaming on portable devices such as smartphones or tablets, reducing the video quality can help conserve battery life. Higher quality videos require more processing power and can drain your device’s battery at a faster rate. Adjusting the video quality to a lower setting can extend your viewing time without worrying about running out of battery.
Remember, the video quality you choose should be based on your specific needs and constraints. Whether you prioritize data conservation, device performance, or optimal viewing experience, Netflix provides a range of video quality settings to cater to your preferences.
How to Change Video Quality on Netflix Smart TV
Adjusting the video quality on your Netflix Smart TV is a straightforward process. Follow these simple steps to optimize your streaming experience:
Step 1: Open Netflix App on Your Smart TV
To begin, turn on your Smart TV and launch the Netflix app. If you haven’t installed it already, you can download it from your TV’s app store.
Step 2: Go to Settings
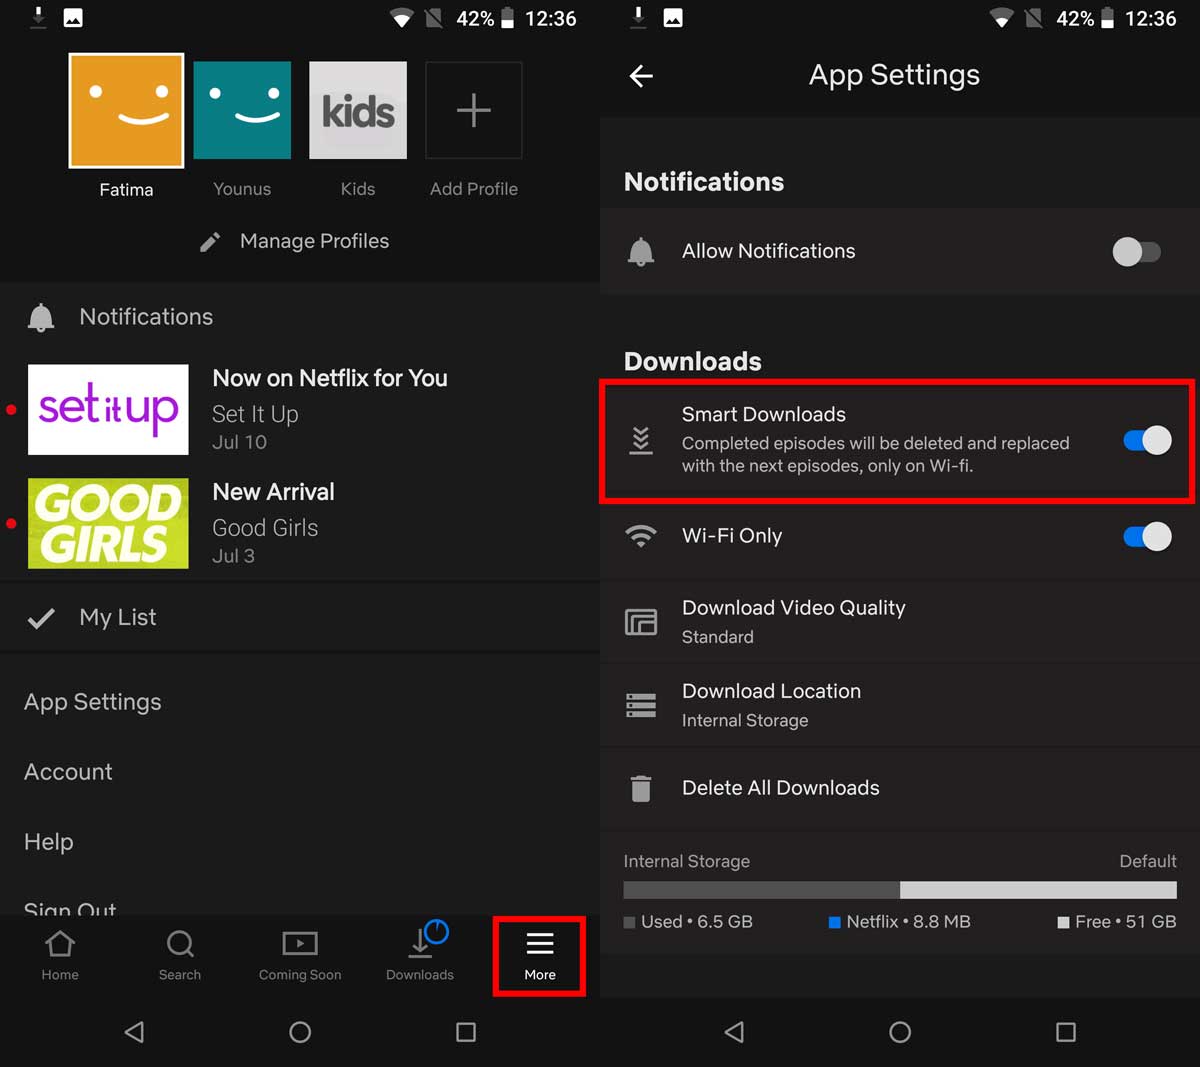
Once you’re in the Netflix app, navigate to the settings menu. The location of the settings may vary depending on your TV’s interface, but it is typically represented by a gear or cog icon.
Step 3: Select the “Playback Settings” Option
Within the settings menu, look for an option called “Playback Settings” or something similar. This is where you can adjust the video quality settings.
Step 4: Choose the Desired Video Quality
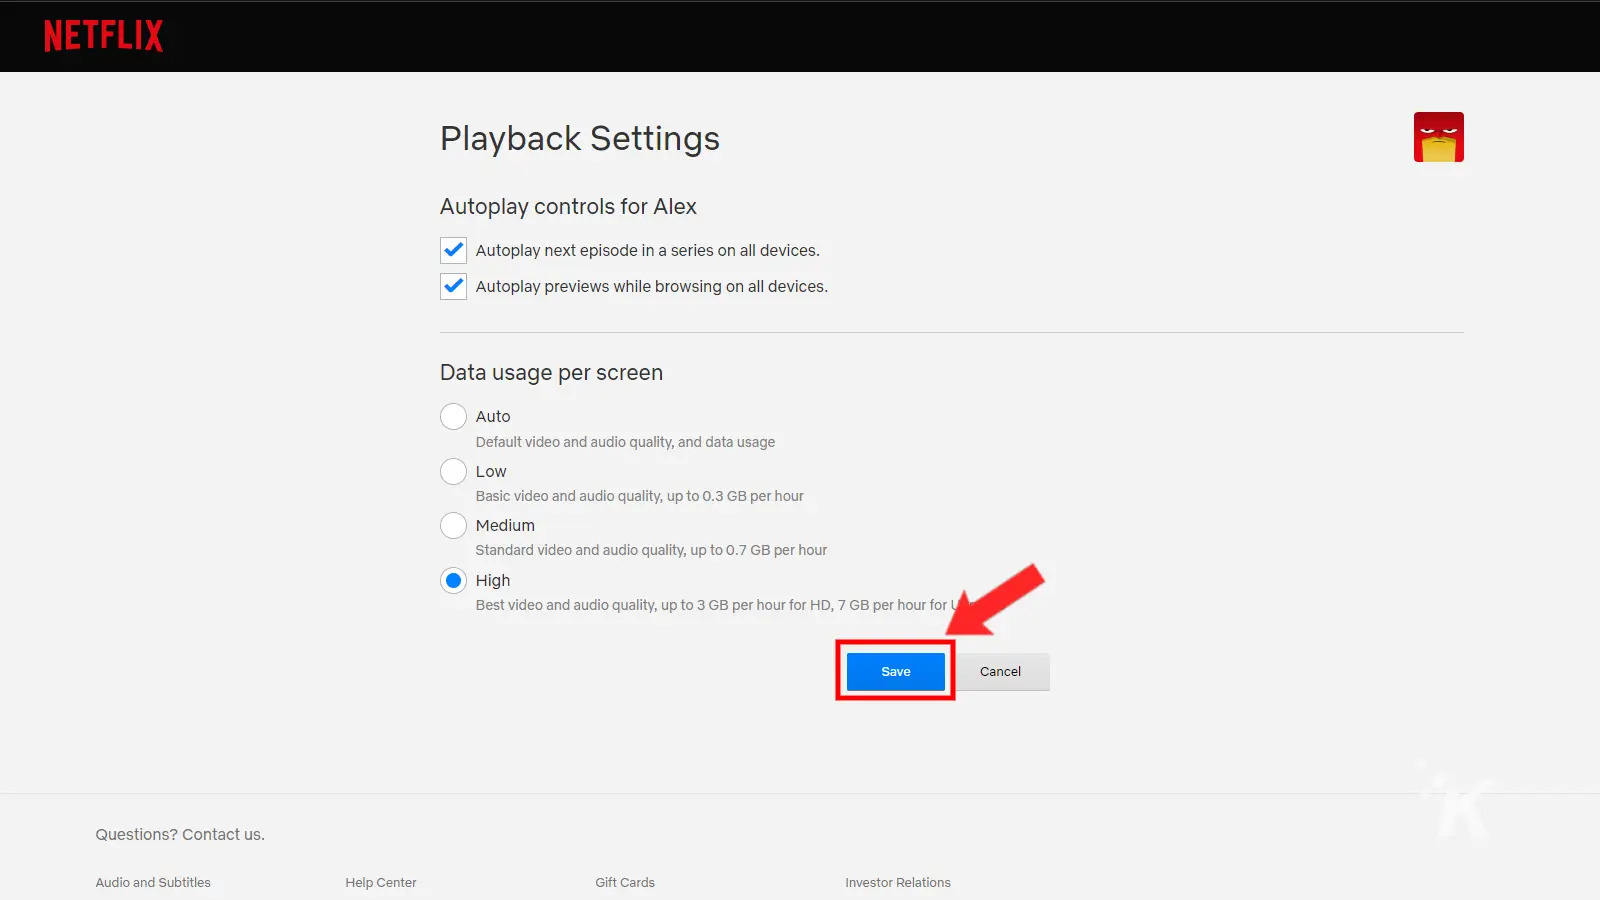
Now, you will be presented with a list of video quality options. Netflix offers different settings, such as Auto, Low, Medium, High, and even Ultra High Definition (UHD) or 4K, depending on your TV’s compatibility.
Auto: Selecting the “Auto” option allows Netflix to automatically adjust the video quality based on your internet connection speed and device capabilities.
Low: This option reduces the video quality to a standard definition (SD) resolution, ideal for slower internet connections or if you want to conserve data.
Medium: The “Medium” option balances video quality and data usage, offering a satisfactory viewing experience without straining your internet connection or consuming excessive data.
High: Choosing the “High” option ensures a high-definition (HD) video quality, suitable for devices with larger screens and faster internet connections.
UHD/4K: If your Smart TV supports Ultra High Definition (UHD) or 4K resolution, you will have the option to select this setting for the highest quality viewing experience.
Step 5: Save Settings and Enjoy Your New Video Quality
After selecting your preferred video quality, save the settings and exit the menu. Your Netflix Smart TV will now stream content in the chosen video quality, providing you with an optimized viewing experience.
Remember, if you’re experiencing any streaming issues or your selected video quality is not suitable, you can always go back to the settings and make adjustments to find the best setting for your specific situation.
Step 1: Open Netflix app on your Smart TV
Before you can change the video quality on your Netflix Smart TV, you need to open the Netflix app. Here’s how to do it:
1. Turn on your Smart TV and ensure it’s connected to the internet.
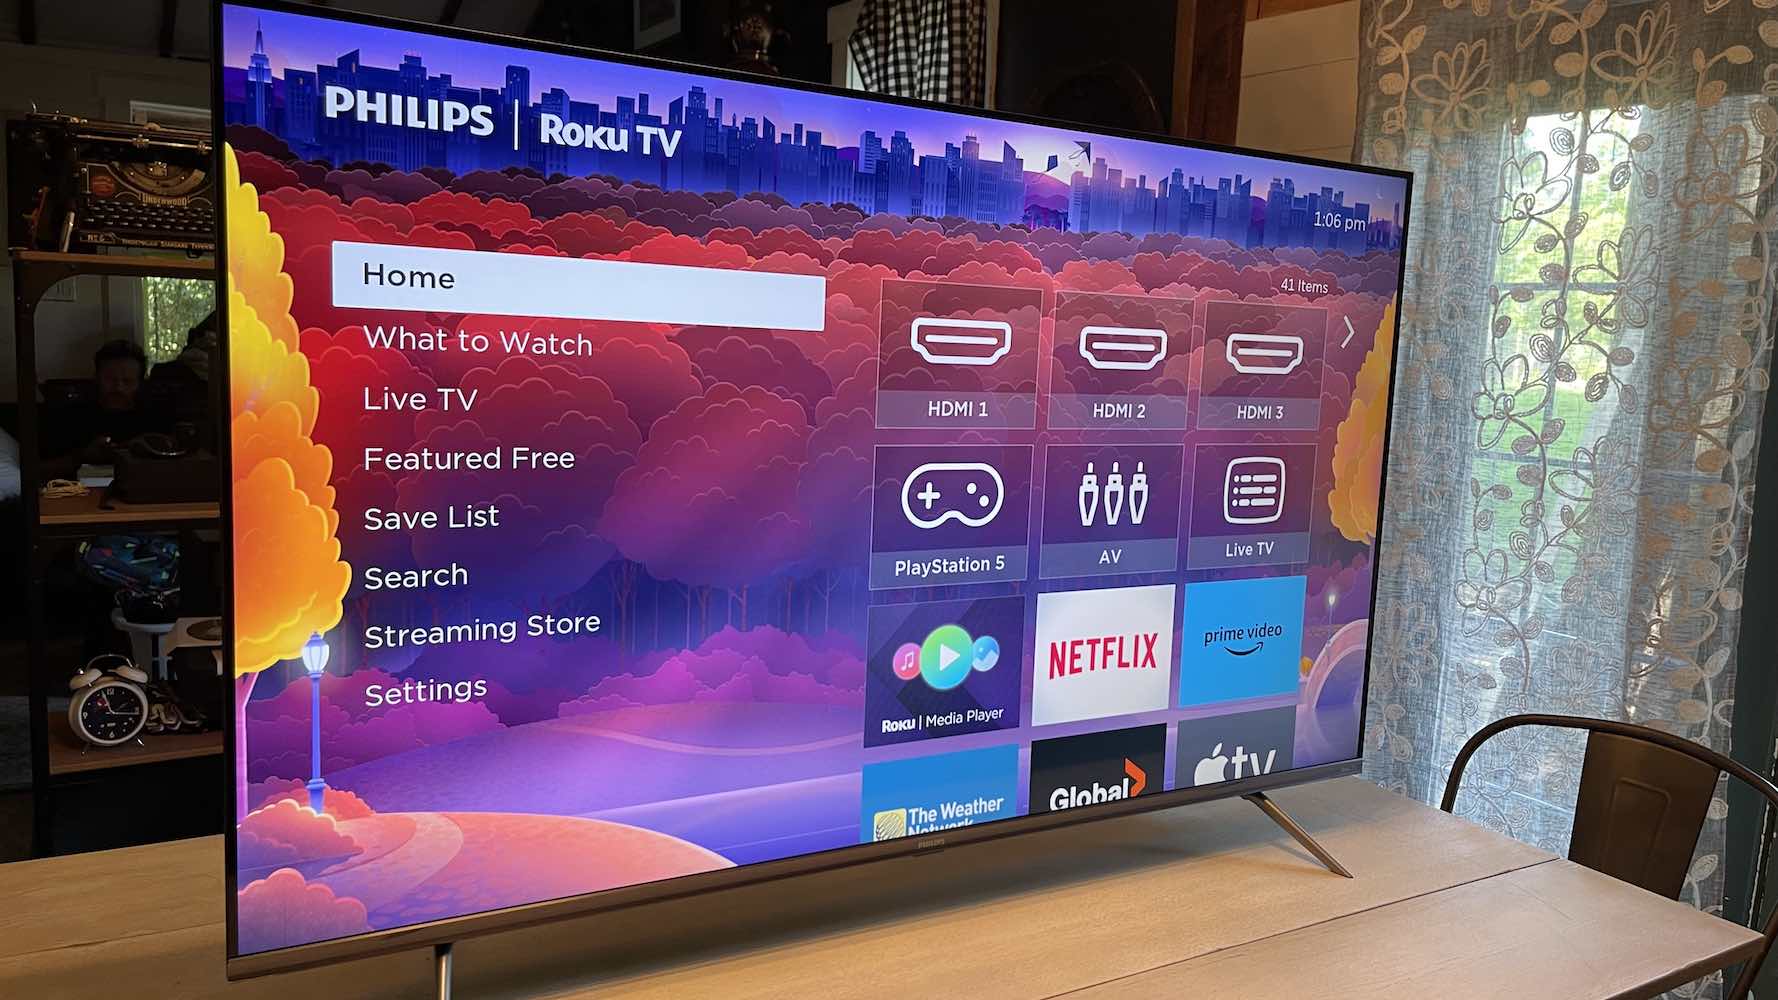
2. Using your TV’s remote control, navigate to the home screen or main menu.
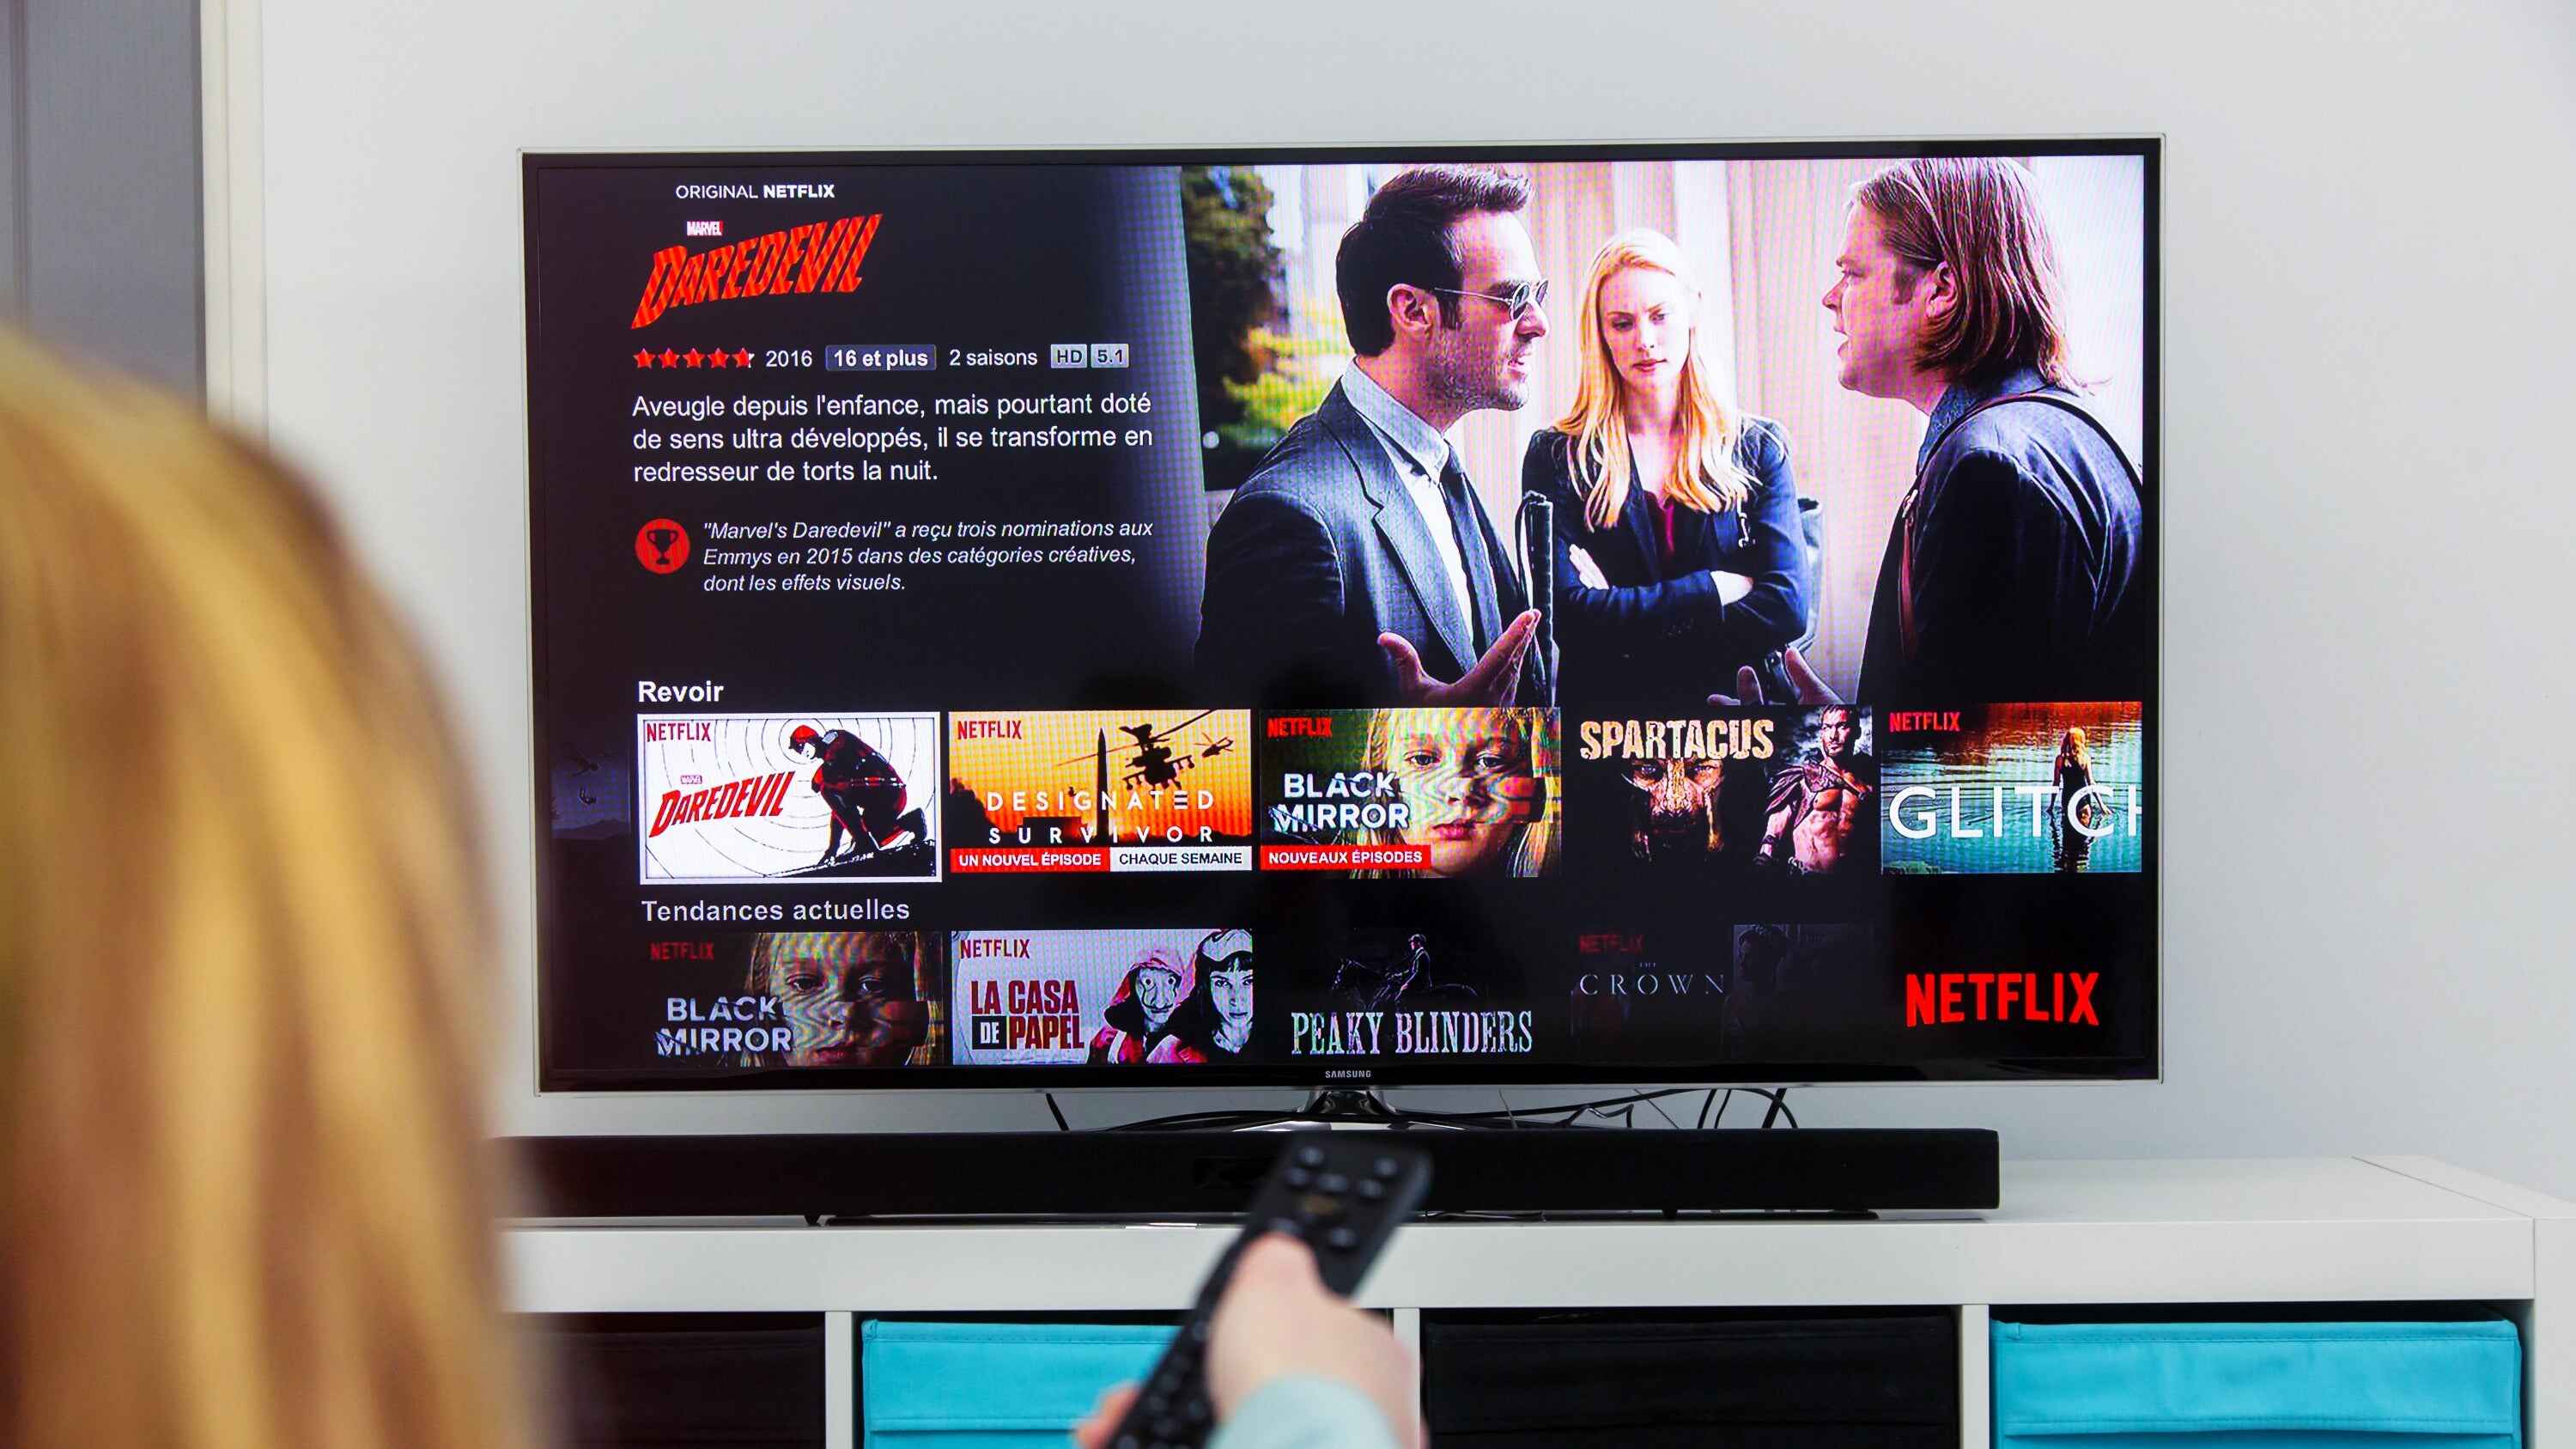
3. Look for the Netflix app icon. It’s usually represented by the company’s red and white logo.
4. Select the Netflix app by highlighting it and pressing the “Enter” or “OK” button on your remote.
5. If you haven’t already logged in to your Netflix account, you will be prompted to do so. Enter your Netflix login credentials, including your email address or phone number, and password.
6. Once logged in, the Netflix app will open, displaying a vast library of TV shows, movies, and other content.
7. You are now ready to proceed to the next step and access the settings to change the video quality settings.
Keep in mind that the exact process of opening the Netflix app may differ slightly depending on your Smart TV brand and model. The remote control buttons and menu navigation may vary, but the general steps should be similar.
If you experience any issues opening the Netflix app, make sure your internet connection is stable and try power cycling your Smart TV by turning it off, unplugging it from the power source, waiting a few minutes, and then plugging it back in and turning it on. This can often resolve temporary glitches and connectivity problems.
Once you have successfully opened the Netflix app on your Smart TV, you can proceed to the next step and navigate to the settings menu to change the video quality settings.
Step 2: Go to Settings
After opening the Netflix app on your Smart TV, the next step in changing the video quality is to access the settings menu. Here’s how to do it:
1. Using your remote control, navigate to the home screen or main menu of your Smart TV.
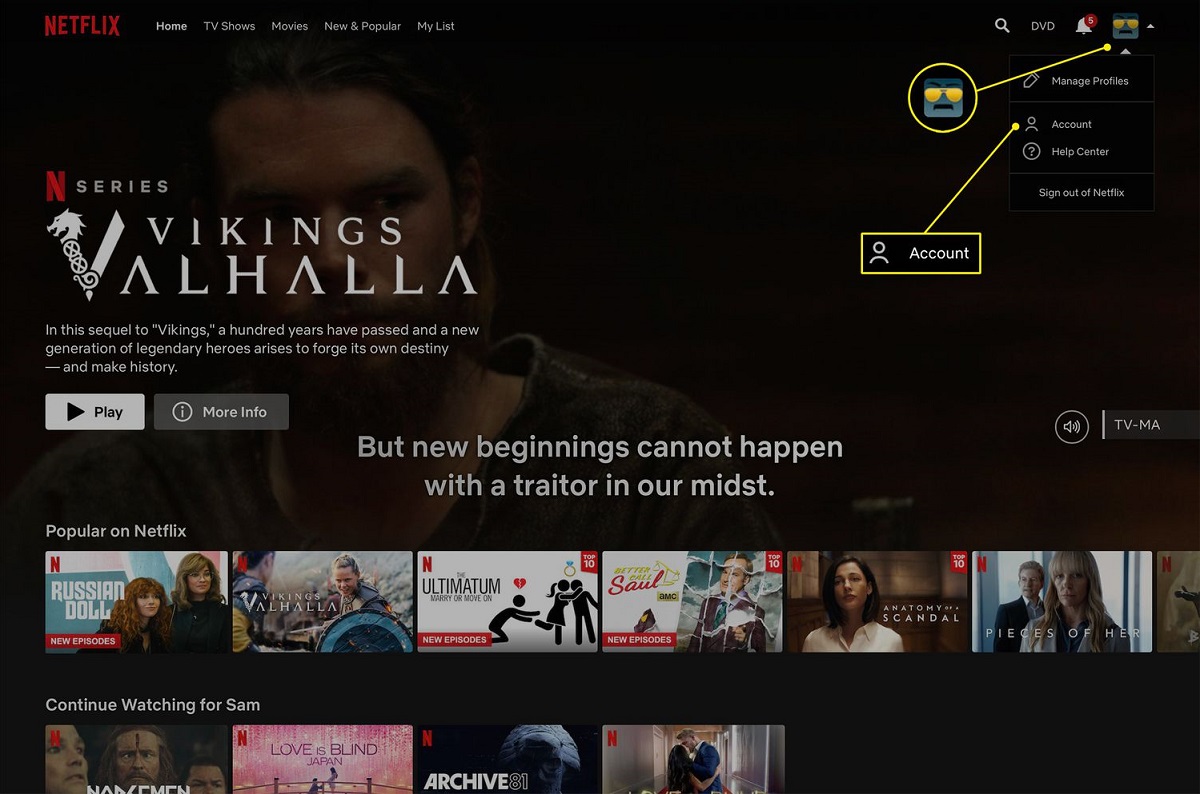
2. Look for the settings icon, which is often represented by a gear or cog symbol. It is typically located at the top, bottom, or side of the screen.
3. Once you have located the settings icon, highlight it and press the “Enter” or “OK” button on your remote to enter the settings menu.
4. In the settings menu, you will find various options and settings for your Smart TV. These settings may include picture settings, audio settings, network settings, and more.
5. Navigate through the settings menu using the arrow buttons on your remote control. Depending on your TV model, you may also have a dedicated button specifically for accessing the settings menu.
6. Continue scrolling or navigating until you find the Netflix settings. The exact location of this option may vary depending on your TV’s interface and layout.
7. Once you have found the Netflix settings, highlight it and press the “Enter” or “OK” button on your remote to enter the Netflix settings menu.
By accessing the settings menu, you are one step closer to changing the video quality settings on your Netflix Smart TV. It’s important to note that the appearance and organization of the settings menu may vary depending on the brand and model of your Smart TV.
If you encounter any difficulties locating the settings icon or navigating through the settings menu, consult your TV’s user manual or visit the manufacturer’s website for specific instructions tailored to your TV model.
Once you have successfully entered the settings menu, you can proceed to the next step and select the “Playback Settings” option to adjust the video quality settings on Netflix.
Step 3: Select the “Playback Settings” option
Once you have accessed the settings menu on your Netflix Smart TV, the next step is to find and select the “Playback Settings” option. This allows you to adjust the video quality settings to your preference. Here’s how to do it:
1. Within the settings menu, navigate through the available options using the arrow buttons on your remote control. Keep scrolling or navigating until you find the “Playback Settings” option.
2. Highlight the “Playback Settings” option using the arrow buttons on your remote control.
3. Once the “Playback Settings” option is highlighted, press the “Enter” or “OK” button on your remote control to select it.
4. The “Playback Settings” menu will now open, displaying a range of video quality options for you to choose from.
The exact location and appearance of the “Playback Settings” option may vary depending on your Smart TV model and interface. However, it is commonly found within the settings menu and should be easily accessible.
If you are having trouble locating the “Playback Settings” option, refer to your TV’s user manual or visit the manufacturer’s website for specific instructions tailored to your TV model.
By selecting the “Playback Settings” option, you are now ready to adjust the video quality settings according to your preferences and requirements. In the next step, you will be given several video quality options to choose from, allowing you to customize your streaming experience on Netflix.
Note that some older Smart TVs may not have the option to adjust the video quality settings within the Netflix app. In such cases, the app will automatically adjust the video quality based on your internet connection and available device resources.
Now that you have successfully selected the “Playback Settings” option, let’s proceed to the next step and choose the desired video quality setting.
Step 4: Choose the desired video quality
After selecting the “Playback Settings” option, it’s time to choose the video quality setting that best suits your needs and preferences. Netflix offers several options, allowing you to customize your streaming experience on your Smart TV. Here’s how to choose the desired video quality:
1. Within the “Playback Settings” menu, you will see a list of video quality options. These options may include:
- Auto: This option allows Netflix to automatically adjust the video quality based on your internet connection and device capabilities.
- Low: Selecting the “Low” option reduces the video quality to a standard definition (SD) resolution, ideal for slower internet connections or if you want to conserve data.
- Medium: The “Medium” option balances video quality and data usage, offering a satisfactory viewing experience without straining your internet connection or consuming excessive data.
- High: Choosing the “High” option ensures a high-definition (HD) video quality, suitable for devices with larger screens and faster internet connections.
- UHD/4K: If your Smart TV supports Ultra High Definition (UHD) or 4K resolution, you will have the option to select this setting for the highest quality viewing experience.
2. Using the arrow buttons on your remote control, navigate to the desired video quality option.
3. Once you have highlighted the desired video quality option, press the “Enter” or “OK” button on your remote control to select it.
4. The selected video quality setting will be applied to your Netflix streaming experience on your Smart TV.
Remember that the available video quality options may vary depending on your Smart TV model, device compatibility, and internet connection speed. Not all options may be available to you.
If you’re unsure which video quality setting to choose, consider factors such as your internet connection speed, device capability, and personal preferences. For example, if you have a slow internet connection or want to conserve data, selecting a lower video quality option may be more suitable. On the other hand, if you have a fast and stable internet connection, you can enjoy higher video quality settings for a more immersive viewing experience.
Once you have chosen the desired video quality, you can proceed to the next step to save the settings and start enjoying your favorite TV shows and movies in your preferred video quality.
Step 5: Save settings and enjoy your new video quality
After selecting the desired video quality setting on your Netflix Smart TV, the final step is to save the settings and start enjoying your chosen video quality. Here’s how to do it:
1. Once you have selected the desired video quality option, navigate to the “Save” or “Apply” button using the arrow buttons on your remote control.
2. Highlight the “Save” or “Apply” button and press the “Enter” or “OK” button on your remote control to save the selected video quality settings.
3. The settings menu will now close, and your Netflix app on the Smart TV will automatically adjust the video quality based on your selection.
4. You can now start streaming your favorite TV shows and movies on Netflix with the newly applied video quality settings.
Remember, it may take a few moments for the video quality settings to be applied and take effect. Once the settings have been saved, any content you watch on Netflix will be streamed in the selected video quality.
Enjoying your new video quality setting is as simple as selecting the appropriate option and saving the settings. Whether you prefer the sharpness of high-definition (HD) or the incredible detail of Ultra High Definition (UHD), Netflix provides a range of video quality options to ensure you have the best viewing experience.
If you ever wish to change the video quality settings in the future, you can simply repeat the steps outlined in this guide. Access the Netflix app, navigate to the settings menu, select the “Playback Settings” option, and choose the desired video quality.
Remember, the video quality you can enjoy may vary depending on factors such as your internet connection speed, device capability, and Netflix subscription plan. Ensure that your internet connection is stable and capable of supporting the selected video quality for the optimal streaming experience.
Now that you have successfully saved the video quality settings, sit back, relax, and enjoy your favorite movies and TV shows in the selected video quality on your Netflix Smart TV.
Conclusion
Adjusting the video quality on your Netflix Smart TV allows you to tailor your streaming experience to your preferences and requirements. By following the simple steps outlined in this guide, you can easily change the video quality settings and enhance your enjoyment of TV shows, movies, and other content on Netflix.
We explored the importance of video quality and how it affects the resolution, frame rate, and overall visual experience. Understanding these factors enables you to make informed decisions when adjusting the video quality settings on your Smart TV.
Changing the video quality on Netflix offers several benefits. You can adapt to your internet connection, conserve data, ensure device compatibility, and enjoy an enhanced viewing experience. Whether you have a slow internet connection or a high-end Smart TV, Netflix provides a range of video quality options to suit your needs.
The step-by-step process covered opening the Netflix app, navigating to the settings menu, selecting the “Playback Settings” option, choosing the desired video quality, and saving the settings. These instructions empower you to take control and customize your streaming experience on your Netflix Smart TV.
Remember, the video quality options available may vary depending on your device, internet connection, and Netflix subscription plan. It is important to consider these factors when selecting the most suitable video quality setting.
Now that you have successfully adjusted the video quality settings on your Netflix Smart TV, you can sit back, relax, and enjoy your favorite TV shows and movies in the optimal video quality. Whether you prefer a high-definition (HD) experience or want to conserve data, Netflix provides the flexibility to cater to your preferences.
By understanding how to change the video quality settings on your Smart TV, you can enhance your streaming experience and take full advantage of what Netflix has to offer.
So, grab your remote control, follow the steps outlined in this guide, and start streaming your favorite content in your preferred video quality on your Netflix Smart TV today.