Introduction
Welcome to the world of Apple Watch, a revolutionary piece of technology that not only keeps you connected, but also allows you to express your personal style. One of the customizable features of the Apple Watch is the ability to change the ringtone. By setting a unique ringtone, you can add a touch of personality to your device and ensure that you never miss an important call or notification.
In this article, we will guide you through the simple steps to change the ringtone on your Apple Watch. Whether you want to select a pre-installed ringtone or customize your own, we’ve got you covered. So, grab your iPhone and let’s dive into the world of Apple Watch customization!
Before we begin, please ensure that your Apple Watch is paired and connected to your iPhone, as the changes you make to the ringtone will be synced between the two devices. Now, let’s get started on personalizing your Apple Watch ringtone!
Step 1: Open the “Watch” app on your iPhone
The first step to changing your Apple Watch ringtone is to open the “Watch” app on your iPhone. This app is pre-installed on your iPhone and is used to manage all the settings and customizations for your Apple Watch.
To locate the “Watch” app, simply swipe down on your iPhone’s home screen and then type “watch” in the search bar at the top of the screen. The app icon will appear, and you can tap on it to open the app.
Once you have launched the “Watch” app, you will see a series of tabs at the bottom of the screen. Tap on the “My Watch” tab at the bottom left corner. This will take you to a screen where you can view and manage various settings for your Apple Watch.
Within the “My Watch” tab, scroll down until you see the “Sounds & Haptics” option. This is where you can access the settings related to your Apple Watch’s sound and vibration settings, including the ringtone.
Now that you have successfully opened the “Watch” app on your iPhone and accessed the “Sounds & Haptics” settings, you are ready to move on to the next step of changing your Apple Watch ringtone.
Step 2: Select the “Sounds & Haptics” option
Once you have opened the “Watch” app on your iPhone and accessed the main “My Watch” tab, it’s time to select the “Sounds & Haptics” option. This is where you will find all the settings related to the sound and vibration features of your Apple Watch.
To select the “Sounds & Haptics” option, simply tap on it from the list of available settings on the “My Watch” screen. This will take you to a new screen where you can modify and customize various sound-related options for your Apple Watch.
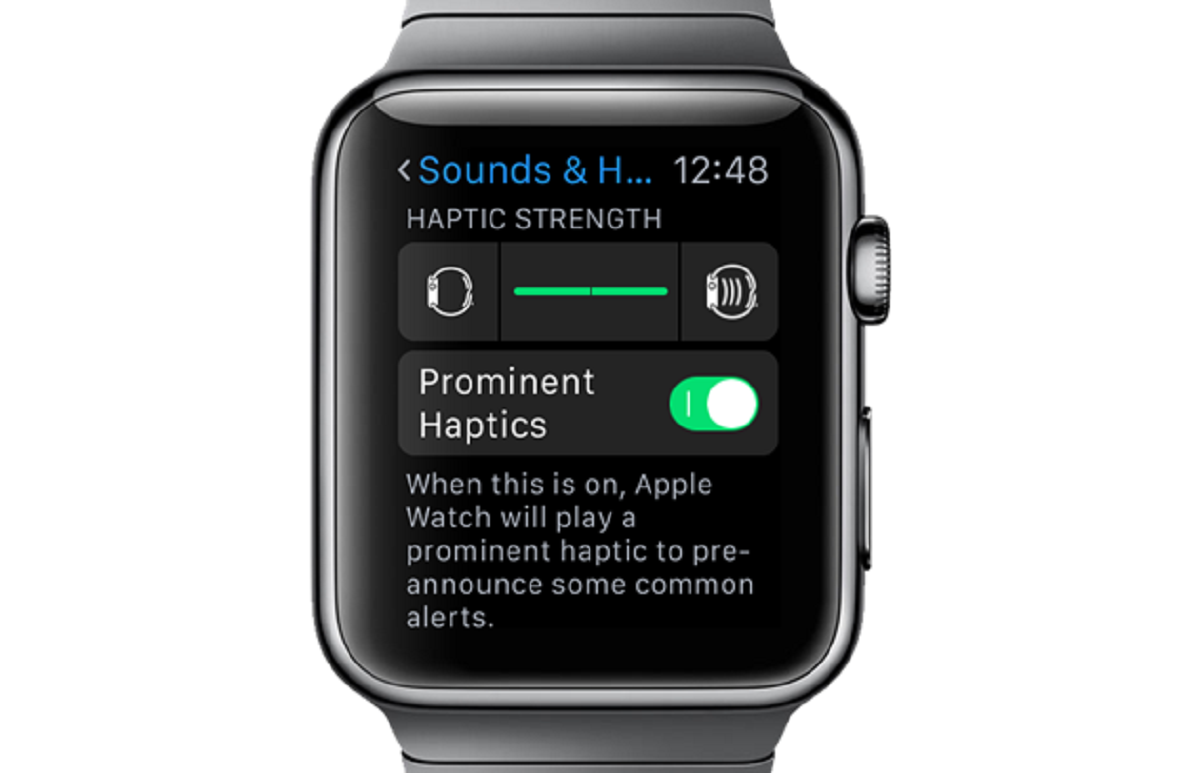
On the “Sounds & Haptics” screen, you will see multiple sections, including “Silent Mode,” “Alert Volume,” and “Haptic Strength.” However, for the purpose of changing the ringtone, focus on the “Sounds and Vibration Patterns” section.
In this section, you will find the “Ringtone” option. By default, your Apple Watch is set to a specific ringtone, but we will show you how to change it to something more to your liking.
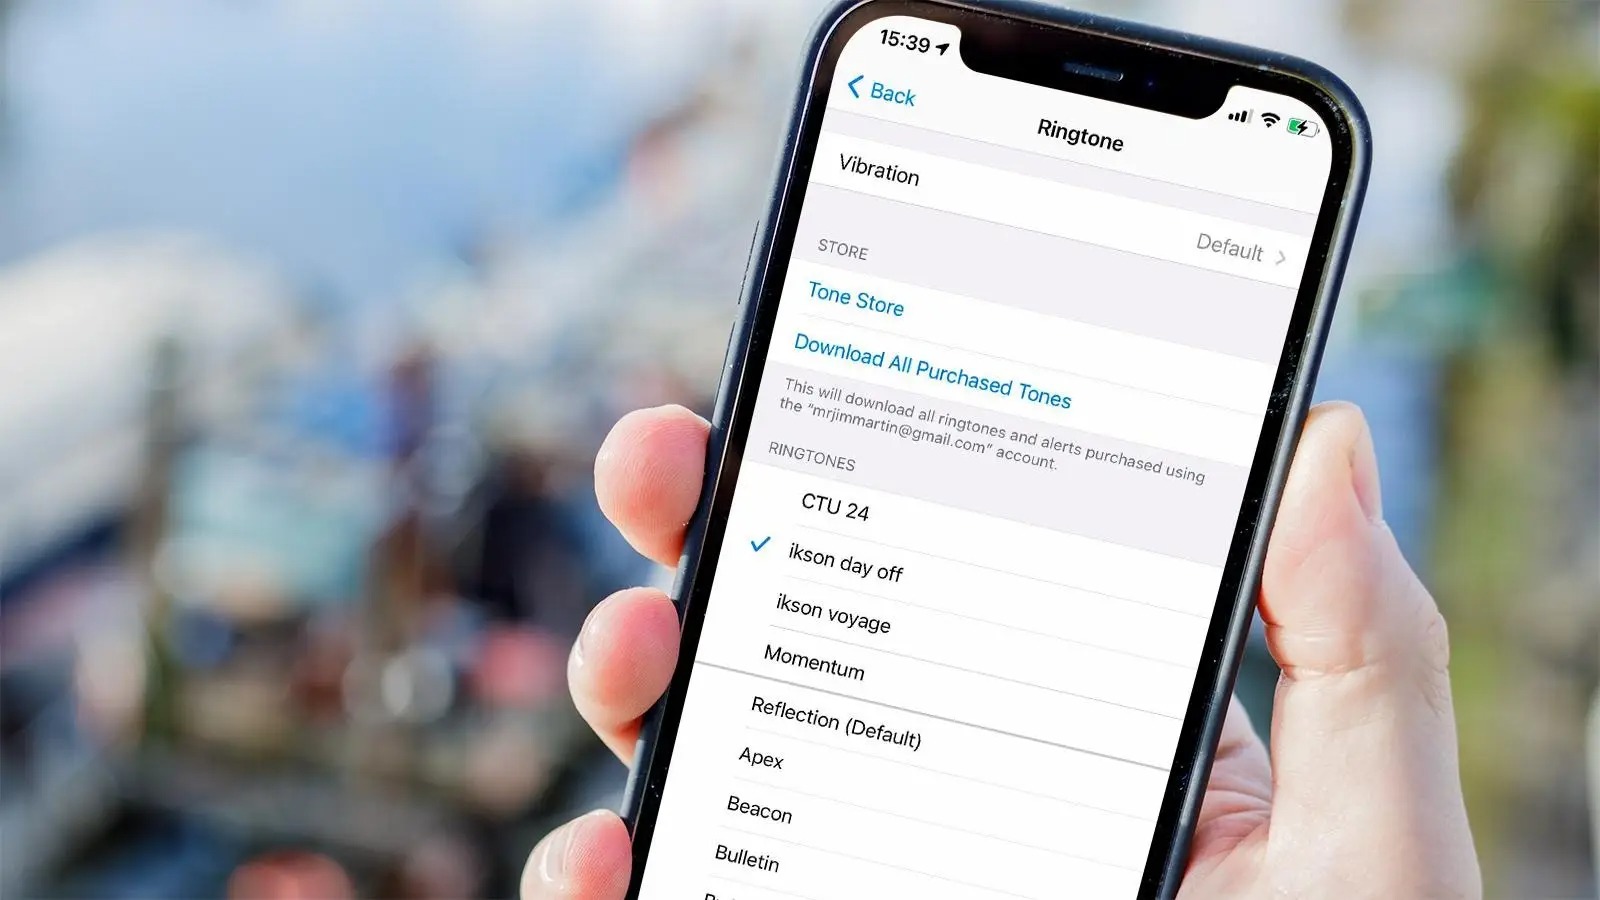
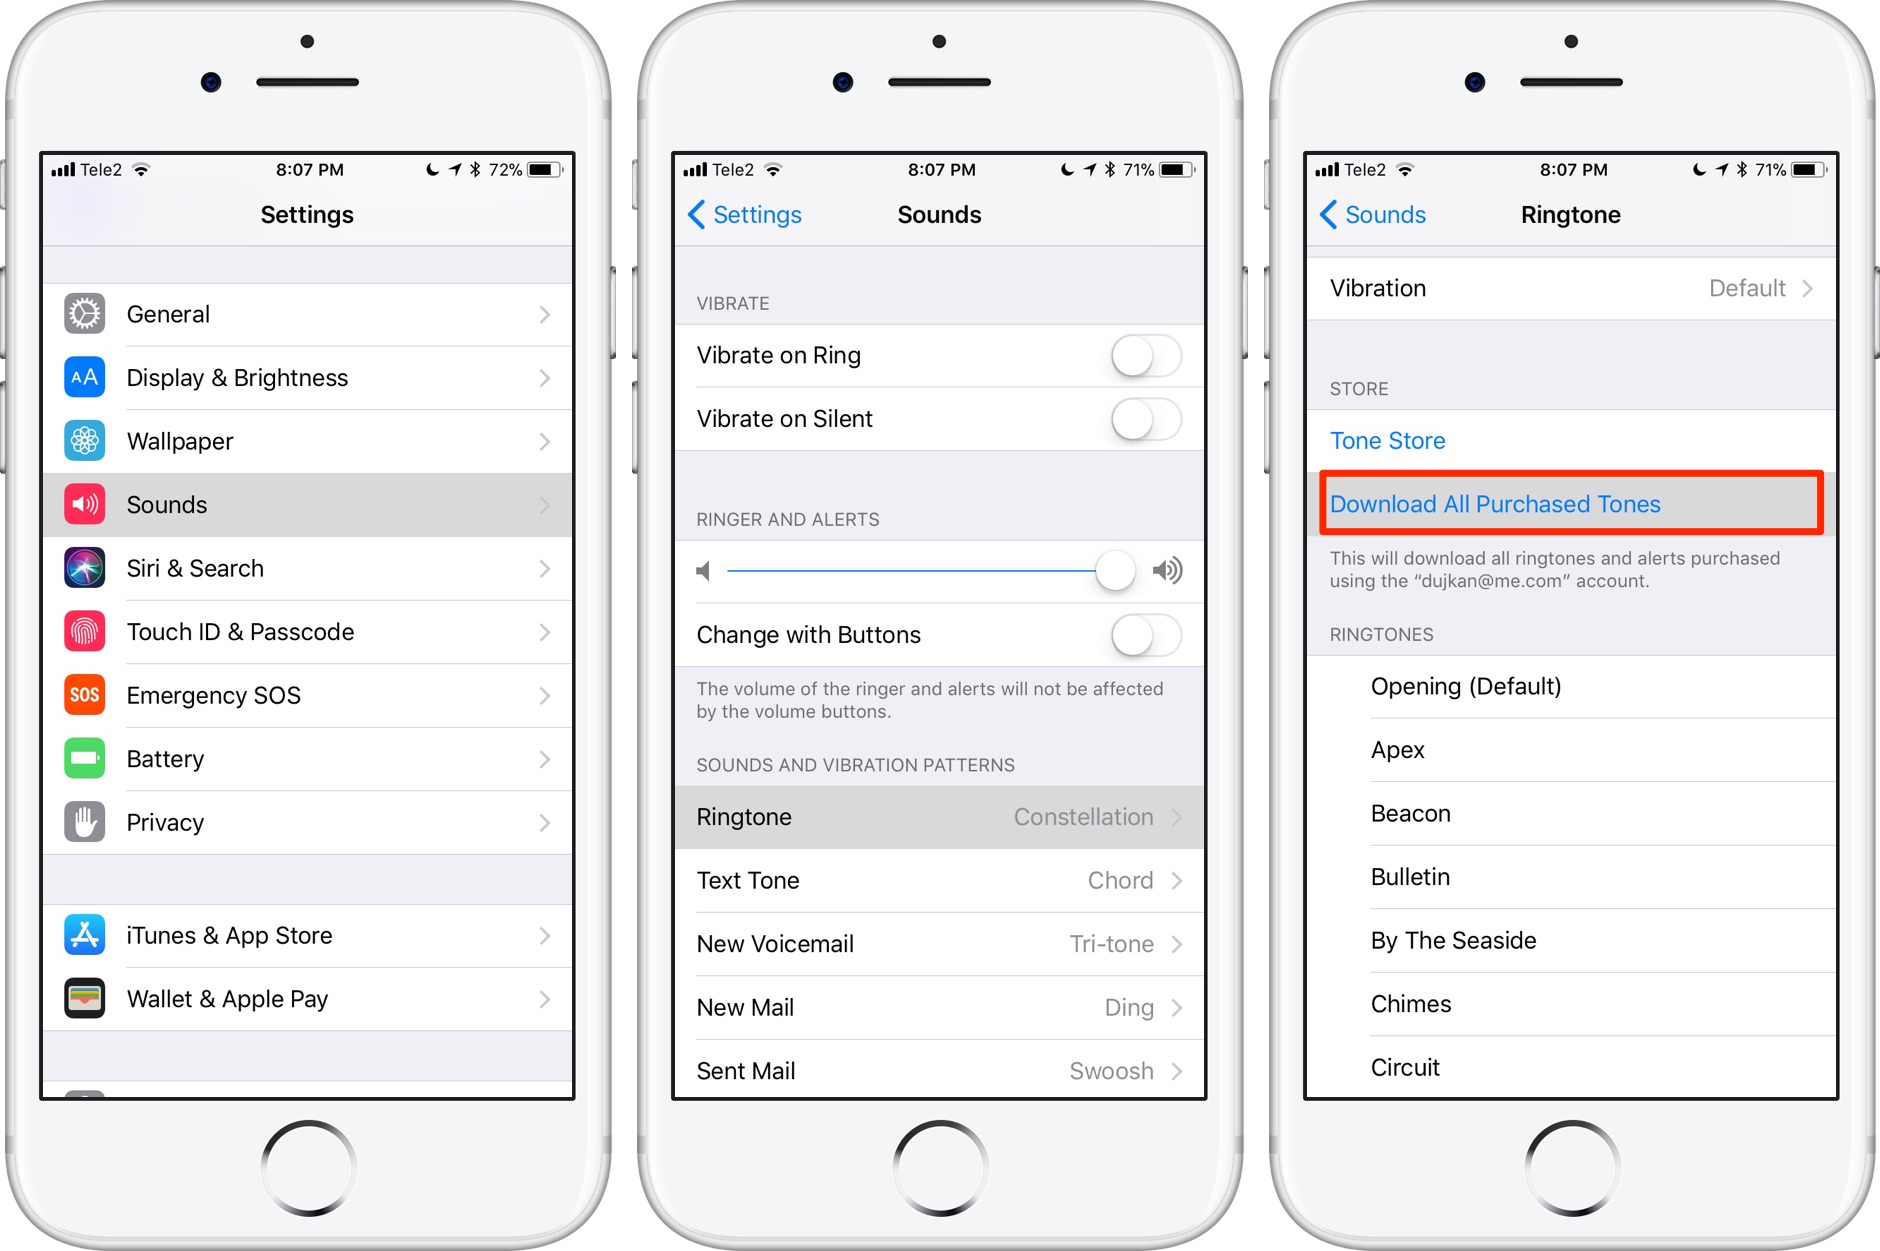
Tap on the “Ringtone” option, and you will now see a list of available ringtones for your Apple Watch. These ringtones are pre-installed on your device, and you can choose from a variety of different sounds, ranging from subtle and soothing to bold and attention-grabbing.
Scroll through the list and listen to the different ringtones by tapping on them. This will give you a preview of what each ringtone sounds like. Once you have found the perfect ringtone for your Apple Watch, you’re ready to move on to the next step of customizing it further.
Step 3: Choose the desired ringtone
Now that you have accessed the “Sounds & Haptics” settings on your Apple Watch, it’s time to choose the desired ringtone. This step allows you to select a ringtone from the pre-installed options on your device.
When you tap on the “Ringtone” option within the “Sounds & Haptics” section, you will be presented with a list of available ringtones. Take your time to scroll through the list and listen to the different options. Each ringtone has a distinct sound, so choose the one that resonates with your personal preference and style.
As you explore the available ringtones, pay attention to the different tones, melodies, and rhythms. You may find ringtone options that range from simple and classic to modern and upbeat. Consider the atmosphere in which you’ll be using your Apple Watch and choose a ringtone that matches your lifestyle and surroundings.
While browsing through the list, you can tap on any ringtone to hear a preview. Take advantage of this feature to ensure that you are selecting the ringtone that suits your taste and preferences. If you can’t decide on one particular ringtone, don’t worry – you can always come back and change it later.
Remember, the ringtone you choose should not only be pleasant to your ears but also loud and distinct enough to grab your attention when your Apple Watch notifies you of incoming calls, messages, or other alerts.
Once you have found the perfect ringtone for your Apple Watch, you’re ready to move on to the next step, where you can further customize your ringtone with vibrations.
Step 4: Customize your ringtone with vibrations
After you have chosen the desired ringtone for your Apple Watch, the next step is to customize it with vibrations. This allows you to have a unique combination of sound and physical feedback whenever you receive a notification or an incoming call on your device.
To customize your ringtone vibrations, find the “Vibration” option on the “Sounds & Haptics” screen. Tap on it, and you will be presented with a list of pre-installed vibration patterns.
Similar to the ringtone selection process, take your time to browse through the list and try out different vibration patterns. Each pattern has a different intensity and duration, providing you with a range of options to personalize your Apple Watch experience.
Tap on any vibration pattern to feel a preview of it on your wrist. This will give you an idea of how it feels and whether it complements the selected ringtone. You can experiment with different combinations of ringtones and vibrations until you find the perfect match that suits your preferences.
If you prefer a more personalized approach, you can even create a custom vibration pattern. To do this, scroll to the top of the “Vibration” screen and tap on the “Create New Vibration” option. You will be taken to a screen where you can tap on the display to create a unique vibration pattern of your own.
Once you are satisfied with your vibration selection, tap on the “Save” button to save the custom vibration pattern. It will now be available alongside the pre-installed options on the list.
Remember, the combination of sound and vibration should be pleasant to your senses and noticeable enough to alert you when your Apple Watch receives a notification. Experiment with different patterns until you find the perfect combination that matches your style and preferences.
Now that you have customized your ringtone with vibrations, it’s time to synchronize the changes to your Apple Watch. Let’s move on to the final step.
Step 5: Sync the changes to your Apple Watch
After choosing your desired ringtone and customizing it with vibrations, the final step is to sync the changes to your Apple Watch. This ensures that the ringtone and vibration settings are applied to your device and that you can start enjoying the personalized experience.
To sync the changes, ensure that your Apple Watch is paired and connected to your iPhone. The synchronization process between the two devices happens automatically when they are in close proximity and connected via Bluetooth.
Once the synchronization is complete, any changes made to the ringtone and vibration settings on your iPhone will be reflected on your Apple Watch. This means that the selected ringtone and customized vibrations will now be active on your watch.
To confirm that the changes have been synced, simply test the new ringtone by asking someone to call your iPhone or by sending a test notification to your Apple Watch. You should hear the chosen ringtone and feel the associated vibration pattern, confirming that the customization has been successfully applied.
If you encounter any difficulties with the synchronization process or if the changes are not reflected on your Apple Watch, ensure that both devices have a stable connection and try restarting them if needed. Additionally, make sure that you have the latest software updates installed on both your iPhone and Apple Watch.
Congratulations! You have successfully changed the ringtone on your Apple Watch and customized it with vibrations to suit your personal preference. Now, whenever you receive a call or notification, you will have a unique and personalized experience on your wrist.
Remember that you can always revisit the “Sounds & Haptics” settings on your iPhone to make further changes or to restore the default ringtone and vibration options. Enjoy the new ringtone and personalized experience on your Apple Watch!
Conclusion
Customizing the ringtone on your Apple Watch is a great way to add a personal touch to your device and make it reflect your unique style and preferences. By following the simple steps outlined in this article, you can easily change the ringtone and customize it with vibrations.
Opening the “Watch” app on your iPhone, selecting the “Sounds & Haptics” option, choosing the desired ringtone, customizing it with vibrations, and syncing the changes to your Apple Watch allows you to create a personalized experience every time you receive a call or notification.
Take the time to explore the available pre-installed ringtones and try out different vibration patterns. This will help you find the combination that suits your style and ensures that you never miss an important call or alert.
Remember, you also have the option to create your own custom vibration pattern, giving you even more control over the alerts on your Apple Watch.
Now that you have successfully customized your Apple Watch ringtone, wear it with pride and enjoy the personalized experience it brings. Stay connected and always be alerted in style!