Introduction
Welcome to our handy guide on how to change the default browser in Windows 10. The default browser is the web browser that opens automatically when you click on a link or open a web page. Windows 10 comes with Microsoft Edge as the default browser, but you have the flexibility to choose a different browser that suits your preferences and needs.
While Microsoft Edge offers some great features and improvements compared to its predecessor, Internet Explorer, you might prefer other browsers such as Google Chrome, Mozilla Firefox, or Opera. Changing the default browser allows you to enjoy a different browsing experience and take advantage of the unique features offered by your preferred browser.
Changing the default browser in Windows 10 is a straightforward process and can be done in just a few simple steps. In this article, we will walk you through the process, helping you set up your preferred browser as the default option.
Please note that the steps may vary slightly depending on the version of Windows 10 you are using. However, the overall process remains the same. So, let’s get started and learn how to change the default browser in Windows 10!
Step 1: Open Settings
The first step to changing the default browser in Windows 10 is to open the Settings menu. You can access the Settings menu through various methods:
- Click on the Start button and select the Settings gear icon from the left-hand side of the Start menu.
- Press the Windows key + I on your keyboard to directly open the Settings menu.
- Click on the Windows logo in the bottom-left corner of the screen and select the Settings icon.
Whichever method you choose, the result will be the same – the Settings menu will open, ready for you to make changes to your system settings.
Alternatively, you can right-click on the Windows Start button and select “Settings” from the context menu that appears. This will also take you directly to the Settings menu.
Once you have opened the Settings menu, you will see a variety of options categorized into different sections. Now, it’s time to move on to the next step and navigate to the Apps section, where we can make further changes.
Step 2: Go to Apps
After opening the Settings menu, the next step in changing the default browser in Windows 10 is to navigate to the Apps section. Here’s how you can do it:
- Within the Settings menu, you will notice several categories. Locate and click on the “Apps” category.
- The Apps category contains various subcategories related to apps and their settings. Choose the “Default apps” subcategory by clicking on it.
By selecting the Default apps subcategory, you will be able to modify the default settings for various types of apps on your Windows 10 system, including the default web browser.
At this point, you have successfully reached the Apps section, specifically the Default apps subcategory. This is where we can make the necessary changes to set a new default browser for your Windows 10 system. Let’s move on to the next step to proceed with the process.
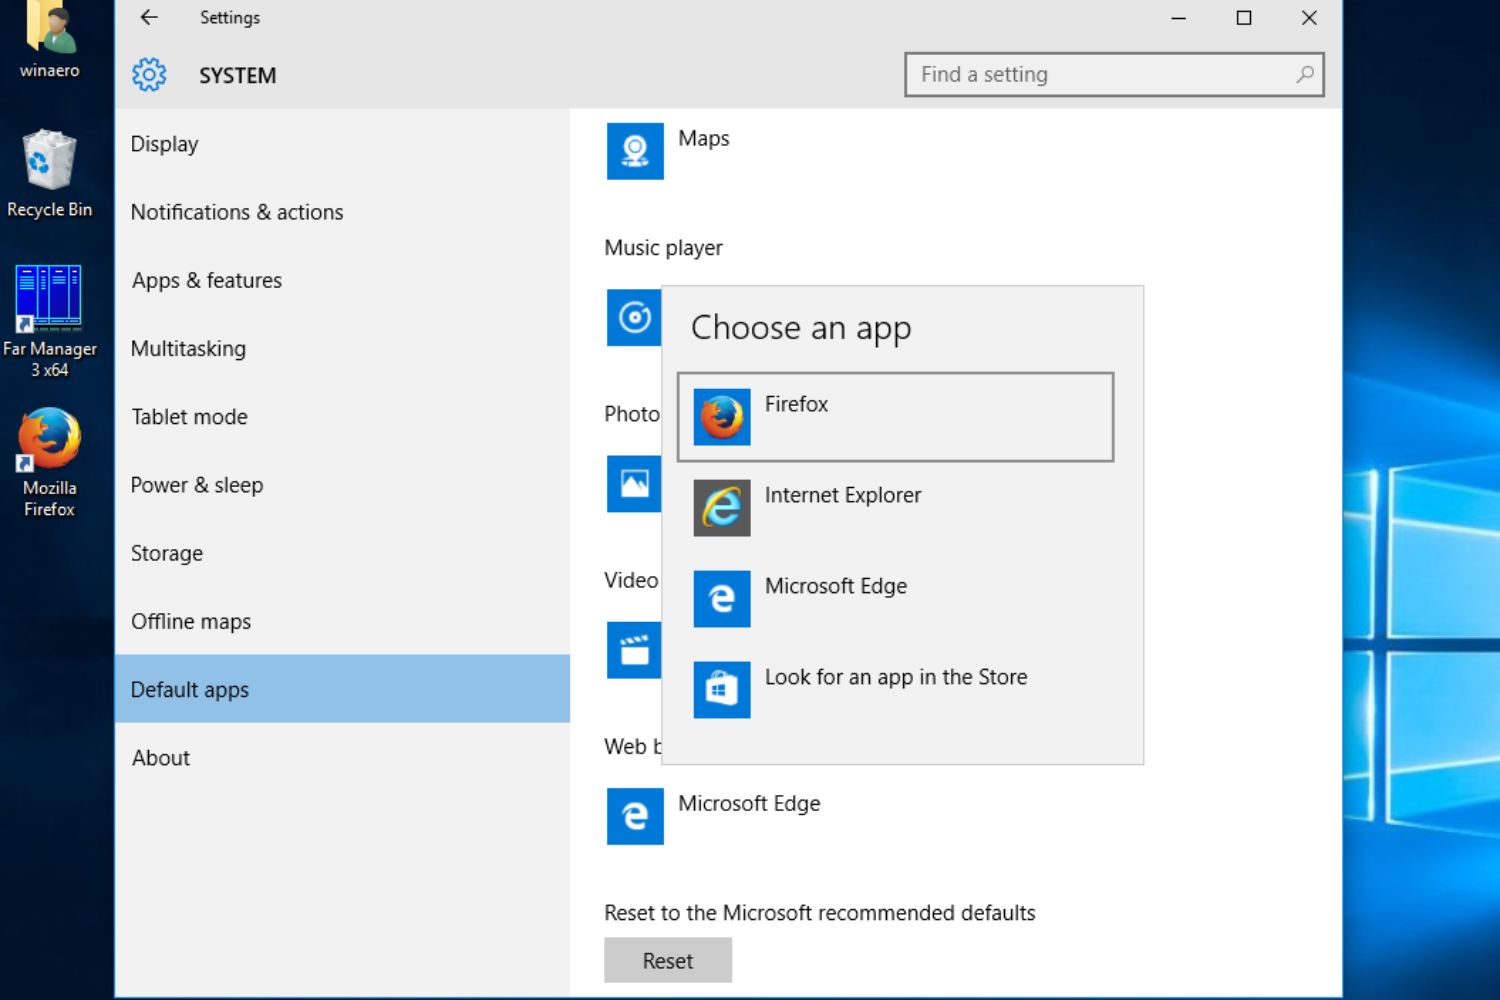
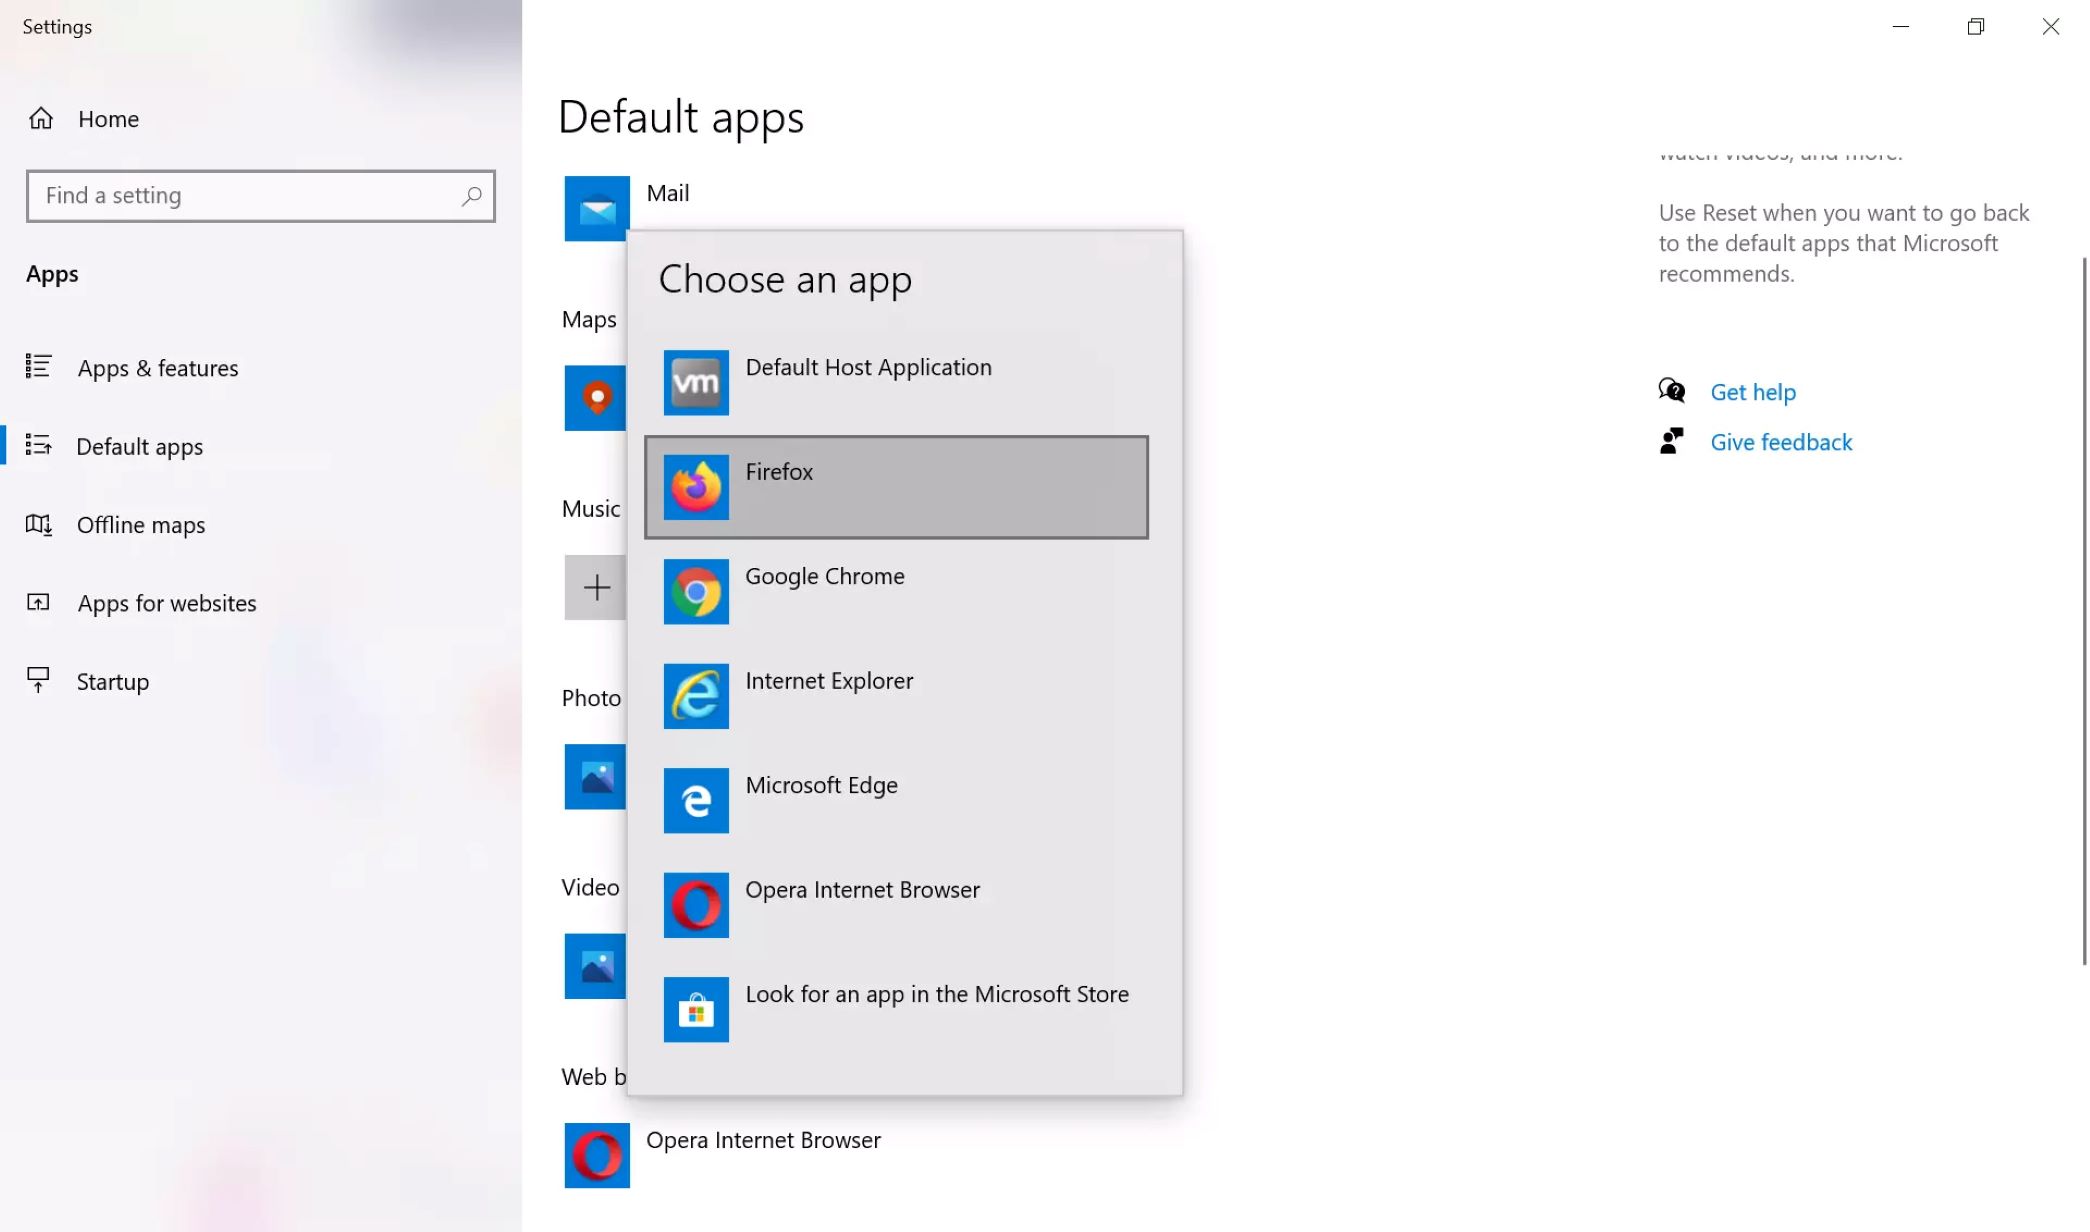
Step 3: Select Default Apps
Now that you’re in the Default apps subcategory of the Apps section in the Settings menu, it’s time to select the option to manage your default apps. Here’s what you need to do:
- Scroll down the Default apps page until you find the section labeled “Web browser”.
- Under the Web browser section, you will see the current default browser set on your Windows 10 system.
- Click on the existing default browser to open the options menu.
Upon clicking on the default browser, you will see a list of available browsers that you can choose from. This list may include browsers such as Microsoft Edge, Google Chrome, Mozilla Firefox, Opera, and other installed browsers on your system.
Windows 10 also gives you the option to select the “Look for an app in the Microsoft Store” link which allows you to explore additional browser options that are available for download from the Microsoft Store.
After clicking on the existing default browser or the “Look for an app in the Microsoft Store” link, you are ready to proceed to the next step and choose a new default browser for your system.
Step 4: Click on Web Browser
Once you have accessed the list of available browsers, it’s time to select your desired browser as the new default for your Windows 10 system. Follow these steps:
- Click on the web browser that you want to set as your default.
- If the browser you prefer is not listed, you may need to ensure that it is installed on your computer. Visit the official website of the browser and download it if necessary.
- Once you have selected the browser, it will be highlighted, indicating that it is now the chosen default web browser for your system.
Keep in mind that the web browser you choose will become your default for all web-related activities, such as opening links from other applications, accessing HTML files, or opening web pages directly from your desktop.
By clicking on your preferred web browser, you are one step closer to enjoying a different browsing experience on your Windows 10 system. Let’s move on to the next step to finalize the change.
Step 5: Choose a New Default Browser
After clicking on your desired web browser in the list, you have effectively selected it as the new default browser for your Windows 10 system. However, before completing the process, it’s crucial to double-check your choice and make sure it’s the right browser for you. Here’s what you should do:
- Take a moment to review your selection. Confirm that the browser you chose matches your preferences and meets your browsing needs.
- If you have any doubts or want to explore more options, you can go back to the list and select a different browser. Windows 10 allows you to change your default browser at any time.
- Consider the features, performance, and compatibility of the browser with the websites and applications you frequently use.
- Remember to take into account factors such as speed, security, user interface, extensions, and customization options when making your decision.
Choosing the right web browser is an important step, as it will redefine your browsing experience on your Windows 10 system. Once you are satisfied with your selection and confident in your choice, it’s time to proceed to the final step and confirm the change.
Step 6: Confirm the Change
Now that you have chosen your new default browser, it’s crucial to confirm the change to ensure that it takes effect on your Windows 10 system. Follow these simple steps:
- After selecting your preferred browser, close the Settings menu by clicking on the “X” button in the top-right corner of the window. Alternatively, you can press the “Esc” key on your keyboard.
- Open any web page, link, or HTML file to test if the new default browser is being used.
- The chosen browser should open automatically, indicating that the change has been successfully applied.
- Confirm that the new browser is functioning as expected and that you are satisfied with its performance and features.
If, for any reason, the new default browser does not open or the change doesn’t seem to take effect, you can revisit the Apps section in the Settings menu and repeat the process to select a different browser as the default.
Remember that you have the flexibility to switch between different browsers and update your default settings whenever you see fit. Windows 10 offers users the freedom to personalize their browsing experience according to their preference.
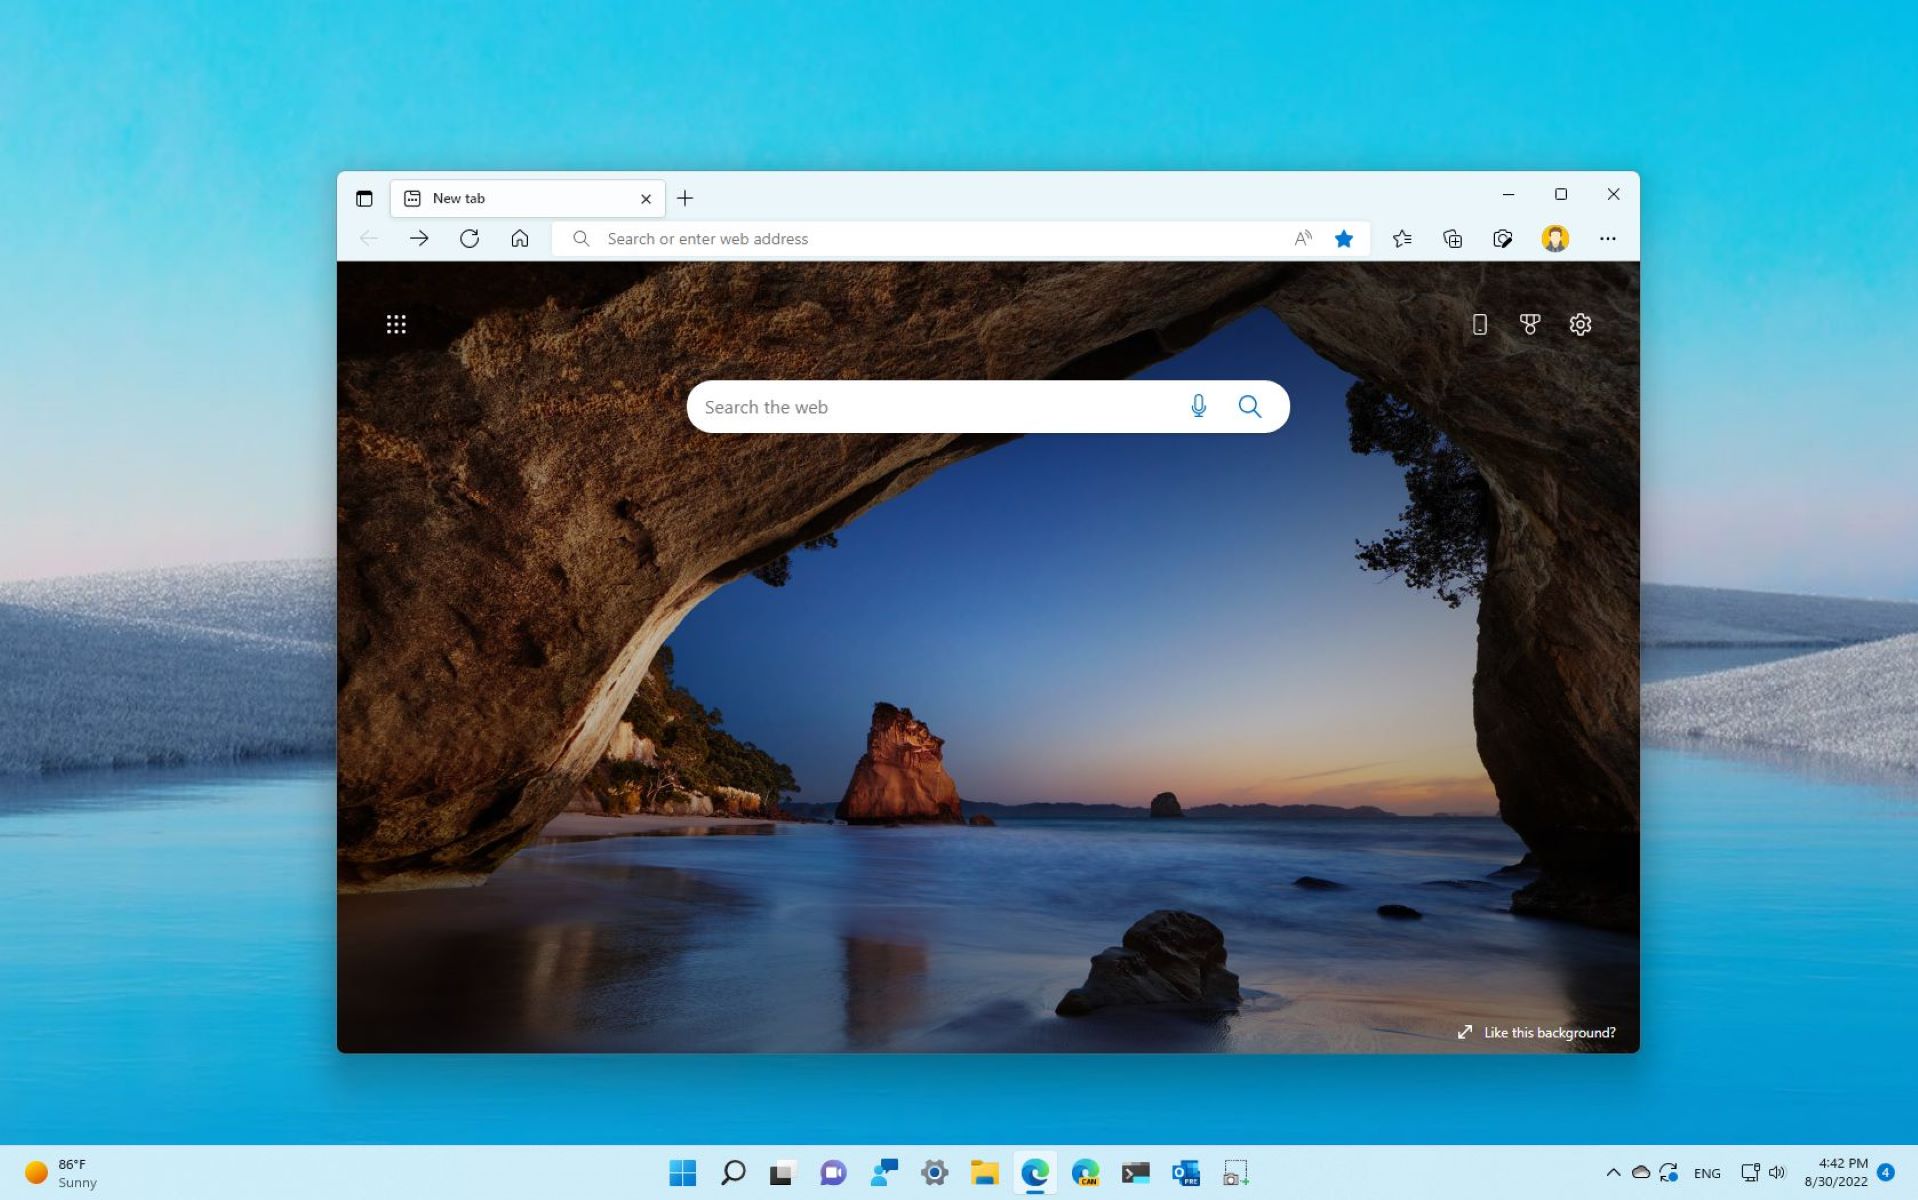
Congratulations! You have successfully changed the default browser on your Windows 10 system. Enjoy exploring the web and discovering all the great features that your new browser has to offer!
Conclusion
Changing the default browser in Windows 10 is a simple yet powerful way to personalize your web browsing experience. By following the step-by-step guide outlined in this article, you can easily select a different browser as your default and enjoy the unique features and performance it has to offer.
Remember, the default browser is the one that opens automatically when you click on links or open web pages. Windows 10 comes with Microsoft Edge as the default browser, but you have the freedom to choose a different browser that better suits your needs and preferences.
Throughout this guide, we have walked you through the process of changing the default browser, from opening the Settings menu to selecting a new default browser and confirming the change. It’s important to choose a browser that aligns with your browsing habits, preferences, and internet security requirements.
Whether you decide to switch to popular browsers like Google Chrome or Mozilla Firefox or choose a less-known alternative, the choice is entirely up to you. Each browser offers its own unique set of features, performance levels, and customization options, allowing you to tailor your browsing experience to your liking.
Now that you have successfully changed the default browser, you can explore the web with confidence, knowing that you have selected a browser that suits your needs. Don’t forget to regularly update your chosen browser to take advantage of the latest features, security enhancements, and improvements.
Enjoy your newly set default browser and happy browsing!