Introduction
Changing your default browser in Outlook allows you to seamlessly open links in your preferred web browser instead of the default browser set by your operating system. This can be particularly useful if you have multiple browsers installed and want to streamline your browsing experience.
By customizing your default browser, you can ensure that links from Outlook open directly in the browser you prefer, with all your personalized settings, bookmarks, and extensions readily available. Whether you’re a Chrome enthusiast, a loyal Firefox user, or prefer the minimalist approach of Safari, changing your default browser for Outlook is a simple process.
Fortunately, you don’t need to be a tech expert to make this change. In this article, we will guide you through the step-by-step process of changing your default browser in Outlook, regardless of whether you’re using Outlook on Windows or Mac. So, let’s get started and empower you to take control of your browsing experience!
Step 1: Open Outlook settings
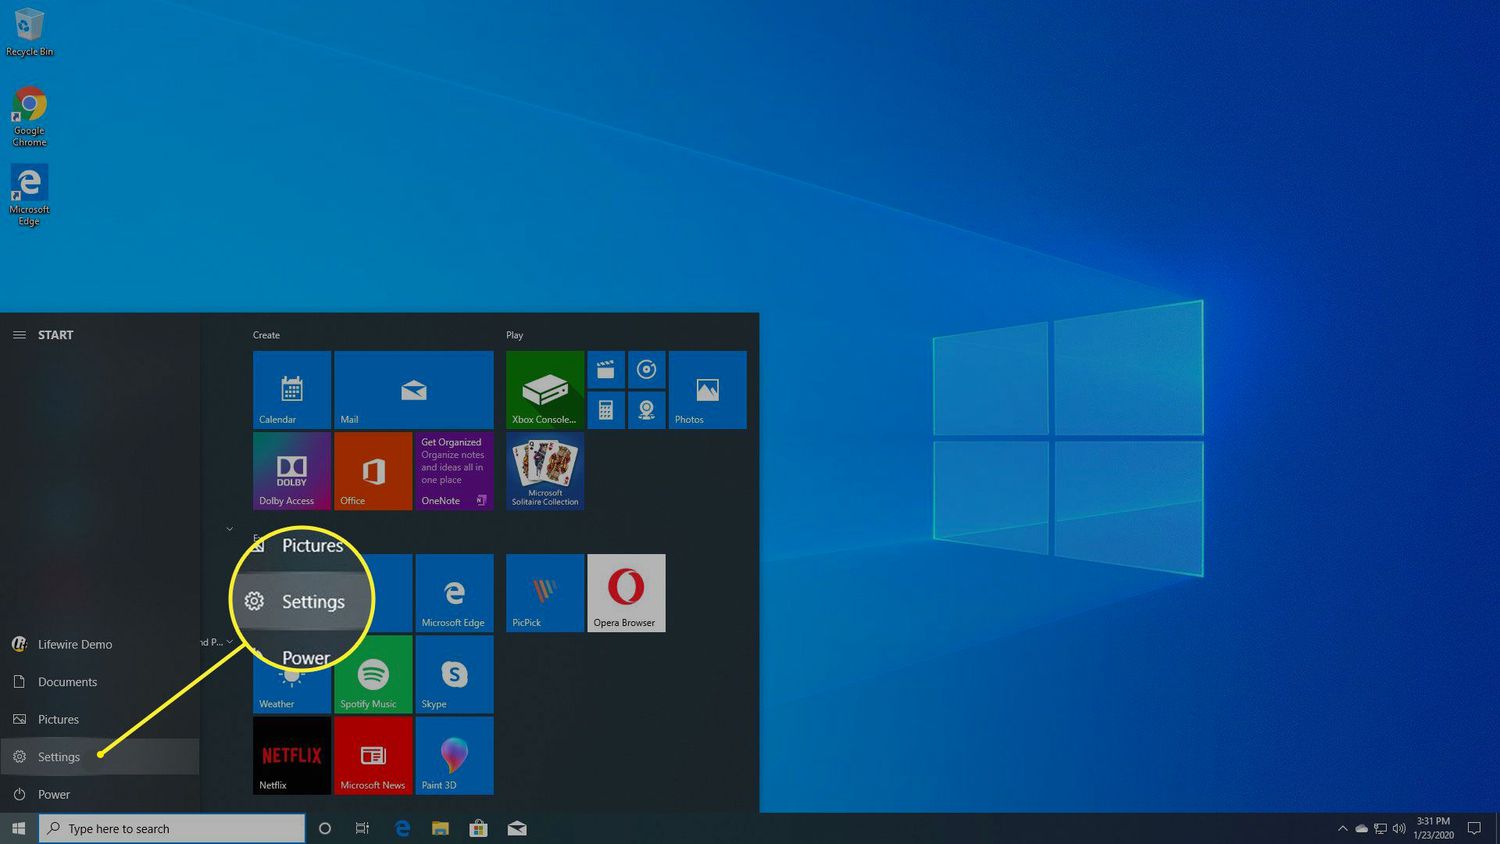
The first step to changing your default browser in Outlook is to open the settings menu. The location of the settings menu may vary slightly depending on the version of Outlook you are using, but the process remains similar.
If you’re using Outlook on Windows, start by opening the application. Once opened, click on the “File” tab located in the top-left corner of the screen. A drop-down menu will appear, and you will see the “Options” button towards the bottom of the list. Click on “Options” to access the Outlook settings.
If you’re using Outlook on Mac, open the application and click on the “Outlook” tab in the top-left corner of the screen. From there, click on “Preferences” in the drop-down menu to access the settings.
Once you have successfully accessed the settings menu, you are ready to proceed to the next step in changing your default browser for Outlook.
Step 2: Click on the “Default Apps” option
After accessing the settings menu in Outlook, the next step is to locate the “Default Apps” option. This option allows you to manage the default applications associated with various tasks, including web browsing.
In the Outlook settings menu, navigate to the section that mentions the default apps or associations. The exact wording and location may vary depending on your version of Outlook. Look for options such as “Default Apps”, “Application Settings”, or “Preferences”.
Click on the “Default Apps” option to proceed to the next step.
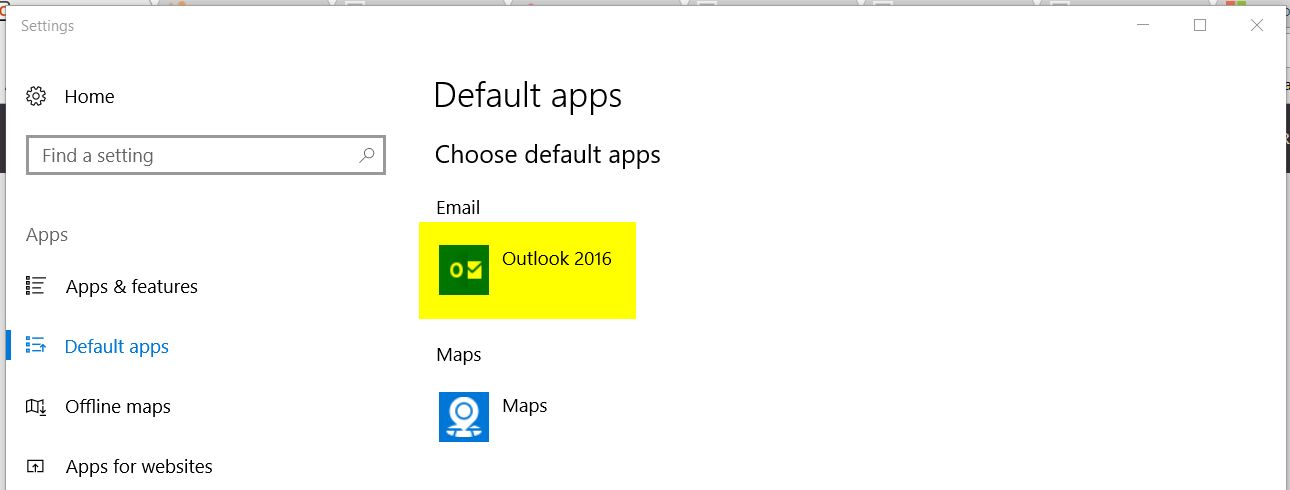
Once you have clicked on the “Default Apps” option, a new window will open, displaying a list of categories on the left-hand side. These categories represent different tasks or file types that you can assign default apps to. We are specifically interested in changing the default web browser, so proceed to the next step to locate the appropriate category.
Step 3: Select the “Web browser” option
Once you have accessed the “Default Apps” menu in Outlook settings, the next step is to locate and select the “Web browser” option. This is the specific category that allows you to change the default browser for Outlook.
In the “Default Apps” menu, browse through the list of categories on the left-hand side. Look for the category labeled “Web browser” or a similar option. It may be listed under a broader category like “Internet” or “Browser settings”.
Click on the “Web browser” option to proceed to the next step of changing your default browser for Outlook.
Once you have selected the “Web browser” option, the menu will display a list of web browsers that are currently installed on your device. This includes popular options like Google Chrome, Mozilla Firefox, Microsoft Edge, Safari, and others.
Continue to the next step to choose your preferred browser and make it the default for Outlook.
Step 4: Choose your preferred browser
After selecting the “Web browser” option in the Outlook settings menu, you will be presented with a list of web browsers installed on your device. Now, it’s time to choose your preferred browser and set it as the default for Outlook.
Look through the list of available browsers and identify the one you want to use as your default. Each browser may have its own logo or icon to help you easily identify it. If you haven’t installed your preferred browser yet, make sure to do so before proceeding with this step.
To set your preferred browser as the default, simply click on the browser’s name or icon in the list. It will be highlighted or marked to indicate that it has been selected as the default browser for Outlook.
By choosing your preferred browser as the default, any links you open from within Outlook will automatically be accessed using that browser. This ensures a seamless browsing experience and allows you to maximize the features and settings of your preferred browser.
Once you have selected your preferred browser, move on to the next step to confirm the changes and finalize the process of changing your default browser in Outlook.
Step 5: Confirm the changes and close the settings window
Now that you have chosen your preferred browser as the default for Outlook, it’s time to confirm the changes and close the settings window to apply the new settings.
Within the Outlook settings menu, review the changes you have made. Double-check that the correct browser is selected as the default for Outlook. If you need to make any adjustments, you can go back to the previous steps to select a different browser.
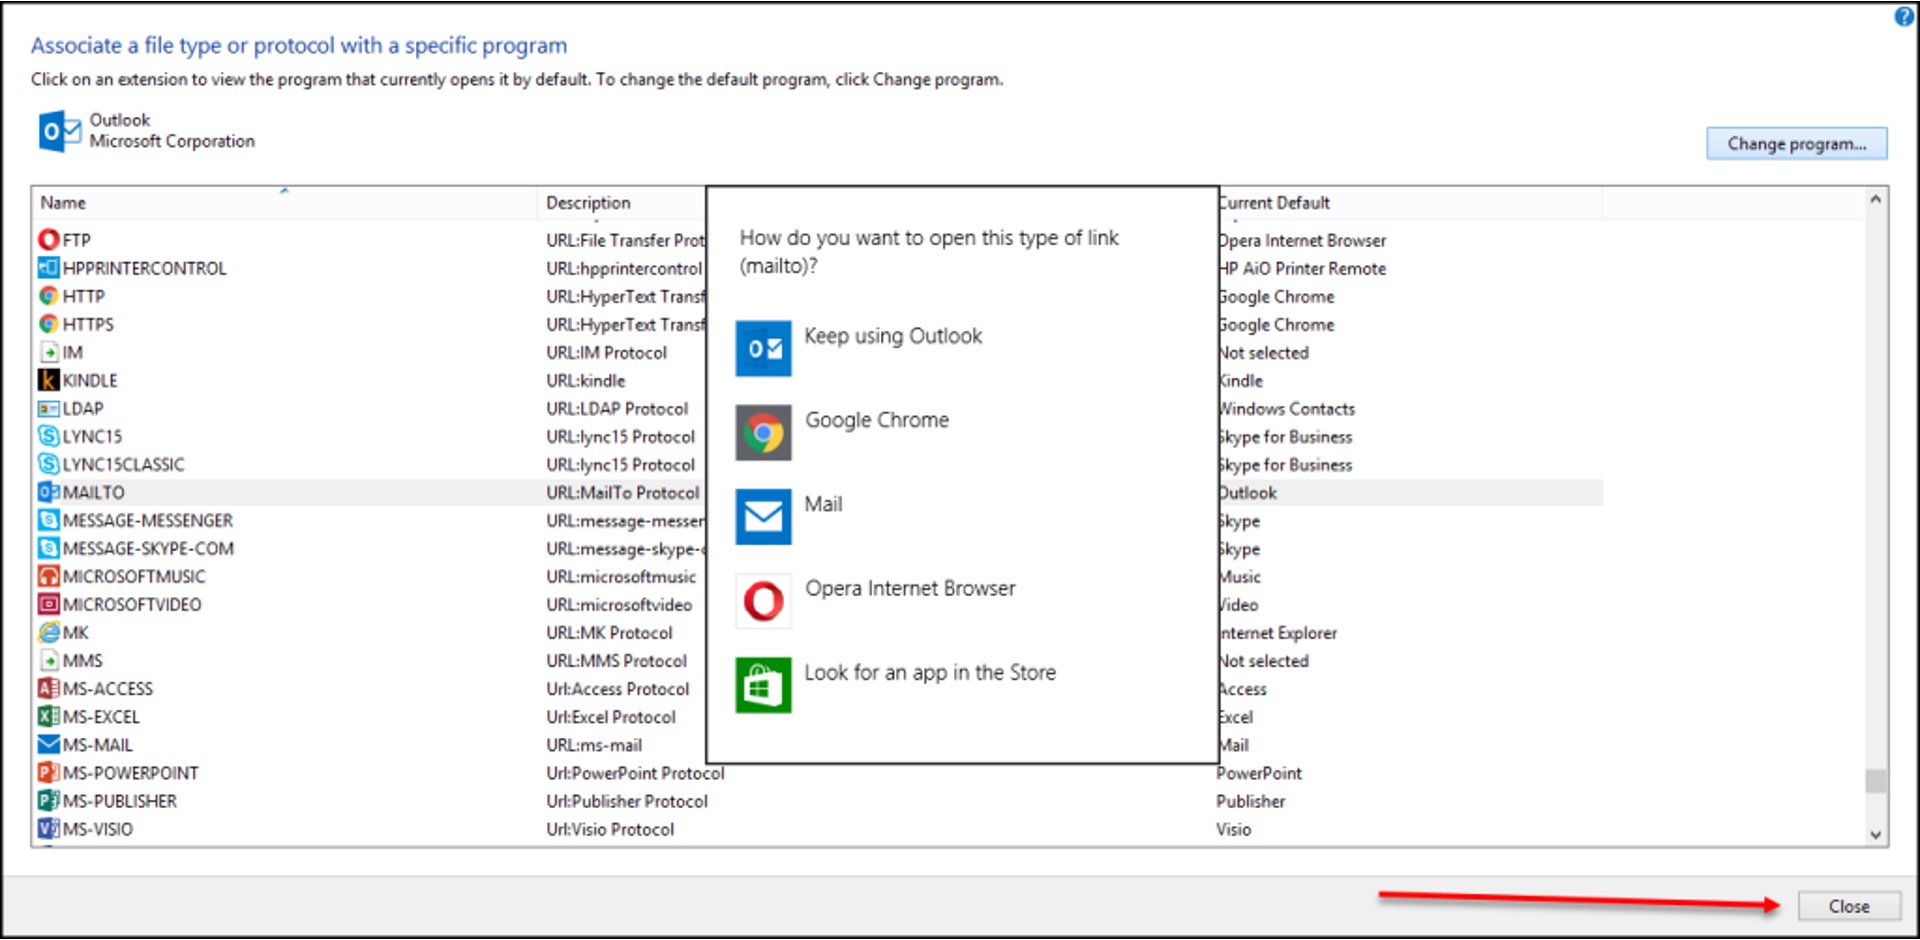
Once you are satisfied with the changes, navigate to the bottom of the settings window and look for a button that says “Save”, “Apply”, or similar wording. Click on this button to confirm and save the changes you have made to the default browser for Outlook.
After saving the changes, you can now proceed to close the settings window. Look for a button that says “Close”, “OK”, or an ‘X’ in the top-right corner of the window. Click on this button to exit the settings menu and return to your Outlook application.
With the changes saved and the settings window closed, you have successfully changed the default browser for Outlook. From now on, any links you open within the application will automatically open in your preferred browser.
If you encounter any issues or want to revert to the previous default browser in the future, you can always revisit the Outlook settings and follow these steps again to make the necessary adjustments.
Now that you have completed the process, enjoy the seamless experience of opening links in your preferred browser while using Outlook!
Conclusion
Changing the default browser for Outlook is a straightforward process that allows you to personalize your browsing experience and seamlessly open links within your preferred web browser. By following the step-by-step guide outlined in this article, you can easily switch to your preferred browser and enjoy a consistent, streamlined, and efficient workflow.
Remember, the specific steps may vary slightly depending on the version of Outlook you are using, but the general process remains the same. Be sure to navigate to the Outlook settings, locate the “Default Apps” or similar option, select the “Web browser” category, choose your preferred browser, and confirm the changes.
Customizing the default browser for Outlook provides you with the opportunity to leverage the features, preferences, and extensions of your preferred browser. Whether you favor Chrome, Firefox, Edge, Safari, or any other popular browser, now you can effortlessly open links from within Outlook and enjoy a seamless browsing experience.
Should you ever wish to revert to the previous default browser or make further changes, you can easily revisit the Outlook settings menu and follow the same steps discussed in this article.
Now that you have successfully changed the default browser for Outlook, you can enjoy a more personalized and efficient experience while using the application.
So go ahead, make the switch, and enjoy the freedom to browse the web on your own terms!