Introduction
Welcome to our guide on how to change the batteries in your Yale Smart Lock. Your Yale Smart Lock provides convenient and secure access to your home, but like any battery-powered device, it will eventually need new batteries. By following the simple steps outlined in this article, you’ll be able to easily replace the batteries in your Yale Smart Lock and ensure its continued functionality.
As a homeowner, it’s important to stay proactive in maintaining the various devices and systems that keep your home running smoothly, and your smart lock is no exception. The Yale Smart Lock uses batteries to power its electronic components, such as the keypad and motorized mechanisms. Regularly replacing the batteries will prevent any potential lockouts due to low battery levels and keep your smart lock functioning at its best.
Before we dive into the steps for replacing the batteries, it’s crucial to note that different models of Yale Smart Locks may have slightly different battery compartments and requirements. Therefore, it’s essential to consult your specific product’s user manual for any model-specific instructions. This guide, however, provides a general overview applicable to most Yale Smart Locks available on the market.
Now that you understand the importance of maintaining your Yale Smart Lock and have familiarized yourself with any model-specific instructions, let’s move on to the step-by-step process for changing the batteries in your smart lock.
Step 1: Locate the battery compartment
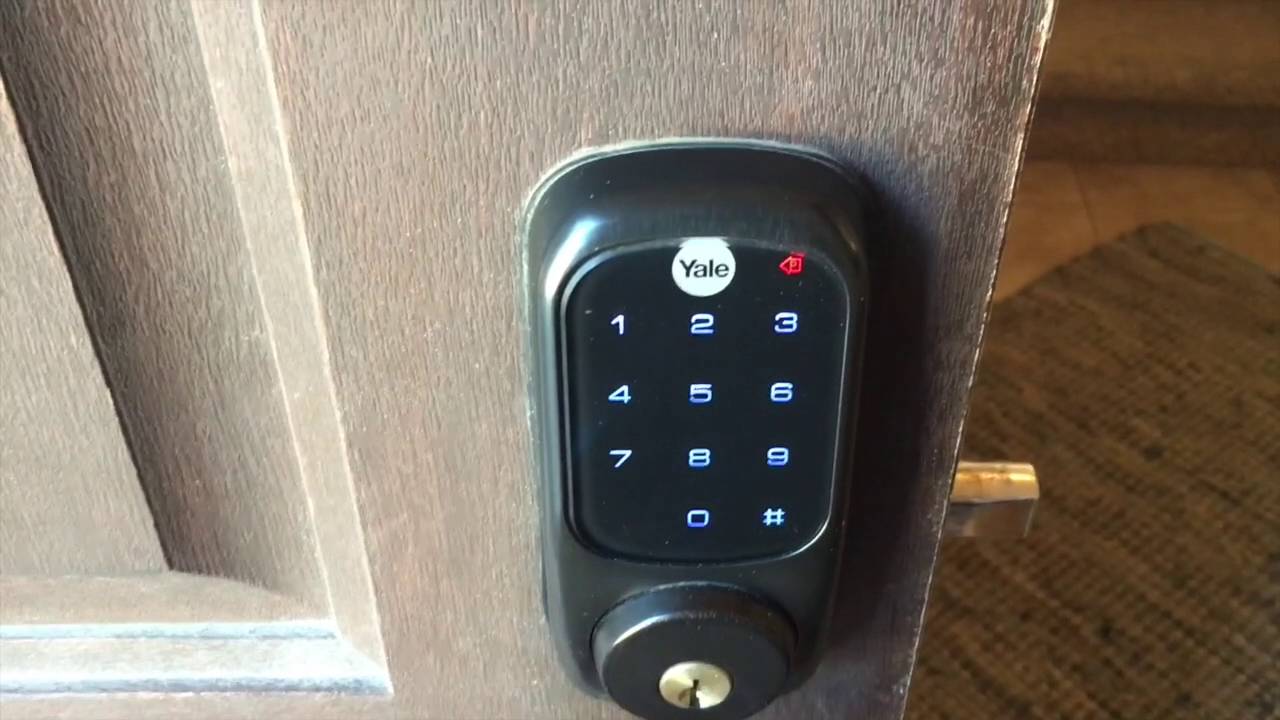
The first step is to locate the battery compartment on your Yale Smart Lock. The location of the battery compartment may vary depending on the model of your smart lock, so consult your user manual for precise instructions. In most cases, you will find the battery compartment on the interior side of the lock mechanism.
Once you have identified the battery compartment, ensure that the lock is in the unlocked position. This will prevent any accidental lockouts while you are changing the batteries. It is also a good idea to have a flashlight handy if the area is poorly lit.
If your Yale Smart Lock has a touchscreen keypad, you may need to remove or slide a cover to access the battery compartment. Some models have exposed battery terminals, while others may require you to remove a battery tray.
Inspect the battery compartment to determine the type and number of batteries required. Most Yale Smart Locks use standard AA or AAA batteries, but some models may have specific battery requirements. Take note of the recommended battery type and make sure you have the correct replacements on hand before proceeding.
Now that you have located the battery compartment and are prepared with the correct battery replacements, you’re ready to move on to the next step: preparing the new batteries.
Step 2: Prepare the new batteries
With the battery compartment of your Yale Smart Lock accessible, it’s time to prepare the new batteries. Before inserting them into the lock, it’s essential to ensure that they are fresh and fully charged, as weak or old batteries may result in unreliable performance.
If the batteries you purchased are not precharged, it’s a good idea to charge them fully using a compatible battery charger before proceeding. This step will help maximize the battery life and performance of your smart lock.
Inspect the new batteries for any signs of leakage or damage. If you notice any abnormalities, do not attempt to use them, as it may affect the operation of your Yale Smart Lock. Instead, dispose of them according to the proper battery disposal guidelines in your local area and obtain new batteries.
Once you have ensured that the new batteries are in good condition, get them ready for insertion by following these steps:
- Remove any protective packaging or film from the batteries, if applicable.
- If the batteries have a positive (+) and negative (-) terminal, make sure you can identify them correctly. Most batteries will have markings to indicate the polarity.
- If your Yale Smart Lock requires multiple batteries, arrange them according to the correct polarity and order specified in the user manual. This step is crucial to ensure the lock operates correctly.
By properly preparing the new batteries and ensuring their quality, you can now proceed to the next step: removing the old batteries from your Yale Smart Lock.
Step 3: Remove the old batteries
Now that you have prepared the new batteries, it’s time to remove the old batteries from your Yale Smart Lock. Follow these steps to properly remove the old batteries:
- Take note of the orientation and arrangement of the old batteries before removing them. This step will help you insert the new batteries correctly later on.
- Using your fingers or a small tool, gently pry the old batteries out of the battery compartment. Be careful not to exert too much force or damage the battery contacts. If your lock has a battery tray, you may need to slide or push the tray to release the batteries.
- Once the old batteries are removed, set them aside for proper disposal.
- If there is any dirt, debris, or corrosion in the battery compartment or on the battery contacts, clean them using a soft, dry cloth. This step ensures good electrical contact between the batteries and the lock.
It’s important to note that although the batteries may still have some charge left, it’s advisable to replace them promptly to avoid any unexpected lockouts due to low battery levels. It’s a good practice to change the batteries in your Yale Smart Lock every 6 to 12 months, depending on usage and battery life.
Now that you have successfully removed the old batteries, let’s move on to the next step: inserting the new batteries into your Yale Smart Lock.
Step 4: Insert the new batteries
With the old batteries removed and the battery compartment clean, it’s time to insert the new batteries into your Yale Smart Lock. Follow the steps below for a smooth battery replacement process:
- Refer to the user manual or the markings on the lock to determine the correct orientation and arrangement of the new batteries.
- Starting with the first battery, align the positive (+) and negative (-) terminals of the battery with the corresponding contacts inside the battery compartment. Slide or push the battery into place until it is fully seated.
- If your lock requires multiple batteries, repeat the above step for each battery, following the correct polarity and arrangement specified in the user manual.
- Ensure that all the batteries are securely and properly inserted. This step is crucial to prevent any connectivity issues or erratic lock behavior.
Take a moment to inspect the battery compartment and make sure there are no loose connections or foreign objects that may interfere with the proper operation of your Yale Smart Lock. If everything looks good, you’re ready to move on to the next step: testing the lock with the new batteries.
Inserting the new batteries correctly is essential for optimal performance and longevity of your Yale Smart Lock. By following the recommended procedures, you can ensure a seamless battery replacement process.
Step 5: Test the lock
After inserting the new batteries, it’s important to test your Yale Smart Lock to ensure that it is functioning properly. Follow these steps to test the lock with the new batteries:
- Close the battery compartment securely, making sure it is properly sealed.
- Check that the lock is in the unlocked position.
- Test the lock by entering your user code or using the appropriate method to engage the lock mechanism. Listen for any unusual sounds or observe any abnormal behavior during the locking and unlocking process.
- If the lock responds normally and displays the expected behavior, congratulations! Your Yale Smart Lock is now successfully powered by the new batteries.
- If you encounter any issues, such as the lock not engaging or displaying error messages, double-check the battery installation to ensure correct polarity and proper contact with the battery terminals. If the problem persists, consult the user manual or contact Yale customer support for further assistance.
By testing your Yale Smart Lock after replacing the batteries, you can have peace of mind knowing that your lock is functioning as intended. Regular testing and maintenance will contribute to the longevity and reliability of your smart lock.
Now that you have tested your lock and confirmed its proper operation, it’s time to move on to the final step: disposing of the old batteries safely and responsibly.
Step 6: Dispose of the old batteries properly
Once you have replaced the batteries in your Yale Smart Lock, it’s essential to dispose of the old batteries in an environmentally friendly manner. Improper disposal of batteries can have harmful effects on the environment and pose a risk to human health. Follow these guidelines for proper battery disposal:
- Check the local regulations and guidelines regarding battery disposal in your area. Different regions may have specific rules for disposing of batteries, including designated drop-off locations or recycling centers.
- Do not throw old batteries into regular household trash or incinerate them. This can release harmful chemicals into the environment and pollute landfills.
- Look for recycling programs or collection sites in your community that accept household batteries. Many retailers, municipal waste facilities, or electronic recycling centers offer battery recycling services.
- If you are unable to find a local recycling option, you can contact the manufacturer or check their website for information on battery disposal. They may have specific instructions or recommendations.
- When transporting old batteries to a collection or recycling point, ensure that they are stored securely in a non-conductive container or bag to prevent accidental contact or short circuits.
By disposing of your old batteries properly, you contribute to environmental sustainability and help prevent potentially hazardous materials from entering the waste stream. It’s an important step in being a responsible consumer.
Congratulations! You have successfully replaced the batteries in your Yale Smart Lock and disposed of the old batteries responsibly. Regular battery replacements and proper disposal will ensure the continued functionality and longevity of your smart lock.
Conclusion
Changing the batteries in your Yale Smart Lock is a simple yet crucial maintenance task that ensures the continued functionality and security of your lock. By following the step-by-step guide outlined in this article, you can easily replace the batteries and maintain optimal performance.
We started by locating the battery compartment and preparing the new batteries, ensuring they were fresh and fully charged. Then, we moved on to removing the old batteries carefully, making note of their arrangement to facilitate the insertion of the new batteries.
After that, we inserted the new batteries correctly, paying attention to the polarity and arrangement specified in the user manual. Once the new batteries were in place, we tested the lock to ensure it operated smoothly and without any issues.
Finally, we discussed the importance of disposing of the old batteries properly. By following local regulations and guidelines, you can ensure the safe and environmentally friendly disposal of the old batteries.
By regularly replacing the batteries in your Yale Smart Lock and practicing proper disposal methods, you can avoid lockout situations due to low battery levels and contribute to a more sustainable environment.
Remember to consult your specific lock model’s user manual for any model-specific instructions or recommendations. If you encounter any difficulties or have questions, do not hesitate to contact Yale customer support for assistance.
With these steps and guidelines, you are now equipped to confidently change the batteries in your Yale Smart Lock, maintaining its functionality and providing secure access to your home.