Introduction
Welcome to our guide on how to center a model in a Russian 3D scanner. 3D scanning technology has revolutionized various industries, including manufacturing, architecture, and entertainment. One of the key tasks in 3D scanning is ensuring that the model is accurately centered to ensure precise measurements and optimal visualization.
The Russian 3D scanner is a powerful and advanced tool that offers high-resolution scanning capabilities. It allows for the digitization of objects, creating detailed 3D models that can be used for a wide range of applications. However, to achieve the best results, it is crucial to properly center the model within the scanner.
In this guide, we will walk you through a step-by-step process to center your model in the Russian 3D scanner. We will cover everything from preparing the scanner for centering to confirming that the model is properly aligned. Whether you are new to 3D scanning or looking to improve your scanning skills, this guide will provide you with the knowledge to ensure accurate and high-quality 3D models.
Before we delve into the details, it is important to understand the significance of centering a model in a 3D scanner. A properly centered model helps to eliminate distortion and inaccuracies in the scanning process, resulting in more accurate measurements and a better representation of the object being scanned. It also facilitates easier alignment and integration with other software and applications.
Now, without further ado, let’s get started with the step-by-step guide on how to center a model in a Russian 3D scanner. Whether you are using a handheld or stationary scanner, these instructions will help you achieve optimal results.
Overview of the Russian 3D Scanner
The Russian 3D scanner is a cutting-edge technology developed by Russian engineers to capture highly detailed and accurate 3D models. It utilizes advanced laser scanning techniques to capture the shape, texture, and geometry of objects with incredible precision.
One of the standout features of the Russian 3D scanner is its ability to capture high-resolution scans at a rapid pace. This makes it suitable for a wide range of applications, including industrial quality control, reverse engineering, product design, and cultural heritage preservation.
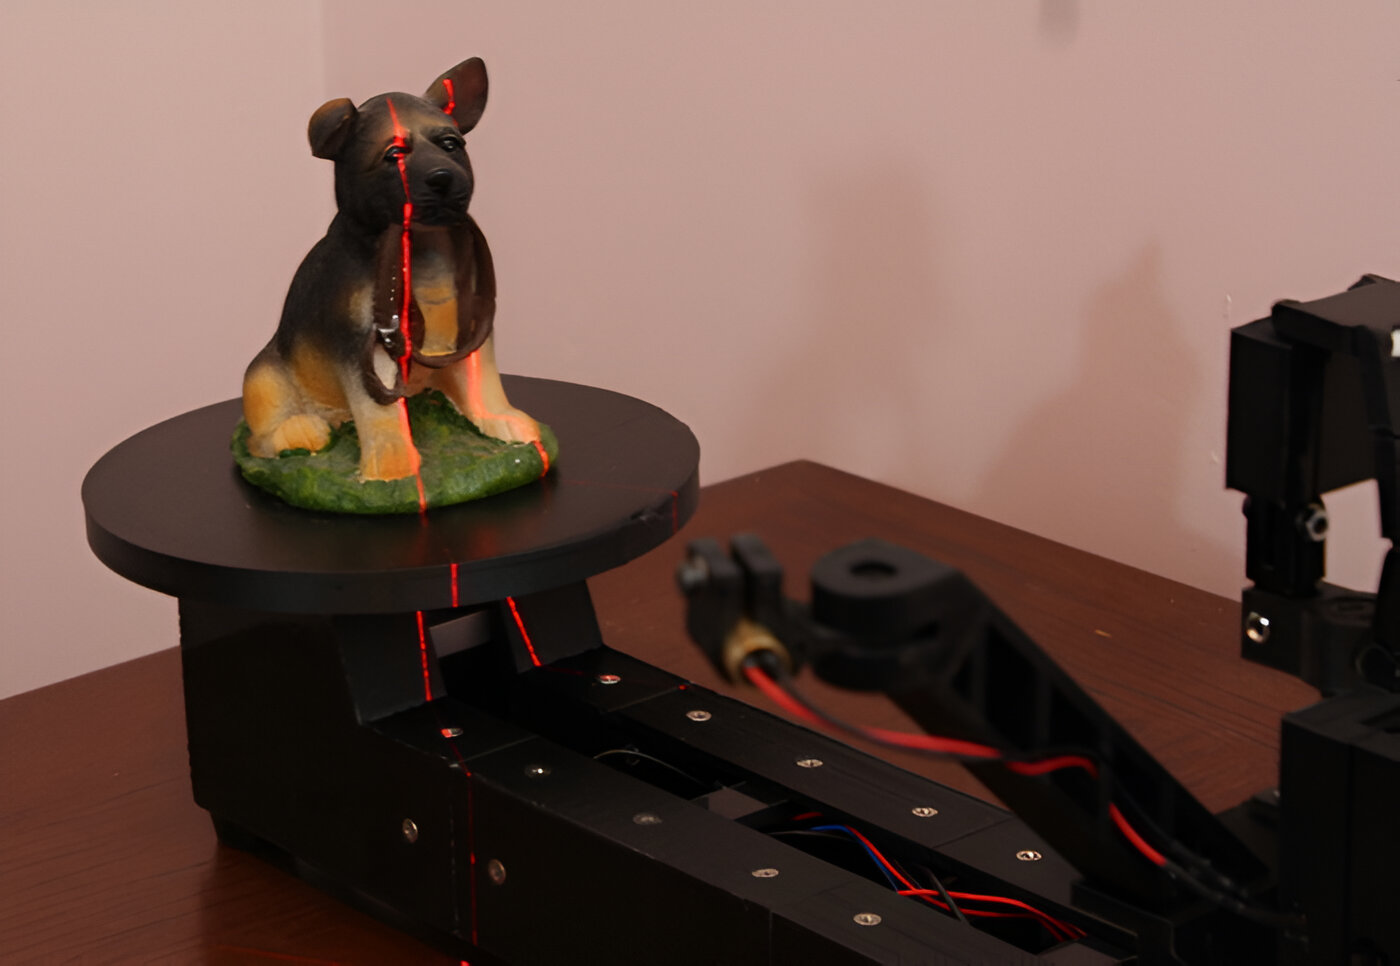
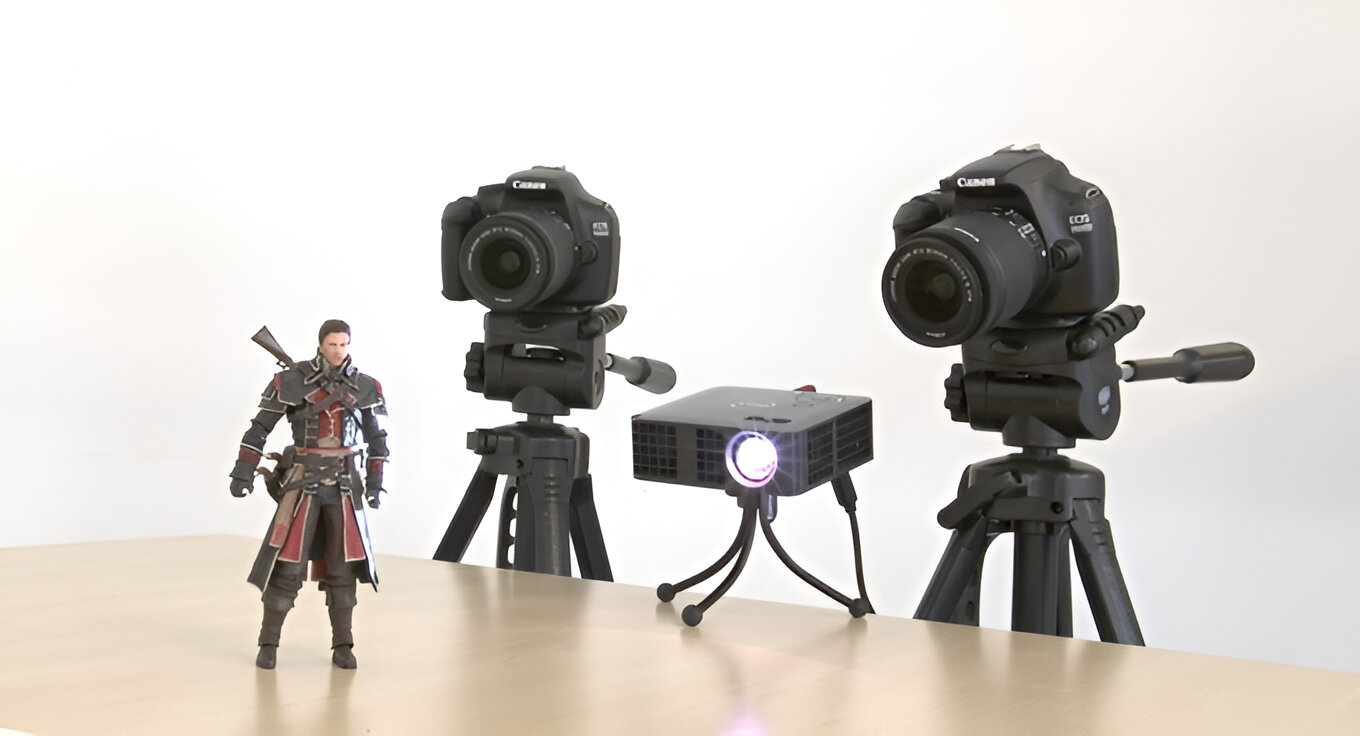
The scanner consists of a laser emitter, cameras, and sophisticated software that work together to capture and process the scanned data. The laser emitter projects a laser beam onto the object, while the cameras capture the reflected laser light. The software then combines these data points to create a detailed 3D representation of the object. The scanner can capture intricate details, including surface texture, curves, and fine geometrical features.
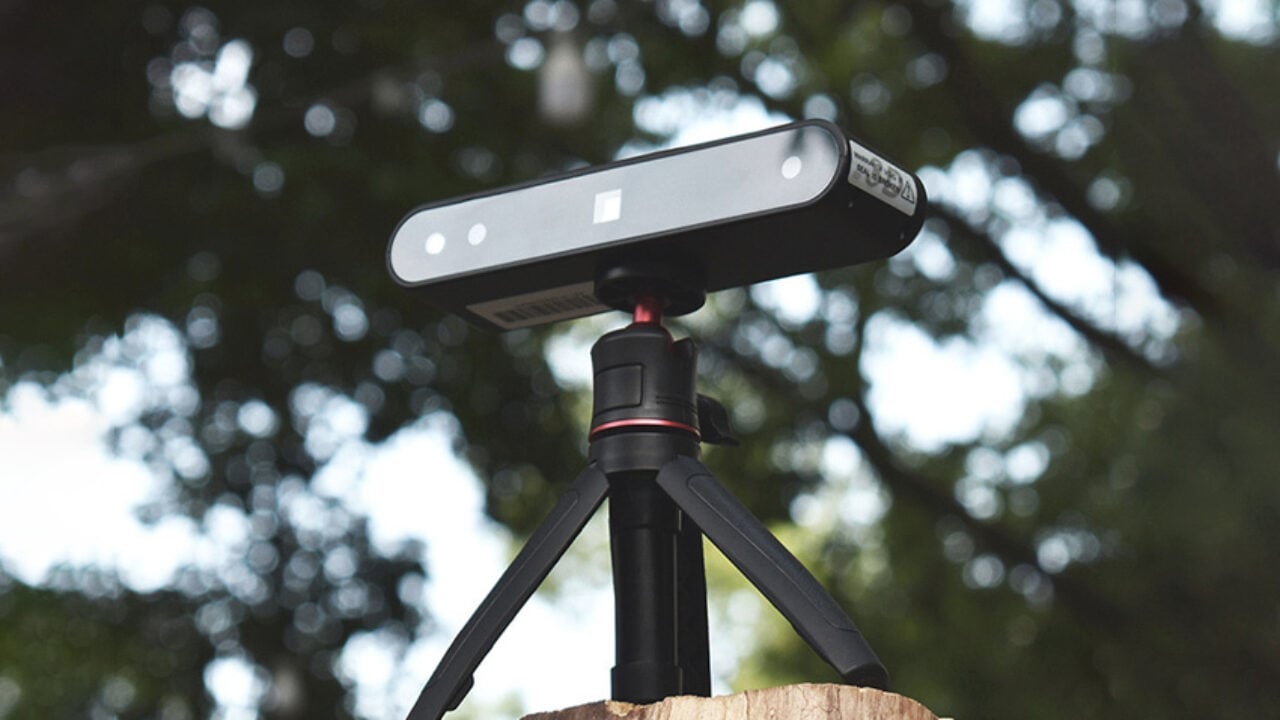
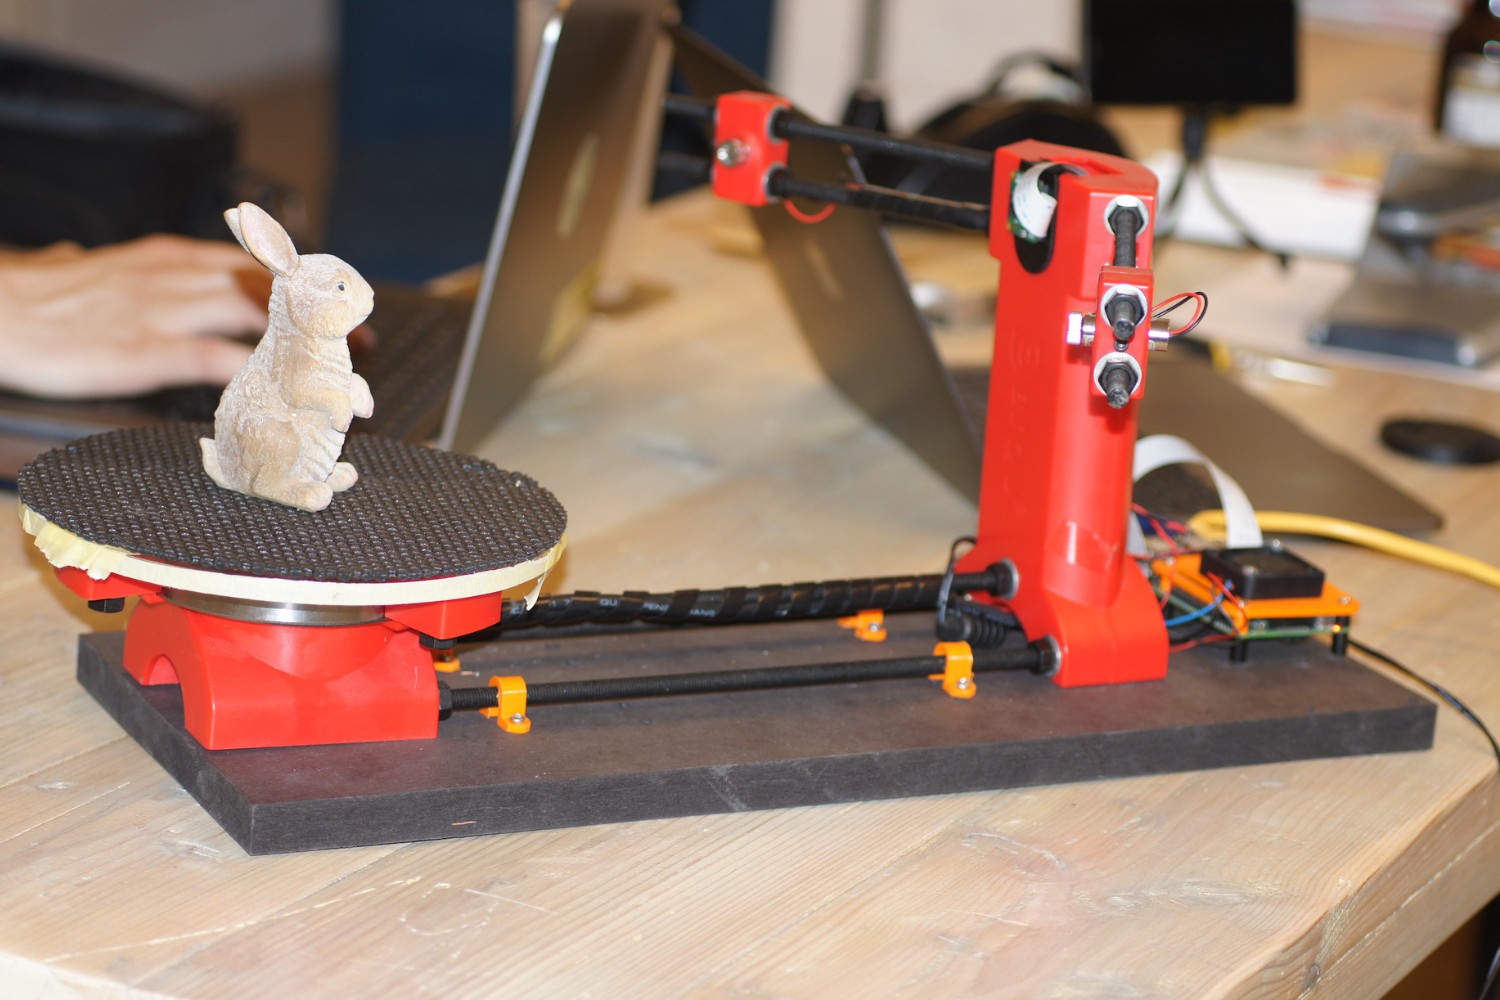
The Russian 3D scanner offers both handheld and stationary options, providing flexibility in scanning various types of objects. The handheld scanner allows for easy maneuverability, making it suitable for scanning larger objects or complex surfaces. On the other hand, the stationary scanner offers stability and precise alignment, making it ideal for smaller objects or objects that require high accuracy.
In addition to its scanning capabilities, the Russian 3D scanner also offers advanced features and functionalities. It has built-in filters to remove noise and unwanted artifacts from the scanned data, ensuring clean and accurate results. The scanner also supports various output formats, allowing for compatibility with different software and applications.
When using the Russian 3D scanner, it is essential to understand its technical specifications, such as scanning resolution, scanning area, and scanning speed. These specifications can vary depending on the specific model and version of the scanner. Familiarizing yourself with these technical details will help you optimize the scanning process and achieve the best possible results.
Now that you have a basic understanding of the Russian 3D scanner, let’s move on to the next section, where we will explore the importance of centering a model before scanning.
Importance of Centering a Model
Centering a model is a critical step in the 3D scanning process, including when using a Russian 3D scanner. It ensures accurate and reliable results by eliminating potential distortions and alignment issues that can arise from an improperly positioned model.
Here are a few key reasons why centering a model is of utmost importance:
- Eliminates Distortion: When a model is not centered in the scanner’s field of view, it can lead to distortions in the resulting 3D scan. These distortions can affect the accuracy of the measurements and the overall quality of the model. Proper centering helps minimize these distortions and ensures that the scan is a true representation of the object’s shape and proportions.
- Avoids Alignment Issues: Centering the model makes it easier to align the scan with other scans or reference points. In applications where multiple scans need to be combined or compared, accurate alignment is crucial. If the model is not properly centered, aligning and merging scans can become challenging, resulting in misalignments and inaccuracies in the final composite model.
- Optimizes Visualization: A properly centered model enhances the visualization experience. Whether you are using the 3D scan for virtual reality, augmented reality, or digital rendering purposes, having the model centered ensures that it appears visually pleasing and realistic. It allows for proper positioning and orientation of the model in the virtual space, creating a more immersive and accurate representation.
- Facilitates Measurement and Analysis: Centering the model in the scanner’s field of view ensures that measurements and analysis performed on the scan are accurate and reliable. This is particularly important in industries such as engineering, architecture, and quality control, where precise measurements are essential. A well-centered model helps minimize measurement errors and ensures consistency in the analysis results.
- Simplifies Post-processing: Properly centering the model simplifies the post-processing workflow. It makes it easier to clean up the scan data, remove unwanted artifacts, and apply smoothing algorithms. Additionally, centered scans are more compatible with various 3D modeling and editing software, streamlining the post-processing and editing tasks.
By understanding the importance of centering a model in a Russian 3D scanner, you can ensure that your 3D scans are accurate, visually appealing, and suitable for various applications. Now let’s move on to the next section, where we will provide a step-by-step guide to centering a model in the Russian 3D scanner.
Step-by-Step Guide to Centering a Model in the Russian 3D Scanner
Properly centering your model in the Russian 3D scanner is crucial for obtaining accurate and high-quality scans. Follow these step-by-step instructions to ensure that your model is correctly positioned within the scanner:
- Prepare the Scanner for Centering: Before you begin, make sure that the scanner is properly set up and calibrated. Ensure that all the necessary cables are connected and that the scanning software is running smoothly. Familiarize yourself with the scanner’s user interface and options.
- Position the Model on the 3D Scanner’s Platform: Place the model on the scanner’s platform in a central position. Make sure that the model is stable and secure to prevent any movement during the scanning process. If necessary, use supports or fixtures to hold the model in place.
- Adjust the Model’s Position: Use the scanner’s controls or software to fine-tune the position of the model. Make adjustments to ensure that the model is centered within the scanner’s field of view. Pay attention to the model’s orientation as well, ensuring that it is facing the desired direction for scanning.
- Confirm that the Model is Centered: Take a test scan or preview to confirm that the model is properly centered. Review the scan data or preview image to check if the model is evenly positioned within the scanning area. Pay attention to any distortions or misalignments that may indicate the need for further adjustments.
- Make Necessary Adjustments: If the model is not centered or aligned as desired, make the necessary adjustments. This may involve repositioning the model, adjusting the scanner’s settings, or using additional fixtures or supports to stabilize the model. Repeat the scanning and preview process until you achieve the desired centering and alignment.
- Capture the Final Scan: Once you are satisfied with the model’s centering and alignment, proceed to capture the final scan. Ensure that the scanner is capturing the necessary level of detail and accuracy. Take multiple scans from different angles if required to capture all the desired aspects of the object being scanned.
- Review and Post-process the Scan: After capturing the final scan, review the scan data to ensure that it meets your expectations. Use post-processing software to clean up the scan, remove any artifacts, and enhance the visual appearance if needed. Export the scan in the desired format for further use or analysis.
By following these step-by-step instructions, you can ensure that your model is accurately centered in the Russian 3D scanner. Remember to take your time and make necessary adjustments to achieve the best results before capturing the final scan.
Next, we will explore some tips for troubleshooting common issues that may arise during the centering process.
Preparing the Scanner for Centering
Before you can begin centering your model in the Russian 3D scanner, it’s important to ensure that the scanner is properly prepared. Follow these steps to prepare the scanner for centering:
- Check the Scanner’s Power and Connectivity: Make sure that the scanner is connected to a power source and turned on. Verify that all cables and connections are secure to avoid any interruptions during the scanning process.
- Calibrate the Scanner: Calibration is a vital step to ensure accurate scanning results. Check the calibration status of your Russian 3D scanner and perform any necessary calibration procedures recommended by the manufacturer. This ensures that the scanner is ready to capture precise measurements.
- Set Up the Scanning Environment: Ensure that the scanning environment is well-lit and free from any potential obstructions or reflective surfaces that may interfere with the scanning process. Remove any objects that are not part of the model to avoid any unwanted data in the scan.
- Familiarize Yourself with the Scanner’s Software: Take the time to familiarize yourself with the scanner’s software interface and settings. Understand how to navigate through the software, adjust scanning parameters, and view preview images or scan data. This will help you efficiently control the scanner during the centering process.
- Set the Scanning Resolution and Mode: Determine the desired scanning resolution and mode based on your specific requirements. Adjust the settings accordingly in the scanner’s software to ensure that you capture the level of detail necessary for your intended use of the 3D scan.
- Prepare any Necessary Markers or Targets: If you are using markers or targets to aid in the centering process, ensure that they are properly prepared and positioned. Markers can be used to provide reference points or alignment guides to assist in achieving accurate centering.
- Ensure Proper Ventilation: Depending on the type of scanner you are using, it may generate heat during the scanning process. Make sure that the scanner is placed in a well-ventilated area and that there is proper airflow to prevent overheating.
By effectively preparing the scanner before centering your model, you can optimize the scanning process and improve the overall quality of your 3D scans.
In the next section, we will discuss how to position the model on the 3D scanner’s platform for optimal centering and scanning results.
Positioning the Model on the 3D Scanner’s Platform
The placement of the model on the 3D scanner’s platform plays a crucial role in achieving accurate and well-centered scans. Follow these steps to properly position your model on the scanner’s platform:
- Select an Appropriate Platform: Depending on the type of Russian 3D scanner you are using, it may come with a specific platform or stage for placing the model. Ensure that the platform provides enough space and stability to hold your model securely during the scanning process.
- Clean and Prepare the Model: Before placing the model on the scanner’s platform, make sure it is clean and free from any debris or dust. If necessary, use compressed air or a soft brush to remove any particles that could affect the scan quality.
- Consider the Size and Weight of the Model: Take into account the dimensions and weight of your model when positioning it on the scanner’s platform. Ensure that the platform can support the weight of the model without any wobbling or instability.
- Place the Model in the Center: Position the model in the center of the scanner’s platform. This will facilitate easier centering and alignment in the subsequent steps. If needed, mark the center or use guidelines to assist in accurately placing the model.
- Secure the Model: To prevent unintended movement or shifting of the model during scanning, secure it to the platform using appropriate fixtures or supports. These may include clamps, adhesives, or specialized attachments. Ensure that the model is firmly attached without obstructing the scanning process.
- Consider the Orientation: Depending on the nature of the model and your scanning requirements, consider the optimal orientation for scanning. Ensure that the desired features or areas of the model are facing the scanner for accurate capturing.
- Account for Accessibility: If you intend to capture the entire model and certain areas are not easily accessible, plan for multiple scans from different angles. This will ensure that you obtain complete coverage of the model without compromising on the centering process.
By carefully positioning your model on the scanner’s platform, you can set a solid foundation for achieving accurate scans and proper centering. Now that the model is in position, we can proceed to the next section, where we will discuss how to adjust the model’s position for optimal centering within the Russian 3D scanner.
Adjusting the Model’s Position
Once you have placed your model on the 3D scanner’s platform, the next step is to fine-tune its position for optimal centering within the scanner. Follow these steps to adjust the model’s position:
- Use the Scanner’s Controls: Familiarize yourself with the controls of the Russian 3D scanner. These controls can either be physical buttons or options within the scanner’s software interface. Understand how to navigate and adjust the position of the model.
- Move the Model in Small Increments: Use the scanner’s controls to move the model in small increments. This allows for precise adjustments and helps you achieve the desired centering more accurately. Be patient and take your time to make gradual movements.
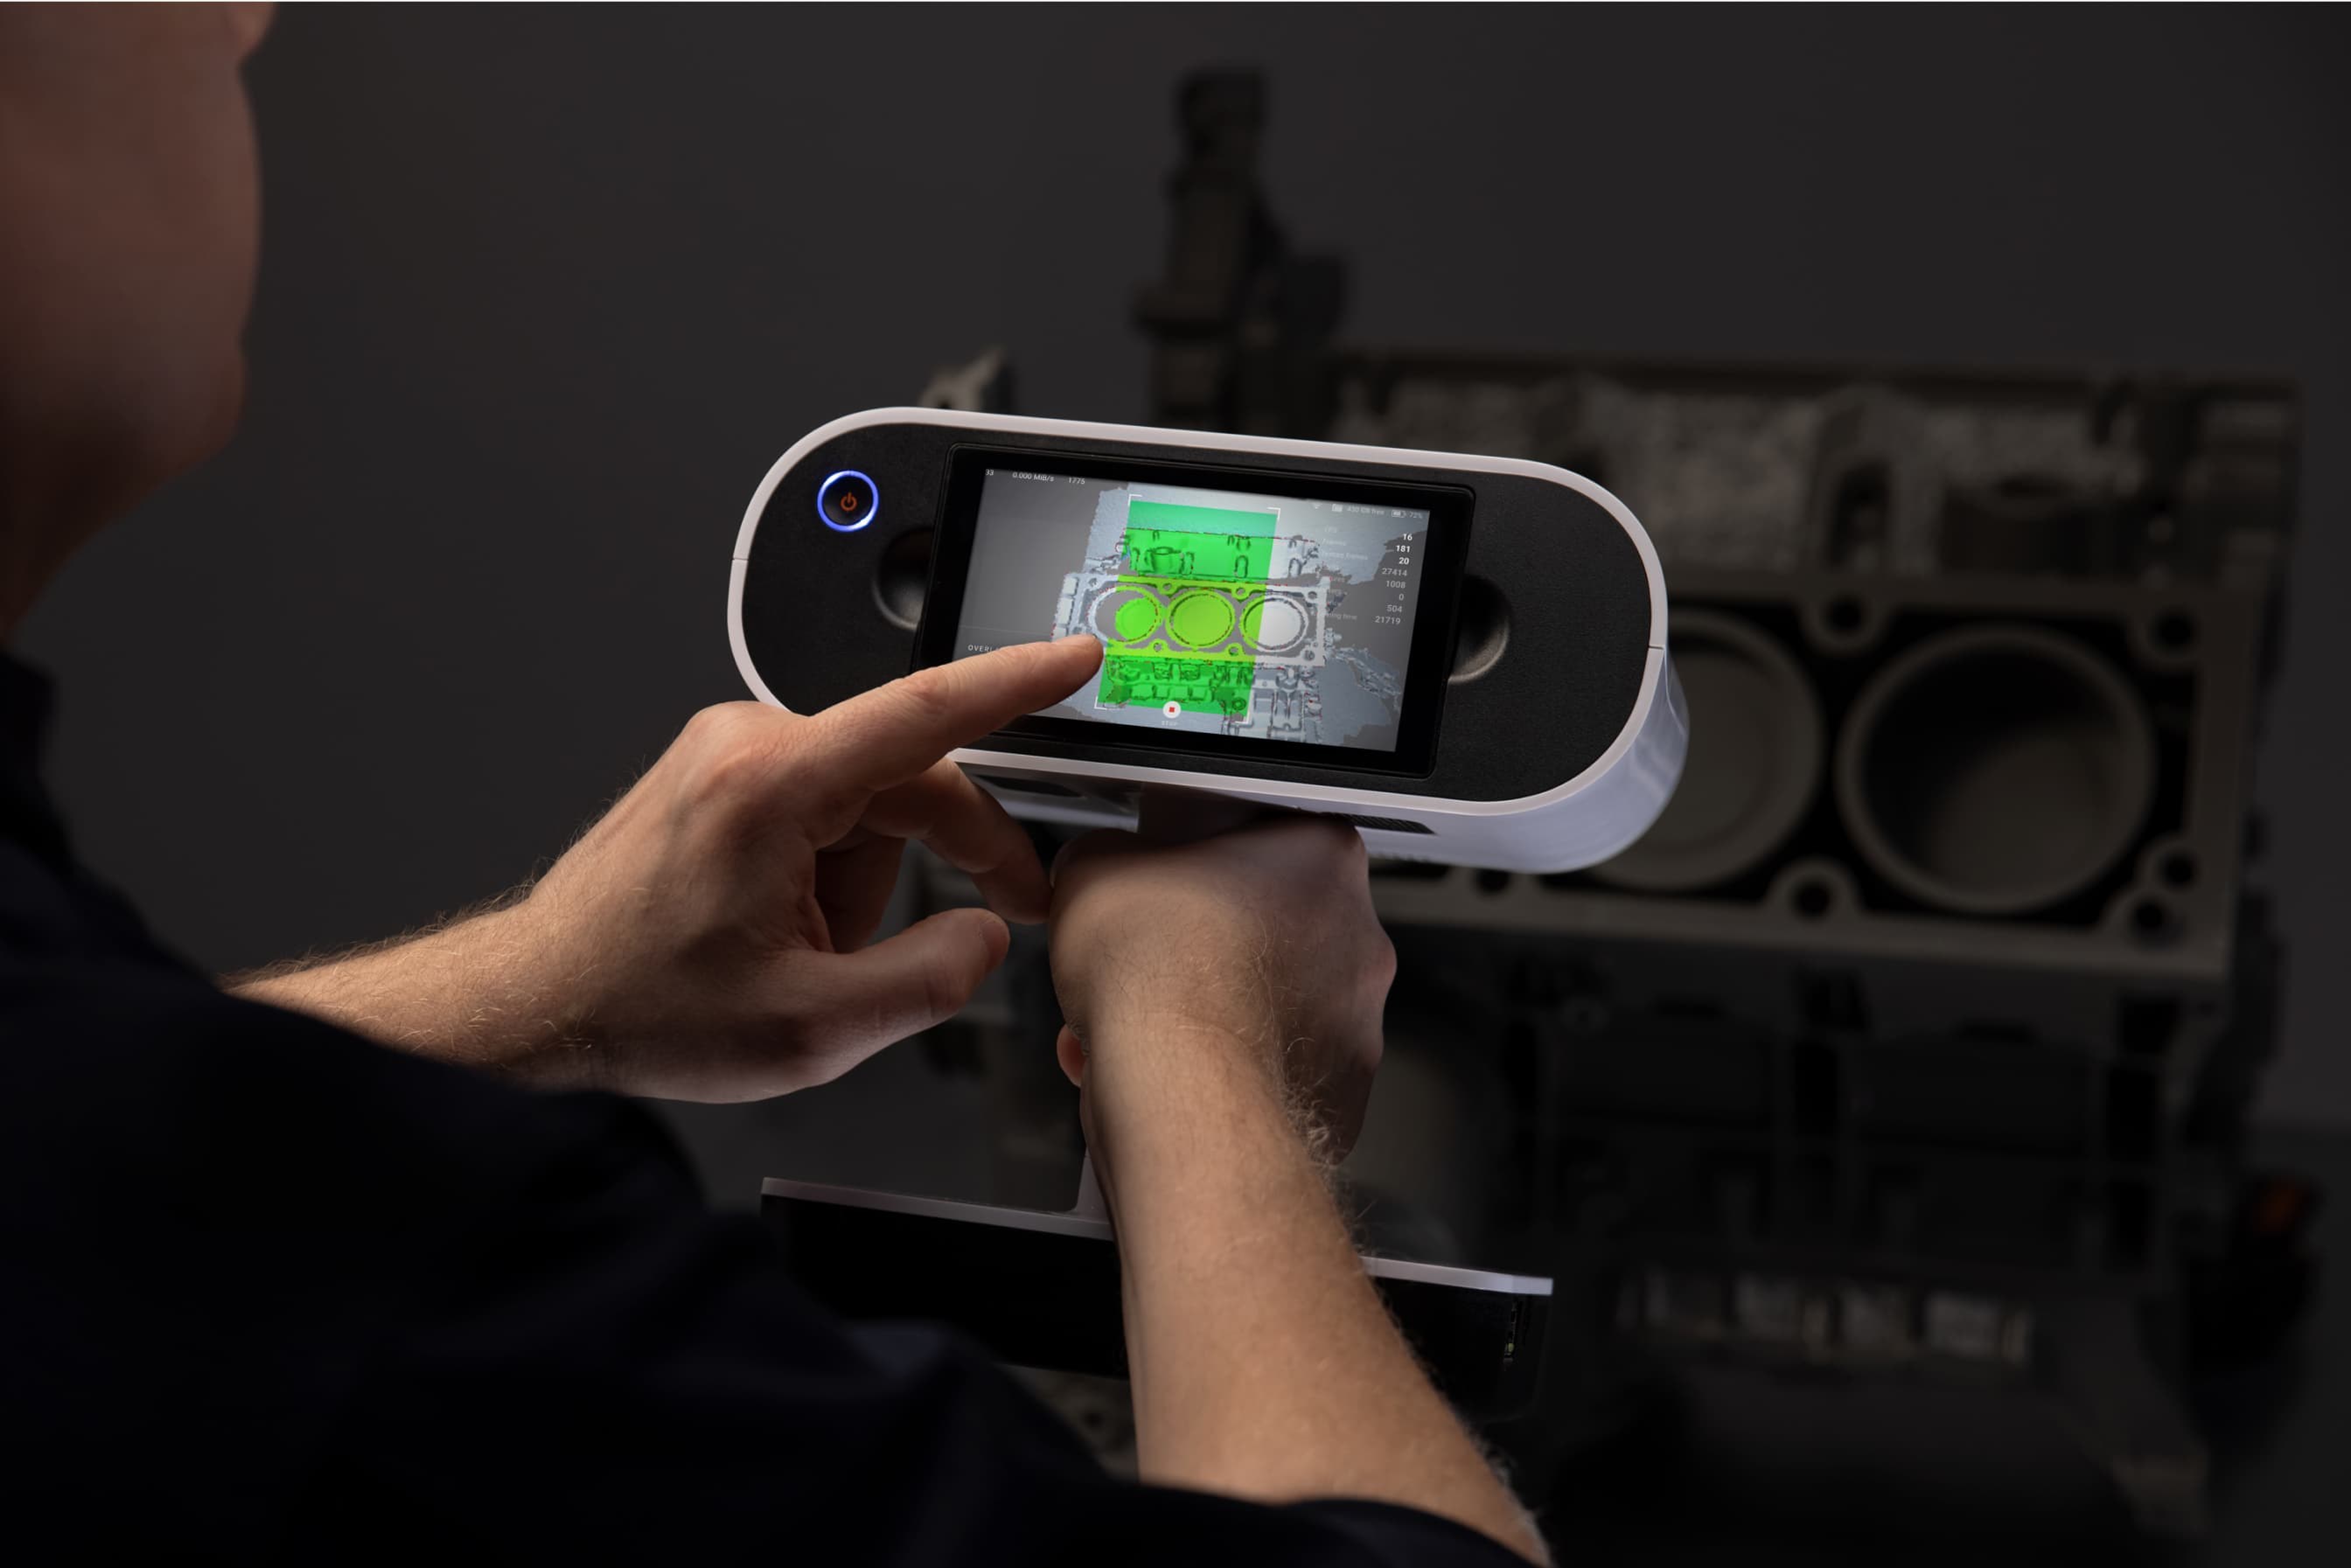
- Refer to the Scanner’s Software Feedback: Many Russian 3D scanners provide real-time feedback through their software interface. Use this feedback to assess the position of the model as you make adjustments. Pay attention to the visual representations or indicators that show the model’s alignment and centering.
- Keep the Model Centered: Continuously monitor the position of the model and ensure that it remains centered as you make adjustments. Avoid any drift or shifting that may occur during the movement of the model.
- Consider Overall Alignment: In addition to centering the model, pay attention to its overall alignment. Ensure that it is straight, level, and consistent with your scanning requirements. Adjust the orientation as needed to capture the model from the desired perspective.
- Make Fine-tune Adjustments: Once you have made initial adjustments, observe the model’s position and assess if any additional fine-tuning is required. Use the scanner’s controls to make smaller, precise movements to achieve the desired centering and alignment.
- Review and Confirm: Take advantage of the scanner’s preview function or a test scan to review the model’s position. Confirm that the model is now well-centered within the scanner’s field of view. Pay attention to any distortions, misalignments, or artifacts that may indicate the need for further adjustments.
By carefully adjusting the model’s position in the Russian 3D scanner, you can ensure accurate and precise centering. Take the necessary time to make gradual movements and refer to the scanner’s feedback to achieve optimal results. Once the model is properly positioned and centered, you are ready to proceed to the next step: confirming that the model is accurately centered within the scanner.
Confirming the Model is Centered
After adjusting the position of the model in the Russian 3D scanner, it is crucial to confirm that the model is accurately centered within the scanner’s field of view. This step ensures that you have achieved the desired centering and alignment before proceeding with the scanning process. Follow these steps to confirm that the model is properly centered:
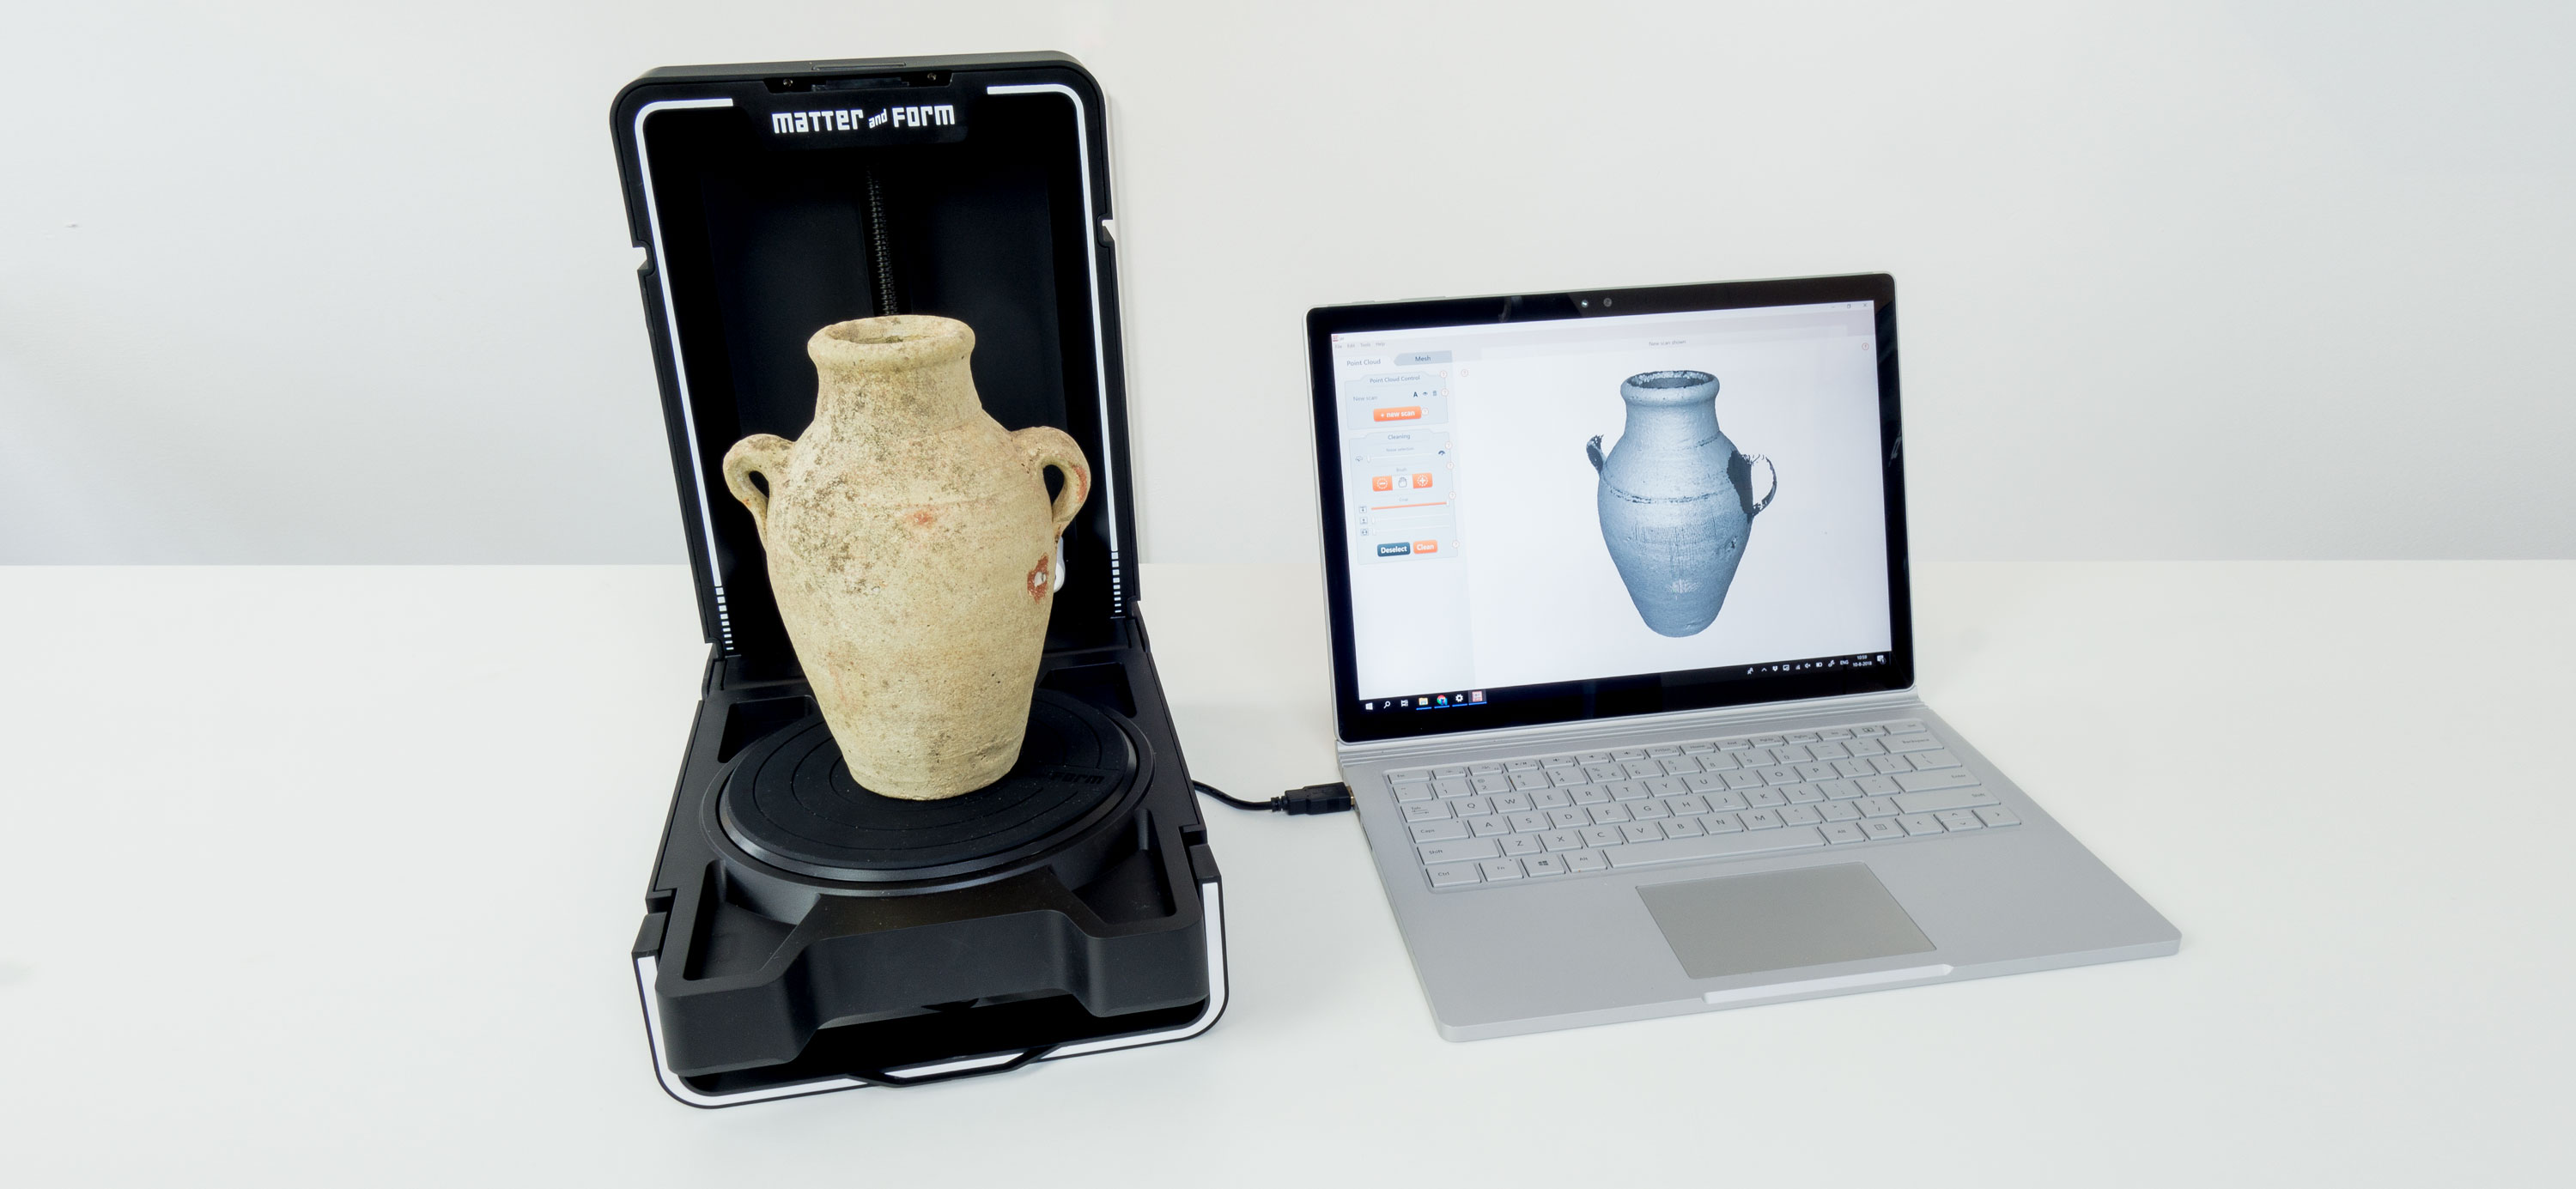
- Perform a Test Scan or Preview: Capture a test scan or use the preview function in the scanner’s software to assess the model’s position. This will provide a visual representation or image that can help you gauge the model’s alignment and centering.
- Review the Scanned Data or Preview Image: Carefully examine the scanned data or preview image to assess the position of the model. Look for any distortions, misalignments, or asymmetries that might indicate an inaccurate centering. Compare the scan data to your expectations and desired results.
- Check for Overall Symmetry: Pay attention to the model’s overall symmetry in the scan data or preview image. If the model appears off-center or imbalanced, further adjustments may be necessary to achieve the desired centering. Ensure that the centerline of the model aligns with the centerline of the scanner.
- Verify Proper Alignment: Confirm that the model is facing the desired direction and that any specific features or areas meant to be captured are properly aligned within the scanner’s field of view. Adjust the model’s orientation if needed to ensure accurate scanning of the desired attributes.
- Assess for Distortions or Artifacts: Look for any distortions, artifacts, or irregularities in the scan data or preview image. These may indicate issues with the centering and alignment of the model. If any aberrations are present, revisit the adjustments made in the previous steps to rectify the problems.
- Repeat Preview or Test Scans if Necessary: If you are uncertain about the accuracy of the model’s centering, repeat the preview or test scan process. This allows you to compare multiple scans and make precise adjustments to achieve the desired centering before proceeding with the final scan.
- Seek Feedback or Validation: If available, consult experienced users or colleagues who have expertise in using the Russian 3D scanner. They can provide valuable insights and feedback to validate the centering of your model and suggest any necessary adjustments.
By thoroughly reviewing and confirming the model’s centering within the Russian 3D scanner, you can ensure accuracy and precision in your final scans. Take the time to assess the scan data or preview images to verify that the model aligns with your desired centering and alignment requirements.
In the next section, we will provide some troubleshooting tips to help you overcome common challenges that may arise during the centering process.
Troubleshooting Tips
While centering a model in a Russian 3D scanner, you may encounter certain challenges that could affect the accuracy of the scan. Here are some troubleshooting tips to help you overcome common issues and ensure successful centering:
- Check for Uneven Lighting: Uneven lighting can cause shadows on the model, affecting the accuracy of the scan. Ensure that the scanning environment is well-lit with consistent lighting to minimize any variations that can impact the centering process.
- Inspect the Model’s Surface: Reflective or transparent surfaces on the model can cause scanning errors or distortions. Apply an anti-reflective spray or powder on reflective surfaces and use a matte spray on transparent areas to enhance scanning accuracy.
- Optimize the Scanner’s Settings: Experiment with different scanning settings, such as resolution, exposure, or filtering options, to achieve the desired centering results. Adjusting these settings can help minimize noise, artifacts, or overexposure in the scan data.
- Ensure Sufficient Overlap in Multiple Scans: If you need to capture a larger model or complex surfaces from different angles, ensure that there is sufficient overlap between the scans. This will aid in merging the scans seamlessly and achieving an accurate composite representation of the model.
- Inspect the Scanner’s Calibration: Periodically check the calibration status of the Russian 3D scanner. If the scans consistently yield inaccuracies or distortions, recalibrate the scanner according to the manufacturer’s guidelines to restore optimal functionality.
- Use Additional Alignment Aids: In challenging centering scenarios, utilize additional alignment aids such as markers or fiducial targets. These aids can provide reference points or guide the proper positioning and alignment of the model within the scanner’s field of view.
- Consult the Russian 3D Scanner’s Documentation: Refer to the scanner’s user manual or documentation for troubleshooting guidance specific to your model. The manufacturer’s instructions can provide valuable insights into addressing any issues or questions you may encounter during the centering process.
- Seek Professional Assistance: If you are facing persistent challenges or are unsure about optimal centering techniques, consider consulting a professional or reaching out to the scanner manufacturer’s technical support. They can provide expert advice and assistance to help resolve any complex issues.
Remember that troubleshooting during the centering process is a normal part of using 3D scanners. By following these tips and being proactive in problem-solving, you can overcome obstacles and achieve accurate centering results in your Russian 3D scanning endeavors.
With the troubleshooting tips addressed, we have covered all the essential aspects of centering a model in the Russian 3D scanner. In the concluding section, we will summarize the key points discussed throughout the guide.
Conclusion
Centering a model in a Russian 3D scanner is an essential step to ensure accurate and high-quality 3D scans. By properly positioning the model within the scanner’s field of view, you can eliminate distortions, achieve precise measurements, and facilitate easier alignment with other scans or reference points.
In this guide, we provided a step-by-step process for centering a model in the Russian 3D scanner. We discussed the importance of centering and the benefits it brings to the scanning process. Additionally, we explored the overview of the Russian 3D scanner and the necessary preparations needed before centering the model.
We then delved into the step-by-step guide, which covered properly positioning the model on the scanner’s platform, adjusting its position for optimal centering, and confirming its accurate alignment within the scanner. Troubleshooting tips were also provided to help overcome common challenges that may arise during the centering process.
By following the guidance and utilizing the troubleshooting tips, you can enhance your proficiency in centering a model in the Russian 3D scanner. Remember to take your time, be patient, and make necessary adjustments to achieve the desired centering results.
Now that you have gained valuable insights into centering a model in the Russian 3D scanner, apply this knowledge to your 3D scanning projects. Whether you are in product design, manufacturing, or other industries requiring precise 3D scans, proper centering will contribute to the accuracy and reliability of your final digital models.
Continue to explore the capabilities of the Russian 3D scanner and experiment with different scanning techniques to further refine your skills. As technology progresses, always stay updated with the latest advancements in 3D scanning technology and techniques to maximize the potential of your scanning endeavors.
With determination and practice, you will become proficient in centering models and unlock the full potential of the Russian 3D scanner for your scanning projects.