Introduction
Welcome to this guide on how to cast on your Philips Smart TV! Casting is a convenient and popular way to share content from your smartphone, tablet, or computer onto a larger screen. By following a few simple steps, you can enjoy your favorite movies, videos, and photos on the big screen with just a few clicks.
Philips Smart TVs offer a range of features that make them an excellent choice for casting. With their advanced technology and user-friendly interface, you can experience seamless connectivity and high-quality entertainment. Whether you want to stream a movie from your phone, share a presentation from your laptop, or display photos from your tablet, casting on your Philips Smart TV is an easy and effective solution.
In this guide, we will walk you through the step-by-step process of casting on your Philips Smart TV. We will cover everything from checking compatibility to setting up the casting app and finally starting the casting process. By the end of this guide, you will be able to stream your favorite content on the big screen and enjoy an immersive viewing experience.
Before we proceed, it is important to note that the specific steps may vary slightly depending on the model and software version of your Philips Smart TV. However, the general process remains the same across most models, so you should be able to follow along regardless of your specific TV model.
Without further ado, let’s dive into the exciting world of casting on your Philips Smart TV!
Step 1: Check Compatibility
Before you start casting on your Philips Smart TV, it is essential to ensure that your devices are compatible. Check if your smartphone, tablet, or computer supports casting functionality. Most modern devices come with built-in casting capabilities.
Firstly, make sure that your Philips Smart TV supports casting. Most Philips Smart TVs have built-in casting capabilities, but it’s important to verify this before proceeding. You can check your TV’s user manual or visit the official Philips website to confirm.
Next, ensure that your casting device is compatible with your Philips Smart TV. Both Android and iOS devices are generally compatible with casting on Philips Smart TVs. For Android users, make sure your device is running a compatible version of Android, usually 4.4 or higher. iPhone and iPad users should ensure that their devices are running the latest iOS version.
Once you have confirmed compatibility, ensure that your Philips Smart TV and casting device are connected to the same Wi-Fi network. Casting works by transmitting data from your device to the TV over a shared network, so it is crucial to have a stable and reliable internet connection.
Lastly, check if your casting device has the latest firmware or operating system installed. Manufacturers often release updates that introduce new features and improve compatibility. Keeping your devices up to date will ensure a smooth casting experience on your Philips Smart TV.
By verifying compatibility and establishing a stable connection, you can proceed to the next steps with confidence. Now that we have confirmed compatibility, let’s move on to Step 2: Connect your Smart TV to the internet.
Step 2: Connect your Smart TV to the internet
In order to cast on your Philips Smart TV, you need to ensure that it is connected to the internet. Here’s how you can connect your Smart TV to Wi-Fi:
1. Turn on your Philips Smart TV and navigate to the settings menu. You can usually find the settings icon on your TV’s home screen or remote control.
2. In the settings menu, look for the “Network” or “Wi-Fi” option. Select it to open the network settings.
3. Your TV will scan for available Wi-Fi networks in the vicinity. Select your home Wi-Fi network from the list of networks.
4. If your network is password protected, you will be prompted to enter the Wi-Fi password. Use the on-screen keyboard or your remote control to input the password accurately. Double-check for any typos to ensure a successful connection.
5. After entering the password, select the “Connect” or “Join” button. Your Philips Smart TV will attempt to connect to the Wi-Fi network. It may take a few moments to establish the connection.
6. Once the connection is successful, your Smart TV will display a confirmation message. You are now connected to the internet.
It is important to ensure that your Wi-Fi signal is strong and stable. A weak or unstable connection can affect the casting performance and result in buffering or interruptions during playback.
If you encounter any issues during the connection process, try restarting your Wi-Fi router and ensure that your Philips Smart TV is within range of the Wi-Fi signal. If the problem persists, consult your TV’s user manual or contact the Philips customer support for further assistance.
Now that your Smart TV is connected to the internet, you’re ready to move on to Step 3: Install the casting app.
Step 3: Install the casting app
To cast on your Philips Smart TV, you will need to install a casting app on your casting device. The casting app acts as a bridge between your device and the Smart TV, allowing you to transmit content wirelessly. Follow these steps to install the casting app:
1. On your casting device, open the app store or play store. This could be the Apple App Store for iOS devices or the Google Play Store for Android devices.
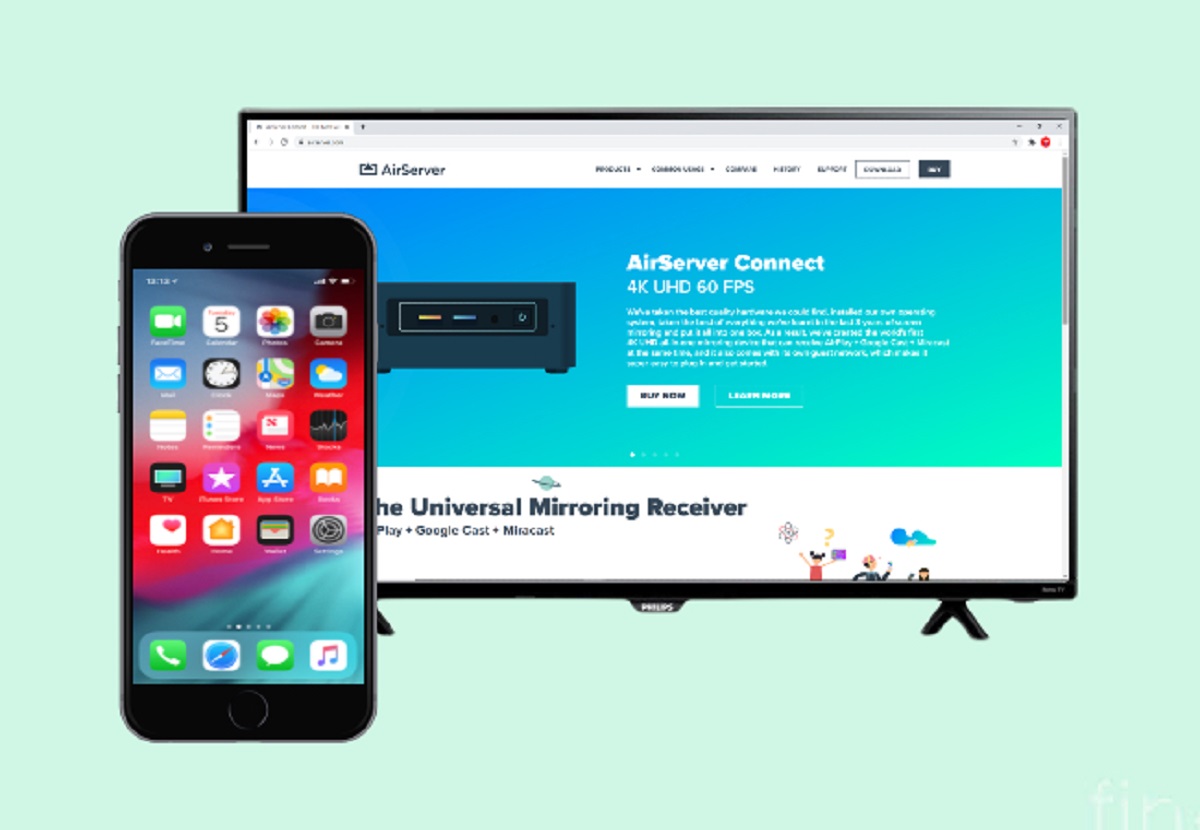
2. In the app store, search for a casting app that is compatible with your device and your Philips Smart TV. Some popular casting apps include Google Chromecast, Miracast, and AirServer.
3. Select the casting app from the search results, and then tap on the “Install” or “Get” button. This will begin the installation process.
4. Wait for the app to download and install on your device. The installation time may vary depending on your internet speed and device performance.
5. Once the installation is complete, open the casting app. You may need to grant the app necessary permissions, such as accessing your media files, connecting to Wi-Fi, or enabling notifications. Follow the on-screen prompts to proceed.
6. After the app opens, it may detect the available casting devices automatically. Look for your Philips Smart TV in the list of devices and select it as the casting destination.
7. If the casting app requires additional setup or configuration, follow the in-app instructions to complete the process. This may involve connecting the app to your Smart TV using a specific code or PIN.
By installing the casting app on your device, you have taken the essential step to enable wireless casting on your Philips Smart TV. The casting app provides the necessary tools and functionalities to establish a secure and reliable connection between your device and the TV.
Now that you have installed the casting app, let’s proceed to Step 4: Set up the casting app.
Step 4: Set up the casting app
After installing the casting app on your device, you need to set it up to ensure smooth and seamless casting on your Philips Smart TV. Here are the steps to set up the casting app:
1. Open the casting app on your device. The app may prompt you to sign in or create an account if required. Follow the on-screen prompts to complete the setup.
2. Once you are signed in, navigate to the app’s settings. Look for options related to device discovery, connection settings, or casting preferences.
3. Enable “Device Discovery” or a similar option to allow the casting app to search for available devices, including your Philips Smart TV.
4. You may also find options to customize the casting experience, such as adjusting video quality, audio settings, or subtitle preferences. Explore these settings to personalize your casting experience.
5. Some casting apps offer additional features and functionalities, such as screen mirroring, media streaming, or casting from cloud storage services. Familiarize yourself with these features and enable them if desired.
6. Confirm that your Philips Smart TV is listed as a available casting device in the app’s device list. If it’s not listed, ensure that your Smart TV is connected to the same Wi-Fi network as your casting device.
7. Once you have customized the settings and ensured that your Smart TV is discoverable, you are ready to start casting on your Philips Smart TV.
It’s important to note that the setup process for each casting app may vary. Some apps may require additional steps or offer advanced features that require further configuration. Refer to the app’s user guide or online documentation for more detailed instructions specific to the casting app you have installed.
With the casting app set up, you are now one step closer to enjoying your favorite content on the big screen. In the next step, we will discuss how to select a device to cast from. Let’s move on to Step 5: Select a device to cast from.
Step 5: Select a device to cast from
Once you have set up the casting app on your device and your Philips Smart TV, it’s time to select the device from which you want to cast your content. Whether it’s your smartphone, tablet, or computer, here’s how you can select a device to cast from:
1. Ensure that your casting device and Philips Smart TV are connected to the same Wi-Fi network. This is essential for casting to work seamlessly.
2. Open the app or platform from which you want to cast your content. It could be a streaming service like Netflix or YouTube, a media player app, or even your device’s photo or video gallery.
3. Look for the casting icon within the app or platform. This icon usually resembles a rectangle with waves or a Wi-Fi symbol. Tap or click on the casting icon to initiate the casting process.
4. The casting app on your device will detect the available casting devices on your network, including your Philips Smart TV. Select your Smart TV from the list of devices.
5. Depending on the app or platform, you may be prompted to choose the content you want to cast. Select the desired video, photo, or audio file that you want to view on your Philips Smart TV.
6. Once you have selected the content, it will start playing on your Philips Smart TV. You can control playback, volume, and other settings directly from your casting device.
7. You can now sit back, relax, and enjoy your favorite content on the big screen of your Philips Smart TV.
It’s worth noting that some casting apps allow you to cast your entire device screen, which means you can mirror everything that appears on your device, including apps, games, and presentations. This can be a useful feature for sharing content or conducting presentations on your Philips Smart TV.
Remember that casting functionality and features may vary depending on the app, platform, or device you are casting from. Refer to the specific instructions or support documentation of the casting app and app/platform you are using for more detailed information.
Now that you know how to select a device to cast from, let’s move on to the final step: Step 6: Start casting on your Philips Smart TV.
Step 6: Start casting on your Philips Smart TV
Now that you have successfully selected a device to cast from, it’s time to start casting on your Philips Smart TV. Follow these simple steps to begin the casting process:
1. Ensure that both your casting device and your Philips Smart TV are connected to the same Wi-Fi network.
2. Open the casting app on your device, and make sure it is connected to your Philips Smart TV.
3. On your casting device, navigate to the content you want to cast. It can be a video, photo, or audio file, or even a webpage or document.
4. Once you have selected the content, look for the casting icon within the app or platform that you are using. This casting icon is usually a rectangle with waves or a Wi-Fi symbol.
5. Tap or click on the casting icon to initiate the casting process. A list of available casting devices, including your Philips Smart TV, will appear on the screen.
6. Select your Philips Smart TV from the list of devices. The casting app will establish a connection between your device and the TV.
7. The content you selected on your casting device will now start playing on your Philips Smart TV. You can use your casting device to control playback, adjust volume, and perform other functions.
8. Sit back, relax, and enjoy your content on the big screen of your Philips Smart TV. You can now experience your favorite movies, videos, and photos with enhanced visual and audio quality.
During the casting process, it’s important to keep your casting device in close proximity to the Wi-Fi router and minimize any possible interferences. This will ensure a stable and uninterrupted casting experience.
If you want to stop casting, simply navigate to the casting app on your device and select the “Stop” or “Disconnect” option. This will end the casting session and return to the regular interface of your casting app.
Now that you know how to start casting on your Philips Smart TV, you’re all set to enjoy a seamless and immersive viewing experience. Take advantage of this convenient feature to share and enjoy your content on the big screen.
Before we wrap up, let’s summarize the key steps we covered:
- Check compatibility
- Connect your Smart TV to the internet
- Install the casting app
- Set up the casting app
- Select a device to cast from
- Start casting on your Philips Smart TV
By following these steps, you can unlock a world of entertainment and seamlessly cast your favorite content on your Philips Smart TV.
Conclusion
Casting on your Philips Smart TV opens up a world of possibilities, allowing you to enjoy your favorite movies, videos, and photos on the big screen with ease. By following the steps outlined in this guide, you can successfully set up and start casting on your Philips Smart TV. Here’s a quick recap of the key steps:
- Check compatibility to ensure your devices can support casting.
- Connect your Smart TV to the internet for a stable connection.
- Install a casting app on your casting device.
- Set up the casting app, customizing settings and preferences.
- Select a device to cast from within the casting app.
- Initiate casting on your Philips Smart TV and enjoy your content on the big screen.
Keep in mind that the specific steps and features may vary depending on the model and software version of your Philips Smart TV, as well as the casting app and casting device you are using. Consult the user manual, online documentation, or support resources for your specific devices to get the most accurate and up-to-date instructions.
Now that you’ve successfully set up casting on your Philips Smart TV, you can open up a whole new world of entertainment and convenience. Whether you want to stream movies, binge-watch TV shows, share memorable moments with family and friends, or deliver professional presentations, casting on your Philips Smart TV provides a hassle-free and immersive experience.
Remember to keep your devices and apps up to date to ensure optimal performance and compatibility. Additionally, maintaining a strong and stable Wi-Fi connection is essential for a seamless casting experience.
So get ready to enhance your viewing experience by casting on your Philips Smart TV. Enjoy the convenience, versatility, and sheer entertainment value that casting brings to your home. Sit back, relax, and indulge in your favorite content on the big screen of your Philips Smart TV.
Thank you for reading. Happy casting!