Introduction
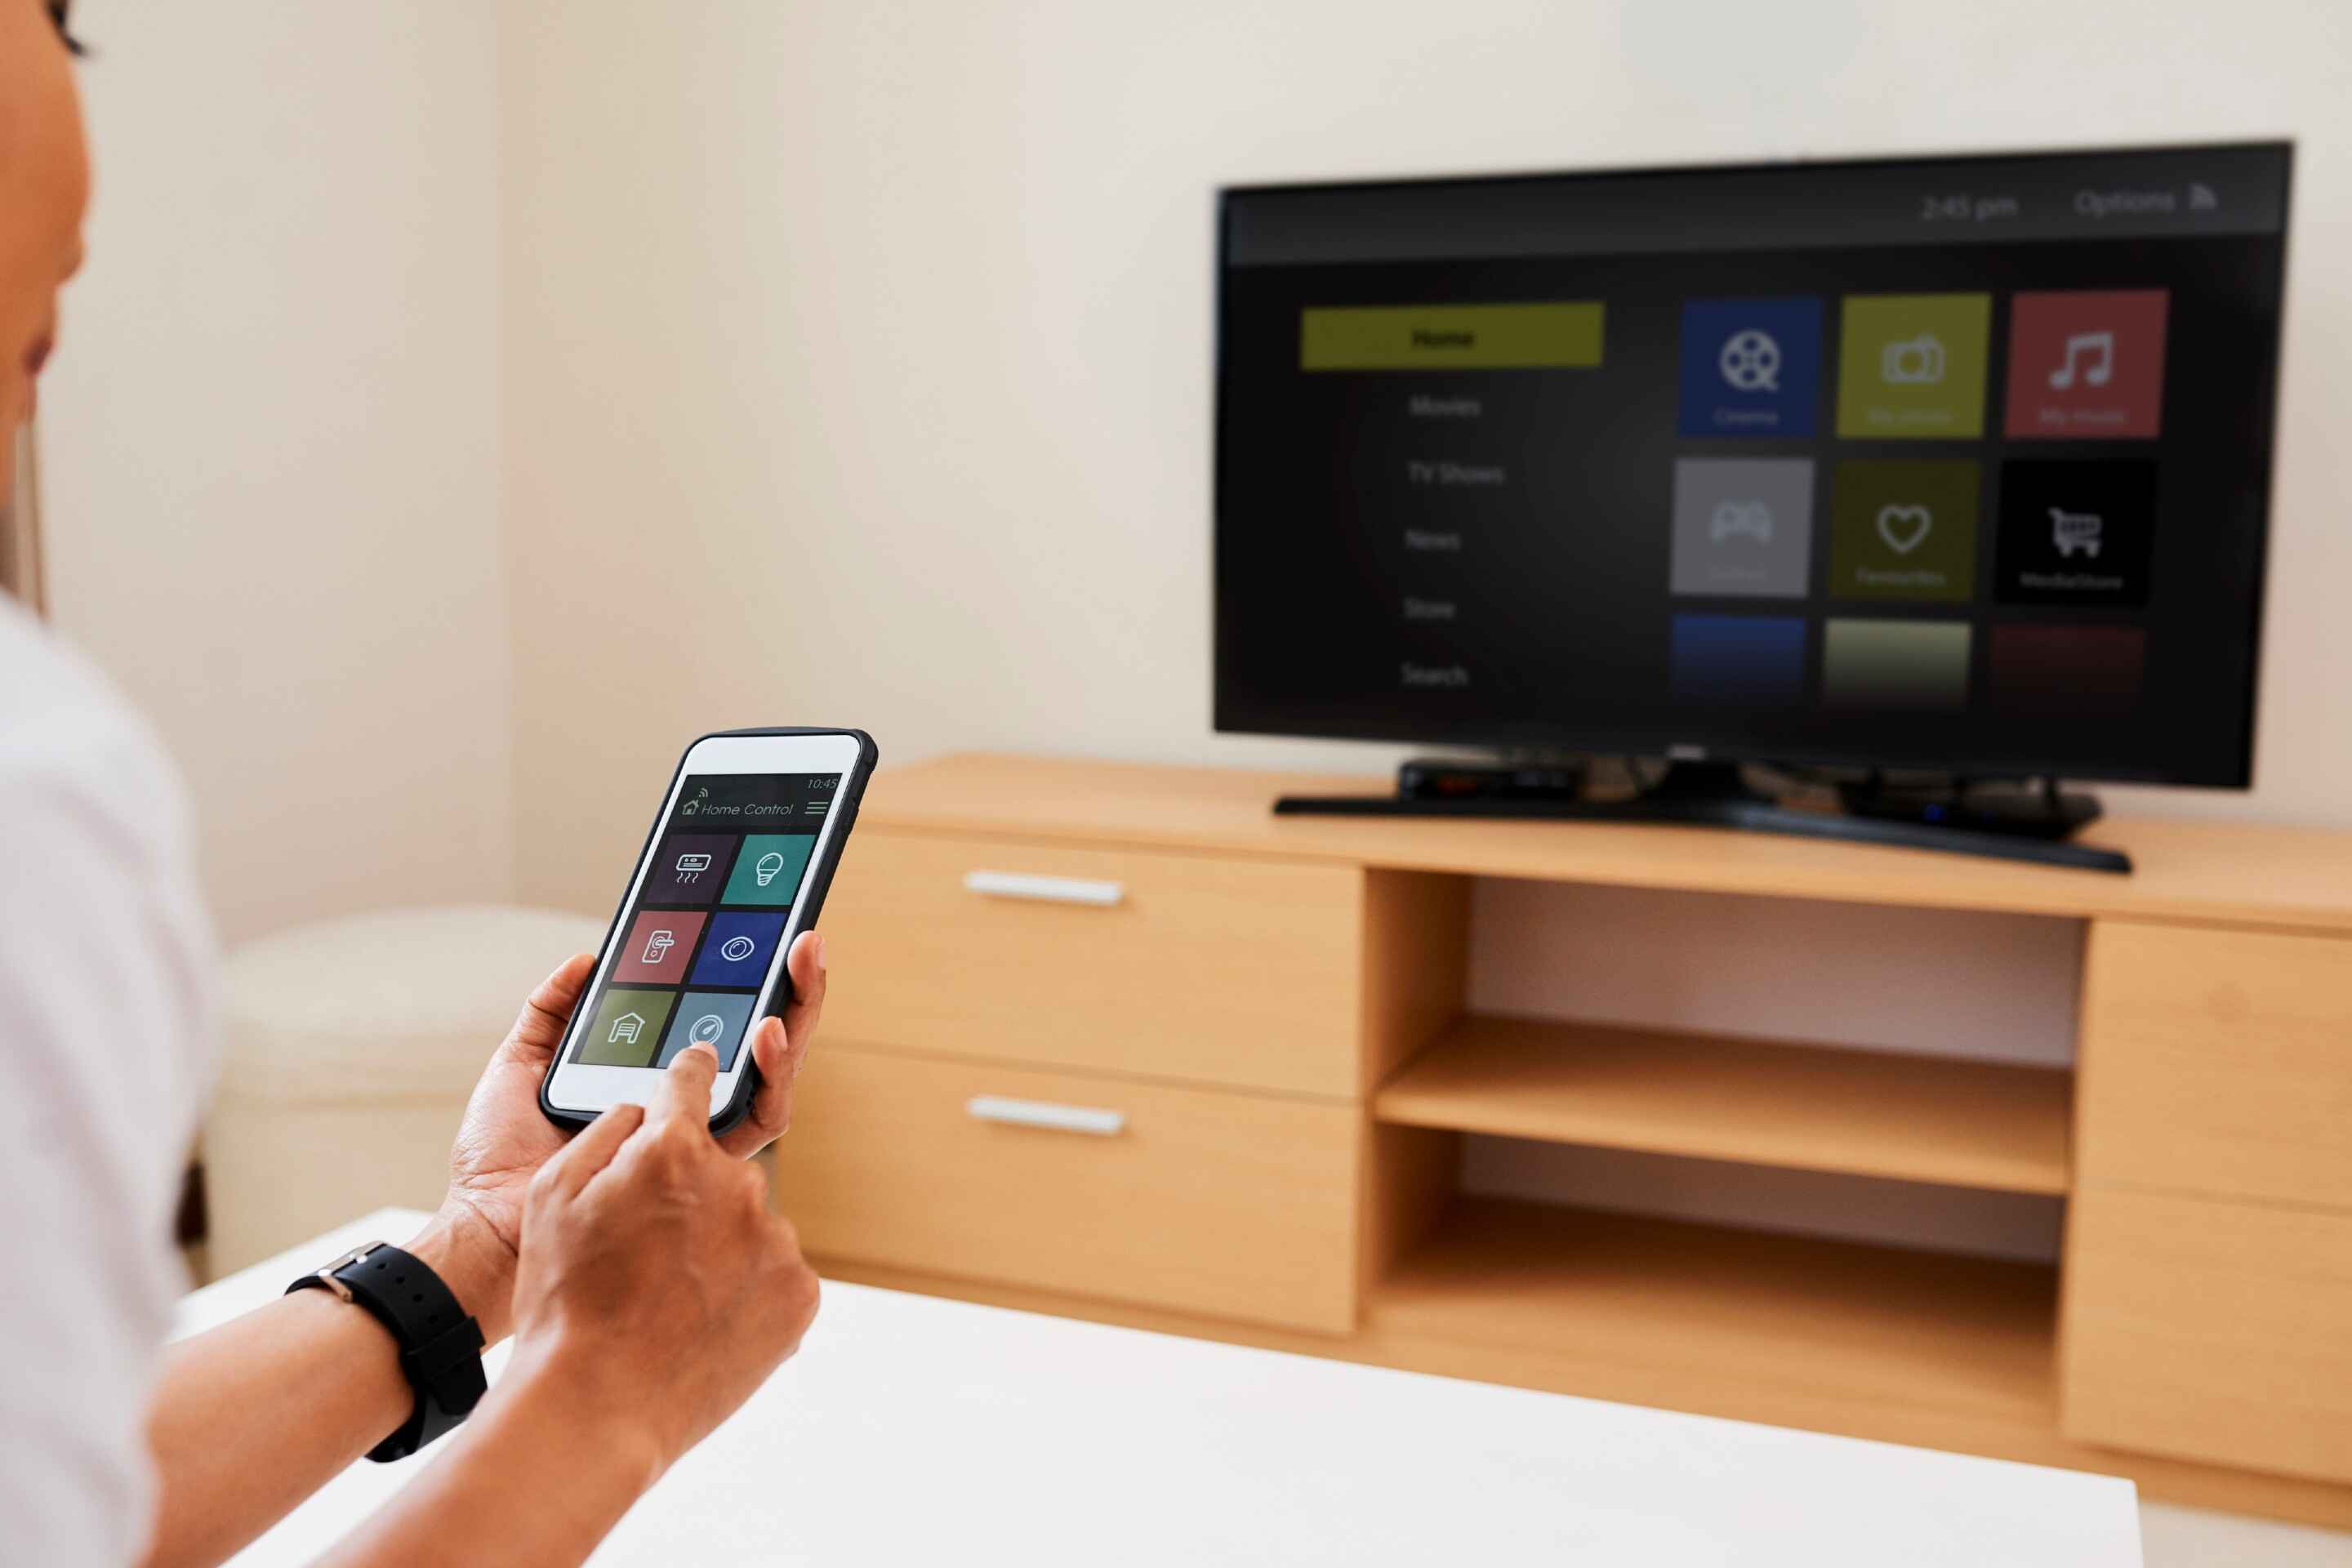
Are you looking to cast your iPhone to your TV but don’t have an Apple TV? Don’t worry, there are several methods available that allow you to enjoy your iPhone content on the big screen without the need for an Apple TV. Whether you want to watch videos, stream movies, play games, or showcase your photos and presentations, casting your iPhone to your TV can provide an immersive experience for you and your friends and family.
In this article, we will explore three different methods that will help you cast your iPhone to your TV without the need for an Apple TV. We will guide you through each method step by step, ensuring that you can easily set up and enjoy casting your iPhone screen to your television.
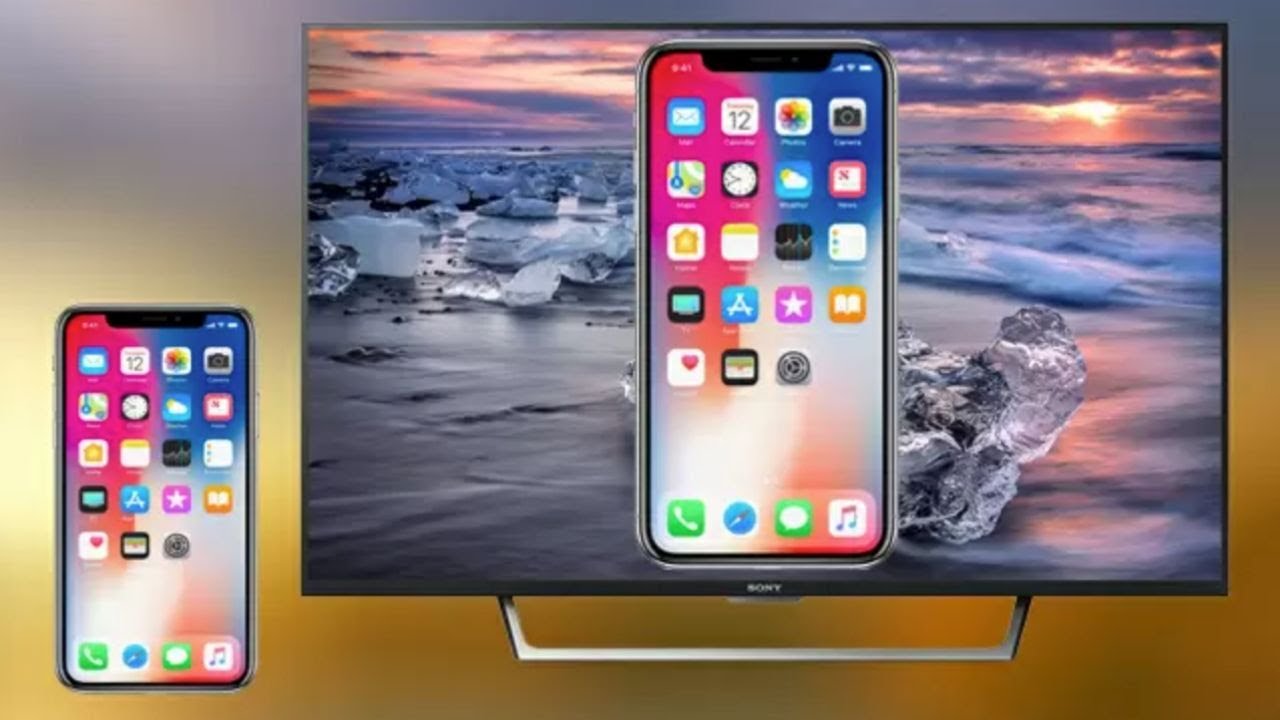
The first method involves using AirPlay technology, which is built into most newer models of smart TVs. This method allows seamless wireless streaming of your iPhone content to your TV. We will explain how to set up and utilize AirPlay to mirror your iPhone screen and audio onto your TV.
If your TV doesn’t support AirPlay, don’t worry! The second method we will cover involves using an HDMI adapter. This method requires a compatible adapter that connects your iPhone to your TV using an HDMI cable. We will walk you through the steps to connect and set up the adapter, allowing you to enjoy your iPhone content on the big screen.
The third method involves using Chromecast or Android TV. If you have either of these devices connected to your TV, you can easily cast your iPhone screen to it. We will explain how to set up Chromecast or Android TV and the steps to connect and cast your iPhone to your TV.
So, whether you have a smart TV with AirPlay capabilities, an HDMI adapter, or Chromecast or Android TV, we’ve got you covered. Let’s dive into the step-by-step guides for each method and get ready to enjoy your favorite iPhone content on your TV!
Method 1: Using AirPlay Technology
If you have a smart TV that supports AirPlay technology, casting your iPhone to your TV is incredibly easy. AirPlay allows you to wirelessly stream your iPhone’s screen and audio to your TV, creating a seamless viewing experience. Follow these steps to cast your iPhone to your TV using AirPlay:
Step 1: Check compatibility
Before getting started, make sure that your smart TV is compatible with AirPlay. Most newer smart TVs support AirPlay, but it’s always a good idea to check the manufacturer’s documentation or website for confirmation.
Step 2: Connect your iPhone and TV to the same Wi-Fi network
To use AirPlay, your iPhone and TV need to be connected to the same Wi-Fi network. Make sure both devices are connected to the same network before proceeding.
Step 3: Enable AirPlay on your iPhone
On your iPhone, open the Control Center by swiping down from the top-right corner for iPhone X and later, or swipe up from the bottom of the screen for iPhone 8 and earlier. Tap on the AirPlay icon, which looks like a rectangle with an upward arrow.
Step 4: Select your TV as the AirPlay device
In the AirPlay menu, you should see a list of available AirPlay devices. Select your TV from the list. If prompted, enter the passcode displayed on your TV to establish the connection.
Step 5: Enjoy casting your iPhone to the TV
Once the connection is established, your iPhone screen will be mirrored on your TV. You can now play videos, movies, browse photos, or even use apps on your iPhone, and the content will be displayed on your TV. To stop casting, simply tap on the AirPlay icon in the Control Center and select “Stop AirPlay” or disconnect from your TV.
Using AirPlay technology allows you to effortlessly cast your iPhone to your TV without the need for any additional cables or adapters. Enjoy sharing your favorite content with friends and family on the big screen!
Step 1: Check compatibility
Before you can start casting your iPhone to your TV using AirPlay, it’s important to ensure that your smart TV is compatible with this technology. While most newer smart TVs support AirPlay, it’s always a good idea to double-check the compatibility to avoid any frustrations or complications down the line. Here’s how to check the compatibility:
1. Consult the manufacturer’s documentation
The easiest way to check if your smart TV supports AirPlay is by referring to the manufacturer’s documentation. Look for specifications or features listed in the user manual or on the manufacturer’s website. They should indicate if AirPlay is supported or if there are any specific requirements for it to work.
2. Look for the AirPlay logo on your TV
If you’re unsure about the compatibility, examine your TV for the AirPlay logo. This logo typically looks like a rectangle with an upward-pointing arrow inside it. The presence of this logo on your TV indicates that it supports AirPlay technology.
3. Check for firmware updates
If your TV is not AirPlay compatible out of the box, there might be firmware updates available that can add this functionality. Check the manufacturer’s website or access the settings menu on your TV to see if there are any updates available. Installing the latest firmware may enable AirPlay support.
4. Connect to the internet
AirPlay requires both your iPhone and your TV to be connected to the same Wi-Fi network. Ensure that your TV is connected to the internet by accessing its network settings. If your TV lacks Wi-Fi capabilities, make sure it is connected to a wired internet connection using an Ethernet cable.
By following these steps, you can determine whether your smart TV is compatible with AirPlay technology. Checking compatibility beforehand ensures a smooth and hassle-free casting experience without any unexpected surprises. If your TV doesn’t support AirPlay, don’t worry! There are alternative methods available, such as using an HDMI adapter or a streaming device like Chromecast or Android TV, which we will cover in the following sections.
Step 2: Connect your iPhone and TV to the same Wi-Fi network
In order to successfully use AirPlay to cast your iPhone to your TV, it is essential that both devices are connected to the same Wi-Fi network. This step ensures a seamless and reliable connection between your iPhone and the TV. Follow the instructions below to connect your iPhone and TV to the same Wi-Fi network:
1. Connect your TV to Wi-Fi
Start by ensuring that your smart TV is connected to your home Wi-Fi network. Access the settings menu on your TV and navigate to the network or Wi-Fi settings. Select your Wi-Fi network from the list of available networks and enter the network password, if required. Once successfully connected, write down the name of the network for reference.
2. Connect your iPhone to Wi-Fi
On your iPhone, go to the Settings app and tap on “Wi-Fi.” Make sure Wi-Fi is turned on, and then select the same Wi-Fi network that your TV is connected to. Enter the network password if prompted. Once connected, your iPhone will display a checkmark next to the network name to indicate a successful connection.
3. Verify the connection
To ensure that both devices are connected to the same Wi-Fi network, you can perform a quick verification. On your iPhone, open any app that requires an internet connection, such as a web browser or a streaming app. Make sure you can access the internet and load content without any issues. This confirms that your iPhone is connected to the same Wi-Fi network as your TV.
If your iPhone and TV are not connected to the same Wi-Fi network, you may experience difficulties when trying to cast your iPhone to your TV using AirPlay. Ensure that both devices are connected to the same network to establish a stable connection.
By connecting your iPhone and TV to the same Wi-Fi network, you have set the foundation for successful AirPlay casting. The next step is to enable AirPlay on your iPhone, which we will cover in the following section.
Step 3: Enable AirPlay on your iPhone
Once you have connected your iPhone and TV to the same Wi-Fi network, the next step is to enable AirPlay on your iPhone. Enabling AirPlay allows your iPhone to discover and connect to compatible AirPlay devices, such as your smart TV. Follow these simple steps to enable AirPlay on your iPhone:
1. Open the Control Center
Swipe down from the top-right corner of the screen (for iPhone X and later models) or swipe up from the bottom of the screen (for iPhone 8 and earlier models) to access the Control Center. The Control Center contains various settings and shortcuts for your iPhone.
2. Locate the AirPlay icon
In the Control Center, look for the AirPlay icon, which resembles a rectangle with an upward-pointing arrow in it. The icon is typically located in the media playback section, along with other audio and video controls. You may need to scroll horizontally or vertically to find it, depending on your iPhone model and iOS version.
3. Tap on the AirPlay icon
Once you have located the AirPlay icon, tap on it to access the AirPlay menu. This menu displays all available AirPlay devices that your iPhone can connect to, including your smart TV. It may take a few moments for your iPhone to detect and populate the list of devices.
4. Select your TV as the AirPlay device
In the AirPlay menu, locate and select your TV from the list of available devices. Your TV name may appear as a model number or a custom name you have assigned to it. If prompted, enter the passcode displayed on your TV screen to establish the connection between your iPhone and the TV.
5. Enable mirroring, if desired
If you wish to mirror your iPhone screen onto your TV, toggle the “Mirroring” option to enable it. Mirroring allows you to display everything on your iPhone screen, including apps, videos, games, and presentations, on the larger TV screen. If you only want to stream specific media, you can leave the mirroring option disabled.
Enabling AirPlay on your iPhone allows you to establish a connection with your TV and stream your iPhone’s screen and audio effortlessly. You are now ready to enjoy casting your iPhone to the TV, which we will cover in the next step.
Step 4: Select your TV as the AirPlay device
After enabling AirPlay on your iPhone, the next step is to select your TV as the AirPlay device. This will establish the connection between your iPhone and the TV, allowing you to stream and display your iPhone content on the big screen. Follow these steps to select your TV as the AirPlay device:
1. Access the AirPlay menu
Open the Control Center on your iPhone by swiping down from the top-right corner (for iPhone X and later models) or swiping up from the bottom of the screen (for iPhone 8 and earlier models). In the Control Center, locate and tap on the AirPlay icon, which looks like a rectangle with an upward-pointing arrow.
2. Locate your TV
In the AirPlay menu, your iPhone will display a list of available AirPlay devices, including your TV. Look for your TV in the list and tap on its name. If your TV doesn’t appear in the list, make sure it is connected to the same Wi-Fi network as your iPhone and that AirPlay is enabled on your TV.
3. Enter the passcode, if prompted
If this is your first time connecting your iPhone to your TV via AirPlay, your TV may display a passcode on the screen. On your iPhone, a prompt will appear asking you to enter the passcode displayed on the TV. Enter the passcode using the on-screen keyboard on your iPhone, and tap “OK” to proceed.
4. Confirm the connection
Once the passcode is entered correctly, your iPhone will establish a connection with your TV. You may see a loading indicator or a notification confirming that the connection is successful. Your iPhone screen should now be mirrored on your TV, displaying the same content and audio.
5. Adjust settings, if desired
If you want to make any adjustments to the streaming settings, such as the volume or aspect ratio, you can do so on your iPhone or through the TV’s remote control. Additionally, within certain apps or media players, you may have specific streaming options available to optimize the viewing experience on your TV.
By selecting your TV as the AirPlay device, you have successfully established the connection between your iPhone and the TV. You can now enjoy streaming and casting your iPhone content directly to the big screen!
Step 5: Enjoy casting your iPhone to the TV
With your iPhone successfully connected to your TV via AirPlay, it’s time to sit back and enjoy casting your iPhone content on the big screen. Whether you want to watch videos, stream movies, play games, or showcase your photos and presentations, you can now do so directly on your TV. Here’s how to make the most of casting your iPhone to the TV:
1. Play videos and movies
You can now play videos and movies on your iPhone, and they will be mirrored and displayed on your TV screen. Open your favorite video streaming app, such as Netflix, YouTube, or Hulu, and choose a video to play. Sit back and enjoy the cinematic experience on your TV, with the sound playing through your TV’s speakers for an immersive viewing experience.
2. Stream music and audio
If you enjoy listening to music on your iPhone, you can stream your favorite songs, albums, or playlists through the TV’s speakers. Open any music streaming app, such as Apple Music or Spotify, and select the desired audio content. The music will play through your TV, enhancing the audio quality and making it ideal for parties or gatherings.
3. Display photos and presentations
Showcasing your photos and presentations on the big screen can be impressive and visually appealing. Open the Photos app on your iPhone and navigate to the album or collection you want to display. Each photo you select will be shown on the TV, allowing you to relive memories or present your work to a larger audience. Similarly, if you have a presentation saved on your iPhone, you can open it and cast it onto the TV for a professional and engaging experience.
4. Utilize apps and games
Many apps and games on your iPhone can benefit from being displayed on a larger screen. Whether you’re gaming, using productivity apps, or exploring educational apps, casting them to the TV can enhance your overall experience. So go ahead and launch your favorite apps and games, and enjoy playing them on a bigger canvas for improved visibility and immersion.
5. Stop casting
To stop casting your iPhone to the TV, open the Control Center on your iPhone and tap on the AirPlay icon. In the AirPlay menu, select “Stop AirPlay” or choose your iPhone as the playback device, depending on your preferences. This will disconnect your iPhone from the TV and revert your iPhone screen and audio back to normal.
By following these steps, you can enjoy casting a wide range of content from your iPhone to your TV using AirPlay. Whether it’s videos, music, photos, presentations, or apps, the possibilities are limitless. Sit back, relax, and enjoy your favorite iPhone content on the big screen!
Method 2: Using HDMI Adapter
If your TV doesn’t support AirPlay technology, don’t worry! You can still cast your iPhone to your TV using an HDMI adapter. This method involves connecting your iPhone to your TV using an HDMI cable and adapter. Follow these steps to cast your iPhone to your TV using an HDMI adapter:
Step 1: Check compatibility and gather necessary equipment
Start by checking if your iPhone supports video output via HDMI. You will need an iPhone with a Lightning connector. Additionally, ensure that your TV has an HDMI input port and that you have a compatible HDMI cable and Lightning to HDMI adapter. These adapters can be purchased from various electronics retailers or online.
Step 2: Connect HDMI adapter to your iPhone
Plug the Lightning end of the HDMI adapter into the charging port of your iPhone. Make sure it fits securely into place. The other end of the adapter should have an HDMI port.
Step 3: Connect HDMI cable to the adapter and TV
Insert one end of the HDMI cable into the HDMI port on the adapter. Connect the other end of the HDMI cable to an available HDMI input port on your TV. Remember to take note of the HDMI input number on your TV where you have connected the cable.
Step 4: Select the HDMI input on your TV
Using your TV’s remote control, select the appropriate HDMI input that corresponds to the port you connected the HDMI cable to. This allows your TV to receive the video and audio signals from your iPhone.
Step 5: Use your iPhone on the big screen
Once the connection is established, your iPhone screen will be mirrored on your TV. You can now navigate through your iPhone’s interface, open apps, play videos, view photos, or perform any other tasks. Your iPhone’s screen will be displayed on your TV, allowing you to enjoy your content on a larger and more immersive display.
Note: Some apps may have restrictions on video playback due to copyright limitations. In these cases, you may see a blank screen or receive an error message on your TV. However, most streaming apps and video players should work seamlessly when connected using an HDMI adapter.
Using an HDMI adapter is a reliable and straightforward method to cast your iPhone to your TV. It provides a stable and high-quality connection, allowing you to enjoy your favorite iPhone content on the big screen.
Step 1: Check compatibility and gather necessary equipment
Before you can start casting your iPhone to your TV using an HDMI adapter, it’s important to check the compatibility and ensure that you have the necessary equipment. This step ensures that you have everything you need to successfully connect your iPhone to your TV. Follow these steps to check compatibility and gather the required equipment:
1. Check iPhone compatibility
First, confirm that your iPhone supports video output via HDMI. This method is compatible with iPhones that feature a Lightning connector, such as iPhone 5 and newer models. If you are unsure about your iPhone’s compatibility, you can refer to the Apple support website or consult the documentation that came with your device.
2. Check TV compatibility
Ensure that your TV has an HDMI input port. Most newer TVs have multiple HDMI input ports, which are usually labeled HDMI 1, HDMI 2, etc. Refer to your TV’s user manual or documentation to find the location of the HDMI input ports. Make sure that you have an available HDMI input port on your TV for connecting the HDMI cable.
3. Gather necessary equipment
You will need the following equipment to cast your iPhone to your TV using an HDMI adapter:
- HDMI cable: Purchase an HDMI cable with the appropriate length to connect your iPhone to your TV. Ensure that it is a standard HDMI cable with the necessary connectors (HDMI Type A or HDMI Type C).
- Lightning to HDMI adapter: Obtain a Lightning to HDMI adapter that is compatible with your iPhone model. This adapter will allow you to connect your iPhone to the HDMI cable. These adapters can be purchased from electronics retailers or online.
4. Set up the equipment
Once you have gathered the necessary equipment, connect one end of the HDMI cable to the HDMI port on the adapter. Then, plug the Lightning end of the adapter into the charging port of your iPhone. Ensure that the connections are secure and snug. Your iPhone is now ready to be connected to your TV using the HDMI adapter and cable.
By verifying the compatibility of your devices and gathering the required equipment, you are one step closer to casting your iPhone to your TV using an HDMI adapter. The next step is to connect the adapter and configure the settings on both your iPhone and TV, which we will cover in the following sections.
Step 2: Connect HDMI adapter to your iPhone
Once you have checked the compatibility and gathered the necessary equipment, the next step is to connect the HDMI adapter to your iPhone. This will allow you to establish a physical connection between your iPhone and the HDMI cable, enabling you to cast your iPhone to your TV. Here’s how to connect the HDMI adapter to your iPhone:
1. Locate the Lightning connector
Begin by identifying the Lightning connector on your iPhone. This is the charging port located on the bottom edge of your iPhone. The Lightning connector is a small rectangular port used for charging and data transfer purposes.
2. Connect the Lightning end of the adapter
Take the Lightning end of the HDMI adapter and insert it firmly into the Lightning connector on your iPhone. Make sure it is securely connected and fits snugly into place. The adapter should now be attached to your iPhone via the Lightning port.
3. HDMI port on the adapter
Inspect the other end of the HDMI adapter, which should have an HDMI port. This is where you will connect the HDMI cable in the following step. Ensure that the HDMI port is clean and free from any debris or damage to ensure a reliable connection.
4. Prepare the HDMI cable
Take one end of the HDMI cable and insert it into the HDMI port on the adapter. Ensure that it is inserted fully and securely into place. The other end of the HDMI cable will be connected to your TV later in the setup process.
By connecting the HDMI adapter to your iPhone, you have successfully established a physical connection that will allow you to cast your iPhone to your TV. With the HDMI adapter connected, you are now ready to proceed to the next step and connect the HDMI cable to your TV.
Step 3: Connect HDMI cable to the adapter and TV
Now that you have connected the HDMI adapter to your iPhone, the next step is to connect the HDMI cable to the adapter and your TV. This will establish the video and audio connection between your iPhone and the TV, allowing you to cast your iPhone to the big screen. Follow these steps to connect the HDMI cable to the adapter and your TV:
1. Connect one end of the HDMI cable
Take one end of the HDMI cable and insert it into the HDMI port on the HDMI adapter. Ensure that it is inserted fully and securely into the port. The HDMI cable should fit snugly with a slight click to indicate a secure connection.
2. Connect the other end of the HDMI cable to your TV
Locate an available HDMI input port on your TV. These ports are typically labeled HDMI 1, HDMI 2, and so on. Insert the other end of the HDMI cable into the corresponding HDMI input port on your TV. Take note of the HDMI input number to which you have connected the cable for later reference.
3. Ensure a secure connection
Verify that both ends of the HDMI cable are securely connected. Check that the cable is inserted fully into the HDMI port on the adapter and that the other end is inserted firmly into the HDMI input port on your TV. A loose connection may result in a poor or no signal transmission.
4. Power on your TV and iPhone
Turn on your TV and switch it to the HDMI input you connected the cable to. Use your TV’s remote control to select the corresponding HDMI input source. Additionally, ensure that your iPhone is powered on and unlocked, as you may need to interact with it during the casting process.
By connecting the HDMI cable to the adapter and your TV, you have established the necessary physical connection for casting your iPhone to the TV. The next step is to select the HDMI input on your TV and configure any additional settings to optimize the casting experience.
Step 4: Select the HDMI input on your TV
Once you have connected the HDMI cable to the HDMI adapter and your TV, the next step is to select the appropriate HDMI input on your TV. This allows your TV to recognize and receive the incoming video and audio signals from your iPhone. Follow these steps to select the HDMI input on your TV:
1. Power on your TV
Ensure that your TV is powered on by pressing the power button on the TV itself or by using your TV’s remote control. Wait for your TV to fully power up and display a picture on the screen.
2. Access the input/source menu
Using your TV’s remote control, locate the input/source button or menu. This button is typically labeled “Input,” “Source,” or may have an icon depicting a television or a variety of input options. Press this button to access the input/source menu.
3. Select the HDMI input
In the input/source menu, you should see a list of available input options. Look for the HDMI input number or label that corresponds to the HDMI input port where you connected the HDMI cable. Use the arrow keys on your remote control to navigate through the menu and highlight the HDMI input, then press the confirmation or enter button.
4. Confirm the selection
Your TV will now switch to the selected HDMI input. You may see a brief indication on the screen or a change in the display. Wait for a moment for your TV to establish a connection and recognize the signal from your iPhone.
5. Verify the connection
If the HDMI input selection was successful, your TV screen should display the content from your iPhone. You will see the familiar interface of your iPhone on the TV screen, indicating a successful connection. At this point, you can proceed to use your iPhone as usual, and the content will be mirrored on the TV.
By selecting the appropriate HDMI input on your TV, you have established the connection between your iPhone and the TV, allowing you to cast your iPhone screen and audio to the TV. The next step is to use your iPhone on the big screen and enjoy your favorite content.
Step 5: Use your iPhone on the big screen
Now that you have successfully connected your iPhone to your TV using the HDMI adapter, you can start using your iPhone on the big screen. With the mirrored display, you can enjoy a larger and more immersive experience. Here’s how you can make the most of using your iPhone on the big screen:
1. Navigate through your iPhone’s interface
With your iPhone mirrored on the TV screen, you can use your iPhone as usual. Navigate through the various apps, menus, and screens on your iPhone using the touchscreen or the physical buttons on the device. The actions and gestures you perform on your iPhone will be mirrored on the TV in real-time.
2. Play videos and movies
Launch your favorite video streaming apps, such as Netflix, YouTube, or Amazon Prime Video, and select a video or movie to watch. The content will be displayed on the TV screen, allowing you to fully enjoy the cinematic experience from the comfort of your living room. Immerse yourself in high-quality visuals and improved audio through your TV’s speakers.
3. Stream music and audio
Play your favorite music or podcasts on your iPhone and enjoy it with enhanced audio quality through your TV’s speakers. Open your preferred music streaming apps, such as Apple Music, Spotify, or Pandora, and select your desired songs or playlists. Feel the music surround you as it fills the room.
4. View photos and presentations
Showcase your photos and presentations on the big screen for a more impactful experience. Open the Photos app on your iPhone and browse through your photo albums. Each photo you select will be displayed in full detail on the TV screen, allowing you to relive your cherished memories or share them with others. If you have a presentation saved on your iPhone, open it using a compatible app and present it with greater visibility and impact.
5. Play games and use apps
Many games and apps on your iPhone can benefit from being displayed on a larger screen. Launch your favorite games and enjoy the immersive gaming experience on the big screen. The increased size of the display enhances your gameplay and visual details. Additionally, productivity apps, educational apps, and other utilities can be more effective when seen on a larger screen.
Remember that you can control your iPhone directly, either through touch or the physical buttons, while enjoying the content on your TV. If you need to interact with an app or make adjustments, you can do so seamlessly. To stop using your iPhone on the big screen, simply disconnect the HDMI cable from your iPhone and TV or power off your TV.
By using your iPhone on the big screen, you can fully appreciate the capabilities of your device and enjoy a more immersive and engaging experience. Whether you’re watching videos, listening to music, showcasing photos, playing games, or using apps, the HDMI adapter allows you to make the most of your iPhone’s content on the larger TV screen.
Method 3: Using Chromecast or Android TV
If you have a Chromecast or Android TV device connected to your TV, you can use it to cast your iPhone to the TV. Chromecast and Android TV provide a convenient and wireless way to stream and display your iPhone content on the big screen. Follow these steps to cast your iPhone to your TV using Chromecast or Android TV:
Step 1: Check compatibility and set up Chromecast or Android TV
Ensure that your TV is compatible with Chromecast or Android TV. If you don’t have one already connected to your TV, you will need to set it up. Follow the instructions that came with your Chromecast or Android TV device to connect it to your TV and complete the initial setup process. Make sure your Chromecast or Android TV device and your iPhone are connected to the same Wi-Fi network.
Step 2: Download and open compatible apps on your iPhone
On your iPhone, download and install any compatible apps that support Chromecast or Android TV. For example, apps like YouTube, Netflix, and Disney+ all have built-in Chromecast support. These apps allow you to cast your iPhone screen and content directly to your TV. Ensure that you are using the latest versions of these apps.
Step 3: Connect to Chromecast or Android TV
Open the app on your iPhone that supports Chromecast or Android TV. Look for the Chromecast or Cast button within the app’s interface and tap on it. This will allow you to connect and pair your iPhone with your Chromecast or Android TV device. Choose your Chromecast or Android TV device from the list of available devices.
Step 4: Select media to cast and enjoy on your TV
Once connected, you can select and play media on your iPhone, such as videos, photos, or music. The media will be streamed and displayed on your TV through Chromecast or Android TV. You can control playback, adjust volume, and perform other functions using the controls within the app on your iPhone. The content will be mirrored or streamed wirelessly to your TV, providing a seamless viewing experience.
Note: Depending on the app and the media you are casting, you may have different controls and options available. Some apps allow you to cast specific content, while others may allow you to mirror your entire iPhone screen. Explore the options within the app to maximize your casting experience.
By using a Chromecast or Android TV device, you can enjoy the convenience of wirelessly casting your iPhone content to your TV. Whether you want to watch videos, stream movies, view photos, or listen to music, Chromecast and Android TV provide a user-friendly solution for casting your iPhone to the big screen.
Step 1: Check compatibility and set up Chromecast or Android TV
To cast your iPhone to your TV using Chromecast or Android TV, it is important to first check the compatibility of your TV and set up the necessary device. This step ensures that your TV is capable of receiving and displaying the content from your iPhone. Follow these steps to check compatibility and set up Chromecast or Android TV:
1. Check TV compatibility
Ensure that your TV is compatible with Chromecast or Android TV. Some newer smart TVs come with built-in Chromecast or Android TV capabilities. However, if your TV doesn’t have these capabilities, you will need to purchase a separate Chromecast device or an Android TV box and connect it to your TV. Refer to your TV’s user manual or consult the manufacturer’s website to determine if it is compatible.
2. Purchase and connect the device
If your TV doesn’t have built-in Chromecast or Android TV, you will need to purchase a Chromecast device or an Android TV box. These devices are typically small and connect to an HDMI port on your TV. Follow the instructions provided with your Chromecast or Android TV device to connect it to your TV and complete the initial setup process. Make sure that your Chromecast or Android TV device and your iPhone are connected to the same Wi-Fi network.
3. Set up Chromecast or Android TV
Once connected, follow the on-screen instructions to set up Chromecast or Android TV. This typically involves connecting to your Wi-Fi network, signing in to your Google account (for Android TV), and configuring any additional settings. Make sure to complete the setup process as instructed to ensure a smooth casting experience.
4. Update firmware and apps (if necessary)
It’s important to check for any available firmware updates for your Chromecast or Android TV device. These updates may include bug fixes, feature enhancements, and improved compatibility. Additionally, make sure to update the apps that support Chromecast or Android TV on your iPhone to their latest versions. This ensures that you have the most recent features and optimizations for casting your iPhone to your TV.
5. Verify the connection
Once your Chromecast or Android TV device is set up and connected to your TV, verify that it is working correctly. Use the remote control provided with your Chromecast or Android TV device to navigate through the device’s interface and ensure that you can access apps and settings. If there are any issues, refer to the troubleshooting section of your Chromecast or Android TV device’s user manual or contact customer support.
By checking the compatibility of your TV and setting up Chromecast or Android TV correctly, you have ensured that your TV is ready to receive and display content from your iPhone. The next step is to download compatible apps on your iPhone and establish a connection between your iPhone and Chromecast or Android TV, which will be covered in the following sections.
Step 2: Download and open compatible apps on your iPhone
After checking compatibility and setting up your Chromecast or Android TV device, the next step is to download and open compatible apps on your iPhone. These apps will allow you to stream and cast content from your iPhone directly to your TV. Here’s how to proceed:
1. Open the App Store
On your iPhone, launch the App Store, which is the official marketplace for downloading apps. You can find the App Store icon on your home screen. Tap on it to open the App Store.
2. Search for compatible apps
In the App Store, use the search bar located at the bottom of the screen to search for apps that are compatible with Chromecast or Android TV. Popular apps that support casting include YouTube, Netflix, Hulu, Disney+, and Spotify. Alternatively, you can also explore the “Top Charts” or “Featured” sections to discover popular casting apps.
3. Download and install the apps
Once you have found an app that supports Chromecast or Android TV, tap on it to access its app page in the App Store. On the app page, tap the “Get” or “Install” button to download and install the app on your iPhone. You may be asked to authenticate with your Apple ID or use Touch ID/Face ID to authorize the download.
4. Open the downloaded apps
After the app has finished downloading, you can launch it by tapping on its icon on your home screen. The app will open with its interface, where you can explore and access its features and content.
5. Sign in to the apps (if required)
If the app requires a sign-in or account creation, follow the on-screen prompts to provide the necessary details and sign in. This step ensures that you can access personalized content and features within the app.
By downloading and opening compatible apps on your iPhone, you have prepared your device to stream and cast content to your TV using Chromecast or Android TV. The next step is to establish a connection between your iPhone and the Chromecast or Android TV device, which will be covered in the following section.
Step 3: Connect to Chromecast or Android TV
Once you have downloaded and opened the compatible apps on your iPhone, the next step is to establish a connection between your iPhone and the Chromecast or Android TV device. This will allow you to stream and cast content from your iPhone to your TV. Follow these steps to connect your iPhone to Chromecast or Android TV:
1. Ensure both devices are on the same Wi-Fi network
Make sure that your iPhone and Chromecast or Android TV device are connected to the same Wi-Fi network. Both devices need to be on the same network to establish a connection and enable casting. If they are not connected to the same network, go to the Wi-Fi settings on your iPhone and connect to the appropriate network.
2. Launch a compatible app on your iPhone
Open one of the compatible apps you downloaded earlier on your iPhone. Look for the casting icon within the app’s interface. This icon is typically represented by the Chromecast logo or an icon resembling a TV with a Wi-Fi signal emanating from it. Tap on the casting icon, usually located near the media playback controls.
3. Select your Chromecast or Android TV device
A list of available devices for casting will appear on your iPhone screen. Look for the name of your Chromecast or Android TV device in the list and tap on it to select it as the casting destination. If prompted, confirm the connection request on your TV screen.
4. Start casting content
Once connected, you can select and start playing media on your iPhone, such as videos, photos, or music, within the app. The media content will be streamed and displayed on your TV through the Chromecast or Android TV device. You can control playback, adjust volume, and perform other functions using the controls within the app on your iPhone.
5. Disconnect or stop casting
To stop casting, open the compatible app on your iPhone and tap on the casting icon again. In the list of available devices, tap on “Stop Casting” or the appropriate option to disconnect your iPhone from the Chromecast or Android TV device. Alternatively, you can also turn off your TV or switch to a different HDMI input on your TV.
By connecting your iPhone to Chromecast or Android TV, you have established a wireless casting connection. Now you can enjoy streaming and casting your favorite content directly from your iPhone to the big screen of your TV.
Step 4: Select media to cast and enjoy on your TV
Once you have successfully connected your iPhone to Chromecast or Android TV, you can start selecting media to cast and enjoy on your TV. With the casting connection established, you can stream various types of media from your iPhone to the larger screen. Follow these steps to select media and enjoy the casting experience:
1. Launch a compatible app on your iPhone
Open one of the compatible apps that support Chromecast or Android TV on your iPhone. This can be a video streaming app like YouTube or Netflix, a music streaming app like Spotify or Pandora, or any other app that allows casting. Ensure that the app is updated to the latest version for optimal performance and casting features.
2. Choose the media you want to cast
Browse through the available content within the app and select the media you want to cast to your TV. This can be a video, TV show, movie, playlist, album, or any other form of media supported by the app. Tap on the media to start playing it on your iPhone.
3. Tap on the casting icon
Look for the casting icon within the app’s interface on your iPhone. It is usually represented by the Chromecast logo or an icon resembling a TV screen with a Wi-Fi signal. Tap on the casting icon to bring up the list of available casting devices.
4. Select your Chromecast or Android TV device
In the list of available devices, locate and choose the name of your Chromecast or Android TV device. Once selected, your media will start playing on your TV screen through the Chromecast or Android TV device. The playback controls will still be accessible on your iPhone, allowing you to pause, resume, or adjust the volume of the media.
5. Control playback and enjoy your media on the TV
Use the playback controls within the app on your iPhone to control the media on your TV. You can pause, play, rewind, fast forward, or skip to different sections of the media. Adjust the volume using the volume controls on your iPhone or the TV’s remote control.
Note: Different apps may have additional features and options for casting, such as queuing multiple videos or creating playlists. Explore the features and settings within the app to customize your casting experience.
By selecting and casting media from your iPhone to your TV, you can enjoy a more immersive and enjoyable viewing or listening experience. Whether you’re watching videos, streaming music, or exploring other forms of media, casting allows you to fully utilize the capabilities of Chromecast or Android TV to enhance your entertainment experience on the big screen.
Conclusion
Casting your iPhone to your TV without the need for an Apple TV is now easier than ever with the various methods available. By following the step-by-step guides provided in this article, you can enjoy your favorite iPhone content on the big screen, enhancing your viewing experience and allowing you to share media with friends and family. Whether you use AirPlay, an HDMI adapter, or Chromecast/Android TV, each method offers its own benefits and suitability based on the devices you have.
If you have a smart TV with AirPlay capabilities, using AirPlay technology is a convenient and seamless option. It allows you to wirelessly stream your iPhone screen and audio to the TV, creating an immersive viewing experience. Ensure compatibility, connect to the same Wi-Fi network, enable AirPlay, select your TV as the AirPlay device, and enjoy casting your iPhone to the TV.
If your TV doesn’t support AirPlay, using an HDMI adapter is a reliable method. Check compatibility, gather the necessary equipment, connect the HDMI adapter to your iPhone, connect the HDMI cable to the adapter and TV, select the HDMI input on your TV, and enjoy using your iPhone on the big screen.
Alternatively, if you have a Chromecast or Android TV device, you can easily cast your iPhone to your TV. Check compatibility, set up Chromecast or Android TV, download compatible apps on your iPhone, connect to Chromecast or Android TV, select media to cast, and enjoy your content on the TV screen.
Regardless of the method you choose, casting your iPhone to your TV opens up a world of possibilities for entertainment, presentations, and sharing experiences. Whether you’re watching videos, streaming music, viewing photos, playing games, or exploring apps, casting allows you to fully utilize the capabilities of your iPhone and enjoy a larger and more immersive display.
So go ahead and start casting your iPhone to your TV, transforming your living room into a personal theater or a vibrant gaming hub. Enjoy the convenience, versatility, and entertainment possibilities that come with casting your iPhone to the big screen!


