Introduction
Welcome to the world of Chromecast, where you can effortlessly cast your desktop screen to your television. Whether you want to share photos, videos, or a presentation with a larger audience, Chromecast makes it easy and convenient. In this article, we will guide you through the process of casting your desktop screen to Chromecast and provide helpful tips to ensure a seamless experience.
Chromecast is a popular streaming device developed by Google that allows you to cast content from your computer, smartphone, or tablet to your TV. While it is mainly used for streaming online videos and music, it also offers the option to cast your entire desktop screen. This feature comes in handy when you want to showcase a slideshow, play games, or simply extend your display.
Before diving into the steps, let’s make sure you have everything you need to get started:
- A Chromecast device: Ensure that you have a Chromecast device plugged into your TV and connected to the same Wi-Fi network as your computer.
- A desktop computer or laptop: You will need a computer running Windows, macOS, or Linux. Make sure it is up to date with the latest software updates.
- The Google Chrome browser: Chromecast screen casting is currently only supported through the Google Chrome browser, so make sure you have it installed on your computer.
Once you have these prerequisites in place, you’re ready to set up Chromecast and start casting your desktop screen. Don’t worry if you’re new to Chromecast or not tech-savvy – we will walk you through each step with clear instructions and provide troubleshooting tips to help you overcome any challenges.
Now, let’s move on to setting up your Chromecast and connecting it to your desktop computer or laptop. By the end of this guide, you’ll be able to effortlessly share your desktop screen on your TV and enjoy a whole new level of viewing experience.
Prerequisites
Before you can start casting your desktop screen to Chromecast, there are a few prerequisites you need to ensure are in place. These prerequisites include:
- A Chromecast device: Make sure you have a Chromecast device connected to your TV. If you don’t have one yet, you can purchase it from various retailers or online stores. Set up your Chromecast according to the instructions provided with the device.
- A stable Wi-Fi network: Both your Chromecast device and your desktop computer need to be connected to the same Wi-Fi network. This ensures a smooth and uninterrupted casting experience.
- A desktop computer or laptop: You will need a computer running Windows, macOS, or Linux. Ensure that your computer meets the system requirements and has the necessary ports for connecting the Chromecast device.
- The Google Chrome browser: Chromecast screen casting is currently only supported through the Google Chrome browser. If you don’t already have it, download and install the latest version of Google Chrome onto your computer.
- Updated software: It is important to keep your computer’s operating system and browser up to date. This ensures compatibility with the Chromecast device and provides access to the latest features and improvements.
By fulfilling these prerequisites, you will be ready to proceed with setting up your Chromecast and connecting it to your desktop computer. It is crucial to have all these elements in place to ensure a smooth and successful casting experience.
Now that we have covered the prerequisites, let’s move on to the step-by-step process of setting up Chromecast and connecting it to your desktop.
Step 1: Setting up Chromecast
Before you can start casting your desktop screen to Chromecast, you need to set up the device and ensure it is ready to receive screen casting requests. Follow these steps to set up your Chromecast:
- Connect your Chromecast device to your TV: Plug the Chromecast device into an available HDMI port on your television. Make sure to connect the power cable to the Chromecast and plug it into a power outlet.
- Select the correct input source: Use your TV remote to switch to the HDMI input that corresponds to the port where you connected your Chromecast. This will allow you to see the Chromecast setup screen.
- Download the Google Home app: On your mobile device or computer, download and install the Google Home app. This app will guide you through the setup process.
- Open the Google Home app: Launch the Google Home app and sign in with your Google account if prompted. Once you’re in the app, tap on the “+” icon to add a new device.
- Set up your Chromecast: The Google Home app will detect your Chromecast device. Follow the on-screen instructions to complete the setup process, including connecting to your Wi-Fi network and giving your Chromecast a name.
- Confirm the setup: Once the setup is complete, you will see a confirmation message on the app. You can now control your Chromecast through the Google Home app or by using supported apps on your mobile device.
With your Chromecast device successfully set up, you are one step closer to casting your desktop screen. Next, let’s move on to connecting your Chromecast to your desktop computer.
Step 2: Connecting Chromecast to your desktop
Once you have completed the setup process for your Chromecast device, the next step is to connect it to your desktop computer. Follow these steps to establish the connection:
- Ensure that your desktop computer is connected to the same Wi-Fi network as your Chromecast device. This is crucial for the devices to communicate with each other.
- Launch the Google Chrome browser on your desktop computer. If you don’t have it installed, download and install the latest version from the official website.
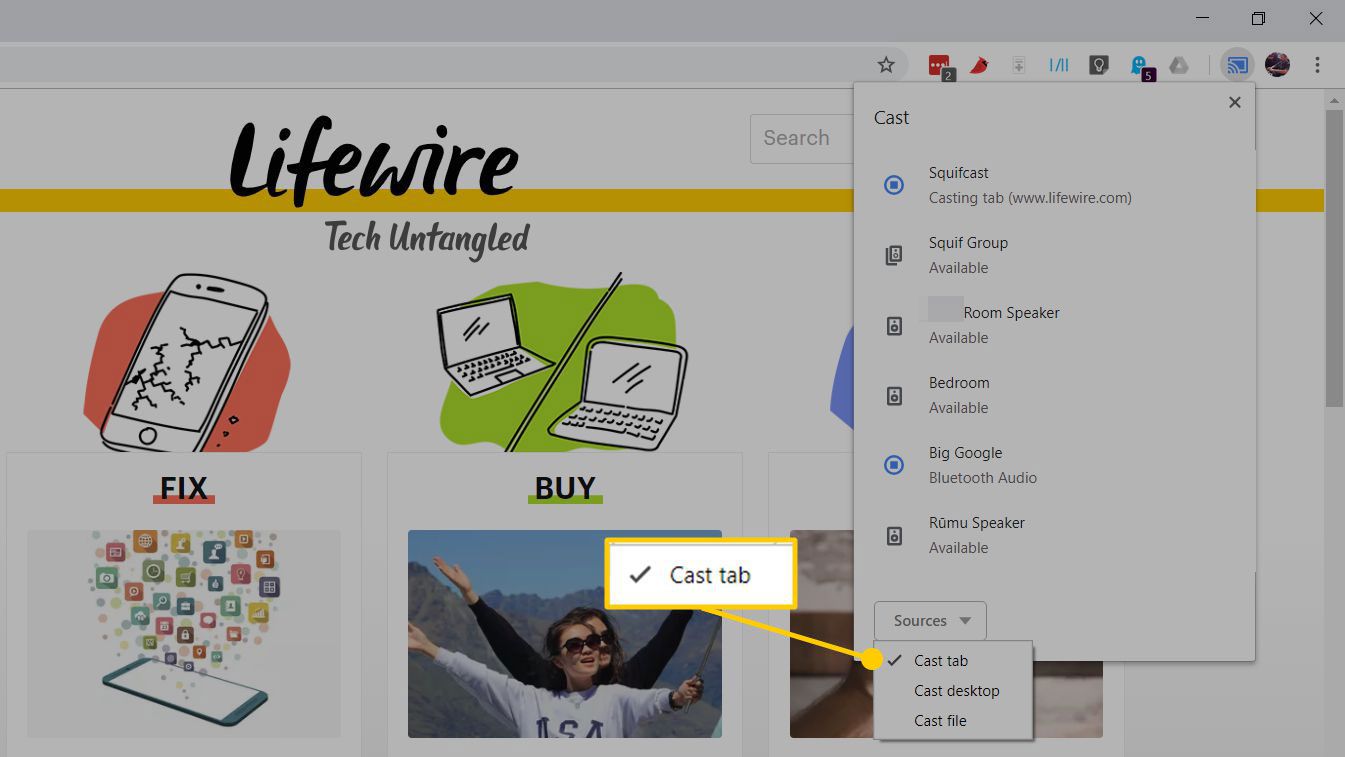
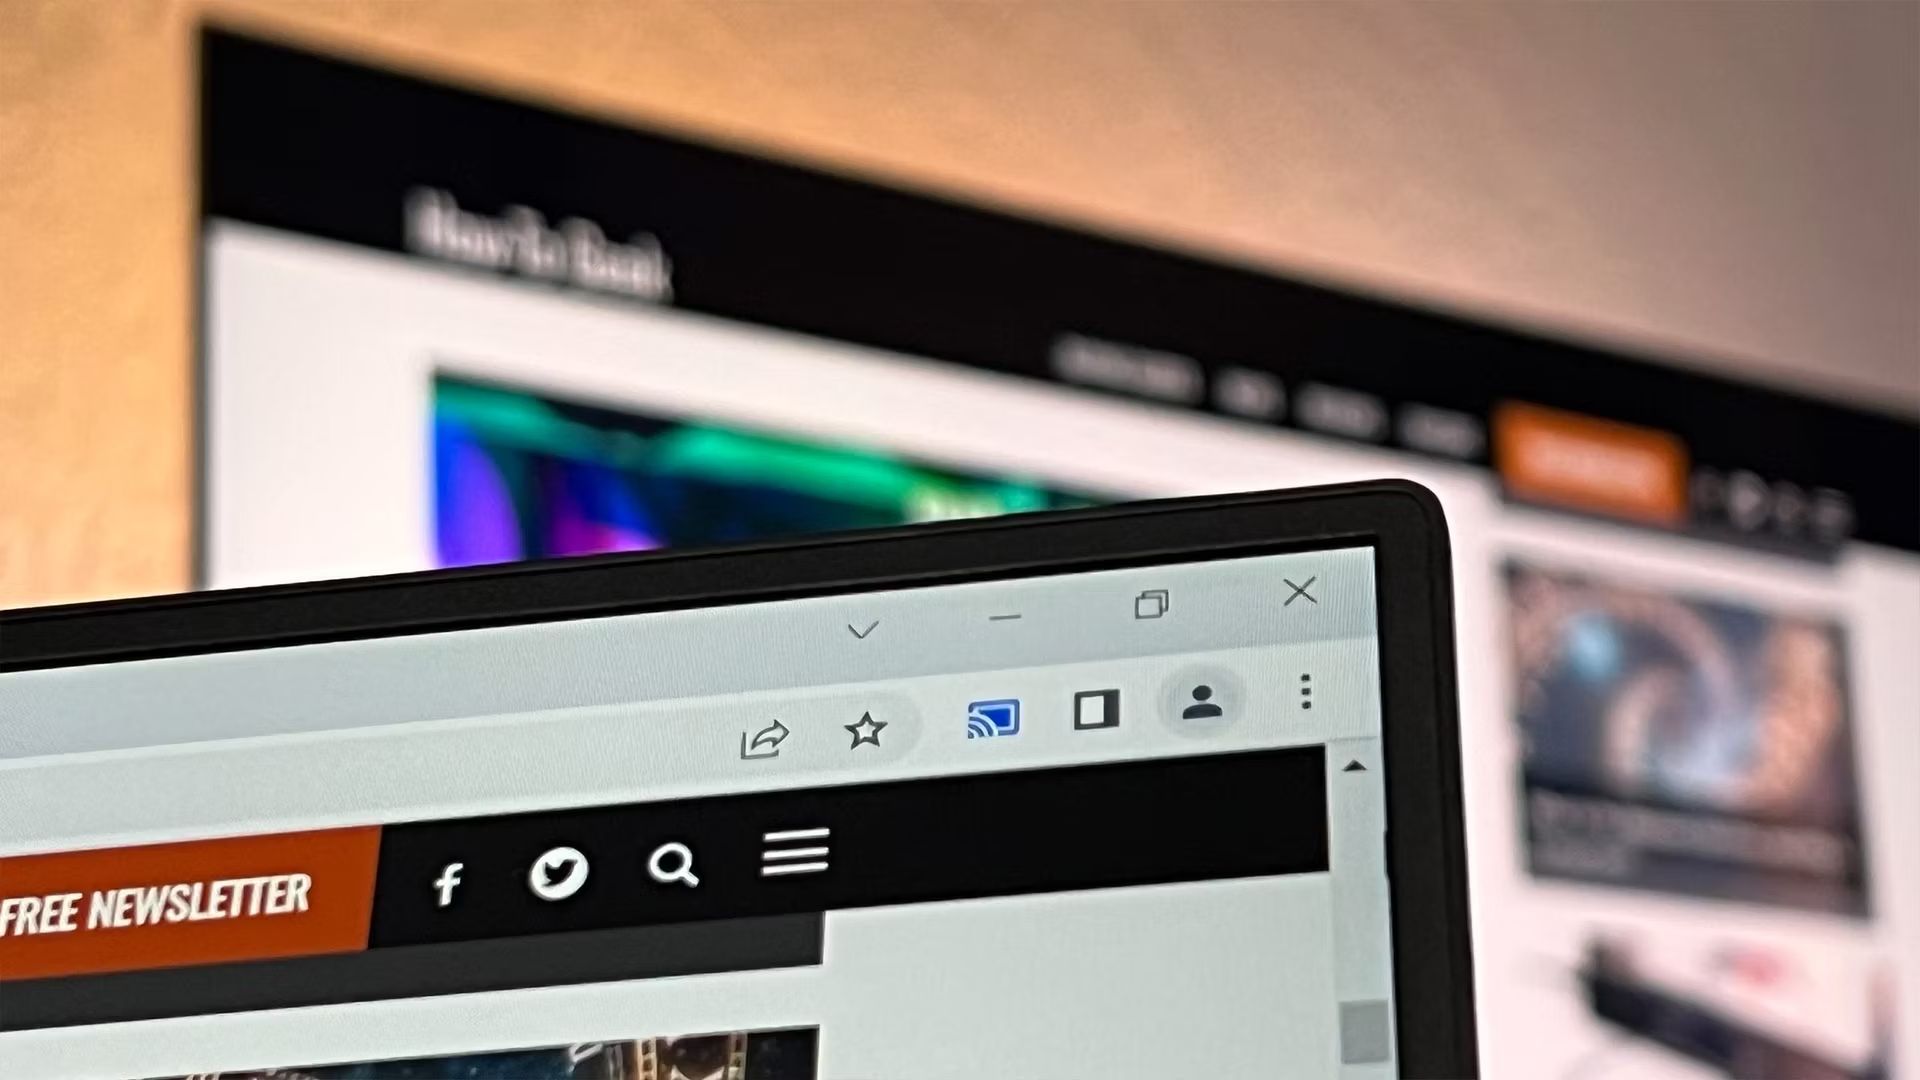
- Locate and click on the three-dot menu icon in the top-right corner of the browser window. A drop-down menu will appear.
- In the menu, select “Cast” from the options. This will open the casting settings panel.
- In the casting settings panel, click on the drop-down menu next to “Cast to” and select your Chromecast device from the list. The name you gave your Chromecast during the setup process should appear in the list.
- Make sure the “Sources” option is set to “Cast tab.” This will allow you to cast the entire content of your browser tab, which includes your desktop screen.
- Optional: If you want to optimize your casting experience, you can click on the gear icon in the casting settings panel to access additional options. Here, you can adjust the video quality and enable sound in the casted tab.
- Once you have made your desired selections, click on the “Cast” button in the casting settings panel.
After clicking the “Cast” button, your desktop screen will begin casting to your Chromecast-connected TV. You will see an indication on the browser tab that it is being casted, and your TV screen will mirror what is on your desktop.
At this point, you have successfully connected your Chromecast device to your desktop computer. Now it’s time to move on to the next step and start casting your desktop screen.
Step 3: Casting your desktop screen
Now that you have successfully connected your Chromecast device to your desktop computer, you can proceed to cast your desktop screen onto your TV. Follow these steps to begin casting:
- Make sure your Chromecast device is turned on and connected to the same Wi-Fi network as your desktop computer.
- Launch the Google Chrome browser on your desktop computer if it is not already open.
- In the browser, click on the three-dot menu icon in the top-right corner of the window to access the menu.
- From the menu, select “Cast” to open the casting settings panel.
- In the casting settings panel, make sure the tab that you want to cast is selected. You can choose to cast your entire desktop or a specific browser tab.
- Click on the “Sources” drop-down menu and select “Cast desktop” to cast your entire desktop screen. Alternatively, you can choose a specific tab if you only want to cast the content within that tab.
- Once you have selected the desired source, click on the name of your Chromecast device in the list of available devices.
- After selecting your Chromecast device, your desktop screen will start casting onto your TV. You will see the content of your desktop screen mirrored on the television.
Now you can enjoy a larger display of your desktop screen on your TV. Whether you want to share a presentation, watch videos, or play games, casting your desktop screen provides a more immersive experience.
Remember that while the desktop screen is being cast, any actions you perform on your computer will be visible on the television. This includes opening applications, browsing the web, and playing media. Take advantage of the versatility and convenience of casting your desktop screen to make the most out of your Chromecast device.
Now that you have successfully casted your desktop screen, it’s time to explore some tips for adjusting screen settings to enhance your casting experience.
Step 4: Adjusting screen settings
After casting your desktop screen to Chromecast, you may want to make some adjustments to optimize the screen settings for a better viewing experience. Here are some tips for adjusting screen settings:
- Resolution: By default, Chromecast will mirror your desktop screen at the same resolution as your computer. However, if you encounter any issues or if the screen appears distorted, you can try adjusting the resolution. To do this, right-click on your desktop and select “Display settings” (Windows) or go to System Preferences > Displays (Mac). From there, you can choose a different resolution that suits your needs.
- Orientation: If you have a vertical monitor or need to rotate the screen for a specific purpose, you can adjust the orientation in the display settings. This ensures that the content is displayed correctly on your TV when casting your desktop screen.
- Sound settings: By default, sound may not be enabled when casting your desktop screen. To enable sound, click on the Google Cast icon in the Chrome browser and select your Chromecast device. From there, click on the gear icon and make sure the “Share audio” option is enabled.
- Full-screen mode: If you want to view your desktop screen in full-screen mode on your TV, press the F11 key on your keyboard (Windows) or use the trackpad gesture for full-screen mode (Mac).
- Multiple displays: If you have multiple displays connected to your desktop computer, you can choose which display you want to cast to Chromecast. To do this, right-click on your desktop, go to Display settings (Windows), or go to System Preferences > Displays (Mac), and select the desired display as your primary or main display.
These are just a few of the settings you can adjust to customize your casting experience. Feel free to explore the options and experiment with different settings to find what works best for you.
Now that you have adjusted the screen settings to your liking, you can sit back, relax, and enjoy casting your desktop screen to your TV. However, if you encounter any issues or challenges along the way, don’t worry. In the next section, we will provide troubleshooting tips to help you address common issues.
Step 5: Troubleshooting common issues
While casting your desktop screen to Chromecast is usually a seamless experience, you may encounter some common issues along the way. Here are some troubleshooting tips to help you address these issues:
- Wi-Fi connectivity: Make sure that both your desktop computer and Chromecast device are connected to the same Wi-Fi network. If the connection is unstable or weak, try moving your router closer to both devices or consider upgrading to a higher-performance router.
- Update Chrome browser: Ensure that you are using the latest version of the Google Chrome browser. Outdated versions may not support casting or may have compatibility issues with Chromecast. Check for updates in the browser’s settings or download the latest version from the official website.
- Restart devices: If you’re experiencing issues with casting, try restarting both your desktop computer and Chromecast device. This can help resolve any temporary glitches or conflicts that might be causing the problem.
- Disable VPN or proxy servers: If you’re using a VPN or proxy server on your desktop computer, try disabling them temporarily. VPNs and proxy servers can sometimes interfere with the casting process and prevent a successful connection.
- Check firewall settings: If you have a firewall enabled on your computer, ensure that it is not blocking the necessary network traffic for casting. Temporarily disable the firewall or add an exception for the Chromecast application to allow it to communicate with your computer.
- Reinstall Chromecast extension: In some cases, reinstalling the Chromecast extension on your Chrome browser can help resolve casting issues. Go to the Chrome Web Store and search for “Chromecast” to find and reinstall the extension.
If you have tried these troubleshooting tips and are still experiencing issues with casting your desktop screen, you can visit the official Chromecast support website for further assistance. They have a comprehensive knowledge base, community forums, and support channels to help you resolve any technical difficulties you may encounter.
Remember, troubleshooting is a normal part of any technology setup, and with these tips, you’ll be well-equipped to overcome any challenges that may arise during the casting process.
Now that you have learned how to troubleshoot common issues, you’re ready to enjoy the benefits of casting your desktop screen to Chromecast. Take advantage of this feature to share presentations, watch videos, play games, and enjoy a more immersive viewing experience on your TV.
Conclusion
In conclusion, casting your desktop screen to Chromecast opens up a world of possibilities for sharing content, presentations, and enjoying a larger display of your desktop on your TV. By following the step-by-step instructions in this guide, you have learned how to set up Chromecast, connect it to your desktop computer, and cast your desktop screen seamlessly.
We started by ensuring that you have all the prerequisites in place, including a Chromecast device, a stable Wi-Fi network, a desktop computer or laptop, and the Google Chrome browser. With these elements in place, you can proceed to set up Chromecast and establish the connection to your desktop.
Once the setup was complete, we walked you through the process of connecting Chromecast to your desktop computer using the Google Chrome browser. This allowed you to select the content you want to cast, whether it’s your entire desktop screen or a specific browser tab.
To enhance your casting experience, we provided tips for adjusting screen settings such as resolution, orientation, sound settings, and full-screen mode. These adjustments allow you to customize the casting experience to your liking.
If you encounter any issues or challenges along the way, we offered troubleshooting tips to help you address common problems. By following these troubleshooting steps, you can overcome any temporary glitches and ensure a smooth casting experience.
Now that you have learned how to cast your desktop screen to Chromecast, you can enjoy the benefits of a larger display, making it easier to share content with others or enjoy a more immersive viewing experience.
Remember to have fun exploring the capabilities of Chromecast and experiment with different types of content, such as presentations, videos, and games. With Chromecast, you can unlock a whole new level of entertainment on your TV.
We hope this guide has been helpful in assisting you with casting your desktop screen to Chromecast. If you have any further questions or need additional support, don’t hesitate to reach out to the Chromecast support channels. Happy casting!