Introduction
Calibrating your OLED TV is an essential step to getting the best possible picture quality. While OLED TVs are known for their stunning visuals and vibrant colors, they are not always perfectly calibrated out of the box. By taking the time to calibrate your TV, you can ensure that you are experiencing the content as intended by the filmmakers or content creators.
Calibration involves adjusting various settings on your TV to achieve optimal brightness, contrast, color accuracy, and other image parameters. By doing so, you can enhance the viewing experience, bringing out the details and colors in your favorite movies, TV shows, and games.
While many people rely on the default factory settings, these settings may not always accurately represent the content due to differences in room lighting conditions and personal preferences. Calibrating your TV allows you to tailor the picture quality to your specific environment and preferences, resulting in a more immersive and lifelike viewing experience.
In this article, we will guide you through the process of calibrating your OLED TV. We will cover everything from understanding the importance of calibration to adjusting the various settings on your TV. Whether you are a casual TV viewer or a dedicated cinephile, following these steps will help you make the most out of your OLED TV’s capabilities.
Before we dive into the calibration process, it’s important to note that the instructions provided here may vary slightly depending on the make and model of your TV. Therefore, it is always a good idea to consult your TV’s user manual for specific instructions tailored to your device. With that said, let’s get started on calibrating your OLED TV for an exceptional viewing experience!
Understanding the Importance of Calibration
Calibration plays a crucial role in ensuring that your OLED TV displays accurate and true-to-life colors. When a TV is not properly calibrated, the colors can be washed out or overly saturated, leading to a distorted viewing experience. By calibrating your TV, you can achieve a more faithful representation of the content, allowing you to see the details and colors as intended by the content creators.
One of the primary benefits of calibration is achieving accurate grayscale and color reproduction. Grayscale refers to the range of black to white, and in a well-calibrated TV, the grayscale should be balanced and neutral, without any visible color shift. This is important because it allows you to see details in shadow areas, highlights, and everything in between, without losing any information.
Color reproduction is equally important, as it ensures that the colors you see on your TV closely match the colors that were used in the production process. Proper calibration ensures that reds look like reds, blues look like blues, and so on, providing a natural and lifelike viewing experience. Whether you’re watching a stunning nature documentary or a visually rich action movie, accurate color reproduction is vital to fully appreciate the intended visual impact.
Another aspect of calibration is achieving the correct brightness and contrast levels. Without proper calibration, your TV may have a tendency to display images that are either too dark or too bright, resulting in a loss of detail and overall image quality. Calibrating the brightness and contrast levels ensures that you can see the subtle details in dark scenes and prevents bright areas from being overly blown out.
Furthermore, calibration helps in maintaining consistency across different content types and sources. Whether you’re streaming a movie, playing a video game, or watching a sports event, having a consistent calibration ensures that the image quality remains consistent and accurate, regardless of the source.
By taking the time to calibrate your OLED TV, you can unlock its full potential and truly immerse yourself in your favorite content. It’s worth noting that calibration is not a one-time process; environmental factors like room lighting can change over time, necessitating periodic recalibration. However, with each calibration, you can continue to enjoy a superior viewing experience, with vibrant colors and stunning visuals that bring your content to life.
Step 1: Gather the Necessary Tools
Before you begin the calibration process for your OLED TV, it’s important to gather the necessary tools to ensure accurate and precise adjustments. Here are the tools you will need:
1. A Colorimeter: A colorimeter is a device that measures and analyzes the colors displayed on your TV screen. It helps in determining the accuracy of the colors and provides valuable data for calibration. There are various colorimeter options on the market, ranging from entry-level options to professional-grade devices.
2. Calibration Software: While not essential, calibration software can greatly assist in the calibration process. It provides step-by-step instructions, test patterns, and reference images to guide you through the process. Some software options even offer automatic calibration features, making the process easier for beginners. There are both paid and free calibration software available.
3. Reference Material: Having access to reference material is essential for accurate calibration. You can use reference images or videos that are known to be well calibrated to compare and adjust your TV settings. These materials should be in high resolution and accurately represent the colors and details that your TV is capable of displaying.
4. A Light Source: An ambient light source is required to evaluate and adjust the brightness and contrast levels of your TV. Ideally, use a light source with a color temperature of 6500K, which is considered the standard for multimedia content consumption.
5. A Calibration Disc/USB Drive: A calibration disc or USB drive, often included with calibration software, provides test patterns and color charts to help you fine-tune specific settings on your TV. These patterns and charts will assist you in adjusting aspects such as black level, white level, and color accuracy.
6. Pen and Paper: It’s useful to have a pen and paper handy to take notes during the calibration process. You can jot down the settings you adjust, the changes you make, and any observations you have along the way. This will ensure that you can replicate successful calibration in the future or make adjustments if necessary.
By gathering these tools, you will be well-equipped to tackle the calibration process and achieve optimal picture quality on your OLED TV. Investing in a colorimeter and calibration software is recommended for those seeking the highest level of accuracy and precision, but even with the basic tools mentioned, you can still make significant improvements to your TV’s visual performance.
Step 2: Prepare Your Environment
Preparing your environment before calibrating your OLED TV is crucial to ensure accurate and consistent results. Here are some steps to follow to create an ideal environment for calibration:
1. Turn off Ambient Light: Start by eliminating any sources of ambient light in the room. Close curtains or blinds, and turn off any overhead lights or lamps. Ambient light can interfere with color perception and affect the perceived contrast on your TV screen. Consequently, calibrating your TV in a dimly lit or dark room will provide the most accurate results.
2. Set Color Temperature: Adjust the color temperature of any nearby light sources to a neutral setting or 6500K. This aligns the ambient light with industry standards for multimedia content viewing, ensuring better color accuracy during calibration.
3. Remove Reflective Surfaces: Check the area around your TV and remove any reflective surfaces that could cause unwanted reflections on your screen. This includes mirrors, picture frames with glass, or any glossy surfaces that may bounce light back onto the TV. Reflections can affect your perception of contrast and colors, making it harder to achieve accurate calibration.
4. Ensure Proper Distance: Position yourself at the correct viewing distance from the TV. This distance will vary depending on the size of your TV and personal preference. Generally, sitting at a distance that allows you to comfortably see the entire screen without straining your eyes is most ideal. Refer to your TV’s user manual for recommended viewing distances.
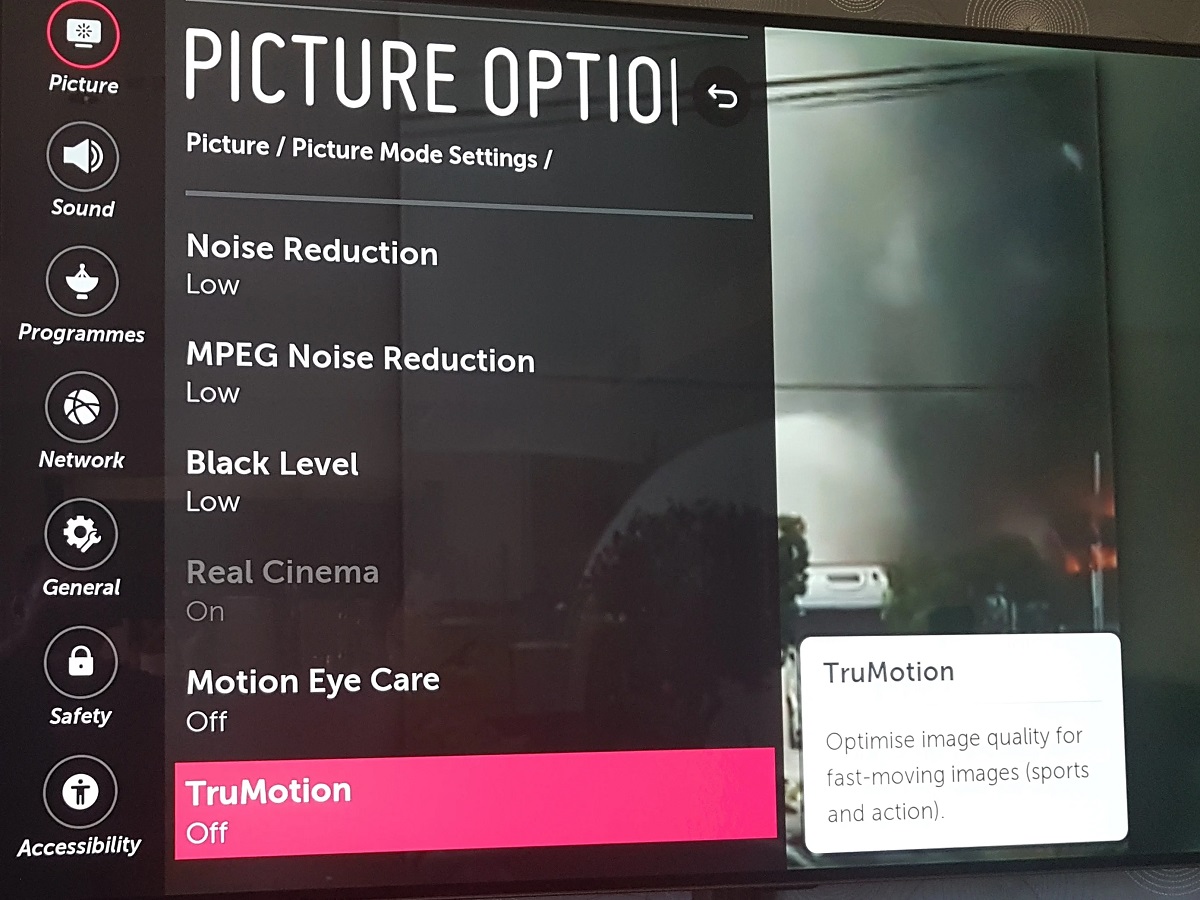
5. Disable Motion Enhancements: Disable any motion enhancements or frame interpolation features on your TV. These features can artificially alter the smoothness of motion, affecting the accuracy of calibration. You want to calibrate your TV in its default or standard picture mode without any additional processing enabled.
6. Warm Up the TV: Allow your TV to warm up for at least 15-30 minutes before starting the calibration process. This ensures that the display panel has reached its optimal operating temperature. It is especially important for OLED TVs, as their picture quality can be affected by temperature fluctuations.
By following these steps to prepare your environment, you can minimize external factors that could interfere with your calibration process. Creating a controlled and optimized environment will help you achieve more accurate results when adjusting your TV settings in the subsequent steps.
Step 3: Adjust the TV Settings
Once you have gathered your tools and prepared the environment, it’s time to start adjusting the settings on your OLED TV. This step focuses on the basic settings that lay the foundation for accurate calibration. Follow these steps to adjust the TV settings:
1. Reset to Factory Settings: Begin by resetting your TV to its factory/default settings. This ensures that you start with a clean slate and removes any previous user settings or adjustments that may affect calibration.
2. Select the Picture Mode: Choose the appropriate picture mode on your TV. Typically, the “Cinema” or “Movie” mode is best for accurate color reproduction, as it is designed to closely match the industry standards. However, you can also select the “Custom” mode if you prefer to fine-tune the settings to your personal preference while still maintaining accuracy.
3. Adjust the Backlight: Set the backlight to a level that suits your viewing environment. If you’re in a dimly lit or dark room, you can reduce the backlight to achieve deeper black levels. However, in a brightly lit room, you may need to increase the backlight to maintain good visibility without washing out the image.
4. Disable Energy-Saving Mode: Energy-saving mode can affect the brightness and overall picture quality. Make sure to disable this feature before calibration to achieve more accurate results.
5. Disable Dynamic Contrast: Dynamic contrast adjusts the TV’s backlight on the fly, resulting in dynamic changes in brightness. To accurately calibrate your TV, disable this feature, as it can interfere with achieving consistent brightness and contrast levels.
6. Disable Noise Reduction: Turn off noise reduction filters. While these filters can help reduce image noise, they often soften the image and can affect color accuracy. Disabling them provides a more accurate representation of the content.
7. Adjust Color Temperature: Set the color temperature to “Warm” or “Warm2” for a more natural and accurate color reproduction. You can fine-tune the color temperature in later steps, so start with the warmest option for now.
8. Turn off Extra Features: Disable any extra image enhancements, such as sharpness enhancement or edge enhancement features. These features can artificially enhance the image and affect color accuracy. For accurate calibration, you want to start with a clean and unaltered image.
By adjusting these TV settings, you establish a solid base for the subsequent calibration steps. Taking the time to optimize these settings ensures a more accurate representation of colors, contrast, and overall picture quality on your OLED TV.
Step 4: Adjust Picture Settings
After setting the foundation by adjusting the basic TV settings, it’s time to move on to fine-tuning the picture settings on your OLED TV. These settings will allow you to optimize the overall picture quality and achieve accurate image reproduction. Follow these steps to adjust the picture settings:
1. Contrast: Start by adjusting the contrast level. This setting controls the difference between the brightest and darkest parts of the image. Increase the contrast until you can clearly distinguish between the subtle shades of gray without losing any details in the highlights.
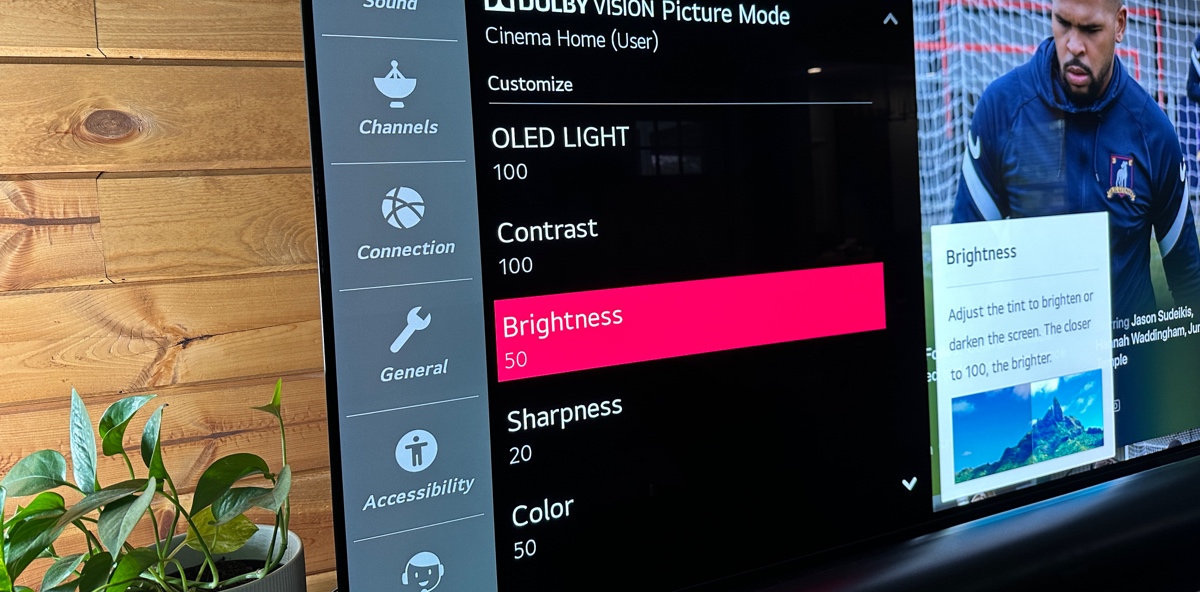
2. Brightness: Adjust the brightness level next. This setting controls the overall black level and affects the visibility of shadow details. Increase the brightness level until you can see the details in dark or shadowed areas without it being too bright or washed out.
3. Black Level: Use a test pattern or reference image to adjust the black level. This setting determines how deep the blacks appear on your TV. Increase or decrease the black level until the black areas appear rich and inky, without losing any details in dark scenes.
4. Sharpness: Next, adjust the sharpness setting. Be careful not to over-sharpen the image, as this can introduce artificial artifacts and make the image look unnatural. Find the sweet spot where the image appears clear and defined without any visible haloing or jagged edges.
5. Local Dimming: If your OLED TV has local dimming or pixel dimming features, adjust this setting to your preference. Local dimming can enhance contrast by dimming specific areas of the screen. Experiment with different levels to see which provides the best balance between deep blacks and preserving shadow details.
6. Aspect Ratio: Select the correct aspect ratio based on the content you are watching. For most modern TVs, the “16:9” aspect ratio is the standard. However, some content may require adjustments to display properly, such as switching to “4:3” for older TV shows or “Zoom” for certain films.
7. Overscan: Disable the overscan feature, if applicable. Overscan can crop the edges of the image, potentially losing important details. Disabling this feature ensures that the entire image is displayed correctly without any cropping or distortion.
8. Motion Blur Reduction: If your TV has motion blur reduction features, adjust this setting to your preference. This feature reduces motion blur and ghosting, resulting in smoother motion during fast-paced scenes. Find a level that reduces blur without introducing noticeable artifacts.
Remember to make small adjustments and refer to reference material or test patterns to evaluate the impact of each change. Take your time to find the settings that provide the best balance of image quality and accuracy for your personal viewing preferences.
Step 5: Adjust Color Settings
Adjusting the color settings is crucial to achieving accurate color reproduction and vibrant visuals on your OLED TV. By fine-tuning these settings, you can ensure that the colors displayed on your screen are faithful to the original content. Follow these steps to adjust the color settings:
1. Saturation: Begin by adjusting the saturation level. This setting controls the intensity of the colors on your TV. Increase or decrease the saturation until the colors appear vibrant and lifelike without being overly saturated or artificial.
2. Hue: Use a reference image or color chart to adjust the hue. This setting determines the balance between the primary colors (red, green, and blue) on your screen. Make subtle adjustments until the colors appear natural and accurate without any noticeable color shifts.
3. Color Temperature: Fine-tune the color temperature setting to achieve accurate white balance. The goal is to achieve a neutral and balanced appearance for white tones. Adjust the color temperature until white objects appear pure white without any noticeable color tint.
4. Color Gamut: Select the appropriate color gamut for your TV. The color gamut determines the range of colors that your TV can display. By default, most OLED TVs are set to the “Standard” color gamut, which covers the sRGB color space. However, if your TV supports a wider color gamut like DCI-P3, you can experiment with selecting it for a more extensive color range.
5. Color Management System (CMS): If your TV has a CMS feature, you can further fine-tune individual colors. Access the CMS settings and adjust the primary and secondary colors to match the reference points provided. This allows you to achieve precise color accuracy for a more lifelike and immersive viewing experience.
6. Tint: Adjust the tint setting if you notice a color imbalance. Generally, it is recommended to leave the tint setting at the default, but if you observe a significant shift in skin tones or grayscale, make slight adjustments to correct it.
7. Color Space: Select the appropriate color space based on the content you are watching. Most modern content is produced in the Rec. 709 color space, so selecting this option ensures accurate color reproduction. However, if you are viewing content specifically mastered in a different color space, such as HDR content, select the corresponding color space for optimal results.
Remember to constantly refer to reference material or test patterns to gauge the impact of each adjustment. Fine-tuning the color settings will enable your OLED TV to display rich, accurate, and vibrant colors, enhancing your overall viewing experience.
Step 6: Calibrate Brightness and Contrast
Brightness and contrast are fundamental settings that significantly impact the overall visual quality on your OLED TV. Calibrating these settings ensures optimal black levels, shadow detail visibility, and a balanced contrast ratio. Follow these steps to calibrate the brightness and contrast:
1. Adjusting Brightness: Begin by displaying a reference black level test pattern on your TV screen. This pattern should contain a range of black values, from true black to darker shades of gray. Increase or decrease the brightness setting until you can clearly distinguish the different shades of black without losing any details in the darkest areas.
2. Setting the Black Level: Utilize a reference white level test pattern to fine-tune the black level setting. This pattern should display a range of whites, from pure white to lighter shades of gray. Adjust the black level setting until you can clearly distinguish between the different shades of white, ensuring that the brightest areas have detail without any loss of contrast.
3. Adjusting Contrast: Now that you have calibrated the black levels, it’s time to adjust the contrast setting. Display a reference contrast test pattern that contains a range of white values. Increase the contrast until you can distinguish the subtle differences between the shades of white without losing any details in the brightest areas.
4. Evaluating the Results: Use reference material or test patterns to evaluate the calibrated results. Examine dark scenes to ensure that black levels are deep and well-defined, with a clear distinction between shadow details. Similarly, bright scenes should exhibit vibrant whites without any visible loss of detail due to overblown highlights.
Remember that the optimal brightness and contrast levels may vary depending on the ambient light conditions of your viewing environment. Adjust the settings based on your personal preference and the lighting conditions in your room, ensuring a comfortable and immersive viewing experience.
Keep in mind that the calibration of brightness and contrast may require periodic readjustment, as lighting conditions and personal preferences may change over time. Regularly reassessing and fine-tuning these settings will help maintain optimal picture quality on your OLED TV.
Step 7: Calibrate Gamma
Gamma calibration is an important step in achieving accurate and well-balanced brightness levels across the entire grayscale on your OLED TV. Calibrating gamma ensures that the transition from dark to light shades appears smooth, revealing the intended details in the content. Follow these steps to calibrate the gamma:
1. Access Gamma Settings: Navigate to the gamma settings menu on your TV. This setting may be located within the picture settings or advanced settings menu.
2. Adjust Gamma Curve: Most TVs offer a range of preset gamma curves, such as 2.2, 2.4, or BT.1886. Begin by selecting the gamma curve that closely matches your preference or the industry standard of 2.2. This is a good starting point for most users.
3. Use a Gamma Test Pattern: Display a gamma test pattern on your TV screen. This pattern typically consists of a smooth gradient from dark to light shades of gray. The goal is to achieve a gradual and consistent brightness progression with good shadow detail visibility.
4. Make Adjustments: Observe the gamma test pattern and adjust the gamma setting accordingly. If the shadows appear too dark or crushed, increase the gamma value. If the shadows are too bright or lacking detail, decrease the gamma value. Make gradual adjustments until the gradient appears smooth without any loss of detail in the dark or light areas.
5. Evaluate the Results: Use reference material or test patterns to assess the calibrated gamma. Examine scenes with varying brightness levels to ensure a balanced and natural transition from dark to light. Details in the shadows should be visible without being overly dark, while bright areas should maintain proper luminance without any visible clipping or loss of detail.
It’s important to note that the ideal gamma curve may vary depending on personal preference and the lighting conditions in your room. Experiment with different gamma settings and evaluate the results to find the balance that suits your viewing preferences and environment.
Remember to save your gamma settings once you achieve the desired calibration. This ensures that the calibrated gamma curve is applied consistently for all content, providing an accurate representation of the intended brightness levels and preserving details throughout the grayscale range.
Step 8: Calibrate Color Temperature
Calibrating the color temperature of your OLED TV is essential for achieving accurate white balance and natural-looking colors. The color temperature setting affects the overall warmth or coolness of the image displayed on the screen. Follow these steps to calibrate the color temperature:
1. Access Color Temperature Settings: Navigate to the color temperature settings menu on your TV. This setting may be located within the picture settings or advanced settings menu.
2. Select a Color Temperature Preset: Most TVs offer multiple color temperature presets, such as Warm, Cool, or Custom. Start by selecting the Warm preset, as it generally provides a more natural and balanced color temperature.
3. Use a Reference White Balance Test Pattern: Display a reference white balance test pattern on your TV screen. This pattern typically contains shades of white, ranging from cool (bluish) to warm (reddish).
4. Make Adjustments: Observe the white balance test pattern and make adjustments to the color temperature setting. If the image appears too cool or bluish, increase the color temperature. If the image appears too warm or reddish, decrease the color temperature. Make small adjustments until the whites appear neutral and free from any noticeable color cast.
5. Evaluate the Results: Utilize reference material or test patterns to assess the calibrated color temperature. Examine scenes with various shades of white to ensure that they appear neutral and devoid of any noticeable color tint. Additionally, observe different colors across the spectrum to ensure accurate and lifelike reproduction without any significant deviations.
It’s important to adjust the color temperature settings according to your personal preference and the lighting conditions in your room. Some individuals may prefer a cooler (bluish) tone, while others may lean towards a warmer (reddish) tone. Additionally, consider the content you typically watch and assess which color temperature setting best suits your viewing preferences.
Once you have achieved the desired color temperature calibration, save the settings to ensure consistent and accurate color reproduction. This will provide a more immersive and true-to-life viewing experience, preserving the intended color palette of the content you watch on your OLED TV.
Step 9: Fine-Tune Sharpness and Noise Reduction
Fine-tuning the sharpness and noise reduction settings on your OLED TV can greatly impact the overall picture quality. Sharpening enhances image details, while noise reduction reduces unwanted artifacts. Follow these steps to achieve optimal sharpness and noise reduction:
1. Access Sharpness Settings: Navigate to the sharpness settings menu on your TV. This setting may be located within the picture settings or advanced settings menu.
2. Use a Reference Image: Display a high-quality reference image that contains fine details, such as textures or patterns. This will help you assess the impact of sharpness settings on image clarity.
3. Adjust Sharpness: Start with the sharpness setting at its default value. Gradually increase the sharpness to enhance the image’s edge definition. However, be cautious not to over-sharpen, as it can introduce unnatural artifacts, such as halos or jagged edges.
4. Evaluate Image Details: Observe the reference image while adjusting the sharpness. Look for fine details and textures in the image to determine if the sharpness level enhances or degrades the overall image quality. Aim for a level that provides clarity and definition without noticeably compromising the natural appearance of the content.
5. Access Noise Reduction Settings: Locate the noise reduction settings menu on your TV. This setting can help reduce the visibility of unwanted noise or artifacts in the image.
6. Adjust Noise Reduction: Begin with the noise reduction setting at its default value. Gradually increase the noise reduction if you notice visible noise or artifacts in the image, such as graininess or pixelation. However, be mindful of excessive noise reduction, as it can lead to a loss of fine details and make the image appear soft or artificially smoothed.
7. Assess Image Quality: Examine the reference image while adjusting the noise reduction. Look for areas with subtle color gradations, smooth gradients, or shadow details to determine if the noise reduction level maintains detail without introducing unwanted side effects.
By fine-tuning sharpness and noise reduction, you can enhance image clarity and reduce distracting visual artifacts. Adjust these settings according to your preference and the content you watch to strike the right balance between crispness and naturalness in image presentation.
Remember to periodically reassess these settings as different video sources and content formats may benefit from specific adjustments. Regularly evaluating sharpness and noise reduction will ensure that you are getting the most out of your OLED TV’s capabilities for a visually pleasing and immersive viewing experience.
Step 10: Fine-Tune Motion Settings
The motion settings on your OLED TV can significantly impact the fluidity and smoothness of on-screen movements. Fine-tuning these settings allows you to achieve an optimal balance between motion clarity and avoiding perceived motion artifacts. Follow these steps to fine-tune the motion settings:
1. Access Motion Settings: Navigate to the motion or motion enhancement settings menu on your TV. These settings may be labeled as motion smoothing, motion interpolation, or motion control.
2. Disable or Reduce Motion Enhancements: Start by disabling or reducing any motion-enhancing features, such as motion smoothing or motion interpolation. These features can create an artificial “soap opera effect” by inserting interpolated frames, resulting in an overly smooth and unrealistic appearance. Disabling these features provides a more authentic representation of the original content.
3. Adjust Motion Blur Reduction: If your TV offers motion blur reduction settings, experiment with adjusting this setting. Motion blur reduction helps eliminate blur during fast-paced movements, enhancing the clarity and smoothness of motion. Gradually increase or decrease this setting to find a level that reduces perceived blur without introducing visible artifacts or image distortions.
4. Adjust Judder Reduction: Some TVs offer judder reduction settings to minimize judder or stuttering in panning shots or camera movements. Judder reduction smooths out these movements for a more fluid and natural appearance. Experiment with adjusting this setting to find a level that minimizes judder without introducing noticeable frame skipping or soap opera-like effects.
5. Evaluate Motion Performance: Observe various types of content, such as fast-action sequences or panning shots, while making adjustments to the motion settings. Look for smoothness and fluidity in on-screen movements without introducing unnatural or distracting artifacts. Pay attention to any visual anomalies, such as ghosting, blurring, or stuttering, as these may indicate that the motion settings require further adjustment.
Remember that the optimal motion settings may vary depending on personal preference and the content being viewed. Some individuals may prefer a more cinematic experience with minimal motion enhancements, while others may prefer a smoother and more fluid appearance. Adjust the settings according to your viewing preferences and the specific characteristics of the content being watched.
Fine-tuning the motion settings on your OLED TV allows you to achieve a balance between preserving the original cinematic experience and reducing motion-related artifacts. By finding the right settings for your preferences, you can enjoy smooth and natural motion reproduction that enhances your overall viewing enjoyment.
Step 11: Calibrate HDR Settings (If Applicable)
If your OLED TV supports HDR (High Dynamic Range) content, calibrating the HDR settings is crucial to fully experience the enhanced contrast, brightness, and color performance that HDR provides. Follow these steps to calibrate the HDR settings on your OLED TV:
1. Enable HDR Mode: Ensure that your TV is set to HDR mode to activate the enhanced HDR capabilities. This mode will allow you to access and adjust specific HDR settings on your TV.
2. Adjust Backlight: Begin by adjusting the backlight setting specifically for HDR content. Increase the backlight to its maximum level and then make subtle adjustments to achieve a balance between brightness and preserving detail in bright areas. Remember that HDR content is designed to showcase a wider dynamic range, so you may need to set the backlight higher than for standard content.
3. Adjust Contrast and Brightness: Fine-tune the contrast and brightness settings to achieve optimal HDR performance. Start by setting the contrast to its maximum value, and adjust the brightness to maintain detail in dark areas without sacrificing overall brightness and luminance.
4. Calibrate Color Settings: Use a reference HDR calibration test pattern or reference HDR content to calibrate the color settings. Adjust the saturation, hue, color temperature, and color gamut to ensure accurate and vibrant HDR colors. Pay attention to preserving the dynamic range and intensity of colors for a more immersive and lifelike visual experience.
5. Adjust HDR Effect Settings: Some TVs offer additional HDR effect settings that can enhance dynamic range and create a more impactful HDR appearance. Experiment with these settings, such as HDR Enhancer or Dynamic HDR, to find a level that suits your preference. Be cautious not to overdo these effects, as they can lead to an unrealistic or exaggerated HDR image.
6. Evaluate the Results: Utilize reference HDR material or test patterns to assess the calibrated HDR settings. Evaluate the contrast, brightness, and color performance to ensure a balanced and visually stunning HDR presentation. Look for well-defined highlights, deep blacks, rich colors, and improved overall image depth and realism.
Calibrating the HDR settings allows you to fully unlock the potential of HDR content and enjoy a more immersive viewing experience on your OLED TV. Keep in mind that HDR standards and capabilities may vary among different TVs, so consult your TV’s user manual for specific instructions and considerations.
Optimizing the HDR settings on your OLED TV brings out the intricate details and enhances the impact of HDR content, showcasing the full range of colors, contrast, and brightness that the content creators intended.
Step 12: Save Your Settings
After calibrating and fine-tuning the various settings on your OLED TV, it’s important to save your customized settings to ensure consistency and easy access in the future. Saving your settings allows you to maintain the optimal picture quality and preserve the calibration adjustments you have made. Follow these steps to save your settings:
1. Access the Settings Menu: Navigate to the settings menu on your TV. This menu is typically accessed through the TV’s remote control or on-screen display.
2. Locate the Picture or Picture Settings: Within the settings menu, locate the section related to picture or picture settings. This is where you will find the specific options for saving and managing your calibrated settings.
3. Choose the Save or Store Option: Find the option to save or store your current settings. It may be labeled as “Save Settings,” “Apply,” or similar wording.
4. Create a Custom Preset: Select the option to create a custom preset. This ensures that your calibrated settings are stored separately from the default or preloaded settings of the TV.
5. Name Your Preset: Give your custom preset a descriptive name that reflects the calibration adjustments you have made. This makes it easier to identify and recall your settings in the future.
6. Save Your Settings: Confirm or save your custom preset to store your calibrated settings. The TV will typically indicate that the settings have been saved successfully.
7. Accessing Saved Settings: To access your saved settings, return to the picture settings menu and select your custom preset from the list of available options. This will load your calibrated settings, ensuring consistent and accurate picture quality whenever you choose to use them.
By saving your settings, you eliminate the need to repeat the calibration process each time you power on the TV or switch picture modes. This allows you to conveniently access your calibrated settings whenever you want to enjoy optimal picture quality, whether for movies, TV shows, gaming, or other content.
Keep in mind that if you make further adjustments or updates to your preferred settings in the future, you can always save those updates as new presets or overwrite your existing custom preset to reflect the latest calibration adjustments.
Implementing this final step ensures that you can easily reproduce and maintain the calibrated settings you have made, providing a consistent and accurate viewing experience on your OLED TV.
Conclusion
Calibrating your OLED TV is a crucial step in obtaining the best possible picture quality and optimizing your viewing experience. By following the steps outlined in this guide, you can achieve accurate color reproduction, balanced contrast, optimal brightness levels, and overall enhanced picture performance.
Starting with gathering the necessary tools and preparing your environment, you set the stage for successful calibration. Adjusting the TV settings, including picture, color, and motion settings, lays the foundation for fine-tuning specific parameters. Calibrating brightness and contrast ensures accurate black levels and shadow details, while calibrating gamma and color temperature produces natural-looking images.
Fine-tuning sharpness and noise reduction settings improves image clarity, and adjusting motion settings achieves smooth and fluid motion reproduction. If applicable, calibrating HDR settings allows you to fully enjoy the enhanced contrast and vibrant colors that HDR content offers.
Finally, saving your customized settings ensures consistency and easy access to your calibrated picture settings in the future. Saving your settings prevents the need to repeat the calibration process each time you use your TV, providing a convenient and reliable means of accessing your optimal picture adjustments.
Remember that these instructions serve as a general guide, and specific calibration methods may vary depending on your OLED TV model. It’s always recommended to consult your TV’s user manual for manufacturer-specific instructions.
With proper calibration, your OLED TV can deliver stunning visuals, accurate colors, and an immersive viewing experience across movies, TV shows, gaming, and other forms of multimedia content. Take the time to calibrate your TV and unlock its true potential, allowing you to enjoy your favorite movies and shows with exceptional picture quality.