Introduction
Welcome to the world of LG OLED TVs, where stunning picture quality meets immersive audio. Owning an LG OLED TV is like having a cinematic experience right in your living room. However, to truly take advantage of your television’s capabilities, it is crucial to calibrate it properly. TV calibration is the process of adjusting various display settings to ensure optimal picture and sound quality. By fine-tuning these settings, you can achieve the most accurate and lifelike representation of the content you’re watching.
Whether you’re a cinephile, a gaming enthusiast, or a casual viewer, calibration is an essential step in maximizing your LG OLED TV’s performance. But why is calibration so important? And how can you go about calibrating your TV effectively? In this guide, we will explore the benefits of calibration, as well as step-by-step instructions to help you calibrate your LG OLED TV like a pro.
With LG’s OLED technology, each individual pixel emits its own light, resulting in perfect blacks, vibrant colors, and infinite contrast ratio. However, out of the box, your TV’s settings may not be optimized for your specific viewing environment. Calibration allows you to customize the picture and sound settings to match your preferences and the conditions of your room.
By calibrating your TV, you can ensure that colors are accurately reproduced, skin tones look natural, and shadow details are visible. Proper calibration also helps to eliminate image artifacts, such as motion blur or color banding, for a smoother and more enjoyable viewing experience. Additionally, calibration can ensure that the audio settings are fine-tuned, delivering clear and balanced sound.
While calibration may seem daunting at first, it is actually a straightforward process that can be done without professional equipment. By following the steps outlined in this guide, you will be able to calibrate your LG OLED TV to achieve the best possible picture and sound quality. So, let’s dive in and unravel the mysteries of calibration, ensuring that you get the most out of your LG OLED TV.
What is TV Calibration?
TV calibration is the process of fine-tuning the settings of your television to achieve the best possible picture and sound quality. When you purchase a new TV, it comes with default settings that are often optimized for showroom environments rather than home viewing. Calibration allows you to customize these settings according to your preferences and the specific conditions of your room, resulting in a more accurate and immersive viewing experience.
During the manufacturing process, TVs are calibrated in a controlled environment to meet specific standards. However, due to variations in ambient lighting, room conditions, and personal preferences, these default settings may not provide the best performance for your specific setup. With calibration, you have the opportunity to adjust parameters such as brightness, contrast, color temperature, and more to match your preferences and viewing conditions.
One of the primary goals of calibration is to ensure accurate color reproduction. This involves adjusting the television’s color settings to display colors as they were intended by the content creators. Proper calibration ensures that skin tones appear natural, without any undue reddish or bluish hue. It also ensures that vibrant colors are not oversaturated or washed out, but rather rich and lifelike.
Additionally, calibration helps to optimize other important aspects of the picture quality. By adjusting the brightness and contrast settings, you can enhance the overall dynamic range, ensuring that dark scenes are not overly dim and bright scenes are not overly blown out. Calibrating the gamma setting helps to achieve a balance between shadow detail and highlight brightness, resulting in a more nuanced and realistic image.
Furthermore, TV calibration also involves fine-tuning the audio settings. By adjusting parameters such as volume levels, equalizer settings, and audio presets, you can optimize the sound quality according to your preferences and the characteristics of your room. A well-calibrated television delivers clear and balanced audio, enhancing the overall viewing experience.
While professional calibration services are available, they can be expensive and may not be necessary for most users. With the right knowledge and tools, you can achieve excellent results by calibrating your TV yourself. In the next sections, we will guide you through the step-by-step process of calibrating your LG OLED TV, allowing you to unlock its full potential and enjoy an immersive and accurate home theater experience.
Why is Calibration Important?
Calibration is important because it allows you to get the most out of your LG OLED TV and enjoy a high-quality viewing experience. Here are some key reasons why calibration is crucial:
Accurate Picture Quality: By calibrating your TV, you can ensure that colors are reproduced accurately and consistently. This means that the content you’re watching will look as close as possible to how the filmmakers intended it. Proper calibration eliminates any tinting or color inaccuracies, resulting in vibrant and lifelike images with realistic skin tones, rich colors, and detailed shadow and highlight areas.
Better Contrast and Brightness: Calibration helps to optimize the contrast and brightness settings of your TV, ensuring that dark scenes are appropriately detailed and bright scenes are not overexposed. By achieving the right balance, you will be able to see more depth and nuance in the images, allowing for a more immersive viewing experience.
Elimination of Artifacts: Calibration can also help to eliminate common image artifacts such as motion blur, judder, and color banding. By fine-tuning the motion settings, you can achieve smoother and more fluid motion, especially important for action-packed scenes or fast-moving sports events. Calibration also reduces color banding, which is the visible stepping of shades in areas of gradual color transitions.
Enhanced Detail and Sharpness: Through calibration, you can improve the overall sharpness and detail of the image. By adjusting settings such as sharpness and noise reduction, you can reduce visual noise and enhance the overall clarity of the picture. This ensures that you don’t miss out on fine details, making the viewing experience more engaging and immersive.
Optimized Audio Experience: Calibration is not just limited to picture settings; it also encompasses audio settings. By adjusting the sound parameters of your LG OLED TV, you can achieve a balanced and immersive audio experience. This includes optimizing volume levels, adjusting equalizer settings, and selecting the appropriate audio presets to suit your preferences and room acoustics.
Personalization: One of the key benefits of calibration is the ability to personalize the settings to your liking. Each room has its own unique lighting conditions, and individual preferences vary when it comes to picture quality. Calibration allows you to tailor the settings to match your specific requirements, ensuring that you have a customized viewing experience that is perfect for you.
Overall, calibration is important because it maximizes the performance of your LG OLED TV. It enables you to enjoy accurate colors, enhanced contrast, reduced artifacts, improved detail, and a personalized audio experience. By investing a little time and effort into calibration, you can unlock the full potential of your TV, transforming your home theater setup into a captivating and immersive entertainment hub.
Preparing for Calibration
Before you begin the calibration process for your LG OLED TV, it’s important to make a few preparations to ensure accurate and optimal results. Here are some key steps to follow:
1. Choose the Right Environment: Find a suitable environment for calibration. Ideally, the room should have controlled lighting conditions, with minimal ambient light that can interfere with the TV’s image quality. Close curtains or blinds to prevent glare or reflections on the screen. Additionally, ensure that the room temperature is comfortable, as extreme heat or cold can affect the performance of the TV.
2. Reset Factory Settings: Start by resetting your LG OLED TV to its factory default settings. This allows you to begin the calibration process from a clean slate. Refer to your TV’s user manual or settings menu to find the option to reset to factory settings. This step ensures that any previous adjustments or customizations are cleared, allowing for a more accurate calibration.
3. Use a Calibration Disc or Software: To achieve precise calibration, it is recommended to use a calibration disc or software. These tools provide test patterns and instructions to guide you through the calibration process. You can find calibration discs or software online or purchase them from reputable sources. Follow the instructions provided with the calibration tool to proceed with each adjustment.
4. Allow for Warm-up Time: Before calibrating your LG OLED TV, allow it to warm up for at least 30 minutes. This allows the display to stabilize and ensures that the settings you adjust are accurate. It also ensures that any potential variations due to power fluctuations or temperature changes are accounted for, resulting in more consistent calibration results.
5. Gather the Necessary Tools: To perform calibration, you may need some additional tools. These can include a colorimeter or spectrophotometer, which are devices that measure color accuracy and luminance levels. Calibration discs or software often come with recommended tools or suggest alternatives that can be used for accurate measurement. Ensure that you have these tools ready before proceeding.
6. Disable Ambient Light Sensors: Many LG OLED TVs have ambient light sensors that automatically adjust the picture settings based on the room’s lighting conditions. While these sensors may be useful for everyday viewing, they can interfere with the calibration process. Make sure to disable these sensors temporarily during calibration, so your adjustments are not overridden by the TV’s automatic picture adjustments.
7. Take Notes: Throughout the calibration process, it’s a good idea to take notes on the adjustments you make. This can help you keep track of the changes and settings you prefer. Note down the original settings before making adjustments, and keep a record of the calibrated settings that you find to be most suitable. Having these notes handy will make it easier to revert back or fine-tune the settings in the future.
By following these preparation steps, you’ll ensure that your LG OLED TV is ready for calibration. Taking the time to properly prepare will greatly contribute to achieving accurate and optimal results during the calibration process. Once these preparations are complete, you can move on to adjusting the basic settings and fine-tuning the picture and audio settings to maximize the performance of your LG OLED TV.
Step 1: Adjusting Basic Settings
Before diving into the more specific calibration adjustments, it’s important to start with the basic settings of your LG OLED TV. These settings lay the foundation for the overall picture quality and should be properly adjusted. Follow these steps to ensure you have a solid starting point:
1.1 Set Picture Mode: Begin by selecting the appropriate picture mode on your TV. LG OLED TVs typically offer different preset picture modes such as Standard, Cinema, Sports, or Game. Each mode is optimized for specific content and viewing conditions. For most users, the Cinema or Movie mode is a good starting point as it provides a more accurate and cinematic picture. Experiment with different modes to see which one suits your preferences.
1.2 Adjust Backlight and Contrast: Next, adjust the backlight and contrast settings. Backlight refers to the intensity of the TV’s backlighting while contrast determines the differentiation between bright and dark areas. Start by setting the backlight level to a comfortable level, considering the ambient lighting conditions in your room. Then, adjust the contrast to achieve a balanced image with good shadow detail and bright highlights. Avoid setting the contrast too high, as it can lead to loss of detail or a washed-out look.
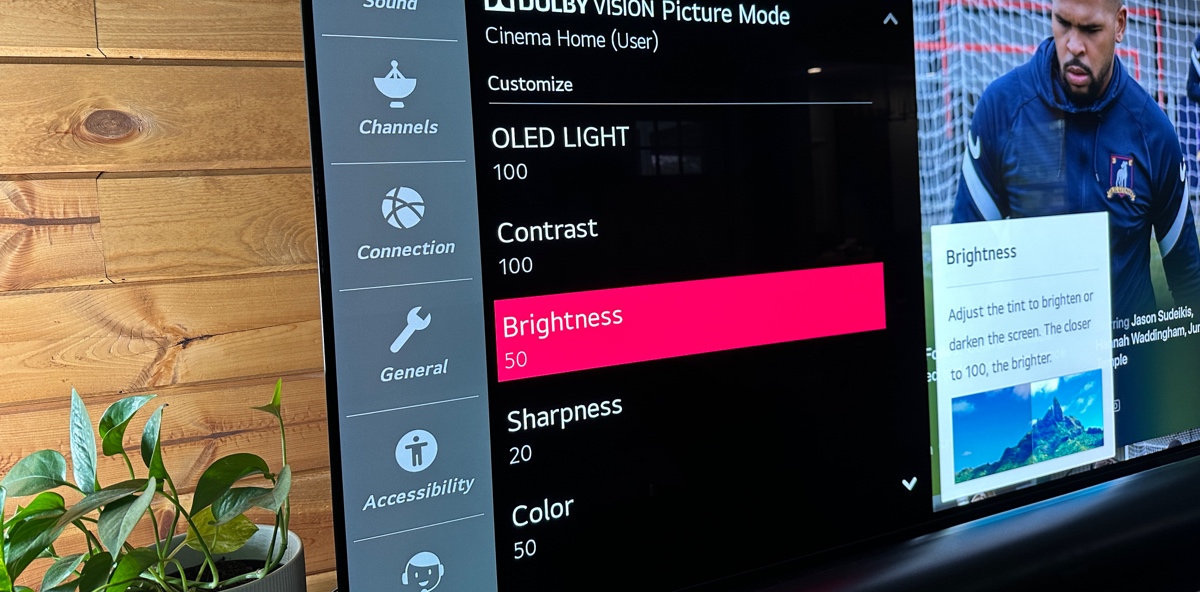
1.3 Set Brightness and Sharpness: Now, proceed to adjust the brightness and sharpness settings. Adjust the brightness to achieve a balance between visible shadow detail and avoiding crushing blacks. You should be able to see details in dark areas without the screen appearing too bright. Sharpness, on the other hand, should be set to a moderate level. Avoid setting it too high as it can introduce artificial enhancement and make the image appear over-sharpened or unnatural.
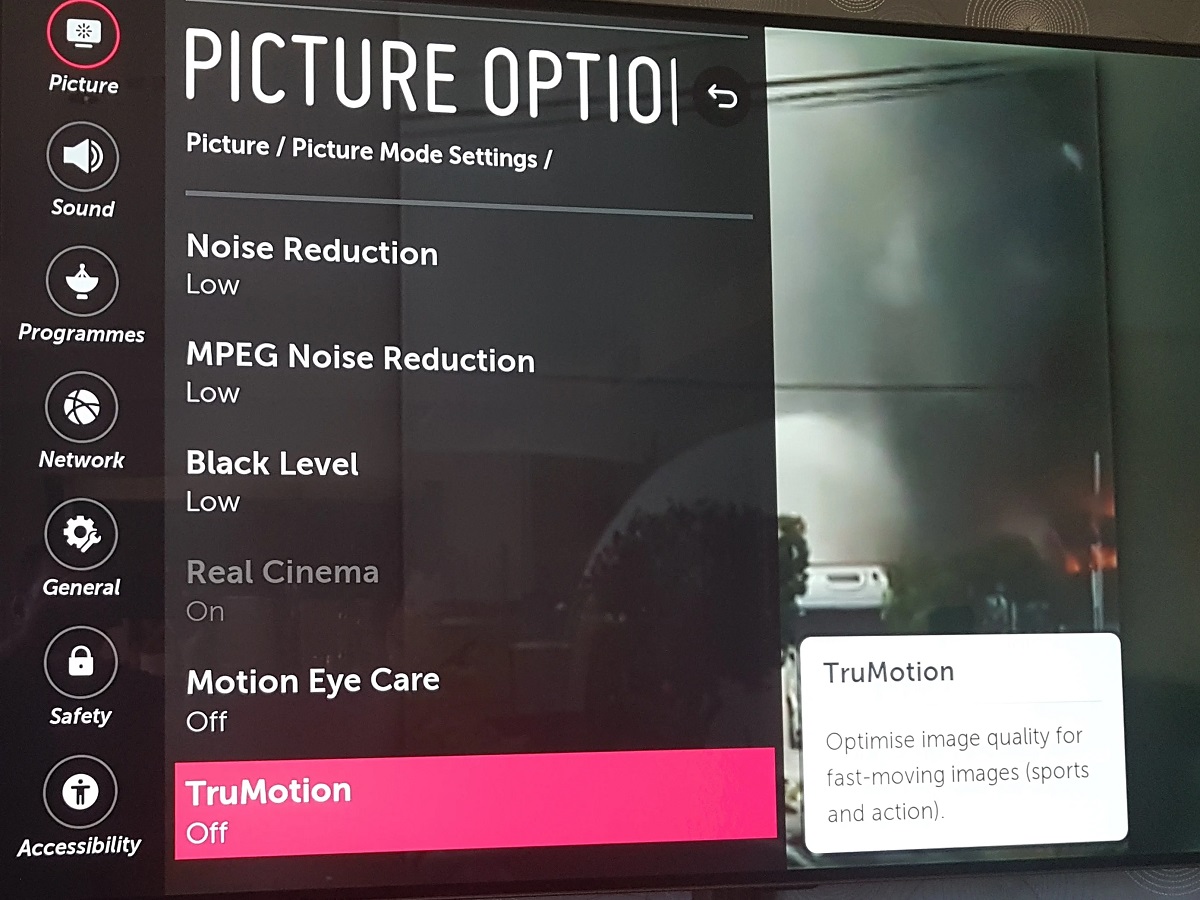
1.4 Disable Image Enhancement Features: It’s recommended to disable any image enhancement features such as noise reduction, dynamic contrast, or motion smoothing during calibration. These features can interfere with the calibration process and alter the picture quality. By turning them off, you’ll have a more accurate representation of the content you’re watching and can fine-tune the settings accordingly.
1.5 Adjust Aspect Ratio: Ensure that the aspect ratio of the TV is set correctly to avoid content appearing stretched or cropped. Most modern TVs have an auto or 16:9 aspect ratio option, which is suitable for most content. However, for specific cases like older films or broadcasts, you may need to adjust the aspect ratio manually to maintain the correct proportions of the content.
1.6 Enable Game Mode (if applicable): If you plan on using your LG OLED TV for gaming, it’s worth enabling the Game mode feature. Game mode reduces input lag, providing a more responsive gaming experience. Refer to your TV’s user manual or settings menu to enable this mode, and remember to recalibrate the picture settings specifically for gaming to ensure optimal performance.
By properly adjusting these basic settings, you’ll establish a solid foundation for the calibration process. Once you have these settings in place, you can proceed to the next steps to fine-tune the picture quality and audio settings of your LG OLED TV. With each adjustment, you’ll be one step closer to experiencing the true potential of your TV and enjoying a stunning and immersive viewing experience.
Step 2: Adjusting Picture Mode
After setting the basic picture settings, the next step in calibrating your LG OLED TV is to fine-tune the picture mode. Picture modes provide pre-configured settings that are optimized for specific content and viewing conditions. Adjusting the picture mode allows you to tailor the TV’s performance to your preferences and ensure the best possible picture quality. Follow these steps to optimize the picture mode:
2.1 Select the Desired Picture Mode: Start by selecting the picture mode that best suits your viewing needs. LG OLED TVs offer various preset picture modes, such as Cinema, Standard, Vivid, or Game. Each mode has different settings for factors like brightness, contrast, color saturation, and sharpness. Experiment with different picture modes and choose the one that provides the most accurate and pleasing image based on your preferences.
2.2 Adjust Picture Settings within the Mode: Once you’ve selected the desired picture mode, delve into the advanced picture settings within that mode. These settings allow you to further fine-tune the image quality. Some common picture settings you’ll find include:
- Brightness: Adjust the brightness setting to ensure that dark areas of the image are visible without being too bright.
- Contrast: Fine-tune the contrast setting to achieve a balance between bright highlights and shadow detail.
- Color: Adjust the color setting to achieve vibrant and accurate colors. Avoid oversaturating the colors, as this can result in an unnatural appearance.
- Tint: Set the tint to ensure that skin tones and colors appear natural. Adjusting the tint can also help eliminate any reddish or bluish hue in the image.
- Sharpness: Fine-tune the sharpness setting to enhance the clarity of the image without introducing unwanted artifacts or over-sharpening.
2.3 Use Reference Material: To further assist in adjusting picture settings, refer to reference material such as test patterns or calibration discs. These materials provide visual references for achieving accurate settings. They can help you adjust settings like gamma, grayscale, or color temperature for the most precise picture reproduction.
2.4 Consider Viewing Conditions: Take into account the lighting conditions of your room when adjusting picture settings. If your room is well-lit, you may want to increase brightness or contrast to counteract any glare or washout. In a darker room, you can lower brightness or adjust the backlight for better black levels and overall contrast.
2.5 Save Custom Picture Mode (Optional): If you are happy with your customized picture settings, many LG OLED TVs allow you to save your adjustments as a custom picture mode. Saving your settings allows you to quickly revert to your preferred calibration in the future, especially if you switch between different content types or prefer specific configurations for specific sources.
By carefully adjusting the picture mode settings, you can achieve a more accurate and personalized viewing experience on your LG OLED TV. Remember to take your time and experiment with different settings to find the combination that best suits your preferences and the content you watch. With the picture mode properly adjusted, you can proceed to the next steps and fine-tune other aspects of the picture quality for an even more immersive viewing experience.
Step 3: Fine-Tuning Picture Settings
After adjusting the picture mode, the next step in calibrating your LG OLED TV is to fine-tune the picture settings to achieve the best possible image quality. Fine-tuning the picture settings allows you to customize and optimize various parameters to enhance the overall visual experience. Follow these steps to fine-tune the picture settings:
3.1 Adjust Backlight and Contrast: Begin by refining the backlight and contrast settings. Adjust the backlight to a level that suits your viewing environment, balancing brightness with minimizing any glare or reflections. Fine-tune the contrast to achieve a pleasing balance between bright highlights and shadow detail, ensuring a more lifelike and dynamic picture.
3.2 Calibrate Color and Color Temperature: Calibrating the color settings is crucial for accurate and vibrant image reproduction. Use color adjustment controls such as saturation, hue, and color tint to achieve the desired color balance. Avoid oversaturating colors, as this can result in an unnatural appearance. For more precise color accuracy, calibrate the color temperature to match industry standards, aiming for a neutral white balance.
3.3 Adjust Sharpness and Clarity: Fine-tune the sharpness setting to enhance the clarity of the image without introducing unwanted artifacts. Be cautious not to over-sharpen, as this can lead to unnatural edges or increased noise. Adjust the clarity control, if available, to enhance detail and textures without compromising overall picture quality.
3.4 Fine-tune Noise Reduction: If your LG OLED TV has noise reduction settings, adjust them to reduce any unwanted visual noise in the image. Find the right balance that minimizes artifacts while maintaining essential detail. Keep in mind that excessive noise reduction can result in a loss of fine textures and details, so be conservative with this setting.
3.5 Calibrate Motion Settings: Adjusting the motion settings can help reduce motion blur and make fast-paced action smoother. Experiment with features such as motion interpolation or motion smoothing to find a setting that suits your preference. However, be aware that some motion enhancement features can introduce artifacts or unnatural smoothness, so it’s important to strike the right balance to maintain a natural-looking motion.
3.6 Fine-tune Gamma and Black Level: Adjusting the gamma setting is critical for achieving an accurate and balanced representation of mid-tones and shadow detail. Calibrating the black level helps to set the appropriate brightness for dark areas of the image, ensuring that details aren’t lost in shadows. Find the optimal gamma and black level settings to achieve a well-calibrated and balanced image.
3.7 Use Test Patterns and Reference Material: Utilize test patterns and reference material to assist in fine-tuning the picture settings. Calibration discs or online resources often provide helpful reference material with specific test patterns that can assist in achieving accurate settings for factors such as grayscale, gamma, or color reproduction. Refer to these resources to ensure your adjustments are precise and aligned with industry standards.
3.8 Review and Revisit: As you fine-tune the picture settings, periodically review the changes you’ve made by viewing different types of content. Check for any undesirable effects such as artifacts or unnatural color shifts. If necessary, revisit previous settings and make further adjustments to achieve your desired picture quality.
By carefully fine-tuning the picture settings, you can achieve a more accurate and visually pleasing image on your LG OLED TV. Don’t be afraid to spend time experimenting and revisiting certain settings to find the ideal balance that enhances your viewing experience. Proceed to the next steps to continue calibrating other aspects of your TV, bringing you closer to a truly optimized and immersive home theater experience.
Step 4: Adjusting Color Temperature
Color temperature refers to the balance of colors displayed on your LG OLED TV. Adjusting the color temperature can greatly impact the overall color accuracy and visual experience. It allows you to fine-tune the white balance and ensure that colors appear natural and accurate. Follow these steps to adjust the color temperature:
4.1 Understanding Color Temperature: Color temperature is measured in Kelvin (K) and determines the warmth or coolness of the displayed colors. Lower color temperatures, such as 6500K, indicate warmer tones with a slight reddish hue. Higher color temperatures, such as 9000K, produce cooler tones with a bluish tint. For accurate color reproduction, a recommended color temperature is typically around 6500K, which simulates natural daylight.
4.2 Selecting a Color Temperature Preset: Most LG OLED TVs offer preset color temperature options such as Warm, Normal, or Cool. Start by selecting the preset that is closest to your desired color balance. You can adjust this further based on your preference and the lighting conditions in your room.
4.3 Adjusting the Color Temperature Manually: If you prefer more precise control over the color temperature, you can manually adjust it. Look for settings related to color temperature or white balance in your TV’s picture settings menu. Typically, you’ll have controls for adjusting the amount of red, green, and blue in the image. As a general guide, increase the blue value to cool down the image, and increase the red value to warm it up. Make small adjustments and observe the changes until you achieve the desired color temperature.
4.4 Using Reference Material: To calibrate the color temperature more accurately, use reference material like calibration discs or test patterns. These materials often provide specific targets for color temperature adjustment. Use them as a visual reference to ensure that the white balance is accurate and the colors are properly balanced at different brightness levels.
4.5 Consider Room Lighting: Take into account the lighting conditions in the room when adjusting the color temperature. If the room has warm incandescent lighting, you may want to decrease the blue and increase the red to compensate for the warm ambient light. Similarly, if the room has cool fluorescent lighting, you may need to increase the blue to counterbalance the cool lighting and maintain accurate color reproduction.
4.6 Test and Evaluate: After making adjustments to the color temperature, test the changes by viewing various content with different color spectrums. Check for any color casts or shifts, and ensure that skin tones appear natural. If necessary, make further adjustments until you achieve a visually appealing and accurate color temperature.
Adjusting the color temperature of your LG OLED TV is an important step in achieving accurate and vibrant color reproduction. By fine-tuning the white balance and color balance, you can ensure that the colors on your screen are natural, pleasing to the eye, and faithful to the original content. Take the time to make precise adjustments based on your preferences and room conditions, bringing you closer to a perfectly calibrated TV.
Step 5: Calibrating Contrast and Brightness
Calibrating the contrast and brightness settings of your LG OLED TV is crucial for achieving accurate and optimal image quality. These settings determine the differentiation between light and dark areas, ensuring a balanced and lifelike visual experience. Follow these steps to calibrate the contrast and brightness:
5.1 Adjusting Contrast: Start by adjusting the contrast setting of your TV. Contrast determines the difference between the darkest and brightest parts of the image. Set the contrast to a level where you can clearly see details in bright areas without sacrificing shadow detail. Avoid setting the contrast too high, as it can lead to loss of detail in brighter parts of the image or washed-out colors. Aim for a balanced contrast that preserves both highlight and shadow details.
5.2 Calibrating Brightness: Next, calibrate the brightness setting to ensure that details in dark areas of the image are visible without being overly bright. Adjust the brightness until you can distinguish subtle details in shadowed parts of the picture, such as dark corners or shadowy scenes. To avoid crushing blacks, where dark areas lose detail and appear completely black, make sure the brightness is not set too low. Strive for a balance that presents an accurate and realistic representation of dark and shadowed elements.
5.3 Using Reference Material: Utilize reference material like calibration discs or test patterns to assist in calibrating contrast and brightness. These resources provide visual references to help you achieve accurate settings. Look for test patterns that feature a range of brightness and contrast levels and use them to ensure that details are visible in both dark and bright areas without excessive black crush or blown-out highlights.
5.4 Adjusting Picture Settings for Different Content: Calibrate the contrast and brightness settings while considering the specific content you watch most frequently. Different types of content may have varying lighting conditions, color palettes, and contrasts. Fine-tune the settings to suit your preferences and the content you enjoy, whether it’s movies, sports, or gaming. Remember to test the changes with various content to ensure consistent and optimized performance.
5.5 Evaluating Realistic Viewing Conditions: Consider the lighting conditions in your viewing environment when calibrating contrast and brightness. If you typically watch TV in a dark room, you may want to set the brightness lower to avoid eye strain and excessive brightness. In brighter environments, a higher brightness level may be needed to compensate for ambient light. Strive to achieve a balance between the TV’s brightness and the ambient lighting so that the image appears natural and comfortable to view.
5.6 Periodic Re-Assessment: Regularly reassess the contrast and brightness settings to account for changes in your viewing environment or personal preferences. Over time, lighting conditions in your room may change, or your visual preferences may evolve. Take the time to recalibrate these settings to maintain an optimal viewing experience and ensure that you’re getting the best image quality from your LG OLED TV.
Calibrating the contrast and brightness of your LG OLED TV helps to achieve accurate and balanced image quality. By fine-tuning these settings, you can preserve both shadow and highlight details, ensuring that your viewing experience is immersive and lifelike. Stay mindful of your viewing environment and adapt the settings accordingly for a truly optimized visual performance.
Step 6: Calibrating Gamma and Black Level
Calibrating the gamma and black level settings of your LG OLED TV is essential for achieving accurate and balanced representation of shades and contrast. Gamma controls the luminance curve of the TV, while black level adjusts the brightness of dark areas. Fine-tuning these settings ensures that the image has proper shadow detail and a smooth transition between different shades of gray. Follow these steps to calibrate gamma and black level:
6.1 Understanding Gamma: Gamma refers to the relationship between the input signal and the brightness of the displayed image. It determines how the TV renders different shades of gray from black to white. Gamma controls the mid-tones, affecting the overall contrast and depth of the image. Correct gamma settings result in a balanced representation of shadows and highlights, allowing for a more realistic and nuanced picture.
6.2 Adjusting Gamma: Access the gamma settings in your TV’s picture settings menu. Typically, you’ll find preset gamma options, such as 2.2 or 2.4, with each number representing a different curve. For most content, a gamma setting of 2.2 is a good starting point, as it provides a balanced and relatively natural representation of shades. However, you may need to experiment and adjust the gamma to find the setting that suits your preference and viewing conditions best.
6.3 Testing and Reference Material: Use test patterns or reference material that provides gamma test patterns to assist in calibrating gamma. These patterns help you achieve the desired gamma curve that corresponds to industry standards. Look for patterns that display a gradient of shades from black to white and adjust the gamma until there is a smooth transition between the different shades, with no loss of detail in the darker or brighter areas.
6.4 Calibrating Black Level: Black level adjustment is crucial to maintain accurate representation of dark areas. It adjusts how deep or bright the blacks appear on the screen. Set the black level to match the content you are viewing and the ambient lighting in your room. You should be able to distinguish the subtle details in dark scenes without any black crush or elevated black levels that wash out the image. Fine-tune the black level until you achieve a balance between preserving detail in dark areas while maintaining depth and contrast.
6.5 Reference Material for Black Level: Utilize reference material with black level test patterns to assist in calibrating this setting accurately. These patterns typically consist of a gradient of shades from black to gray. Adjust the black level setting until you can discern distinct shades of black, without losing any detail in the darker areas or having them appear elevated and grayish.
6.6 Periodic Re-Assessment: Monitor your gamma and black level settings periodically as lighting conditions and personal preferences may change over time. Adjust the settings if you notice that blacks appear crushed, shadows lack detail, or mid-tones appear washed out. Regular recalibration ensures that the gamma and black level remain accurate and optimal for a balanced and realistic representation of shades and contrast.
Calibrating the gamma and black level of your LG OLED TV is vital for achieving accurate and balanced image quality. By fine-tuning these settings, you ensure that shadows have detail, mid-tones are properly rendered, and highlights are not overexposed. Stay mindful of reference material, test patterns, and your viewing environment to achieve the optimal gamma and black level balance for an immersive and true-to-life viewing experience.
Step 7: Adjusting Motion Settings
Adjusting the motion settings of your LG OLED TV is important for optimizing the smoothness and clarity of fast-moving images. Motion settings determine how the TV handles motion blur, judder, and motion interpolation. Fine-tuning these settings allows you to enhance the overall motion performance and enjoy a more immersive viewing experience. Follow these steps to adjust the motion settings:
7.1 Understand Motion Settings: Familiarize yourself with the motion settings available on your LG OLED TV. Common settings include motion blur reduction, motion smoothing or interpolation, and judder reduction. Each setting affects how the TV handles different types of motion, offering a trade-off between smoothness and motion clarity.
7.2 Disable Motion Smoothing: Start by disabling motion smoothing or motion interpolation features. While these features may make motion appear smoother, they can also introduce artifacts and create an unnatural soap opera effect. Disabling motion smoothing provides a more authentic representation of the original content without added processing.
7.3 Adjust Motion Blur Reduction: Adjust the motion blur reduction setting, if available, to minimize motion blur. This setting helps reduce blurring during fast-paced scenes or action sequences. Set it to a level that minimizes blur without introducing excessive artifacts or visible processing effects.
7.4 Judder Reduction: Some TVs offer a judder reduction setting to reduce judder, which is the slight stuttering effect often seen in certain types of content like movies or 24p video. Enable this setting if you notice juddering during slow camera pans or panning shots. Adjust it slowly to find the right balance where judder is reduced without introducing any unnatural or jarring effects.
7.5 Consider Gaming: If you plan on gaming on your LG OLED TV, keep in mind that certain motion settings may introduce input lag. Gaming modes or settings specifically optimized for low input lag should be enabled to ensure a responsive gaming experience. Refer to your TV’s user manual or settings menu to find and enable the appropriate gaming mode.
7.6 Test with Different Content: After making adjustments to the motion settings, test them with different types of content to evaluate their impact. Watch fast-action scenes, sports events, or any content with rapid motion to observe the changes. Ensure that the motion appears smooth, without significant blur or judder, while still maintaining a natural and artifact-free viewing experience.
7.7 Experiment for Personal Preference: Adjust the motion settings according to your personal preference. Some individuals may prefer a more cinematic feel with a slight amount of motion blur, while others may prefer a smoother motion with minimal blur. Fine-tune the settings to achieve the desired balance and smoothness that suits your viewing preferences.
Adjusting the motion settings of your LG OLED TV allows you to optimize the smoothness and clarity of fast-moving images. By disabling unnecessary motion processing, minimizing motion blur, and reducing judder, you can enjoy a more immersive and satisfying viewing experience. Remember to experiment and fine-tune the settings based on the content you watch and your personal preferences to achieve the best motion performance.
Step 8: Fine-Tuning Sound Settings
Fine-tuning the sound settings of your LG OLED TV is essential for optimizing your audio experience. While LG OLED TVs offer impressive audio capabilities, adjusting the sound settings allows you to personalize the audio to your preference and enhance the overall immersion. Follow these steps to fine-tune the sound settings:
8.1 Select the Preferred Sound Mode: Begin by choosing the sound mode that best suits your audio preference and viewing content. LG OLED TVs typically offer sound modes such as Standard, Cinema, Music, or Sports. Each mode enhances specific audio elements and can provide a different listening experience. Experiment with different modes and select the one that suits your preferences and the content you watch.
8.2 Adjust the Sound Equalizer: Most LG OLED TVs allow you to adjust the sound equalizer settings. The equalizer provides control over different frequency ranges to fine-tune the audio output. You can adjust the bass, midrange, and treble settings to achieve a balanced sound profile that suits your preferences. Experiment with the equalizer controls to find the ideal audio balance for your preferred content.
8.3 Enable Surround Sound Options: If your LG OLED TV supports surround sound, ensure that it is enabled for a more immersive audio experience. Surround sound technology creates a multi-dimensional sound field that envelops the listener. Check the sound settings menu to enable any available options, such as simulated surround sound or virtual sound enhancement, to enhance the spatial audio experience.
8.4 Optimize Volume Level & Modes: Adjust the volume level to a comfortable level that suits your listening environment and personal preference. Some LG OLED TVs offer volume modes such as Auto Volume, Night Mode, or Dialog Enhancement. Auto Volume equalizes volume discrepancies between different sources, Night Mode reduces volume peaks for night-time viewing, and Dialog Enhancement enhances dialog clarity. Enable or adjust these modes based on your specific needs for a more enjoyable audio experience.
8.5 Consider External Audio Devices: If you have external audio devices, such as soundbars or home theater systems, connect them to your LG OLED TV and adjust the settings accordingly. Your TV may have specific audio settings to optimize the audio output for external devices. Consult the user manuals for your TV and audio equipment to ensure proper setup and configuration.
8.6 Use Reference Material: Utilize reference material like movies or music that you are familiar with to test and fine-tune the sound settings. Listen for clarity, balance, and overall immersion. Reference material can help you identify any specific audio elements that need adjustment and guide you in achieving the desired sound quality.
8.7 Test and Personalize: Finally, listen to a variety of content with different audio characteristics to evaluate the impact of your adjustments. Test various genres, such as movies, music, or sports, and assess the soundstage, clarity, and depth. Personalize the sound settings based on your listening preferences to create an audio experience that is tailored to your individual taste.
Fine-tuning the sound settings of your LG OLED TV allows you to optimize the audio experience to your preference. By adjusting equalizer settings, enabling surround sound options, and personalizing various audio parameters, you can enhance the overall immersion and enjoyment of the content you watch. Take the time to experiment with different settings and reference material to achieve a well-balanced and personalized sound experience.
Step 9: Saving and Verifying Calibration Settings
After calibrating your LG OLED TV, it’s important to save and verify the calibration settings to ensure consistent and accurate performance. Saving the settings allows you to easily revert to your calibrated setup and ensures that your efforts are not lost. Follow these steps to save and verify your calibration settings:
9.1 Saving the Settings: Many LG OLED TVs provide the option to save your customized calibration settings as a preset. Locate the “Save” or “Store” option in the TV’s settings menu and follow the prompts to save the current settings. Give the preset a name that reflects the calibration settings for easy identification in the future. This step ensures that you can quickly restore your preferred calibration whenever needed.
9.2 Verifying the Settings: Once the calibration settings are saved, take a moment to verify that they have been applied correctly. Navigate to the TV’s picture and sound settings menu to make sure that the saved preset is active. Review the settings to ensure that they match your calibrated values. This step provides peace of mind that your customized settings have been saved and applied correctly.
9.3 Testing with Various Content: To further verify the calibration settings, test them with a variety of content. Watch different movies, TV shows, or games that you are familiar with and evaluate the picture quality, color accuracy, contrast, and audio performance. Pay attention to any noticeable differences or inconsistencies in the image or sound. Adjust the settings if necessary to achieve the desired performance across different types of content.
9.4 Recalibration as Needed: Over time, it’s important to re-evaluate and recalibrate the settings as necessary. Factors like changes in ambient lighting, updates to the TV’s firmware, or personal preferences may prompt adjustments to the calibration. Regularly assess the performance of your TV and make any required refinements or fine-tuning to maintain optimal picture quality and sound experience.
9.5 Documenting Your Settings: Consider documenting your calibration settings in a secure location for future reference. This documentation can serve as a reference guide if you ever need to reset or recreate your customized settings. Include details such as the picture mode, specific settings values, and any additional adjustments you made during the calibration process.
9.6 Seeking Professional Calibration (Optional): If you desire the highest level of precision and expertise, or if you prefer not to calibrate your LG OLED TV yourself, you may consider hiring a professional calibration service. Professional calibrators utilize specialized equipment and have in-depth knowledge of display calibration. They can analyze the specific characteristics of your TV and the viewing environment to deliver the most accurate and optimized calibration results.
By saving and verifying your calibration settings, you can ensure that your LG OLED TV consistently delivers the best picture quality and sound performance. Regularly revisit and re-evaluate these settings, as well as make necessary adjustments, to maintain an optimal viewing and listening experience over time.
Conclusion
Calibrating your LG OLED TV is a rewarding process that allows you to unlock its full potential and enjoy a truly immersive and accurate viewing experience. By following the step-by-step instructions outlined in this guide, you can fine-tune various settings to achieve optimal picture quality, sound performance, and overall enjoyment.
Through the process of calibration, you ensure that colors are accurately reproduced, brightness and contrast levels are balanced, motion is smooth, and audio is fine-tuned to your preferences. Calibration also eliminates common image artifacts and enhances shadow detail, resulting in a more vibrant and lifelike picture.
Remember to take into account the specific characteristics of your viewing environment, as ambient lighting and room conditions can impact the calibration process. Utilize reference material, test patterns, and professional calibration services if necessary, to achieve the most accurate and optimal results.
Once you have calibrated your LG OLED TV, save your customized settings and verify that they are applied correctly. Periodically revisit and recalibrate the settings to account for changes in preferences, viewing conditions, or firmware updates.
Whether you’re enjoying movies, TV shows, gaming, or any other content, a properly calibrated LG OLED TV will provide you with a breathtaking visual experience, true-to-life colors, and immersive sound. Take the time to fine-tune your TV, and you’ll be rewarded with an exceptional home entertainment system that brings every scene to life.
Enjoy the journey of calibration and immerse yourself in the immersive world of your LG OLED TV!