Introduction
Welcome to the world of DJI Go, a powerful app that allows you to control and navigate your DJI drone with precision and ease. With its user-friendly interface and advanced features, DJI Go has become a staple for both amateur and professional drone pilots around the globe.
One of the most important aspects of any drone flight is having access to accurate and reliable maps. These maps not only help you navigate the sky, but they also provide crucial information such as airspace restrictions, landmarks, and points of interest. However, relying on real-time data can be a challenge, especially if you’re flying in remote areas or places with limited internet connectivity.
This is where map caching comes in handy. Map caching allows you to download and store map data on your device, so you can access it offline whenever you need it. By proactively caching maps in DJI Go, you can ensure that you have the necessary information at your fingertips, regardless of your location or internet access.
In this article, we’ll walk you through the process of caching maps in DJI Go, step by step. Whether you’re planning a long-distance flight or simply want to be prepared for any situation, map caching is a valuable tool that every DJI drone pilot should be familiar with.
What is DJI Go?
DJI Go is a mobile application developed by DJI, a leading manufacturer of drones and aerial imaging technology. It is designed to provide drone pilots with a streamlined and intuitive interface for controlling their DJI drones and accessing a wide range of features and settings.
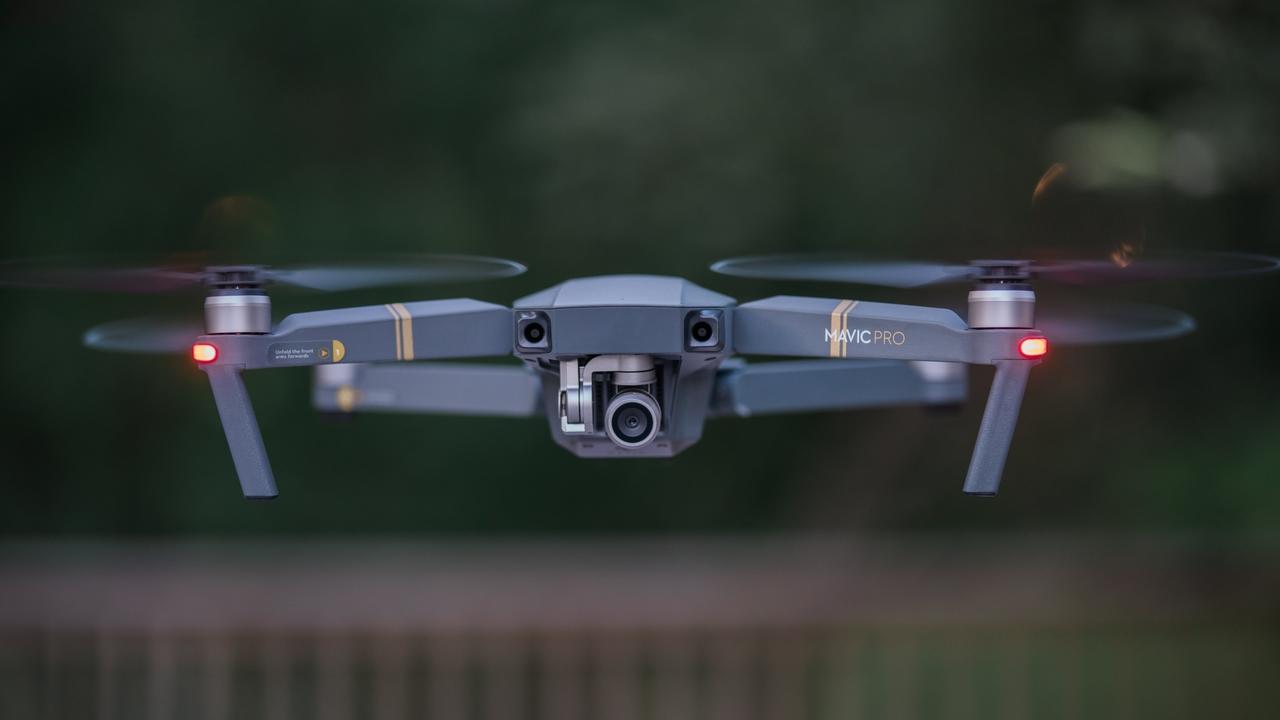
DJI Go is compatible with various DJI drone models, including the popular Phantom series, Mavic series, and Inspire series. It offers a seamless connection between your mobile device and the drone, allowing you to monitor the flight in real-time, capture stunning aerial photos and videos, and adjust camera settings on the fly.
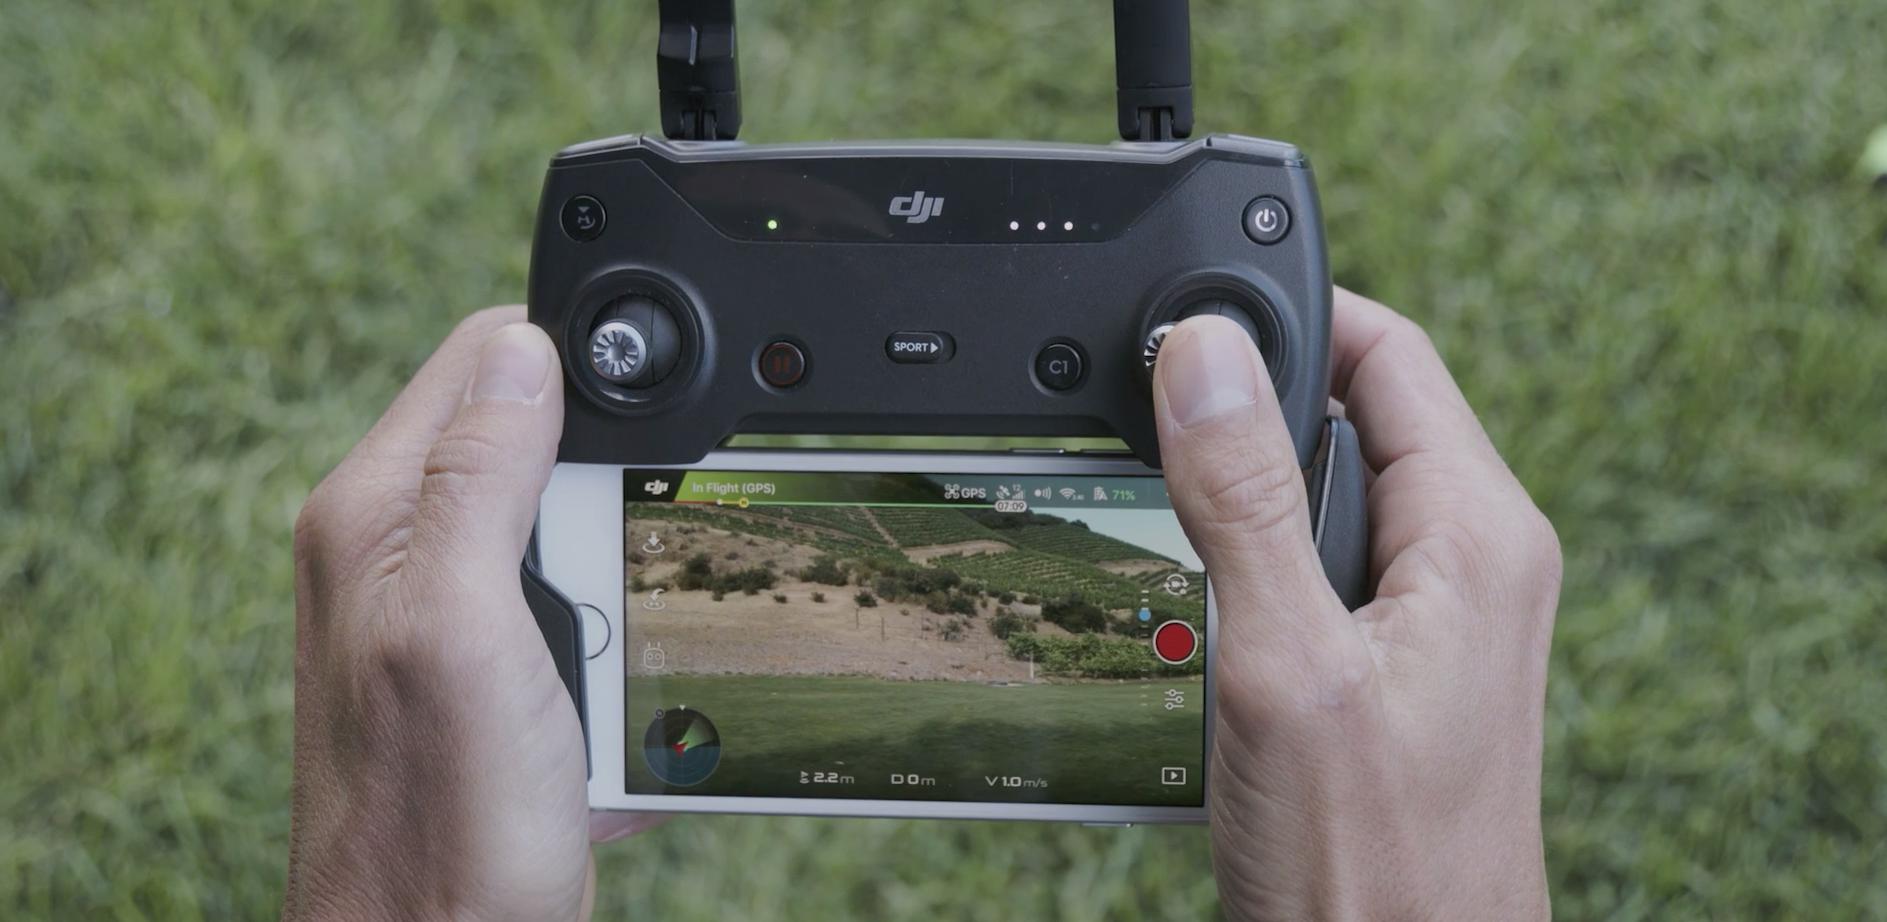
In addition to flight control, DJI Go also provides a wealth of information and features to enhance your drone flying experience. It offers a live HD video feed from the drone’s camera, allowing you to see exactly what the drone sees. You can also access flight telemetry data, such as GPS coordinates, altitude, battery level, and more.
Furthermore, DJI Go provides a range of intelligent flight modes that automate certain tasks and maneuvers, such as Follow Me, Waypoints, and ActiveTrack. These features make it easier to capture complex shots and perform precise flight maneuvers, even for novice pilots.
Another notable feature of DJI Go is its integration with mapping services. It utilizes map data to display your drone’s location, track its flight path, and provide contextual information about the surroundings. This is where map caching becomes essential, as it enables you to store map data offline and access it even when you don’t have an internet connection.
With its comprehensive set of features and user-friendly interface, DJI Go has become the go-to app for drone enthusiasts and professionals alike. Whether you’re a hobbyist capturing stunning aerial footage or a commercial pilot conducting inspections or surveys, DJI Go offers the tools and capabilities you need to take your drone flying to new heights.
What is map caching?
Map caching is the process of downloading and storing map data on your device for offline use. It allows you to access maps and related information without relying on a continuous internet connection. By caching maps, you can have access to vital geographic data even in remote areas or locations with limited network coverage.
When you cache a map, you essentially download a specific area of the map onto your device’s storage. This cached map can include various map layers, such as satellite imagery, topographic details, points of interest, and more. The level of detail and the specific map layers cached can be customized based on your needs.
The cached map data is stored on your device, usually in the DJI Go app, and can be accessed anytime, even when you’re offline. This means that you can still view your drone’s location, plan flight routes, and navigate accurately using the cached maps, without the need for a continuous internet connection.
Map caching is particularly useful for drone pilots as it allows them to plan flights in advance and be prepared for situations where an internet connection may not be available or reliable. It ensures that you have access to critical information about your flight area, such as airspace restrictions, ground features, and potential obstacles, regardless of your location.
Additionally, map caching can significantly improve the performance of the DJI Go app during flight operations. With the map data already stored on your device, the app can load and display the maps faster, reducing lag and improving overall responsiveness. This is especially beneficial when you’re flying in areas with poor network coverage or congested internet connections.
Overall, map caching is a valuable feature that provides convenience and reliability to drone pilots. By downloading and storing map data offline, you can ensure a smooth and uninterrupted flying experience, enabling you to focus on capturing breathtaking aerial imagery and carrying out your drone operations with confidence.
Why should you cache maps in DJI Go?
Map caching in DJI Go offers several compelling reasons why you should take advantage of this feature. By caching maps, you can overcome common challenges and enhance your drone flying experience in the following ways:
1. Offline Access: By caching maps, you can access them even when you don’t have an internet connection. This is especially beneficial when flying in remote areas or locations with limited network coverage, where accessing real-time map data may be impossible.
2. Improved Safety: Having cached maps allows you to plan your flights in advance and identify potential hazards or airspace restrictions before taking off. By having critical information at your fingertips, you can make more informed decisions and ensure a safe and smooth flight.
3. Faster Load Times: With map data already stored on your device, the DJI Go app can load and display maps faster compared to relying on real-time data. This reduces lag and improves responsiveness, allowing you to quickly access the information you need during your flight.
4. Conserves Battery Life: When you cache maps, your device doesn’t need to constantly download map data during the flight. This helps conserve battery life, as the app can use cached maps instead of constantly using data and GPS to load new map information.
5. Increases Flight Planning Efficiency: Map caching enables you to plan your flight routes and navigate without interruptions or delays caused by poor network connectivity. You can easily measure distances, identify waypoints, and adjust flight paths using the cached maps, making your flight planning process more efficient.
6. Enhanced Experience in Remote Locations: Whether you’re capturing aerial photography or conducting professional operations in remote areas, map caching ensures that you have access to accurate and detailed maps. This helps you navigate and explore with confidence, even in places where internet access is limited or non-existent.
Overall, caching maps in DJI Go provides the convenience of offline access, faster loading times, increased safety, and improved flight planning efficiency. It ensures that you have the necessary geographic data at your disposal, allowing you to fly your drone confidently, regardless of the location or internet connectivity.
How to check if your DJI Go app supports map caching
Before diving into the process of caching maps in DJI Go, it’s important to ensure that your DJI Go app supports this feature. Follow these steps to check if your DJI Go app supports map caching:
- Open the DJI Go app: Launch the DJI Go app on your mobile device. Make sure you have the latest version installed to access all the latest features and improvements.
- Go to the settings: Navigate to the settings menu in the DJI Go app. This can usually be accessed by tapping on the gear icon or a similar symbol located in a menu or toolbar.
- Look for map caching option: In the settings menu, search for an option related to map caching or offline maps. The exact location and wording may vary depending on the version of the DJI Go app and the mobile device you’re using.
- Check for map caching settings: Once you’ve found the map caching option, explore the settings related to map caching. Look for options to set cache size, clear cached maps, or enable/disable map caching.
- Ensure offline map availability: Some DJI Go app versions may require additional steps to download and cache maps. Check if there are any prompts or instructions to download offline maps and ensure their availability for offline use.
If you can successfully locate the map caching option in the DJI Go app’s settings and configure the map caching settings, it means that your app supports map caching. You’re now ready to proceed with caching maps for offline use.
However, if you cannot find any settings or options related to map caching in the DJI Go app, it indicates that your app version may not have this feature. To benefit from map caching, make sure to update the DJI Go app to the latest version available for your device.
Remember, it’s essential to have a compatible app version that supports map caching in order to take advantage of this valuable feature during your drone flights.
How to cache maps in DJI Go
Caching maps in DJI Go is a straightforward process that ensures you have offline access to map data during your drone flights. Follow these step-by-step instructions to cache maps in DJI Go:
- Open the DJI Go app: Launch the DJI Go app on your mobile device. Ensure that you have a stable internet connection before proceeding.
- Connect your drone to the app: Connect your DJI drone to the DJI Go app using the appropriate method specified by your drone’s instruction manual.
- Go to the map view: Once your drone is connected, navigate to the map view in the DJI Go app. Usually, you can access the map view by tapping on the map icon located in the app’s main menu or toolbar.
- Zoom in to the area you want to cache: Using pinch-to-zoom gestures or the zoom buttons within the map view, zoom in to the area you want to cache. Ensure that the map displays the desired level of detail for your flight area.
- Tap the map caching button: Look for a button or icon within the map view that indicates map caching. This button is typically represented by a cloud or download symbol and is often located in the corner of the screen.
- Set the cache size: After tapping the map caching button, you may be prompted to set the cache size. Choose an appropriate cache size that suits the amount of map data you want to store on your device. Note that larger cache sizes require more storage space.
- Start caching the map: Once you’ve set the cache size, initiate the map caching process. The app will start downloading the map data for the selected area onto your device.
- Monitor the caching progress: During the caching process, monitor the progress bar or indicator provided by the app. The app will display the percentage of map data that has been cached, allowing you to track the progress.
- Use the cached maps during your flight: Once the map caching is complete, you can disconnect from the internet or switch to airplane mode on your device. The DJI Go app will automatically switch to using the cached maps for offline navigation during your drone flights.
By following these steps, you can effectively cache maps in DJI Go and ensure that you have access to crucial map data even when offline. This empowers you to fly with confidence, knowing that you have accurate and reliable map information readily available for your drone operations.
Step 1: Open the DJI Go app
The first step to caching maps in DJI Go is to open the DJI Go app on your mobile device. Ensure that you have installed the latest version of the app to access all the latest features and improvements.
Locate the DJI Go app icon on your device’s home screen or in your app drawer and tap on it to open the app. The app may take a few moments to load, depending on your device’s performance and the size of the app.
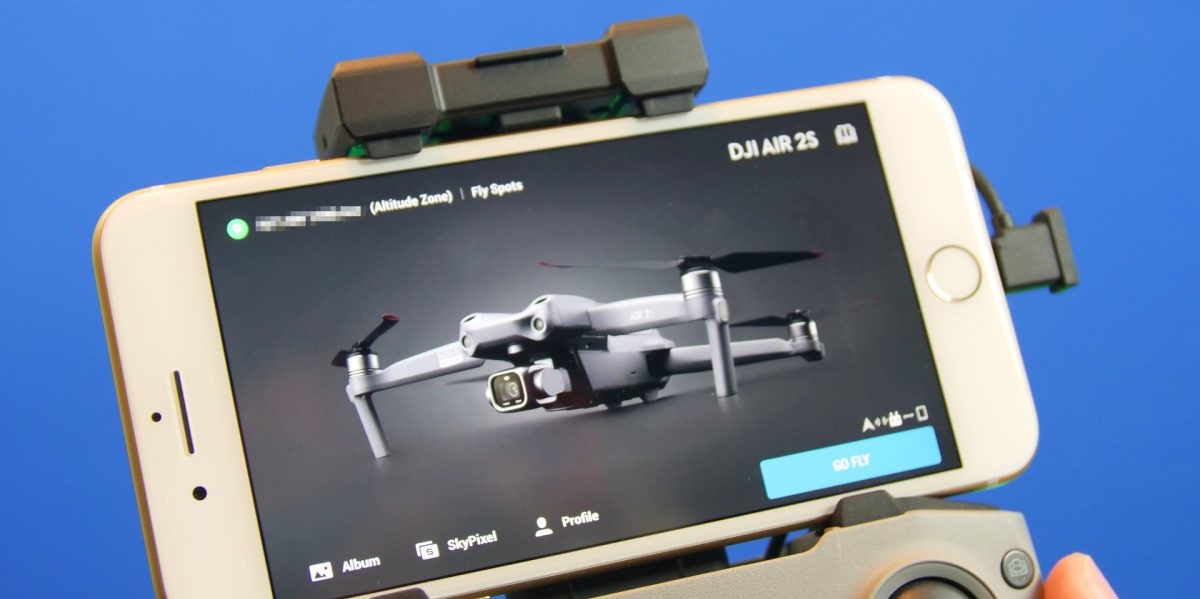
Once the app is open, you will be greeted with the DJI Go home screen. This screen serves as a central hub for accessing various features and settings related to your DJI drone and its operations.
The exact layout and design of the DJI Go home screen may vary slightly depending on the version of the app and the specific DJI drone model you are using. However, you will typically find a range of options and icons that allow you to control your drone, access camera settings, view flight telemetry data, and more.
Take a moment to familiarize yourself with the different sections and icons on the DJI Go home screen. Some key elements to look out for include the flight mode selector, battery level indicator, camera settings, and flight telemetry data display.
Before proceeding to the next steps, ensure that your drone is powered on and properly connected to your mobile device. Refer to your drone’s instruction manual for specific instructions on how to establish a connection between your drone and the DJI Go app.
Opening the DJI Go app is the first crucial step towards caching maps and accessing the various features and controls it offers. Now that you have successfully launched the app, you’re ready to continue with the map caching process and enjoy the benefits of offline map access during your drone flights.
Step 2: Connect your drone to the app
Once you have opened the DJI Go app, the next step in caching maps is to connect your drone to the app. Establishing a secure and reliable connection ensures that you can control your drone, access its features, and cache maps for offline use.
Follow these steps to connect your drone to the DJI Go app:
- Power on your drone: Make sure your drone is powered on and ready for flight. Check the battery level and ensure that it is sufficient for your intended operations.
- Activate the remote controller: Turn on the remote controller that comes with your drone. Follow the instructions provided by the manufacturer to activate the remote controller properly.
- Enable Wi-Fi or connect via cable: Depending on your drone model and its compatibility options, you can connect your mobile device to the drone’s Wi-Fi network or use a physical cable to establish a connection. Consult your drone’s instruction manual for specific instructions on how to enable Wi-Fi or make the physical connection.
- Launch the DJI Go app: With your drone and remote controller powered on and the connection method activated, launch the DJI Go app on your mobile device.
- Wait for the app to detect the drone: After launching the app, wait for it to detect the presence of your drone. This may take a few moments as the app establishes communication with the drone.
- Confirm the connection: Once the DJI Go app detects your drone, it will prompt you to confirm the connection. Follow the on-screen instructions to ensure a secure connection between the app and your drone.
- Verify the connection status: Look for the connection status indicator within the DJI Go app. It should display a successful connection and show relevant information about your drone, such as the battery level and GPS signal strength.
Establishing a connection between your drone and the DJI Go app is crucial for accessing the app’s features, controlling your drone, and caching maps. It enables real-time telemetry data, camera control, and offline access to essential map data during your flights.
Once your drone is successfully connected to the DJI Go app, you’re ready to proceed to the next steps and continue with caching the maps for offline use.
Step 3: Go to the map view
After connecting your drone to the DJI Go app, the next step in caching maps is to navigate to the map view. This view allows you to see the geographical location of your drone, plan flight routes, and cache maps for offline access.
Follow these steps to go to the map view in the DJI Go app:
- Launch the DJI Go app: Ensure that your drone is connected to the app, as described in the previous step. If you have already connected your drone, open the DJI Go app on your mobile device.
- Access the main menu: Look for a menu icon or a similar symbol within the app’s interface. This is usually represented by three horizontal lines, positioned either at the top or bottom of the screen. Tap on the menu icon to access the main menu.
- Select the map view: In the main menu, look for an option that indicates the map view. The icon or label for the map view may vary depending on the version of the DJI Go app and the specific drone model you are using. Look for icons such as a globe, map, or compass. Tap on the map view option to navigate to the map view.
- Confirm the map view: After selecting the map view option, the app will switch to the map view screen. Here, you will see a map display, which may be centered on your current location or the last known location of your drone. The map display will show visual reference points, such as terrain, roads, and water bodies.
Once you have successfully reached the map view in the DJI Go app, you will have a visual representation of the geographical area where you plan to fly your drone. This view serves as a key interface for caching maps and accessing important features, such as flight planning and location tracking.
Take a moment to familiarize yourself with the different elements of the map view, such as zoom controls, map layers, and any additional tools or icons provided by the app. This will help you navigate and utilize the map view effectively during the map caching process.
Now that you have reached the map view in the DJI Go app, you’re ready to proceed to the next steps and continue with the process of caching maps for offline access.
Step 4: Zoom in to the area you want to cache
Once you have reached the map view in the DJI Go app, the next step in caching maps is to zoom in to the specific area you want to cache. This allows you to specify the region for which you want to download and store map data for offline use.
Follow these steps to zoom in to the area you want to cache:
- Ensure you are in the map view: Make sure you have successfully navigated to the map view in the DJI Go app, as described in the previous step.
- Use pinch-to-zoom gesture: On most touchscreen devices, you can zoom in and out of the map view by using the pinch-to-zoom gesture. Simply place two fingers on the screen close together and then spread them apart to zoom in. Repeat the gesture to zoom out if needed.
- Use zoom buttons or slider: Some versions of the DJI Go app may provide zoom buttons or a zoom slider within the map view interface. Look for these controls and utilize them to zoom in to the area of interest. The zoom buttons typically resemble a plus (+) and a minus (-) sign, while the zoom slider can be dragged to adjust the zoom level.
- Navigate to the desired area: Move the map display by swiping or panning across the screen to navigate to the specific area you want to cache. You can move sideways, up, or down to explore different regions on the map.
- Continue zooming in: As you navigate to the desired area, continue zooming in using pinch-to-zoom gestures or the provided zoom controls. Zoom in until the map displays the desired level of detail for the area you want to cache.
Zooming in to the area you want to cache allows you to focus on a specific region and download detailed map data for that area. This ensures that you have accurate and comprehensive information when accessing the cached maps offline.
Take your time to explore the map view and navigate to the exact location you intend to cache. By zooming in and selecting the specific area of interest, you can optimize the caching process and ensure that you have the necessary map data for your drone flights.
Once you have successfully zoomed in to the desired area, you’re ready to proceed to the next steps and continue with the process of caching maps in DJI Go.
Step 5: Tap the map caching button
After zooming in to the area you want to cache in the DJI Go app, the next step in caching maps is to tap the map caching button. This button initiates the process of downloading and storing map data for offline use.
Follow these steps to tap the map caching button:
- Ensure you are in the map view: Confirm that you are still in the map view within the DJI Go app. If you have navigated away from the map view, follow the previous steps to return to it.
- Look for the map caching button: Scan the screen for a button or icon that represents map caching. In most versions of the DJI Go app, the map caching button is a cloud or download symbol. It is often located in the corner of the screen or in a toolbar.
- Tap the map caching button: Once you have located the map caching button, tap on it to initiate the map caching process. The button may highlight or display a loading animation to indicate that the caching process has started.
After tapping the map caching button, the DJI Go app will begin downloading the map data for the selected area onto your device. The time it takes to complete the caching process depends on the size of the selected area and the speed of your internet connection. It’s important to have a stable and reliable internet connection during this step to ensure a smooth caching process.
While the map caching process is underway, avoid closing the app or switching away from the map view. Allow the app to work in the background to complete the caching process successfully. Depending on the size of the selected area, you may need to wait for some time until the caching is complete.
By tapping the map caching button, you have taken the necessary step to initiate the downloading and storage of map data for offline use. Now, you can proceed to the next steps and monitor the progress of the caching process in the DJI Go app.
Step 6: Set the cache size
After tapping the map caching button in the DJI Go app, the next step is to set the cache size. This allows you to determine the amount of storage space that will be allocated for storing the downloaded map data on your device.
Follow these steps to set the cache size:
- Ensure the map caching process has started: Confirm that the map caching process has successfully started after tapping the map caching button. You should see a progress indicator or animation on the screen.
- Find the cache size settings: Look for the cache size settings within the map caching interface. Depending on the version of the DJI Go app, this setting may be accessible through a separate menu or within the map caching settings.
- Adjust the cache size: Once you have located the cache size settings, you may have the option to adjust the allocation of storage space for the cached maps. Some versions of the DJI Go app offer presets (e.g., small, medium, large) or manual input options for the cache size.
- Select an appropriate cache size: Choose a cache size that suits your needs and the available storage capacity on your device. Keep in mind that larger cache sizes will require more storage space but offer more detailed map data for offline use. Conversely, if storage space is limited, you can opt for a smaller cache size that still provides relevant map information for your flight area.
- Confirm the cache size: Once you have set the cache size, confirm your selection. The app may provide a confirmation prompt or display a message indicating that the cache size has been successfully set.
Setting the cache size is an important step in the map caching process, as it ensures that you allocate the appropriate amount of storage space on your device for storing the downloaded map data. By selecting an appropriate cache size, you can strike a balance between having enough detailed map information and managing the available storage capacity.
Take your time to consider the cache size that best suits your needs and the resources available on your device. Once you have successfully set the cache size, you can proceed with the map caching process and monitor the progress of the caching in the DJI Go app.
Now that you have set the cache size, it’s time to move on to the next steps and complete the map caching process in the DJI Go app.
Step 7: Start caching the map
After setting the cache size in the DJI Go app, the next step in caching maps is to start the actual process of downloading and storing the map data for offline use. This step initiates the caching process, ensuring that you have access to the necessary map information during your drone flights, even without an internet connection.
Follow these steps to start caching the map:
- Ensure the cache size has been set: Confirm that you have successfully set the cache size, as described in the previous step. The cache size determines the amount of storage space allocated for the downloaded map data.
- Monitor the caching progress: Once the cache size is set, the DJI Go app will automatically start caching the map data for the selected area. The app will display a progress indicator or animation to show the ongoing caching process. Monitor the progress to track the download and storage of the map data.
- Stay connected to the internet: During the caching process, it is important to maintain a stable internet connection. Ensure that your device remains connected to a reliable Wi-Fi network or has a strong mobile data signal. This will facilitate the smooth and uninterrupted downloading of the map data.
- Allow time for caching to complete: Depending on the size of the selected area and the speed of your internet connection, the caching process may take some time. Be patient and allow the process to complete before proceeding to the next steps. Avoid closing the app or interrupting the internet connection during this time.
- Confirm the completion of caching: Once the caching process is complete, the DJI Go app will notify you. This notification may appear as a message on the screen or an indicator that the caching is finished. Double-check that the caching progress indicator reaches 100% and confirms that the map data has been successfully cached.
Starting the caching process is a vital step in ensuring offline access to map data during your drone flights. By following these steps and monitoring the progress of the caching, you can ensure that the necessary map information is downloaded and stored on your device for seamless offline use.
Now that you have started caching the map, it’s time to move on to the next steps and monitor the progress of the caching process in the DJI Go app.
Step 8: Monitor the caching progress
After initiating the caching process in the DJI Go app, it is important to monitor the progress to ensure that the map data is successfully downloaded and stored on your device. Monitoring the caching progress allows you to stay informed about the completion status and take any necessary actions if required.
Follow these steps to monitor the caching progress:
- Verify the caching indicator: Once the caching process begins, you will typically see a progress indicator or animation on the screen. This indicator shows the percentage of completion and gives you an idea of how much map data has been downloaded.
- Keep an eye on the progress bar: Look for a progress bar or numerical indicator that shows the progress of the caching process. This may be displayed as a loading bar, a number indicating the percentage completed, or both.
- Monitor the download speed: Some versions of the DJI Go app may display the download speed of the caching process. This information can give you an estimated time for completion and help you gauge the effectiveness of your internet connection during the caching process.
- Ensure a stable internet connection: Maintaining a stable internet connection is crucial while monitoring the caching progress. Make sure that your device remains connected to a reliable network and avoid interruptions in the internet connection to ensure a seamless caching process.
- Be patient: Depending on the size of the selected area and the speed of your internet connection, the caching process may take some time. Be patient and allow the DJI Go app to complete the download and storage of the map data. Avoid interrupting the caching process or closing the app prematurely.
- Verify completion: Once the caching progress reaches 100% and the app indicates that the download is complete, verify that the map data has been successfully cached. Check that the cache size corresponds to the selected area and ensure that the app confirms the successful completion of the caching process.
Monitoring the caching progress allows you to stay informed about the status of the download and storage of the map data. By actively monitoring this progress, you can ensure that the caching process is successfully completed, enabling you to use the cached maps for offline navigation during your drone flights.
Now that you are monitoring the caching progress, you can move on to the next steps and make use of the cached maps for a seamless and reliable drone flying experience.
Step 9: Use the cached maps during your flight
Once the map caching process is complete in the DJI Go app, you can utilize the cached maps during your drone flight. Using the cached maps allows you to access crucial geographic information even when you are offline, ensuring a smooth and informed flight experience.
Follow these steps to use the cached maps during your flight:
- Confirm the completion of caching: Before starting your flight, double-check that the map caching process has been successfully completed. Ensure that the progress indicator in the DJI Go app has reached 100% and that the app confirms the successful caching of the map data.
- Disconnect or switch to airplane mode: To ensure that your device solely relies on the cached maps, disconnect from the internet or switch your device to airplane mode. This prevents the DJI Go app from attempting to connect to online map services and forces it to use the cached maps instead.
- Enter the mapped flight area: Fly your drone to the area you cached the maps for. As you enter the designated flight area, the DJI Go app will automatically load the cached maps.
- Navigate using the cached maps: As you fly your drone, rely on the cached maps for navigation and orientation. The map display will show your drone’s location in real-time and provide essential information about the environment, such as landmarks, terrain, and potential obstacles.
- Access additional map features: Take advantage of additional features offered by the DJI Go app, such as waypoint planning, flight telemetry, and location tracking. These features can enhance your flight experience and ensure precise and safe operations.
- Monitor flight conditions: Continuously monitor the flight conditions and adapt your flight plan accordingly. The cached maps offer valuable information to help you make informed decisions and adjust your flight path if needed.
- Enjoy a seamless flight experience: By using the cached maps during your flight, you can experience a seamless and uninterrupted flight experience. You no longer need to rely on a continuous internet connection, ensuring that you have access to vital geographic information wherever you fly.
Using the cached maps during your flight allows you to navigate accurately and confidently, even when you are offline or in areas with limited network coverage. It ensures that you have access to essential map data, enhancing your situational awareness and contributing to a safe and successful flight operation.
Now that you know how to use the cached maps during your flight, you can confidently take to the skies with the DJI Go app and enjoy the benefits of offline map access.
Conclusion
Caching maps in DJI Go is a valuable feature that enhances your drone flying experience by providing offline access to essential map data. By following the step-by-step process outlined in this article, you can effectively cache maps and ensure that you have accurate and reliable map information for your flights, even in areas with limited internet connectivity.
With cached maps, you can confidently plan your flights, navigate accurately, and make informed decisions with access to critical information such as airspace restrictions, landmarks, and potential obstacles. Map caching also improves the performance of the DJI Go app, reducing lag and responsiveness issues that may arise when relying on real-time map data.
Remember to check if your DJI Go app supports map caching and update to the latest version if necessary. Open the app, connect your drone, and navigate to the map view to begin the caching process. Zoom in to the desired area, tap the map caching button, and set the cache size based on your needs and available storage space. Monitor the caching progress and ensure a stable internet connection throughout the process. Once the caching is complete, use the cached maps during your flight by disconnecting from the internet or switching to airplane mode.
Caching maps in DJI Go provides convenience, safety, and reliability to drone pilots. It allows you to fly confidently, even in remote areas or locations with limited network coverage. By having offline access to accurate map data, you can focus on capturing breathtaking aerial imagery, conducting professional operations, and making the most of your drone flying adventures.
So, take advantage of map caching in DJI Go and elevate your drone flying experience to new heights. With offline access to maps, you can navigate with confidence, plan your flights in advance, and explore the world from a whole new perspective.