Introduction
Welcome to the exciting world of FPV (First Person View) drone building! Building your own FPV drone is a thrilling and rewarding experience that allows you to have complete control over its design, performance, and capabilities. Whether you are a hobbyist looking for a new project or an aspiring FPV pilot, this guide will walk you through the process of building your own FPV drone.
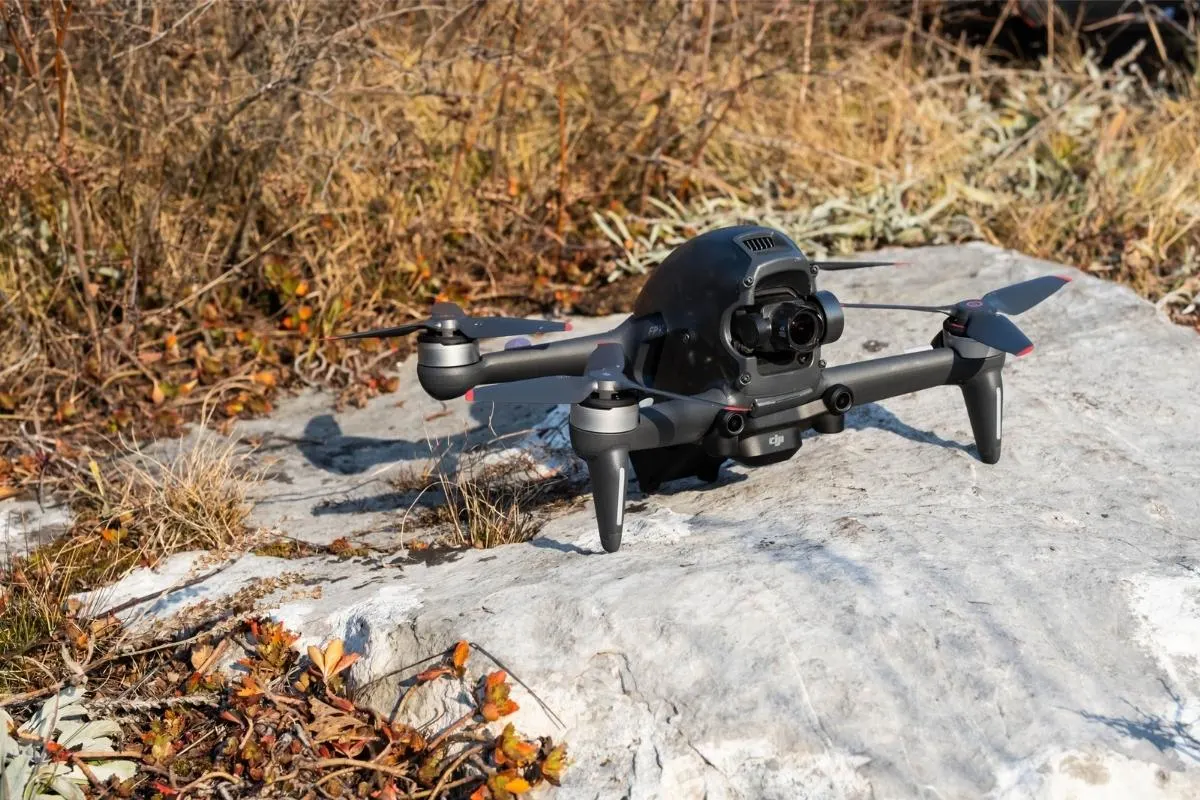
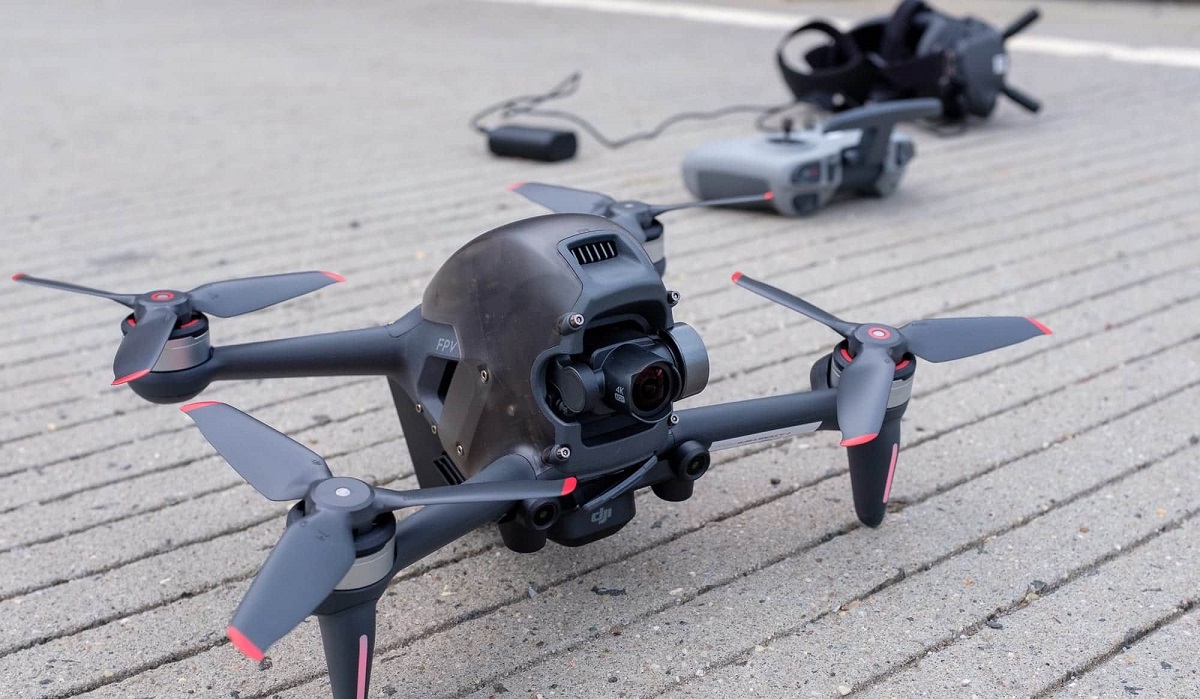
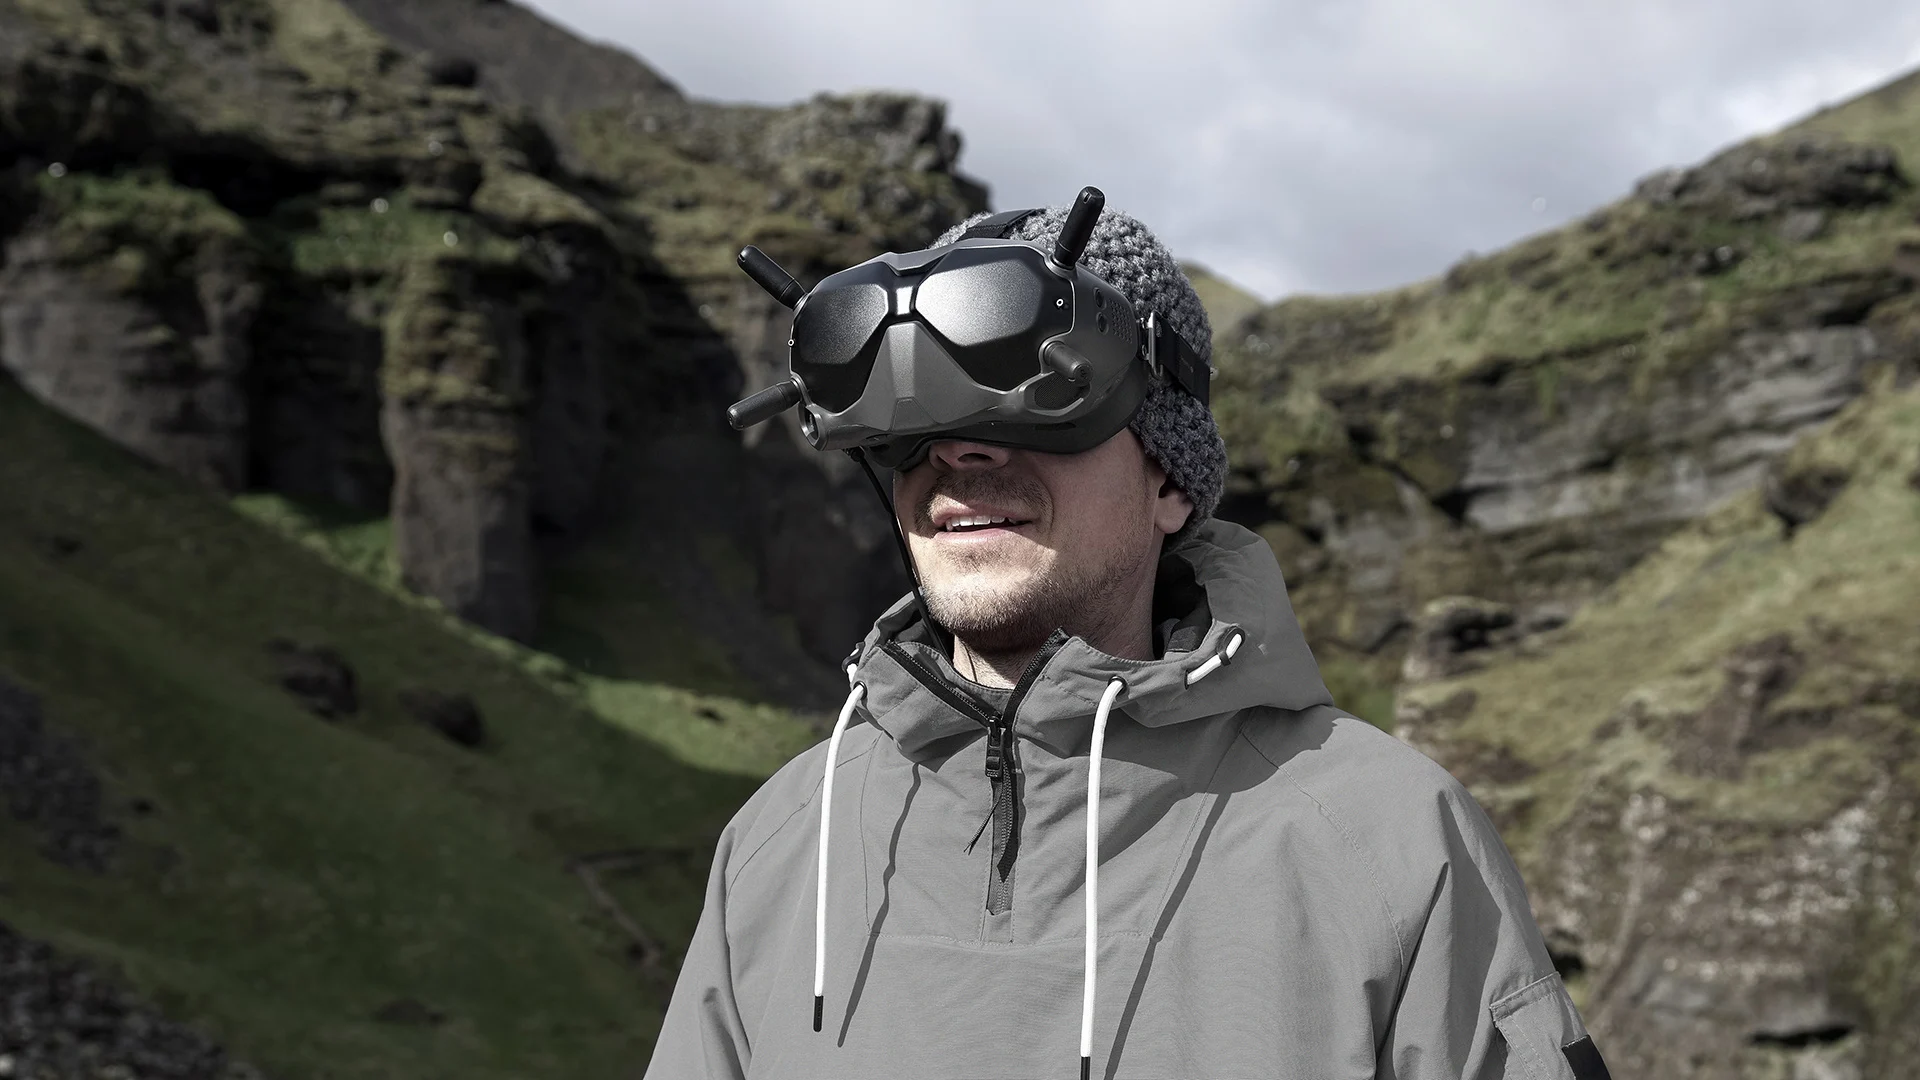
FPV drones are remote-controlled quadcopters equipped with a camera and a video transmission system that allows the pilot to experience a first-person view through a set of VR goggles or a monitor. This immersive experience gives you the sensation of actually being in the pilot’s seat, as if you were flying through the air yourself. It’s a truly exhilarating experience that has gained immense popularity among drone enthusiasts around the world.
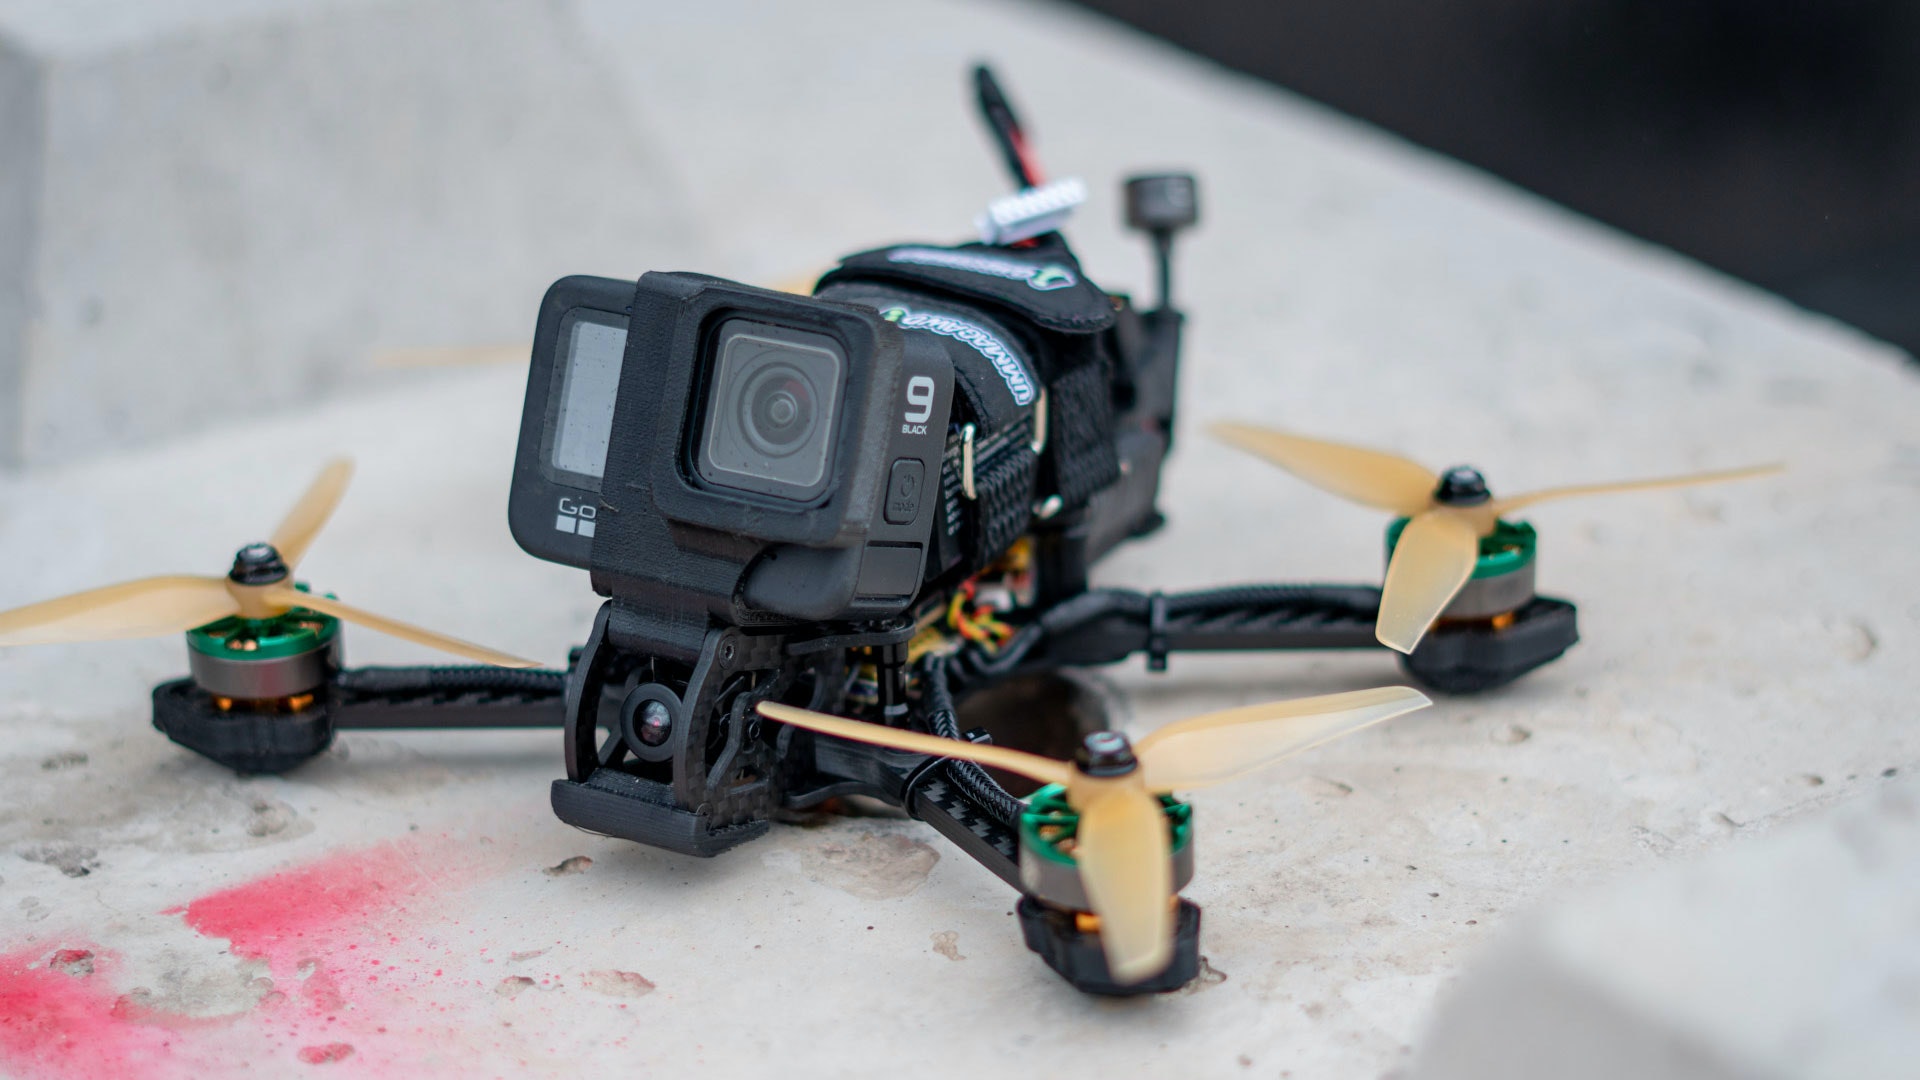
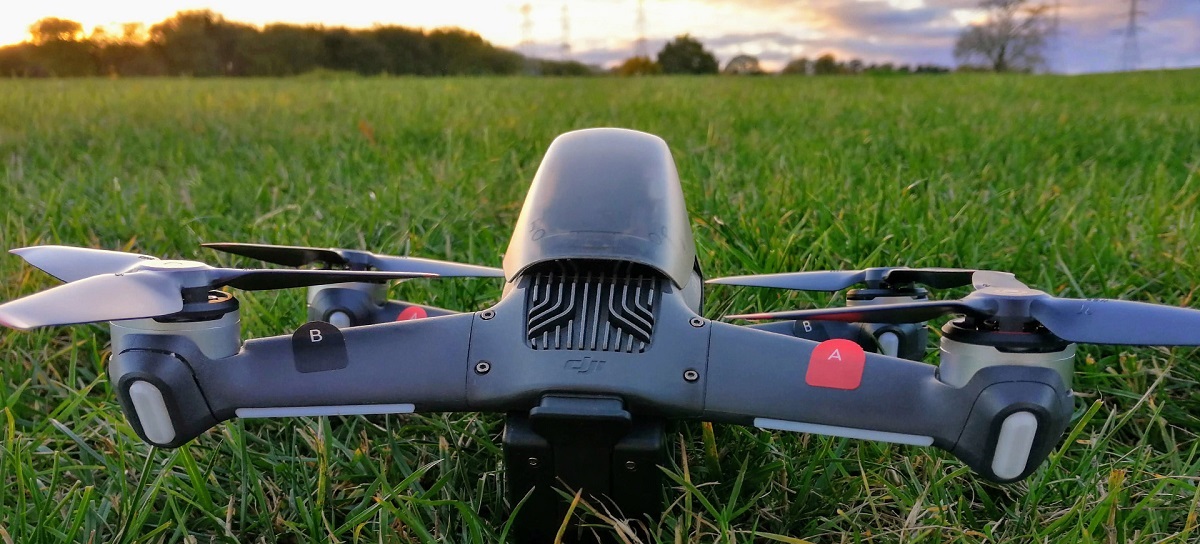
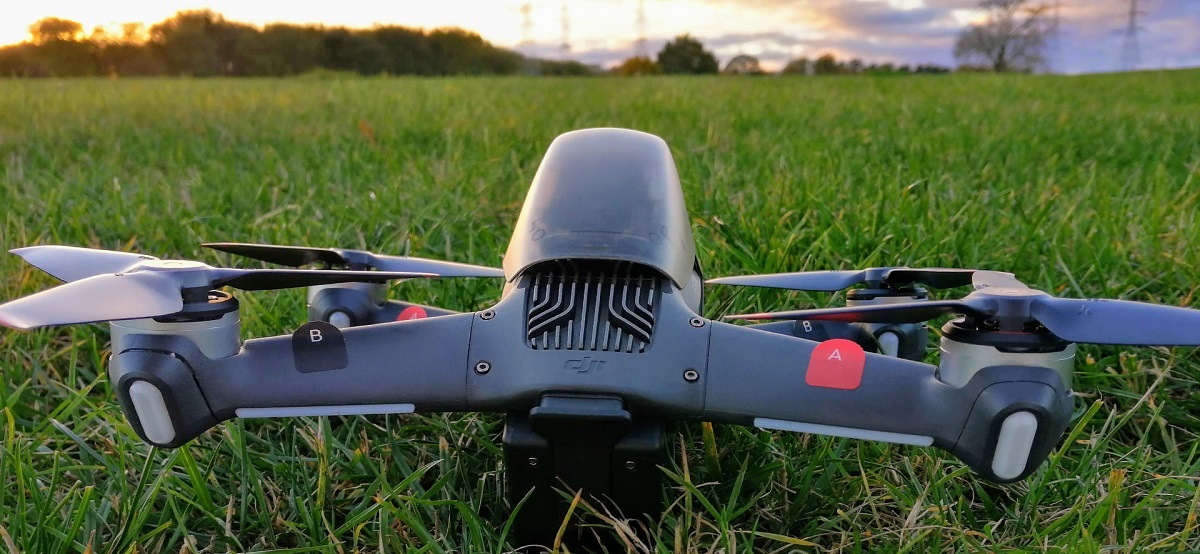
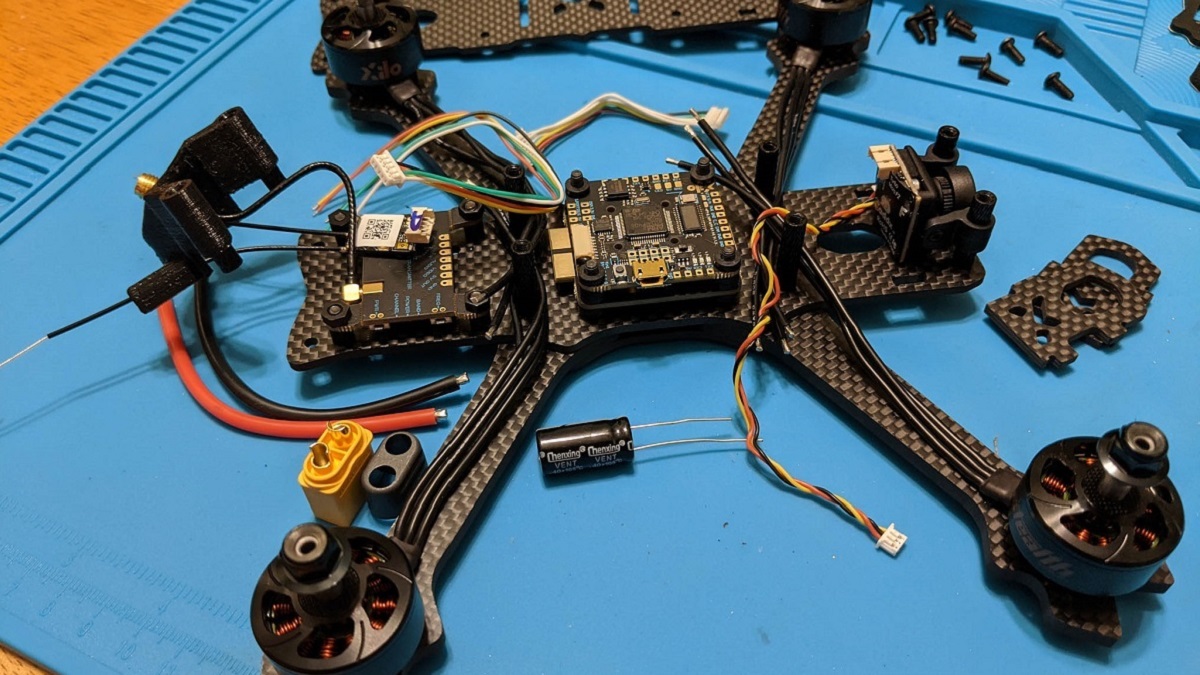
Before embarking on this journey, it is important to have a clear understanding of what an FPV drone consists of. The basic components include a frame, flight controller, motors, electronic speed controllers (ESCs), radio transmitter and receiver, FPV camera, video transmitter, and power distribution system. Each component plays a crucial role in the overall performance and functionality of the drone.
Throughout this guide, we will provide step-by-step instructions on gathering the necessary components, building the frame, assembling the flight controller, mounting the motors and ESCs, connecting and calibrating the radio transmitter and receiver, installing the FPV camera and video transmitter, configuring the flight controller software, powering the drone, and configuring and testing the FPV system.
It is important to note that building an FPV drone requires some basic knowledge of electronics, soldering, and computer software. However, with a little bit of patience and commitment, you will be able to create your very own high-performance FPV drone that is tailored to your unique preferences and flying style.
So, without further ado, let’s dive into the exciting world of FPV drone building and embark on this amazing adventure!
Understanding FPV Drones
Before diving into the process of building an FPV drone, it is essential to gain a solid understanding of what exactly an FPV drone is and how it differs from traditional drones.
FPV drones, as mentioned earlier, are remote-controlled quadcopters equipped with a camera and a video transmission system. The key difference between FPV drones and regular drones is the ability to have a real-time first-person view of the flight from the perspective of the drone itself.
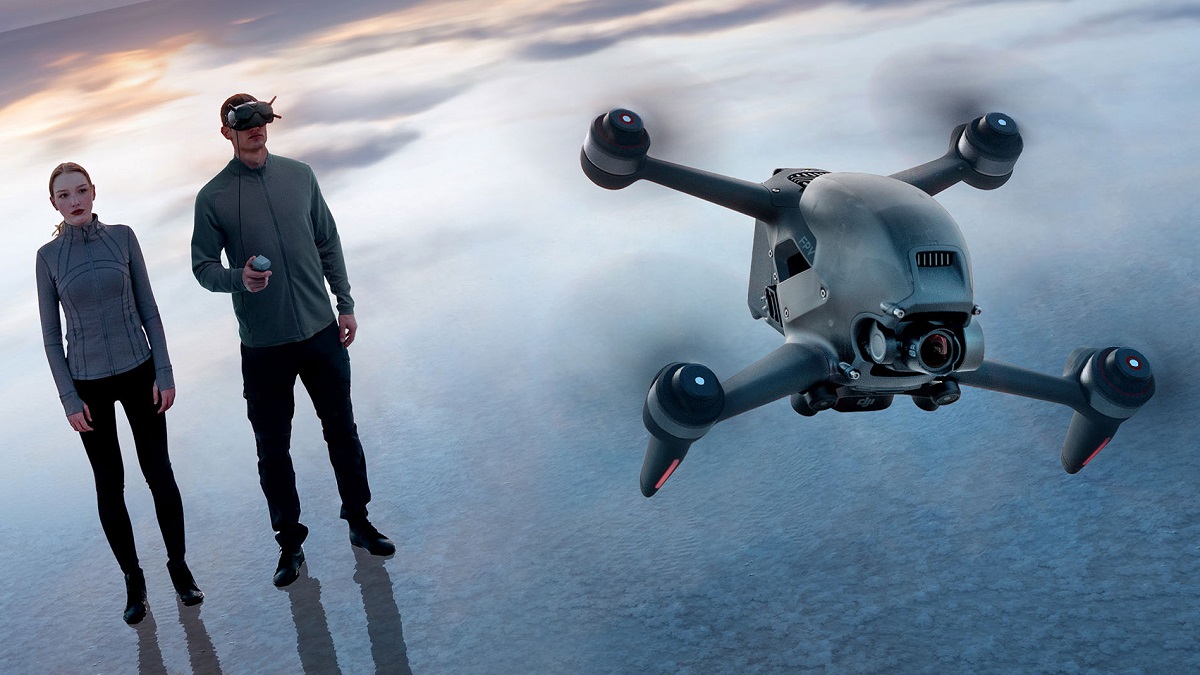
This first-person view is made possible by the FPV camera mounted on the front of the drone, which captures the live video feed. The video is then transmitted wirelessly to the pilot’s FPV goggles or monitor, allowing them to see exactly what the drone sees.
This immersive experience provides a whole new level of excitement and engagement, as pilots can navigate their drone through tight spaces, perform aerobatics, and explore new perspectives from the comfort of their own eyes.
In addition to the FPV camera, FPV drones also feature a flight controller, which is the brain of the drone. It receives inputs from the pilot via the radio transmitter and relays the information to the motors and electronic speed controllers (ESCs) to control the drone’s flight movements.
The flight controller also plays a crucial role in stabilizing the drone and ensuring smooth flight performance. It utilizes various sensors such as gyroscopes and accelerometers to maintain stability and compensate for any external factors that may affect the drone’s flight.
Another essential component of FPV drones is the video transmitter, which sends the live video feed from the FPV camera to the pilot’s goggles or monitor. It operates on specific frequencies and channels to ensure a clear and uninterrupted video signal.
FPV drones are commonly used for various purposes, including racing, freestyle flying, aerial photography, and even search and rescue operations. The modular design of FPV drones allows for customization and upgrades, ensuring that pilots can adapt their drones to meet their specific needs and preferences.
Understanding the components and functionality of FPV drones will provide a solid foundation for the subsequent sections on building and assembling your own FPV drone. So, let’s move on to the next step: gathering the necessary components for your project.
Gathering the Necessary Components
Now that you have a good understanding of what FPV drones are, it’s time to start gathering the necessary components for building your own. To ensure a successful build, it’s important to carefully select high-quality components that are compatible with each other.
Here’s a list of the essential components you’ll need:
- Frame: The frame serves as the structural foundation of your drone. It should be made of durable materials such as carbon fiber or aluminum, and should accommodate the size and weight of your chosen components.
- Flight Controller: The flight controller is the central processing unit that controls your drone’s flight. Choose a reliable and feature-rich controller that is compatible with your preferred software.
- Motors and Electronic Speed Controllers (ESCs): The motors generate the thrust needed to lift your drone off the ground and maneuver it in the air. Make sure to select motors and ESCs that are suitable for your desired flying style and weight requirements.
- Radio Transmitter and Receiver: The radio transmitter is what you’ll use to control your drone. Look for a transmitter with a comfortable grip and sufficient range. The receiver should be compatible with your chosen flight controller.
- FPV Camera and Video Transmitter: The FPV camera captures the live video feed and transmits it to your goggles or monitor. Choose a camera with good image quality and low latency. The video transmitter should be compatible with the frequencies used in your region.
- Battery and Power Distribution: Select a high-capacity LiPo (Lithium Polymer) battery that can provide enough power to your drone. The power distribution board will distribute power to the various components and prevent voltage drops.
- Propellers: Propellers are responsible for generating the thrust produced by the motors. Make sure to choose the right size and pitch of propellers for your specific motor and frame combination.
- FPV Goggles or Monitor: To experience the first-person view, you’ll need FPV goggles or a monitor. Look for goggles or a monitor with good resolution, comfortable fit, and a receiver that matches your video transmitter.
These are the fundamental components you’ll need to build your FPV drone. However, there are also optional accessories such as antennas, voltage regulators, and onboard GPS modules that you can consider based on your needs.
Take your time to research and compare different brands and models to find the best components for your budget and desired performance. It’s crucial to ensure compatibility between the components to avoid any issues during the assembly process.
Once you have gathered all the necessary components, it’s time to move on to the next section and start building your FPV drone from scratch!
Building the Frame
The frame of your FPV drone serves as the foundation and structural support for all the components. Building a sturdy and well-designed frame is essential for ensuring a stable and reliable flight. Here’s a step-by-step guide on how to build the frame:
- Choose a Frame: Select a frame that suits your FPV drone’s size and flight requirements. Consider factors such as the material used, weight capacity, and layout for mounting the other components.
- Prepare the Frame: Lay out all the frame parts and familiarize yourself with the different pieces. Ensure that you have all the necessary screws, standoffs, and other hardware provided with the frame.
- Assemble the Base Plate: Start by attaching the arms of the frame to the base plate. Use the provided screws and secure them tightly. Ensure that the arms are evenly spaced and aligned with each other.
- Attach the Standoffs: Install the standoffs onto the base plate. These standoffs act as spacers, creating separation between the main plate and the top plate. Make sure they are properly aligned and secured.
- Install the Flight Controller: Mount the flight controller onto the top plate using the provided standoffs and screws. Ensure that it is securely fastened, and the orientation aligns with the arrow or designated markers on the flight controller.
- Attach the Motors: Install the motors onto the arms of the frame. Each motor should have its own mounting holes. Align the motors perpendicular to the center of the frame and use the provided screws to secure them tightly.
- Connect the ESCs: Connect the electronic speed controllers (ESCs) to the motors. Ensure that the signal wires are correctly connected to the corresponding motor outputs on the flight controller. Secure the ESCs to the arms using adhesive pads or zip ties.
- Secure the Power Distribution: Mount the power distribution board onto the frame using adhesive pads or zip ties. Connect the LiPo battery to the power distribution board, ensuring correct polarity. Double-check all connections to prevent any short circuits.
- Check for Structural Integrity: Give the frame a thorough inspection to ensure that all components, including the flight controller, motors, and ESCs, are securely fastened and aligned. Check for any loose screws or connections that may jeopardize the drone’s stability.
Building the frame is a critical step in the construction of your FPV drone. It’s important to follow the manufacturer’s instructions and take your time to assemble the frame correctly. A well-built frame will ensure the durability and performance of your drone during flight. With the frame complete, it’s time to move on to the next step of assembling the flight controller and preparing it for flight.
Assembling the Flight Controller
The flight controller is the brain of your FPV drone, responsible for processing all the inputs and commands from the pilot and coordinating the movement of the motors. Here’s a step-by-step guide on how to assemble the flight controller:
- Prepare the Flight Controller: Take your flight controller out of its package and ensure that you have all the necessary components, including the flight controller itself, the ribbon cables, and any additional accessories.
- Attach the Flight Controller to the Frame: Using the provided standoffs or mounting hardware, secure the flight controller to the designated area on the frame. Make sure it is positioned in a central location that provides stability and accessibility.
- Connect the Ribbon Cables: Carefully connect the ribbon cables to the appropriate ports on the flight controller. This includes connections for the ESCs, receiver, and other peripherals. Ensure that the cables are inserted correctly and securely.
- Secure the Cables: Use zip ties or adhesive pads to manage and secure the ribbon cables to the frame. This helps prevent them from getting tangled or disconnected during flight maneuvers.
- Install Additional Modules: If your flight controller supports additional modules such as GPS, compass, or telemetry systems, carefully connect and install them according to the manufacturer’s instructions. Take note of any specific wiring or configuration requirements.
- Double-Check Connections: Once all the connections are made, carefully inspect them to ensure that they are secure and properly seated. Loose or improperly connected cables can interfere with the flight controller’s functionality.
- Update Firmware and Configure: Before powering on your drone, it is essential to update the firmware on the flight controller and configure it according to your preferences. Follow the manufacturer’s instructions or the recommended software tool to complete this step.
Assembling the flight controller requires attention to detail and precision. Pay close attention to the orientation and alignment of the flight controller, as well as the proper connections of the ribbon cables. Double-checking everything at this stage will help ensure a smooth assembly process and prevent any potential issues during flight.
With the flight controller securely assembled, you can now move on to the next step of mounting the motors and electronic speed controllers (ESCs) onto the frame.
Mounting the Motors and Electronic Speed Controllers (ESCs)
The motors and electronic speed controllers (ESCs) are crucial components of your FPV drone that control its propulsion and speed. Properly mounting these components ensures optimal performance and stability. Here’s a step-by-step guide on how to mount the motors and ESCs:
- Identify Motor Mounting Holes: Examine the arms of your frame and locate the designated mounting holes for the motors. These holes are typically pre-drilled and have threaded inserts or nuts to securely attach the motors.
- Prepare the Motors: Take each motor and make sure the wires are organized and accessible. Identify the clockwise (CW) and counterclockwise (CCW) rotating motors based on the threading direction of the propeller shafts.
- Align the Motors: Position each motor over its corresponding mounting hole, ensuring that the wires are facing towards the frame’s center. Align the motor such that the propeller shaft is perpendicular to the arm and parallel to the frame’s centerline.
- Secure the Motors: Insert the screws provided with the frame kit into the motor mounting holes and tighten them until the motors are securely fastened to the frame. Make sure not to overtighten, as it may damage the frame or motor.
- Connect the ESCs: On each motor, locate the three motor wires and connect them to the corresponding ESCs. The wires should be color-coded; match the wires according to their colors (usually red, blue, and yellow).
- Mount the ESCs: With the motors connected to the ESCs, find a suitable location on the arms or frame to mount the ESCs. Use adhesive pads or zip ties to secure the ESCs, ensuring they are well-protected and won’t interfere with the propellers’ rotation.
- Secure the ESC Wires: To prevent the ESC wires from getting tangled or caught in the propellers, neatly route and secure them to the arms or frame using zip ties or adhesive pads. Ensure that there is no excessive strain on the wires that may cause disconnections during flight.
- Double-Check Connections: Before proceeding, double-check all the motor and ESC connections to ensure they are securely fastened and properly seated.
Mounting the motors and ESCs requires careful alignment and attention to detail. Properly aligned motors and secure ESC connections are essential for maintaining stability and achieving optimal flight performance.
Once the motors and ESCs are securely mounted, you can move on to the next step of connecting and calibrating the radio transmitter and receiver, bringing your FPV drone one step closer to taking flight!
Connecting and Calibrating the Radio Transmitter and Receiver
The radio transmitter and receiver are essential components that allow you to control and maneuver your FPV drone. It’s important to properly connect and calibrate them to ensure a reliable and responsive control system. Here’s a step-by-step guide on how to connect and calibrate the radio transmitter and receiver:
- Connect the Receiver: Locate the receiver on your drone and identify the channels for connecting the different control signals. Depending on the transmitter and receiver, you may have channels for throttle, yaw, pitch, and roll, as well as auxiliary channels for additional features like mode switching or camera control.
- Match Frequency Bands: Ensure that the transmitter and receiver are operating on the same frequency band. Most modern systems use the 2.4GHz frequency, but double-check the documentation for your specific equipment.
- Bind the Receiver: Follow the manufacturer’s instructions to bind the receiver to the transmitter. This process establishes a secure communication link between the two devices. Typically, you’ll need to press a button or follow a specific sequence of actions to initiate the binding process.
- Calibrate the Radio Transmitter: Enter your transmitter’s calibration mode, usually done by powering on the controller while holding down specific buttons or switches. Follow the prompts to calibrate the throttle, yaw, pitch, and roll inputs to their neutral positions.
- Verify Stick Movements: Move the control sticks in different directions and observe the corresponding movements on the flight controller software or OSD (On-Screen Display) system. Ensure that each stick input corresponds correctly to the designated control on your software interface.
- Set Endpoints and Adjustments: Access the endpoint adjustments on your transmitter to fine-tune the range of motion for each control. This step prevents the sticks from over-traveling, which can lead to erratic behavior and potential damage to the drone in extreme settings.
- Test Failsafe Functionality: Configure the failsafe settings on your receiver so that, in the event of signal loss or interference, the drone will execute predetermined actions, such as landing or hovering in place. Test the failsafe functionality to ensure it responds as intended.
- Secure Receiver and Wiring: Carefully secure the receiver and its wiring to the frame or designated location, ensuring that the antenna(s) are positioned correctly. Use zip ties or adhesive pads to secure the wiring and prevent any interference or damage while flying.
Connecting and calibrating the radio transmitter and receiver is a critical step to ensure proper control and responsiveness of your FPV drone. Take the time to carefully follow the instructions provided by your equipment’s manufacturer, as procedures may vary. A well-calibrated system will enhance your piloting experience and minimize the risk of control issues during flight.
With the radio transmitter and receiver successfully connected and calibrated, you’re one step closer to experiencing the thrill of flying your fully functional FPV drone! The next section will cover the installation of the FPV camera and video transmitter.
Installing the FPV Camera and Video Transmitter
The FPV camera and video transmitter are essential components that allow you to get the real-time first-person view of your FPV drone’s flight. Proper installation of these components is crucial to ensure a clear and reliable video feed. Here’s a step-by-step guide on how to install the FPV camera and video transmitter:
- Choose a Mounting Location: Select a suitable location on your drone’s frame to mount the FPV camera. Consider factors such as weight distribution, visibility, and protection from damage during flight.
- Mount the FPV Camera: Securely attach the FPV camera to the chosen location using adhesive pads or brackets provided with the camera. Ensure that the camera is aligned properly and angled to provide the desired field of view.
- Connect the Camera: Take the camera’s video cable and carefully route it to the video transmitter location. Connect the video cable to the designated video output on the camera and securely fasten it.
- Choose a Video Transmitter Mounting Location: Find a suitable spot on your drone to mount the video transmitter. Consider factors such as weight distribution, signal interference, and accessibility for antenna routing.
- Mount the Video Transmitter: Attach the video transmitter to the chosen location using adhesive pads or brackets. Make sure the transmitter is securely fastened and oriented correctly for optimal signal transmission.
- Connect Power Supply: Connect the video transmitter to the appropriate power supply on your drone. Ensure the voltage is compatible, and double-check the polarity to avoid any damage to the equipment.
- Connect Video Signal: Take the video cable from the FPV camera and plug it into the video input port on the video transmitter. Ensure a secure connection to prevent any signal loss during flight.
- Secure Wiring: Neatly route the video transmitter’s wiring, including the power and video cables, along the frame. Use zip ties or adhesive pads to secure the wiring and prevent it from getting entangled or damaged by propellers or other components.
- Double-Check Connections: Before finalizing the installation, double-check all connections. Ensure that the FPV camera, video transmitter, and the rest of the equipment are securely connected and properly seated.
Installing the FPV camera and video transmitter is a crucial step to ensure a clear and reliable video feed during your FPV flights. Taking the time to carefully mount and secure these components will enhance your flying experience and provide you with a real-time immersive view of your drone’s flight.
With the FPV camera and video transmitter successfully installed, it’s time to move on to the next section, where we will discuss installing and configuring the flight controller software to optimize your FPV drone’s performance.
Installing and Configuring the Flight Controller Software
The flight controller software is a critical component that allows you to control and fine-tune your FPV drone’s performance. Installing and configuring the software is essential to ensure optimal flight characteristics and responsiveness. Here’s a step-by-step guide on how to install and configure the flight controller software:
- Download the Software: Visit the manufacturer’s website or the open-source community platform for your specific flight controller and download the appropriate software. Ensure that you download the latest stable version for optimal performance and compatibility.
- Connect the Flight Controller: Connect your flight controller to your computer using a USB cable. Ensure that the flight controller is powered on and recognized by your computer as a USB device.
- Install the Drivers: If required, install any necessary drivers for your flight controller to properly communicate with your computer. Follow the manufacturer’s instructions to install the drivers if they are not automatically detected and installed.
- Open the Software: Open the flight controller software and navigate to the appropriate section for initial setup or configuration. The layout of the software may vary depending on the flight controller model and software used.
- Configure Basic Settings: Configure basic settings such as flight modes, arm/disarm procedures, fail-safe behavior, and receiver input mappings. Ensure that the settings align with your desired flying style and preferences.
- Calibrate Sensors: Access the sensor calibration section of the software and follow the prompts to calibrate the accelerometer, gyroscope, and compass. Accurate sensor calibration improves stability and flight accuracy.
- Tune PID Settings: Fine-tune the PID (Proportional, Integral, and Derivative) settings to optimize your drone’s stability and responsiveness. Adjust the P, I, and D values incrementally and test the performance of your drone after each adjustment.
- Setup Modes and Switches: Configure flight modes and assign them to specific switches on your radio transmitter. This allows you to switch between different flight modes such as acro, stabilized, or altitude hold during flight.
- Ensure Firmware Compatibility: Check for any firmware updates available for your flight controller and ensure that you have the latest stable firmware version installed. Follow the manufacturer’s instructions to update the firmware if necessary.
- Save and Apply Settings: Once you’ve configured all the necessary settings, save them in the flight controller software and apply them to the flight controller. This ensures that your drone will operate according to your specific configurations.
Installing and configuring the flight controller software allows you to customize and optimize your FPV drone’s behavior. Take your time to understand and adjust the various settings, and regularly test and fine-tune the performance to achieve your desired flying experience.
With the flight controller software successfully installed and configured, the next section will cover powering your drone and ensuring a reliable power supply for optimal flight performance.
Powering the Drone
Powering your FPV drone is a crucial step that ensures a reliable and consistent power supply for all the components. Selecting the right battery and following proper power distribution practices are essential for optimal flight performance. Here’s a step-by-step guide on how to power your drone:
- Select the Battery: Choose a high-quality LiPo (Lithium Polymer) battery that suits your drone’s power requirements. Consider factors such as capacity, voltage, and discharge rate. Ensure that the battery is compatible with your drone’s power distribution board.
- Connect the Battery: Connect the battery to the drone’s power distribution board. Double-check the polarity to avoid any damage to the equipment. Ensure a secure connection and ensure that the battery is properly attached to the drone’s frame.
- Balance Charge the Battery: Use a balance charger to charge your LiPo battery. Set the charger to the appropriate voltage and ampere rating as specified by the battery manufacturer. Monitor the charging process closely and follow all safety guidelines.
- Check Battery Voltage: Before every flight, use a battery checker or voltage meter to verify the voltage of your battery. Ensure that it is within the safe operating range and does not exceed the specified maximum voltage.
- Secure the Battery: Use battery straps or other secure mounting methods to ensure that the battery is firmly attached to the drone’s frame during flight. This prevents the battery from shifting or disconnecting during maneuvers.
- Monitor Battery Health: Regularly check the battery’s health and performance. Keep an eye on its capacity, internal resistance, and overall condition. Replace any damaged or deteriorating batteries to maintain optimal flight performance and safety.
- Implement Low Voltage Protection: Configure your flight controller’s low voltage warning feature or use a separate battery alarm to alert you when the battery voltage drops to a specified level. This helps prevent over-discharging and damage to the battery.
- Follow Proper Charging and Storage Practices: Adhere to proper charging and storage practices for LiPo batteries. Charge them in a safe location, avoid overcharging, and store them in a fireproof LiPo bag or case away from flammable materials.
Properly powering your drone is crucial for reliable and efficient flight performance. Take the time to carefully select and maintain your batteries, ensuring they are charged, balanced, and securely connected to your drone.
With the drone powered up, the next section will cover configuring and testing the FPV system to ensure a clear and immersive flying experience.
Configuring and Testing the FPV System
Configuring and testing the FPV (First Person View) system is an important step in ensuring a clear and immersive flying experience with your drone. Proper calibration and adjustment of the FPV camera and video transmitter will optimize video quality and reduce latency. Here’s a step-by-step guide on how to configure and test the FPV system:
- Adjust Camera Settings: Access the camera’s menu settings to adjust parameters such as brightness, contrast, color saturation, and exposure. Fine-tune these settings based on your flying environment and personal preferences.
- Set Video Transmitter Frequency: Select an appropriate video transmission frequency based on local regulations and available frequencies. Ensure that your video transmitter and receiver are set to the same frequency to establish a clear video signal.
- Check Transmission Power: Choose the appropriate transmission power level for your video transmitter. Higher power levels may provide a longer range but can also cause interference. Adapt the transmission power to your flight requirements and local regulations.
- Adjust Antennas: Position the FPV receiver antenna on your goggles or monitor, ensuring it is pointing in the direction of your drone. Orient the antennas on both the FPV transmitter and receiver parallel to each other for optimal signal transmission.
- Test Video Feed: Power on your FPV system and ensure that a clear video feed from the FPV camera is displayed on your goggles or monitor. Adjust the frequency and channels if the video feed appears distorted or contains interference.
- Check Video Latency: Move the drone’s control sticks and observe the live video feed for any noticeable delay. Adjust the camera and video transmitter settings, as well as the video receiver settings, to minimize latency and ensure a smooth FPV experience.
- Verify Video Range: Test the video transmission range by gradually increasing the distance between the drone and the receiver. Keep an eye on the video feed quality and any potential interference. Be aware of the limitations of your FPV system’s range.
- Inspect and Maintain Antennas: Regularly inspect the FPV antenna connections for any damage or signs of wear. Clean the antenna surfaces and connections, ensuring they are free from dirt and debris to maintain optimal signal quality.
- Ensure Good Reception: Consider using diversity receivers or high-gain antennas to enhance your FPV system’s reception capabilities, especially in challenging environments. Experiment with different antenna placements to find the configuration that provides the best reception.
Configuring and testing the FPV system is crucial for a clear and immersive flying experience. Take the time to adjust camera settings, select the appropriate transmission frequency, and optimize antenna placement to ensure a reliable and high-quality video feed during your FPV flights.
With the FPV system configured and tested, the final steps focus on safety precautions and ensuring a successful and enjoyable FPV drone journey.
Final Steps and Safety Precautions
As you near the completion of your FPV drone build, there are a few final steps and safety precautions to consider. These steps will help ensure a safe and successful flying experience. Let’s explore them:
- Perform Pre-Flight Checks: Before each flight, conduct pre-flight checks to verify the overall condition of your drone. Check for any loose screws, damaged components, or signs of wear and tear. Ensure the propellers are correctly attached and in good condition.
- Verify Flight Readiness: Double-check that the flight controller software is properly configured, and all the control inputs respond as expected. Verify that the motors spin smoothly and the propellers are balanced.
- Consider a Maiden Flight: For a new build, consider conducting a maiden flight in an open and safe location. This will allow you to assess the drone’s performance and make any necessary adjustments before flying in more challenging environments.
- Observe Local Regulations: Familiarize yourself with local drone flying regulations and adhere to them strictly. Respect no-fly zones, altitude limits, and privacy restrictions. Ensure you have any necessary permits or licenses required by your local authorities.
- Choose a Suitable Flying Location: Select a suitable and legal flying location that provides ample space, minimal obstacles, and minimal interference. Be mindful of people, buildings, and other aircraft in the area.
- Use a Spotter: Consider having a spotter present during flights, especially when flying at a long range or in crowded areas. A spotter can assist with maintaining visual contact, ensuring safety, and providing valuable feedback.
- Monitor Battery Levels: Keep a close eye on your battery levels during flight and plan your flights accordingly to avoid inadvertently draining the battery and losing power mid-air. Implement a timer or set voltage alarms to alert you when the battery levels are low.
- Keep a Safe Distance: Maintain a safe distance from people, animals, and property during flight. Avoid flying directly over crowds or congested areas. Be respectful of private property and maintain distance from wildlife and protected areas.
- Be Aware of Environmental Factors: Consider the impact of weather conditions such as wind, rain, or extreme temperatures on your drone’s performance. Avoid flying in adverse weather conditions that may affect flight stability or risk damaging your equipment.
- Continuously Educate Yourself: Stay updated with the latest drone regulations, best practices, and technological advancements in the industry. Expand your knowledge and skills through online resources, forums, and local drone communities.
By following these final steps and safety precautions, you can ensure a safe and enjoyable FPV drone flying experience. Always prioritize safety, be responsible, and respect the privacy and rights of others when flying your drone.
Now that you have completed the final steps, you are ready to embark on your exciting FPV drone journey. Fly responsibly and enjoy the amazing world of FPV flight!
Conclusion
Congratulations on completing the journey of building your own FPV drone! By following the step-by-step process outlined in this guide, you have gained the knowledge and skills needed to assemble, configure, and test your very own FPV drone.
Throughout this process, you have learned about the various components that make up an FPV drone, including the frame, flight controller, motors, ESCs, radio transmitter and receiver, FPV camera, and video transmitter. You have gained an understanding of how they work together to provide an immersive flying experience.
Furthermore, you have familiarized yourself with important concepts such as adjusting camera settings, configuring the flight controller software, and ensuring a reliable power supply. You have also learned about safety precautions and adhering to local regulations to fly your drone responsibly.
Building an FPV drone is an ongoing journey that does not end with the completion of this guide. As you gain more experience, you can further personalize and enhance your drone with additional features, such as GPS modules, telemetry systems, or upgraded components.
Remember to continuously educate yourself about the latest advancements in drone technology and stay informed about any changes in regulations or best practices. This will help you stay at the forefront of FPV drone flying and ensure a safe and enjoyable experience.
Now, it’s time to take your FPV drone out for its maiden flight. Enjoy the thrill of piloting your own creation and exploring new perspectives from the sky. Embrace the joy of FPV flight and the endless possibilities it offers.
Happy flying and may your FPV adventures be filled with exhilaration and unforgettable moments!