Introduction
Welcome to the exciting world of drones! If you’re interested in building your own drone using a Raspberry Pi, you’ve come to the right place. Drones have become increasingly popular in recent years, offering endless possibilities for aerial photography, videography, and even delivery services. With a Raspberry Pi, a single-board computer known for its versatility and affordability, you can create a customized drone that suits your specific needs and preferences.
Building a drone might sound intimidating, but fear not! This step-by-step guide will walk you through the process, from gathering the necessary materials to configuring the flight controller software. Whether you’re a hobbyist, a tech enthusiast, or a DIY enthusiast, building your own drone is an incredibly rewarding experience that allows you to gain valuable knowledge about electronics, programming, and aviation.
In this guide, we will focus on building a quadcopter, a drone with four rotors, as it is the most common and beginner-friendly configuration. However, the principles discussed can be applied to different types of drones as well.
Before we dive into the assembly process, it’s important to ensure you have all the necessary materials ready. This will save you time and prevent any delays during the construction. So, let’s gather the components and tools needed to build your Raspberry Pi drone!
Materials Needed
Before you start building your drone, you will need to gather the following materials:
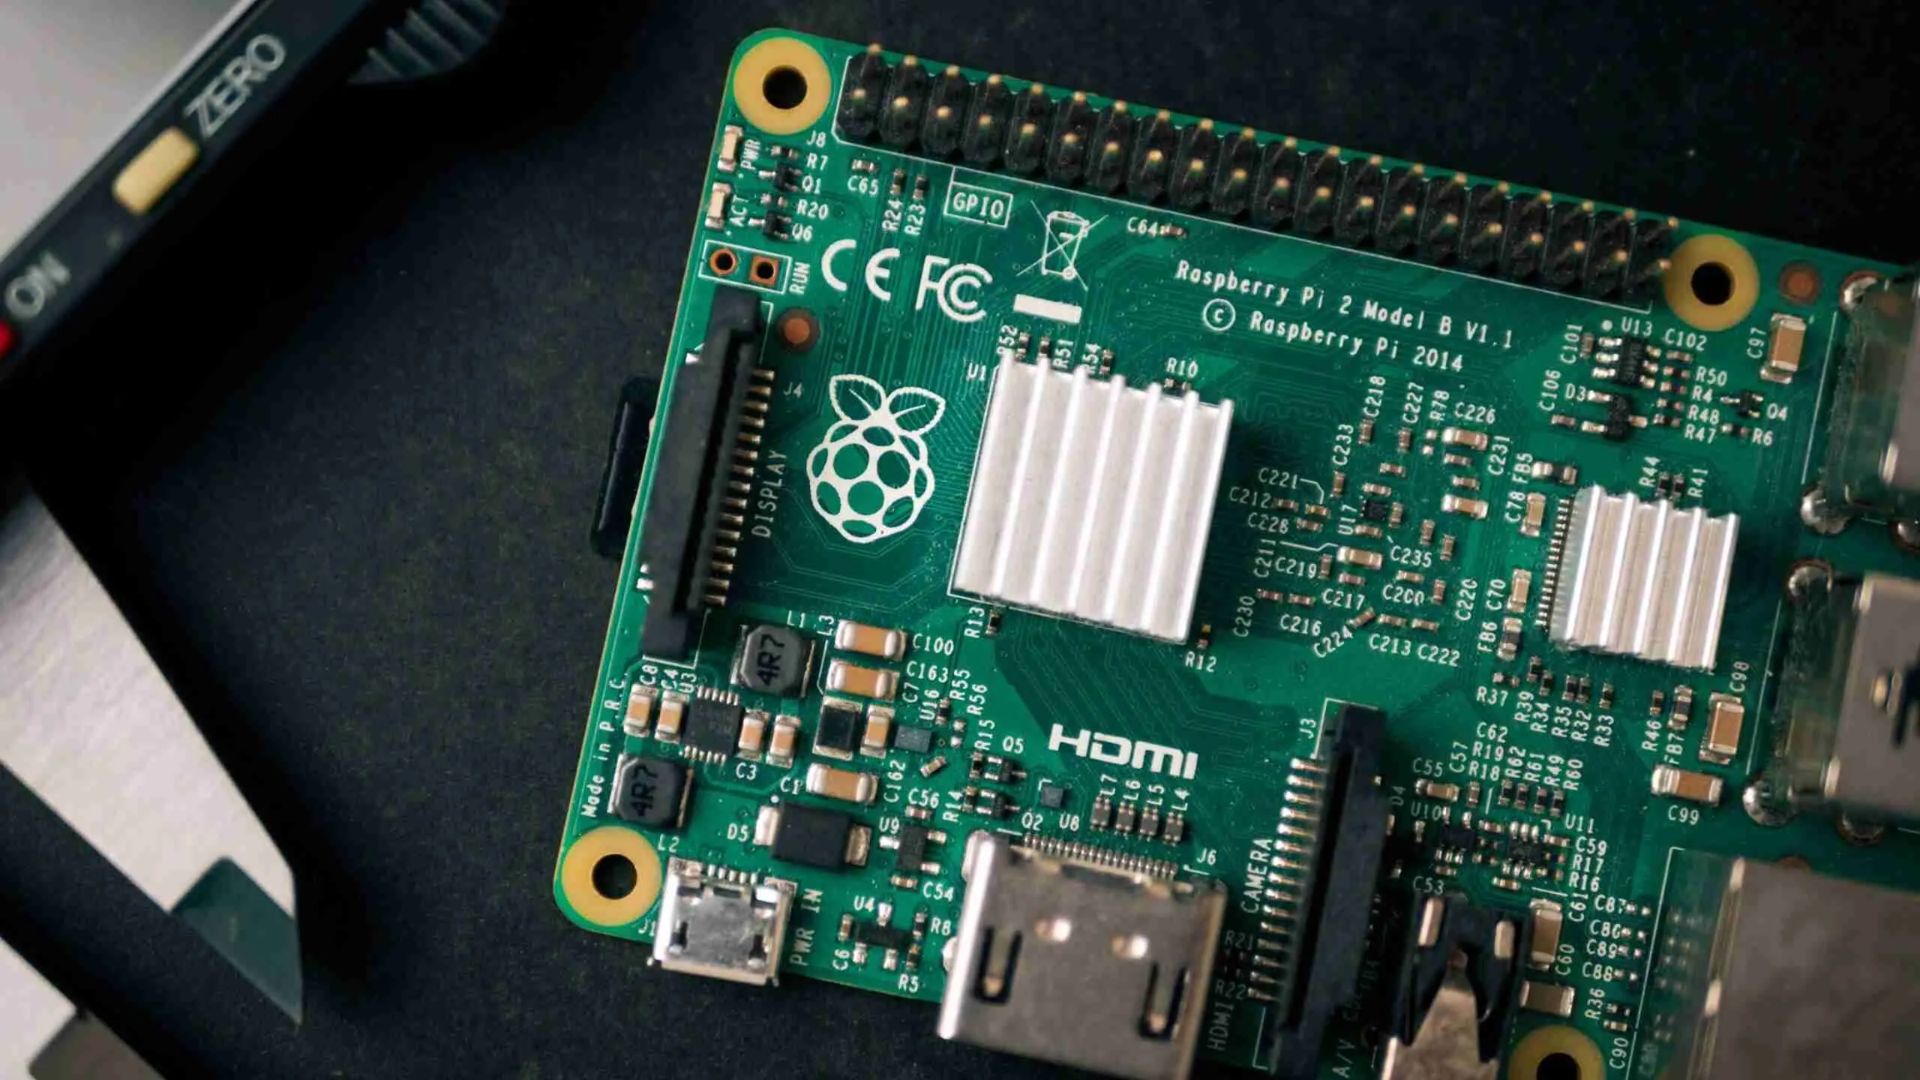
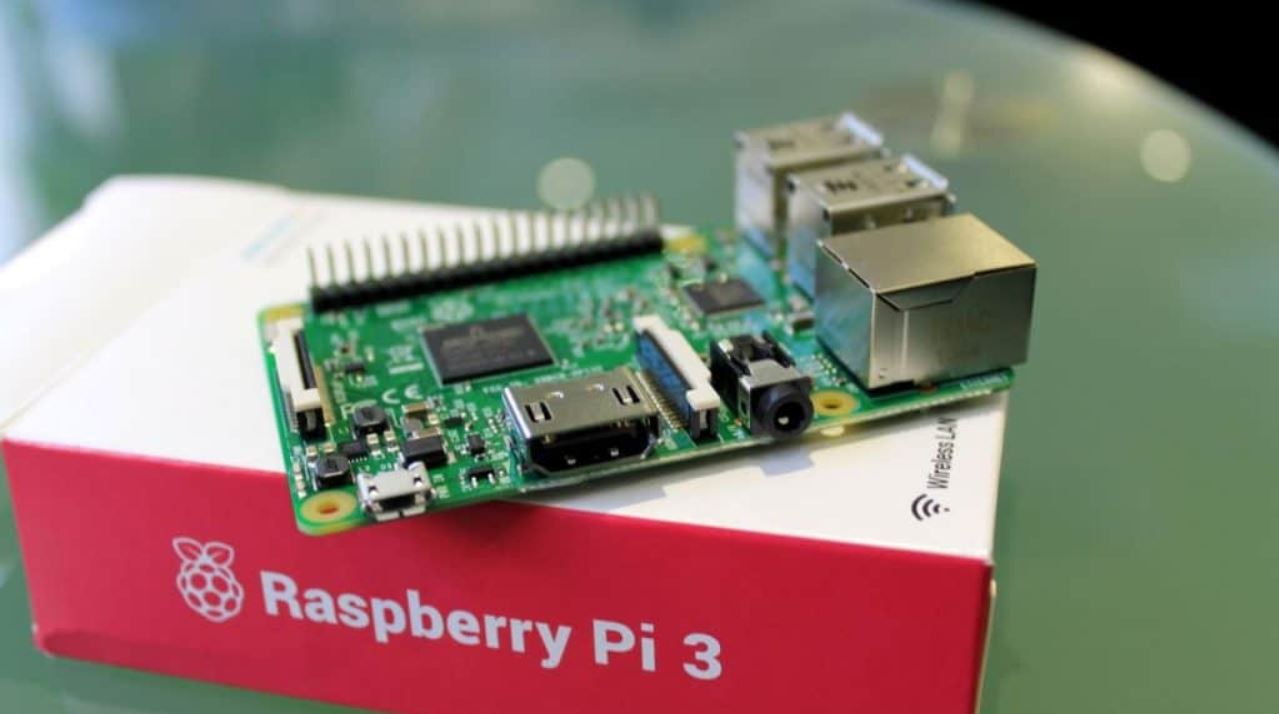
- Raspberry Pi: You will need a Raspberry Pi board, such as Raspberry Pi 4 or Raspberry Pi Zero. This will serve as the brain of your drone and handle the flight control and other functionalities.
- Frame: Choose a drone frame compatible with your Raspberry Pi and capable of supporting the weight of the additional components. Popular options include carbon fiber frames or 3D printed frames.
- Quadcopter Motors and Propellers: Select four brushless motors and corresponding propellers for your drone. Ensure that the motors and propellers are compatible with each other and provide enough thrust for your desired flight capabilities.
- Electronic Speed Controllers (ESCs): You will need four ESCs to control the speed of the motors. Make sure the ESCs are compatible with the motors and can handle the current requirements.
- Flight Controller: Choose a flight controller board that supports the Raspberry Pi. Popular options include the Pixhawk or the Navio2.
- Power Distribution Board (PDB): The PDB distributes power to the different components of the drone, preventing voltage drops and ensuring a stable power supply.
- LiPo Battery: Select a high-quality lithium polymer (LiPo) battery with an appropriate capacity to power your drone. Consider factors such as weight, flight time, and voltage compatibility when choosing a battery.
- Battery Charger: You will need a charger specifically designed for LiPo batteries to safely recharge and maintain your drone’s battery.
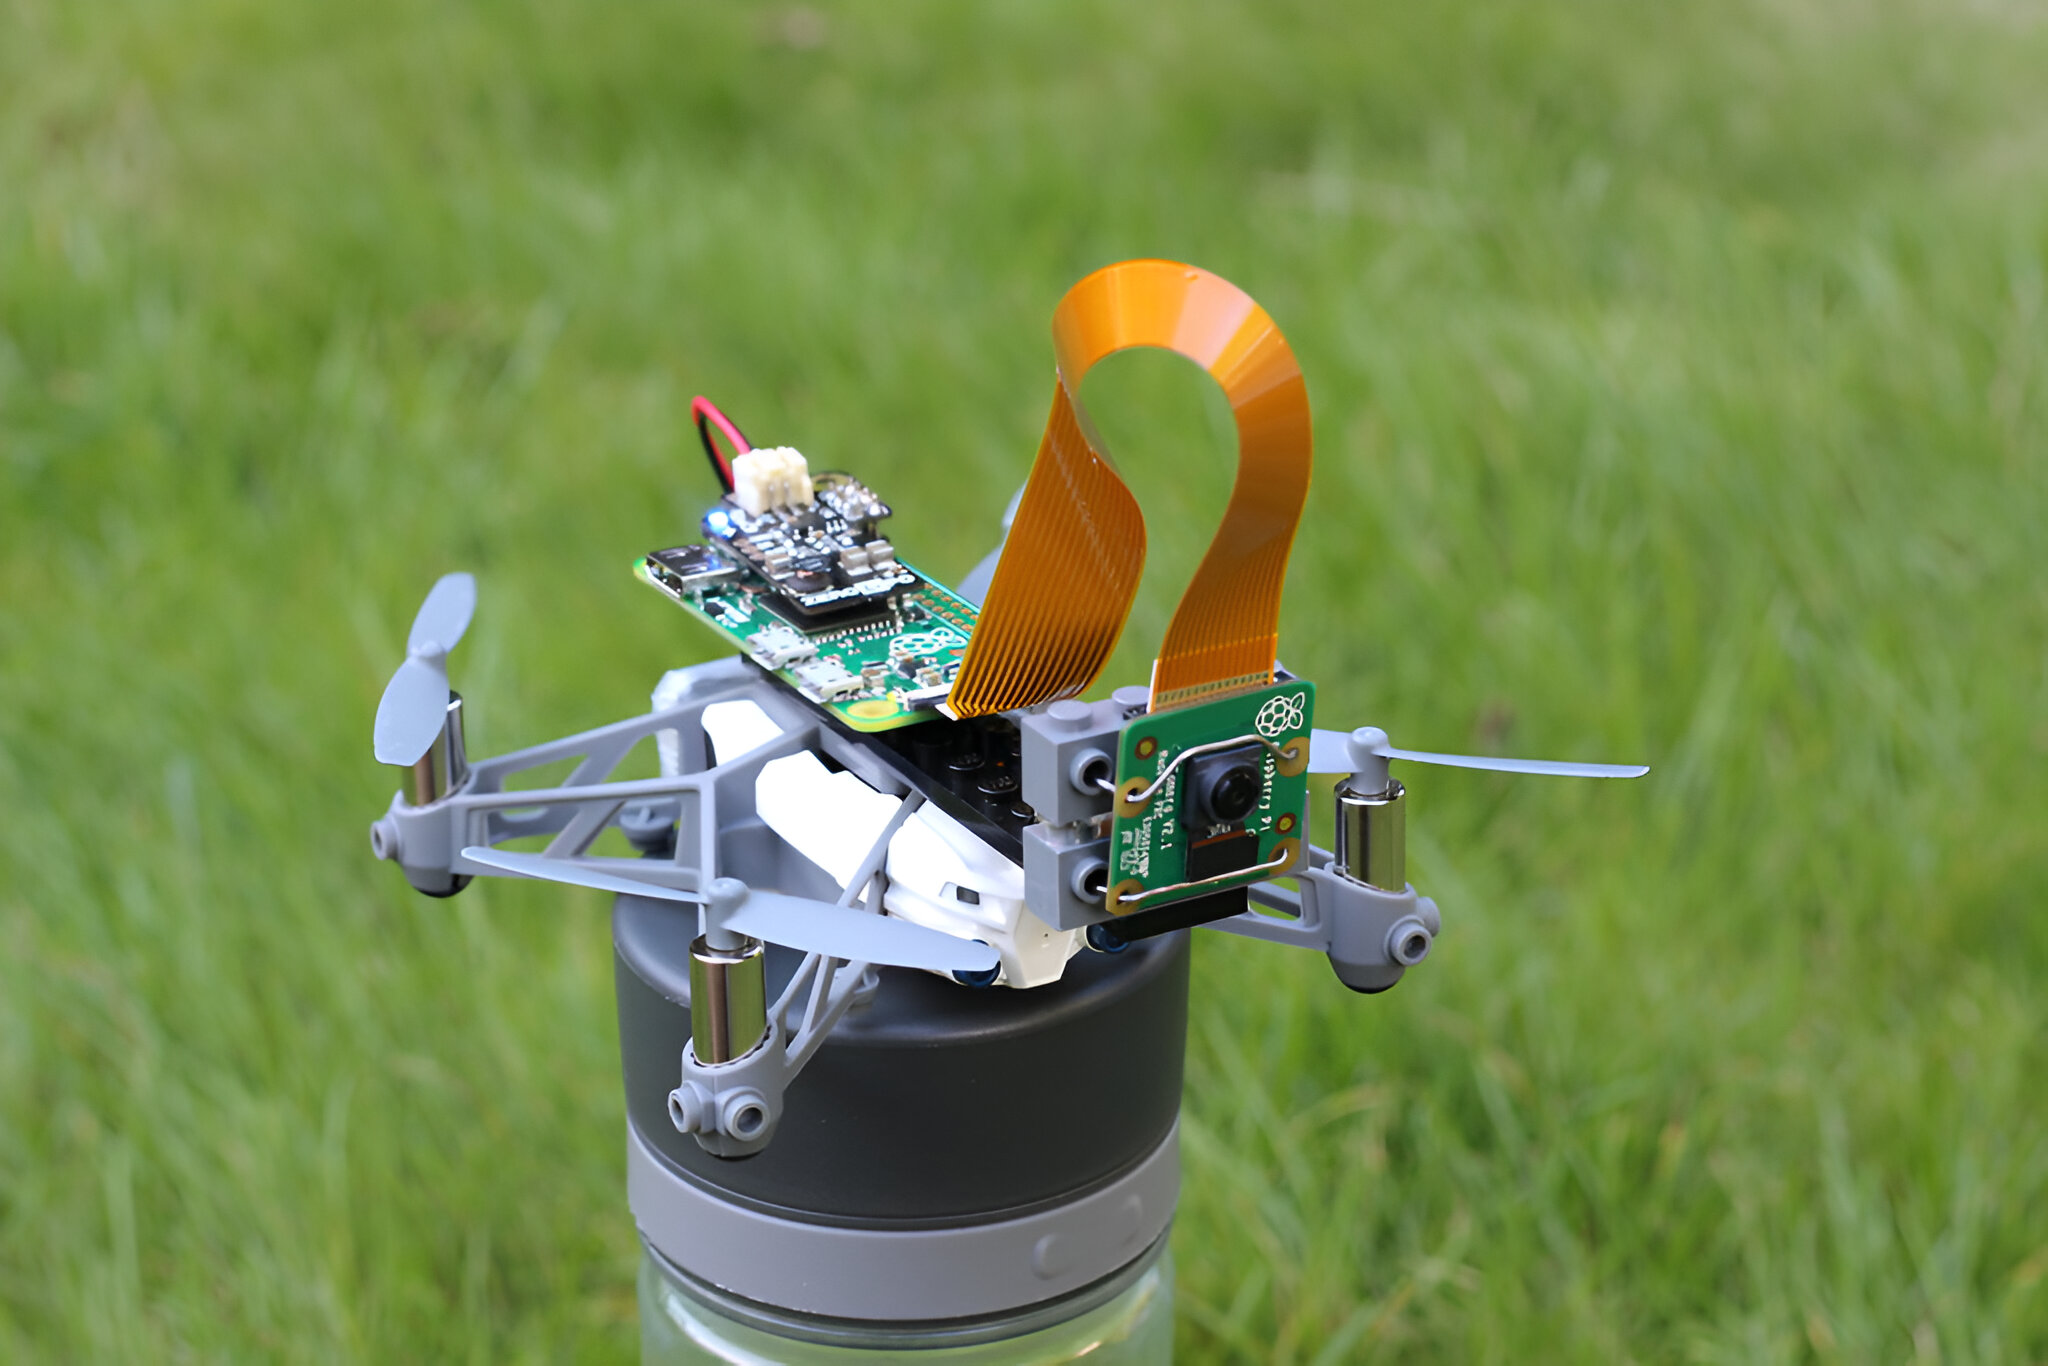
- Camera Module (Optional): If you wish to capture photos or videos during the flight, consider adding a compatible camera module to your drone.
- Radio Transmitter and Receiver: For manual control of your drone, you will need a radio transmitter and receiver set that supports the frequency used in your country.
- Various Tools and Accessories: Don’t forget to gather tools like screwdrivers, pliers, soldering iron, and electrical tape. Additionally, you may need zip ties, connectors, and heat shrink tubing for secure connections and cable management.
With these materials in hand, you are ready to move on to the next step: gathering the necessary parts to assemble your drone’s frame.
Step 1: Gathering the Parts
Now that you have a clear understanding of the materials needed, it’s time to gather the specific parts required for building your drone. Here are the key components you will need to acquire:
- Raspberry Pi: Choose the Raspberry Pi model that suits your requirements and budget. The Raspberry Pi 4 is a powerful option, while the Raspberry Pi Zero W offers a more compact and affordable alternative.
- Frame: Select a frame that accommodates your chosen Raspberry Pi and provides stability and durability. Carbon fiber frames are popular due to their lightweight and sturdy construction.
- Quadcopter Motors and Propellers: Look for brushless motors and propellers that are compatible with your chosen frame and have suitable thrust capabilities. Consider factors such as motor size, kv rating, and propeller diameter.
- Electronic Speed Controllers (ESCs): Choose ESCs that match the specifications of your motors and ensure they can handle the required voltage and current. Opt for ESCs with a built-in BEC (Battery Eliminator Circuit) to power the Raspberry Pi and other components.
- Flight Controller: Select a flight controller that supports the Raspberry Pi, such as the popular Pixhawk or Navio2. Make sure it has the necessary features for stable flight control, GPS capabilities, and sensor integration.
- Power Distribution Board (PDB): Acquire a PDB that can handle the voltage and current requirements of your drone’s system. It should have sufficient outputs to distribute power to the Raspberry Pi, ESCs, and other components.
- LiPo Battery: Choose a high-quality lithium polymer (LiPo) battery with the appropriate voltage and capacity to power your drone. Consider factors such as weight, flight time, and discharge rate.
- Battery Charger: Invest in a reliable LiPo battery charger that supports the type and voltage of your chosen battery. It is crucial to use a charger specifically designed for LiPo batteries to ensure safe and proper charging.
- Camera Module (Optional): If you wish to capture aerial footage, consider adding a camera module compatible with your Raspberry Pi. Popular options include the Raspberry Pi Camera Module or a compatible USB camera.
- Radio Transmitter and Receiver: Look for a radio transmitter and receiver set suitable for your drone. Ensure they operate within the legal frequency range in your country and choose one with sufficient channels for manual control.
- Various Tools and Accessories: Don’t forget to gather essential tools such as screwdrivers, pliers, wire cutters, and soldering equipment. You may also need accessories like zip ties, connectors, heat shrink tubing, and electrical tape for secure connections and cable management.
Once you have gathered all the necessary parts, you are ready to move on to the exciting process of assembling the frame, which will be covered in the next step.
Step 2: Assembling the Frame
With all the parts ready, it’s time to start assembling the frame of your drone. Follow these steps to ensure a sturdy and secure construction:
- Prepare the Frame: Lay out the frame components and familiarize yourself with the assembly instructions provided by the manufacturer. Identify the main frame plates, arms, and other supporting structures.
- Attach the Arms: Begin by attaching the arms to the main frame plates. Use the provided screws and bolts to secure them firmly in place. Make sure the arms are aligned properly and tightened evenly.
- Mount the Flight Controller: Depending on your frame design, locate a suitable spot to mount the flight controller. The flight controller should be placed near the center of the drone for optimal stability. Use the mounting hardware provided with the flight controller to secure it to the frame.
- Install the Power Distribution Board (PDB): Determine the position for the PDB and mount it securely on the frame. Connect the power cables from the ESCs to the corresponding ports on the PDB. Make sure the connections are tight and secure.
- Attach the ESCs: Position the ESCs on the arms, near the motors. Use zip ties or adhesive mounts to secure them in place. Connect the signal wires from the ESCs to the appropriate ports on the flight controller. Ensure that the wiring is tidy and free from any potential interference.
- Secure the Raspberry Pi: Locate a safe and vibration-free spot on the frame to mount the Raspberry Pi. Ensure that it is easily accessible for connecting cables and peripherals. Use mounting screws or adhesive tape to secure it in place.
- Mount the Battery: Find a suitable location on the frame to mount the LiPo battery. Use straps or adhesive mounts to secure it securely. Ensure the battery is well-balanced and does not interfere with any moving parts.
- Connect the Wiring: Begin connecting the necessary wires between the different components. Connect the ESC signal wires to the corresponding motor output pins on the flight controller. Attach the power cables from the ESCs and the battery to the PDB and the flight controller.
- Check for Secure Connections: Double-check all the connections to make sure they are secure and properly insulated. Ensure there are no loose wires that could cause short circuits or interfere with the propellers or other components.
- Inspect and Adjust: Take a careful look at the assembled frame and components. Check for any loose or misaligned parts. Make any necessary adjustments to ensure a sturdy and balanced frame before proceeding to the next step.
By following these steps, you will have successfully assembled the frame of your drone. With the foundation in place, you are now ready to move on to the next step: mounting the motors and propellers.
Step 3: Mounting the Motors and Propellers
With the frame assembled, it’s time to mount the motors and propellers onto your drone. Follow these steps to ensure proper installation:
- Prepare the Motors and Propellers: Inspect the motors and propellers to ensure they are in good condition. Check for any damage or defects that may affect performance. Ensure that the motors and propellers are compatible with each other in terms of size and specification.
- Identify Motor Positions: Determine the placement of each motor on the frame. Generally, the front-left, front-right, rear-left, and rear-right positions are used for a quadcopter configuration. Refer to the frame assembly instructions for guidelines on motor placement if needed.
- Attach the Motors: Secure each motor to its designated position on the frame. Use motor mounts or motor arms provided by the frame manufacturer. Ensure that the motor is tightly secured to prevent any movement during flight.
- Connect the Propellers: Attach the propellers to their corresponding motor shafts. Most propellers have adapters or nuts that allow them to be easily connected. Make sure the propellers are tightly fastened to prevent them from coming loose during flight.
- Check Rotation Direction: It’s crucial to ensure that the motors are spinning in the correct direction. By default, adjacent motors should spin in opposite directions to maintain stability. Use the flight controller software to verify the motor rotation direction and make any necessary adjustments.
- Balancing the Propellers: Propeller balancing is essential to minimize vibrations and ensure smooth operation. Use a propeller balancer or a simple balancing technique to identify any imbalances. Sand or trim the propeller as needed to achieve a balanced rotation.
- Inspect and Secure: Carefully inspect all motor and propeller connections. Ensure that the motors are securely mounted and the propellers are tightly attached. Double-check for any loose or misaligned components that could impact the performance or stability of your drone.
Once you have mounted the motors and propellers, your drone will start to take shape. In the next step, we will move on to connecting the Electronic Speed Controllers (ESCs) to the motors.
Step 4: Connecting ESCs to the Motors
Now that the motors and propellers are securely mounted, it’s time to connect the Electronic Speed Controllers (ESCs) to the motors. These ESCs will control the speed and direction of the motors. Follow these steps to ensure proper connections:
- Locate the ESCs: Identify the ESCs that correspond to each motor. Check the labeling or markings on the ESCs or consult the user manual to ensure you have the correct configuration.
- Connect the ESC Signal Wires: Take the signal wire from each ESC and connect it to the corresponding motor output pin on the flight controller. Match the ESC signal wires with the correct motor output pins, ensuring a proper motor-to-ESC match.
- Solder and Secure the Connections: Strip a small section of insulation from the end of each ESC signal wire. Then, carefully solder the exposed wire to the corresponding motor output pin on the flight controller. Ensure that the solder joints are strong and secure.
- Connect the ESC Power Wires: Determine the power source for the ESCs. In most cases, the ESCs are powered directly from the flight battery. Connect the positive (red) and negative (black) power wires of each ESC to the appropriate terminals on the Power Distribution Board (PDB).
- Check for Proper Polarity: Ensure that the polarity of the ESC power connection is correct. The red wire should be connected to the positive terminal, and the black wire should be connected to the negative terminal. Reversing the polarity can cause damage to the ESCs.
- Secure the ESCs: Use zip ties or adhesive mounts to secure the ESCs to the frame. Ensure that the ESCs are positioned securely without any risk of interference with other components or moving parts of the drone.
- Inspect the Connections: Double-check all the connections for any loose or poor joints. Inspect the wiring to ensure a neat and organized setup. Make any necessary adjustments or corrections to ensure all connections are properly secured.
By connecting the ESCs to the motors, you have completed an essential step in assembling your drone. In the next step, we will discuss installing the flight controller, which will allow you to control and stabilize your drone during flight.
Step 5: Installing the Flight Controller
With the motors and ESCs connected, it’s time to install the flight controller, which will be responsible for controlling and stabilizing your drone during flight. Follow these steps to properly install the flight controller:
- Select a Mounting Location: Choose a suitable location on the drone frame to mount the flight controller. Consider factors such as vibration, accessibility, and ease of wiring. Ideally, the flight controller should be placed near the center of the drone for optimal balance and stability.
- Prepare the Flight Controller: Familiarize yourself with the flight controller’s user manual or documentation. Ensure that any jumpers or switches on the flight controller are set according to your specific configuration or requirements.
- Secure the Flight Controller: Use the provided mounting hardware, such as screws or brackets, to securely attach the flight controller to the chosen location on the drone frame. Ensure that the flight controller is tightly fastened and does not move or vibrate excessively.
- Connect the Power and Signal Cables: Attach the power and signal cables from the flight controller to the appropriate ports on the Power Distribution Board (PDB). Follow the flight controller’s documentation for the specific wiring configuration.
- Check for Proper Orientation: Most flight controllers have an orientation indicator or arrow that should point forward on the drone. Ensure that the flight controller is correctly oriented to align with the drone’s intended flight direction.
- Connect Other Components: Depending on your setup, you may need to connect other components such as GPS modules, telemetry systems, or additional sensors to the flight controller. Follow the documentation or instructions provided with these components for proper wiring and connections.
- Secure and Organize Wires: Use cable ties, adhesive mounts, or wire clips to secure and organize the wires connected to the flight controller. This will help prevent any loose or tangled cables that may interfere with the drone’s operation.
- Inspect the Connections: Double-check all the connections to ensure that they are secure and properly insulated. Verify that all cables are connected to the correct ports and that there are no loose or exposed wires that could cause short circuits.
Once the flight controller is installed and the connections are checked, your drone is one step closer to completion. In the next step, we will explore connecting the Raspberry Pi to the flight controller to enable communication and control.
Step 6: Connecting the Raspberry Pi
Now that the flight controller is installed, it’s time to connect the Raspberry Pi, which will serve as the brain of your drone. Follow these steps to establish the connection between the Raspberry Pi and the flight controller:
- Identify the Required Connections: Determine the necessary connections between the flight controller and the Raspberry Pi. The specific connections may vary depending on the flight controller and the communication protocols being used.
- Connect the Power: Ensure that both the Raspberry Pi and the flight controller are powered off. Connect the appropriate power cables from the Power Distribution Board (PDB) to the Raspberry Pi and flight controller. Ensure that the voltage levels and polarities are properly matched.
- Establish Communication: Depending on the flight controller and the Raspberry Pi model you’re using, you will need to establish communication using available protocols such as UART, I2C, or SPI. Consult the documentation or user manual of your specific flight controller to determine the correct pins and wiring configuration.
- Secure the Connections: Once the necessary connections are made, ensure that all cables and wires are securely connected. Check for any loose connections or potential points of interference. Use cable ties or adhesive mounts to secure the cables and keep them organized.
- Perform a Test: After making the connections, power on both the Raspberry Pi and the flight controller. Test the communication between the two by checking for any error messages or indications that the devices are properly connected. Double-check the wiring and make any necessary adjustments if the communication is not established.
- Configure the Flight Controller Software: Once the Raspberry Pi and flight controller are connected, you may need to configure the flight controller software. This typically involves setting up flight modes, adjusting control parameters, and calibrating the sensors. Follow the instructions provided by the flight controller’s software and documentation for the specific configuration process.
- Recheck the Connections: Before proceeding, double-check all the connections between the Raspberry Pi and the flight controller. Ensure that they are secure and properly insulated. Verify that there are no loose wires or potential points of failure that could affect the drone’s performance.
By successfully connecting the Raspberry Pi to the flight controller, you have established the critical communication link that will allow you to control your drone. In the next step, we will explore configuring the flight controller software to customize your drone’s behavior and functionality.
Step 7: Configuring the Flight Controller Software
With the Raspberry Pi and flight controller connected, it’s time to configure the flight controller software. This step is crucial as it allows you to customize your drone’s behavior, flight modes, and other functionalities. Follow these steps to configure the flight controller software:
- Access the Flight Controller Software: Connect your computer to the flight controller using the appropriate interface, such as USB, telemetry, or Wi-Fi. Launch the flight controller software, such as Mission Planner, QGroundControl, or APM Planner, depending on your flight controller.
- Connect to the Flight Controller: Once the software is running, establish a connection between your computer and the flight controller. Follow the software’s instructions to connect via the available interface and select the correct communication protocol, such as Serial, USB, or Network.
- Calibrate Sensors: Before proceeding with configuration, it’s important to calibrate the sensors on your flight controller. This typically involves performing accelerometer and compass calibrations to ensure accurate readings during flight. Follow the software’s instructions for step-by-step guidance on sensor calibration.
- Adjust Flight Parameters: Access the flight parameters or settings within the software interface. Adjust the parameters according to your preferences and specific flight requirements. These parameters may include rates, gains, PID settings, flight modes, and failsafe settings. Be sure to consult the documentation or user manual for your flight controller for guidance on parameter adjustment.
- Set Up Flight Modes: Configure the flight modes that you want to use on your drone. Common modes include stabilized mode, altitude hold, loiter mode, and autonomous mission mode. Assign corresponding switches or channels on your radio transmitter for easy switching between flight modes while in the air.
- Test and Verify Settings: Once the configuration is complete, it’s important to test and verify the settings. Use the flight controller software’s simulation or test mode if available, or perform test flights in a controlled and open area. Monitor the drone’s behavior and flight response, and make any necessary adjustments to the configuration settings if required.
- Save Configuration and Parameters: After verifying the settings, save the configuration and parameters in the flight controller software. This will ensure that the settings are retained for future flights and can be restored if needed.
- Document Your Configuration: It’s a good practice to document your configuration, including the flight parameters, flight modes, and any customizations you’ve made. This documentation will serve as a reference for future maintenance, troubleshooting, or upgrades.
By successfully configuring the flight controller software, you have personalized and optimized your drone’s performance and functionality. In the next step, we will explore the optional step of adding a camera module to capture aerial footage.
Step 8: Adding a Camera Module
If you wish to capture stunning aerial footage or images, adding a camera module to your drone is an exciting option. Follow these steps to incorporate a camera module into your drone:
- Choose a Compatible Camera Module: Select a camera module that is compatible with your Raspberry Pi model. Popular options include the Raspberry Pi Camera Module or compatible USB cameras. Consider factors such as resolution, image quality, and weight when making your selection.
- Prepare the Mounting: Determine the ideal location on your drone frame to mount the camera module. Consider factors such as stability, aerodynamics, and field of view. Ensure that the mounting location will not obstruct any other components or moving parts.
- Mount the Camera Module: Use the provided mounting brackets, screws, or adhesive tape to secure the camera module to the chosen location. Ensure that the camera is firmly attached and will not shift or vibrate during flight.
- Connect the Camera Cable: Connect the camera cable to the camera module and the appropriate port on the Raspberry Pi board. Ensure that the connection is secure and properly aligned. Follow any specific instructions provided by the camera module manufacturer for proper cable alignment.
- Configure Camera Settings: Access the Raspberry Pi’s operating system and camera software to configure the camera settings. Adjust parameters such as resolution, white balance, exposure, and capture mode according to your desired outcomes.
- Test the Camera Module: Perform test flights to ensure that the camera module is functioning correctly. Capture sample photos or footage to verify the image quality and check for any issues such as blurry images or interference from vibrations.
- Monitor Battery Usage: Keep in mind that adding a camera module can increase power consumption. Monitor your drone’s battery usage during flights to ensure sufficient power for both the flight and camera operation. Adjust flight times and battery capacity as necessary.
- Consider Additional Equipment: Depending on your filming or photography needs, you may want to consider additional equipment such as gimbal stabilization systems or FPV (First-Person View) systems. These can enhance the stability and viewing capabilities of your camera footage.
- Securely Fasten Wires: After connecting the camera module, ensure that all wires and cables are securely fastened and properly routed. Use zip ties, adhesive mounts, or cable management accessories to organize the wires and prevent any interference with other drone components.
By adding a camera module to your drone, you can unlock a whole new dimension of creativity and capture breathtaking aerial imagery. In the next step, we will cover the important task of connecting the battery to power your drone.
Step 9: Connecting the Battery
Now that your drone is taking shape, it’s time to connect the battery that will power your aircraft. Follow these steps to ensure a safe and reliable battery connection:
- Select a Compatible LiPo Battery: Choose a lithium polymer (LiPo) battery that matches the voltage and capacity requirements of your drone. Consider factors such as weight, flight time, and power output when selecting a battery. Ensure that the battery’s discharge rate can handle the demands of your drone’s components.
- Prepare the Battery Compartment: Identify the designated battery compartment or area on your drone’s frame. Ensure that the compartment is clear of any obstructions and provides a secure and snug fit for the battery. Remove any protective covers or caps.
- Attach Battery Connectors: Depending on your setup, you may need to install battery connectors to both the battery and the Power Distribution Board (PDB) or flight controller. Solder or securely connect the appropriate connectors to the battery wires and the corresponding ports on the PDB or flight controller.
- Connect the Battery: Gently insert the LiPo battery into the designated compartment, ensuring that the positive and negative terminals align with the appropriate connectors. Do not force the battery or make any forced connections. The connection should be snug but not overly tight.
- Secure the Battery: Use Velcro straps, adhesive mounts, or other secure fastening methods to hold the battery in place within the compartment. Ensure that the battery is firmly secured and will not shift or come loose during flight.
- Secure and Route the Wires: Ensure that the battery wires are properly secured and routed to prevent them from interfering with any moving parts or propellers. Use cable ties, adhesive mounts, or other wire management solutions to keep the wires organized and away from potential hazards.
- Check Battery Capacity and Voltage: Before each flight, check the battery’s capacity and voltage using a LiPo battery checker or voltage meter. Ensure that the battery is adequately charged and in a healthy state for safe operation.
- Monitor Battery Temperature: During flight, monitor the battery’s temperature to prevent overheating. If the battery becomes excessively hot, discontinue the flight and allow it to cool down. Do not charge or use a damaged or swollen LiPo battery.
- Disconnect the Battery: After each flight, disconnect the battery to prevent any accidental discharges or damage to the drone. Disconnect the battery by safely removing the connectors from the ports on the PDB or flight controller.
- Handle Batteries Safely: Follow proper LiPo battery handling and storage procedures to ensure safety. Store and transport LiPo batteries in a fireproof and secure container. Avoid puncturing, crushing, or exposing the batteries to extreme temperatures or moisture.
By connecting the battery properly and following safety guidelines, you are ensuring reliable power to your drone. In the final step, we will cover testing and troubleshooting to ensure smooth operation and address any potential issues.
Step 10: Testing and Troubleshooting
After completing the assembly and connecting all the components, it’s crucial to thoroughly test and troubleshoot your drone to ensure its proper functioning and safety. Follow these steps to test and troubleshoot your drone:
- Perform a Pre-Flight Check: Before each flight, conduct a pre-flight checklist. Check for any loose connections, damaged components, or obstructed propellers. Ensure that the battery is securely connected and adequately charged. Verify that the flight controller is calibrated and the sensors are functioning correctly.
- Conduct a Maiden Flight: Start with a short and controlled maiden flight in a suitable open area. Gradually apply throttle and observe the drone’s response. Check for stable takeoff, smooth control, and balanced flight. Pay attention to any abnormal vibrations, tilting, or drifting issues.
- Monitor Flight Characteristics: During flight, observe the drone’s flight characteristics. Pay attention to stability, responsiveness, and overall behavior. Take note of any unexpected behavior or anomalies and seek to understand their causes.
- Address Stability Issues: If the drone exhibits unstable flight characteristics, such as erratic movements or uncontrollable behavior, first check for any loose connections or improperly balanced components. Adjust the flight controller settings, such as PID values or gains, to improve stability. If necessary, seek assistance from drone forums or communities for troubleshooting advice.
- Check Motor and ESC Temperatures: After flying, check the temperature of the motors and Electronic Speed Controllers (ESCs). Warm motors and ESCs are normal, but excessive heat may indicate overloading or improper airflow. Ensure that your drone’s cooling system, if present, is functioning effectively.
- Inspect the Frame and Components: Regularly inspect the frame, motors, propellers, and other components for signs of wear, damage, or stress. Replace any worn-out or damaged parts to maintain the integrity and performance of your drone.
- Keep Firmware and Software Updated: Stay updated with the latest firmware and software releases for your flight controller, Raspberry Pi, and other components. Regularly check for updates and install them to benefit from performance improvements and bug fixes.
- Record and Analyze Flight Data: Use flight controller software or on-board data logging to record flight data. Analyze the data to identify any patterns or anomalies, which can help troubleshoot and fine-tune your drone’s performance.
- Seek Support if Needed: If you encounter persistent issues or have difficulty troubleshooting on your own, seek support from drone communities, forums, or the manufacturers’ customer support. Experienced enthusiasts and professionals can provide valuable insights and guidance.
- Continue Learning and Improving: Building and testing a drone is an ongoing process. Continuously expand your knowledge and skills, experiment with different settings, and explore new features and functionalities. This will help you optimize your drone’s performance and unlock its full potential.
By thoroughly testing and addressing any issues that arise, you can ensure a safer and more enjoyable drone flying experience. Remember to always prioritize safety and follow local regulations to operate your drone responsibly.
Conclusion
Congratulations on successfully building your own drone with a Raspberry Pi! Through the step-by-step process of gathering the necessary materials, assembling the frame, connecting components, and configuring the software, you have created a customized drone that suits your needs and preferences.
Building a drone is not only a rewarding experience, but it also allows you to gain valuable knowledge about electronics, programming, and aviation. By understanding the intricacies of each component and connection, you have developed the skills to troubleshoot and maintain your drone.
Remember to always prioritize safety when flying your drone. Adhere to local regulations, respect privacy, and fly in appropriate areas. Regularly inspect and maintain your drone to ensure its optimal performance and longevity.
As your skills grow, consider exploring advanced features and enhancements such as gimbal stabilization, advanced camera setups, or autonomous flight capabilities. The possibilities are endless, and the journey of drone building and customization is an ongoing one.
Continue to learn, experiment, and share your experiences with other drone enthusiasts. Engage in online communities, attend drone events, and stay updated with the latest developments in drone technology.
Building a drone is more than just creating a flying machine — it’s an opportunity to unleash your creativity and unlock new perspectives from above. So, grab your drone, venture into the skies, and capture breathtaking moments that were once out of reach.