Introduction
Welcome to the exciting world of DIY camera drones! Building your own camera drone using a Raspberry Pi can be a rewarding and educational experience, allowing you to delve into the realms of both hardware and software. By combining the versatility of the Raspberry Pi with the capabilities of a camera module and the mechanics of a drone, you can create a fully functional aerial photography platform.
With this project, you’ll have the opportunity to gain hands-on experience in assembling electronic components, configuring software, and understanding the principles of flight dynamics. Whether you’re an enthusiast looking to capture stunning aerial footage or a hobbyist eager to explore the intersection of technology and aviation, this guide will walk you through the process of constructing your very own camera drone.
Throughout this tutorial, you’ll learn how to set up the Raspberry Pi, assemble the drone frame, mount the motors and propellers, connect the electronic speed controllers (ESCs), attach the flight controller, install the camera module, and configure the necessary software. By the end, you’ll be ready to test and fly your custom-built camera drone, opening up a world of creative possibilities from the skies.
Materials Needed
Before diving into the construction of your camera drone, it’s essential to gather all the necessary components and tools. Here’s a comprehensive list of the materials you’ll need to bring your project to life:
- Raspberry Pi (preferably a model with Wi-Fi and Bluetooth capabilities)
- MicroSD card (16GB or higher) with Raspbian OS installed
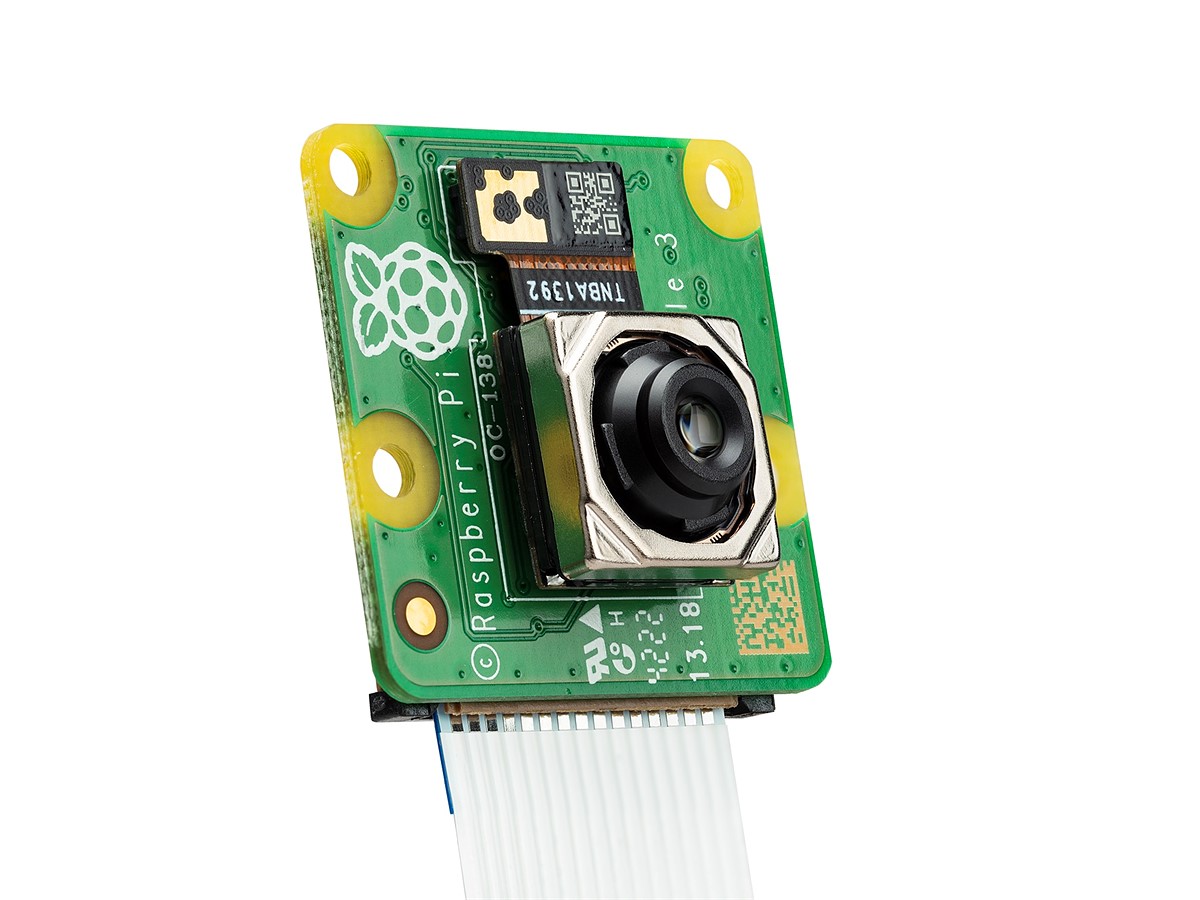
- Camera module compatible with the Raspberry Pi
- Drone frame kit
- Brushless motors and propellers
- Electronic Speed Controllers (ESCs)
- Flight controller board
- Power distribution board
- Lithium polymer (LiPo) battery
- Battery charger
- Wireless controller (transmitter and receiver)
- Propeller balancer
- Soldering iron and solder
- Wire strippers and cutters
- Double-sided tape and zip ties
- Small screwdrivers and hex keys
- Computer with SD card reader and internet access
Additionally, having a dedicated workspace with ample lighting and a clean, organized layout will greatly facilitate the assembly process. With these materials at your disposal, you’ll be well-equipped to embark on this thrilling journey of constructing a camera drone from scratch.
Setting up the Raspberry Pi
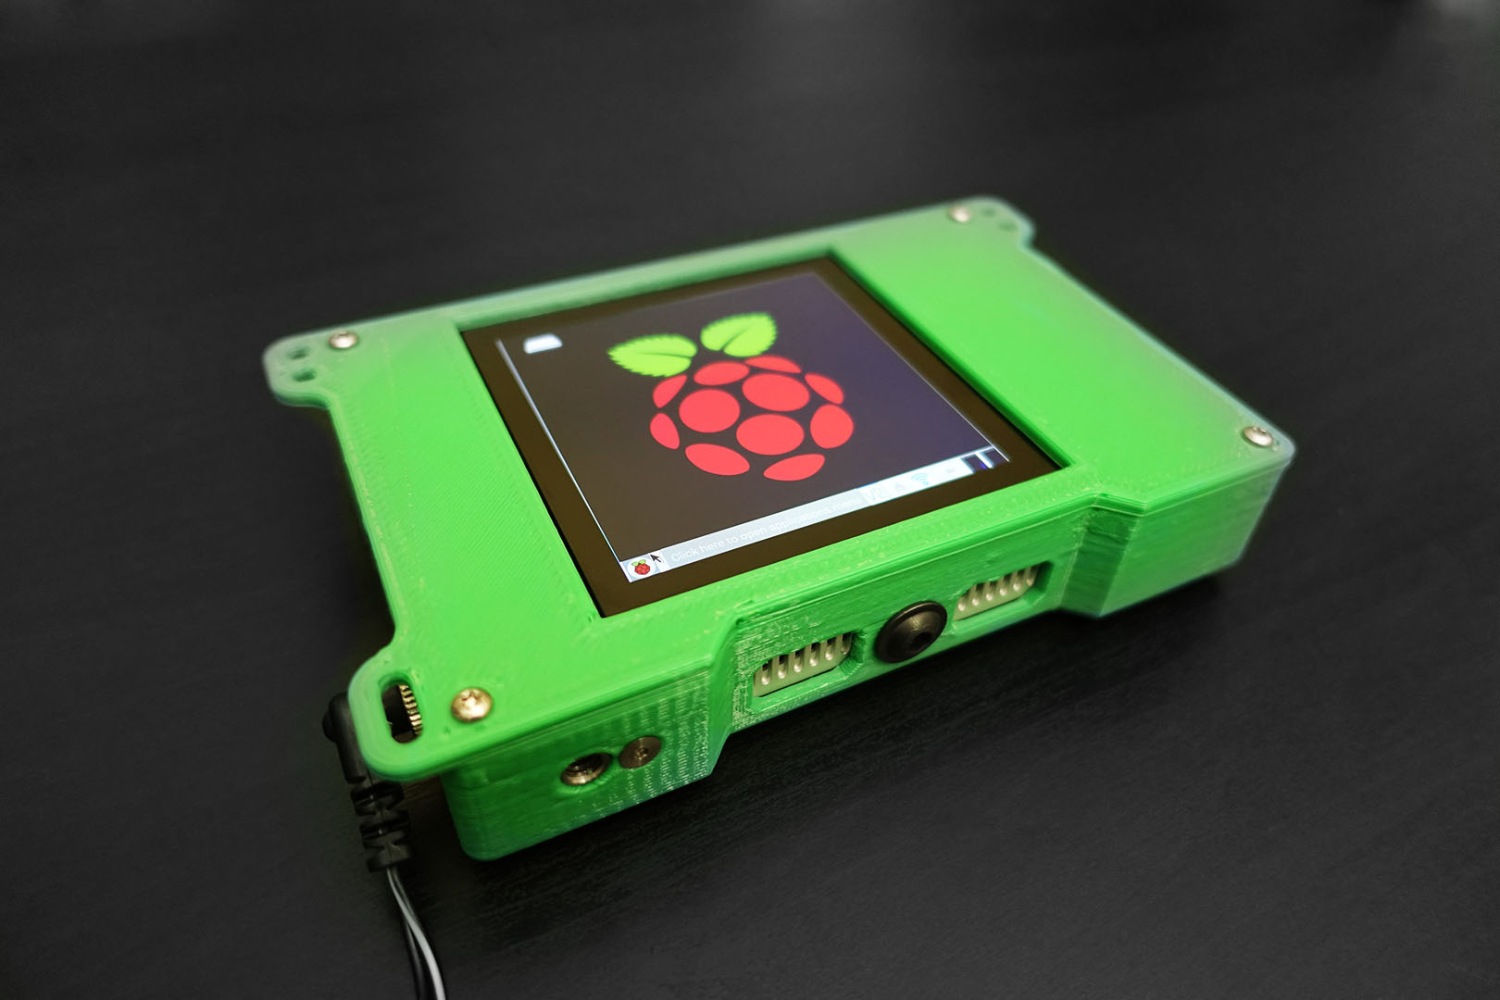
Before delving into the physical construction of the camera drone, it’s crucial to properly configure the Raspberry Pi, which will serve as the brain of the aerial platform. Begin by inserting the microSD card with the Raspbian OS into the Pi and connecting it to a power source. Once booted up, follow these essential steps to set up the Raspberry Pi:
- Initial Configuration: Access the Raspberry Pi’s desktop interface and navigate to the Configuration tool. Here, you can set the correct time zone, enable SSH for remote access, and configure the Wi-Fi connection if applicable.
- Software Updates: Utilize the terminal to run the necessary commands for updating the system and installed packages. This ensures that the Raspberry Pi is equipped with the latest software and security patches.
- Camera Module Activation: Enable the camera interface by accessing the Raspberry Pi Configuration tool and selecting the “Interfaces” tab. Check the box next to “Camera” to activate the camera module for use with the drone.
- Testing the Camera: Verify the functionality of the camera module by capturing a test image or video. This step ensures that the camera is operational and ready to capture stunning aerial footage once integrated into the drone.
- Remote Access: For convenience, set up remote access to the Raspberry Pi using SSH or VNC. This allows you to control the Pi from another device, facilitating software configuration and troubleshooting without the need for a dedicated monitor and keyboard.
By meticulously setting up the Raspberry Pi and activating the camera module, you lay a solid foundation for the subsequent stages of assembling the camera drone. With the Pi primed and ready, you’re now prepared to move on to the physical construction of the drone frame and the integration of electronic components.
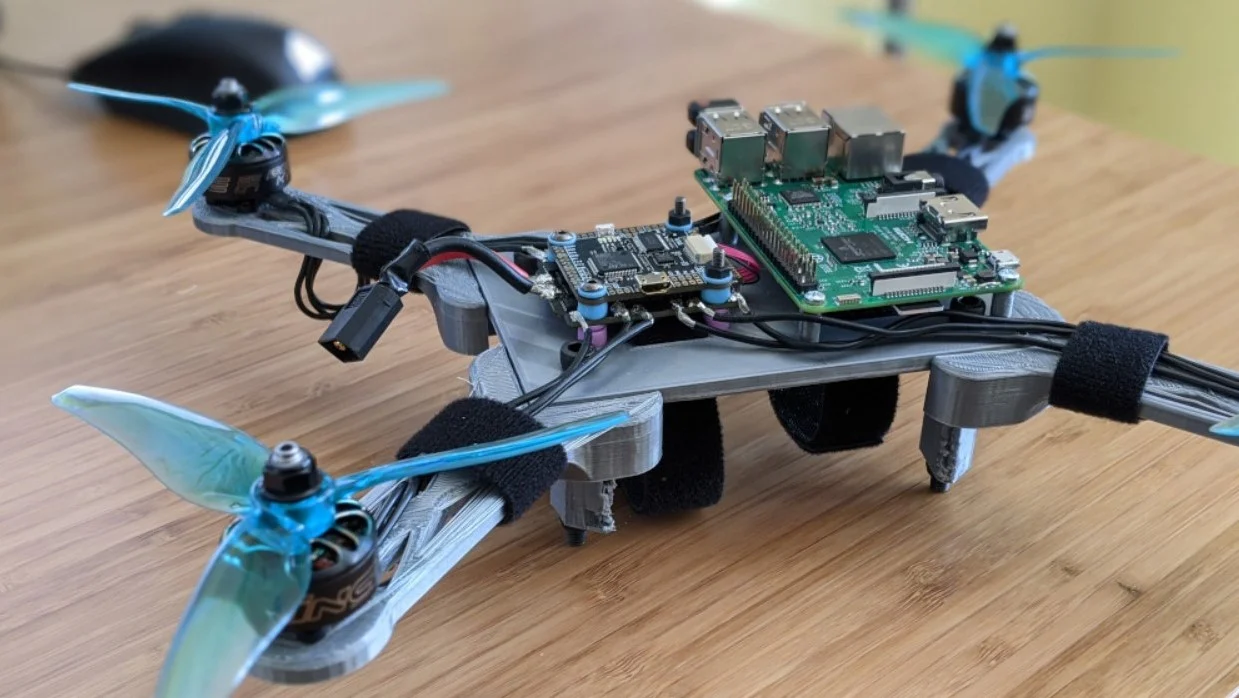
Assembling the Drone Frame
The first physical step in constructing your camera drone involves assembling the drone frame, providing the foundational structure for the aerial platform. Follow these essential guidelines to effectively assemble the drone frame:
- Frame Selection: Choose a drone frame kit that aligns with the size and payload capacity suitable for accommodating the Raspberry Pi, camera module, and associated electronic components. Consider factors such as material durability, weight, and the availability of mounting points for motors and other hardware.
- Component Layout: Lay out the components, including the Raspberry Pi, power distribution board, and flight controller, to visualize their placement within the frame. This step helps in determining the optimal positioning to ensure a balanced and stable center of gravity.
- Frame Assembly: Follow the manufacturer’s instructions to meticulously assemble the drone frame, securing the arms, landing gear, and any additional structural components. Pay careful attention to the alignment and fastening of the frame elements to guarantee structural integrity during flight.
- Mounting Considerations: Ensure that the frame provides ample space and secure mounting points for attaching the motors, electronic speed controllers (ESCs), and the battery. This step is crucial for distributing weight evenly and maintaining the drone’s stability during operation.
- Integration Planning: Anticipate the integration of the electronic components and wiring within the frame, allowing sufficient room for routing cables and ensuring accessibility for maintenance and troubleshooting.
By methodically assembling the drone frame, you establish a robust foundation for the subsequent stages of mounting the motors, connecting the electronic speed controllers, and integrating the flight controller. With the frame in place, you’re ready to progress to the next crucial steps in building your camera drone.
Mounting the Motors and Propellers
With the drone frame assembled, the next pivotal step in constructing your camera drone involves mounting the brushless motors and propellers. This phase is essential for imparting the necessary thrust and lift to achieve stable and controlled flight. Follow these steps to effectively mount the motors and propellers:
- Motor Placement: Identify the designated locations on the drone frame for mounting the brushless motors. Ensure that the motor positions correspond to the recommended configuration for multirotor drones, such as the X or H frame layout, to optimize stability and maneuverability.
- Motor Alignment: Align the motors parallel to the arms of the frame, maintaining uniformity in positioning to promote balanced thrust distribution. Precision in motor alignment is crucial for achieving smooth and predictable flight characteristics.
- Secure Mounting: Utilize appropriate hardware, such as motor mounting screws or clamps, to firmly attach the motors to the frame. Verify the tightness of the fasteners to prevent any potential loosening during operation, which could compromise flight stability.
- Propeller Selection: Choose propellers compatible with the specifications of the motors, considering factors such as diameter, pitch, and rotational direction. Ensure that the propellers are balanced and free from any defects to minimize vibration and enhance overall flight performance.
- Propeller Attachment: Affix the propellers onto the motor shafts, adhering to the designated rotational direction for each propeller. Securely tighten the propeller nuts or adapters to prevent unintended detachment during flight, prioritizing safety and operational reliability.
By meticulously mounting the motors and propellers, you establish the fundamental components for generating thrust and lift, essential for achieving controlled flight and aerial maneuvering. With these critical elements in place, you’re poised to proceed to the subsequent stage of connecting the electronic speed controllers (ESCs) and integrating the flight controller, bringing your camera drone closer to completion.
Connecting the Electronic Speed Controllers (ESCs)
As you progress in the construction of your camera drone, the next vital step involves connecting the electronic speed controllers (ESCs) to the brushless motors and the flight controller. The ESCs play a pivotal role in regulating the speed and direction of the motors, directly influencing the stability and responsiveness of the drone during flight. Follow these essential guidelines to effectively connect the ESCs:
- ESC Identification: Differentiate the ESCs based on their designated motor connections, ensuring that each ESC is matched with the corresponding motor position on the drone frame. This step is crucial for maintaining proper motor rotation and coordination.
- Motor Wiring: Connect the three motor wires from each brushless motor to the corresponding terminals on the ESC, adhering to the standard color-coding for motor phases (typically, yellow, blue, and white). Secure the connections with solder or connectors, ensuring a reliable and low-resistance linkage.
- Battery Power: Connect the power leads from the ESCs to the power distribution board, ensuring that the polarity is correctly aligned to prevent potential damage to the components. Verify the secure fastening of the power connections to guarantee stable power delivery during flight.
- Signal Connection: Establish the signal connections from the ESCs to the designated channels on the flight controller, following the prescribed wiring layout. This step enables the flight controller to regulate the motor speed and responsiveness based on user input and flight conditions.
- Calibration and Testing: Calibrate the ESCs as per the manufacturer’s instructions, ensuring uniform motor response and synchronization. Test the motor rotation and speed control to verify the proper functionality of the ESCs and address any potential issues before flight operations.
By meticulously connecting the electronic speed controllers (ESCs) to the motors and flight controller, you establish the crucial linkages for motor control and power distribution, laying the groundwork for precise and stable flight performance. With the ESCs integrated into the drone’s electrical system, you’re now prepared to advance to the subsequent stages of attaching the flight controller and installing the camera module, bringing your camera drone closer to its operational state.
Attaching the Flight Controller
As you continue the assembly of your camera drone, the next critical step involves attaching the flight controller, a pivotal component responsible for stabilizing the aircraft, processing user commands, and executing autonomous flight functions. Follow these essential guidelines to effectively attach the flight controller to your drone:
- Mounting Location: Select a suitable location within the drone frame to securely mount the flight controller, ensuring accessibility for wiring and configuration while maintaining the drone’s center of gravity. Optimal positioning contributes to stable flight characteristics and facilitates maintenance and adjustments.
- Mounting Hardware: Utilize vibration-damping mounting hardware, such as rubber standoffs or foam pads, to isolate the flight controller from high-frequency vibrations and external disturbances. This minimizes the impact of motor and propeller-induced vibrations on the flight controller’s sensors and processing capabilities.
- Wiring Connections: Establish the necessary wiring connections between the flight controller and the electronic speed controllers (ESCs), receiver, and power distribution board. Adhere to the prescribed wiring layout, ensuring secure and insulated connections to prevent signal interference and power fluctuations.
- Orientation Calibration: Calibrate the orientation of the flight controller based on the drone’s configuration (e.g., quadcopter, hexacopter) using the designated calibration software or firmware. This step ensures that the flight controller accurately interprets the drone’s orientation and motion during flight operations.
- Configuration Setup: Access the flight controller’s configuration software to set parameters such as motor layout, stabilization modes, and transmitter endpoints. Tailor the configuration to align with your specific drone setup and flight preferences, optimizing the performance and responsiveness of the aircraft.
By meticulously attaching the flight controller to your drone, you establish a critical component for stabilizing and controlling the aircraft, essential for achieving precise and predictable flight characteristics. With the flight controller seamlessly integrated into the drone’s electrical system, you’re now poised to advance to the next pivotal stage of installing the camera module, bringing your camera drone closer to its operational state.
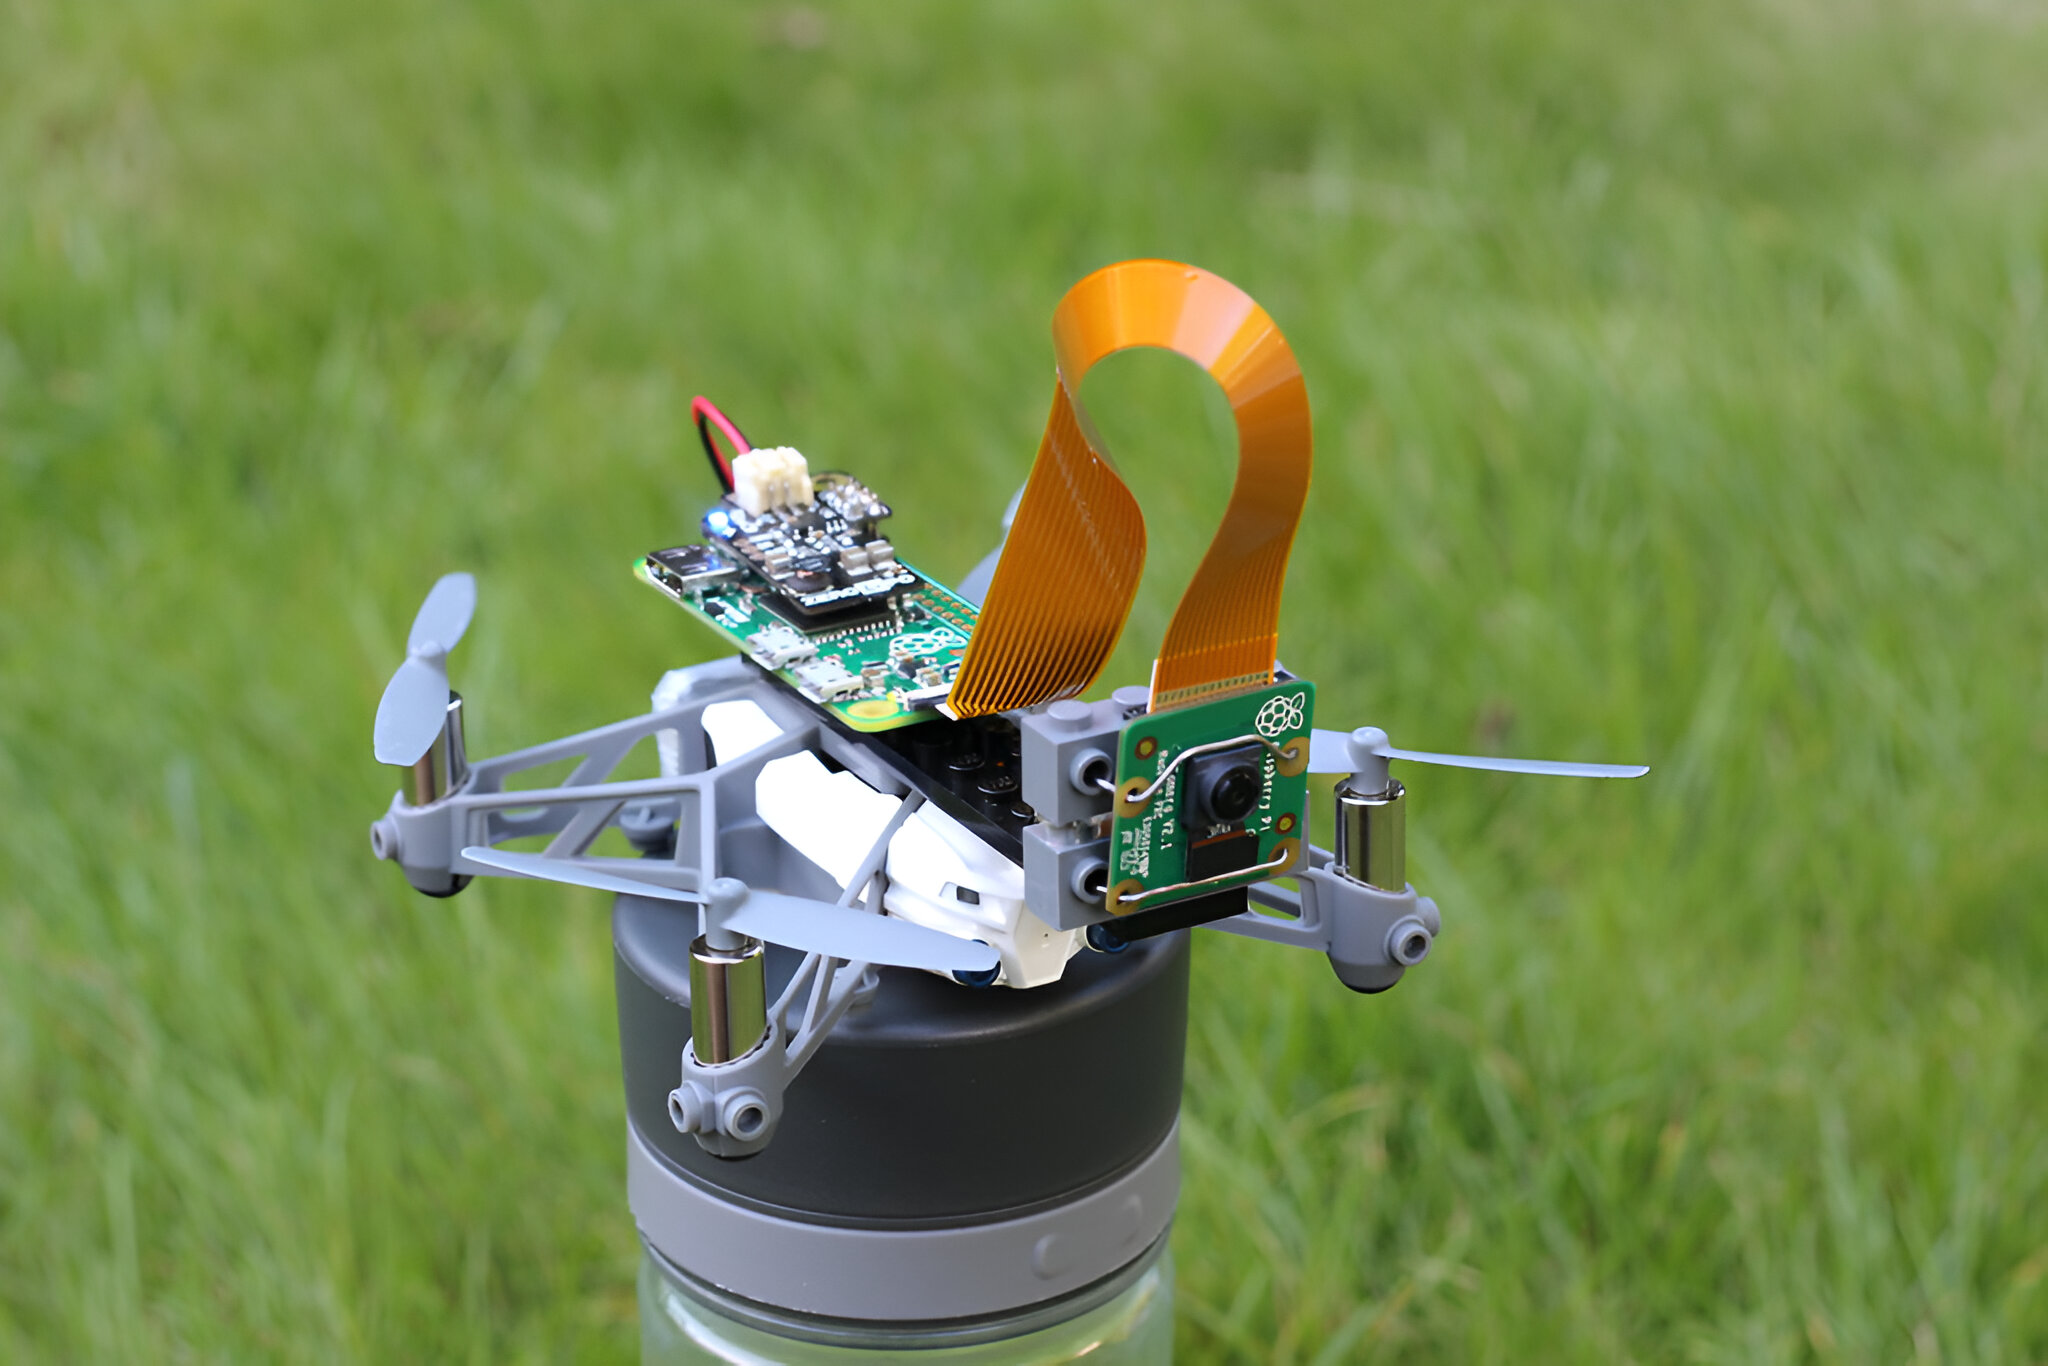
Installing the Camera Module
As you approach the final stages of constructing your camera drone, the installation of the camera module marks a significant step in transforming the aircraft into a versatile aerial photography platform. Follow these essential guidelines to effectively install the camera module onto your drone:
- Camera Mounting: Securely mount the camera module onto the designated mounting platform or bracket within the drone frame, ensuring a stable and vibration-free arrangement. Consider utilizing vibration-damping materials or mounts to minimize the impact of airborne vibrations on the camera, thereby enhancing image and video stability.
- Wiring Integration: Establish the necessary wiring connections between the camera module and the Raspberry Pi, ensuring proper alignment and secure connections. Adhere to the prescribed wiring layout, and consider using cable management techniques to organize and protect the wiring within the drone frame.
- Camera Orientation: Adjust the camera module’s orientation to align with the desired field of view and imaging requirements. Ensure that the camera’s viewpoint complements the drone’s flight dynamics and intended photography or videography objectives, optimizing the captured visual content.
- Software Configuration: Access the Raspberry Pi’s software interface to configure the camera module settings, such as resolution, frame rate, and image capture parameters. Customize the camera’s operational parameters to suit your specific aerial photography or videography preferences.
- Testing and Calibration: Conduct comprehensive testing of the camera module’s functionality in conjunction with the drone’s flight operations. Verify the camera’s imaging quality, stability, and responsiveness to ensure seamless integration into the aerial platform.
By meticulously installing the camera module onto your drone, you elevate the aircraft into a capable aerial photography platform, ready to capture stunning imagery and footage from unique vantage points. With the camera seamlessly integrated into the drone’s system, you’re now prepared to advance to the final stages of configuring the software and conducting test flights, bringing your camera drone to its operational readiness.
Configuring the Software
As you near the completion of your camera drone construction, configuring the software is a crucial step that empowers the drone with operational capabilities and enhances its functionality. Follow these essential guidelines to effectively configure the software for your camera drone:
- Raspberry Pi Setup: Access the Raspberry Pi’s operating system and ensure that it is updated to the latest version. Install any required software packages and libraries to support the functionality of the camera module, flight controller, and wireless communication.
- Camera Interface Configuration: Access the camera interface settings on the Raspberry Pi and adjust parameters such as exposure, white balance, and image format to optimize the camera’s performance for aerial photography or videography. Test the camera’s functionality to ensure seamless integration with the drone’s system.
- Flight Controller Calibration: Utilize the flight controller’s configuration software to calibrate sensor inputs, motor response, and stabilization parameters. Fine-tune the flight controller settings to achieve optimal flight performance and responsiveness tailored to your specific drone configuration.
- Wireless Controller Binding: If utilizing a wireless controller for manual flight control, ensure that the controller is properly bound to the receiver and configured to interface with the flight controller. Verify the functionality of control inputs and responsiveness to guarantee reliable manual flight operations.
- Autonomous Flight Programming: If desired, explore the possibilities of autonomous flight programming using compatible software or flight controller firmware. Configure autonomous flight modes, waypoints, and mission parameters to enable automated flight operations for aerial mapping or surveying applications.
By meticulously configuring the software for your camera drone, you empower the aircraft with the necessary operational settings and capabilities, setting the stage for seamless flight operations and aerial photography or videography missions. With the software finely tuned and optimized, your camera drone is poised for the final stages of testing and conducting maiden flights, bringing your custom-built aerial platform to life.
Testing and Flying the Camera Drone
As you approach the culmination of your camera drone construction, the testing and maiden flights represent the pivotal phase where all your meticulous assembly and configuration efforts come to fruition. Follow these essential guidelines to effectively test and fly your camera drone:
- Pre-Flight Inspection: Conduct a comprehensive pre-flight inspection of the drone, verifying the secure fastening of all components, the integrity of wiring connections, and the functionality of critical systems such as motors, propellers, and the flight controller. Ensure that the battery is fully charged and properly secured within the drone frame.
- Location Selection: Choose a suitable outdoor flying location with ample space, minimal obstructions, and favorable weather conditions. Avoid flying near populated areas, airports, or restricted airspace, adhering to local regulations and safety guidelines.
- Flight Readiness Check: Power on the drone and perform a final systems check, verifying that the flight controller initializes properly, the motor responses are uniform, and the wireless controller (if used) is successfully linked to the drone’s receiver.
- Maiden Flight: Execute cautious and controlled takeoff, gradually ascending to a safe altitude to assess the drone’s stability, responsiveness, and flight characteristics. Practice basic flight maneuvers, such as hovering, forward/backward movement, and gentle turns, to evaluate the drone’s handling and performance.
- Camera Functionality Test: Engage the camera module to capture test images or video footage during flight, assessing the imaging quality, stability, and responsiveness of the camera system. Verify that the camera integrates seamlessly with the drone’s flight operations and captures the desired visual content.
- Flight Performance Evaluation: Assess the overall flight performance, stability in varying wind conditions, and the responsiveness of manual and autonomous flight modes if applicable. Identify any potential issues or areas for improvement to refine the drone’s operational capabilities.
By meticulously testing and flying your camera drone, you validate the successful integration of all components and systems, ensuring that the aircraft operates reliably and performs as intended. With successful test flights and operational validation, your custom-built camera drone is ready to embark on a myriad of aerial photography and videography missions, capturing captivating imagery from the skies.