Introduction
Welcome to our guide on how to block an app on your Amazon Fire Tablet. Whether you are a concerned parent wanting to restrict certain apps on your child’s device or simply seeking to reduce distractions by blocking addictive apps on your own device, we’ve got you covered. With the Amazon Fire Tablet’s built-in parental controls feature, you can easily block specific apps and prevent them from being accessed.
By blocking apps, you can promote a healthier and more productive digital experience, ensuring that you or your loved ones engage with the apps that align with your priorities. Whether it’s limiting social media usage, curbing gaming addiction, or preventing access to inappropriate content, blocking apps can be an effective solution.
In this step-by-step guide, we will walk you through the process of identifying the app you want to block and how to apply the block using the Amazon Fire Tablet’s settings menu. We will also cover necessary steps, such as enabling parental controls and creating a PIN, to ensure effective app blocking.
Before we dive into the step-by-step instructions, please note that the exact menu and option names may vary slightly depending on the model and software version of your Amazon Fire Tablet. Nevertheless, the overarching process remains the same, and we will provide general instructions that should be applicable to most devices.
Step 1: Identify the App to Block
The first step to block an app on your Amazon Fire Tablet is to identify the specific app you want to restrict. Take a moment to consider which app is causing concern or distraction and make a note of its name.
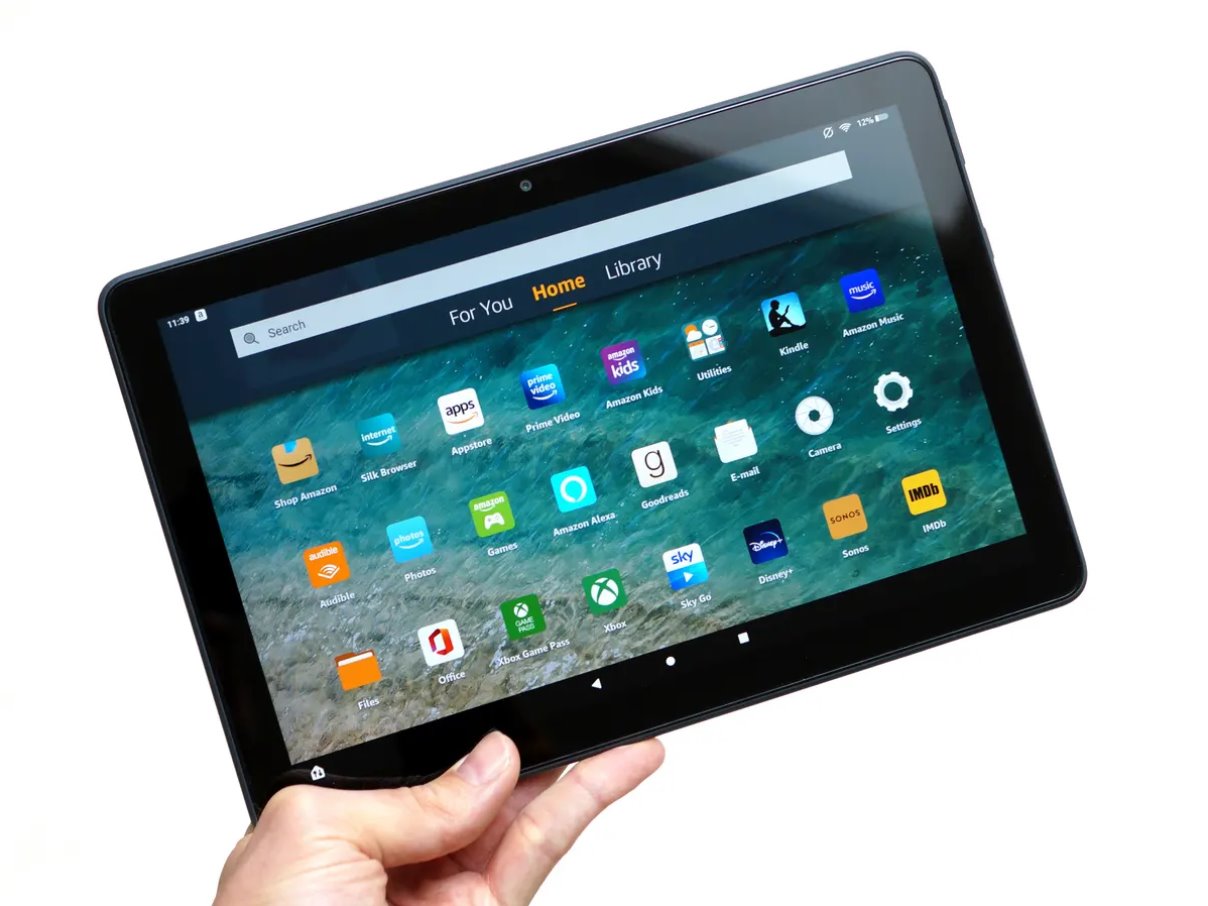
To easily identify the app, you can navigate to the home screen of your Amazon Fire Tablet and locate the app icon. The app icons are typically displayed in a grid-like layout, allowing you to quickly find the desired app.
If you are unsure of the app’s name or can’t find it on the home screen, you can access the app library by swiping up from the bottom of the screen. This will reveal a list of all the installed apps on your device. Scroll through the list and look for the app you want to block.
Additionally, you can use the search functionality on your Amazon Fire Tablet to search for the app by name. Simply swipe down from the top of the screen to access the search bar, type in the name of the app, and tap on the app when it appears in the search results.
Once you have identified the app you want to block, you are ready to proceed to the next step, where we will access the settings menu to begin the app blocking process.
Step 2: Access the Settings Menu
Now that you have identified the app you want to block on your Amazon Fire Tablet, it’s time to access the settings menu where you can find the necessary options to apply the block.
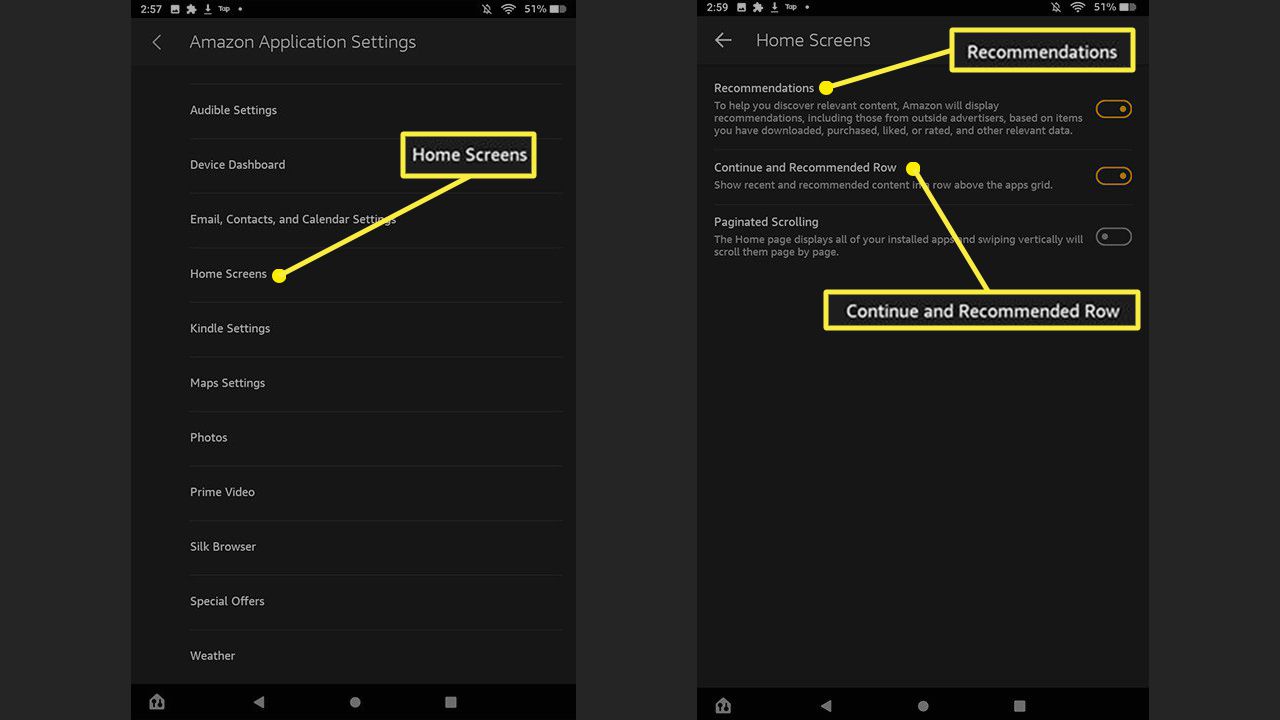
To access the settings menu, swipe down from the top of the screen to reveal the notification panel. From the top-right corner of the notification panel, tap on the “Settings” gear icon. This will open the settings menu, which is where you can customize various aspects of your device’s functionality.
On the settings menu, you will find a list of different categories and options. Scroll down until you locate the “Security & Privacy” category. Tap on it to access the security and privacy settings of your Amazon Fire Tablet.
Depending on the software version of your device, the “Security & Privacy” category may be listed as “Security” or “Security & Device Options.” The exact naming may vary, but the concept remains the same.
Once you have found the “Security & Privacy” category, you are ready to proceed to the next step, where we will enable parental controls to gain control over app blocking and other restrictions.
Step 3: Select “Security & Privacy”
In this step, we will delve into the “Security & Privacy” settings menu, where you can enable parental controls and set up app blocking on your Amazon Fire Tablet.
Once you have accessed the settings menu, scroll down until you find the “Security & Privacy” category. Tap on it to enter the security and privacy settings section.
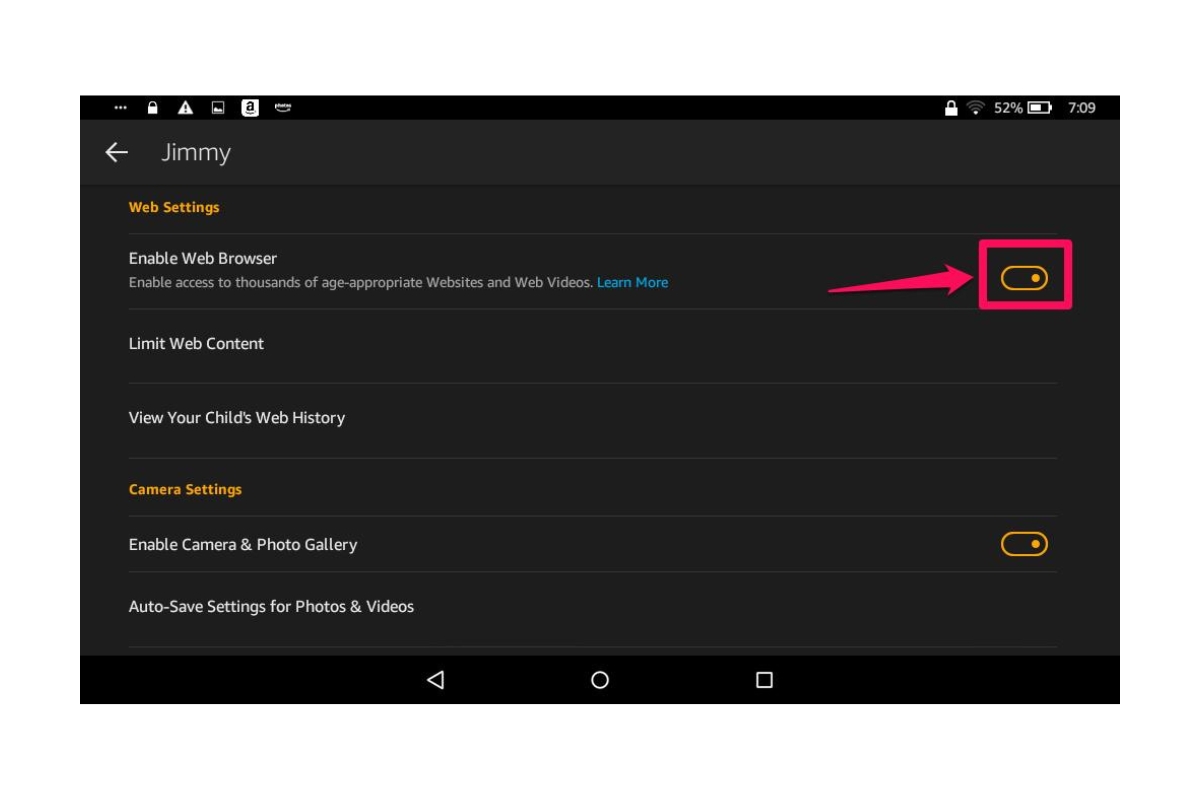
Within the “Security & Privacy” settings, you may encounter different options related to device security, privacy, and content restrictions. Look for the option that corresponds to parental controls or content restrictions. It may be labeled as “Parental Controls,” “Restrictions,” or something similar.
Tap on the parental controls option to proceed to the next step.
On some Amazon Fire Tablet models, you may need to provide your device PIN or password to access the parental controls settings. This is to ensure that only authorized users can make changes to these important security settings.
Once you have successfully entered the parental controls settings, you are now ready to enable parental controls and set up your desired app blocking restrictions.
In the upcoming steps, we will guide you through the process of activating parental controls, creating a PIN, and finally, blocking the app you identified earlier. Stay tuned!
Step 4: Enable Parental Controls
Enabling parental controls is an essential step in gaining control over app blocking and other restrictions on your Amazon Fire Tablet. By activating parental controls, you can customize the settings according to your specific needs and preferences.
Within the parental controls settings, you will find various options and restrictions that you can apply to your device. These options include app blocking, content filtering, screen time limits, and more.
To enable parental controls, start by locating the option to “Turn On” or “Enable” parental controls. It may be prominently displayed at the top of the parental controls settings page, or it may be within a separate section specifically for activation.
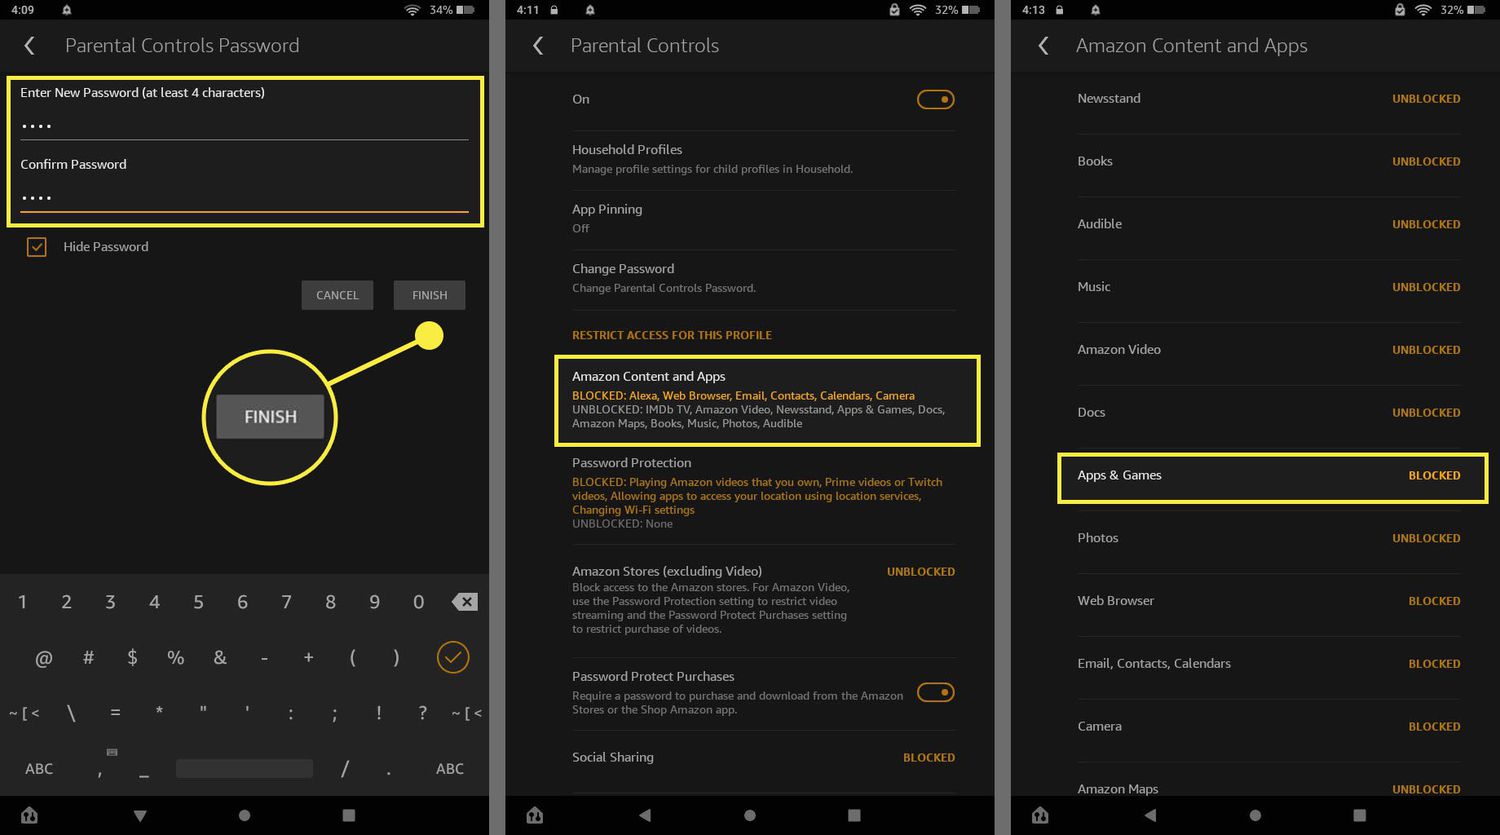
Tap on the “Turn On” or “Enable” option to activate parental controls. Depending on your device’s software version, you may be prompted to create a PIN or password to secure and manage the parental controls settings. Follow the on-screen instructions to complete this step.
Keep in mind that the PIN or password you create here will be required whenever you want to make changes to the parental controls settings or access any blocked apps or content.
Once you have successfully enabled parental controls, you have laid the foundation for applying app blocking on your Amazon Fire Tablet. In the next step, we will guide you through the process of creating a PIN, which will be used to further customize and enforce the app blocking restrictions.
Step 5: Create a PIN
Creating a PIN is a crucial part of setting up parental controls on your Amazon Fire Tablet. The PIN acts as a security measure that allows you to manage and modify the app blocking settings and access to restricted content.
To create a PIN, navigate to the parental controls settings on your device. This is the same section where you enabled parental controls in the previous step.
Look for the option to “Create PIN” or “Change PIN.” Tap on it to initiate the PIN setup process.
Follow the on-screen instructions to enter and confirm your desired PIN. Keep in mind that the PIN should be something easily memorable for you but challenging for others to guess.
Once you have successfully created your PIN, make sure to remember it as you will need it to make any changes to the parental controls settings or access blocked apps/content.
Additionally, you can choose to enable “Use PIN for Purchases” if you want to prevent unauthorized purchases within apps or from the Amazon Appstore. This feature adds an extra layer of security by requiring the PIN whenever a purchase is attempted.
With the PIN created and enabled, you are now ready to proceed to the next step and start blocking the app you identified earlier to promote a more controlled and focused digital experience.
Step 6: Block the App
Now that you have enabled parental controls and created a PIN, you can proceed to block the specific app on your Amazon Fire Tablet.
Start by accessing the parental controls settings on your device. This is where you enabled parental controls and set up your PIN in the previous steps.
Look for the option or menu that allows you to customize app blocking or manage app restrictions. Depending on your device’s software version, this option may be labeled as “Manage Apps,” “App Blocking,” or something similar.
Tap on the appropriate option to proceed to the app blocking settings.
Within the app blocking settings, you will typically see a list of all the installed apps on your Amazon Fire Tablet. Scroll through the list and locate the app you want to block.
Once you find the app, you will often see a toggle switch or checkbox next to it. Activate the toggle switch or check the box to block the app. This action will restrict access to the app on your device.
Depending on your preferences and requirements, you may have the option to block the app entirely, meaning it won’t be accessible at all, or you may have more granular control options, such as setting time restrictions for the app.
If you want to apply additional restrictions, such as time limits or content filters for the blocked app, explore the app blocking settings further to see if those options are available.
Once you have successfully selected and blocked the app, you can exit the settings menu. The app will now be inaccessible on your Amazon Fire Tablet, and the restrictions will remain in place until you make any changes using your PIN in the parental controls settings.
Great job! You have successfully blocked the app on your Amazon Fire Tablet. In the final step, we will briefly cover how to confirm that the blocking has been applied.
Step 7: Confirm App Blocking
After blocking the app on your Amazon Fire Tablet, it’s essential to confirm that the blocking has been applied successfully. This step ensures that you have successfully restricted access to the app you wanted to block.
To confirm the app blocking, exit the settings menu and navigate to the home screen of your Amazon Fire Tablet.
Locate the app icon of the blocked app that you previously identified and blocked. Try tapping on the app icon to access the app.
If the blocking has been applied correctly, you should see a message or prompt notifying you that the app is blocked and cannot be accessed.
Additionally, you may notice that the blocked app’s icon may appear dimmed or may have a small lock symbol overlay indicating that it is inaccessible due to the app blocking settings.
If you encounter any issues or the app is still accessible despite being blocked, double-check the app blocking settings in the parental controls. Ensure that you have selected the correct app for blocking and that the blocking toggle switch or checkbox is activated.
Remember, to make any changes to the app blocking settings or access the blocked app, you will need to enter your previously created PIN.
By confirming the app blocking, you can have peace of mind knowing that your desired app restrictions have been successfully implemented on your Amazon Fire Tablet.
Congratulations! You have completed all the necessary steps to block an app on your Amazon Fire Tablet. Enjoy a more controlled and focused digital experience on your device!
Conclusion
Blocking an app on your Amazon Fire Tablet is an effective way to take control of your digital experience and enforce restrictions on specific apps. Whether you want to limit screen time, prevent access to certain content, or create a distraction-free environment, the built-in parental controls feature provides a straightforward solution.
In this guide, we walked you through the step-by-step process of blocking an app on your Amazon Fire Tablet. We started by identifying the app you wanted to block, accessing the settings menu, and enabling parental controls. We then guided you through creating a PIN and blocking the app in question. Finally, we emphasized the importance of confirming the app blocking to ensure successful implementation.
Remember to regularly review and update your app blocking settings as your needs and priorities may change over time. Additionally, make sure to keep your PIN confidential to maintain the integrity of your app restrictions.
By blocking apps, you can cultivate a healthier and more focused digital environment for yourself or your loved ones. Take advantage of the app blocking feature on your Amazon Fire Tablet to align your digital habits with your goals and priorities.
We hope this guide has been helpful in successfully blocking an app on your Amazon Fire Tablet. Enjoy a more controlled and intentional digital experience!