Introduction
In the world of online communication and communities, Discord has quickly emerged as one of the most popular platforms for gamers, hobbyists, and various interest groups to connect and interact. With its multitude of features and customizable options, Discord provides users with a seamless experience to collaborate and engage with others.
However, in any online community, there may be instances where it becomes necessary to remove or ban a user who is violating the rules or causing disruption. Discord provides server administrators with the ability to ban users, effectively removing them from the server and restricting their access.
In this article, we will guide you through the process of banning someone on Discord. Whether you are a server administrator dealing with disruptive users or a member who wants to learn more about the moderation tools available, this step-by-step guide will help you navigate the process easily.
Please note that banning someone on Discord should be done judiciously and in accordance with the server’s rules and guidelines. It is important to foster a positive atmosphere and ensure a safe environment for all members. With that in mind, let’s dive into the process of banning users on Discord.
Step 1: Access Server Settings
To begin the process of banning a user on Discord, you need to have administrative privileges on the server. Only users with the necessary permissions can access and modify server settings. Here’s how you can access the server settings:
- Launch the Discord application on your device and log in to your account.
- Select the server where you want to ban the user from the left-hand sidebar. The server’s name will be listed under the “My Servers” section.
- Once you have selected the server, look for the server’s name at the top left corner of the application and locate the small arrow icon just beside it. Click on this arrow to reveal the server’s drop-down menu.
- From the drop-down menu, select “Server Settings.” This will open the settings menu for the selected server.
By following these steps, you will successfully access the server settings, allowing you to proceed with the banning process. It’s important to note that only server administrators or users with the necessary administrative permissions can perform this action.
Each server has its own unique settings and configuration options, so it’s worth exploring the available options to familiarize yourself with the server’s specific setup. Now that you have accessed the server settings, you are ready to move on to the next step: navigating to the members tab.
Step 2: Navigate to the Members Tab
Once you have accessed the server settings, the next step is to navigate to the Members tab. This tab contains all the information about the users on the server and allows you to manage their roles, permissions, and bans. Here’s how you can find the Members tab:
- In the server settings menu, you will see a list of various options on the left-hand sidebar. Look for the “Members” option and click on it.
- Upon clicking on the Members tab, you will be presented with a comprehensive list of all the users on the server. This list displays the usernames, avatars, and status of each member.
- Scroll through the list or use the search bar at the top to find the specific user you want to ban. Discord allows you to search for users by their username or nickname.
By navigating to the Members tab, you gain access to the list of users on the server, making it easier to find the individual you wish to ban. It’s essential to locate the correct user before proceeding with the banning process to ensure that you take the appropriate action.
Take your time to browse through the list and double-check the user’s identity. Banning an innocent user by mistake can be a significant inconvenience for both parties involved. Once you have located the user you want to ban, you can move on to the next step: selecting the user’s profile.
Step 3: Locate the User to be Banned
After navigating to the Members tab, the next step is to locate the specific user you wish to ban from the Discord server. Discord provides you with several options to find and identify users. Here’s how you can locate the user to be banned:
- Scan through the list of members displayed on the Members tab. Look for the username, avatar, or nickname of the user you want to ban.
- If you have a large server with numerous members, scrolling through the list may be time-consuming. In that case, you can use the search bar at the top of the Members tab to type in the username or nickname of the user you want to ban. Discord will automatically filter the results, making it easier to find the specific user.
It is crucial to correctly identify the user you want to ban. Mistakenly banning the wrong user can lead to confusion and unnecessary disruption within the server. Take your time to verify the user’s identity by cross-referencing their username, avatar, or nickname.
If you still cannot find the user you want to ban, double-check the spelling of their username or nickname. Discord’s search function is case-sensitive, so make sure to use the correct capitalization.
Once you have successfully located the user you wish to ban, you can proceed to the next step, which involves selecting the user’s profile and accessing their information.
Step 4: Select the User’s Profile
After locating the user you want to ban on Discord, the next step is to select their profile. By selecting the user’s profile, you gain access to their specific information and moderation options. Here’s how you can select the user’s profile:
- On the Members tab, find the user you wish to ban. You can identify them by their username, avatar, or nickname.
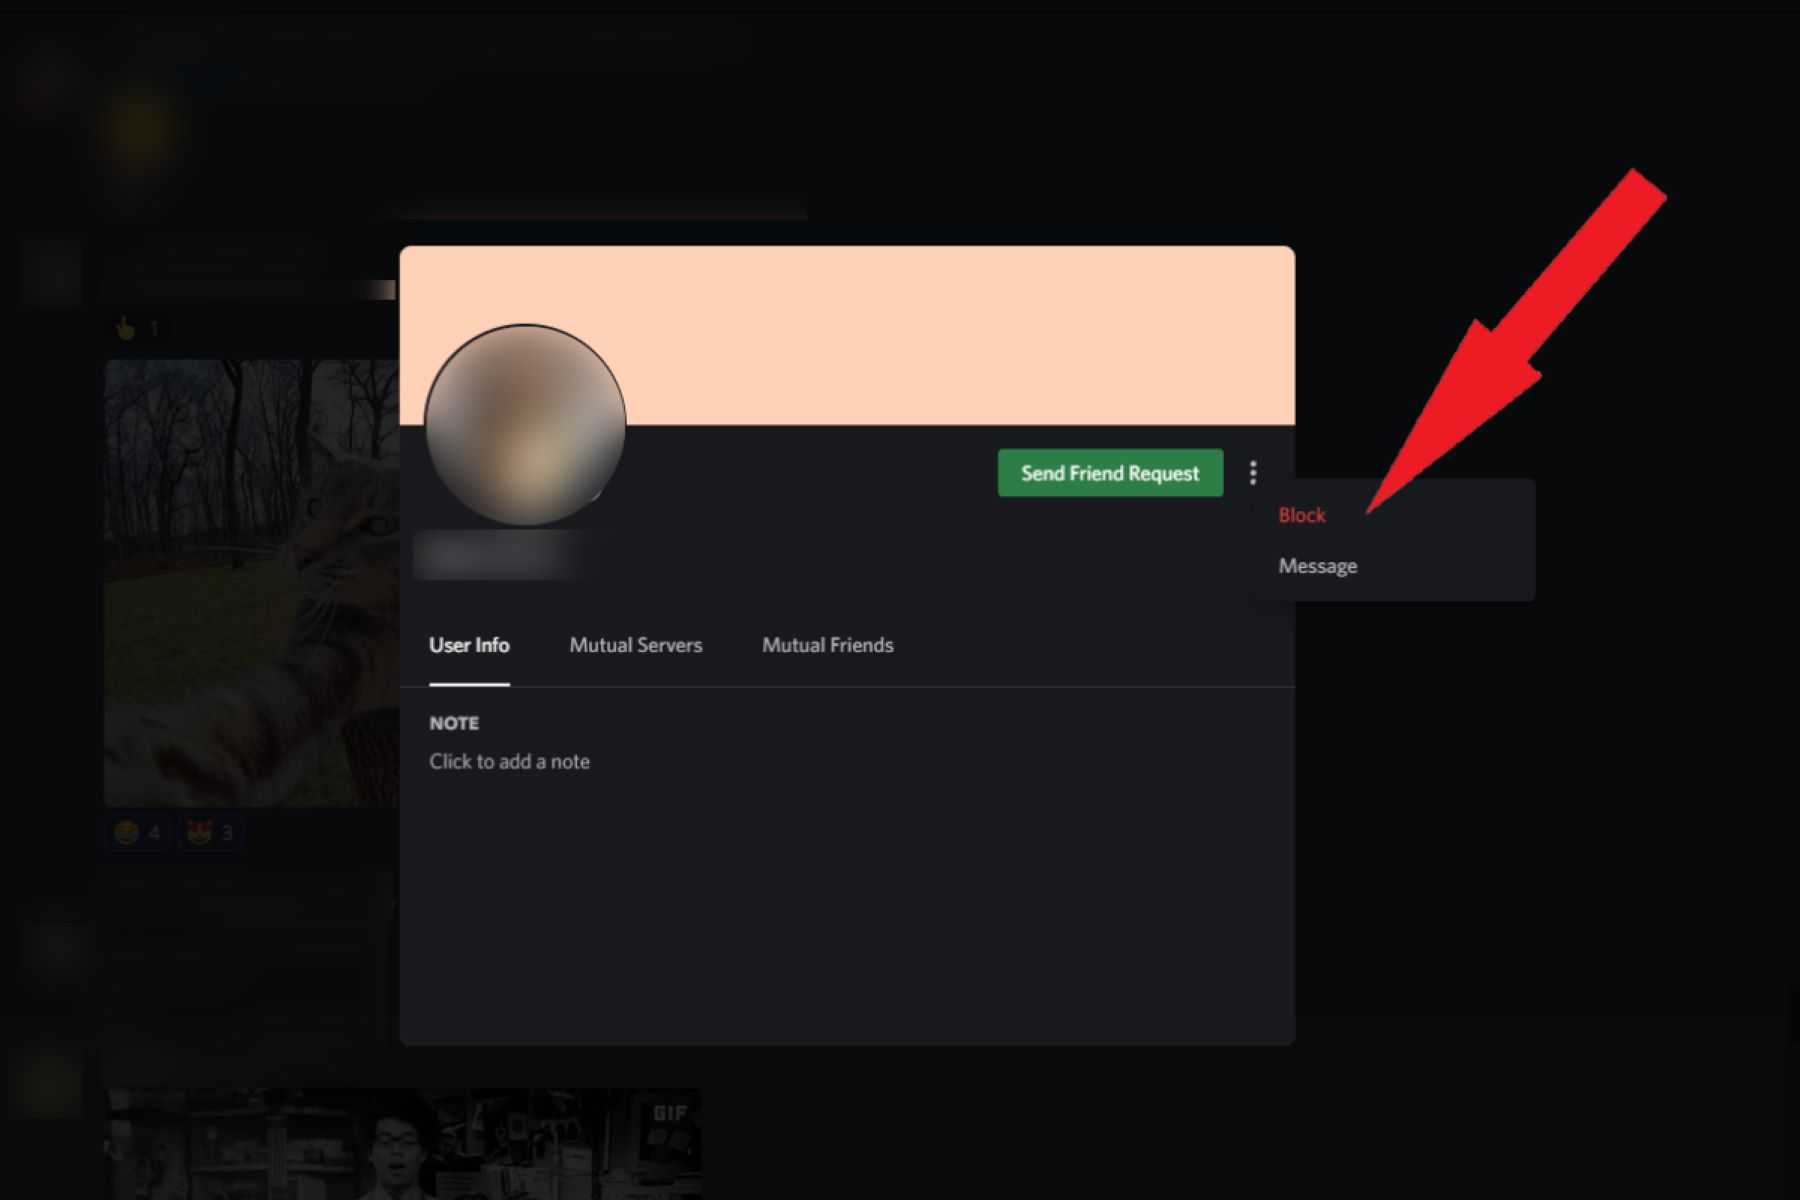
- Hover your mouse cursor over the user’s name, avatar, or nickname. This action will reveal a series of icons and options.
- Click on the username or nickname of the user to open their profile.
When you select the user’s profile, you will be able to view their details, including their roles, activity status, and other relevant information. Additionally, you will have access to various moderation options to manage the user’s actions within the server.
It is essential to ensure that you have selected the correct user’s profile before proceeding to the next step of the banning process. Double-check the username or nickname to avoid mistakenly targeting the wrong user.
Now that you have successfully selected the user’s profile, you can move on to the next step, which involves clicking on the ban button to initiate the banning process.
Step 5: Click on the Ban Button
After selecting the user’s profile, the next step in the process of banning someone on Discord is to click on the ban button. Discord provides a straightforward and intuitive interface to perform this action. Here’s how you can proceed:
- Make sure you are on the user’s profile page, displaying their information and moderation options.
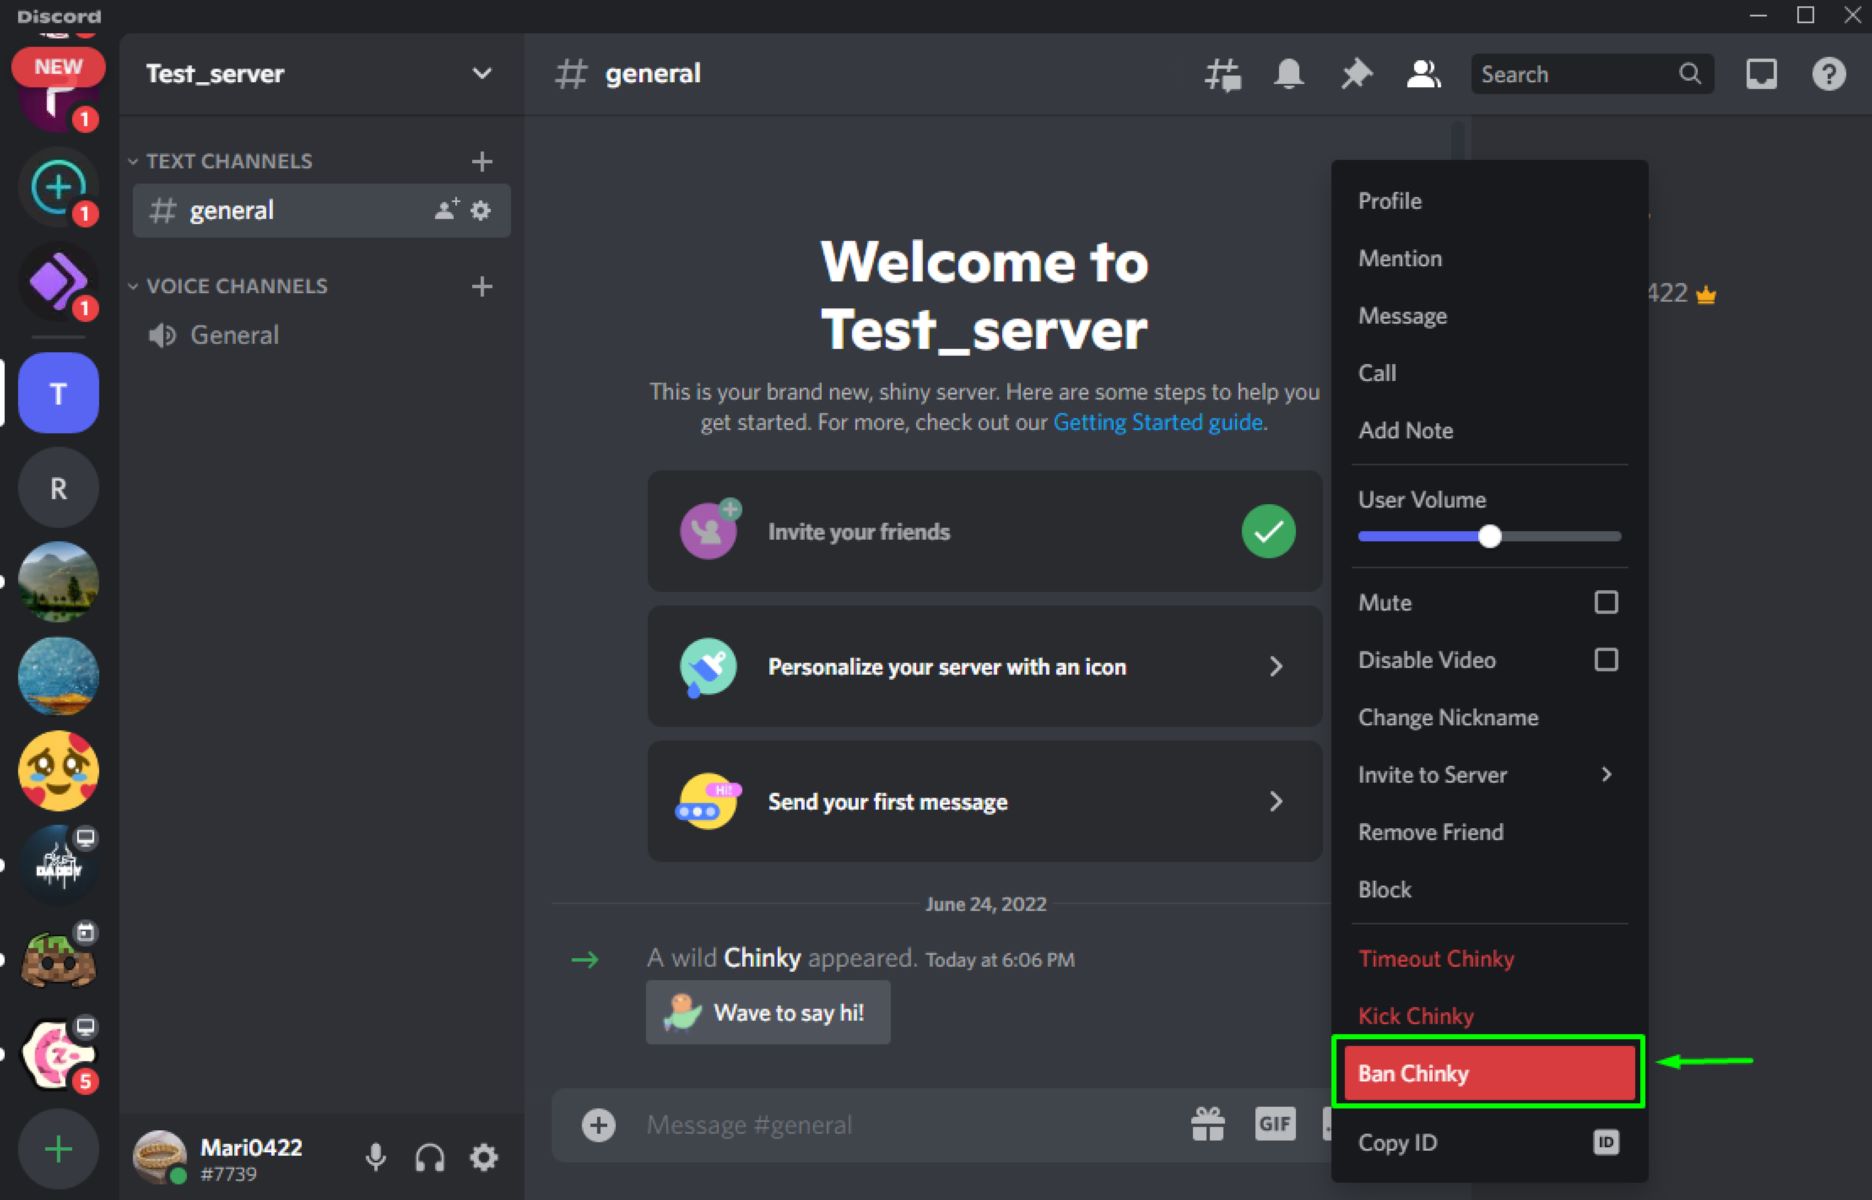
- Look for the administrative options or moderation tools available on the profile page. Discord typically places these options in a visible and accessible location.
- Locate and click on the ban button. The ban button is usually represented by an icon or text that clearly indicates its function.
By clicking on the ban button, you are initiating the banning process for the selected user. Discord will prompt you to confirm the ban before proceeding, ensuring that you take this action deliberately and with caution.
It’s important to note that once you ban a user, they will no longer be able to access the server or interact with its members. Banning should be reserved for individuals who violate the server’s rules or engage in disruptive behavior.
By successfully clicking on the ban button, you have completed a significant step in the process of banning someone on Discord. The next step involves confirming the ban, which we will cover in detail in the following section.
Step 6: Confirm the Ban
Once you have clicked on the ban button, Discord will prompt you to confirm the ban before it takes effect. This confirmation step ensures that you are intentionally banning the user and helps prevent accidental bans. Here’s how you can proceed to confirm the ban:
- After clicking on the ban button, a pop-up or confirmation window will appear on your screen. This window will typically display the user’s name and additional information about the ban.
- Take a moment to review the details and ensure that you have selected the correct user for banning.
- Read any additional information or options presented in the confirmation window. Discord may provide checkboxes or settings that allow you to customize the ban further.
- If you are certain about the banning action, click on the confirmation or proceed button to execute the ban. This action will permanently remove the user from the server.
Confirming the ban is a crucial step to ensure that you are taking the appropriate action against the user. It helps prevent accidental bans and provides an opportunity to review the ban details before finalizing the process.
It is important to note that once the ban is confirmed, it is not reversible within the server interface. The banned user will no longer have access to the server, and their presence will be removed, including their messages and interactions.
With the ban successfully confirmed, you have completed an essential step in the process of banning someone on Discord. In the next section, we will explore an optional step – specifying a ban reason.
Step 7: Specify Optional Ban Reason
After confirming the ban, Discord provides an optional feature to specify the reason for the ban. While not mandatory, providing a ban reason can help clarify the purpose of the ban and communicate the consequences to other server members. Here’s how you can specify an optional ban reason:
- After confirming the ban, Discord will typically present you with an additional input field or text box where you can enter the ban reason.
- Click on the ban reason field to activate it. You can then type in the specific reason for the ban.
- Take your time to provide a concise and clear ban reason. This can include violations of server rules, inappropriate behavior, or any other pertinent information regarding the user’s actions.
- Once you have specified the ban reason, you may have the option to save or submit the ban. Discord will then display the ban reason in the server’s moderation logs or other relevant sections.
Specifying an optional ban reason is beneficial for transparency and accountability within the server community. It allows server members to understand the rationale behind the ban and fosters a sense of trust and fairness.
Remember to provide a clear and accurate ban reason, as it serves as a record of the action taken against the user. This can be particularly helpful for server administrators and moderators in managing and reviewing moderation actions.
With the ban reason specified (if desired), you have effectively completed the optional step in the process of banning someone on Discord. In the next section, we will explore an additional step – revoking a ban, which is optional but may be relevant in certain circumstances.
Step 8: Revoke Ban (Optional)
Discord provides an optional feature that allows server administrators to revoke or lift a ban on a user if necessary. While not a mandatory step, revoking a ban can be useful in situations where a user’s behavior has improved or when reconsideration is needed. Here’s how you can proceed with revoking a ban on Discord:
- Access the server settings by following the steps outlined in the earlier sections.
- Navigate to the Members tab, locate the banned user in the list, and select their profile as described before.
- Scan the user’s profile page for any administrative options or moderation tools available.
- If a ban has been previously imposed, you may see an option to revoke or lift the ban. This option is usually represented by an icon or text that indicates its purpose.
- Click on the revoke ban button to lift the ban on the user. Discord may prompt you to confirm the action.
Revoking a ban is a flexible and considerate approach when dealing with users. It allows for second chances and promotes a community that values growth and improvement.
However, it is crucial to exercise caution when revoking a ban. Ensure that the user has genuinely addressed the issues that led to the ban and that their reintegration into the server will not cause further disruptions.
With the optional step of revoking a ban completed, you have successfully covered the entire process of banning and potentially unbanning a user on Discord. It is important to use these moderation tools responsibly and in accordance with the server’s rules and guidelines.
Conclusion
Banning users on Discord is an essential aspect of maintaining a healthy and thriving online community. Through the step-by-step process outlined in this guide, you have learned how to effectively ban and potentially revoke a ban on Discord.
Remember, the banning process should be approached with caution and only used when necessary. It is vital to adhere to the server’s rules and guidelines and to consider the overall well-being of the community.
By accessing the server settings, navigating to the Members tab, locating the user to be banned, selecting their profile, clicking on the ban button, and confirming the ban, you can ensure that disruptive individuals are removed from the server.
Additionally, the optional steps of specifying a ban reason and revoking a ban provide additional flexibility and communication within the server. Providing a ban reason helps create transparency, while revoking a ban can offer second chances for users who have demonstrated improvement.
Remember, as a server administrator or user with administrative privileges, you have a responsibility to maintain a safe and inclusive environment. Use the banning feature judiciously and with fairness in mind, keeping the best interests of the community at heart.
By following this guide, you now have the knowledge and tools to effectively ban and manage users on Discord, ensuring a positive and harmonious experience for all members of your server.