Introduction
Welcome to our guide on how to adjust screen size in Windows 10. Whether you’ve recently upgraded your operating system or are simply looking to tweak your display settings, this article will provide you with step-by-step instructions on how to modify the screen size to your liking. By customizing the screen resolution, display scaling, text size, and screen layout, you can optimize your Windows 10 experience and ensure that everything on your screen is visually appealing and easy to read.
Having the right screen size is crucial for a comfortable computing experience. If the screen is too small, it can strain your eyes and make it difficult to see details, while a screen that is too large can distort images and make objects appear fuzzy. Fortunately, Windows 10 offers various methods to adjust the screen size and make it perfect for your preferences and needs.
In the following sections, we will explore six different methods to adjust the screen size in Windows 10. These methods include changing the screen resolution, adjusting the display scaling, modifying the text size, customizing the screen layout, using the magnifier tool, and adjusting the screen size for specific apps.
So, without further ado, let’s dive into each method and learn how to adjust the screen size in Windows 10 to create a comfortable and visually pleasing computing environment.
Method 1: Change screen resolution
One of the simplest ways to adjust the screen size in Windows 10 is by changing the screen resolution. Screen resolution refers to the number of pixels displayed on your screen, typically expressed as width x height. Higher resolutions offer more screen real estate, allowing you to fit more content on your screen, while lower resolutions can make everything appear larger.
To change the screen resolution, follow these steps:
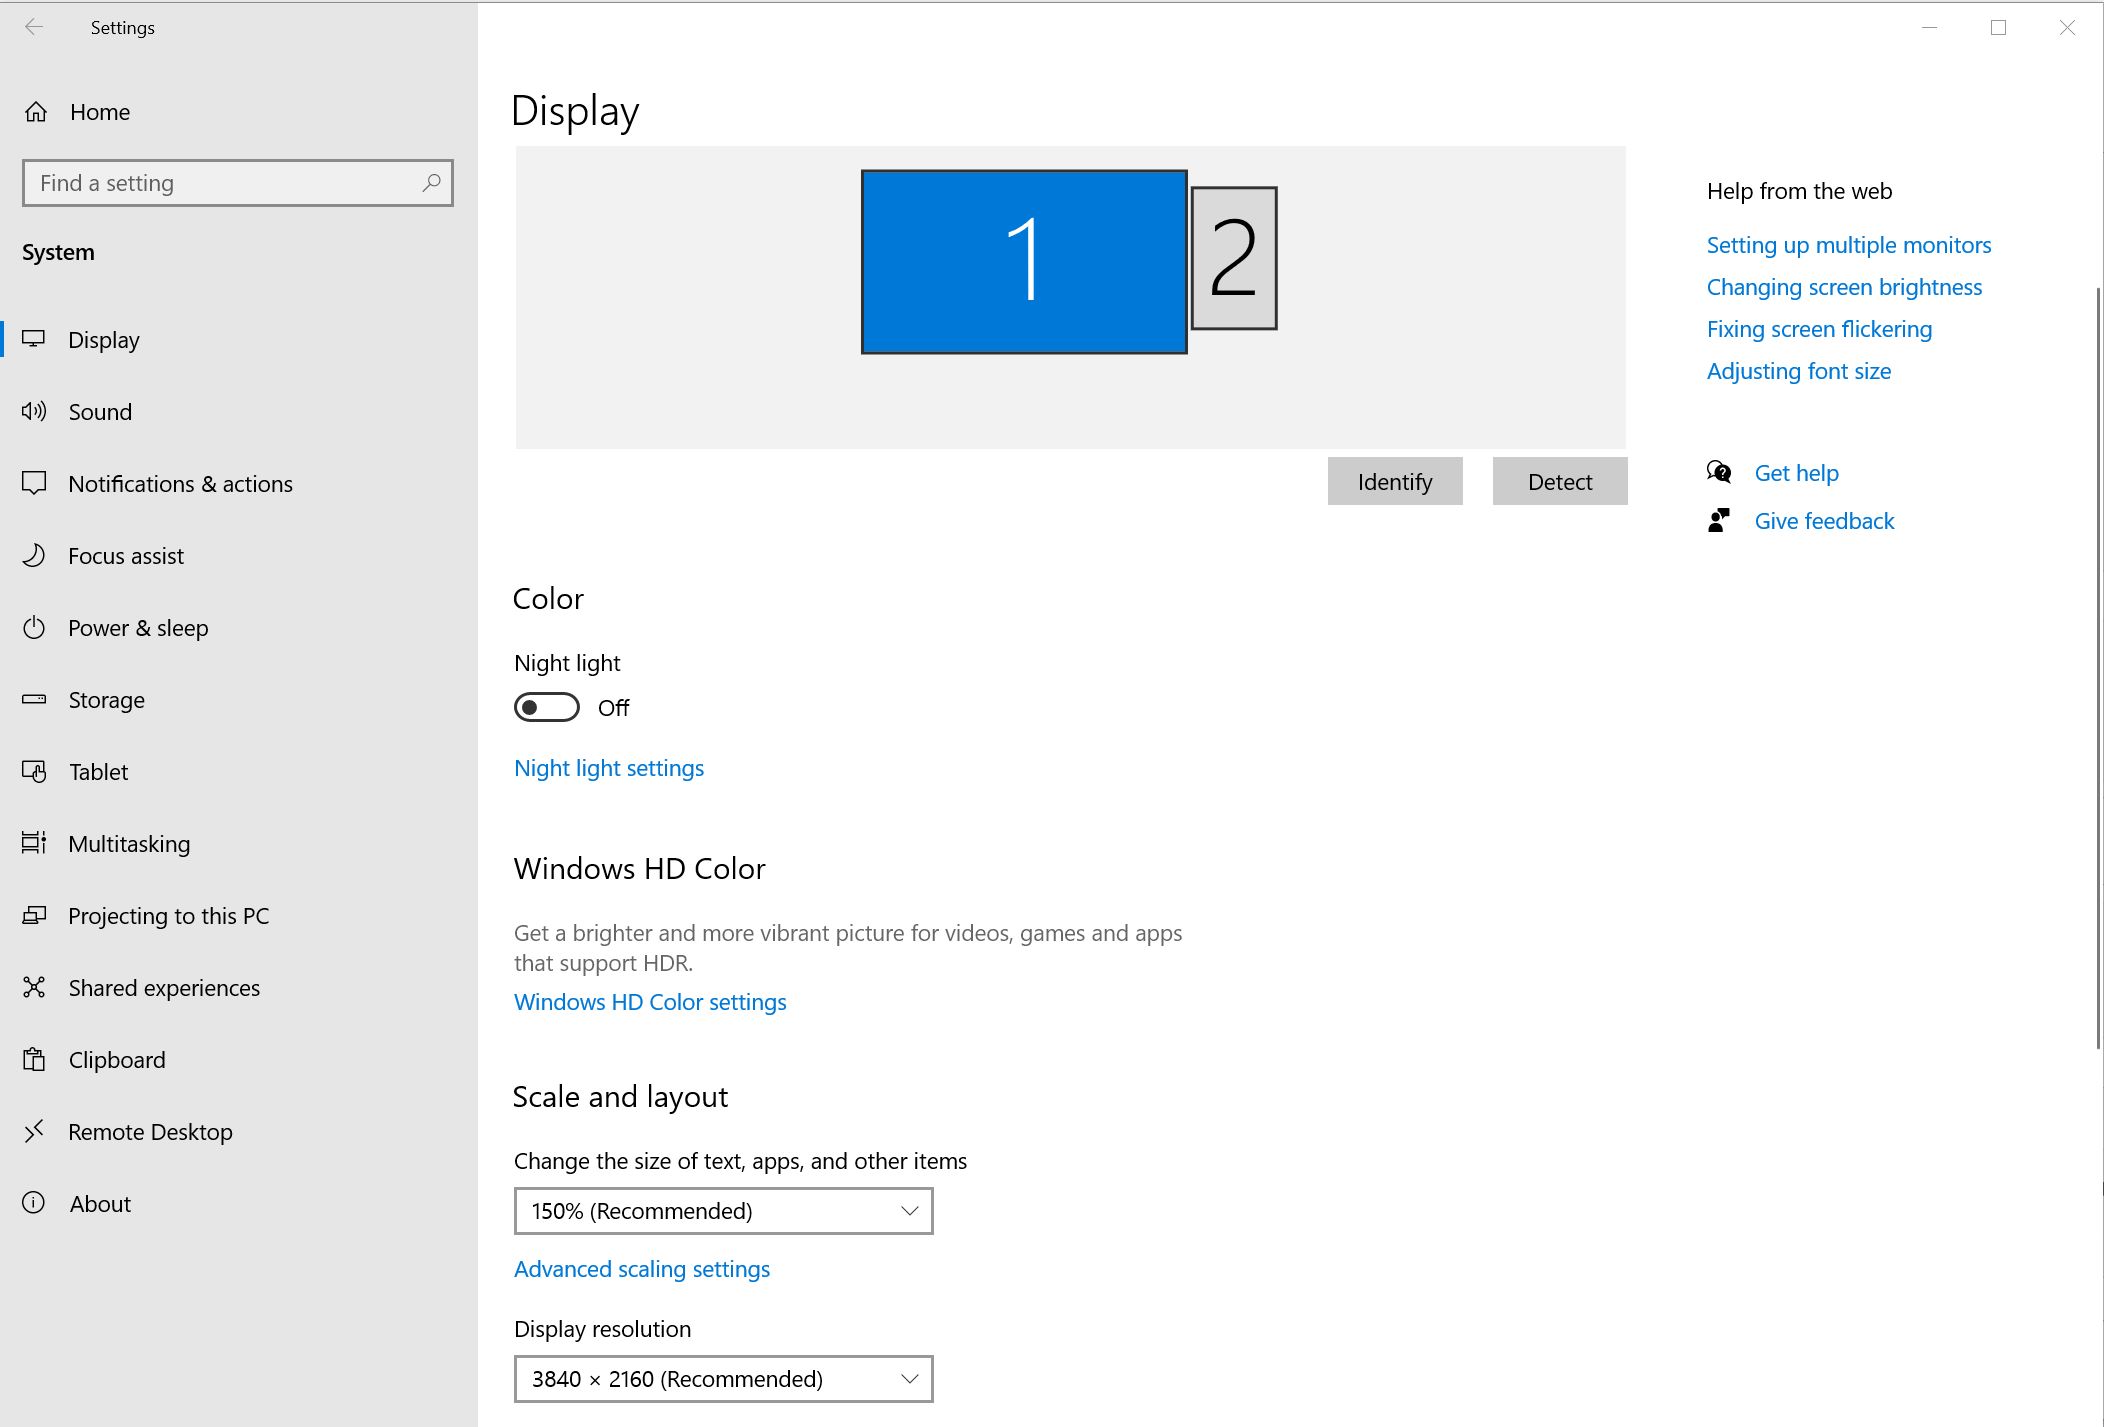
- Right-click on an empty area of your desktop and select “Display settings” from the context menu.
- In the Display settings window, scroll down to the “Resolution” section.
- Click on the drop-down menu and choose a different resolution that suits your needs. Windows will recommend the resolution that it thinks is best for your display, but you can experiment with different options to find the one that works for you.
- After selecting a new resolution, Windows will ask if you want to keep the changes. If you’re happy with the new resolution, click “Keep changes”; otherwise, click “Revert” to undo the changes.
Note that changing the screen resolution may affect the sharpness and clarity of your display. In some cases, you may need to adjust other settings, such as the refresh rate, to ensure optimal visual quality.
By changing the screen resolution, you can fine-tune the size of the elements on your screen and make everything appear more fitting to your preference. Experiment with different resolutions to find the one that strikes the perfect balance between screen real estate and readability.
Method 2: Adjust display scaling
Another effective method to adjust the screen size in Windows 10 is by adjusting the display scaling. Display scaling allows you to control the size of text, apps, and other items on your screen to make them appear larger or smaller.
To adjust the display scaling, follow these steps:
- Right-click on an empty area of your desktop and select “Display settings” from the context menu.
- In the Display settings window, scroll down to the “Scale and layout” section.
- Under the “Change the size of text, apps, and other items” heading, you will find a slider with varying options for scaling. Drag the slider to the left to make everything appear smaller, or drag it to the right to make everything appear larger.
- Windows will instantly apply the changes, allowing you to see the impact on your screen. If you’re satisfied with the new scaling, click “Keep changes”; otherwise, click “Revert” to undo the changes.
Adjusting the display scaling can be particularly beneficial if you have a high-resolution display or if you’re using a monitor with a small physical size. Increasing the scaling can make text and icons easier to read, while decreasing the scaling can provide more screen space for multitasking.
Keep in mind that changing the display scaling may require some additional adjustments, such as adjusting the screen resolution or the text size in specific applications, to ensure optimal clarity and usability. Experiment with different scaling options to find the one that provides the best balance between visibility and screen real estate for your needs.
Method 3: Change text size
If you find that the text on your screen is too small or too large, you can adjust the text size in Windows 10 to make it more comfortable to read. This method allows you to change the size of text system-wide, affecting all applications and menus.
To change the text size, follow these steps:
- Right-click on an empty area of your desktop and select “Display settings” from the context menu.
- In the Display settings window, scroll down to the “Scale and layout” section.
- Under the “Change the size of text, apps, and other items” heading, you will find a link labeled “Advanced scaling settings.” Click on it to open the advanced scaling settings.
- In the Advanced scaling settings window, click on the “Advanced scaling settings” link once again.
- A new window will open, displaying a slider for adjusting the size of text. Move the slider to the left to decrease the text size, or to the right to increase the text size.
- Windows will instantaneously apply the changes, allowing you to preview the new text size. If you’re satisfied with the new size, click “OK”; otherwise, click “Cancel” to revert the changes.
Changing the text size can be particularly helpful for users with visual impairments or those who prefer larger text for improved readability. It allows you to tailor the display to your specific needs and enhance your overall user experience.
Keep in mind that changing the text size may not only affect the size of text in system menus and applications but also impact the layout and spacing of certain elements. If you encounter any issues with the new text size, you may need to adjust other display settings, such as the screen resolution or the display scaling, to ensure optimal visibility and usability.
Method 4: Adjust screen layout
In addition to adjusting the screen size through resolution, scaling, and text size, Windows 10 also allows you to customize the screen layout to better suit your preferences. By modifying the screen layout, you can arrange and organize the elements on your screen, such as taskbars and windows, for a more efficient workflow.
To adjust the screen layout, follow these steps:
- Right-click on an empty area of your taskbar and hover over “Taskbar settings” in the context menu. Click on it to open the Taskbar settings window.
- In the Taskbar settings window, you will find various options to customize the taskbar behavior and appearance. To adjust the screen layout, focus on the “Taskbar location on screen” section.
- Click on the drop-down menu and select a different position for the taskbar, such as the bottom, top, left, or right of the screen.
- Windows will immediately move the taskbar to the new position. You can also choose to automatically hide the taskbar by toggling the “Automatically hide the taskbar in desktop mode” option.
- To further customize the screen layout, you can also resize and rearrange application windows. Click and drag the edges of windows to resize them, or drag and drop windows to different parts of the screen to rearrange them.
Modifying the screen layout can greatly enhance your productivity and multitasking capabilities. By positioning the taskbar in a convenient location and arranging windows to your preference, you can create a personalized workspace that suits your workflow.
Remember to experiment with different screen layouts to determine which one best meets your needs. You can always revert to the default settings or try different configurations until you find the layout that enhances your Windows 10 experience.
Method 5: Use the magnifier tool
If you need to temporarily magnify certain areas of your screen, Windows 10 provides a built-in tool called the Magnifier. This tool allows you to zoom in on specific parts of your screen, making it easier to read text and view details. The Magnifier tool can be particularly useful for individuals with visual impairments or for anyone who needs to examine fine details closely.
To use the Magnifier tool, follow these steps:
- Press the Windows key on your keyboard to open the Start menu.
- Type “Magnifier” in the search bar and select the “Magnifier” app from the search results.
- The Magnifier tool will open in a separate window. By default, it will zoom in at 100% magnification.
- Use the Magnifier controls to adjust the zoom level and the size of the magnification window. You can also choose to have the Magnifier follow your mouse or keyboard cursor.
- To exit the Magnifier tool, simply close the Magnifier window.
Using the Magnifier tool allows you to temporarily increase the size of content on your screen without permanently modifying the display settings. It provides a flexible solution for magnifying specific areas and can be easily enabled or disabled as needed.
Experiment with different magnification settings to find the level that works best for you. Whether you need to read small text or examine details in images, the Magnifier tool is a valuable feature that can greatly enhance your Windows 10 experience.
Method 6: Adjust screen size for specific apps
While adjusting the screen size system-wide is useful, there may be certain applications that require a more customized approach. Windows 10 allows you to adjust the screen size for individual apps, ensuring that specific programs are displayed optimally and cater to your preferences.
To adjust the screen size for specific apps, follow these steps:
- Open the app for which you want to customize the screen size.
- Once the app is open, right-click on its title bar or any empty area within the app window.
- In the context menu that appears, select “Properties” or “Options.”
- In the Properties or Options window, navigate to the “Compatibility” or “Display” tab.
- Look for options related to screen size or display settings for the app. These options may vary depending on the app you are using.
- Adjust the screen size or display settings to your liking. You may have options to change the resolution, scaling, or text size specifically for that app.
- Click “OK” or “Apply” to save the changes.
By adjusting the screen size for specific apps, you can ensure optimal visibility and usability within those applications. This is particularly helpful for apps that have unique display requirements or do not adhere to the system-wide settings.
Keep in mind that not all apps may have built-in options to adjust the screen size. In such cases, you can try changing the compatibility settings for the app or explore third-party solutions that offer more control over app-specific screen settings.
Remember to experiment with these settings to find the optimal screen size for each app. Customizing the screen size for specific applications can greatly enhance your user experience and make working with those apps more comfortable and enjoyable.
Conclusion
Adjusting the screen size in Windows 10 is essential for creating a personalized and comfortable computing experience. By utilizing the methods outlined in this guide, you can tailor the screen resolution, display scaling, text size, screen layout, and even app-specific settings to meet your specific preferences and needs.
Changing the screen resolution allows you to fine-tune the number of pixels displayed on your screen, providing more or less screen real estate depending on your requirements. Adjusting the display scaling enables you to control the size of text, apps, and other items, making them appear larger or smaller to suit your visual comfort. Changing the text size system-wide enhances readability, while adjusting the screen layout and exploring app-specific settings further personalize your workspace.
Remember to take into account factors such as your vision, screen size, and personal preferences when making adjustments. Finding the perfect screen size is a matter of trial and error, so don’t be afraid to experiment with different settings until you achieve the optimal visual experience.
Whether you’re looking to reduce eye strain, accommodate accessibility needs, or create a more efficient workflow, adjusting the screen size in Windows 10 empowers you to create a computing environment that is both visually appealing and comfortable to use.
Now that you’re armed with the knowledge of these six methods, go ahead and take control of your screen size in Windows 10. Customize your display settings, find the perfect balance between visuals and functionality, and enjoy a more personalized computing experience!