Introduction
Welcome to the world of Asana! Asana is a powerful project management tool that helps teams collaborate and stay organized. One of the key features of Asana is the ability to add tags to tasks. In this article, we will explore what tags are, why they are useful, and how to add, edit, and remove tags in Asana.
Tags are a way to label and categorize tasks in Asana. They act as keywords or labels that can be associated with specific tasks, making it easier to organize and search for relevant information. By using tags, you can group related tasks together, filter tasks based on specific criteria, and track progress across different projects.
There are many reasons why using tags in Asana is beneficial. Firstly, tags provide a visual representation of the status or category of a task. For example, you can use tags like “Urgent,” “In Progress,” or “Completed” to indicate the current state of a task. This helps team members quickly understand the status of a task without having to delve into its details.
Secondly, tags facilitate collaboration and communication between team members. By using specific tags, team members can easily identify tasks that they need to focus on or contribute to. This avoids confusion and streamlines workflow within a project.
Thirdly, tags can be used to track specific attributes or characteristics of a task. For instance, you can create tags for different project phases, client names, team members responsible for the task, or any other relevant criteria. This allows for flexible sorting and filtering options, making it easier to find and group tasks based on specific parameters.
Now that we have a clear understanding of what tags are and why they are useful in Asana, let’s dive into the steps of how to add tags to tasks in Asana. Whether you are starting a new project or managing an existing one, tags can be a powerful tool to enhance organization and efficiency in your workflow.
What are tags?
Tags are a way to label and categorize tasks in Asana. They act as keywords or labels that can be associated with specific tasks, making it easier to organize and search for relevant information. Think of tags as sticky notes that you can attach to tasks to add additional context or information.
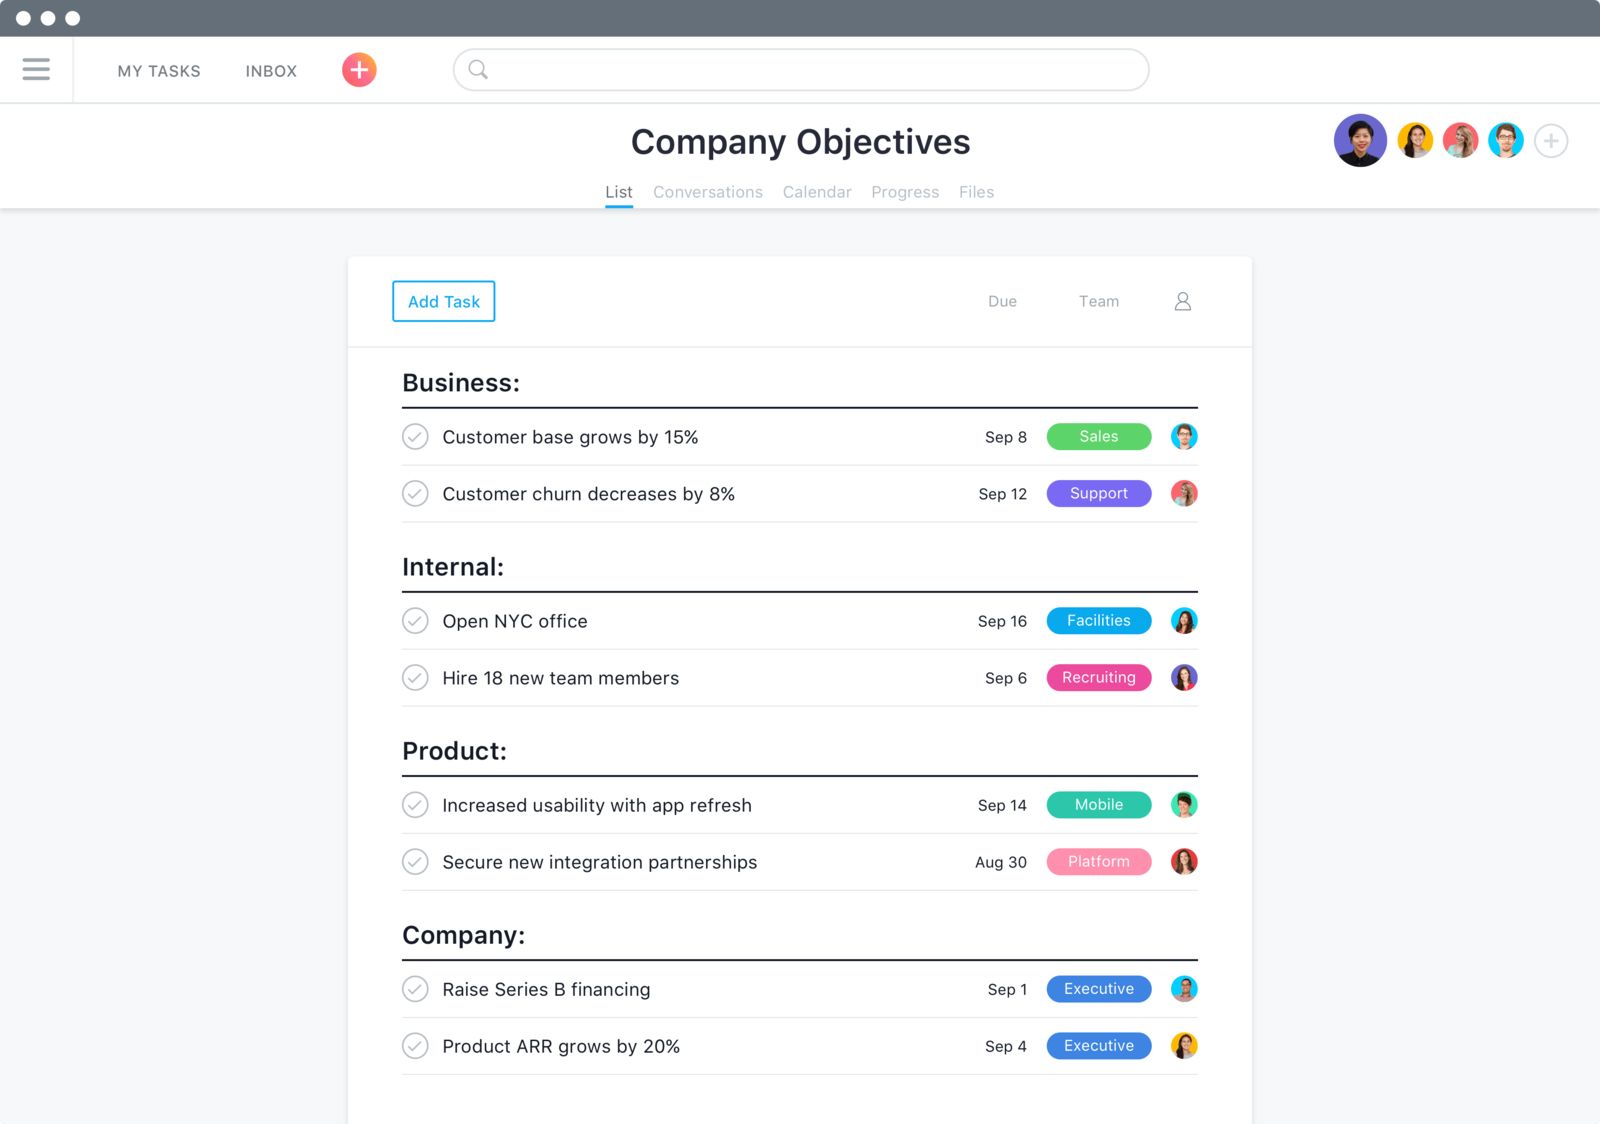
In Asana, tags are represented by colored labels that can be applied to tasks. You can create tags based on your unique project requirements, such as different phases of a project, priority levels, team member names, or specific categories. Tags can be customized with colors, making it visually appealing and easy to distinguish between different tags at a quick glance.
Tags can be used in various ways to enhance project management. One common use is to indicate the status of a task. For example, you can create tags like “In Progress,” “On Hold,” or “Completed” to track the progress of tasks. This allows team members to have a clear understanding of which tasks are actively being worked on, which ones are awaiting action, and which ones have been finished.
Another way to utilize tags is by assigning them to specific team members. By creating tags with team member names or roles, you can easily track tasks assigned to individuals or teams. This helps in distributing workload evenly, ensuring accountability, and improving collaboration within the team.
Tags can also be used to categorize tasks based on project phases or milestones. For example, if you have a software development project, you can create tags like “Planning,” “Design,” “Development,” and “Testing.” This allows you to track the progress of different phases and filter tasks based on specific stages of the project.
Overall, tags offer a flexible and customizable way to organize and classify tasks in Asana. With the ability to add multiple tags to a single task, you can create a highly detailed and specific system to suit your project’s needs. By leveraging tags effectively, you can streamline your workflow, improve communication, and gain better visibility into your project’s progress.
Why use tags in Asana?
Tags are a powerful tool in Asana that offer several benefits for effective project management. Let’s explore the reasons why you should consider using tags in Asana:
1. Improved organization: Tags provide a simple and intuitive way to categorize and organize tasks. By assigning relevant tags to tasks, you can quickly group together related tasks and create a logical structure within your projects. This makes it easier to navigate and locate specific tasks, saving you time and effort.
2. Enhanced searchability: Asana has robust search capabilities, and tags play a vital role in improving the search experience. When you assign tags to tasks, you can easily filter and search for tasks based on specific criteria. This allows you to retrieve relevant information quickly, even in large and complex project setups.
3. Streamlined task tracking: Tags act as visual markers that provide instant information about the status, priority, or specific attributes of a task. With a quick glance, you can determine the current state of tasks, identify high-priority items, or track specific task properties. This helps in prioritizing and managing tasks efficiently, ensuring that nothing falls through the cracks.
4. Efficient collaboration: By adding tags to tasks, you can improve communication and collaboration within your team. Team members can easily identify tasks that require their attention or are relevant to their area of expertise by filtering tasks based on specific tags. This promotes a more efficient workflow and ensures that everyone is on the same page.
5. Data analysis and reporting: Tags enable you to gather valuable insights and generate reports about your projects. By analyzing data based on specific tags, you can identify trends, measure progress, and evaluate the performance of different aspects of your projects. This helps in making data-driven decisions and improving overall project management strategies.
In summary, incorporating tags in Asana can greatly enhance your project management experience. From better organization and searchability to streamlined task tracking and improved collaboration, the benefits of using tags are extensive. By leveraging tags effectively, you can optimize your workflow, stay organized, and achieve successful project outcomes.
How to add tags in Asana
Adding tags to tasks in Asana is a straightforward process that can be done in just a few simple steps. Let’s explore how to add tags to tasks in Asana:
Step 1: Create a project or open an existing project in Asana
Before you can add tags to tasks, you need to create a project or open an existing project in Asana. Projects provide the framework for organizing and managing tasks. If you don’t have a project set up yet, you can create one by clicking on the “+” button in the left sidebar and selecting “Project.”
Step 2: Navigate to the task you want to add tags to
Once you have your project open, navigate to the task that you want to add tags to. You can either click on the task directly in the project view or search for the task using the search bar at the top of the screen.
Step 3: Click on the Tags option in the right sidebar
In the task view, you will see a right sidebar that displays various details and options for the selected task. Look for the “Tags” option in the sidebar, which is represented by a tag icon. Clicking on this option will open the tag editor.
Step 4: Add or create tags
In the tag editor, you will see a list of existing tags that you can choose from. If the desired tag already exists, you can simply click on it to add it to the task. If the tag doesn’t exist yet, you can create a new tag by clicking on the “+” button next to “Add Tags.” Enter the name of the tag and optionally select a color for it.
Step 5: Apply the tags to the task
After adding or creating the desired tags, click on the “Apply” button to associate them with the task. The selected tags will now be visible in the right sidebar of the task view. You can add multiple tags to a single task, allowing for greater flexibility in organizing and categorizing tasks.
That’s it! You have successfully added tags to a task in Asana. Repeat these steps for other tasks that require tags. By consistently applying tags to tasks, you can improve organization, searchability, and collaboration within your projects.
Step 1: Create a project or open an existing project in Asana
Before you can add tags to tasks in Asana, you will need to create a project or open an existing project. Projects serve as the foundation for organizing and managing tasks in Asana. Here’s how to create a project or open an existing one:
Create a project:
To create a new project, start by clicking on the “+” button in the left sidebar of your Asana dashboard. A dropdown menu will appear, and you can select the “Project” option. You will be prompted to enter a name for your project. Choose a descriptive name that captures the purpose or nature of the project. Additionally, you can provide a brief description to provide more context. Once you’ve named your project, select the team or workspace that the project belongs to, and click on the “Create Project” button. Congratulations! You’ve created a new project in Asana.
Open an existing project:
If you already have existing projects in Asana, you can easily access them by clicking on the project name in the left sidebar. The sidebar will display all the projects that you have access to, organized by team or workspace. Scroll through the sidebar or use the search bar at the top to find and select the specific project you want to work on. The project view will open, showing all the tasks and details associated with that project.
Having a well-structured project is crucial for effective task management. By creating projects in Asana, you can group related tasks together and have a centralized hub where team members can collaborate and track progress. Whether you are starting a new project from scratch or accessing an existing one, Asana provides a user-friendly interface that simplifies project organization and management.
Now that you have created or opened a project in Asana, you are ready to move on to the next step: adding tags to your tasks. Tags will help you categorize, organize, and filter tasks to streamline your workflow and improve productivity.
Step 2: Navigate to the task you want to add tags to
Once you have created or opened a project in Asana, the next step is to navigate to the specific task that you want to add tags to. Asana provides a user-friendly interface that makes it easy to find and access individual tasks within a project. Follow these steps to navigate to the task you want to add tags to:
1. Project View:
Start by opening the project that contains the task you want to work on. In the left sidebar of your Asana dashboard, click on the name of the project. This will take you to the project view, where you will see a list of tasks associated with the project.
2. Search Bar:
If you are unsure which section or category the task belongs to within the project, you can use the search bar at the top of the screen. Simply type in keywords related to the task, such as the task name or a specific tag associated with it. As you type, Asana will display relevant results, including the tasks that match your search criteria. Click on the desired task to open its task view.
3. Task Details:
In the project view or task search results, click on the task that you want to add tags to. This will open the task view, where you can access and modify various details of the task. The task view provides a comprehensive overview of the task and includes options to add tags, assignees, due dates, and more.
Navigating to the specific task you want to work on is crucial to ensure that you can add tags accurately and efficiently. Whether you locate the task through the project view or use the search bar, Asana’s intuitive interface makes it easy to find tasks within your projects.
Now that you have successfully navigated to the task you want to add tags to, you are ready to move on to the next step: actually adding the tags. By assigning tags to tasks, you will be able to categorize and organize your tasks effectively, making it easier to filter and search for specific tasks based on their tags.
Step 3: Click on the Tags option in the right sidebar
In Asana, adding tags to tasks is a simple process that can be done through the right sidebar of the task view. Once you have navigated to the task you want to add tags to, follow these steps:
1. Open the task view:
In the project view or search results, click on the task that you want to add tags to. This will open the task view, where you can access and modify various details of the task.
2. Locate the right sidebar:
In the task view, you will see a right sidebar that provides additional details and options for the selected task. The sidebar contains various sections such as Assignees, Due Date, Tags, and more.
3. Click on the Tags option:
To add tags to the task, locate and click on the “Tags” option in the right sidebar. The “Tags” option is represented by a tag icon and is usually positioned under the “Due Date” section.
4. Open the tag editor:
Clicking on the “Tags” option will open the tag editor, where you can view and manage the tags associated with the task. The tag editor will display any existing tags that have already been assigned to the task.
By clicking on the “Tags” option in the right sidebar, you are now ready to add or modify the tags for the selected task. In the next step, we will explore how to add or create tags and associate them with the task to further categorize and organize it.
The ability to access the tag editor through the right sidebar provides a convenient and efficient way to manage tags within individual tasks in Asana. By centralizing the tag management process in this location, Asana ensures a streamlined user experience and makes it easy to stay organized.
Step 4: Add or create tags
Once you have opened the tag editor in the task view by clicking on the “Tags” option in the right sidebar, you can add or create tags to associate with the task in Asana. Here’s how to add or create tags:
1. View existing tags:
In the tag editor, you will see a list of existing tags that have already been assigned to the task. These tags may have been created previously and can be reused for other tasks. Take a moment to review the existing tags to see if any of them are applicable to the current task.
2. Add existing tags:
To add an existing tag to the task, simply click on the tag name in the list. By clicking on a tag, it will be associated with the task and displayed in the tag editor. You can add multiple existing tags to a single task by clicking on each tag name in the list.
3. Create new tags:
If the desired tag does not exist in the list of existing tags, you have the option to create a new tag. To create a new tag, click on the “+” button next to “Add Tags” in the tag editor. This will open a text field where you can enter the name of the new tag. Give the tag a descriptive name that accurately represents its purpose or category.
4. Customize tags with colors:
In Asana, you can further customize tags by assigning colors to them. To assign a color to a tag, simply click on the color palette icon next to the tag name in the tag editor. A color selection menu will appear, allowing you to choose from a variety of predefined colors. Assigning colors to tags can provide visual cues and make it easier to identify and differentiate between different tags at a glance.
By adding or creating tags in Asana, you can better categorize and classify tasks, making it easier to filter and locate specific tasks based on their tags. Organizing tasks with tags helps in streamlining workflow, improving collaboration, and enhancing overall project management in Asana.
Once you have added or created the desired tags, you are ready to apply them to the task. Proceed to the next step to learn how to apply tags and finalize the tagging process for the task in Asana.
Step 5: Apply the tags to the task
After adding or creating tags in the tag editor, the final step is to apply these tags to the task in Asana. Here’s how you can apply the tags:
1. Review the selected tags:
In the tag editor, take a moment to review the tags that you have added or created for the task. Make sure that they accurately represent the category, status, or any other relevant information associated with the task.
2. Click on “Apply”:
To apply the tags to the task, simply click on the “Apply” button in the tag editor. This will associate the selected tags with the task and display them in the right sidebar. The applied tags will now provide additional information and context to the task.
3. View the applied tags:
You can now see the applied tags in the right sidebar of the task view. The tags will be displayed below the “Tags” section, and each tag will appear as a colored label. The applied tags give you visual cues and a quick overview of the task’s properties, status, or any other relevant attributes.
4. Edit or remove tags:
If you need to edit or remove tags from the task, you can do so by clicking on the “Edit” button in the tag editor. This will open the tag editor again, where you can make changes to the selected tags or remove them entirely. Remember to click on “Apply” to save any changes made to the tags.
By applying the tags, you have successfully categorized and labeled the task in Asana. The applied tags will help you in organizing, filtering, and searching for tasks based on specific criteria. They provide a valuable tool for navigating and managing tasks efficiently and effectively.
Adding tags to tasks in Asana enhances your project management capabilities, improves collaboration, and enables better visibility into your workflow. With the ability to assign multiple tags to a task, you can create a robust tagging system tailored to your project’s unique needs.
Congratulations! You have successfully added and applied tags to the task in Asana. Keep using tags to maintain organization, streamline your workflow, and achieve project success.
How to edit or remove tags in Asana
In Asana, managing tags for tasks is a flexible process. You have the ability to edit or remove tags as needed. Let’s explore how to edit or remove tags in Asana:
1. Open the task view:
Start by opening the task that contains the tags you want to edit or remove. You can do this by navigating to the project view, finding the task, and clicking on its name to open the task view.
2. Locate the tags:
In the right sidebar of the task view, you will see the tags section. It displays all the tags currently associated with the task. Take a moment to review the tags and identify the ones you want to edit or remove.
3. Edit tags:
To edit a tag, click on the “Edit” button that appears when you hover over the tag’s label. This opens the tag editor, where you can make changes to the tag’s name or color. Simply update the tag’s details as desired and click on “Apply” to save the changes. The tag will be updated throughout your project.
4. Remove tags:
To remove a tag from the task, click on the “Edit” button next to the tag in the tag editor. In the tag editor, you will see an “X” icon next to the tag’s name. Click on the “X” to remove the tag from the task. Confirm the removal when prompted. The tag will be detached from the task but will still be available for use in other tasks.
5. Apply the changes:
After editing or removing tags, click on the “Apply” button in the tag editor to save the changes to the task. The updated tags will now reflect the changes you made.
By being able to edit or remove tags in Asana, you have the flexibility to adjust your tagging system as your project’s needs evolve. This allows you to maintain accuracy, relevance, and organization in your task management.
Remember that tags are not permanent and can be modified at any time. Be mindful of updating tags consistently and communicating changes to your team members to ensure everyone is on the same page.
With Asana’s tag editing and removal capabilities, you can easily adapt your project’s tagging system to optimize your workflow and keep your tasks well-organized.
Conclusion
Tags are a valuable feature in Asana that allow you to categorize, organize, and filter tasks in an effortless and efficient way. By adding tags to tasks, you can enhance collaboration, improve task visibility, and streamline your project management processes. Here’s a recap of what we covered in this article:
– We started by understanding what tags are and how they function in Asana. Tags act as labels or keywords that you can associate with tasks, providing additional context and helping you organize and search for specific tasks.
– We explored the benefits of using tags in Asana, such as improved organization, enhanced searchability, streamlined task tracking, efficient collaboration, and insightful data analysis.
– We delved into the step-by-step process of adding tags to tasks in Asana. We covered creating or opening a project, navigating to the desired task, clicking on the Tags option in the right sidebar, adding or creating tags, and applying the tags to the task.
– We also discussed how to edit or remove tags in Asana, providing flexibility to adjust your tagging system as your project evolves.
Remember, effectively utilizing tags requires thoughtful planning and consistency. Define a tagging system that suits your project’s needs and communicate it to your team members to ensure everyone understands and follows the same conventions.
By maximizing the use of tags in Asana, you can significantly improve your workflow, boost collaboration, and achieve successful project outcomes. So, start incorporating tags into your task management process in Asana and experience the benefits for yourself.


