Introduction
Adding subtitles to a video can greatly enhance its accessibility and impact. Whether you are creating a video for your website, YouTube channel, or social media platform, incorporating subtitles is a valuable way to ensure that your content reaches a wider audience, including those who are deaf or hard of hearing, non-native English speakers, or simply prefer to watch videos with subtitles.
Subtitles provide a textual representation of the dialogue and other important audio elements in your video. They not only make your content more inclusive but also improve its search engine optimization (SEO) by providing text that can be indexed by search engines. Additionally, subtitles can be useful in noisy environments or situations where the audio cannot be played aloud.
However, it’s important to add subtitles permanently so that they are embedded in the video file itself. This ensures that the subtitles are always displayed, regardless of the platform or media player used to view the video. In this article, we will explore the process of adding subtitles permanently to a video, including the choice of subtitle format, the tools and software to use, and a step-by-step guide to help you get started.
Before we dive into the practical aspects of adding subtitles, it’s crucial to understand the impact and benefits of incorporating subtitles into your videos. By doing so, you can create a more inclusive and impactful viewing experience for your audience.
Understanding the Importance of Subtitles
Subtitles play a vital role in making your videos accessible to a wider audience. Let’s explore the importance of subtitles and the benefits they offer:
1. Accessibility: Subtitles make your videos accessible to individuals who are deaf or hard of hearing. By providing a textual representation of the dialogue and audio cues, you ensure that everyone can understand and enjoy your content.
2. Inclusivity: Subtitles cater to non-native English speakers or viewers with language difficulties. They allow these individuals to follow along with the video, ensuring that language barriers do not hinder their understanding or enjoyment.
3. SEO Boost: Adding subtitles to your videos can significantly improve their search engine optimization. Search engines index the text in subtitles, helping your video rank higher in search results and potentially attracting more viewers.
4. Increased Engagement: Studies have shown that videos with subtitles tend to have higher engagement rates. Subtitles capture the viewer’s attention, making it easier for them to follow the content, leading to better comprehension and increased viewer retention.
5. Convenience: Subtitles provide added convenience for viewers in various situations. For example, when watching videos in public places or quiet environments, viewers can read subtitles without needing to use headphones or disturb those around them.
6. Improved Comprehension: Subtitles help viewers better understand the dialogue and audio elements, especially in videos with complex vocabulary, accents, or fast-paced speech. By providing a visual aid, subtitles enhance comprehension and ensure that the intended message is conveyed effectively.
7. Enhanced Multimedia Experience: Subtitles add an extra layer of information and context to your videos, enhancing the overall viewing experience. They can convey additional details such as sound effects, background music lyrics, or speaker identification, enriching the multimedia experience for viewers.
Incorporating subtitles into your videos not only makes them more accessible and inclusive but also boosts their SEO, engagement, and comprehension. It’s clear that subtitles are an invaluable asset for any video creator. Now that we’ve discussed the importance of subtitles, let’s explore the different subtitle formats available and how to choose the right one for your videos.
Choosing the Right Subtitle Format
When it comes to adding subtitles to your videos, choosing the right subtitle format is crucial. The format you select will determine the compatibility, functionality, and appearance of the subtitles in your video. Here are some popular subtitle formats to consider:
1. SRT (SubRip Subtitle): The SRT format is one of the most commonly used subtitle formats. It is a simple text-based format that contains the timestamped dialogue and associated text. SRT files are widely supported by video players and platforms, making them a versatile choice for adding subtitles.
2. VTT (WebVTT Subtitle): VTT is a subtitle format specifically designed for web-based videos. It offers more advanced features compared to SRT and provides options for text formatting, positioning, and styling. WebVTT files are compatible with HTML5 video players and are ideal for online streaming platforms, websites, and social media.
3. ASS/SSA (Advanced SubStation Alpha/SubStation Alpha): ASS and SSA formats are known for their advanced features and flexibility. They support various text formatting options, including font styles, colors, and animations. These formats are commonly used for subtitling in anime, movies, and TV shows, where more intricate styling and effects may be required.
4. IDX/SUB (DVD Subtitles): The IDX and SUB formats are often used for DVD video subtitles. The SUB file contains the actual subtitle data, while the IDX file provides timing and formatting instructions. These formats are suitable for creating subtitles for DVDs or converting DVD subtitles for digital use.
5. SMI/SAMI (Synchronized Accessible Media Interchange): SMI/SAMI is an older subtitle format that supports basic text formatting and timing information. It was commonly used for subtitles in Windows Media Player. While less popular now, it can still be compatible with certain legacy systems and players.
When choosing a subtitle format, consider the platform or video player you will be using, as well as the specific features and requirements of your video content. It’s also important to ensure that the format you select is supported by the target audience’s devices and playback software.
Now that you have a better understanding of subtitle formats, let’s explore the tools and software available for adding subtitles to your videos.
Tools and Software for Adding Subtitles
Adding subtitles to your videos can be made easier and more efficient with the help of dedicated tools and software. Let’s take a look at some popular options:
1. Aegisub: Aegisub is a powerful and customizable subtitle editor. It allows you to create, edit, and synchronize subtitles with precision. With its user-friendly interface and extensive features, Aegisub is widely used by professional subtitlers and enthusiasts alike.
2. Subtitle Edit: Subtitle Edit is a free and intuitive subtitle editor that supports a wide range of subtitle formats. It offers a comprehensive set of features, including spell-checking, waveform display, and automatic syncing. Subtitle Edit is compatible with both Windows and Mac operating systems.
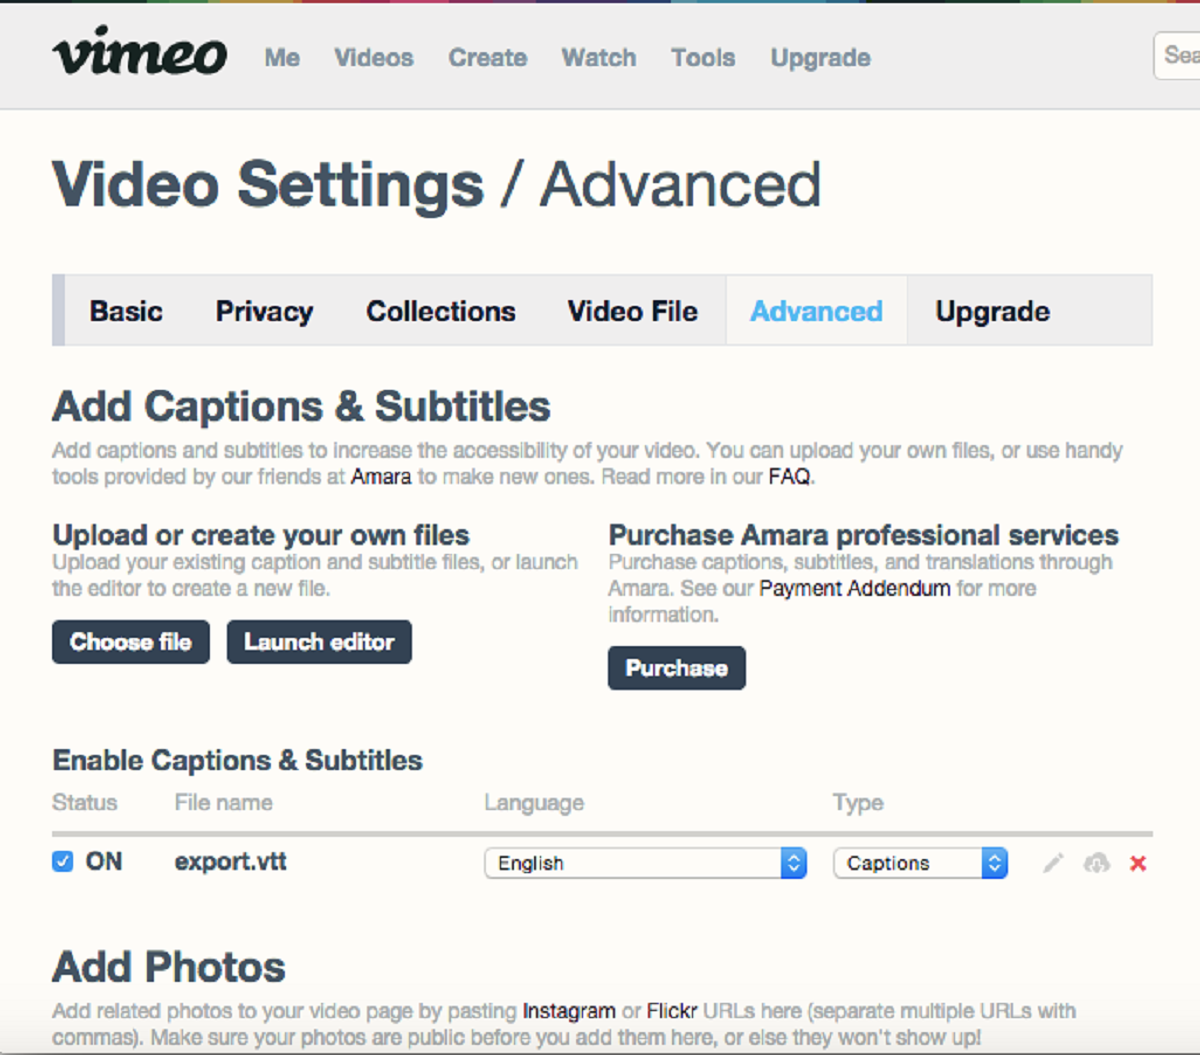
3. Amara: Amara is an online subtitle creation and translation platform. It allows multiple collaborators to work on subtitles simultaneously, making it ideal for collaborative projects. Amara offers an easy-to-use interface and supports various video platforms, including YouTube and Vimeo.
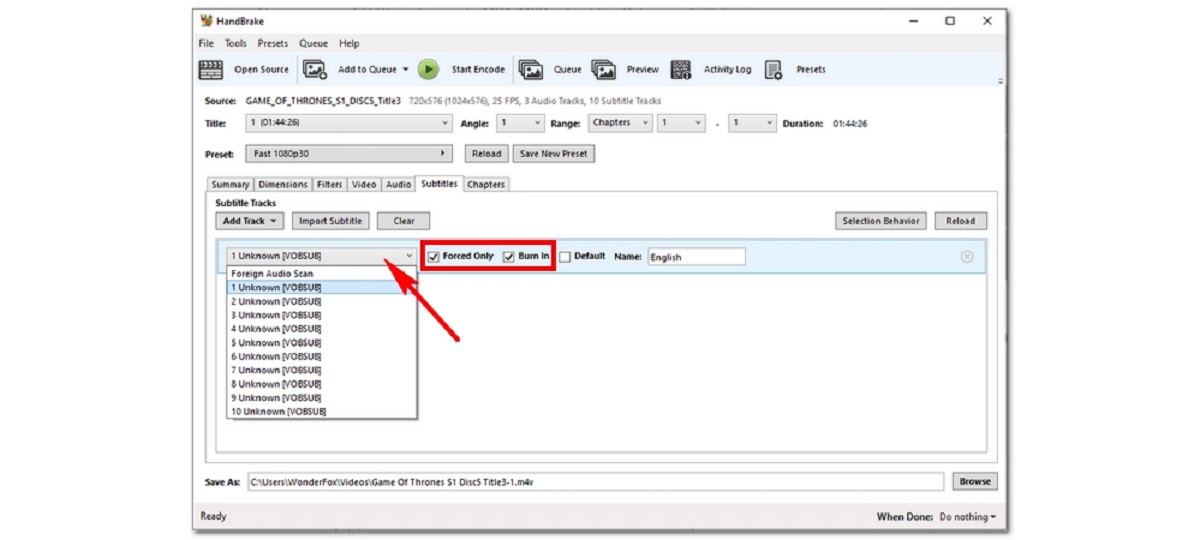
4. HandBrake: HandBrake is a popular open-source video transcoder that also supports subtitle integration. It enables you to add subtitles to your videos during the transcoding process, ensuring that the subtitles are permanently embedded in the video file. HandBrake is compatible with Windows, Mac, and Linux operating systems.
5. YouTube Studio: If you’re uploading videos to YouTube, the YouTube Studio platform provides built-in subtitle and closed caption tools. You can upload subtitles in various formats or use the auto-generated captioning feature to generate subtitles automatically. YouTube Studio allows you to edit and synchronize the subtitles before publishing your video.
6. Subtitle Workshop: Subtitle Workshop is a popular subtitle editing software that offers a range of features for creating and editing subtitles. It supports various subtitle formats and provides functionalities like spell-checking, simultaneous preview, and batch editing. Subtitle Workshop is compatible with Windows operating systems.
7. Adobe Premiere Pro: Professional video editing software like Adobe Premiere Pro provides comprehensive subtitle editing capabilities. It allows you to import, create, and synchronize subtitles directly within the editing timeline, giving you precise control over the appearance and timing of the subtitles.
These tools and software options provide different features and functionalities to suit your specific needs and preferences. Explore and experiment with them to find the one that best fits your workflow and helps you create high-quality subtitles for your videos.
Now that you have an idea of the tools available, let’s move on to the next section: a step-by-step guide on how to add subtitles permanently to your videos.
Step-by-step Guide to Adding Subtitles Permanently
Adding subtitles permanently to your videos ensures that they are embedded in the video file itself, making them visible across different platforms and media players. Follow these steps to add subtitles permanently:
Step 1: Choose the right subtitle format: Select a subtitle format that is compatible with your video player or platform. Popular formats include SRT, VTT, and ASS/SSA.
Step 2: Create or obtain subtitle files: Create your subtitles using a dedicated subtitle editor or obtain subtitle files from reputable sources. Make sure the subtitle file matches the video’s duration and content.
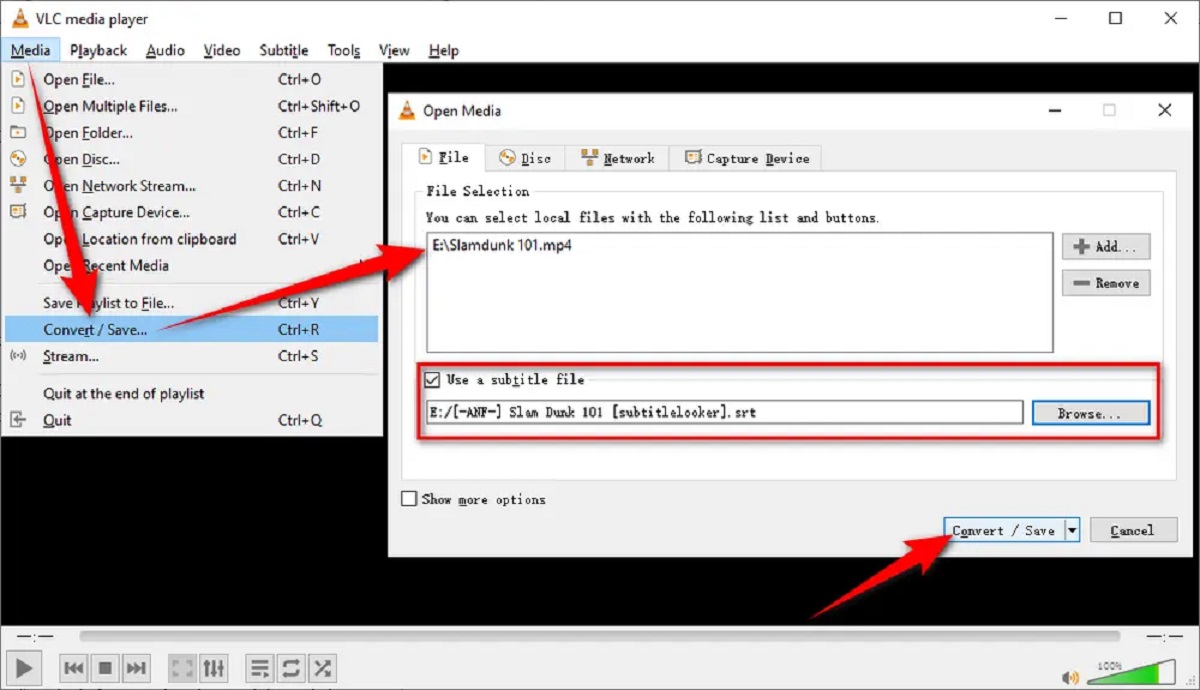
Step 3: Use video editing software: Open your video in a video editing software that supports subtitle integration, such as Adobe Premiere Pro or HandBrake.
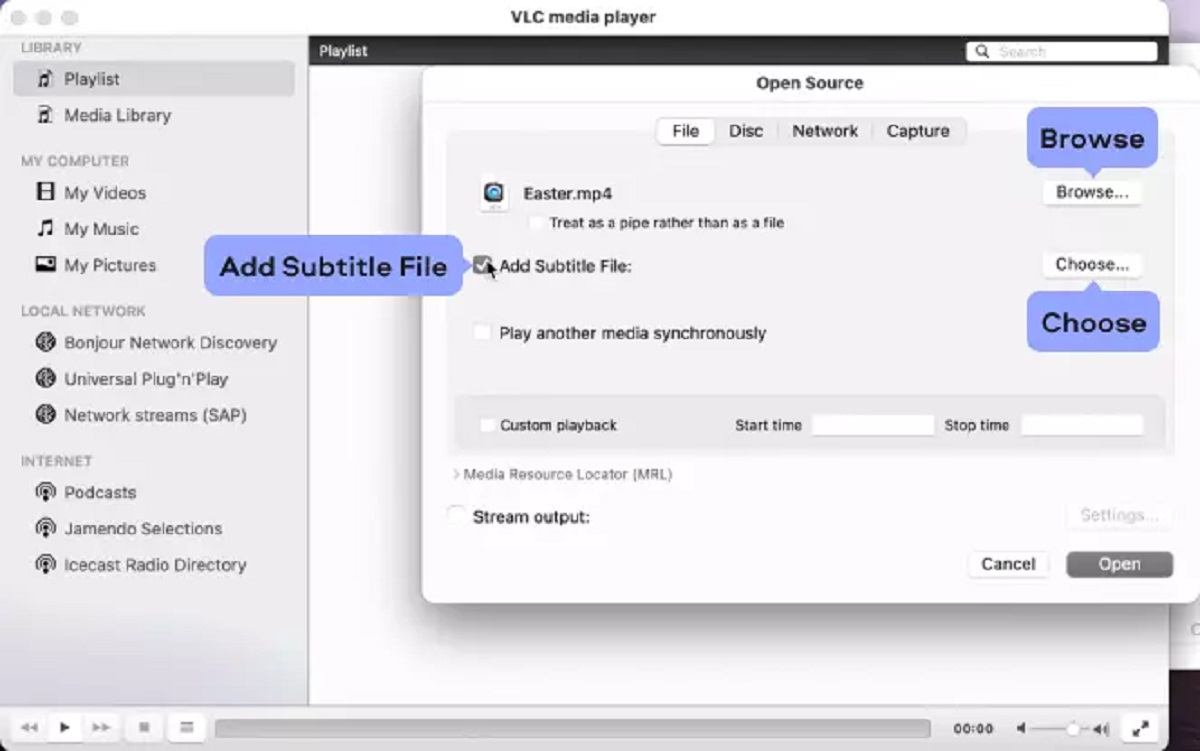
Step 4: Import the subtitle file: Import the subtitle file into the video editing software. Ensure that the subtitle file is correctly synced with the video’s timing.
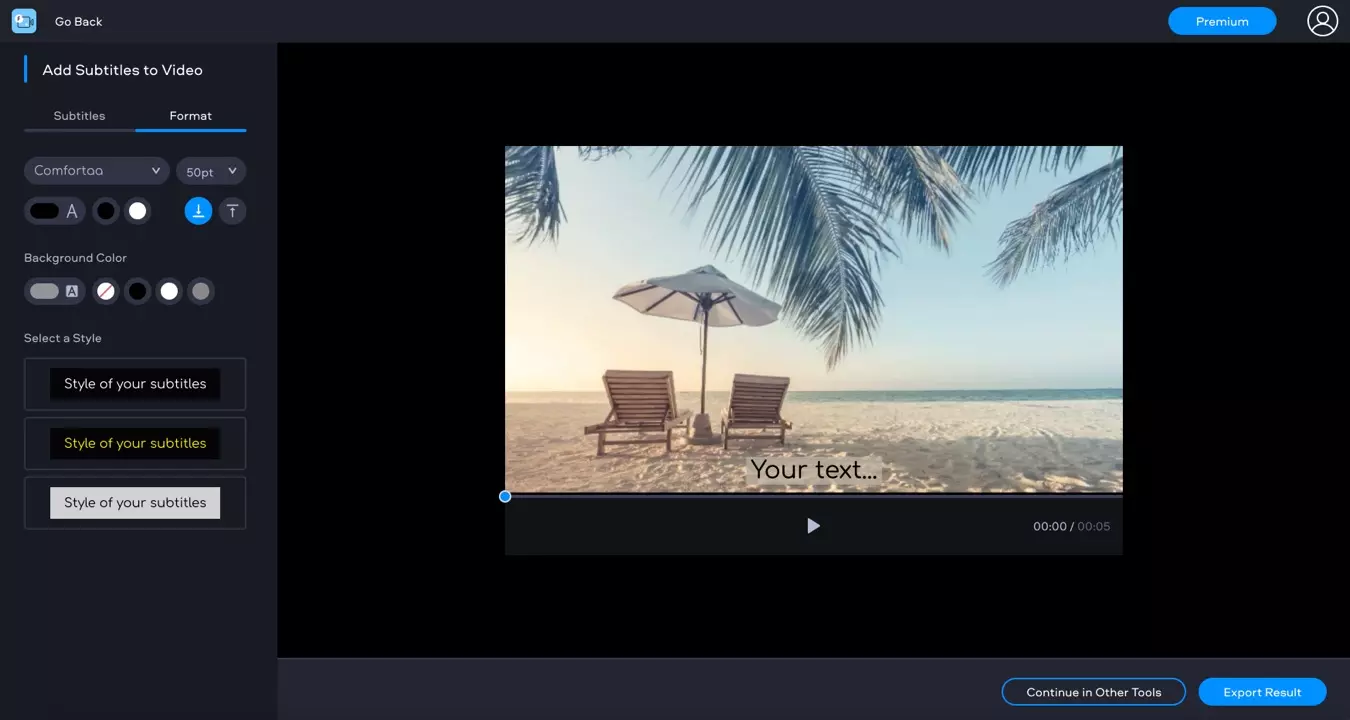
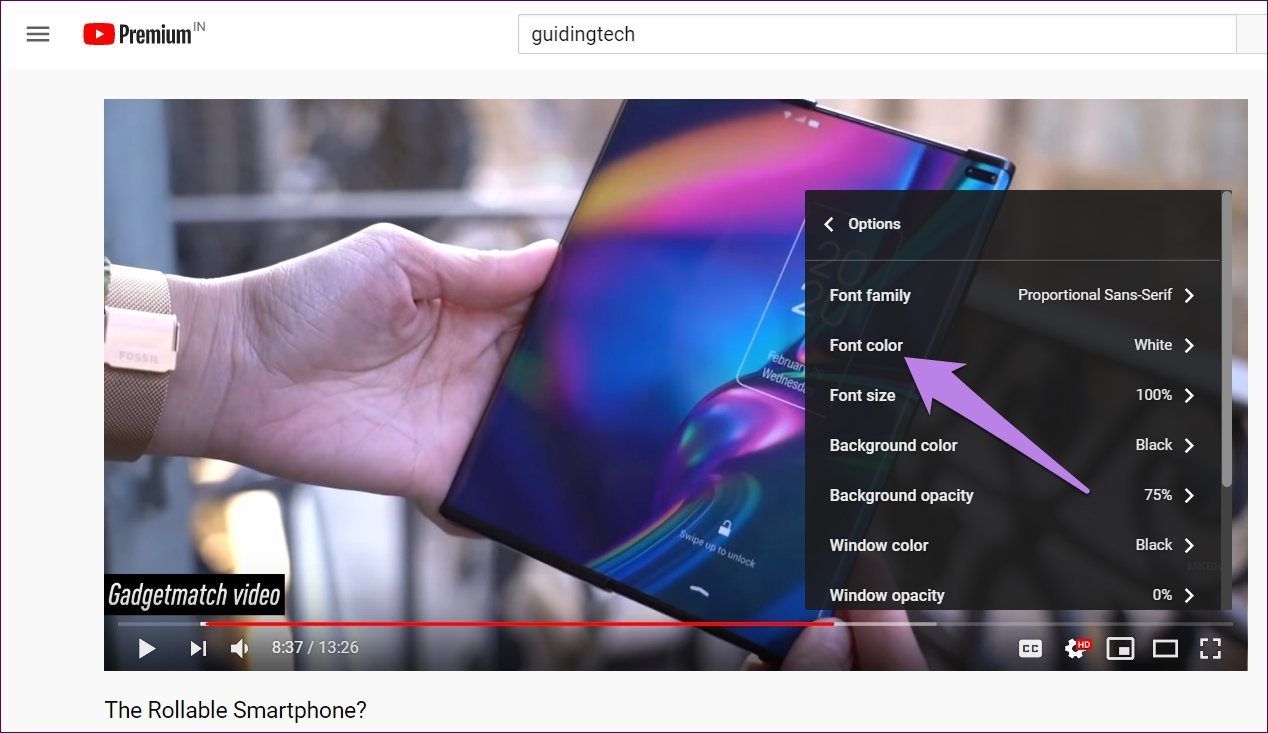
Step 5: Adjust subtitle appearance: Customize the appearance of the subtitles, such as font style, size, color, and positioning, to ensure they are readable and visually pleasing.
Step 6: Preview and fine-tune: Preview the video with the added subtitles to ensure they are displayed correctly and synchronized accurately. Make any necessary adjustments to the subtitle timing and appearance.
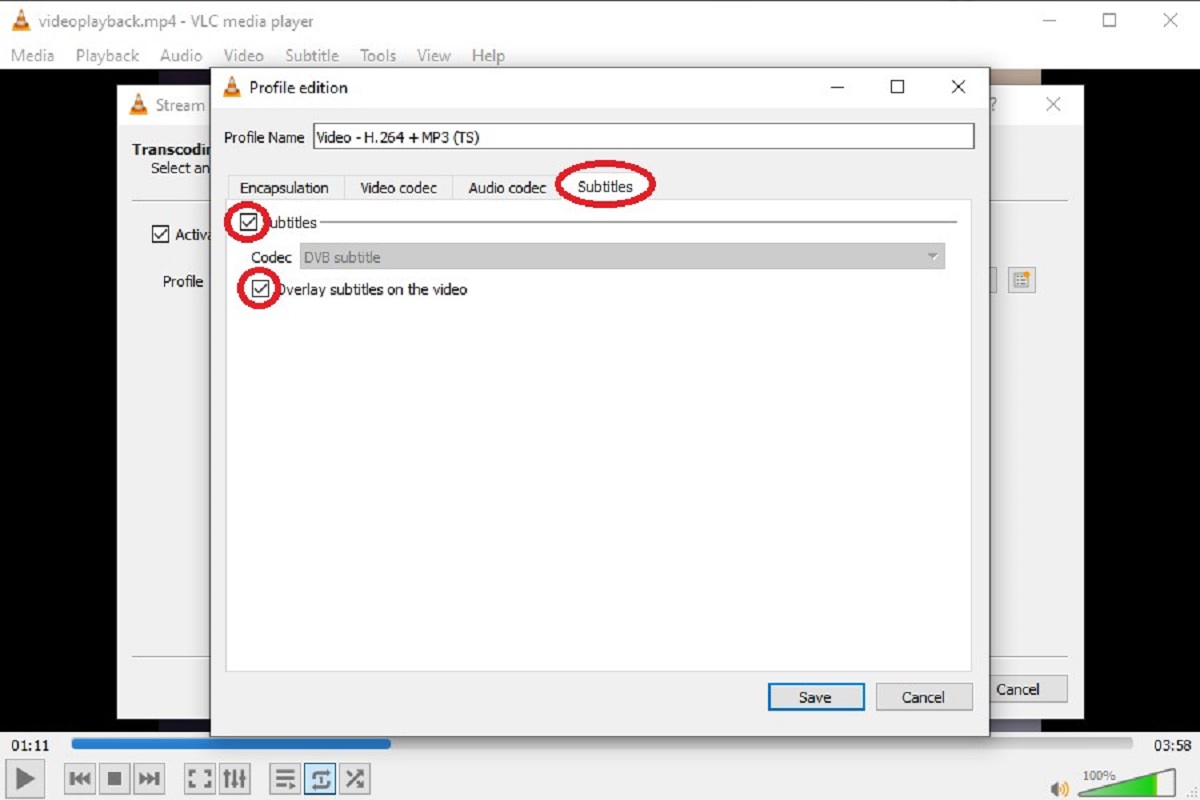
Step 7: Export the video: Once you are satisfied with the subtitles, export the video in a format of your choice. The subtitles will be permanently embedded in the video file.
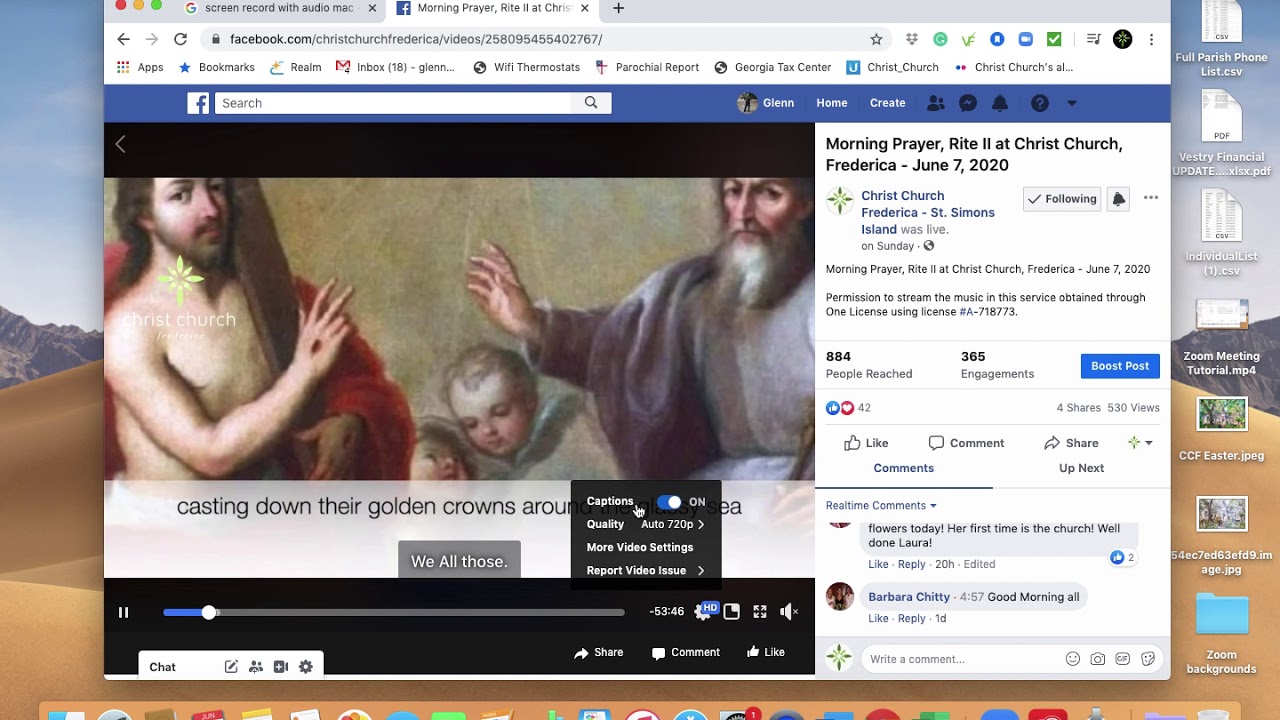
Step 8: Test the video: Play the exported video file on different platforms and media players to verify that the subtitles are displayed properly and remain visible.
By following these step-by-step instructions, you can add subtitles permanently to your videos, ensuring that they are accessible and visible to your audience, regardless of the platform or media player used.
Now that you know how to add subtitles permanently, let’s move on to the next section, which focuses on testing and adjusting your subtitles to ensure optimal viewing experience.
Testing and Adjusting Your Subtitles
Once you have added subtitles to your videos, it’s important to test and adjust them to ensure that your audience has the best viewing experience. Here are some steps to help you test and fine-tune your subtitles:
Step 1: Verify subtitle readability: Play the video with subtitles on different devices, screen sizes, and resolutions to ensure that the text is easily readable. Pay attention to font size, color contrast, and subtitle positioning to ensure optimal visibility.
Step 2: Check subtitle synchronization: Watch the video and compare the subtitles with the audio to ensure they are synchronized correctly. Subtitles that appear too early or too late can be distracting and affect the viewer’s understanding of the content.
Step 3: Validate subtitle duration: Ensure that each subtitle stays on the screen long enough for viewers to read and comprehend the text. Subtitles that appear for too short a duration may cause viewers to miss important information, while those that stay on the screen for too long can be disruptive.
Step 4: Review subtitle accuracy: Pay attention to the accuracy of the subtitles, ensuring that they reflect the dialogue and audio cues accurately. Review for any spelling or grammatical errors and make necessary corrections.
Step 5: Consider subtitle localization: If your target audience speaks a different language, consider translating the subtitles or providing localized versions. This can greatly enhance the accessibility and reach of your videos.
Step 6: Gather viewer feedback: Share your video with a test audience and gather their feedback on the subtitles. Their insights can help identify any areas that need improvement and ensure that the subtitles enhance the overall viewing experience.
Step 7: Fine-tune as necessary: Based on the feedback and your own observations, make any required adjustments to the subtitle timing, positioning, or appearance. Continuously refine the subtitles to ensure a seamless and engaging viewing experience.
By thoroughly testing and adjusting your subtitles, you can ensure that they are accurate, synchronized, and visually appealing. This attention to detail will contribute to a better viewing experience for your audience, accommodating diverse needs and preferences.
Now that we have covered the testing and adjustment process for subtitles, let’s move on to the final section of this article, which provides some tips for creating effective subtitles.
Tips for Creating Effective Subtitles
Creating effective subtitles is crucial in ensuring that your videos are accessible, engaging, and easy to follow. Here are some tips to help you create subtitles that enhance the overall viewing experience:
1. Keep it concise: Subtitles should be concise and to the point. Aim for shorter sentences to ensure that viewers can comfortably read and comprehend the text within the allotted screen time.
2. Use proper punctuation: Use proper punctuation to clarify the meaning of subtitles. This includes using commas, periods, and question marks appropriately to aid in the flow and understanding of the text.
3. Maintain readability: Choose a font style, size, and color that ensure clear readability, even on smaller screens. Avoid using fonts that are too fancy or decorative, as they can be difficult to read.
4. Consider line breaks: Break longer sentences into multiple lines to avoid overcrowding the screen. Ensure that each line does not exceed a certain character limit, typically around 35-40 characters, to maintain readability.
5. Reflect tone and emotion: Capture the tone and emotion of the dialogue in your subtitles. Use punctuation, capitalization, and font styles to convey the speaker’s mood, whether it be excitement, sarcasm, or urgency.
6. Ensure accuracy: Double-check the accuracy of your subtitles to avoid any misinterpretation or confusion. Pay attention to spelling, grammar, and any specific words or terminology used in the video.
7. Use speaker identification: When there are multiple speakers in the video, use speaker identification (e.g., “John: [Dialogue]”) to help viewers easily distinguish between different speakers and follow the conversation.
8. Maintain synchronization: Ensure that the timecodes of your subtitles are correctly synced with the corresponding audio. This ensures that viewers can read the subtitles as the dialogue is being spoken.
9. Localize for international audiences: If you have an international audience, consider translating and localizing your subtitles to reach a broader range of viewers. Ensure that the translations accurately convey the original meaning of the dialogue.
10. Test and gather feedback: Test your subtitles with a sample audience and solicit their feedback. Use their insights to make any necessary improvements to the readability, timing, or content of the subtitles.
By following these tips, you can create subtitles that enhance accessibility, comprehension, and engagement for your viewers. Remember to continuously refine your subtitle creation process to adapt to the needs and preferences of your audience.
Now that we have covered tips for creating effective subtitles, let’s conclude this article and summarize the key points discussed.
Conclusion
Adding subtitles permanently to your videos is not only a way to enhance accessibility but also to improve search engine optimization and engagement. By following the steps outlined in this article, you can successfully add subtitles that are embedded in the video file itself, ensuring they are visible across different platforms and media players.
We began by highlighting the importance of subtitles, discussing how they make videos accessible, inclusive, and improve SEO. We then explored the different subtitle formats available and how to choose the right one for your videos.
Next, we delved into the tools and software that can simplify the subtitle creation process, including Aegisub, Subtitle Edit, Amara, HandBrake, YouTube Studio, Subtitle Workshop, and Adobe Premiere Pro.
A step-by-step guide was provided to help you add subtitles permanently to your videos, ensuring correct synchronization and visual appeal. We also emphasized the importance of testing and adjusting subtitles to provide the best viewing experience for your audience.
Finally, we shared tips for creating effective subtitles, such as maintaining readability, using proper punctuation, reflecting tone and emotion, and considering localization for international audiences.
By incorporating these practices, you can make your videos more accessible, engaging, and inclusive, reaching a wider audience and maximizing the impact of your content.
Remember, the process of adding subtitles permanently to your videos may require some trial and error. Continuously seek feedback from your viewers and make necessary adjustments to ensure the best possible subtitles.
Now that you are equipped with the knowledge and tools to add subtitles permanently, go ahead and enhance your videos to make them accessible and appealing to a broader audience.