Introduction
Welcome to the world of Discord, a popular communication platform designed for gamers and communities alike. With its extensive features and customization options, Discord provides a unique and engaging experience for users. One of the many ways to enhance your Discord interactions is by adding stickers. Stickers are expressive images or animations that can be used to convey emotions, reactions, or simply add a touch of fun to your messages.
In this guide, we will walk you through the process of adding stickers to Discord, whether you want to use pre-made sticker packs or create your own custom stickers. With a variety of methods to choose from, you’ll be able to find the perfect stickers to personalize your Discord experience.
Before we delve into the step-by-step guide, let’s take a moment to understand why stickers are a great addition to Discord conversations.
Enhance Communication: Stickers provide an alternative way to express yourself and add visual elements to your messages. They can convey emotions, reactions, or even clarify the tone of your message.
Personalize Your Experience: By adding stickers to Discord, you can customize your conversations to reflect your personality or interests. Whether it’s cute animals, memes, or your own designs, stickers allow you to make your messages truly unique.
Create a Relaxed Atmosphere: Stickers can help create a more relaxed and friendly environment in your Discord server. They can engage members, spark conversations, and create a sense of community.
Now that you understand the benefits of using stickers in Discord, let’s dive into the step-by-step guide on how to add stickers to your account.
What are stickers and why use them in Discord?
Stickers in Discord are visual elements, usually in the form of images or animations, that can be added to messages to enhance communication and express emotions. They serve as a fun and creative way to interact with others in your Discord server. Here are a few reasons why you should consider using stickers in Discord:
Express Emotions: Stickers are a fantastic tool for expressing your emotions in a more visual and engaging way. Sometimes, words alone cannot capture the full range of emotions we want to convey. Stickers allow you to add that extra layer of expression to your messages, making your interactions more vibrant and captivating.
Convey Reactions: Have you ever struggled to find the right words to respond to a message? Stickers can come to your rescue! They offer a wide range of reactions that can reflect your feelings towards a particular message or conversation. Whether it’s a thumbs up, a facepalm, or a burst of laughter, stickers enable you to easily communicate your reactions.
Add Personality: Customizing your Discord experience is a key aspect of making it truly your own. With stickers, you can infuse your personality into your conversations. From showcasing your favorite memes to sharing your love for a specific hobby or interest, stickers allow you to express yourself and make your messages stand out.
Create a Sense of Community: Discord is all about building communities and connecting with like-minded individuals. Stickers can contribute to this sense of community by fostering engagement and sparking conversations. They provide a common ground for members to bond over shared interests, memes, or inside jokes.
Encourage Interaction and Engagement: Stickers are visually appealing and captivating, which can attract the attention of other users in your server. By using stickers, you can encourage others to react or respond to your messages, leading to increased interaction and engagement within your community.
Overall, stickers in Discord offer a wide range of benefits, from enhancing communication and expressing emotions to personalizing your experience and fostering a sense of community. Now that you understand why stickers are worth using, let’s move on to the step-by-step guide on how to add stickers to Discord.
Step-by-step guide to adding stickers to Discord
Adding stickers to your Discord account is a straightforward process. Whether you want to use pre-made sticker packs or create your own custom stickers, there are multiple methods to choose from. Here is a step-by-step guide to help you add stickers to Discord:
- Method 1: Using a sticker bot:
- Search for a sticker bot on Discord’s bot list or on popular bot listing websites.
- Add the chosen sticker bot to your server by following the instructions provided by the bot.
- Once the bot is added, use the specified command to access the bot’s sticker library.
- Browse through the available sticker packs and choose the ones you want to add to Discord.
- Click on the desired sticker to send it in a chat or follow the bot’s instructions to activate the stickers.
- Method 2: Uploading custom stickers:
- Create or collect the images or animations you want to use as stickers. Ensure they meet Discord’s guidelines regarding size and format.
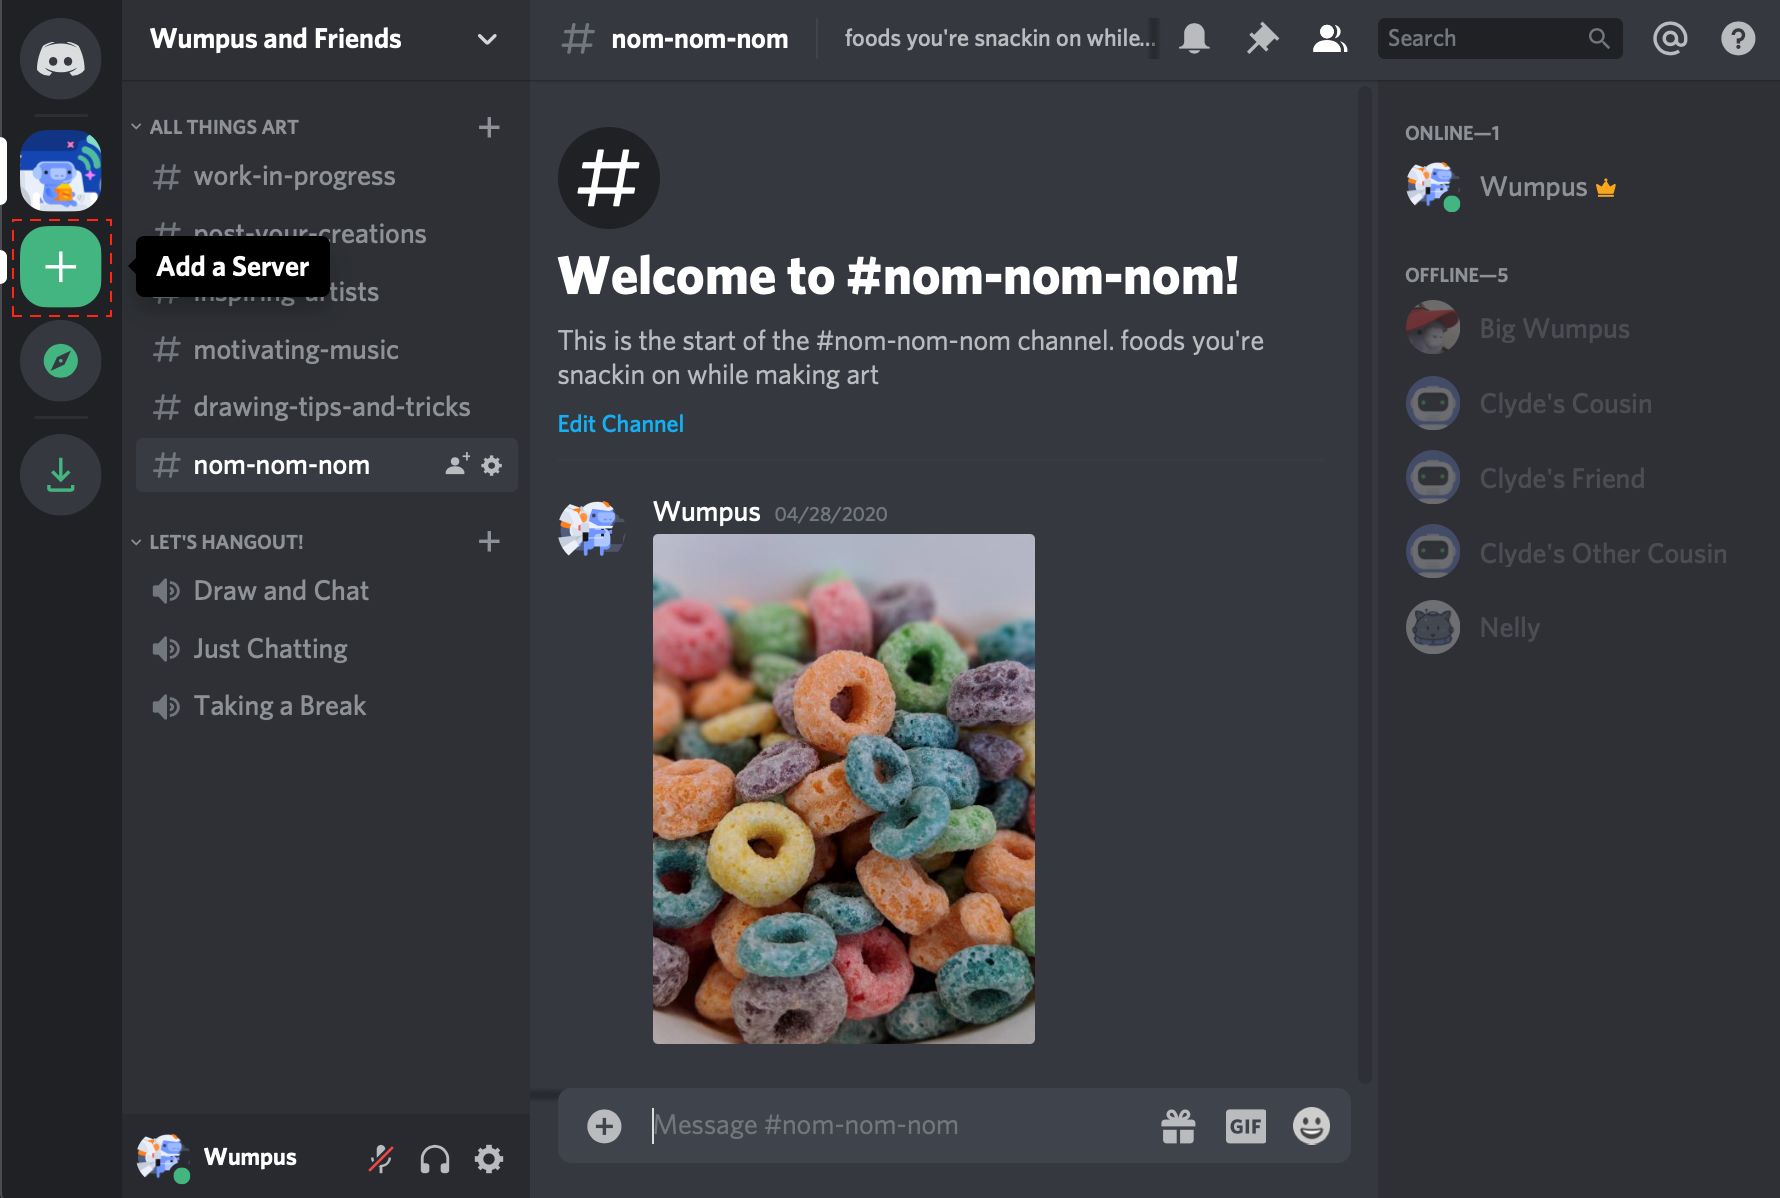
- In your Discord server, click on the ‘+’ button next to the ‘Stickers’ category in the left-hand sidebar.
- Click on the ‘Upload’ button and select the sticker file you want to add.
- Assign a name and tags to the sticker to make it easily searchable within your server.
- Click ‘Save’ to add the custom sticker to your Discord server.
- Method 3: Enabling animated stickers:
- Determine if the server you are in allows animated stickers. Some servers may have specific rules or restrictions regarding the usage of animated stickers.
- If animated stickers are allowed, select the ‘+’ button next to the ‘Stickers’ category in the left-hand sidebar of your Discord server.
- Click ‘Upload’ and select the animated sticker file you want to add.
- Assign a name and tags to the animated sticker for easy searchability.
- Toggle on the ‘Animated’ button to enable animation for the sticker.
- Click ‘Save’ to add the animated sticker to your Discord server.
By following these steps, you can add stickers to your Discord server and start using them in your conversations. Now that you know the methods, it’s time to explore some tips for choosing and using stickers effectively in Discord. Let’s dive in!
Method 1: Using a sticker bot
Using a sticker bot is one of the easiest ways to add stickers to your Discord server. These bots offer a wide range of pre-made sticker packs that you can choose from. Here is a step-by-step guide on how to use a sticker bot to add stickers to Discord:
- Search for a sticker bot: Start by searching for a sticker bot that suits your preferences. You can find sticker bots on Discord’s bot list or popular bot listing websites. Look for bots that have positive reviews and offer a variety of sticker packs to choose from.
- Add the sticker bot to your server: Once you have found a sticker bot you like, follow the instructions provided by the bot to add it to your Discord server. Typically, you will need to click on a link or use a command to invite the bot to your server.
- Access the sticker library: After the bot is added to your server, you can use a specific command to access its sticker library. The bot will provide you with the command you need to use. Make sure you have the necessary permissions to use the bot’s commands.
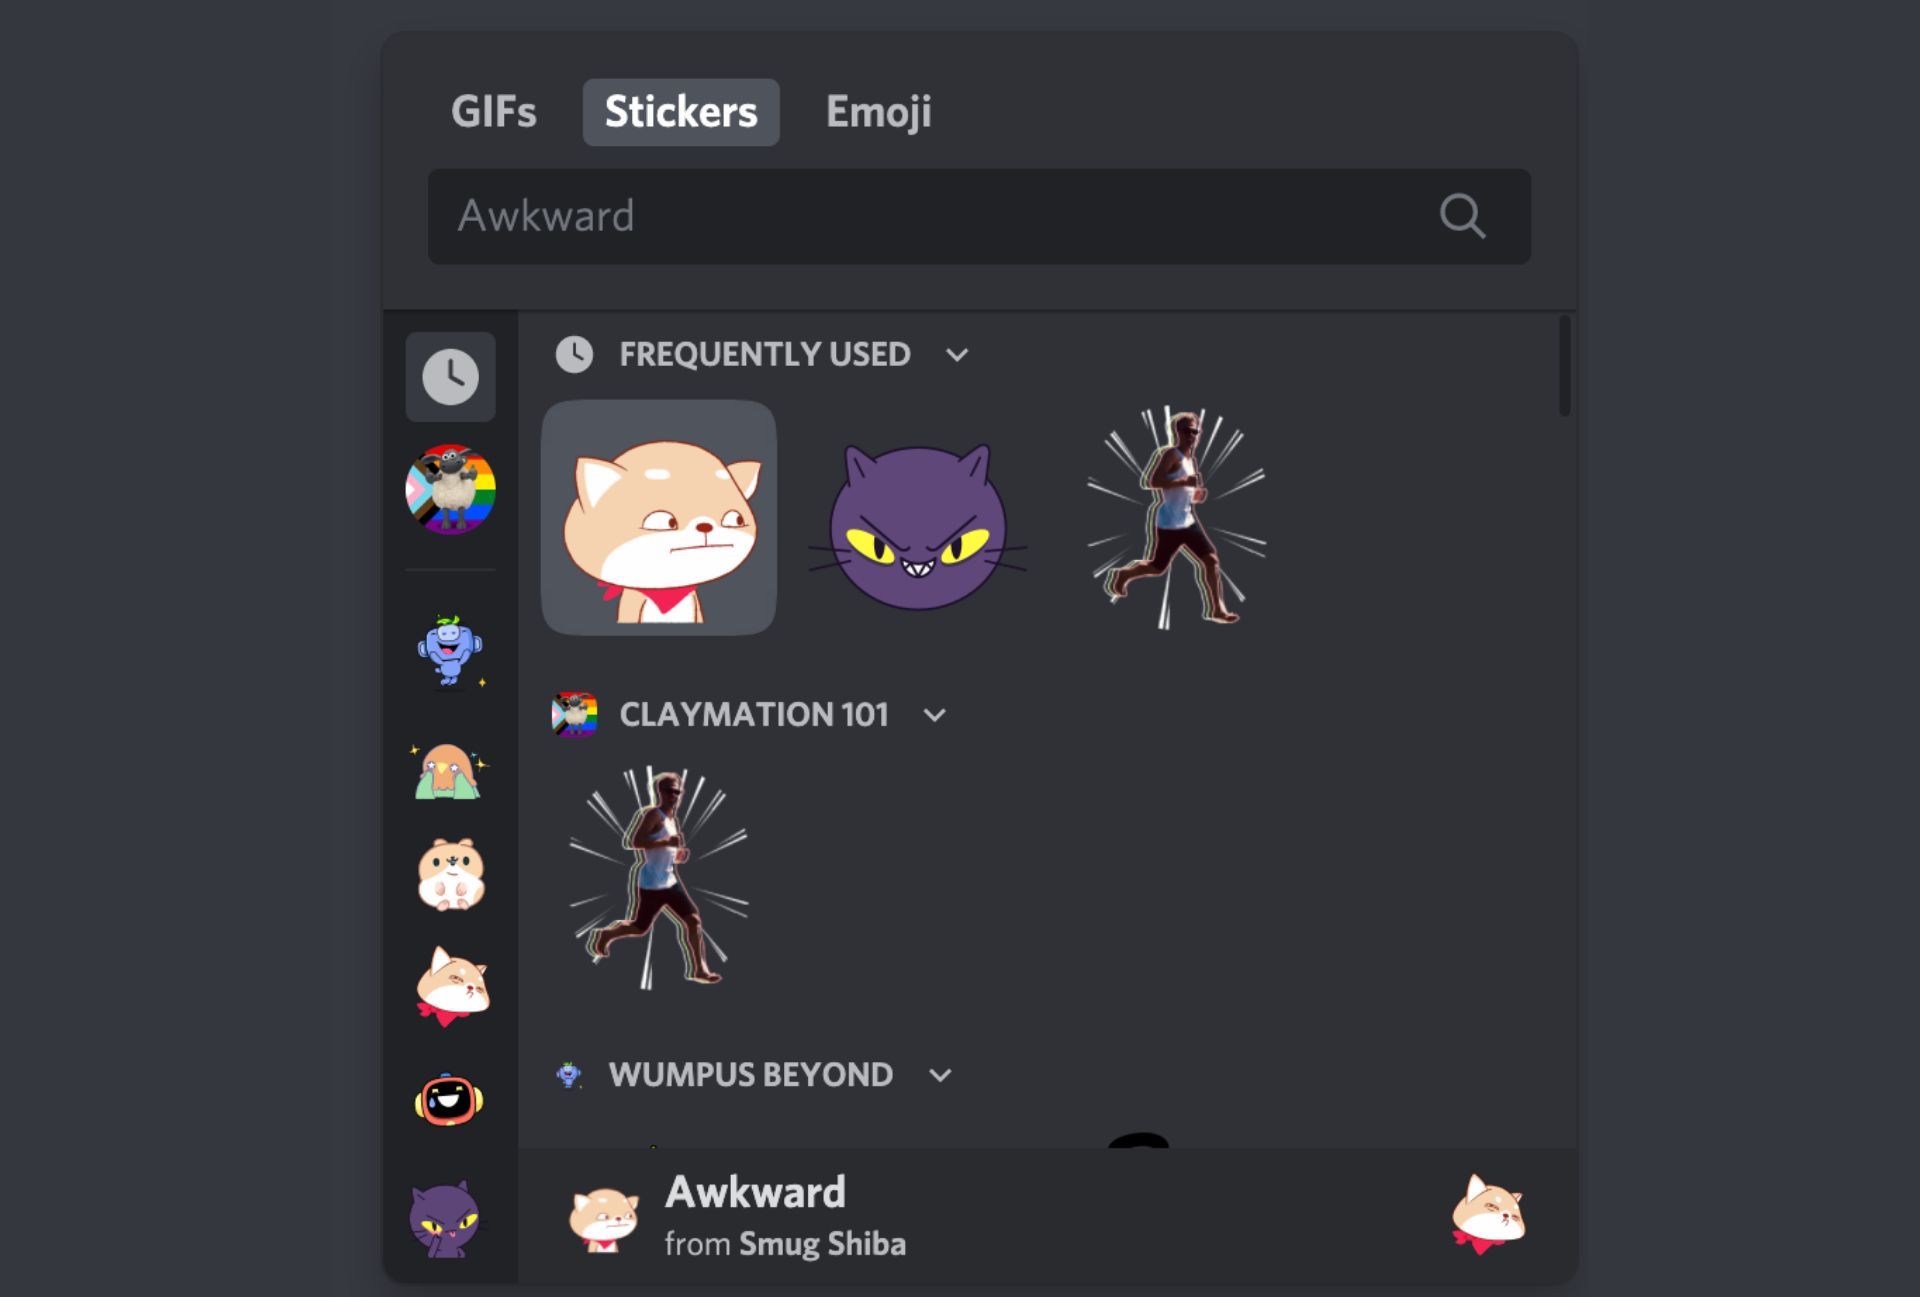
- Browse and choose stickers: Once you have access to the sticker library, browse through the available sticker packs. The packs are usually organized by themes, categories, or artists. Take your time to explore the options and find the stickers that suit your style and preferences.
- Send stickers or activate them: When you find a sticker you want to use, simply click on it to send it in the chat. The sticker will be displayed in its animated or static form, depending on the design. Some bots may require you to follow additional instructions to activate the stickers before you can use them.
Using a sticker bot gives you access to a wide range of pre-made stickers that you can easily add to your Discord conversations. It’s a great option if you want a hassle-free way to enhance your messages with expressive stickers. Experiment with different sticker bots to find the ones that align with your interests and add a touch of fun to your Discord experience.
Now that you know how to use a sticker bot, let’s move on to the next method: uploading custom stickers to Discord.
Method 2: Uploading custom stickers
If you want to add a personal touch to your Discord server, uploading custom stickers is the way to go. With this method, you can use your own images or animations to create unique stickers that reflect your style and interests. Here’s a step-by-step guide on how to upload custom stickers to Discord:
- Create or collect your sticker images: Start by creating or collecting the images or animations you want to use as custom stickers. Make sure they meet the guidelines set by Discord in terms of size and format. Ideally, stickers should be transparent PNG files with a size of 512×512 pixels.
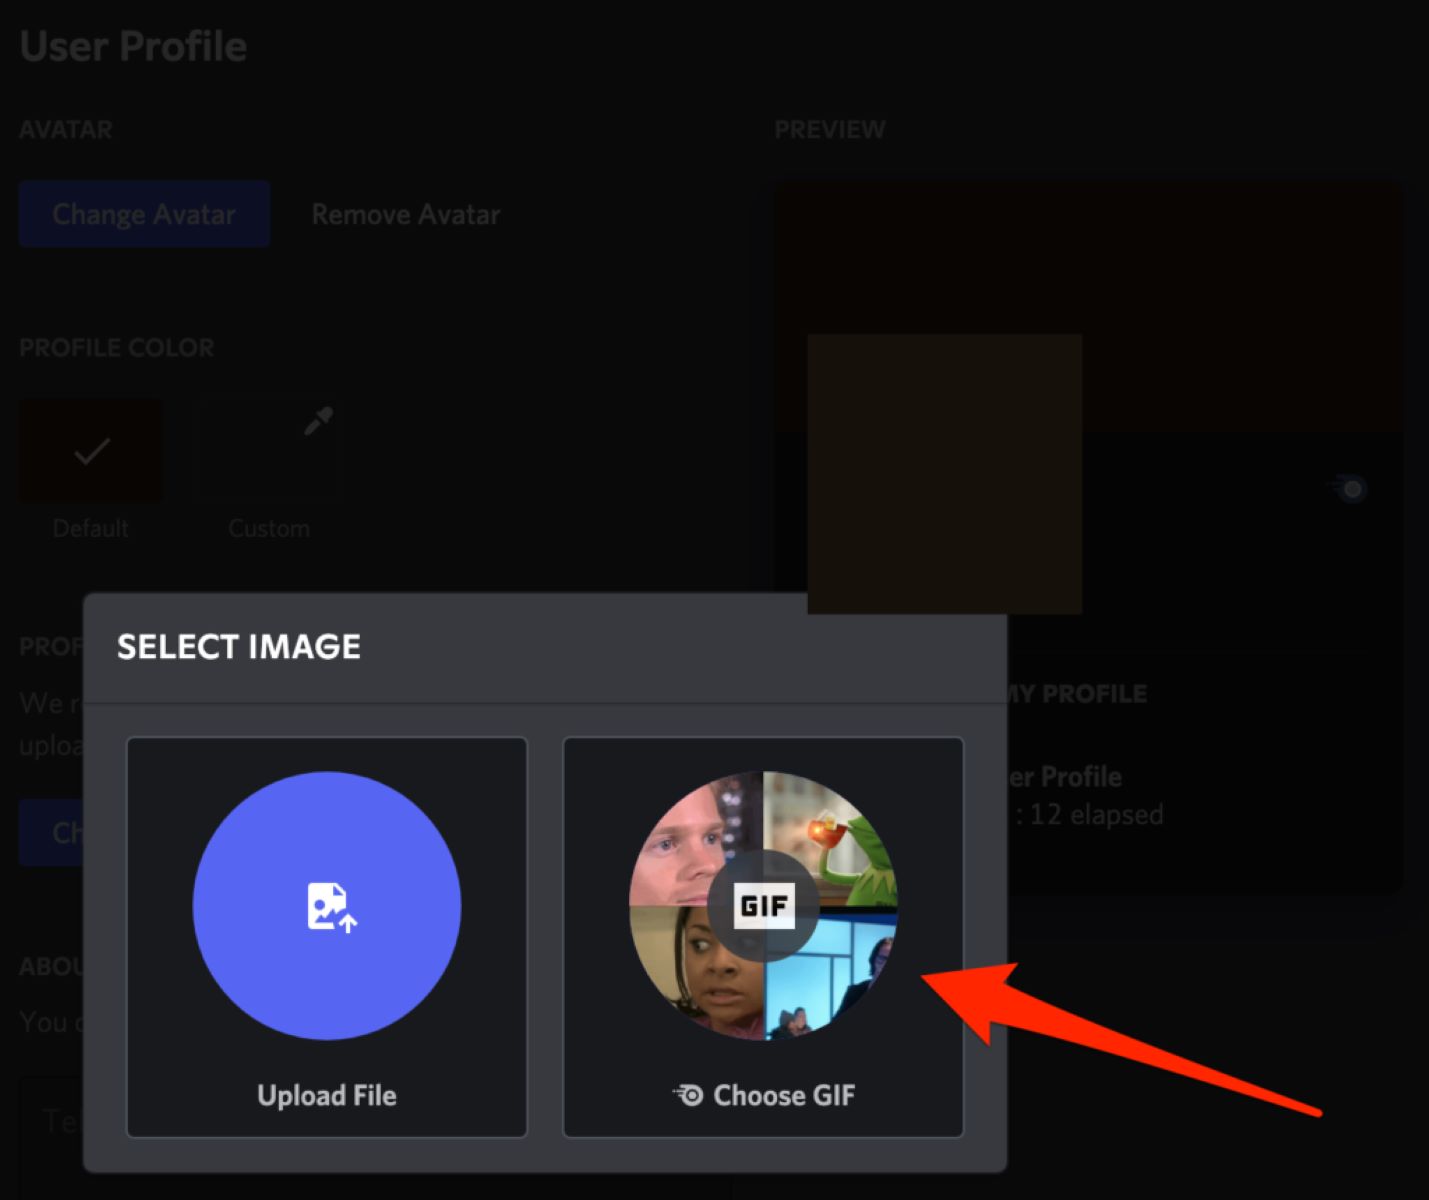
- Access the Stickers section in Discord: In your Discord server, look for the ‘+’ button next to the ‘Stickers’ category in the left-hand sidebar. Click on this button to access the Stickers section.
- Upload the custom sticker: Once you’re in the Stickers section, click on the ‘Upload’ button. This will open a file selection dialog where you can choose the sticker file you want to upload. Select the appropriate file from your device.
- Name and tag your sticker: After selecting the sticker file, you will be prompted to assign a name and tags to the sticker. Provide a descriptive name that helps identify the sticker and choose relevant tags that make it easily searchable within your server.
- Save the custom sticker: Once you have named and tagged your sticker, click on the ‘Save’ button to add it to your Discord server. The sticker will now be available for you and other members of your server to use in Discord conversations.
Uploading custom stickers allows you to showcase your creativity and tailor your Discord experience to your preferences. Whether you create stickers featuring your own artwork or collect images that resonate with your community, custom stickers add a personal touch to your server’s conversations.
Don’t forget to explore different themes and styles when creating or collecting custom stickers. This will ensure that you have a diverse collection to choose from, allowing you to express yourself in various situations and conversations.
Now that you know how to upload custom stickers, let’s move on to the next method: enabling animated stickers in Discord.
Method 3: Enabling animated stickers
If you want to take your sticker game to the next level, Discord allows you to enable animated stickers. These animated stickers add a dynamic and eye-catching element to your conversations. Here’s a step-by-step guide on how to enable animated stickers in Discord:
- Check server rules and permissions: Before enabling animated stickers, make sure to check whether the server you are in allows the usage of animated stickers. Some servers may have specific rules or restrictions regarding the use of animated content.
- Access the Stickers section in Discord: To enable animated stickers, go to your Discord server and look for the ‘+’ button next to the ‘Stickers’ category in the left-hand sidebar. Click on this button to access the Stickers section.
- Upload the animated sticker file: Once you’re in the Stickers section, click on the ‘Upload’ button. This will prompt a file selection dialog. Choose the animated sticker file you want to add to your server.
- Name and tag the animated sticker: After selecting the sticker file, provide a descriptive name and relevant tags for your animated sticker. This will make it easier for you and other server members to find and use the sticker.
- Toggle on the ‘Animated’ button: To enable the animation for the sticker, locate the ‘Animated’ button in the Sticker upload window. Toggle this button on to activate the animation for the sticker.
- Save the animated sticker: Once you have named, tagged, and enabled animation for the sticker, click on the ‘Save’ button. The animated sticker will now be available for you and other members of your server to use in Discord conversations.
Enabling animated stickers in Discord adds a dynamic and playful element to your conversations. They are a great way to catch attention, express excitement, or convey a specific message in a more lively manner.
When exploring animated stickers, consider using a variety of styles and themes to cater to different preferences within your server. This ensures that you have a diverse collection that appeals to a wide range of users. Additionally, keep in mind that too many animated stickers in a single conversation might make it overwhelming, so use them judiciously to enhance your messages without overwhelming your audience.
Now that you know how to enable animated stickers, it’s time to move on to some helpful tips for choosing and using stickers effectively in Discord.
Tips for choosing and using stickers effectively
Choosing and using stickers effectively can greatly enhance your Discord experience and make your conversations more engaging. Here are some helpful tips to consider when selecting and utilizing stickers:
- Align with the tone and context: Choose stickers that align with the tone and context of your conversations. Whether you’re looking for something funny, cute, or expressive, make sure the stickers you use enhance the message you want to convey.
- Reflect your personality: Infuse your own personality into your sticker choices. Select stickers that resonate with you and reflect your interests, sense of humor, or unique style. This allows you to express yourself authentically and create a more personalized Discord experience.
- Variety is key: Don’t limit yourself to a single style or theme. Create a diverse collection of stickers that cater to different moods and situations. This ensures that you have a wide range of options to choose from and keeps your conversations interesting and fresh.
- Consider your audience: If you’re managing a Discord server or engaging in group conversations, consider the preferences and interests of your community members. Choose stickers that are likely to resonate with them and spark interactions.
- Use stickers sparingly: While stickers can add flair to your conversations, it’s important not to overdo it. Using stickers in moderation ensures that they retain their impact and don’t become overwhelming. Avoid cluttering your messages with too many stickers and use them strategically to enhance specific points.
- React with stickers: Instead of just sending stickers as standalone messages, use them to react to the messages of others. Reacting with stickers adds a layer of interactivity and can help initiate conversations or further engage with the content shared by others.
- Encourage sticker usage: If you want to promote sticker usage within your server or community, create channels or specific events where members can showcase their favorite stickers or engage in sticker-related activities. This helps foster a sense of community and encourages members to explore and use stickers more actively.
By following these tips, you’ll be able to choose and use stickers effectively, amplifying the expressiveness and engagement of your Discord conversations. Remember to have fun and experiment with different sticker combinations to find what works best for you and your community.
Now that you’re equipped with these tips, you can make the most of your Discord sticker experience. Whether it’s adding stickers from bots, uploading custom designs, or enabling animated stickers, let your creativity shine and enhance your conversations in Discord.
Conclusion
Stickers are a fantastic way to enhance your Discord conversations, adding a touch of personality, emotion, and creativity to your messages. Whether you use pre-made sticker packs from sticker bots, upload your own custom stickers, or enable animated stickers, the choices are endless. By following the step-by-step guide and incorporating the tips mentioned above, you can make the most of stickers in Discord and create a more engaging and vibrant community.
Remember to choose stickers that align with the tone and context of your conversations, reflect your personality, and cater to the interests of your community members. Use stickers sparingly and strategically to enhance specific points or react to the messages of others. Encourage sticker usage within your server or community by creating dedicated channels or events where members can showcase their favorite stickers.
With stickers, you have the power to express yourself in a visually appealing and dynamic way, fostering a sense of community and increasing interaction among Discord users. So go ahead, explore the world of stickers in Discord, and have fun adding a splash of creativity and emotion to your conversations!