Introduction
Welcome to the world of LG Smart TVs, where entertainment is just a click away! With its sleek design, stunning picture quality, and smart features, an LG Smart TV is the perfect addition to any living room or bedroom. One of the biggest advantages of owning an LG Smart TV is the ability to access a wide range of channels directly from your TV, providing you with endless entertainment options.
In this article, we will guide you through the process of adding channels to your LG Smart TV. Whether you’re a sports enthusiast, a movie buff, or just looking for some family-friendly programming, you’ll find something that suits your taste in the LG Content Store. We’ll walk you through each step, from connecting your TV to the internet to installing and organizing your desired channels.
Before we dive into the process, let’s go over the prerequisites for adding channels to your LG Smart TV. First and foremost, you need a stable internet connection. The TV relies on an internet connection to stream content, so make sure your Wi-Fi or Ethernet connection is set up and working properly. Moreover, ensure that your LG Smart TV is running on the latest firmware version. Updating the firmware will ensure that you have access to the latest features and optimizations.
Prerequisites for Adding Channels
Before you start adding channels to your LG Smart TV, there are a few prerequisites you need to take care of. These will ensure a seamless and hassle-free experience when installing and enjoying your favorite channels.
First and foremost, make sure that your LG Smart TV is connected to the internet. Whether it’s through a Wi-Fi connection or an Ethernet cable, a stable internet connection is essential for streaming channels on your TV. If you’re using Wi-Fi, ensure that your TV is within range of your router or access point for optimal performance.
Next, check that your LG Smart TV is running on the latest firmware version. Firmware updates often include performance enhancements, bug fixes, and support for new features, ensuring a smoother user experience. To update the firmware, go to the settings menu on your TV, navigate to the “About” or “General” section, and select “Software Update” or a similar option. Follow the on-screen instructions to check for and install any available updates.
You’ll also need an LG account to access the LG Content Store and install channels on your TV. If you don’t have an LG account yet, you can easily create one through the settings menu on your TV. Simply navigate to the “Account” or “Sign In” section and select “Create Account” or a similar option. Follow the prompts to enter your details and set up your account.
Lastly, ensure that you have a list of channels you want to add to your LG Smart TV. Take some time to research and find channels that align with your interests and preferences. Whether you’re into live sports, movies, news, or documentaries, the LG Content Store offers a wide variety of channels to choose from. Having a pre-planned list will make the process of searching and installing channels much easier and more efficient.
By taking care of these prerequisites, you’ll be ready to add channels to your LG Smart TV and embark on a journey of truly personalized entertainment. So let’s dive into the steps and get started on adding the channels you love!
Step 1: Connect your LG Smart TV to the internet
Before you can begin adding channels to your LG Smart TV, you need to ensure that it is connected to the internet. There are two main ways to connect your TV: via Wi-Fi or using an Ethernet cable. Follow the steps below to establish a connection:
1. Wi-Fi Connection:
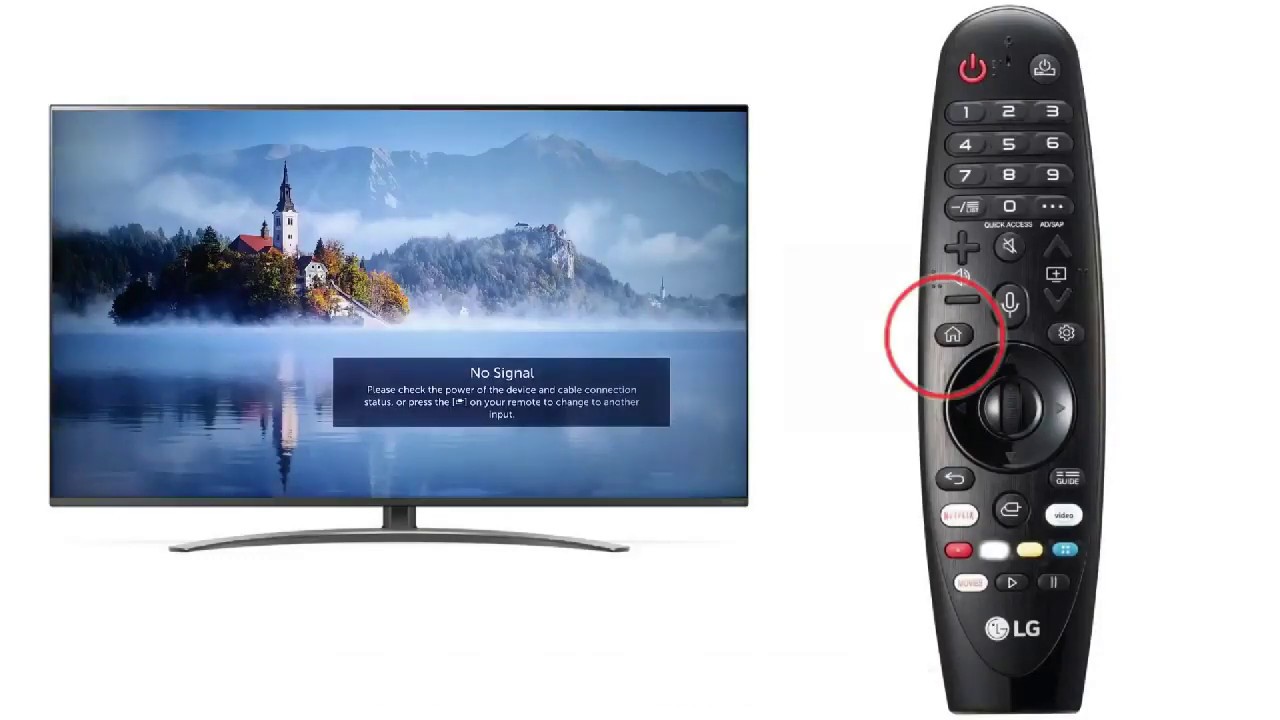
– Using your remote control, press the “Settings” or “Home” button to access the TV’s main menu.
– Navigate to the “Network” or “Settings” section and select “Wi-Fi Settings” or a similar option.
– Your TV will search for available Wi-Fi networks. Select your network from the list and enter the password if prompted.
– Once the connection is established, your TV will display a confirmation message. You are now connected to the internet via Wi-Fi.
2. Ethernet Connection:
– Locate the Ethernet port on the back of your LG Smart TV.
– Connect one end of the Ethernet cable to the port on the TV and the other end to your router or modem.
– Your TV will automatically detect the Ethernet connection and establish a network connection.
Once your LG Smart TV is successfully connected to the internet, you can proceed to the next step of adding channels. A stable internet connection is vital for streaming content, so make sure your Wi-Fi signal is strong or your Ethernet connection is secure.
It’s worth mentioning that if you are using a wired Ethernet connection, you don’t need to worry about Wi-Fi signal strength or interference. Conversely, if you choose to connect via Wi-Fi, ensure that your TV is within range of your router or access point to maintain a reliable connection.
Now that your LG Smart TV is connected to the internet, you’re ready to explore the LG Content Store and start adding channels to your TV. Let’s move on to the next step!
Step 2: Access the LG Content Store
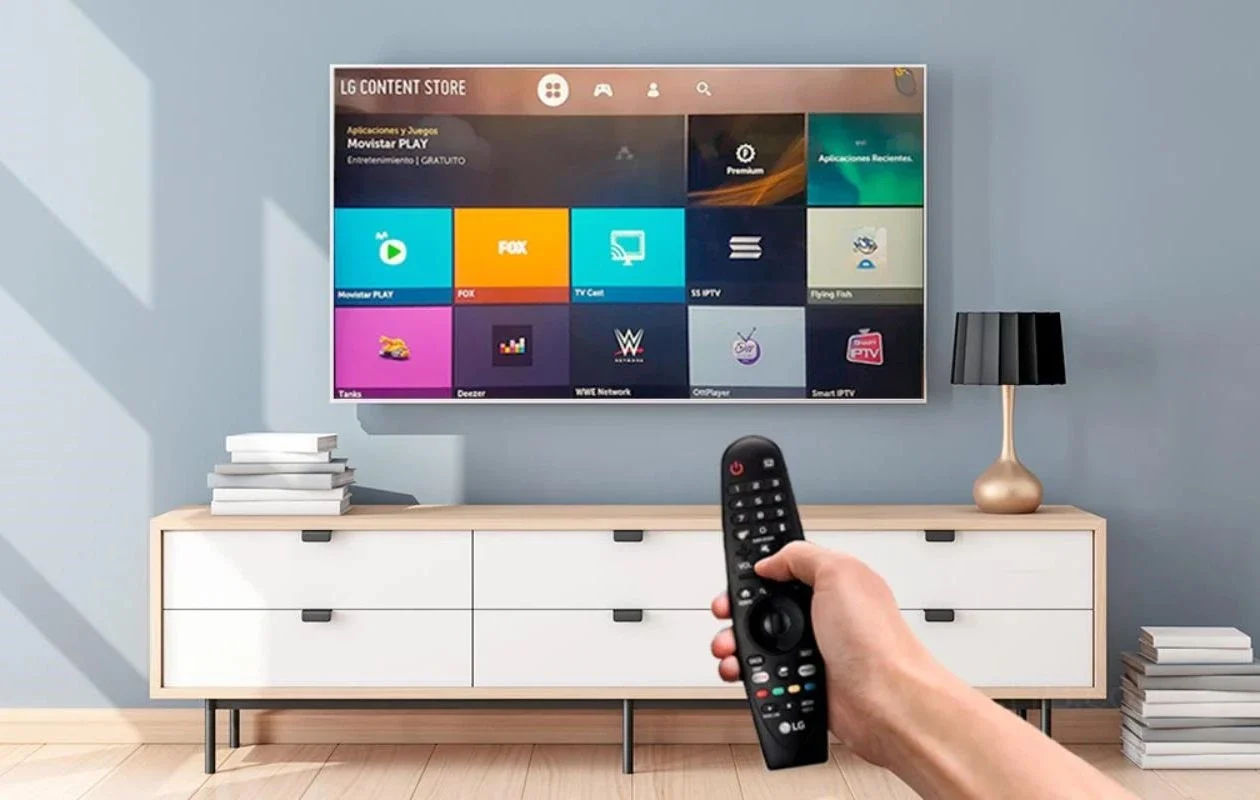
Now that your LG Smart TV is connected to the internet, it’s time to access the LG Content Store, where you will find a wide range of channels to choose from. The LG Content Store is the official app store for LG Smart TVs and offers a variety of apps and channels for your entertainment needs. Follow the steps below to access the LG Content Store:
1. Using your remote control, press the “Home” or “Smart” button to open the main menu of your LG Smart TV.
2. Navigate to the “Apps” or “LG Content Store” section. The exact name may vary depending on your TV model.
3. Select the “LG Content Store” option and press the OK or Enter button on your remote.
Once you have successfully accessed the LG Content Store, you will be greeted with a wide selection of apps and channels to explore. You can browse through different categories, such as movies, sports, TV shows, or use the search function to find specific channels or apps.
The LG Content Store provides a user-friendly interface, making it easy to navigate and discover new content. You can also view ratings, reviews, and descriptions for each channel, helping you make informed decisions about which ones to install.
It’s important to note that some channels may require a subscription or in-app purchases for full access to their content. Make sure to read the details and terms of each channel before installing them on your TV.
In addition to adding channels, the LG Content Store offers a variety of other apps to enhance your smart TV experience. These apps can range from streaming services and gaming platforms to news and weather apps. Take some time to explore the different categories and discover new apps that align with your interests.
With the LG Content Store at your fingertips, you have a world of entertainment options waiting to be discovered. Now that you know how to access it, let’s move on to the next step of browsing and searching for available channels.
Step 3: Browse and search for available channels
Now that you have accessed the LG Content Store on your LG Smart TV, it’s time to browse and search for the available channels that you want to add to your TV. The LG Content Store offers a wide variety of channels across different genres, including movies, sports, news, lifestyle, and more. Here’s how you can browse and search for channels:
1. Browsing Channels:
– Use the arrow keys on your remote control to navigate through the different categories available in the LG Content Store.
– Select a category that interests you, such as Movies, Sports, or TV Shows.
– Explore the channels within the selected category by scrolling through the list. You can use the arrow keys to navigate up and down.
– Select a channel to view its details, including a description, ratings, and reviews.
2. Searching for Channels:
– If you have a specific channel in mind, you can use the search function to find it quickly.
– Navigate to the search bar in the LG Content Store.
– Use the on-screen keyboard or your remote control to enter the name of the channel.
– As you type, the search results will start appearing. Select the desired channel from the list to view its details.
While browsing or searching for channels, take note of any subscription requirements, in-app purchases, or additional charges associated with specific channels. It’s important to check these details before installing a channel to avoid any surprises later on.
To help you make informed decisions, you can read user reviews and ratings for each channel. These reviews can provide insights into the quality of content, user experience, and any potential issues that other users have encountered.
Once you have found a channel that you want to install, proceed to the next step to learn how to add it to your LG Smart TV.
Remember, the LG Content Store regularly updates its list of channels and adds new ones, so make sure to check back frequently for the latest additions. This will ensure that you always have access to a wide range of content that suits your interests and preferences.
Now that you know how to browse and search for channels in the LG Content Store, let’s move on to the next step of installing the desired channels onto your LG Smart TV.
Step 4: Install desired channels
Now that you have found the channels you want to add to your LG Smart TV, it’s time to install them. The LG Content Store makes the installation process quick and straightforward. Follow these steps to install your desired channels:
1. Select the channel: Navigate to the channel you want to install in the LG Content Store. Highlight the channel and press the OK or Enter button on your remote control to view its details.
2. Install the channel: On the channel’s details page, you will typically find an option to “Install” or “Add to My Channels.” Select this option to initiate the installation process. Depending on the channel’s size and your internet connection speed, it may take a few moments to download and install.
3. Monitor the installation progress: You will usually see a progress bar or loading symbol indicating the installation progress. Be patient and wait for the installation to complete. Avoid turning off the TV or interrupting the installation process to ensure a successful installation.
4. Confirmation message: Once the channel is successfully installed, you will see a confirmation message on the screen. This indicates that the channel is now ready to be accessed and enjoyed.
5. Repeat for additional channels: If you have more channels you want to install, repeat the above steps for each one. Explore different categories, search for specific channels, and add as many channels as you desire. Your LG Smart TV has enough storage capacity to accommodate multiple channels, so feel free to install a variety of options.
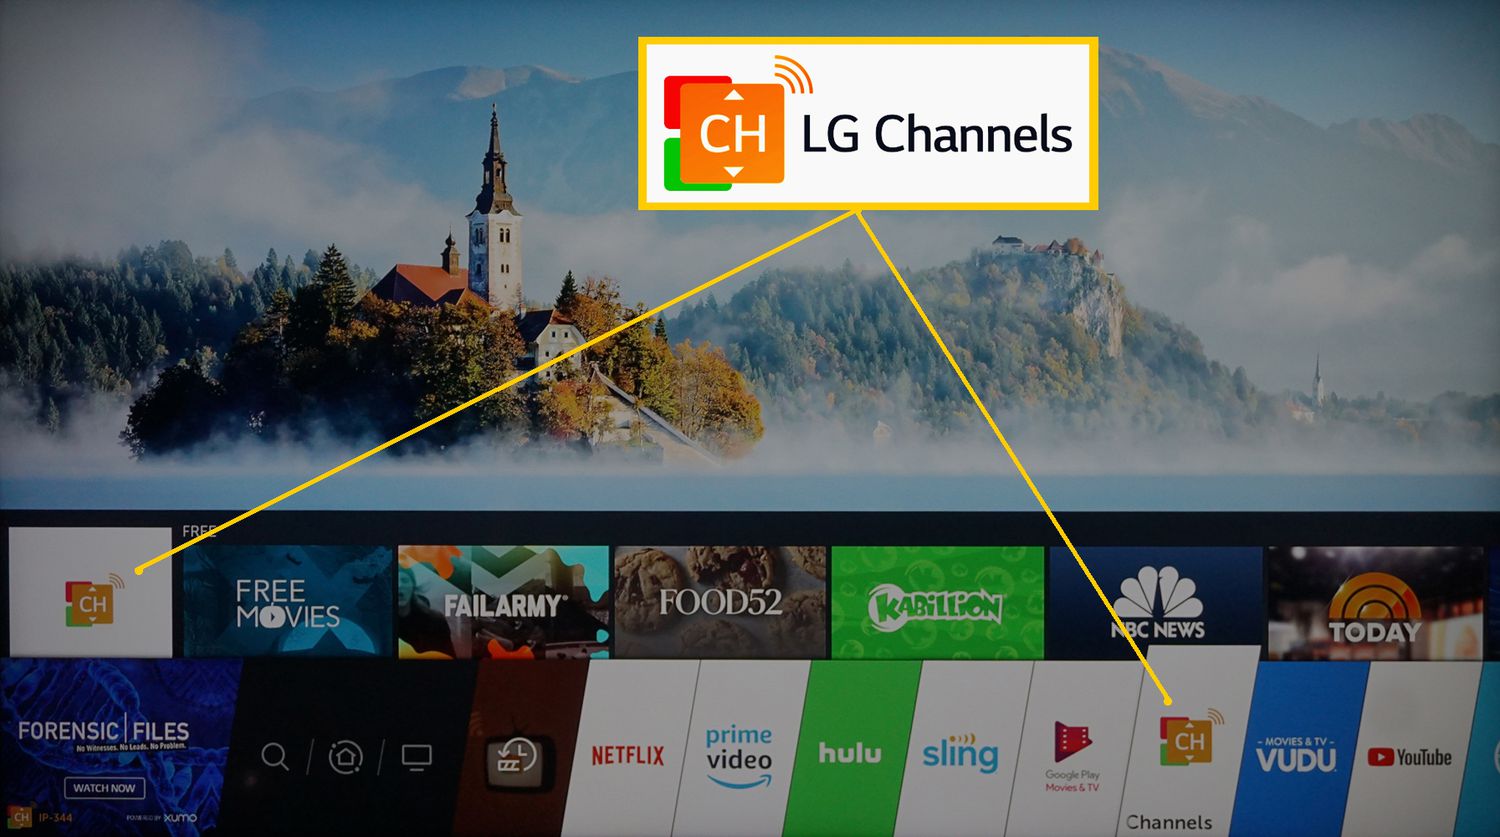
After installing your desired channels, you can access them directly from the main menu of your LG Smart TV. They may appear in a dedicated “My Channels” section, or you can find them in the “Apps” or “Home” menu, depending on your TV model. Use the remote control to navigate through your installed channels and start enjoying their content.
It’s worth noting that you can also remove or uninstall channels if you no longer want them on your LG Smart TV. Simply go to the “My Channels,” “Apps,” or “Home” menu and locate the channel you wish to remove. Select the channel, and you should see an option to “Remove” or “Uninstall.” Confirm your choice, and the channel will be removed from your TV.
By following these steps, you can easily install your desired channels on your LG Smart TV. It’s time to sit back, relax, and enjoy a world of entertainment without leaving your couch!
In the next step, we will guide you on organizing your channel list to personalize your TV-watching experience further.
Step 5: Organize your channel list
Now that you have successfully installed your desired channels on your LG Smart TV, it’s time to organize your channel list for easy navigation and a personalized TV-watching experience. Follow these steps to organize your channel list:
1. Access the channel list: Using your remote control, navigate to the main menu of your LG Smart TV. Look for the “My Channels,” “Apps,” or “Home” section, where your installed channels are listed.
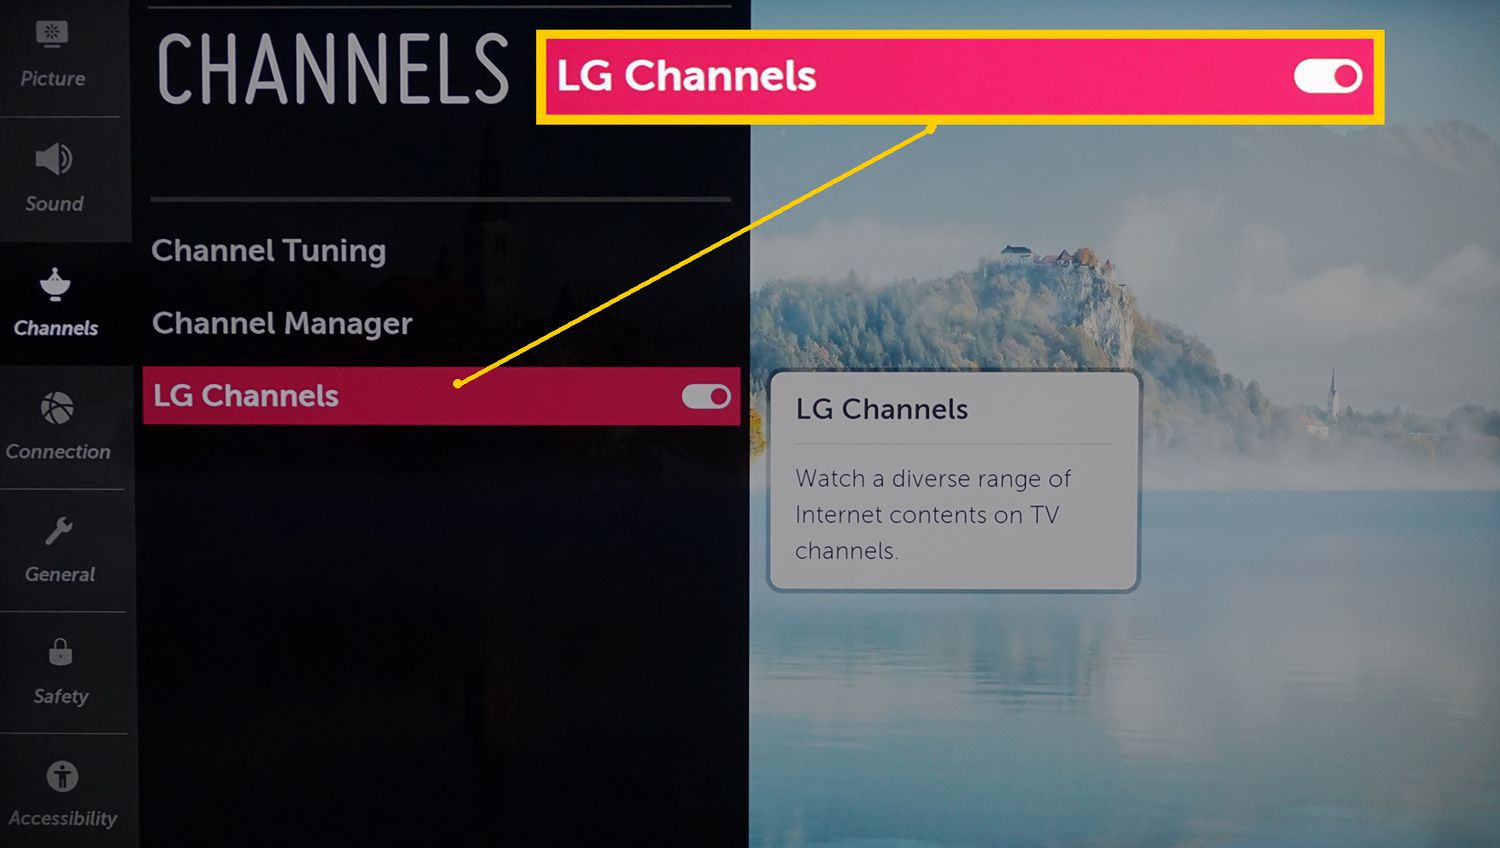
2. Edit your channel list: Find the option to “Edit” or “Manage” your channel list. This may be indicated by an icon that resembles a pencil or a gear. Select this option to enter the edit mode.
3. Rearrange the channels: Once in the edit mode, you can rearrange the order of the channels in your list. Use the arrow keys or a numeric keypad on your remote control to move the channels up or down. This allows you to prioritize your favorite channels and have quick access to them.
4. Create folders or groups: Some LG Smart TVs offer the option to create folders or groups to categorize your channels. This allows you to create separate folders for different genres, such as sports, movies, or news. Select the option to create a new folder, give it a name, and move the relevant channels into it.
5. Delete unwanted channels: If you have channels that you no longer wish to keep, you can delete them from your channel list. Select the channel you want to remove and look for the option to “Remove” or “Delete.” Confirm your choice, and the channel will be removed from your list.
6. Save your changes: Once you are satisfied with the organization of your channel list, select the option to “Save” or “Done.” This will save your changes and exit the edit mode.
By organizing your channel list, you can create a customized TV-watching experience that reflects your preferences and makes it easy to navigate through your favorite channels. You can now easily find and access the channels that matter most to you, ensuring that your entertainment is just a few clicks away.
It’s important to note that the process of organizing your channel list may vary slightly depending on your LG Smart TV model and firmware version. Refer to the user manual or on-screen instructions for specific guidance on organizing your channels.
With your channel list organized, you can now sit back, relax, and enjoy your newly customized LG Smart TV experience. Whether you’re in the mood for a movie marathon, a sports game, or catching up on the latest news, your personalized channel list will make it easy to find what you’re looking for.
In the next section, we will address some common troubleshooting issues and provide solutions to ensure a smooth and enjoyable experience with your LG Smart TV.
Troubleshooting common issues
While setting up and using your LG Smart TV, you may encounter some common issues. Here are a few troubleshooting tips to help you resolve these issues and ensure a smooth experience:
1. No internet connection: If you are unable to connect your LG Smart TV to the internet, first ensure that your Wi-Fi or Ethernet connection is working correctly. Check that your router or modem is powered on and connected properly. Try restarting your TV and router to refresh the connection. If the issue persists, consider contacting your internet service provider for further assistance.
2. Slow or buffering streams: If you experience slow or buffering streams while watching channels, your internet connection speed may be insufficient. Ensure that you have a stable and high-speed connection. Disconnect any other devices connected to the same network that may be consuming bandwidth. Consider upgrading your internet plan if necessary.
3. Channel freezing or crashing: If a specific channel freezes or crashes frequently, it may be due to an issue with the channel itself. Try uninstalling and reinstalling the channel to see if it resolves the problem. If the issue persists, contact the channel’s support or check their website for any known issues or updates.
4. Remote control not responding: If your LG Smart TV’s remote control is not responding, check the batteries and replace them if necessary. Make sure there are no obstructions between the remote and the TV. If the issue continues, try pairing the remote control with the TV again. Refer to your TV’s user manual for instructions on how to do this.
5. Firmware updates: It’s essential to keep your LG Smart TV’s firmware up to date. Regular firmware updates often include bug fixes, performance improvements, and new features. Check for firmware updates in the settings menu of your TV and install any available updates. This can help resolve compatibility issues and enhance your TV’s overall performance.
6. Audio or video issues: If you experience problems with audio or video quality, such as distorted sound or picture, ensure that your TV is set to the appropriate display and audio settings. Check the cables connecting your TV to external devices, such as a cable box or soundbar, for any loose connections. Adjust the settings on both the TV and the external device if needed.
If you encounter any other issues that are not addressed here, refer to your LG Smart TV’s user manual or visit the LG support website for further troubleshooting assistance. You can also contact LG customer support for personalized guidance and solutions.
Remember, troubleshooting steps may vary depending on your specific LG Smart TV model and firmware version. Always refer to the manufacturer’s instructions and support resources for accurate troubleshooting instructions.
By addressing these common issues, you can ensure a seamless and enjoyable experience with your LG Smart TV, allowing you to make the most of the available channels and features.
In the next section, we will wrap up this guide and summarize the key points discussed.
Conclusion
Congratulations! You have successfully learned how to add channels to your LG Smart TV. By following the steps outlined in this guide, you can now access a wide range of channels and personalize your TV-watching experience.
We started by ensuring that your LG Smart TV is connected to the internet and running on the latest firmware version. These prerequisites are crucial for a smooth and enjoyable streaming experience.
Next, we explored how to access the LG Content Store, where you can browse and search for available channels. With various categories and a convenient search function, you can easily find channels that cater to your interests.
Once you found your desired channels, we guided you through the installation process. By simply selecting the “Install” option, you added the channels to your LG Smart TV.
To further enhance your experience, we discussed how to organize your channel list. Rearranging channels, creating folders, and deleting unwanted channels allow you to customize your TV interface and access your favorite content with ease.
Lastly, we addressed some common troubleshooting issues and provided tips to overcome them. From internet connectivity issues to remote control problems, these troubleshooting steps will help you resolve any technical hiccups that may arise.
With your newly added and organized channels, you can now sit back, relax, and enjoy a world of entertainment from the comfort of your own home. Whether you’re in the mood for movies, sports, news, or documentaries, your LG Smart TV has got you covered.
Remember, always refer to your LG Smart TV’s user manual or visit the LG support website for specific instructions and assistance based on your TV model.
Thank you for using this guide, and we hope you have a fantastic time exploring and enjoying your LG Smart TV channels!