Introduction
With the advancements in technology, Smart TVs have become increasingly popular, offering a wide range of features and functionalities. One of the key benefits of owning a Smart TV is the ability to access various channels and stream content directly on your television. If you own an LG Smart TV and want to expand your entertainment options, adding new channels is a simple and straightforward process.
In this guide, we will walk you through the steps on how to add a channel on your LG Smart TV. Whether you’re looking for popular streaming services, news channels, or niche content providers, you’ll be able to find and install your desired channels in just a few minutes.
Before we delve into the step-by-step instructions, it’s important to note that the exact process may vary slightly depending on the model and firmware of your LG Smart TV. However, the overall procedure remains relatively consistent, and the following steps should provide a general guideline for most LG Smart TVs.
So, if you’re ready to enhance your television viewing experience, let’s get started by exploring how to add a channel to your LG Smart TV.
Step 1: Access the Home Menu
The first step to adding a channel on your LG Smart TV is to access the Home Menu. The Home Menu serves as the central hub for navigating through various settings and features on your television.
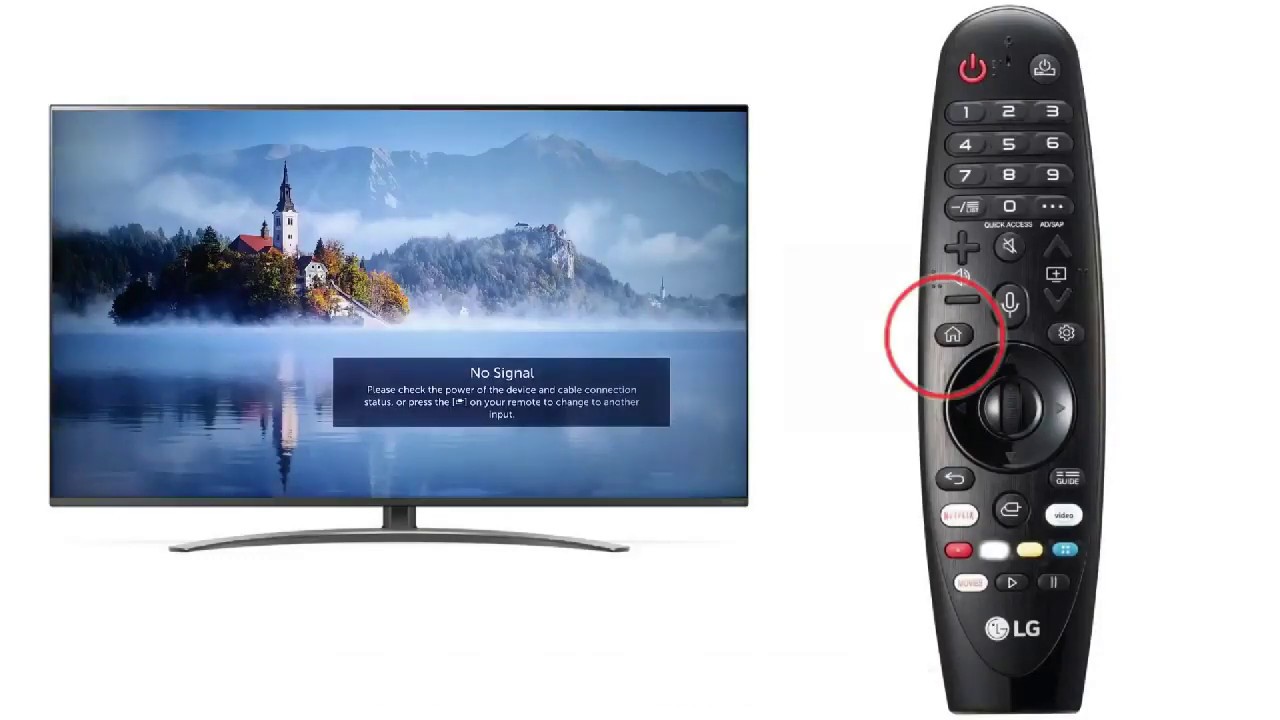
To access the Home Menu, grab your LG TV remote control and look for the “Home” button. The location of this button may vary depending on the model of your remote control, but it is usually located at the center or top portion of the remote. Press the “Home” button to bring up the main menu on your screen.
Once the Home Menu appears, you will be presented with a grid layout of different options and apps. From here, you can navigate through the various sections of the Home Menu by using the arrow buttons on your remote control.
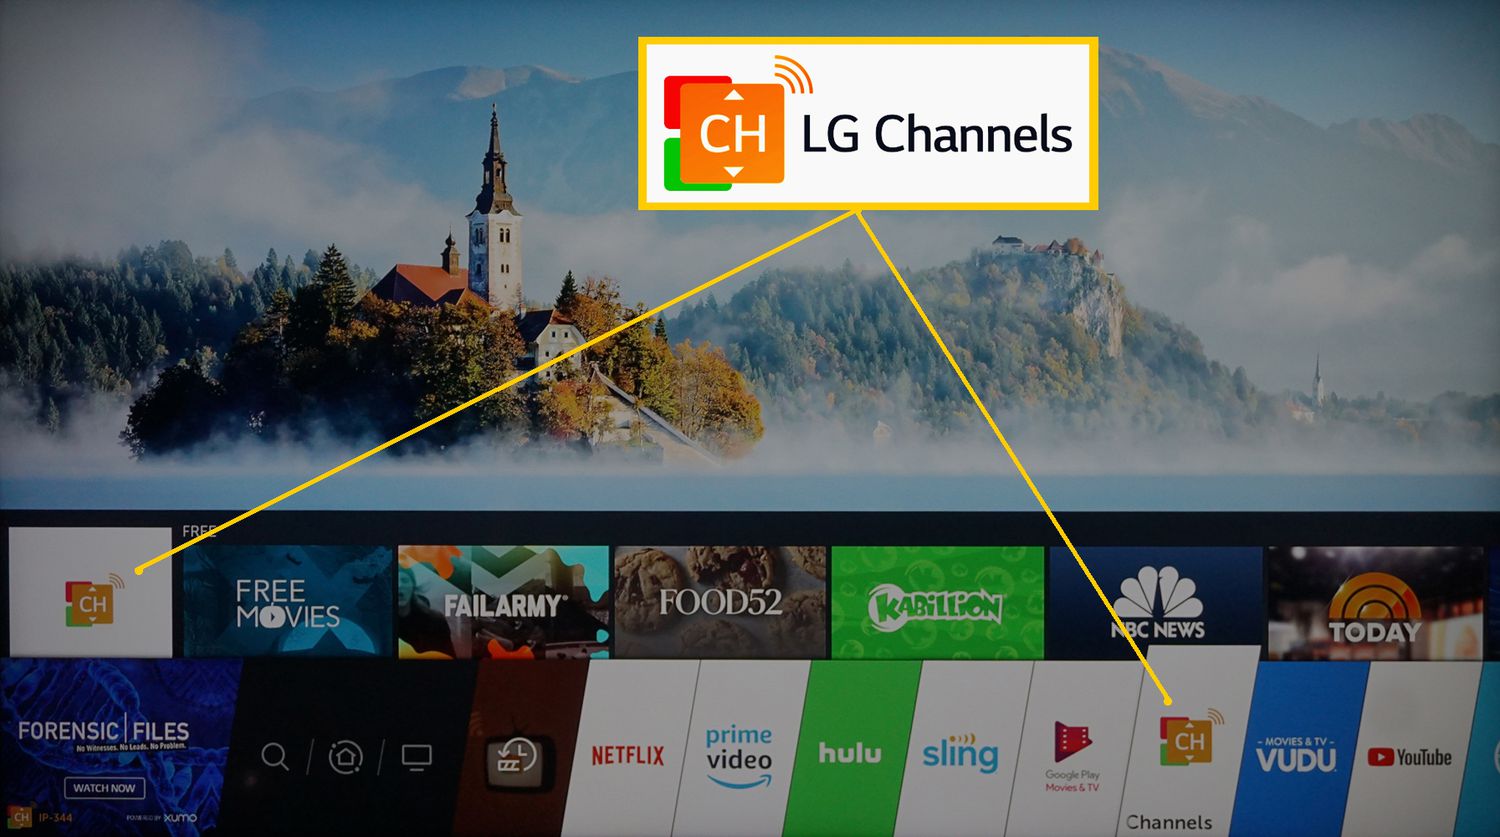
Take your time to familiarize yourself with the different sections of the Home Menu. You will notice that there are options for accessing different apps, settings, and features of your LG Smart TV. To proceed with adding a new channel, we will be focusing on the Channel Store section.
Use the arrow buttons on your remote control to navigate and highlight the Channel Store option in the Home Menu. Once the Channel Store section is highlighted, press the “OK” or “Enter” button on your remote to enter the Channel Store.
By following these steps, you have successfully accessed the Home Menu on your LG Smart TV and are ready to proceed to the next step in adding a new channel.
Step 2: Go to the Channel Store
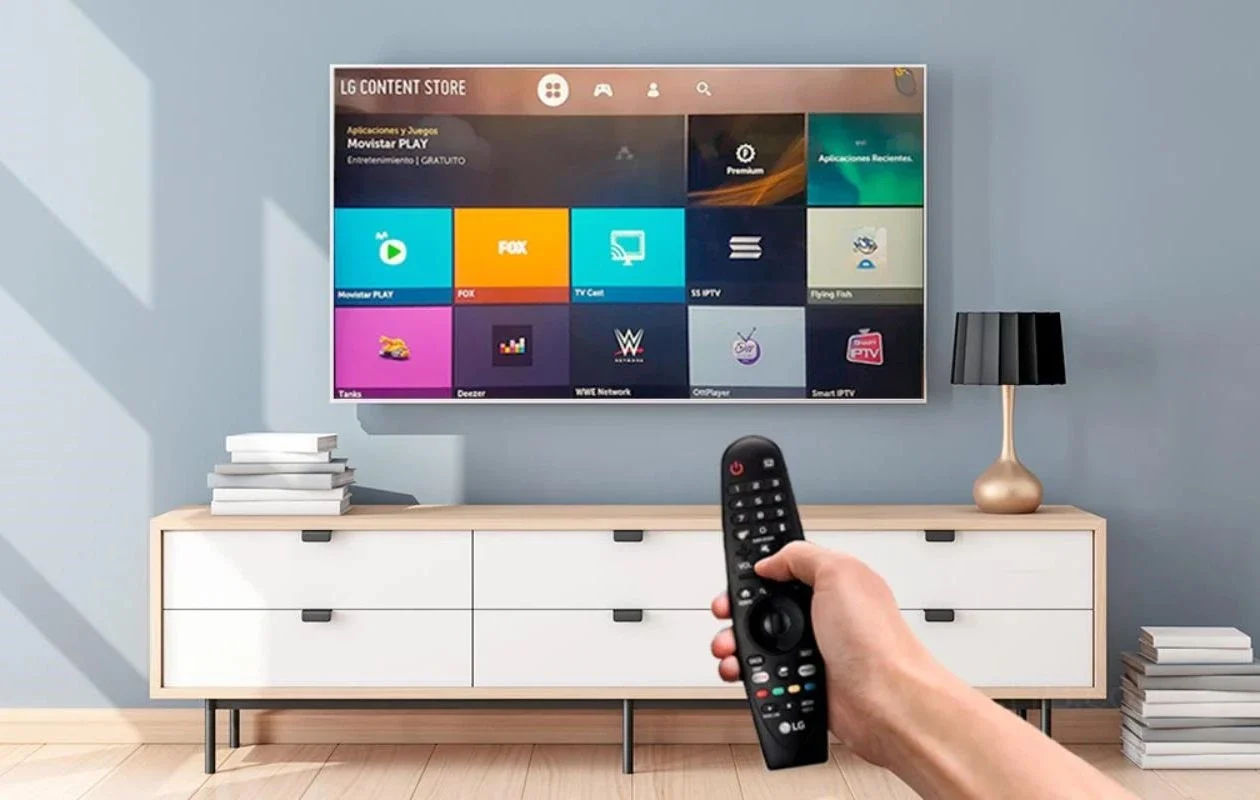
After accessing the Home Menu on your LG Smart TV, the next step is to navigate to the Channel Store. The Channel Store is where you can browse and find a wide variety of channels to add to your TV’s lineup.
Using the arrow buttons on your remote control, scroll through the options in the Home Menu until you find the Channel Store section. Once you’ve located it, press the “OK” or “Enter” button on your remote to enter the Channel Store.
Upon entering the Channel Store, you will be presented with a collection of different categories and featured channels. These categories can include popular streaming services, news channels, movie and TV show providers, sports networks, and much more.
Take some time to explore the different categories and featured channels available in the Channel Store. You can use the arrow buttons to navigate through the options and get an idea of the content that appeals to you.
If you already know the name of the specific channel you want to add, you can also use the search function in the Channel Store. Simply locate the search bar, enter the name of the channel using your remote control’s number buttons or the virtual keyboard on the screen, and press the “OK” or “Enter” button to initiate the search.
Remember that the availability of channels may vary depending on your location and the specific model of your LG Smart TV. Some channels may also require a subscription or offer in-app purchases for certain content.
Once you have familiarized yourself with the Channel Store and have identified the channels you want to add, you can proceed to the next step to install them on your LG Smart TV.
Step 3: Search for Channels
Searching for channels is an essential step in adding new content to your LG Smart TV. Whether you know the name of the specific channel you want to add or you’re exploring different options, the search function in the Channel Store makes it easy to find and discover new channels.
To begin searching for channels, navigate to the Channel Store by following the previous steps outlined in Step 2. Once you’re in the Channel Store, locate the search bar, which is usually located at the top of the screen.
Using your LG TV remote control, you can enter the name of the desired channel by either using the number buttons or the on-screen virtual keyboard. If you’re using the number buttons, each number corresponds to a set of letters on the screen. Simply press the corresponding number multiple times to cycle through the letters until you spell out the channel’s name.
Alternatively, you can use the virtual keyboard on the screen to type in the name of the channel using the arrow keys to select the letters. Once you’ve entered the channel’s name, press the “OK” or “Enter” button to initiate the search.
The Channel Store will then display the search results, listing the channels that match your search query. Scroll through the search results using the arrow buttons on your remote control to browse the available options.
If you’re unsure about which channels to add, you can explore the different categories and featured channels available in the Channel Store. This can help you discover new and popular channels in various genres, such as entertainment, news, sports, and more.
When you find a channel you want to add, highlight it using the arrow buttons and press the “OK” or “Enter” button to view more details about the channel. This will provide you with additional information, such as a description, ratings, and any subscription or purchase requirements.
Once you’ve chosen a channel to add, you’re ready to move on to the next step to install it on your LG Smart TV.
Step 4: Select and Install a Channel
After searching for channels in the Channel Store on your LG Smart TV, it’s time to select and install the channel of your choice. This step allows you to add the desired content to your TV’s lineup, expanding your entertainment options.
Once you have found a channel you want to add, highlight it using the arrow buttons on your remote control. This will bring up additional information about the channel, such as its description, ratings, and any subscription or purchase requirements.
Read through the information provided to ensure that the channel meets your preferences and requirements. If you’re satisfied and ready to install the channel, press the “OK” or “Enter” button on your remote control.
This will prompt a confirmation screen to appear, asking if you want to install the channel. On this screen, you may also be presented with additional options, such as adding the channel to your favorites or customizing its position in your channel lineup.
Use the arrow buttons on your remote control to navigate through the options, and once you’ve made your desired selections, press the “OK” or “Enter” button to confirm the installation.
The installation process may take a few moments, depending on your internet connection and the size of the channel. You’ll typically see a progress bar on the screen indicating the installation status.
Once the installation is complete, you will receive a notification or see a confirmation message on the screen. At this point, you can either choose to continue browsing for more channels to add or proceed to access the newly installed channel.
Keep in mind that some channels may require additional steps for activation or account setup. If this is the case, follow the on-screen instructions provided by the channel to complete the setup process.
Congratulations! You have successfully selected and installed a new channel on your LG Smart TV. Now, it’s time to explore the added content and enjoy a wider range of entertainment options.
Step 5: Access the Installed Channel
After successfully installing a new channel on your LG Smart TV, the next step is to access and enjoy the content that the channel offers. By accessing the installed channel, you can now enjoy a wide variety of movies, TV shows, live streams, and more, depending on the specific channel you added.
To access the installed channel, navigate back to the Home Menu on your LG Smart TV. Use the “Home” button on your remote control to return to the main menu.
Once you’re in the Home Menu, use the arrow buttons on your remote control to navigate through the grid layout and find the section where your installed channels are located. This section is typically labeled as “Apps” or “My Apps.”
Locate the installed channel you want to access and highlight it using the arrow buttons. Once the channel is highlighted, press the “OK” or “Enter” button on your remote control to launch it.
After launching the channel, you will be greeted with the channel’s interface, which may vary depending on the specific channel you added. From here, you can explore the various categories, browse content, and access the features offered by the channel.
Use the navigation buttons on your remote control to browse through the channel’s content library, select a movie or TV show, or explore different settings and options. The interface of each channel may differ, but they typically offer a user-friendly and intuitive browsing experience.
If the channel you installed requires an account or subscription, you may be prompted to sign in or provide your credentials during the first launch. Follow the on-screen instructions to complete the necessary steps and gain access to the channel’s full content library.
Now that you have successfully accessed the installed channel, you can sit back, relax, and enjoy the wide range of entertainment it has to offer. Explore the available content, discover new shows and movies, and make the most of your LG Smart TV’s capabilities.
Step 6: Remove or Update Channels
As your preferences and viewing habits change over time, you may find the need to remove or update channels on your LG Smart TV. Removing channels that you no longer use or updating channels to access the latest content ensures that your channel lineup stays up-to-date and relevant to your entertainment needs.
To remove a channel from your LG Smart TV, navigate to the Home Menu using the “Home” button on your remote control. Once in the Home Menu, locate the section where your installed channels are located, typically labeled as “Apps” or “My Apps.”
With the installed channels visible, highlight the channel you wish to remove using the arrow buttons on your remote control. Once selected, press the “OK” or “Enter” button to open the channel options menu.
In the channel options menu, you will see various actions you can perform, including “Remove,” “Delete,” or “Uninstall.” Choose the appropriate option to remove the selected channel from your LG Smart TV.
Confirm the removal by following the on-screen prompts or selecting “Yes” when prompted. The channel will be uninstalled from your TV, freeing up space and removing it from your channel lineup.
If you want to update a channel to access the latest features and content, navigate to the Channel Store in the Home Menu. Locate the installed channel that you want to update and highlight it using the arrow buttons on your remote control.
Press the “OK” or “Enter” button to open the channel details and options. Look for an option that says “Update” or “Upgrade” and select it to initiate the update process.
The channel will then begin to update, and you will see a progress bar indicating the status of the update. Wait for the update to complete, and once finished, you can access the updated channel to enjoy its new features and content.
By removing channels you no longer use or updating channels to access the latest content, you can ensure that your LG Smart TV’s channel lineup remains customized and up-to-date with your entertainment preferences.
Conclusion
Adding channels to your LG Smart TV is a simple and convenient way to expand your entertainment options. Whether you’re looking for popular streaming services, news channels, sports networks, or niche content providers, the process of adding channels is straightforward and can be done within minutes.
In this guide, we walked you through the step-by-step process of adding a channel to your LG Smart TV. We started by accessing the Home Menu, followed by navigating to the Channel Store and searching for channels. We then learned how to select and install a channel, and finally, we explored how to access the installed channel and remove or update channels as needed.
Remember, the exact steps may vary slightly depending on the model and firmware of your LG Smart TV, but the overall procedure remains relatively consistent. Take your time to explore the available channels in the Channel Store, and choose the ones that align with your interests and preferences.
With the ability to add and customize your channel lineup, your LG Smart TV becomes a powerful entertainment hub, providing you with a wide range of content at your fingertips.
So, take the time to discover new channels, enjoy your favorite shows and movies, and make the most of your LG Smart TV’s capabilities. Enhance your television viewing experience and immerse yourself in a world of entertainment that fits your unique tastes.
Now that you have a clear understanding of how to add channels to your LG Smart TV, go ahead and start exploring the vast selection of content available. Get ready to enjoy endless hours of entertainment right from the comfort of your own living room.