Introduction
With the increasing reliance on cloud storage for data management, accessing iCloud from a PC has become a necessity for many users. iCloud, Apple’s cloud-based storage and computing service, allows you to store files, photos, videos, and more, and enables seamless synchronization across all your Apple devices.
While iCloud is predominantly designed for use on Apple devices, such as iPhones, iPads, and Mac computers, it is also possible to access iCloud from a PC. This allows PC users to take advantage of the features and benefits offered by iCloud, such as accessing files, photos, emails, calendars, contacts, and more, directly from their Windows computers.
In this article, we will explore several methods to access iCloud from a PC, providing step-by-step instructions to help you navigate through the process. Whether you need to access your iCloud files, view or download photos, check your iCloud email, or manage your iCloud calendar and contacts, we’ve got you covered.
Before diving into the various methods, it’s important to note that you will need an active Apple ID and iCloud account to access iCloud from a PC. If you don’t have an Apple ID or iCloud account yet, you can create one for free on the Apple website.
From accessing iCloud via the iCloud website to using the iCloud for Windows desktop app and accessing iCloud Drive using File Explorer, this article will provide you with the tools and knowledge to seamlessly integrate iCloud into your PC workflow.
Method 1: Accessing iCloud via the iCloud website
One of the simplest ways to access your iCloud account from a PC is by using the iCloud website. This method allows you to access various iCloud services, such as iCloud Drive, iCloud Photos, iCloud Mail, and more, directly from your web browser.
Here’s how you can access iCloud via the iCloud website:
- Open a web browser on your PC and go to the iCloud website. You can visit the website by typing “www.icloud.com” in the address bar and pressing Enter.
- Once on the iCloud website, enter your Apple ID and password in the respective fields and click on the arrow button to sign in.
- After signing in, you will be presented with the iCloud dashboard, which displays various iCloud services and applications.
- From the dashboard, you can navigate to different iCloud services, such as iCloud Drive, iCloud Photos, Mail, Contacts, Calendar, and more, by clicking on the respective icons.
- To access files stored in iCloud Drive, simply click on the iCloud Drive icon. From there, you can upload, download, and manage your files and folders.
- If you want to view or download your iCloud photos, click on the iCloud Photos icon. This will give you access to all your photos and albums stored in iCloud.
- To access your iCloud Mail, click on the Mail icon. This will open up the iCloud Mail interface, where you can send, receive, and manage your emails.
- Similarly, you can access your iCloud Contacts and Calendar by clicking on the respective icons, allowing you to manage your contacts, schedule events, and stay organized.
By accessing your iCloud account through the iCloud website, you can conveniently manage and access your iCloud data from any PC with an internet connection. It provides a user-friendly interface that closely resembles the experience of using iCloud on Apple devices.
Now that you know how to access iCloud via the iCloud website, let’s explore another method to access iCloud from a PC using the iCloud for Windows desktop app.
Method 2: Using the iCloud for Windows desktop app
If you prefer a more integrated approach to accessing iCloud from your PC, you can utilize the iCloud for Windows desktop app. This application allows you to sync your iCloud data with your Windows computer, enabling seamless access to files, photos, emails, and more.
Here’s how you can use the iCloud for Windows desktop app to access your iCloud account:
- Make sure your PC meets the system requirements for the iCloud for Windows app. You can check the requirements on the Apple website.
- Download and install the iCloud for Windows app from the Apple website.
- Once installed, launch the iCloud for Windows app on your PC.
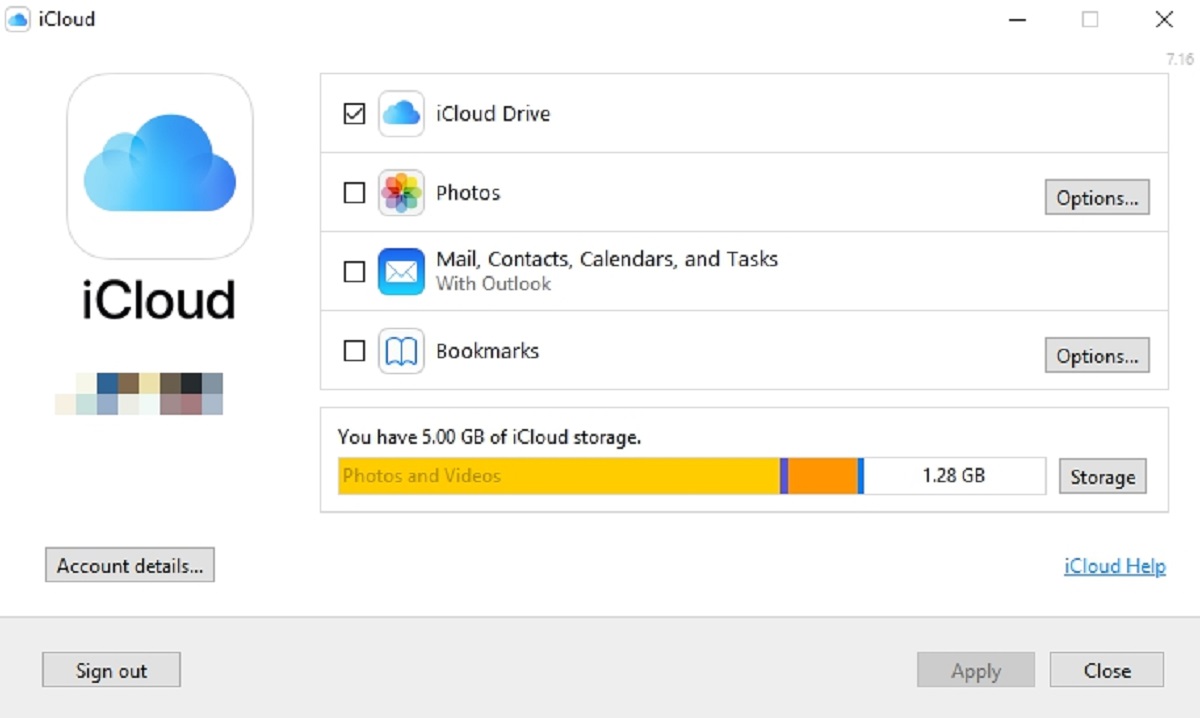
- Sign in to the app using your Apple ID and password. Make sure to enable the services you want to sync with your PC, such as iCloud Drive, Photos, Mail, Contacts, and Calendar.
- Click on the “Apply” button to save the settings and start the sync process.
- Once the sync is complete, you can access your synced iCloud data directly from your PC’s File Explorer.
- To access iCloud Drive, open File Explorer and click on “iCloud Drive” in the navigation pane. This will display all your iCloud files and folders, allowing you to manage them like any other files on your PC.
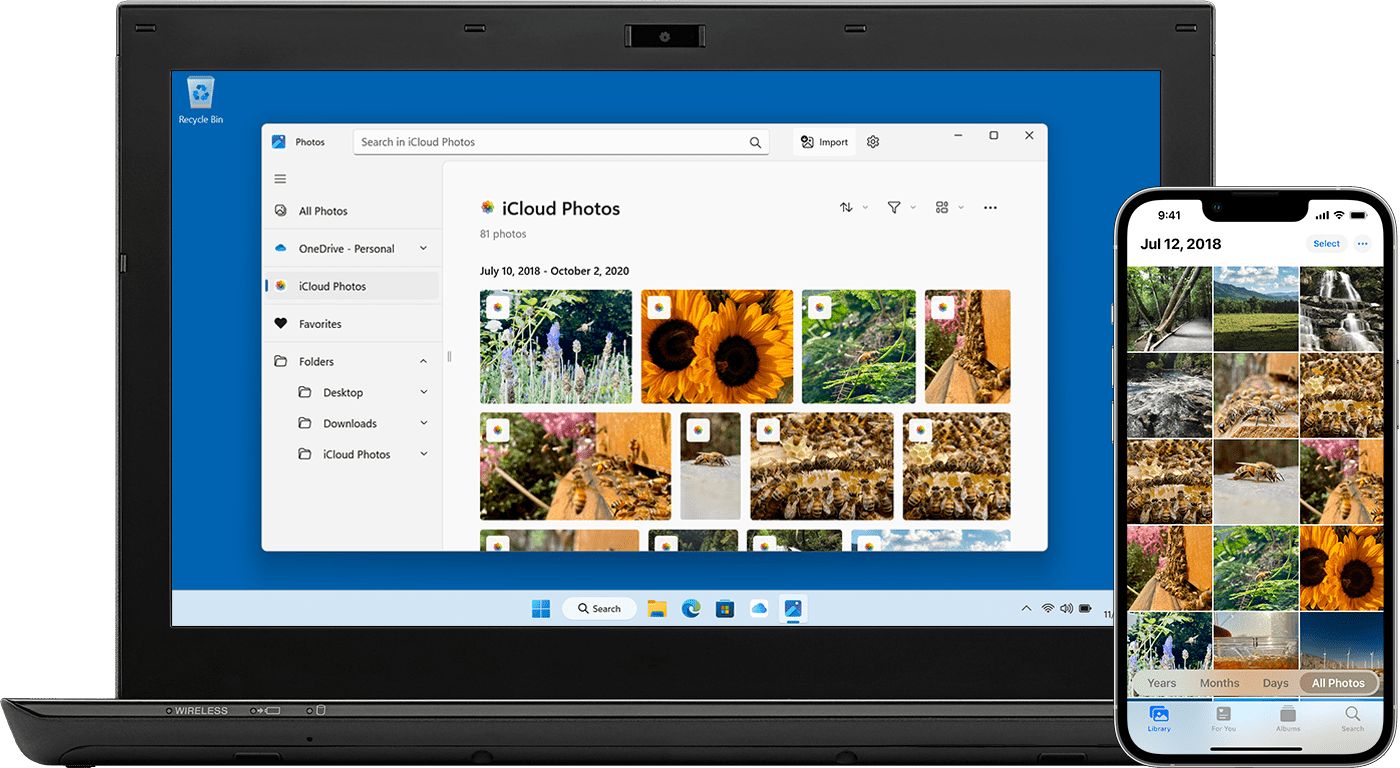
- If you want to access your iCloud photos, open the “iCloud Photos” folder in File Explorer. From there, you can view, download, and manage your iCloud photos and albums.
- To access your iCloud email, open your preferred email client on your PC, such as Microsoft Outlook, and set up your iCloud email account using the provided credentials. This will enable you to send and receive emails from your iCloud account directly through your PC.
- Similarly, you can access your iCloud Contacts and Calendar through your preferred applications, such as Microsoft Outlook. Simply add your iCloud account to these applications to sync and manage your contacts and schedule.
By using the iCloud for Windows desktop app, you can seamlessly integrate your iCloud data with your PC, making it easily accessible and synchronized across your Apple devices and Windows computer.
Now that you know how to access iCloud using the iCloud for Windows desktop app, let’s explore another method to access iCloud Drive using File Explorer.
Method 3: Accessing iCloud Drive using File Explorer
If you primarily use iCloud Drive to store and manage your files, accessing it directly from File Explorer on your PC can provide a convenient and familiar experience. By following a few simple steps, you can access your iCloud Drive and its contents seamlessly.
Here’s how you can access iCloud Drive using File Explorer:
- Ensure that you have iCloud for Windows installed on your PC. If not, you can download and install it from the Apple website.
- Open File Explorer on your PC by pressing the Windows key + E or by clicking on the File Explorer icon in the taskbar.
- In the left-hand navigation pane of File Explorer, you should see a list of Quick Access folders. Scroll down until you find the “Folders” section.
- Under the “Folders” section, click on “iCloud Drive”. This will open up your iCloud Drive folder in File Explorer.
- Within the iCloud Drive folder, you will see all your files and folders that are stored in your iCloud Drive.
- You can now manage your iCloud files in the same way you manage other files on your PC. You can copy, move, delete, and rename files and folders as needed.
Accessing iCloud Drive using File Explorer allows you to work with your iCloud files seamlessly within the familiar Windows file management system. Any changes you make to your files in the iCloud Drive folder will automatically sync with your other Apple devices.
It’s important to note that while you can access your iCloud Drive files using File Explorer, any changes you make to non-iCloud Drive files within the iCloud Drive folder will not sync back to your other Apple devices. Only files specifically stored in the iCloud Drive folder will sync across your devices.
Now that you know how to access iCloud Drive using File Explorer, let’s explore another method to access iCloud using the iCloud Control Panel for Windows.
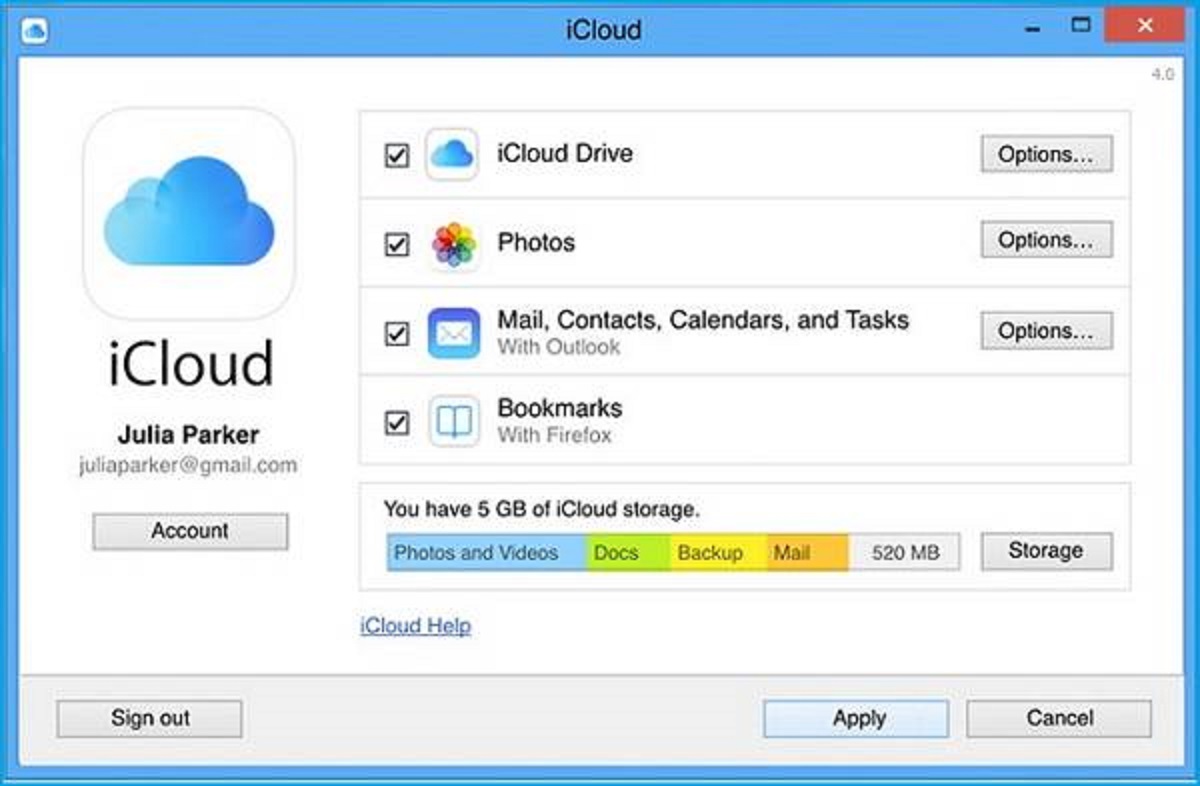
Method 4: Using the iCloud Control Panel for Windows
If you’re looking for a comprehensive way to access and manage your iCloud data on a Windows PC, the iCloud Control Panel for Windows provides a dedicated solution. This software, developed by Apple, allows you to sync your iCloud data with various Windows applications, making it easy to access and update your iCloud information right from your PC.
Follow these steps to use the iCloud Control Panel for Windows:
- Ensure that you have iCloud for Windows installed on your PC. If not, you can download and install it from the Apple website.
- Launch the iCloud Control Panel for Windows by clicking on the Start menu, searching for “iCloud,” and selecting the iCloud for Windows app.
- Sign in to the iCloud Control Panel using your Apple ID and password.
- In the iCloud Control Panel window, you will see various options for syncing your iCloud data with Windows applications. You can choose which services you want to enable, such as Mail, Contacts, Calendars, and Tasks.
- Click on the “Apply” button to save your settings and start the sync process.
- Once the sync is complete, you can access your synced iCloud data in the corresponding Windows applications. For example, your iCloud contacts will be available in the Windows Contacts app, and your iCloud calendar events will be accessible in the Windows Calendar app.
By using the iCloud Control Panel for Windows, you can seamlessly integrate your iCloud data with your Windows environment. This allows you to access and manage your iCloud email, contacts, calendars, and tasks using the native Windows applications you are familiar with.
It’s worth noting that the iCloud Control Panel for Windows provides a more comprehensive syncing solution for your iCloud data, compared to other methods like accessing iCloud through the web or using the iCloud for Windows desktop app. If you rely heavily on iCloud services for your day-to-day tasks, this method can provide a seamless experience on your Windows PC.
Now that you know how to access iCloud using the iCloud Control Panel for Windows, let’s explore another method to access iCloud Photos on a PC.
Method 5: Accessing iCloud Photos on a PC
Accessing your iCloud Photos on a PC allows you to view and manage your photo library stored in iCloud directly from your computer. This method ensures that you have easy access to your precious memories, even if you don’t have an Apple device.
Here’s how you can access your iCloud Photos on a PC:
- Make sure you have iCloud for Windows installed on your PC. If not, download and install it from the Apple website.
- Open the iCloud for Windows app on your PC and sign in with your Apple ID.
- In the iCloud app, make sure the Photos option is checked.
- Click on the “Options” button next to Photos.
- In the Photos Options window, choose the options you prefer for syncing your photos. You can select to download new photos and videos to your PC, or simply access them in iCloud without downloading.
- Click on the “Done” button to save your settings.
- Open File Explorer on your PC and navigate to the “iCloud Photos” folder in the Quick Access section of the navigation pane.
- Within the “iCloud Photos” folder, you will find all your synced iCloud photos and videos.
- You can now view, download, and manage your iCloud photos and videos on your PC, just like any other files on your computer.
Accessing your iCloud Photos on a PC provides a convenient way to enjoy your photo collection and easily share them with others. Whether you want to organize your photos into folders, edit them, or simply reminisce, this method allows you to leverage the power of iCloud on your PC.
Keep in mind that the syncing process may take some time, depending on the size of your photo library and your internet connection speed. Once the initial sync is complete, any changes you make to your photos on your PC will be reflected in your iCloud Photos library and across your other devices.
Now that you know how to access your iCloud Photos on a PC, let’s explore another method to set up iCloud email on your PC.
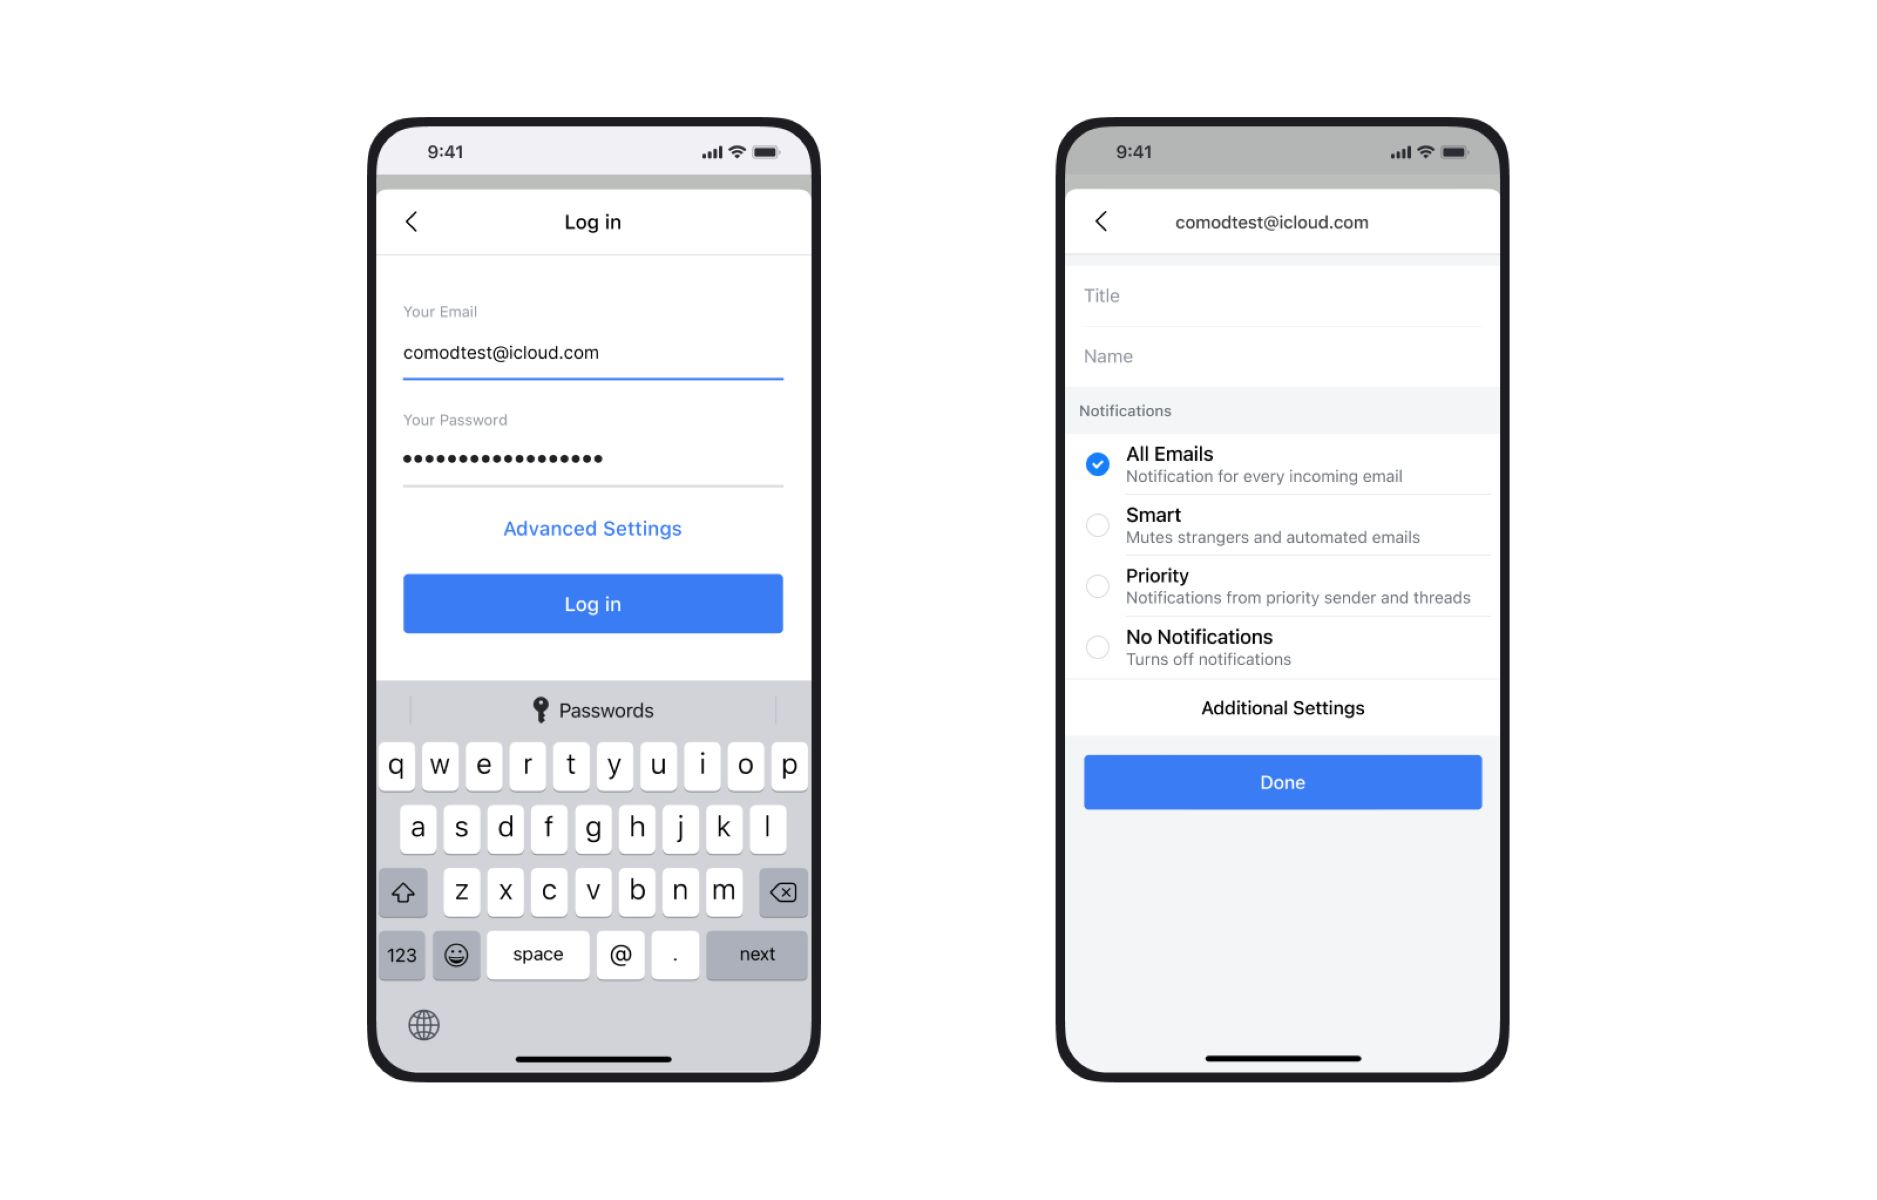
Method 6: Setting up iCloud email on a PC
If you have an iCloud email account and want to access it on your PC, setting up iCloud email allows you to send, receive, and manage your emails using your preferred email client. Whether you use Microsoft Outlook, Mozilla Thunderbird, or any other email software, you can easily integrate your iCloud email with it.
Here’s how you can set up iCloud email on a PC:
- Open your preferred email client on your PC, such as Microsoft Outlook.
- Go to the account settings or preferences section of your email client, where you can add a new email account.
- Choose the option to add a new email account and provide the requested information.
- Enter your name and the full iCloud email address that you want to set up.
- Choose the type of email account you want to add. In this case, select “IMAP” or “POP.”
- Enter the incoming and outgoing mail server information for iCloud. The incoming mail server is “imap.mail.me.com” for IMAP or “pop.mail.me.com” for POP. The outgoing mail server is “smtp.mail.me.com.”
- Enter your full iCloud email address as the username, and then enter your iCloud email account password.
- Complete the account setup process by following any additional prompts or instructions provided by your email client.
Once you have successfully added your iCloud email account to your preferred email client, you can start sending and receiving emails through your iCloud email address directly on your PC. This allows you to stay connected and manage your iCloud emails seamlessly across all your devices.
It’s important to note that setting up iCloud email using an email client may have slightly different steps depending on the software you are using. However, most email clients have similar account setup options and should allow you to add your iCloud email account without any issues.
Now that you know how to set up iCloud email on your PC, let’s explore another method to access iCloud Calendar, Contacts, and Reminders on a PC.
Method 7: Accessing iCloud Calendar, Contacts, and Reminders on a PC
Keeping your schedule, contacts, and reminders organized is crucial, and accessing them from your PC can help you stay on top of your tasks and appointments. With iCloud, you can easily access and manage your iCloud Calendar, Contacts, and Reminders on a PC, ensuring that you never miss a beat.
Here’s how you can access iCloud Calendar, Contacts, and Reminders on a PC:
- Make sure you have iCloud for Windows installed on your PC. If not, download and install it from the Apple website.
- Launch the iCloud app on your PC and sign in with your Apple ID.
- In the iCloud app, make sure the relevant options are checked for Calendar, Contacts, and Reminders.
- Click on the “Apply” button to save your settings and start syncing your iCloud data.
- Open your preferred applications for Calendar, Contacts, and Reminders on your PC. For example, you can open the Windows Calendar app for accessing your iCloud Calendar.
- Add your iCloud account to these applications by providing your iCloud email address and password. This will enable the sync between iCloud and the respective applications.
- Once the sync is complete, you will be able to view and manage your iCloud Calendar events, Contacts, and Reminders directly from the corresponding Windows applications.
- Any changes you make to your iCloud Calendar, Contacts, or Reminders on your PC will sync with your other Apple devices and vice versa.
By accessing iCloud Calendar, Contacts, and Reminders on your PC, you can seamlessly integrate your personal and professional information into your daily routine. This method allows you to stay organized and on track, ensuring that you have your important dates, contacts, and tasks readily available at your fingertips.
Keep in mind that the specific steps to access iCloud Calendar, Contacts, and Reminders on a PC may vary depending on the applications you are using. However, most calendar, contact, and reminder applications on Windows have options to add and sync iCloud accounts, making the process straightforward and user-friendly.
Now that you know how to access iCloud Calendar, Contacts, and Reminders on your PC, you have a comprehensive understanding of various methods to access and manage your iCloud data seamlessly.
Conclusion
Accessing iCloud from a PC opens a world of possibilities for users who want to seamlessly manage their iCloud data outside of the Apple ecosystem. With the methods outlined in this article, you can access iCloud services such as iCloud Drive, iCloud Photos, iCloud Mail, Calendar, Contacts, Reminders, and more, right from your Windows computer.
Whether you choose to access iCloud via the iCloud website, use the iCloud for Windows desktop app, access iCloud Drive through File Explorer, utilize the iCloud Control Panel for Windows, access iCloud Photos, set up iCloud email on your PC, or access iCloud Calendar, Contacts, and Reminders, each method offers its own benefits and functionalities. By following the step-by-step instructions provided, you can seamlessly integrate iCloud into your PC workflow and enjoy the convenience of accessing and managing your iCloud data from any device.
It’s important to note that to access iCloud from a PC, you will need an active Apple ID and iCloud account. By creating an Apple ID and iCloud account, you can take advantage of the various iCloud services and features available.
Whether you’re a professional who needs to access important files and emails on the go or a user who wants to view and manage photos and stay organized with calendar and contact information, accessing iCloud from a PC provides the flexibility and convenience you need.
Explore the different methods outlined in this article and choose the one that suits your needs and preferences. From syncing your files and photos to accessing your email and managing your calendar and contacts, take full advantage of the capabilities offered by iCloud on your PC.
No matter which method you choose, accessing iCloud from your PC allows you to stay connected, organized, and productive across multiple devices. Embrace the power of iCloud and seamlessly integrate it into your Windows computer workflow today.