Introduction
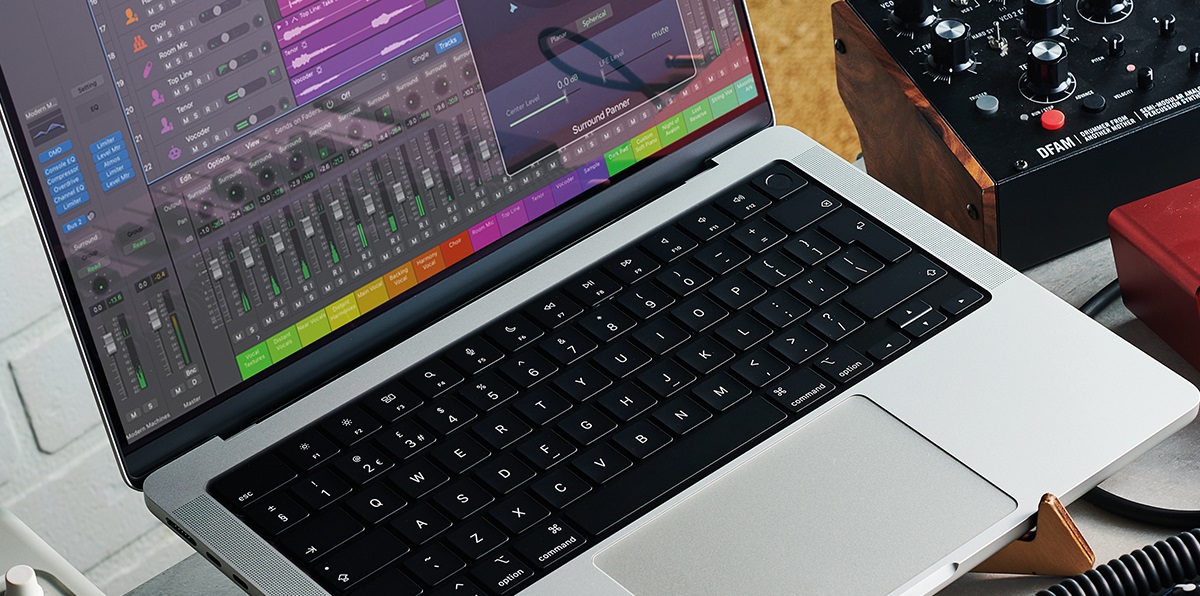
Welcome to the exciting world of music recording! Whether you’re a budding musician or an experienced producer, having the right equipment is crucial for achieving professional-sounding results. One often-overlooked component that plays a significant role in the recording process is RAM (Random Access Memory). In this article, we will explore the importance of RAM for music recording and provide recommendations on how much RAM you need for different recording setups.
RAM is a type of computer memory that stores data temporarily, allowing your computer’s processor to quickly access and manipulate that data. When it comes to recording music, having sufficient RAM is essential for smooth operation and efficient processing of audio tracks, virtual instruments, effects, and plugins. Insufficient RAM can lead to latency issues, audio dropouts, and system crashes, ultimately hindering your creativity and productivity.
The amount of RAM you need for recording music depends on various factors, such as the complexity of your projects, the number of tracks and plugins you use, and the software you utilize. In general, music production software and plugins are becoming more resource-intensive, requiring larger amounts of RAM to run smoothly.
For a basic home studio setup where you work with a few tracks and use a limited number of plugins, a minimum of 8GB of RAM should suffice. However, if you work with larger projects, utilize sample libraries, or employ resource-intensive plugins and virtual instruments, you may need 16GB or even 32GB of RAM to ensure optimal performance.
It’s important to consider your future needs as your projects become more complex. Investing in more RAM from the beginning can save you from potential headaches down the road and allow you to work seamlessly as your skills and projects grow.
In the following sections, we will delve deeper into specific RAM requirements for different recording setups, factors to consider when determining how much RAM you need, tips for optimizing RAM usage, and how to check and upgrade your RAM for improved performance. Let’s dive in!
What is RAM and why is it important for recording music?
RAM, or Random Access Memory, is a crucial component of a computer system that plays a vital role in recording music. It is a type of volatile memory that stores data temporarily, allowing the computer’s processor to access and manipulate it quickly. While storage devices like hard drives and SSDs provide long-term data storage, RAM provides the computer with the ability to access and process data in real-time.
When it comes to recording music, RAM is essential for smooth operation and efficient processing of audio tracks, virtual instruments, effects, and plugins. Every task you perform in your music production software requires data to be loaded and processed by the computer’s CPU. This includes playing back audio tracks, applying effects, running virtual instruments, and mixing multiple tracks together.
Insufficient RAM can lead to several issues that can hinder your music production workflow. One common problem is latency, which refers to the delay between when you play a note or trigger a sound and when you hear it. If your system doesn’t have enough RAM to handle the real-time processing requirements, you may experience a noticeable delay, making it difficult to perform and record music accurately.
Another issue is audio dropouts, where the audio playback stutters or cuts out altogether. This occurs when the computer struggles to process the audio data in real-time due to inadequate RAM. Audio dropouts can be frustrating and disrupt your creative flow, reducing your ability to get into the groove and capture the desired performance.
Moreover, using resource-intensive plugins or virtual instruments can quickly consume a large amount of RAM. These tools require substantial processing power to generate high-quality sounds and effects, and without sufficient RAM, your computer may not be able to handle them smoothly. As a result, you may face system crashes or freezes, resulting in the loss of unsaved work and further interruptions to your creative process.
By having enough RAM in your system, you can ensure smooth playback, responsive recording, and efficient processing of your music projects. It allows you to work with larger and more complex projects, utilize a higher number of tracks, virtual instruments, and effects, and explore creative possibilities without technical limitations. In essence, RAM provides the foundation for a stable, reliable, and enjoyable music recording experience.
In the next section, we will discuss the specific RAM requirements for different recording setups, taking into account factors such as project complexity, track count, and plugin usage. Understanding these requirements will enable you to determine how much RAM you need to achieve optimal performance in your music production journey.
RAM requirements for different recording setups
The RAM requirements for recording music can vary depending on the complexity of your projects and the specific recording setup you have. Let’s explore the different recording setups and their corresponding RAM needs:
- Basic home studio: If you have a basic home studio setup where you work with a few audio tracks and use a limited number of plugins and virtual instruments, a minimum of 8GB of RAM should be sufficient. This is suitable for recording demos, song ideas, or simple productions where you don’t require a high track count or complex processing.
- Intermediate studio: For a more intermediate setup, where you work with medium-sized projects, utilize sample libraries, and employ a moderate number of plugins and virtual instruments, consider upgrading to 16GB of RAM. This additional memory will ensure smoother operation and better performance, especially when using resource-intensive tools and manipulating larger audio files.
- Professional studio: In a professional studio environment, where you handle large-scale productions, track intricate arrangements, and require a high level of processing power, it is recommended to have 32GB of RAM or more. This allows for seamless multitasking, smoother real-time processing of multiple tracks and effects, and ensures that your system can handle the demands of complex projects without any performance bottlenecks.
Keep in mind that these RAM recommendations are general guidelines, and the specific needs may vary based on your unique workflow and software requirements. It’s always a good idea to check the system requirements of your music production software and plugins to get a better understanding of the minimum and recommended RAM specifications.
Additionally, if you plan on live recording and processing multiple channels simultaneously or working with high-resolution audio formats, it’s advisable to have extra RAM to accommodate the increased data transfer and processing demands. This ensures a smooth recording experience and reduces the risk of latency or audio dropouts during capturing performance.
In the next section, we will discuss the factors you should consider when determining how much RAM you need for your specific recording setup. Understanding these factors will help you make an informed decision and ensure that your system has sufficient RAM to handle your music production tasks effectively.
RAM recommendations for home studio setups
In a home studio setup, where you work on music production projects as a hobbyist or a beginner, having appropriate RAM is crucial for a smooth recording and production experience. Here are some RAM recommendations for home studio setups:
- 8GB of RAM: If you primarily work on basic projects with a few audio tracks, minimal plugin usage, and limited virtual instrument usage, 8GB of RAM should suffice. This is suitable for recording simple demos or song ideas, where you don’t require extensive processing capabilities. It’s a good starting point for beginner home studio setups.
- 16GB of RAM: If you plan to work on more intermediate-level projects, utilize sample libraries, and experiment with a moderate number of plugins and virtual instruments, upgrading to 16GB of RAM is recommended. This additional memory provides more headroom for processing power and allows for smoother operation, especially when working with larger audio files and running resource-intensive plugins.
- 32GB of RAM: For those who have more advanced home studios, work with larger projects, and require a higher track count, it’s advisable to have 32GB of RAM. This increased memory capacity allows for handling complex productions, running multiple virtual instruments and effects simultaneously, and ensures optimal performance when manipulating audio tracks with extensive editing and processing requirements.
While 8GB of RAM is a good starting point for a home studio, keep in mind that the memory requirements may vary depending on your specific workflow, software, and the size and complexity of your projects. It’s always a good idea to check the system recommendations provided by your music production software and plugins to understand their RAM requirements and ensure optimal performance.
It’s also worth considering future needs when determining the RAM capacity for your home studio. As you gain experience and start working on more complex projects, your RAM requirements may increase. Investing in higher RAM from the beginning can save you from potential performance issues and the need for immediate upgrades as your skills and projects evolve.
In the next section, we will discuss the factors to consider when determining how much RAM you need for your specific recording setup. By understanding these factors, you can make an informed decision and ensure that your home studio has sufficient RAM to handle your music production needs effectively.
Factors to consider when determining how much RAM you need
When it comes to determining how much RAM you need for your specific recording setup, several factors come into play. Consider the following factors to ensure you have sufficient RAM for your music production needs:
- Project complexity: The complexity of your music projects plays a significant role in determining how much RAM you require. If you work on simple projects with a few tracks and minimal processing, you can get by with lower RAM capacities. However, if you deal with large-scale productions, intricate arrangements, and heavy processing requirements, you’ll need more RAM to handle the workload efficiently.
- Track count and instrument usage: The number of tracks and virtual instruments you use in your projects has a direct impact on RAM usage. Each track and virtual instrument requires memory to load and process audio data. If you work with a high track count or utilize multiple virtual instruments simultaneously, it’s important to have enough RAM to accommodate the resource requirements of these elements.
- Plugin usage: Plugins, such as effects and processors, also consume RAM as they process audio data in real-time. Different plugins have varying resource requirements, and using multiple instances of resource-intensive plugins can quickly eat up your available RAM. Consider the types and number of plugins you use in your projects to determine the RAM capacity you’ll need.
- Sample libraries: If you work with sample libraries or virtual instruments that utilize pre-recorded audio samples, these libraries can be quite memory-intensive. Some sample libraries can require several gigabytes of RAM to load and manipulate the samples effectively. Take into account the size and complexity of the sample libraries you use, and ensure that you have sufficient RAM to handle their memory requirements.
- Future scalability: It’s wise to consider your future needs when determining your RAM requirements. As you progress as a musician or producer, your projects may become more complex, and your requirements might increase. Investing in higher RAM capacity from the beginning allows you to handle future projects without the need for immediate upgrades.
It’s important to note that these factors are not exclusive, and their impact will vary based on your specific recording setup and the software you use. Checking the system recommendations provided by your music production software and plugins is essential. They typically provide guidance on the minimum and recommended RAM specifications for optimal performance.
By considering these factors and understanding your specific workflow and requirements, you can determine how much RAM you need to ensure a smooth and efficient music production experience in your recording setup.
Tips for optimizing RAM usage while recording and mixing music
Optimizing RAM usage is crucial for ensuring smooth and efficient music recording and mixing sessions. By following these tips, you can make the most of your available RAM and avoid potential performance issues:
- Close unnecessary applications: Before starting your music production sessions, close any unused applications running in the background. These applications consume system resources, including RAM, and can negatively impact the performance of your music recording software.
- Disable unnecessary plugins: Only load and activate the plugins you need for your current project. Unnecessary plugins consume RAM and can slow down your system. Disable or remove any unused or idle plugins from your project to free up valuable memory.
- Free up system resources: Keep your system optimized by regularly performing maintenance tasks such as disk cleanup, removing temporary files, and defragmenting your hard drive or SSD. A well-maintained system can help maximize available RAM for music recording and mixing tasks.
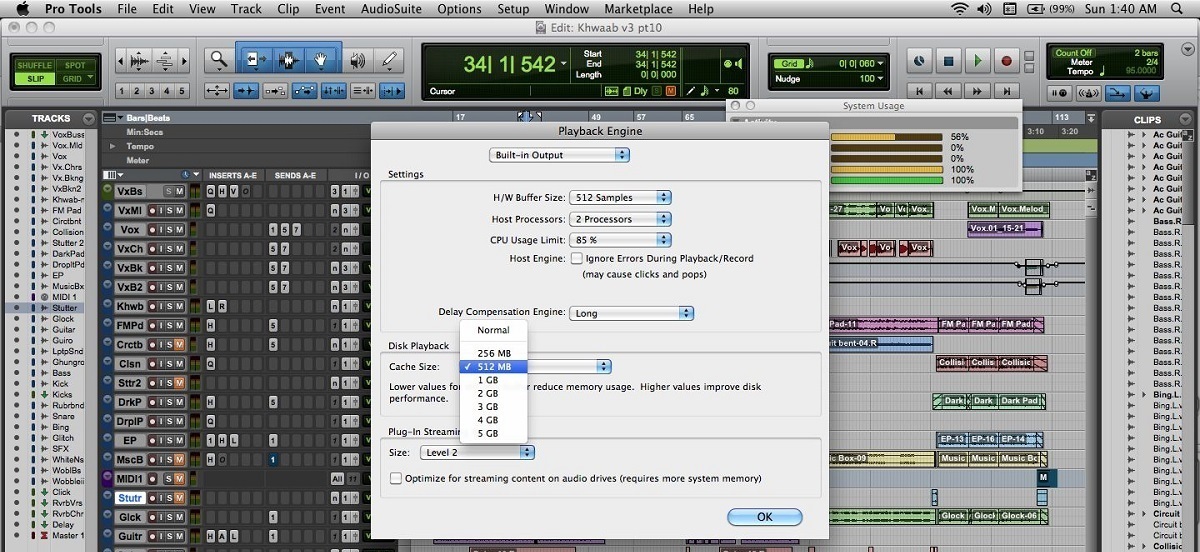
- Adjust buffer size: The buffer size setting in your music production software determines the amount of audio data that is loaded into RAM for processing. A larger buffer size can reduce CPU strain but increases latency, while a smaller buffer size decreases latency but increases CPU demand. Find the optimal buffer size that balances latency and RAM usage for your specific needs.
- Free up RAM resources: Close any unnecessary tracks or channels in your music production software. These unused tracks still consume memory in RAM. Additionally, consider freezing or bouncing tracks with heavy processing to reduce the active RAM usage.
- Utilize RAM-saving techniques: Some software provides options for saving RAM usage. For example, you can use sample interpolation in virtual instruments to reduce memory consumption or use offline rendering to bounce heavy effects and processor-intensive tracks to free up RAM resources.
- Upgrade your RAM: If you find that your RAM usage consistently reaches its limits during recording and mixing sessions, consider upgrading to a higher capacity RAM module. Adding more RAM can provide the necessary headroom for handling larger projects and complex processing requirements.
Implementing these tips will help optimize your RAM usage, improve the overall stability of your music production software, and enhance your productivity during recording and mixing sessions. Experiment with different techniques to find the right balance between efficient RAM usage and smooth performance in your specific setup.
How to check and upgrade your RAM for improved performance
If you’re experiencing performance issues and suspect that your system’s RAM is the bottleneck, it may be time to check and potentially upgrade your RAM for improved performance. Here’s how you can go about it:
- Check your current RAM: To determine the amount of RAM currently installed on your system, you can check the system information provided by your operating system. On Windows, you can press the Windows key + Pause Break to access the System panel, where you’ll find the RAM information. On macOS, click on the Apple menu, go to About This Mac, and click on the Memory tab to view the RAM details.
- Check system specifications: Look up the specifications of your computer or motherboard model to find out the maximum amount of RAM it can support. This information is typically available on the manufacturer’s website or in the user manual. Make sure you explore compatible RAM types, speeds, and capacities specific to your system.
- Decide on the RAM upgrade: Based on your requirements and the maximum RAM capacity supported by your system, decide on the amount of RAM you want to upgrade to. Consider factors such as the complexity of your projects, track count, and plugin usage to determine the ideal capacity for your needs.
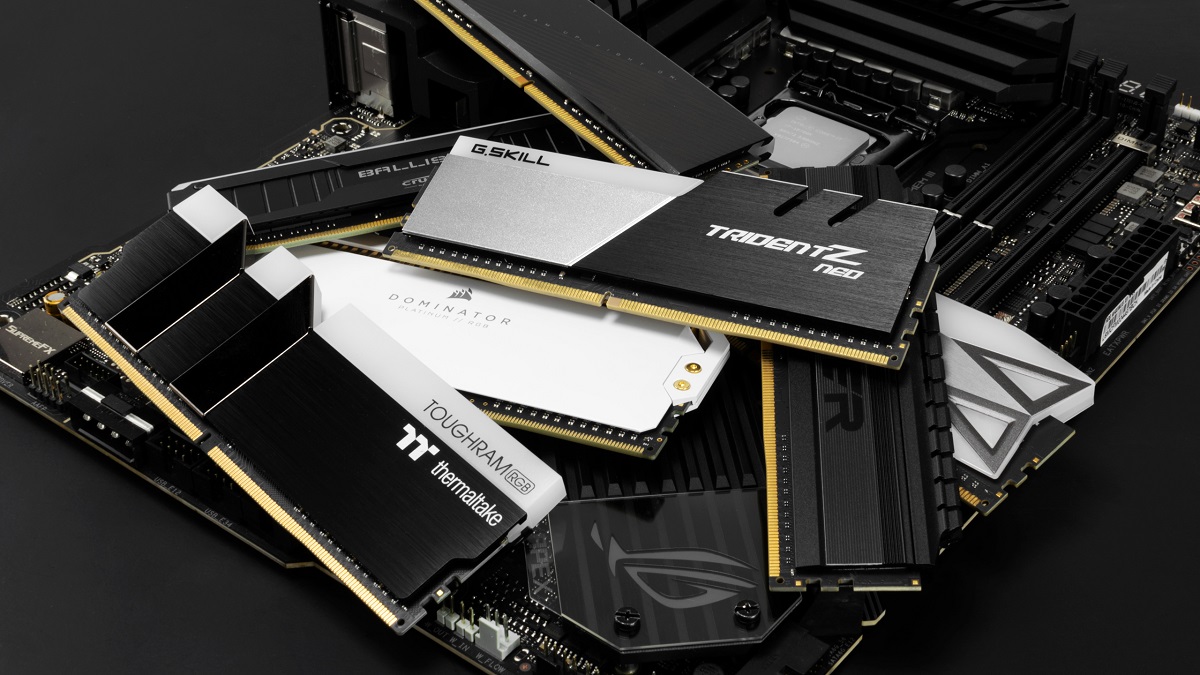
- Purchase the compatible RAM: Purchase RAM modules that are compatible with your system’s specifications. Take note of the type (e.g., DDR3, DDR4), speed, and capacity. It’s recommended to buy RAM modules of the same type and speed for optimal performance.
- Power off and open your computer: Before physically installing the new RAM modules, ensure your computer is powered off and unplugged. Open the casing or remove the access panel to gain access to the RAM slots.
- Remove and replace RAM modules: Gently press down on the clips at each end of the existing RAM module(s) to release them from the slots. Carefully remove the modules from the slots, and then insert the new RAM modules into the corresponding slots. Ensure that the modules are properly seated and the clips lock into place.
- Power on and check RAM capacity: After securing the new RAM modules, power on your computer and check if the increased RAM capacity is recognized by your operating system. You can revisit the system information panel to ensure the correct amount of RAM is being detected. This indicates a successful RAM upgrade.
- Test performance: With the upgraded RAM, test the performance of your music production software. Pay attention to any improvements in responsiveness, reduced latency, and the ability to handle larger projects without performance issues. Enjoy the enhanced capabilities of your system!
It is worth noting that upgrading your RAM may void any warranty on your computer or hardware. If you are unsure of the upgrade process or if your system is still under warranty, it may be best to consult with a professional technician or the manufacturer for assistance.
By following these steps, you can check and upgrade your RAM to meet the demands of your music production tasks, leading to improved performance, reduced latency, and a smoother workflow.
Conclusion
RAM plays a crucial role in the recording and production of music. It enables smooth operation, efficient processing of audio tracks, plugins, and virtual instruments, and ensures a seamless creative experience. Understanding the importance of RAM and determining the right amount for your recording setup is essential for achieving optimal performance.
In this article, we explored what RAM is and why it is important for music recording. We discussed the RAM requirements for different recording setups, including basic home studios, intermediate studios, and professional studios. We also highlighted the factors to consider when determining how much RAM you need, such as project complexity, track count, and plugin usage.
Furthermore, we provided tips for optimizing RAM usage while recording and mixing music, including closing unnecessary applications, disabling unused plugins, adjusting buffer size, and upgrading RAM if needed. These tips can help you make the most of your available RAM and avoid performance issues during your music production sessions.
Lastly, we discussed how to check and upgrade your RAM for improved performance, emphasizing the importance of checking your current RAM, understanding system specifications, purchasing compatible RAM modules, and properly installing them in your computer. Upgrading your RAM can significantly enhance your system’s capabilities and allow for smooth execution of complex music projects.
By considering these factors and implementing the recommended tips, you can ensure that your music recording and production workflow is optimized for efficiency, creativity, and top-notch performance. Remember, RAM is an investment in your ability to create music smoothly, so make sure to assess your specific needs and make informed decisions when it comes to upgrading your RAM.