Introduction
3D printing has revolutionized various industries, allowing for the creation of complex and intricate objects with ease. One crucial aspect of successful 3D printing is maintaining the right distance between the nozzle and the print bed. This distance, known as the nozzle-to-bed distance, plays a vital role in ensuring accurate prints and preventing potential issues that can arise during the printing process.
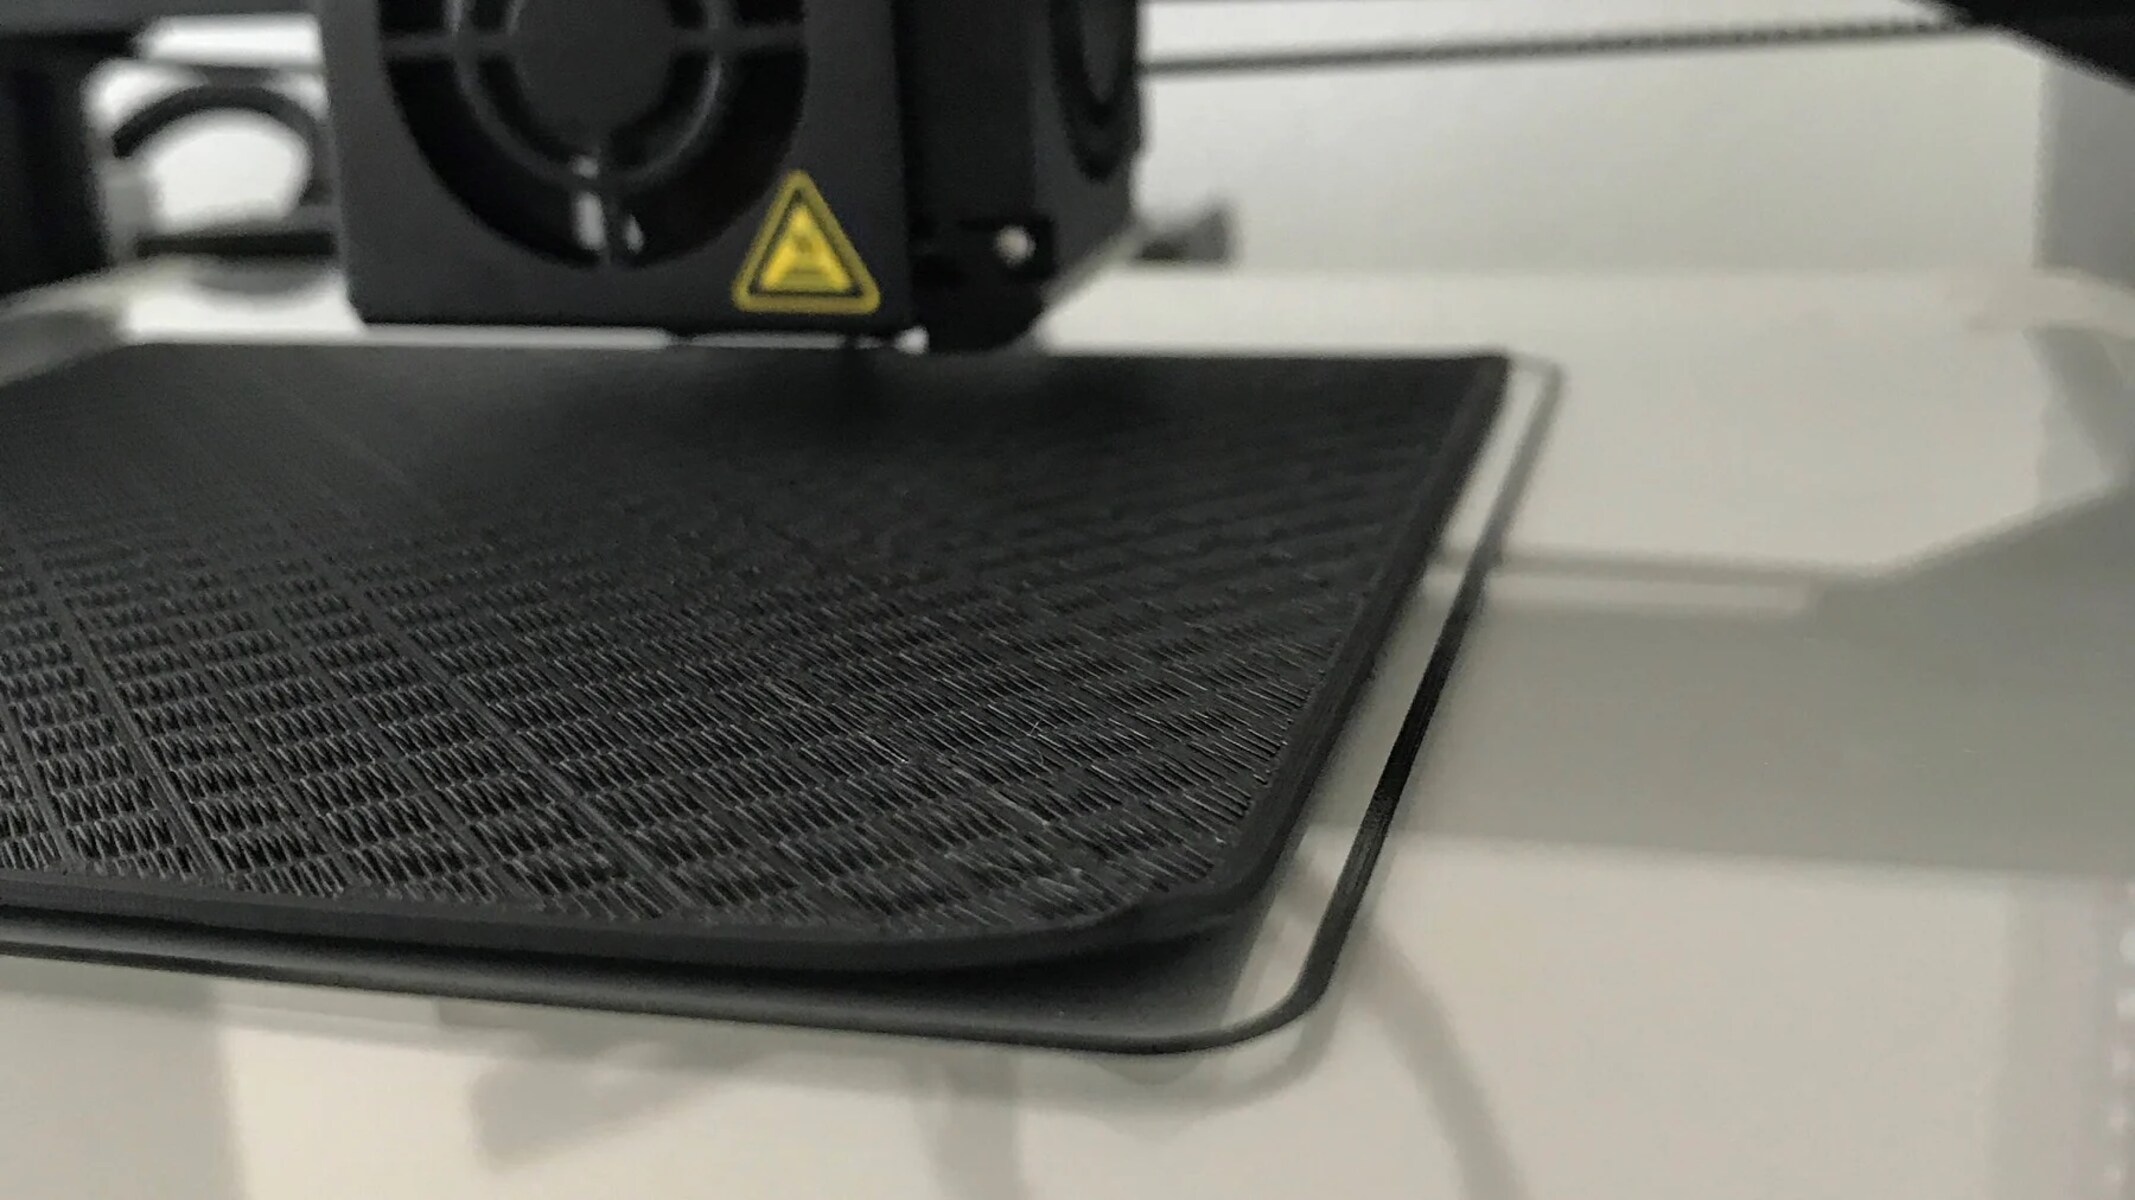
The nozzle-to-bed distance refers to the height between the nozzle of a 3D printer and the surface of the print bed. It is essential to have the correct nozzle-to-bed distance to ensure proper adhesion, layer uniformity, and overall print quality. Whether you are a beginner or an experienced user, understanding the importance of nozzle-to-bed distance is key to achieving flawless 3D prints.
Proper nozzle-to-bed distance has a significant impact on the first layer of a print. This layer serves as the foundation for the entire object, and any inconsistencies or errors during this stage can lead to failed prints or subpar quality. By maintaining the right distance between the nozzle and the print bed, the filament is deposited accurately, ensuring proper adhesion and preventing any warping or curling of the print.
Furthermore, the nozzle-to-bed distance affects the flow of filament and the overall printing speed. If the nozzle is too close to the bed, it can impede the flow of filament, leading to clogs or uneven extrusion. On the other hand, if the nozzle is too far from the bed, it can result in poor adhesion and print failure.
Now that we understand the importance of nozzle-to-bed distance, let’s explore the factors that need to be considered when determining the optimal distance for successful 3D printing.
Importance of Nozzle-to-Bed Distance
The nozzle-to-bed distance is a critical factor in achieving high-quality 3D prints. It directly impacts the adhesion, accuracy, and overall finish of the printed object. Maintaining the correct distance between the nozzle and the print bed is essential for several reasons:
- Adhesion: The nozzle-to-bed distance influences how well the first layer of the print adheres to the bed. If the distance is too far, the extruded filament may not stick properly, leading to lifting, warping, or a failed print. Conversely, if the nozzle is too close, excessive pressure may cause the filament to squish or spread too much, resulting in poor bed adhesion and a messy print.
- Print Accuracy: The nozzle-to-bed distance directly affects the accuracy and precision of the printed object. If the distance is not properly set, the filament may be deposited too high or too low, leading to dimensional inaccuracies and compromised print quality. A small deviation in the nozzle-to-bed distance can result in misshapen, distorted, or uneven layers.
- Layer Uniformity: Consistency in layer height is crucial for achieving a smooth and uniform surface finish. If the nozzle is not correctly leveled with respect to the bed, the layers may vary in thickness, leading to an uneven surface. This can be particularly noticeable in objects with large flat surfaces or in prints with intricate details.
- Printing Speed: The nozzle-to-bed distance can affect the speed at which you can print. If the nozzle is too close to the bed, it may restrict the flow of filament, causing underextrusion and slower printing speeds. Conversely, if the nozzle is too far, excessive filament flow may result in overextrusion and slower print speeds. Finding the optimal distance allows for efficient and consistent extrusion, balancing print speed and quality.
- Preventing Damage: Maintaining the appropriate nozzle-to-bed distance also helps prevent damage to both the printer and the print bed. A distance that is too close can cause the nozzle to scratch or damage the bed surface, while a distance that is too far can lead to clogs or filament jams, potentially damaging the printer’s extruder.
Considering the importance of nozzle-to-bed distance, it is crucial to understand the factors that influence determining the correct distance for your specific 3D printer and printing material.
Factors to Consider When Determining Nozzle-to-Bed Distance
When determining the nozzle-to-bed distance for your 3D printer, several factors come into play. These factors can vary based on the type of printer, the printing material, and your specific printing environment. Consider the following key aspects:
- Printer Type: Different types of 3D printers may have varying mechanisms for leveling the bed or adjusting the nozzle-to-bed distance. For example, some printers use manual leveling, where you adjust the bed height manually, while others come with automatic bed leveling systems. Understanding your printer’s capabilities is essential in setting the correct distance.
- Printing Material: The type of material being used can influence the optimal nozzle-to-bed distance. Materials such as PLA, ABS, and PETG may require slightly different distances due to variations in their properties, including thermal expansion and adhesion characteristics. It is recommended to consult the manufacturer’s guidelines or conduct experiments to find the ideal distance for each material.
- Print Bed Surface: The type of surface on your print bed can impact the nozzle-to-bed distance. Smooth surfaces, such as glass or BuildTak, may require a different distance compared to textured surfaces like PEI or blue painter’s tape. The surface texture affects the bed adhesion and the amount of filament squish required for proper layer adhesion. Experimentation and adjustment may be necessary to find the optimal distance for different bed surfaces.
- Temperature and Humidity: Environmental conditions can impact the nozzle-to-bed distance. Changes in temperature and humidity can cause materials to expand or contract, affecting the overall printing process and the required distance. It is essential to consider the ambient conditions in your printing environment and make adjustments accordingly.
- Bed Leveling: Proper bed leveling is crucial for achieving the correct nozzle-to-bed distance. If the bed is not leveled correctly, it can lead to an uneven distance across the print surface, resulting in inconsistent adhesion and print quality. Whether you are using manual leveling or an automatic bed leveling system, ensuring a level bed is essential for optimal results.
By taking these factors into account, you can determine the appropriate nozzle-to-bed distance for your specific 3D printing setup. Keep in mind that some trial and error may be necessary to fine-tune the distance, as it can vary depending on various factors specific to your printer and materials.
Manual Leveling vs. Automatic Leveling Systems
When it comes to setting the nozzle-to-bed distance, there are two main methods: manual leveling and automatic leveling systems. Both approaches have their advantages and considerations that you should take into account:
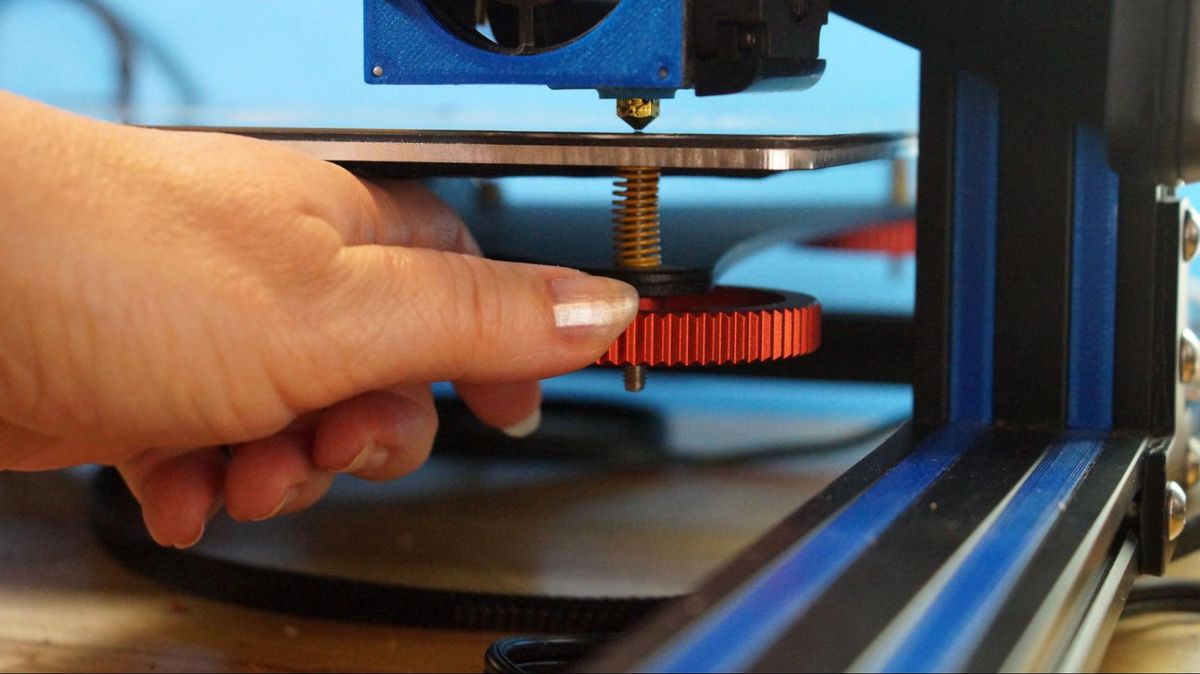
- Manual Leveling: Manual bed leveling involves adjusting the height of the print bed manually to achieve the desired nozzle-to-bed distance. This process typically requires using a piece of paper or a feeler gauge to gauge the distance between the nozzle and the bed. Manual leveling provides a higher level of control, allowing for precise adjustments. It is relatively straightforward and works well for printers without automatic leveling capabilities.
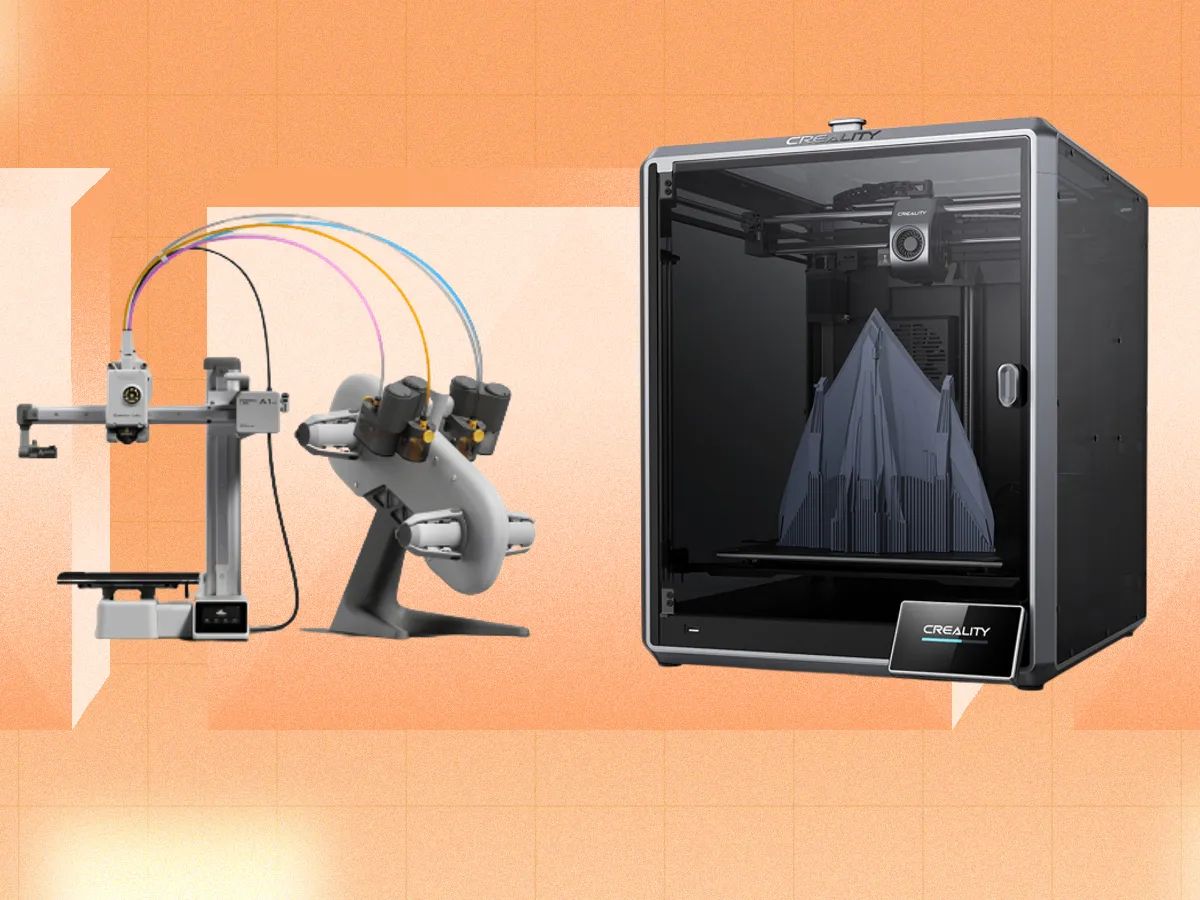
- Automatic Leveling Systems: Many modern 3D printers come equipped with automatic bed leveling systems. These systems use sensors to measure the distance between the nozzle and the bed and automatically adjust the bed height to achieve the ideal nozzle-to-bed distance. Automatic leveling systems offer convenience and ease of use, eliminating the need for manual adjustments. They are particularly beneficial for printers with multiple bed screws or complex bed leveling mechanisms.
When deciding between manual and automatic bed leveling, there are a few factors to consider:
- User Experience: Manual leveling requires a bit of practice and patience to master. It involves making precise adjustments and can be time-consuming. On the other hand, automatic leveling systems offer a more user-friendly experience, simplifying the leveling process and reducing the likelihood of user errors.
Not all 3D printers come with automatic leveling systems. If your printer does not have this feature, manual leveling is the only option. However, if you have the option to choose between a manual or automatic leveling system, consider the specific model and its features before making a decision. Manual leveling can provide more precise leveling adjustments, allowing for fine-tuning to achieve an optimal nozzle-to-bed distance. Automatic leveling systems, although convenient, may not always be as accurate or sensitive to slight variations. Automatic levelers can compensate for minor irregularities in the bed, ensuring a consistent nozzle-to-bed distance across the entire print surface. Manual leveling relies on the stability and evenness of the bed, so if your print bed is not sturdy or tends to warp, manual leveling may present challenges.
Ultimately, the choice between manual and automatic bed leveling depends on your specific requirements, preferences, and the capabilities of your 3D printer. Regardless of the method you choose, achieving the proper nozzle-to-bed distance is essential for successful 3D prints.
Recommended Nozzle-to-Bed Distances for Different Materials
The optimal nozzle-to-bed distance can vary depending on the type of material being used for 3D printing. Different materials have unique characteristics and requirements that determine the ideal distance. Here are some recommended nozzle-to-bed distances for commonly used 3D printing materials:
- PLA: For PLA, it is generally recommended to have a nozzle-to-bed distance of around 0.1-0.2mm. PLA is known for its good bed adhesion, and having a slightly closer distance helps ensure proper adhesion and layer bonding.
- ABS: ABS typically requires a slightly larger nozzle-to-bed distance compared to PLA, around 0.15-0.3mm. ABS can be prone to warping, and having a slightly larger distance helps mitigate this issue while ensuring good bed adhesion.
- PETG: PETG works best with a nozzle-to-bed distance of approximately 0.2-0.3mm. PETG is known for its strong adhesion, and having a slightly larger distance helps prevent excessive squishing and improves print quality.
- Nylon: Nylon is a material that generally requires a close nozzle-to-bed distance, around 0.05-0.1mm. Nylon tends to have high shrinkage and needs proper adhesion to the bed to prevent delamination and warping.
- PVA (Support Material): PVA is commonly used as a support material in dual extrusion printing. It is recommended to have a nozzle-to-bed distance of around 0.1-0.2mm for proper adhesion to the print bed, similar to PLA.
It is important to note that these are general guidelines and that specific printers, materials, and environmental conditions may require slight adjustments to achieve the best results. It is always a good idea to consult the manufacturer’s recommendations or conduct test prints to fine-tune the appropriate nozzle-to-bed distance for your specific setup.
Troubleshooting Common Issues Related to Nozzle-to-Bed Distance
Properly setting the nozzle-to-bed distance is crucial for successful 3D printing. However, even with the best intentions, issues can arise. Here are some common problems related to nozzle-to-bed distance and how to troubleshoot them:
- Poor Bed Adhesion: If your print is not sticking properly to the bed or detaching during the print, it may be due to an incorrect nozzle-to-bed distance. Try adjusting the distance slightly closer to improve adhesion. Additionally, make sure your bed is clean and properly leveled.
- First Layer Not Smoothing Properly: If your first layer does not have a smooth and consistent finish, it may be caused by an incorrect nozzle-to-bed distance. If the layer looks squished or overextruded, try moving the nozzle slightly higher. If it appears to be too thin or uneven, try decreasing the nozzle-to-bed distance.
- Extrusion Problems: If you are experiencing underextrusion or inconsistent extrusion during the print, it could be a result of an incorrect nozzle-to-bed distance. Ensure that the nozzle is not too close to the bed, as this can restrict the filament flow. Alternatively, if the nozzle is too far, it may lead to overextrusion and clogs.
- Warped or Deformed Prints: If your prints exhibit warping, curling, or deformations, it may indicate an improper nozzle-to-bed distance. Adjust the distance accordingly, ensuring that the first layer is properly adhering to the bed. Additionally, consider using a heated bed or an adhesive like glue or hairspray to improve bed adhesion.
- Nozzle Clogs or Jams: If your nozzle frequently clogs or causes filament jams, it may be due to an incorrect nozzle-to-bed distance. A distance that is too close can cause excessive pressure on the filament, leading to issues. Try increasing the distance slightly to alleviate the problem.
When troubleshooting nozzle-to-bed distance issues, it is crucial to make small adjustments and perform test prints to observe the impact. Every printer and material combination may require slightly different settings, so patience and experimentation are key.
Remember to take other factors into consideration as well, such as bed leveling, print speed, and environmental conditions. These can all play a role in achieving optimal nozzle-to-bed distance and ensuring successful 3D prints.
Tips for Achieving the Proper Nozzle-to-Bed Distance
Getting the proper nozzle-to-bed distance can be crucial for successful 3D printing. Here are some tips to help you achieve the optimal distance:
- Level Your Print Bed: Before adjusting the nozzle-to-bed distance, ensure that your print bed is properly leveled. A level bed provides a solid foundation for accurate printing and helps achieve consistent nozzle-to-bed distance across the entire surface.
- Start with Manufacturer Guidelines: Consult the manufacturer’s guidelines or documentation for recommended nozzle-to-bed distances specific to your printer and materials. These guidelines can give you a starting point, from which you can make adjustments based on your specific requirements.
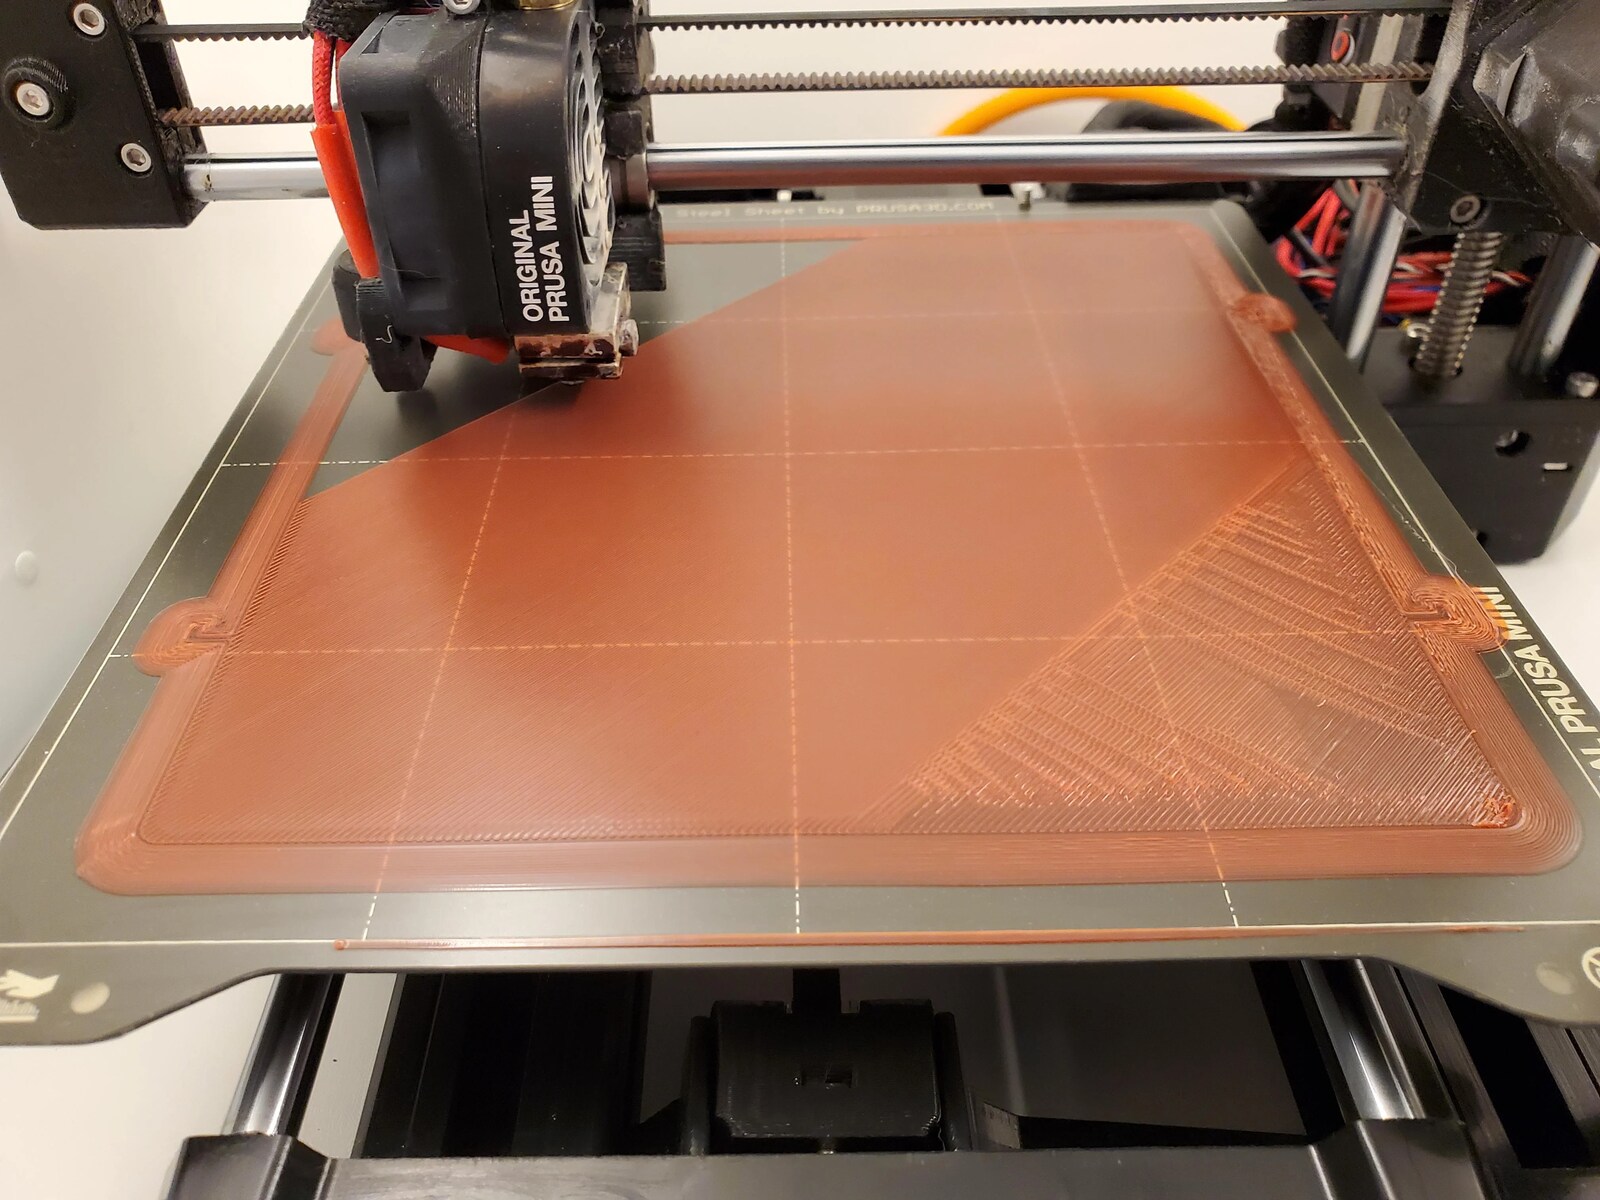
- Use a Calibration Test Print: Calibration test prints, such as the “first layer calibration” or “bed leveling test,” can help you fine-tune the nozzle-to-bed distance. These prints typically have specific patterns or lines that allow you to assess the quality and consistency of the first layer and make necessary adjustments.
- Make Small Adjustments: When adjusting the nozzle-to-bed distance, make small increments of changes. Gradual adjustments allow you to find the optimal distance without making drastic changes that could negatively impact the print quality.
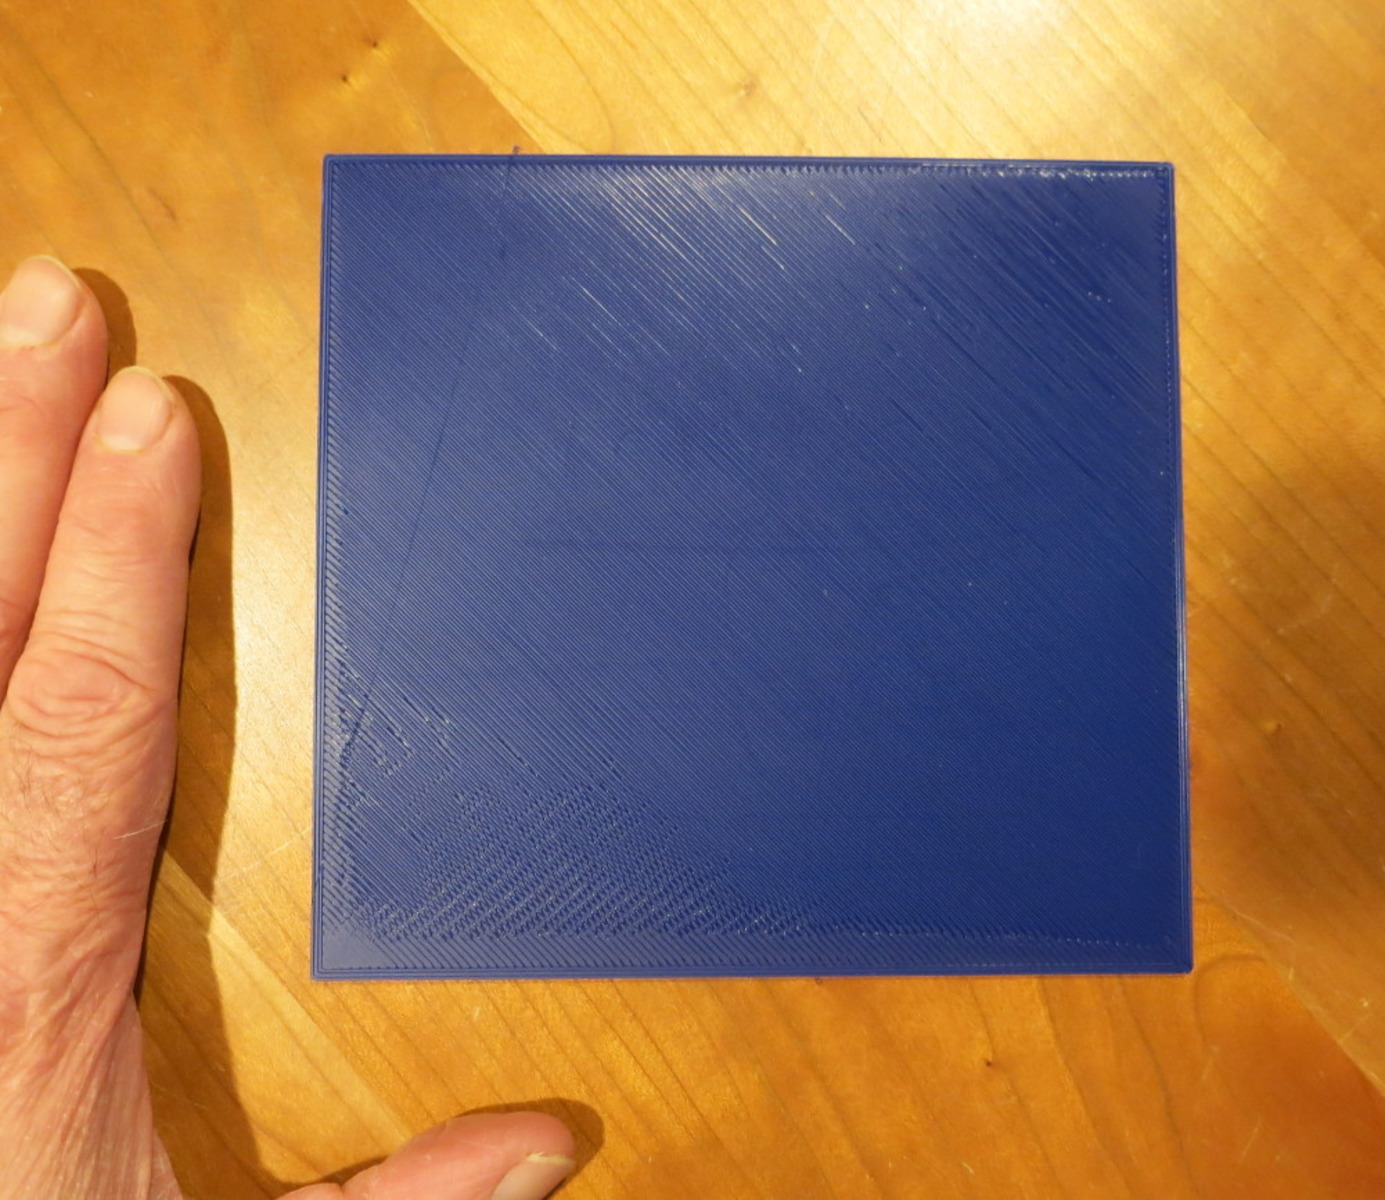
- Utilize Visual and Physical Feedback: Pay attention to the first layer of your print. Look for signs of proper adhesion, such as uniform lines and smooth coverage. Additionally, use visual cues, such as the “squish test,” where the first layer should have a slight squished appearance without appearing too flat or too thin.
- Take Note of Different Materials: Different materials may require slight adjustments to the nozzle-to-bed distance. Take note of the characteristics of the material you are using and experiment with the distance to achieve the best results. Keep a record of the optimal nozzle-to-bed distance for each material for future reference.
- Consider Using Printing Aids: Printing aids like adhesives (e.g., glue stick, hairspray) or a heated bed can help improve bed adhesion and compensate for slight distance variations. These aids can be particularly useful when working with materials that have poor adhesion properties.
- Regularly Maintain and Clean Your Printer: Keep your printer clean and perform regular maintenance procedures such as nozzle cleaning and bed surface cleaning. A clean and well-maintained printer ensures smooth and accurate printing, including maintaining the proper nozzle-to-bed distance.
Remember, achieving the proper nozzle-to-bed distance may require some trial and error to fine-tune the settings for your specific printer and materials. Be patient and persistent, and always make adjustments gradually to achieve the best results.
Conclusion
Setting and maintaining the proper nozzle-to-bed distance is a crucial component of successful 3D printing. It ensures optimal adhesion, print accuracy, and layer uniformity, resulting in high-quality prints. By considering factors such as printer type, printing material, bed surface, temperature, and bed leveling, you can determine the ideal distance for your specific setup.
Whether using manual leveling or an automatic bed leveling system, it is essential to understand the advantages and considerations of each method. Manual leveling offers precision and control, while automatic leveling provides convenience and ease of use.
For different materials, recommended nozzle-to-bed distances may vary. Experimentation and following manufacturer guidelines can help you find the optimal distance for each specific material and printing scenario.
When troubleshooting issues related to the nozzle-to-bed distance, be mindful of factors such as poor bed adhesion, first layer smoothing, extrusion problems, warped prints, and nozzle clogs. Making incremental adjustments and performing test prints are essential for finding the perfect balance.
To achieve the proper nozzle-to-bed distance, use tips such as leveling the print bed, referring to manufacturer guidelines, using calibration test prints, making small adjustments, utilizing visual and physical feedback, considering different materials, using printing aids, and maintaining your printer regularly.
Remember, achieving the optimal nozzle-to-bed distance may require some experimentation and fine-tuning, but with patience and persistence, you will be able to achieve the highest quality prints with accurate adhesion and exceptional detail.