Introduction
Installing a vertical internal solid-state drive (SSD) is a great way to enhance the performance and storage capacity of your computer. SSDs are known for their faster read and write speeds, making them ideal for running applications, handling large files, and improving overall system responsiveness. While installing an SSD may seem daunting at first, it is actually a relatively straightforward process that can be completed with just a few tools and some basic knowledge.
In this article, we will guide you through the step-by-step process of installing a vertical internal SSD in your computer. Whether you are upgrading an existing SSD or adding one for the first time, our instructions will help you get the job done efficiently and correctly.
Before we begin, it is essential to note that the process may vary slightly depending on the specific make and model of your computer. We recommend consulting your computer’s user manual or the manufacturer’s website for any specific instructions or compatibility issues.
Now, let’s get started and unlock the benefits of a vertical internal SSD installation!
Step 1: Gather the necessary tools and equipment
Before you begin the installation process, it’s important to gather all the necessary tools and equipment. Having everything ready beforehand will save you time and ensure a smooth installation.
Here are the tools and equipment you will need:
- Screwdriver set: Depending on your computer case, you may need a Phillips or a Torx screwdriver. Check the screws on your case to determine which type you need.
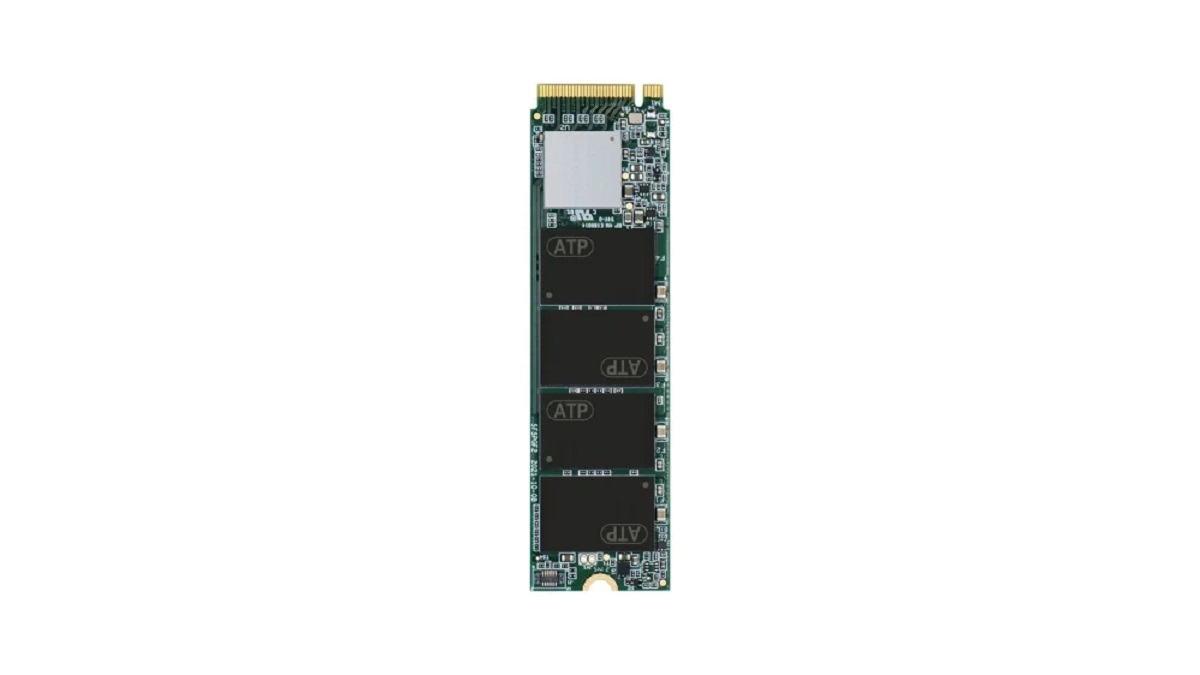
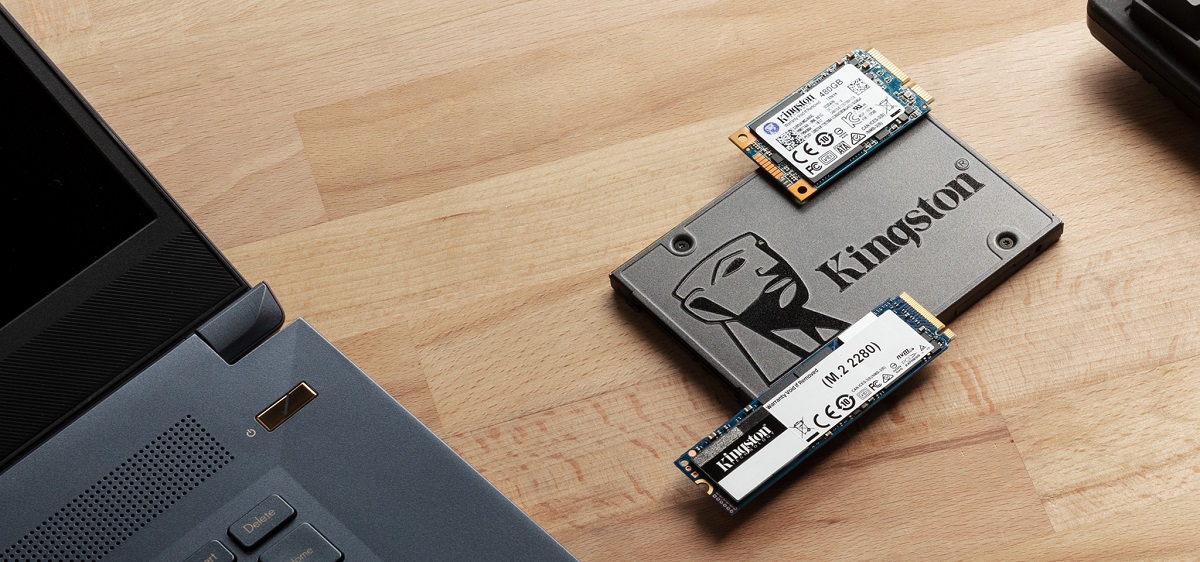
- An internal solid-state drive (SSD): Make sure you have a vertical internal SSD that is compatible with your computer.
- Static wrist strap or grounding mat: This will help protect your computer components from static electricity damage.
- Cable ties or Velcro straps: You may need these to secure cables in place and keep your installation tidy.
- Optional: Cable management clips or adhesive cable holders: These can be useful for organizing and securing cables inside your computer case.
Ensure that you have all the necessary tools and equipment readily available at your workstation before proceeding to the next step. This will prevent any unnecessary interruptions during the installation process, allowing you to complete the task efficiently and without any delays.
Step 2: Prepare your computer for installation
Before you can install the vertical internal SSD, it’s important to prepare your computer for the installation process. This step involves shutting down your computer and taking necessary precautions to ensure the safety of your components.
Here are the steps to prepare your computer for installation:
- Shut down your computer: Save any open files and properly shut down your computer.
- Disconnect the power source: Unplug the power cord from the computer’s power supply or wall outlet to prevent any electrical mishaps.
- Ground yourself: To prevent static electricity damage, ground yourself by either wearing a static wrist strap or by touching a metal surface on your computer case.
- Remove any static charge: Once grounded, discharge any static charge by touching a metal part of the computer case, such as the power supply, for a few seconds.
- Find a well-lit and ventilated workspace: Choose a clear and well-lit area to work in, ensuring that you have enough space to comfortably maneuver your computer.
- Place your computer on a stable surface: Position your computer on a sturdy and stable surface to avoid accidental falls or damage during the installation process.
- Remove any static-sensitive objects: Remove any objects near your workspace that are sensitive to static electricity, such as floppy disks or external hard drives.
By following these preparation steps, you are setting the stage for a successful installation of the vertical internal SSD. Taking the time to properly prepare your computer will reduce the risk of accidental damage to your components and ensure a smooth installation process.
Step 3: Open the computer case
Now that you have prepared your computer, it’s time to open the computer case to gain access to the internal components. Opening the computer case may vary depending on the design of your computer, but the general steps are outlined below.
Follow these instructions to open the computer case safely:
- Locate the screws holding the side panel: Depending on your computer case, the screws holding the side panel may be on the back, top, or bottom of the case.
- Use the appropriate screwdriver to remove the screws: Using a screwdriver (likely a Phillips or a Torx), carefully remove the screws securing the side panel of the computer case.
- Slide or lift off the side panel: Once the screws are removed, gently slide or lift off the side panel to expose the internal components of your computer.
- Set aside the side panel in a safe place: Keep the side panel in a secure location to avoid misplacing or damaging it during the installation process.
Note: Some computer cases may have a latch or release mechanism instead of screws. Refer to your computer’s user manual or the manufacturer’s website for specific instructions on how to open your particular computer case.
Opening the computer case allows you to access the internal components of your computer, including the PCIe slots where the SSD will be installed. Take a moment to familiarize yourself with the inside of your computer and locate the PCIe slot where the vertical internal SSD will be inserted in the next step.
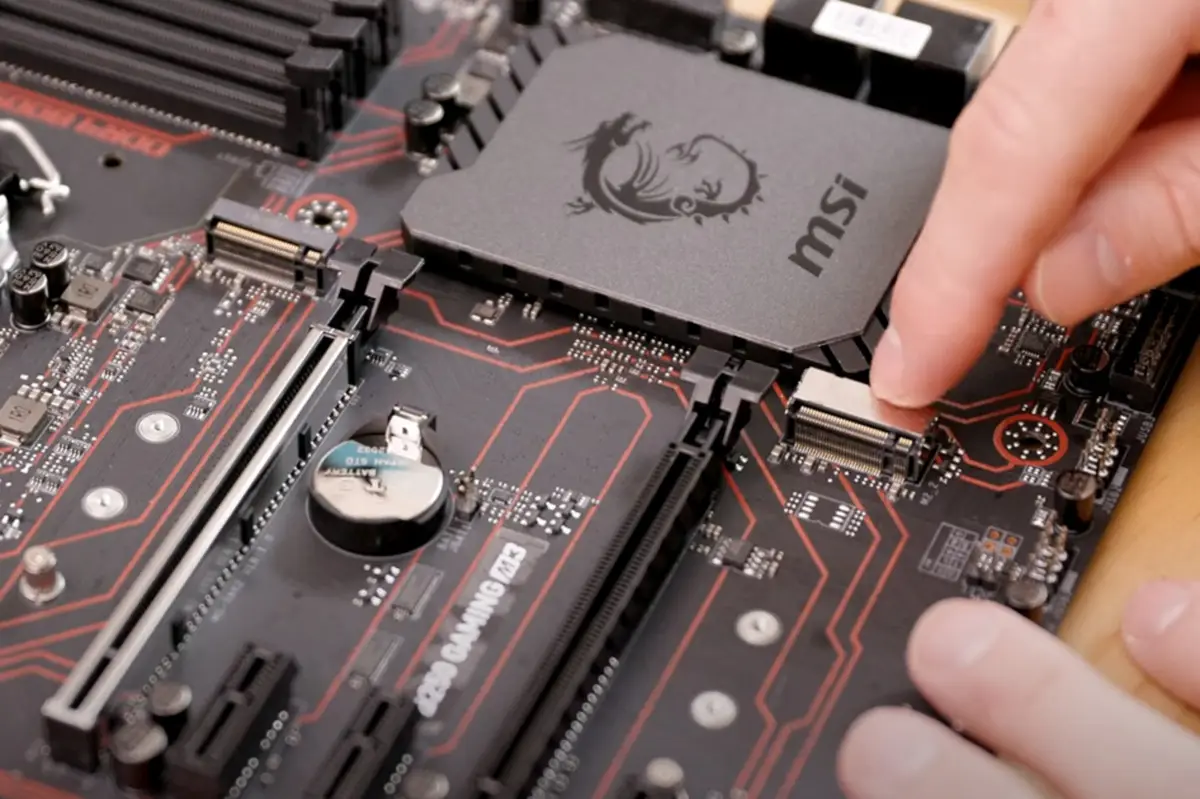
Step 4: Locate the PCIe slot for the SSD
Now that you have the computer case open, it’s time to locate the PCIe slot where the vertical internal SSD will be installed. The PCIe slot is a connection interface found inside your computer that allows for high-speed communication with various expansion cards, including SSDs.
Follow these steps to locate the PCIe slot for the SSD:
- Identify the PCIe slots: Look for a row of long, narrow slots on the motherboard inside your computer case. These slots are typically located near the bottom of the motherboard.
- Determine the available PCIe slots: Inspect the PCIe slots and identify which ones are available for insertion. Most motherboards have multiple PCIe slots, and the available slots may vary depending on your specific motherboard model.
- Consult the motherboard manual: If you are unsure which PCIe slot to use, consult your motherboard’s user manual. The manual should provide information on the available slots and their specifications.
It’s important to choose a PCIe slot that supports the specifications of your SSD, such as its form factor (e.g., M.2 or PCIe 3.0) and length. Refer to the SSD’s documentation or the manufacturer’s website for compatibility details.
Once you have located the appropriate PCIe slot, you are now ready to proceed to the next step of inserting the vertical internal SSD into the slot. Take your time in identifying the correct slot, as this will ensure proper functionality and compatibility with your SSD.
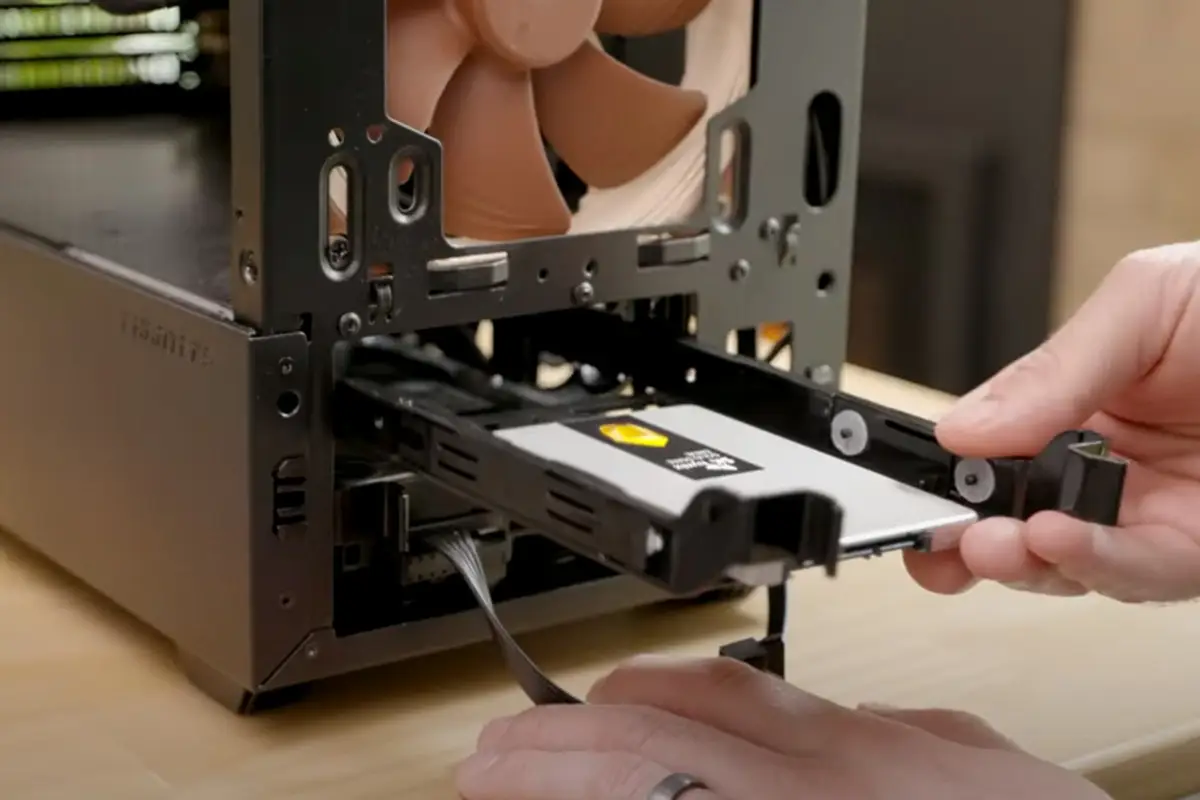
Step 5: Insert the SSD into the PCIe slot
With the PCIe slot identified, it’s time to insert the vertical internal SSD into the slot. This step will physically connect the SSD to your computer’s motherboard, allowing for data transfer and communication.
Follow these steps to insert the SSD into the PCIe slot:
- Hold the SSD by its edges: Gently handle the SSD by its edges to avoid touching the connectors or circuitry.
- Align the SSD with the PCIe slot: Position the SSD above the PCIe slot, aligning the connectors on the SSD with the slot on the motherboard.
- Ensure proper alignment: Take care to align the notches or keying on the SSD with the slot to ensure a proper fit. The PCIe slot and SSD connectors are designed to fit together in only one orientation.
- Apply gentle pressure: Once aligned, apply even and gentle pressure to insert the SSD into the PCIe slot. The SSD should smoothly slide into the slot without excessive force. Avoid using excessive pressure, as this can damage the SSD or the motherboard.
- Confirm secure connection: After inserting the SSD, gently push down on the SSD to confirm that it is fully seated in the slot. The connectors should be fully engaged, and the SSD should sit evenly in the slot.
Take a moment to ensure that the SSD is properly inserted and seated in the PCIe slot. A secure and proper connection is essential for the functioning of the SSD and to avoid any connectivity issues.
With the SSD successfully inserted into the PCIe slot, you are now ready to move on to the next step of securing the SSD in place within the computer case.
Step 6: Secure the SSD in place
Once the SSD is inserted into the PCIe slot, the next step is to secure it in place within the computer case. This is important to ensure the stability and longevity of the SSD, preventing any accidental disconnections or damage during use.
Follow these steps to secure the SSD in place:
- Locate the screw holes or retention mechanism: Inspect the area around the PCIe slot and SSD to identify the screw holes or retention mechanism designed to secure the SSD.
- Align the screw holes: If there are screw holes, align them with the corresponding holes on the SSD and the computer case. Ensure that the SSD is flush against the case.
- Insert and tighten the screws: Insert the screws into the aligned holes and use a screwdriver to tighten them securely. Be careful not to overtighten the screws, as this can damage the SSD or the computer case.
- Follow the manufacturer’s instructions: If your computer case has a specific retention mechanism, refer to the manufacturer’s instructions for securing the SSD in place. This may involve sliding or latching the SSD into the mechanism.
Properly securing the SSD in the computer case adds an extra layer of protection and stability. It ensures that the SSD remains securely connected to the motherboard, even when the computer is moved or undergoes vibrations.
Take a moment to double-check that the SSD is securely fastened and properly aligned within the computer case. With the SSD securely in place, it’s time to move on to the next step of connecting the necessary cables.
Step 7: Connect the necessary cables
With the SSD securely installed in the computer case, the next step is to connect the necessary cables to ensure proper functionality and data transfer. These cables will provide power and data connectivity to the SSD, allowing it to communicate with the rest of the system.
Follow these steps to connect the necessary cables to the SSD:
- Locate the power cable: Identify the power cable coming from the power supply unit (PSU) of your computer. It typically has a SATA power connector or a Molex connector depending on the type of SSD and power supply.
- Connect the power cable to the SSD: Carefully align the power connector on the cable with the corresponding port on the SSD. Gently push the connector into the port until it is securely attached. Be cautious not to force it and check for a proper fit.
- Locate the data cable: Identify the data cable that will connect the SSD to the motherboard. This could be a SATA data cable or a specialized cable based on the type of SSD.
- Connect the data cable to the SSD and motherboard: Align the data connector on the cable with the corresponding ports on the SSD and motherboard. Make sure the connectors are properly aligned and gently push them in until they are fully inserted and secured.
Ensure that all the cable connections are securely attached and properly seated. Check for any loose or disconnected cables and reattach them if necessary.
Properly connecting the power and data cables to the SSD is crucial for its functioning. It ensures that the SSD has the necessary power supply and can communicate with the motherboard to transfer data effectively.
With the necessary cables successfully connected, you are now ready to move on to the next step of closing the computer case.
Step 8: Close the computer case
Now that the SSD is securely installed and all cables are connected, it’s time to close the computer case and ensure everything is properly sealed. Closing the case protects the internal components from dust, debris, and accidental damage while helping to maintain proper airflow and cooling.
Follow these steps to close the computer case:
- Align the side panel: Take the side panel that you previously removed and align it with the edges of the computer case.
- Slide or push the side panel into place: Carefully slide or push the side panel back onto the computer case. Ensure that it fits snugly and aligns with the screw holes or latching mechanism.
- Secure the side panel: If you previously used screws to secure the side panel, use the appropriate screwdriver to reinsert and tighten the screws. If your case has a latch or locking mechanism, engage it to securely close the panel.
- Double-check for proper closure: Gently shake the computer case to ensure that the side panel is securely fastened. Check for any gaps or loose areas that may indicate the panel is not properly closed.
It’s important to take your time and ensure a secure closure of the computer case. This helps protect the internal components from external elements and prevents any accidental disconnections or damage to the SSD or other parts.
By closing the computer case, you are nearing the end of the SSD installation process. Once the case is closed, it’s time to move on to the next step – powering on the computer and checking for proper installation.
Step 9: Power on the computer and check for proper installation
After closing the computer case, the final step is to power on your computer and check if the vertical internal SSD has been properly installed. This step ensures that the SSD is recognized by the system, allowing you to verify its functionality and begin using it for storage or as a boot drive.
Follow these steps to power on the computer and check for proper installation:
- Plug in the power cord: Reconnect the power cord to the power supply unit (PSU) and plug it into a power outlet.
- Power on the computer: Press the power button on your computer to turn it on.
- Observe the boot sequence: As the computer powers on, pay attention to the startup sequence and any on-screen prompts or messages that may appear.
- Access the BIOS/UEFI settings (optional): Depending on your computer, you may need to access the BIOS/UEFI settings to ensure that the SSD is recognized and properly configured. Refer to your computer’s manual for instructions on accessing the BIOS/UEFI settings.
- Verify SSD recognition: Once the computer has booted up, open the operating system’s Disk Management utility or equivalent software to verify if the SSD is detected and listed.
- Test SSD performance (optional): If desired, you can run performance testing software to check the read and write speeds of the SSD. This can help ensure that the SSD is performing optimally.
If the computer successfully boots up, and the SSD is recognized and listed in the Disk Management utility or equivalent software, then congratulations! Your vertical internal SSD has been properly installed.
It’s important to note that some operating systems may require you to initialize and format the SSD before using it. Consult the operating system’s documentation or online resources for instructions on how to perform this initialization process.
Now, you can enjoy the enhanced storage and performance benefits that the vertical internal SSD brings to your computer!
Conclusion
Installing a vertical internal solid-state drive (SSD) can greatly enhance the performance and storage capacity of your computer. By following the step-by-step instructions outlined in this guide, you can successfully complete the installation process and reap the benefits of a faster and more efficient system.
We started by gathering the necessary tools and equipment, ensuring that everything is readily available for the installation. Then, we prepared the computer by shutting it down, grounding ourselves to prevent static electricity damage, and opening the computer case to access the internal components.
Next, we located the PCIe slot for the SSD and properly inserted it, making sure it was securely seated. We then secured the SSD in place within the computer case using screws or a retention mechanism.
After securing the SSD, we connected the necessary power and data cables, ensuring a proper and secure connection. Finally, we closed the computer case, double-checking for a snug fit and proper closure to protect the internal components.
The last step was to power on the computer and check for proper installation. By verifying SSD recognition in the operating system and optionally performing performance testing, we confirmed that the installation was successful.
Remember to consult your computer’s user manual or the manufacturer’s website for any specific instructions or compatibility issues before proceeding with the installation. Additionally, if you are not comfortable performing the installation yourself, it is always recommended to seek assistance from a professional.
With the vertical internal SSD successfully installed, you can enjoy faster storage access, improved system responsiveness, and increased overall performance. Whether you’re running applications, handling large files, or just using your computer for everyday tasks, the SSD will greatly enhance your computing experience.
Now that you have completed the installation process, take a moment to appreciate the enhanced capabilities and storage capacity that the vertical internal SSD brings to your computer. Enjoy the benefits of a faster and more efficient system!