Introduction
Welcome to the world of iMessage, the popular messaging app designed for Apple users. With its intuitive interface and array of features, iMessage offers a seamless and engaging messaging experience. One of the key aspects of iMessage is the ability to edit and customize your messages, allowing you to express yourself in a more precise and creative manner.
In this article, we will explore various ways to edit and enhance your iMessage conversations. Whether you want to fix a typo, add some flair with emojis and stickers, or format your text for emphasis, iMessage has got you covered. We will also delve into features like Tapbacks, digital touch, and managing notifications to help you make the most of your messaging experience.
So, grab your iPhone, iPad, or Mac and get ready to become an iMessage editing pro. Let’s dive in and discover the hidden gems of iMessage that will elevate your texting game!
Editing Text in iMessage
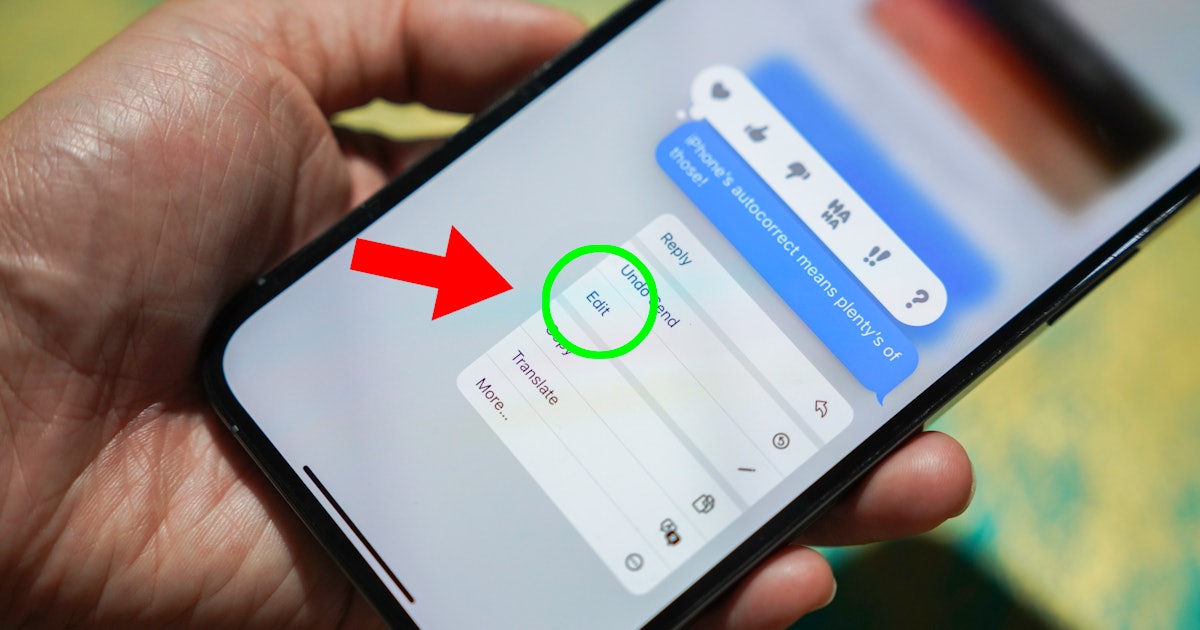
One of the basic functionalities of iMessage is the ability to edit your text before sending it. Whether you want to correct a typo or rephrase a message, iMessage makes it easy to make adjustments. To edit text in iMessage, follow these simple steps:
- Tap and hold the message you want to edit. A pop-up menu will appear.
- Select “Edit” from the menu.
- The message will transform into an editable text box.
- Make the necessary changes to the text.
- Tap “Done” to save your edits.
- Your edited message will now be displayed in the conversation.
It’s important to note that editing a message only affects your side of the conversation. The recipients will see the updated version of the message, but they will also be notified that the message has been edited.
Additionally, iMessage allows you to undo your edits if you change your mind. After editing a message, you can tap and hold the message again, select “Edit,” and revert back to the original version. This gives you the flexibility to refine your messages until you are satisfied with the final result.
With the ability to edit text in iMessage, you can easily correct mistakes or modify your messages to better convey your intended meaning. It’s a handy feature that saves you from the embarrassment of sending a message with errors.
Now that you know how to edit text in iMessage, let’s explore some other exciting editing features iMessage has to offer!
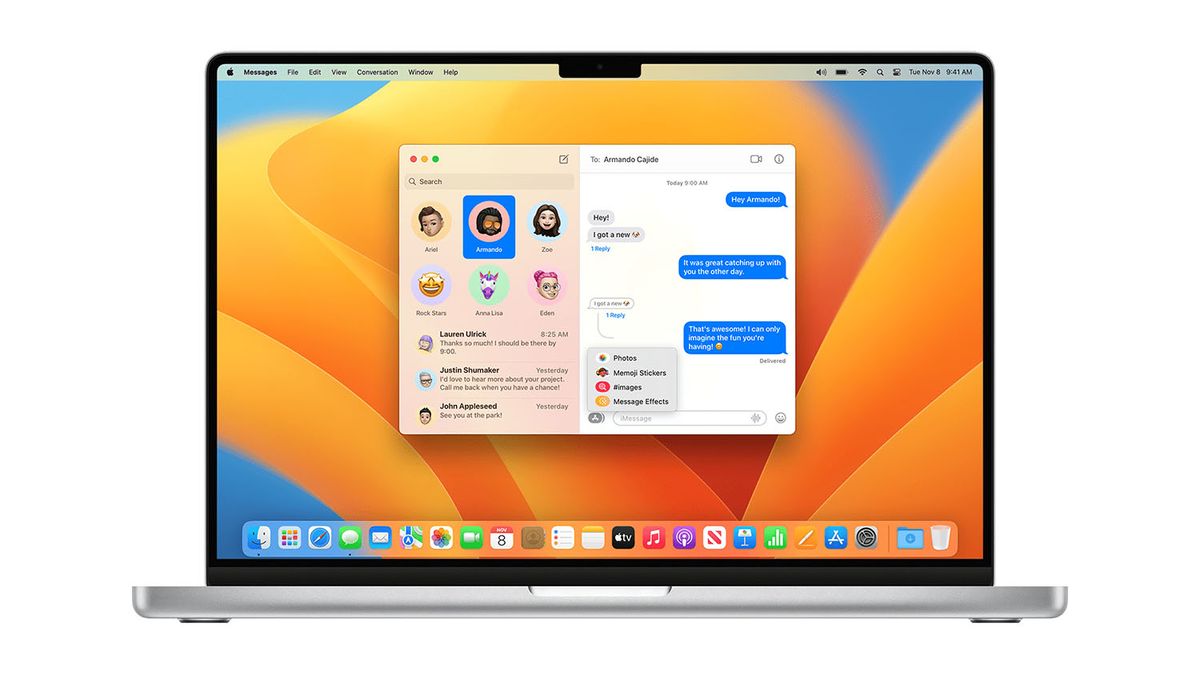
Adding Emojis and Stickers
Emojis and stickers are a fun and expressive way to enhance your iMessage conversations. They add a dash of personality and convey emotions that words alone may not capture. With iMessage, you have a vast collection of emojis and stickers at your fingertips. Here’s how you can add them to your messages:
- Open iMessage and start a new conversation or open an existing one.
- Tap on the text input field to bring up the keyboard.
- Look for the emoji icon on the keyboard (usually a smiley face) and tap on it. This will bring up the emoji picker.
- Browse through different emoji categories, such as smileys and people, animals and nature, food and drink, and more.
- Tap on the emoji or sticker you want to add to your message. It will be inserted into the text input field.
- You can add multiple emojis or stickers by tapping on different ones.
- Once you’ve selected the emojis or stickers you want to use, you can send the message as usual.
In addition to the default emojis, iMessage also supports animated emojis, known as Animojis, on devices with Face ID. Animojis use the TrueDepth camera to map your facial expressions onto various animated characters, bringing them to life in your messages.
To access Animojis:
- Open iMessage and start a new conversation or open an existing one.
- Tap on the text input field to bring up the keyboard.
- Look for the emoji icon on the keyboard and tap on it.
- Swipe left on the emoji categories until you reach the Animoji section.
- Select an Animoji character from the list.
- Follow the instructions to align your face within the frame and start recording your facial expressions.
- Once you’re satisfied with your recording, tap the send button to share your animated Animoji.
From expressive emojis to playful stickers and animated Animojis, iMessage offers a plethora of options to add a touch of creativity to your conversations. Explore the vibrant world of emojis and stickers, and let your messages come alive with visual elements!
Using Tapbacks to Respond
iMessage offers a unique feature called Tapbacks, which allows you to respond to messages quickly and effortlessly. With Tapbacks, you can use predefined reactions to express your thoughts or feelings without having to type out a response. Here’s how you can use Tapbacks in iMessage:
- Open iMessage and navigate to the conversation where you want to respond.
- Tap and hold the message you want to react to. A menu of Tapback options will appear.
- Choose the Tapback you want to use by tapping on it. The Tapback will then appear on the selected message.
iMessage offers six Tapbacks to choose from:
- Thumbs Up: Use this Tapback to show agreement or approval.
- Thumbs Down: Use this Tapback to indicate disagreement or disapproval.
- Heart: Express your love or appreciation with this Tapback.
- Laugh: Use this Tapback to show that something is funny or entertaining.
- Exclamation Mark: Indicate surprise or excitement with this Tapback.
- Question Mark: Use this Tapback to convey confusion or curiosity.
Tapping on a Tapback will apply it to the selected message, and the sender of the message will receive a notification indicating your reaction. You can also use multiple Tapbacks on a single message if you want to express multiple emotions or thoughts.
Tapbacks can add a touch of fun and simplicity to your conversations, enabling you to respond rapidly while still conveying your sentiments. They are particularly useful in group chats or situations where you want to acknowledge a message without composing a lengthy response. So, start using Tapbacks in iMessage to streamline your interactions and engage with your contacts in a unique way!
Correcting Autocorrect Mistakes
We’ve all experienced those hilarious and sometimes embarrassing autocorrect mishaps in our messages. Fortunately, iMessage offers a simple way to correct autocorrect mistakes before sending them. Here’s how you can adjust your messages to fix autocorrect errors:
- Type out your message as usual.
- If autocorrect changes a word and you want to revert to your original input, simply tap the “x” that appears directly above the corrected word.
- The corrected word will be replaced with your intended word.
Alternatively, if you send a message with an autocorrect error and realize it immediately after sending, there’s a way to quickly rectify it.
- After sending the message, tap and hold on the message bubble.
- Select “Edit” from the options that appear.
- Fix the autocorrect error by editing the text within the text input field.
- Tap “Done” to save the corrected message.
Now, the recipient will see your message with the intended word instead of the autocorrected version. It’s a simple but effective way to make sure your messages accurately convey your intended meaning.
iMessage also provides a feature called “Text Replacement” that allows you to create custom shortcut corrections for frequently autocorrected words. To set up text replacements:
- Open the “Settings” app on your device and go to “General.”
- Select “Keyboard” and then “Text Replacement.”
- Tap on the “+” icon in the top-right corner to add a new text replacement.
- In the “Phrase” field, enter the word you frequently type that gets autocorrected.
- In the “Shortcut” field, enter the sequence of characters you want to trigger the replacement.
- Tap “Save” to add the new text replacement.
From now on, whenever you type the shortcut, iMessage will automatically replace it with the designated phrase, saving you from autocorrect frustrations.
By using these methods to correct autocorrect mistakes, you can ensure that your messages are accurate and intelligible, preventing any potential miscommunications or comical misunderstandings.
Deleting Messages or Conversations
Over time, your iMessage conversations can become cluttered with old messages that you no longer need. Thankfully, iMessage provides options for deleting individual messages or entire conversations to keep your message threads organized and free up space on your device. Here’s how you can delete messages or conversations in iMessage:
To delete individual messages:
- Open iMessage and navigate to the conversation that contains the message(s) you want to delete.
- Tap and hold on the specific message you want to delete. A menu will appear.
- Select “More” from the menu options.
- The selected message will be highlighted, and checkboxes will appear next to other messages.
- Select the checkboxes next to all the messages you want to delete.
- Tap the trash can icon at the bottom left corner of the screen.
- A confirmation message will ask if you want to delete the selected messages. Confirm by tapping “Delete Message(s)”.
The selected messages will now be deleted from the conversation, but keep in mind that this action is irreversible, so double-check before proceeding.
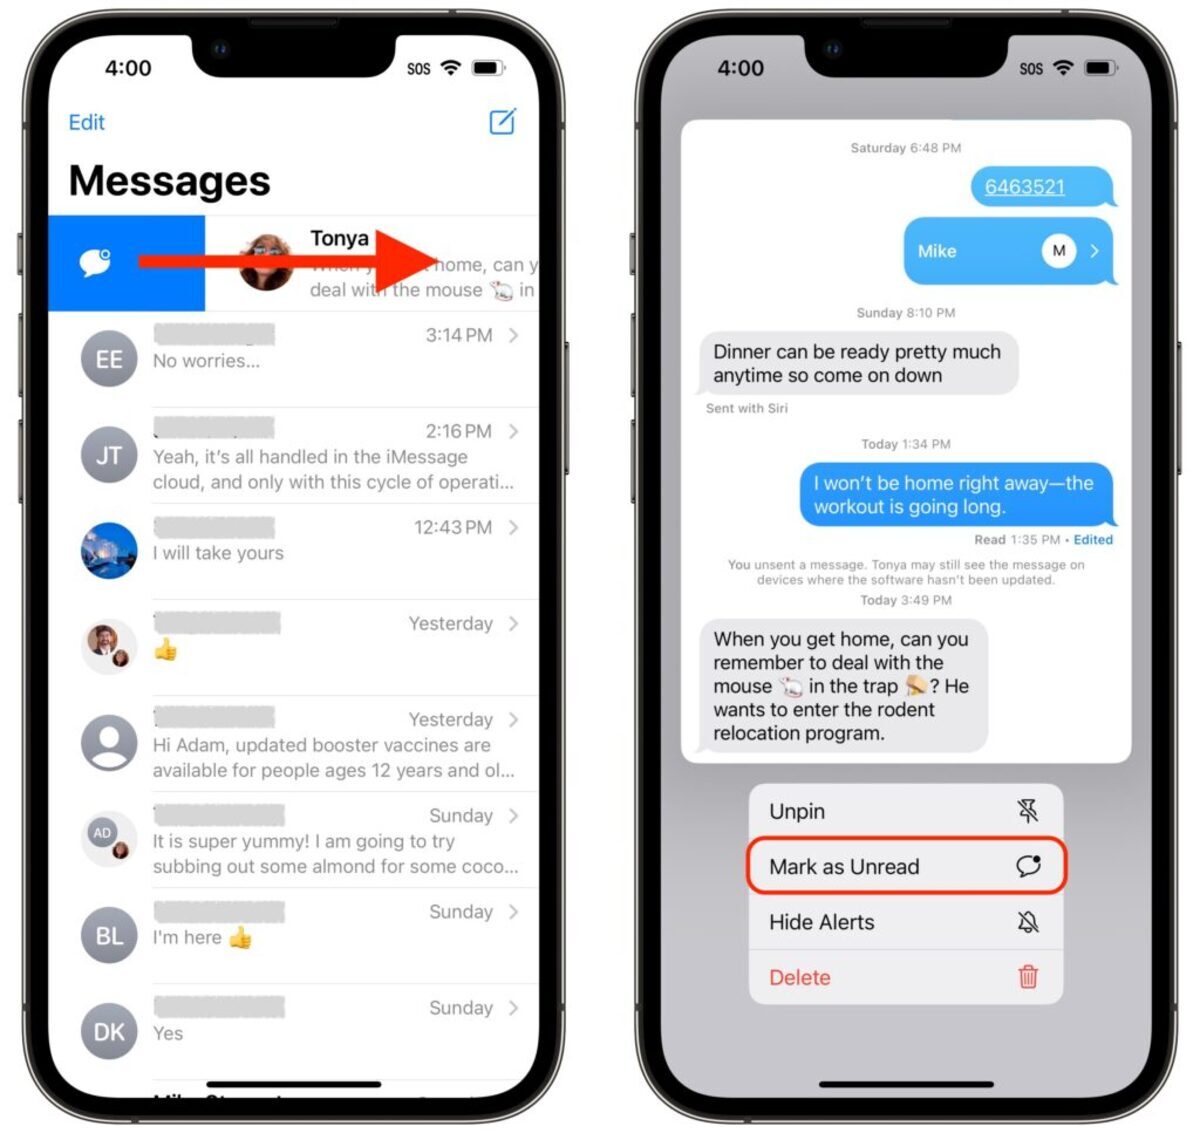
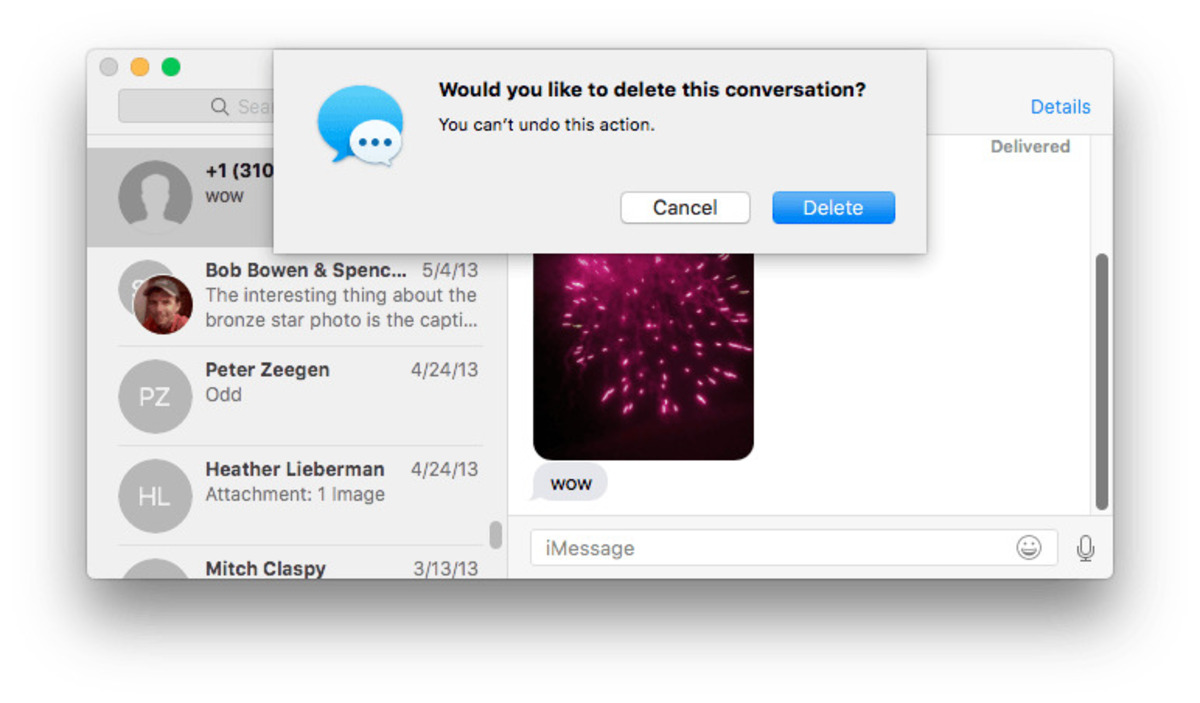
If you want to delete an entire conversation:
- Open iMessage and locate the conversation you want to delete.
- Swipe left on the conversation to reveal a red “Delete” button.
- Tap “Delete” to confirm the deletion.
Alternatively, you can also use the Edit button in the top-left corner of the iMessage interface to enter the editing mode. From there, you can select multiple conversations by tapping on them and then tap the trash can icon to delete them all at once.
It’s important to note that when you delete a conversation, it will be removed from your device, but it will still be visible on the other participants’ devices, as the deletion is only local to your device.
By regularly deleting unnecessary messages or entire conversations, you can declutter your iMessage app and maintain a clean and organized messaging experience.
Formatting Text in iMessage
When it comes to expressing yourself through text, sometimes words alone aren’t enough. That’s where text formatting in iMessage comes in handy. iMessage provides various formatting options to help you emphasize certain parts of your messages or enhance their visual appeal. Let’s explore the different ways you can format text in iMessage:
Bold Text: To make text bold, simply surround the desired text with double asterisks (). For example, typing “Hello**” will display as Hello.
Italic Text: To italicize text, use single underscores (_). For example, typing “_Good morning_” will appear as Good morning.
Strikethrough Text: To add a strikethrough effect to your text, enclose it with double tildes (~~). For instance, typing “~~Mistakes happen~~” will show as Mistakes happen.
Monospaced Text: If you want to display text in a monospaced font, ideal for showcasing code snippets or emphasizing certain details, enclose the text within triple backticks (). For example, typing “This is monospaced text” will be rendered as This is monospaced text.
Text Size: iMessage allows you to adjust the size of your text to make it more prominent or subtle. To resize text, follow the steps below:
- Select the text you want to modify.
- Tap the arrow icon (→) in the pop-up menu.
- Tap the “Aa” icon that appears on the right.
- Choose from the available text sizes: Small, Medium, or Large.
By using these formatting options, you can add emphasis, clarify meanings, and make your messages stand out in conversations. Experiment with different formatting techniques to make your text visually appealing and easier to interpret.
Using Digital Touch and Handwritten Messages
iMessage goes beyond traditional text-based communication by offering interactive features like Digital Touch and handwritten messages. These features allow you to add a personal and creative touch to your conversations. Let’s explore how you can use Digital Touch and handwritten messages in iMessage:
Digital Touch:
Digital Touch allows you to send animated drawings, taps, and even your heartbeat to your iMessage contacts. Here’s how to use Digital Touch:
- Open iMessage and start a new conversation or open an existing one.
- Tap the Digital Touch icon (looks like a heart with two fingers) located next to the text input field.
- A blank canvas will appear, allowing you to create your drawing or animation.
- Use your finger or Apple Pencil (on supported devices) to draw or write on the canvas.
- Tap and hold with two fingers to send a tap, or place two fingers on the screen to send your heartbeat.
- You can also access additional options like changing the line thickness or color by tapping on the respective icons.
- Once you’ve finished your Digital Touch creation, tap the blue upward arrow to send it.
Your recipient will receive your Digital Touch creation, which they can replay and respond to. It’s a playful and expressive way to engage with your contacts through visuals and tactile input.
Handwritten Messages:
Handwritten messages allow you to send handwritten notes within iMessage. Here’s how to send a handwritten message:
- Open iMessage and start a new conversation or open an existing one.
- Rotate your device to landscape mode.
- You’ll notice that the text input field turns into a handwriting area.
- Use your finger or Apple Pencil (on supported devices) to write your message on the screen.
- Alternatively, you can tap the handwriting icon (looks like a squiggly line) located at the bottom right corner of the keyboard to access the handwriting area.
- To convert your handwritten message to text, simply tap the arrow icon to send it.
Your handwritten message will be sent as an animated sequence to the recipient, who can watch it unfold on their device. It adds a personal and stylized element to your messages, making them feel more intimate and unique.
With Digital Touch and handwritten messages, iMessage lets you communicate through drawings, taps, heartbeats, and handwritten notes, giving you the ability to connect with others in a more interactive and personalized way.
Managing Notifications and Do Not Disturb
Notifications are an essential part of iMessage as they keep you informed about incoming messages. However, managing notifications effectively can help avoid distractions and maintain a better messaging experience. In iMessage, you have control over how and when you receive notifications through features like Do Not Disturb and customizing notification settings. Let’s explore how to manage notifications in iMessage:
Do Not Disturb:
Do Not Disturb is a feature that allows you to silence incoming notifications and calls temporarily. It ensures that your device remains silent and undisturbed, giving you uninterrupted focus or the ability to enjoy some quiet time. To enable Do Not Disturb in iMessage:
- Open the Control Center by swiping down from the top-right corner (iPhone X or newer) or swiping up from the bottom (iPhone models with a Home button).
- Tap the crescent moon icon to activate Do Not Disturb mode.
You can also enable Do Not Disturb through the Settings app:
- Open the Settings app on your device.
- Scroll down and tap “Do Not Disturb.”
- Toggle the “Do Not Disturb” switch to enable it.
While in Do Not Disturb mode, your device will not play sounds or vibrate for incoming iMessage notifications. However, the notifications will still be visible when you access the iMessage app.
Customizing Notification Settings:
In iMessage, you can customize notification settings to control how you are alerted about incoming messages. To customize notification settings:
- Open the Settings app on your device.
- Scroll down and tap “Notifications.”
- Scroll down and tap “Messages.”
- Here, you can configure various options such as allowing notifications on the lock screen, showing previews, choosing notification sounds, and more.
By customizing notification settings, you can refine your iMessage experience to align with your preferences and reduce distractions.
Managing notifications in iMessage is crucial for maintaining productivity and staying focused. By utilizing features like Do Not Disturb and customizing notification settings, you can strike the right balance between staying connected and managing interruptions.
FAQs about Editing iMessage
Here are some frequently asked questions about editing iMessage:
1. Can I edit messages in iMessage after I’ve sent them?
No, once a message is sent in iMessage, it cannot be edited. However, you can use the Edit feature to modify the message immediately after sending it, but keep in mind that the recipient will be notified that the message has been edited.
2. How do I undo my edits in iMessage?
To undo your edits in iMessage, simply tap and hold the message you want to revert. Then, select “Edit” and go back to the original version of the message. This feature allows you to correct any unintentional changes or mistakes you made during the editing process.
3. Can I edit messages in group conversations?
Yes, you can edit messages in group conversations just like you would edit messages in one-on-one conversations. Simply tap and hold the message you want to edit, select “Edit,” make your changes, and tap “Done” to save your edits. The edited message will be visible to all participants in the group conversation.
4. Can I edit messages across different Apple devices?
Yes, you can edit messages across different Apple devices as long as they are all connected to the same iCloud account and the Messages in iCloud feature is enabled. By enabling Messages in iCloud, your messages will sync across all your Apple devices, allowing you to edit and view the messages seamlessly across them.
5. Is there a limit to how many times I can edit a message in iMessage?
No, there is no specific limit to how many times you can edit a message in iMessage. You can make as many edits to a message as you like, as long as you do so within the editing timeframe. However, it’s important to note that excessively editing messages may disrupt the flow of the conversation and may not be well-received by the recipient.
Editing messages in iMessage provides a convenient way to correct mistakes, clarify thoughts, and improve the overall quality of your conversations. With these FAQs, you’ll have a better understanding of how to edit messages effectively in iMessage.