Introduction
Do you own a digital camera and want to know how to easily download pictures from it to your computer? Whether you’ve captured precious memories, breathtaking landscapes, or stunning portraits, transferring your photos from your camera to your computer is a crucial step in preserving and organizing your digital image collection.
This guide will walk you through various methods of downloading pictures from a digital camera to your computer. Whether you prefer to use a USB cable, software, or even a wireless connection, we’ll cover all the necessary steps to get your pictures safely transferred and ready for editing, sharing, or printing.
Downloading pictures from your digital camera is a simple process that requires a few basic tools and a little bit of know-how. By following the steps outlined in this article, you’ll be able to effortlessly retrieve your photos and preserve those memorable moments captured through your lens.
Whether you’re a seasoned photographer or a novice enthusiast, understanding the different methods of transferring pictures from your camera to your computer is a valuable skill to have. This knowledge gives you the freedom to explore your creativity without worrying about the logistics of storing and accessing your digital images.
So, grab your camera, connect it to your computer, and let’s delve into the various methods of downloading pictures. Whether you’re using a Windows PC or a Mac, we’ve got you covered with step-by-step instructions to make the process as seamless as possible.
Before we get started, it’s important to ensure that your camera’s battery is charged and that you have enough storage space on your memory card. This will avoid any interruptions during the downloading process and safeguard your photos from being lost or corrupted.
Connecting the Camera to Your Computer
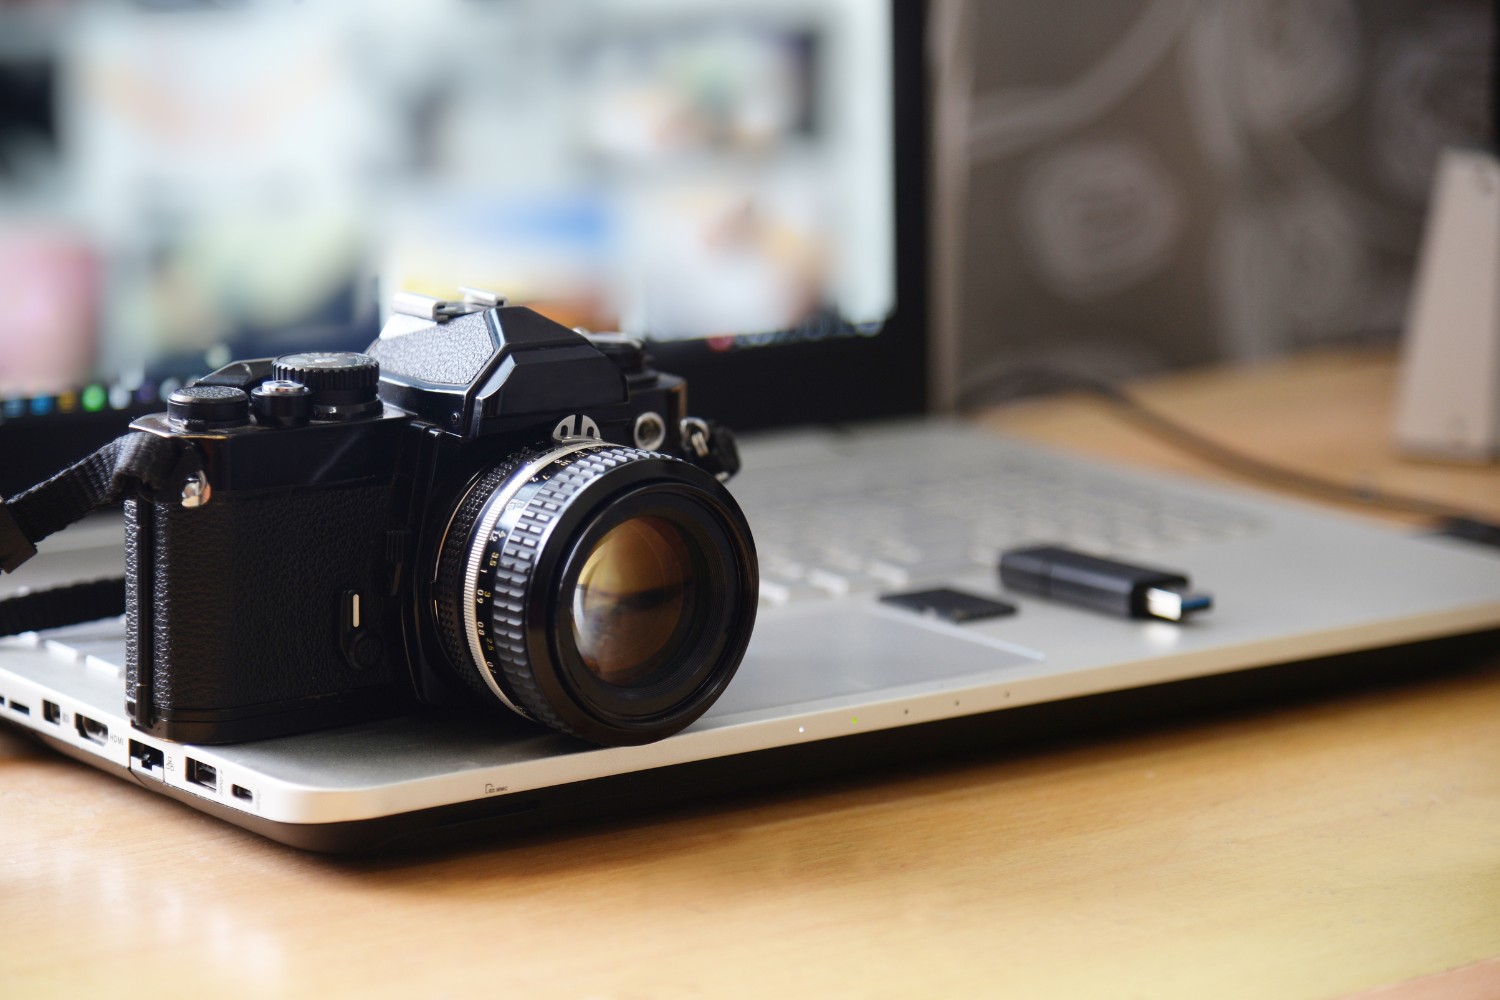
Before you can start downloading pictures from your digital camera, you need to establish a physical connection between your camera and computer. There are a few different ways to achieve this, depending on the make and model of your camera and the capabilities of your computer.
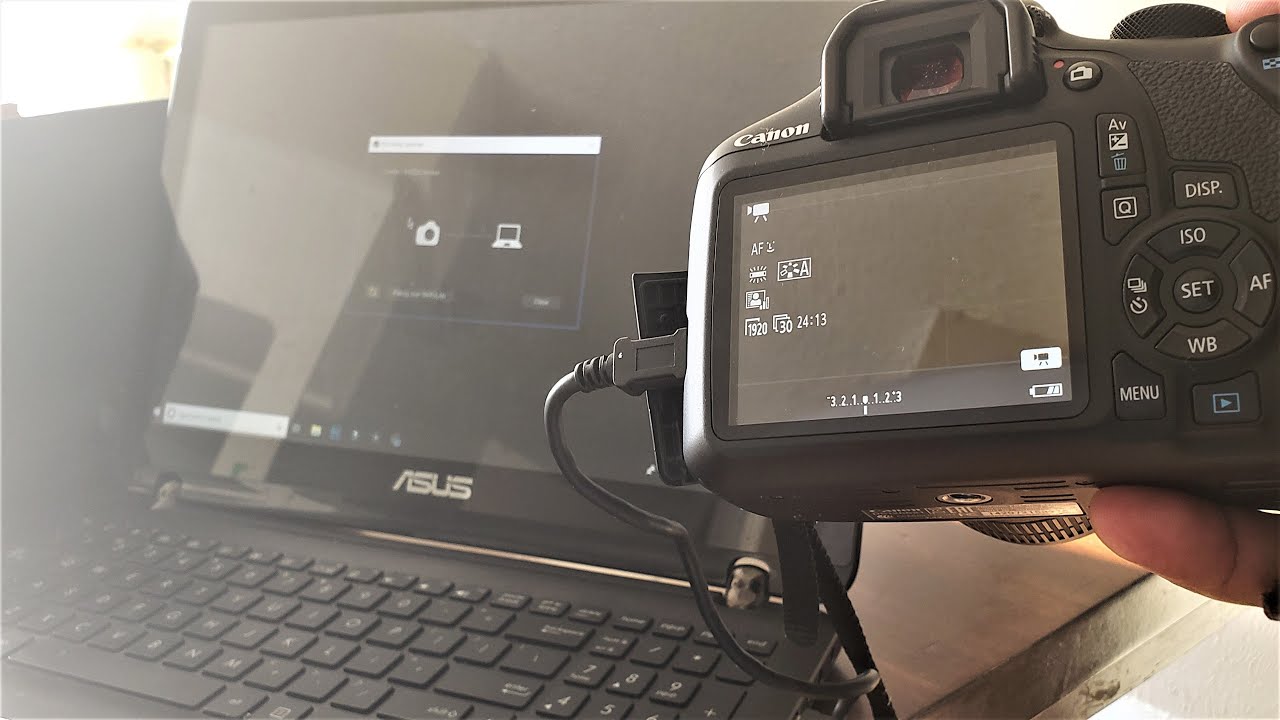
1. USB Cable: The most common method is to use a USB cable. Most digital cameras come with a USB cable that allows you to connect your camera directly to your computer’s USB port. Simply plug one end of the cable into the camera and the other end into the computer. Once connected, your camera may prompt you to select a mode (such as “Transfer” or “PC”) to enable data transfer between the two devices.
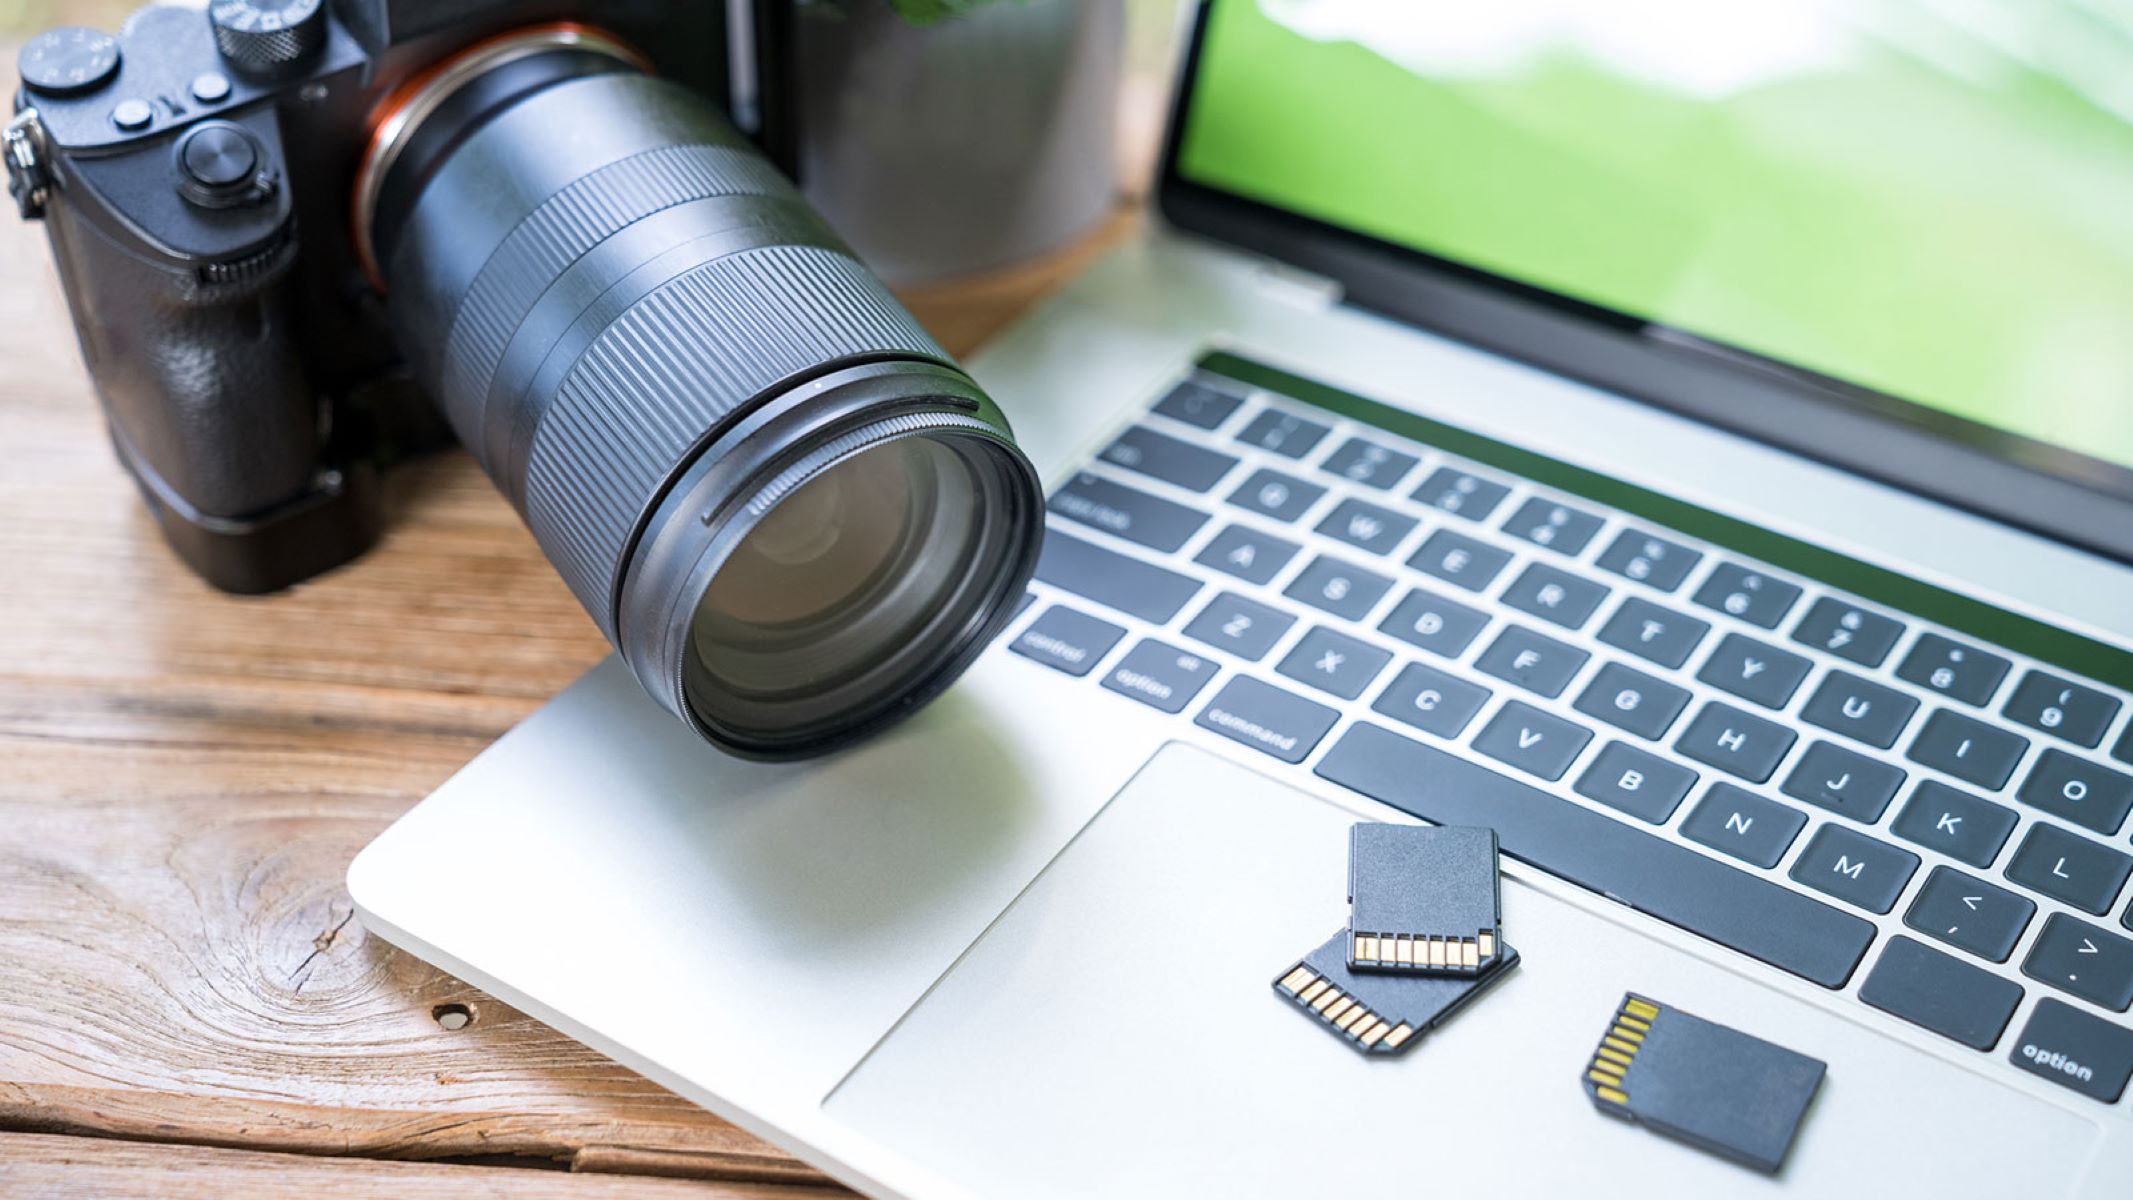
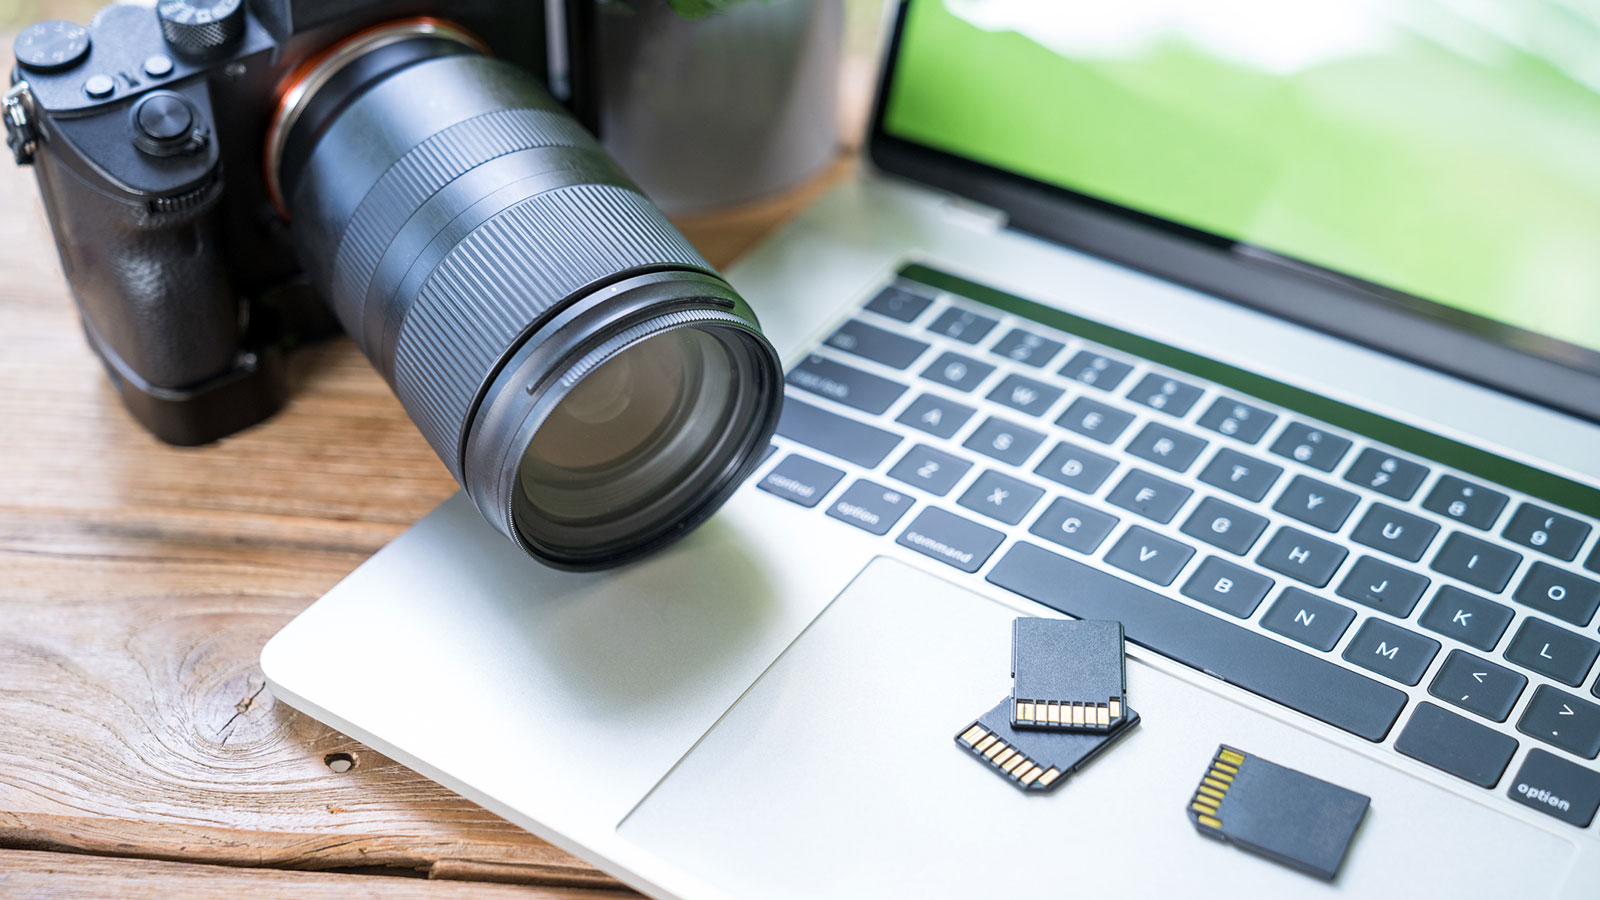
2. Memory Card Reader: If your computer doesn’t have a USB port or if you prefer not to use the USB cable, you can use a memory card reader. This external device allows you to remove the memory card from your camera and insert it into the card reader. Then, plug the card reader into your computer’s USB port. The computer will recognize the memory card as a removable storage device, and you can easily access and transfer your pictures.
3. Built-in Wi-Fi: Many modern digital cameras offer built-in Wi-Fi capabilities, enabling you to connect your camera wirelessly to your computer. To establish the connection, ensure that both your camera and computer are connected to the same Wi-Fi network. On your camera, navigate to the Wi-Fi settings menu and select the option to connect to a computer. On your computer, open the appropriate software or application to receive the photos wirelessly.
Once you have successfully connected your camera to your computer using one of these methods, you’re ready to move on to the next step: transferring pictures from your camera to your computer.
Note: It’s important to refer to your camera’s user manual for specific instructions on connecting your camera to your computer, as the process may vary depending on the camera brand and model.
Transferring Pictures Using a USB Cable
Using a USB cable is one of the most straightforward methods for transferring pictures from your digital camera to your computer. This method is widely supported and works with both Windows and Mac computers. Here’s how to do it:
1. Start by ensuring that your camera is switched off. Then, locate the USB port on your camera and connect one end of the USB cable to it.
2. Next, find an available USB port on your computer and connect the other end of the USB cable to it. Your computer will recognize the camera as a connected device.
3. Once the camera is connected, power it on. Depending on your camera’s settings, the computer may prompt you to choose a mode for connecting the camera. Select the appropriate option, such as “Transfer” or “PC,” to allow the camera and computer to communicate.
4. After establishing the connection, your computer’s operating system will automatically recognize the camera as a removable storage device. It may appear as a new drive or as a device with a specific name, depending on your computer’s settings.
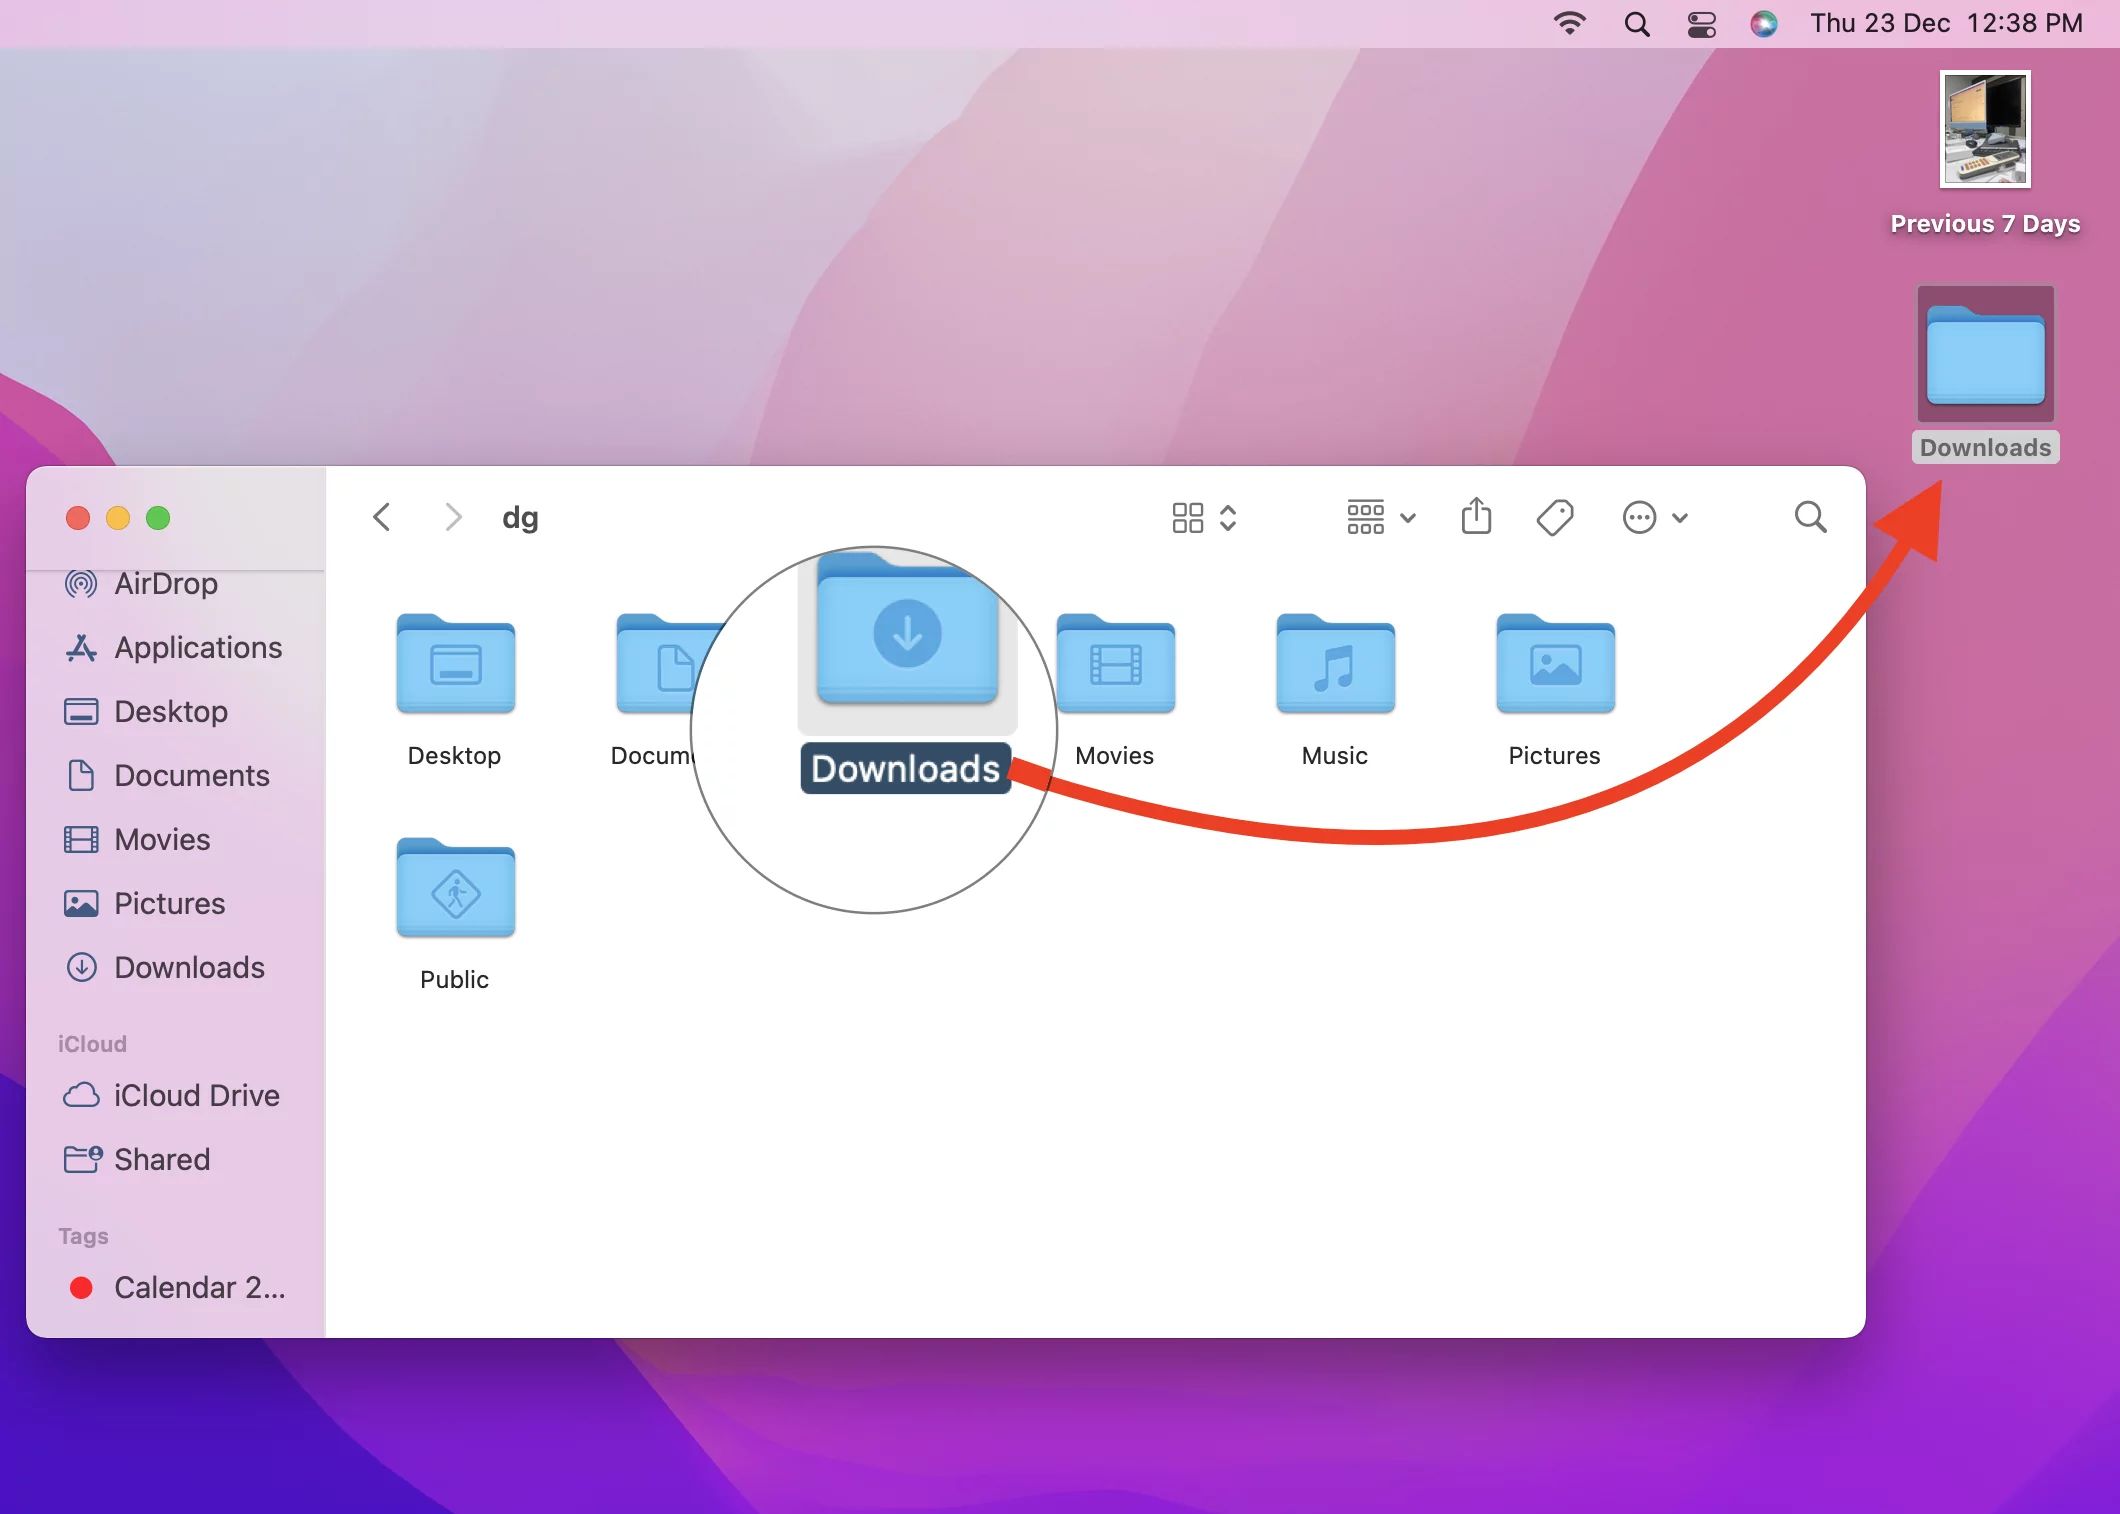
5. Open the file explorer or finder on your computer and navigate to the location where you want to save your transferred pictures. Create a new folder if desired for better organization.
6. Locate the connected camera device or drive in the file explorer or finder window. Double-click on it to open and access the camera’s storage.
7. Inside the camera’s storage, you will typically find a folder named “DCIM” (Digital Camera Images) or a similar name. Open this folder to access the photos and videos stored on your camera.
8. Select the pictures you want to transfer by either dragging and dropping them into the folder on your computer or using the copy/paste function. You can also select multiple pictures by holding down the Ctrl key (Windows) or Command key (Mac) while clicking on each photo.
9. Once you’ve selected the pictures, wait for the transfer process to complete. The time it takes depends on the number and size of the pictures being transferred.
10. Once the transfer is finished, safely disconnect your camera from your computer by either using the “Eject” option provided by your computer’s operating system or safely removing the USB device.
That’s it! You have successfully transferred your pictures from your digital camera to your computer using a USB cable. Your photos are now ready for editing, organizing, or sharing with family and friends.
Note: Some cameras may require you to install specific software or drivers before you can transfer pictures using a USB cable. Refer to your camera’s manual or the manufacturer’s website for any additional instructions or software requirements.
Importing Pictures Using Software
Another method for transferring pictures from your digital camera to your computer is by using software provided by the camera manufacturer or third-party applications. This method offers more advanced features and options for managing and organizing your photos. Here’s how to import pictures using software:
1. Install the Software: Start by installing the software provided with your camera onto your computer. This software is typically included in the camera’s package or available for download from the manufacturer’s website.
2. Connect Your Camera: Connect your camera to your computer using a USB cable and power on the camera.
3. Open the Software: Launch the software on your computer. The specific steps may vary depending on the software you are using, but typically you can find the software icon on your desktop or in your computer’s Applications or Programs folder.
4. Importing Options: Once the software is open, you will be presented with different importing options. These options may include importing all pictures, selecting specific pictures to import, or even setting up automatic importing when the camera is connected.
5. Choose Import Location: Select the location where you want to import the pictures on your computer. This can be a specific folder or a designated location within the software itself.
6. Select Pictures: Choose the pictures you want to import from your camera. This can be done by manually selecting individual photos or by using the software’s automatic selection feature, which can group and select pictures based on date, location, or other criteria.
7. Start Import: Once you have made your selection, click the “Import” or “Start Import” button to begin transferring the selected pictures from your camera to your computer. The software will display a progress bar or indicator to show the status of the transfer.
8. Organize and Edit: After the import is complete, you can organize and edit your pictures using the software’s features. This may include renaming files, adding tags or keywords, adjusting colors and exposure, or even creating albums or slideshows.
9. Safely Disconnect: When you are finished working with your pictures, make sure to properly disconnect your camera from the computer. Use the “Eject” option provided by the software or safely remove the USB device from your computer.
Using software to import pictures from your digital camera offers an efficient way to manage and organize your photo collection. It provides additional features and flexibility compared to simply transferring pictures using a USB cable. Take advantage of the software’s capabilities to enhance and streamline your photo workflow.
Note: Make sure to check for software updates from the camera manufacturer’s website to ensure compatibility with your computer’s operating system and to access any new features or bug fixes offered by the software.
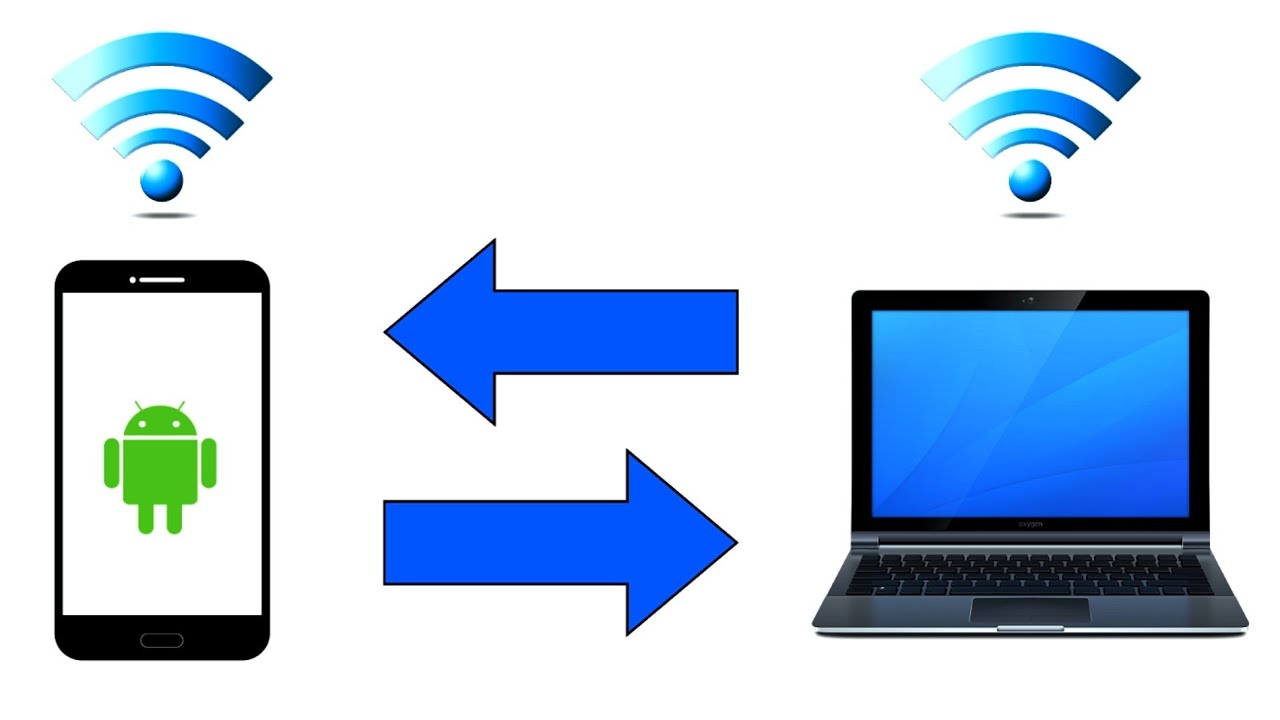
Transferring Pictures Wirelessly
If you prefer a wireless approach for transferring pictures from your digital camera to your computer, you’re in luck! Many modern cameras offer wireless connectivity options that allow you to transfer files without the need for cables or software. Here’s how to transfer pictures wirelessly:
1. Check Camera Compatibility: Verify that your camera has built-in wireless capabilities or supports wireless adapters. Refer to your camera’s manual or manufacturer’s website for specific information on wireless features and compatibility.
2. Enable Wi-Fi on Your Camera: Turn on the Wi-Fi feature on your camera. This can usually be done through the camera’s settings menu. Your camera may also have a dedicated Wi-Fi button or shortcut on the body.
3. Connect to the Same Wi-Fi Network: Ensure that both your camera and computer are connected to the same Wi-Fi network. You may need to consult your camera’s manual for instructions on connecting to a network.
4. Set Up the Connection: On your camera, navigate to the Wi-Fi settings menu and select the option to connect to a computer or device. This step may vary depending on the camera model and brand. Consult your camera’s manual for specific instructions.
5. Enable Wi-Fi on Your Computer: Make sure that the Wi-Fi feature on your computer is turned on and connected to the same Wi-Fi network as your camera.
6. Open the App or Software: Depending on your camera and its manufacturer, you may need to use a dedicated app or software to facilitate the wireless transfer. Install the required app or software on your computer and open it.
7. Connect to the Camera: Within the app or software, look for an option to connect to the camera wirelessly. This may involve scanning for devices or manually entering the camera’s IP address or network name.
8. Select and Transfer Pictures: Once connected, you should see a list of available pictures on your camera. Select the pictures you want to transfer and initiate the transfer process within the app or software. Your selected pictures will be wirelessly transmitted from the camera to your computer.
9. Monitor the Transfer: The app or software will display a progress indicator or status bar to show the transfer progress. Depending on the number and size of the pictures being transferred, the process may take a few minutes.
10. Safely Disconnect: Once the transfer is complete, safely disconnect the camera from the computer and disable the Wi-Fi on both devices.
Wirelessly transferring pictures from your digital camera to your computer provides convenience and flexibility. It eliminates the need for cables and allows you to transfer files even when your camera and computer are not in close proximity to each other. Enjoy the benefits of wireless technology and effortlessly transfer your photos for editing, sharing, or archiving.
Note: The steps involved in wireless transfer can vary depending on camera models, brands, and the software or apps provided by the manufacturer. It’s important to consult your camera’s manual and the accompanying documentation for specific instructions tailored to your device.
Troubleshooting Common Issues
While transferring pictures from your digital camera to your computer is usually a straightforward process, you may encounter some common issues along the way. Here are a few troubleshooting tips to help you resolve these issues and ensure a successful transfer:
1. Connection Problems: If you’re having trouble connecting your camera to your computer, double-check that the USB cable is securely connected on both ends. Try using a different USB port on your computer or a different USB cable if available. For wireless connections, verify that both your camera and computer are connected to the same Wi-Fi network and that the Wi-Fi features are enabled on both devices.
2. Software Compatibility: If you’re using software to transfer pictures, make sure that the software is compatible with your camera model and your computer’s operating system. Check the camera manufacturer’s website for any software updates or recommendations for compatible software alternatives.
3. Slow Transfer Speed: If the transfer speed seems slow, it could be due to large file sizes, a slow USB connection, or a congested Wi-Fi network. Optimize file sizes by resizing or compressing the images before transferring them. Ensure that your USB cable is in good condition and try using a USB 3.0 port, which provides faster data transfer speeds. Additionally, try transferring pictures on a less congested Wi-Fi network or at a time when network usage is low.
4. Memory Card or Camera Malfunction: If your computer does not recognize the camera or memory card, try troubleshooting the hardware components. Ensure that the memory card is properly inserted into the camera and that it is not locked. Test the memory card in a card reader or another camera to determine if it is functioning correctly. If the camera itself is not recognized, consult the camera’s manual for specific troubleshooting steps or contact the manufacturer for assistance.
5. Driver Issues: If you’re experiencing connectivity issues, it could be due to outdated or missing drivers. Update your camera’s drivers by visiting the manufacturer’s website and downloading the latest driver software for your camera model. Follow the provided instructions to install the drivers on your computer.
6. Software Freezes or Crashes: If the software you’re using freezes or crashes during the transfer process, ensure that your computer meets the minimum system requirements for running the software. Close any other unnecessary applications or processes that could be using system resources. If the issue persists, try reinstalling the software or using an alternative application for transferring pictures.
7. Insufficient Storage Space: If your computer displays an error message indicating insufficient storage space during the transfer, check the destination folder on your computer to ensure that it has enough free space. Alternatively, you can transfer the pictures to an external hard drive or cloud storage service to free up space on your computer.
If you encounter any other issues not mentioned here, consult your camera’s manual, visit the manufacturer’s website for support resources, or seek assistance from online forums or technical support professionals. Remember to approach troubleshooting with patience and always ensure the safety of your pictures by having backups before attempting any troubleshooting steps.
Conclusion
Downloading pictures from your digital camera to your computer is a fundamental process for photographers of all skill levels. With the right tools and knowledge, you can seamlessly transfer your captured moments and memories, allowing you to edit, organize, share, and preserve your photos.
In this guide, we explored various methods for downloading pictures from a digital camera to a computer. We started by discussing how to connect your camera to your computer using a USB cable, memory card reader, or wirelessly. We also covered the process of transferring pictures using software provided by the camera manufacturer or third-party applications.
We provided troubleshooting tips for common issues that may arise during the transfer process, such as connection problems, slow transfer speeds, software compatibility issues, and insufficient storage space. By following these troubleshooting steps, you can overcome obstacles and ensure a successful transfer of your pictures.
Remember, each camera model and computer setup may have unique requirements and steps. It’s essential to consult your camera’s manual, manufacturer’s website, or technical support resources for specific instructions tailored to your equipment.
By mastering the art of picture transfer, you can unleash your creativity and fully utilize the potential of your digital camera. Whether you’re a professional photographer, an aspiring artist, or simply a hobbyist, safely and efficiently downloading your pictures to your computer is a skill that opens up a world of possibilities for editing, sharing, and enjoying your photographic endeavors.
So, grab your camera, connect it to your computer using the method that suits you best, and start exploring the possibilities that await you in the digital realm of photography!