Understanding the Camera App
The camera app on your Samsung tablet allows you to capture beautiful photos and record videos with ease. It is important to familiarize yourself with the layout and features of the app to make the most out of your tablet’s camera capabilities.
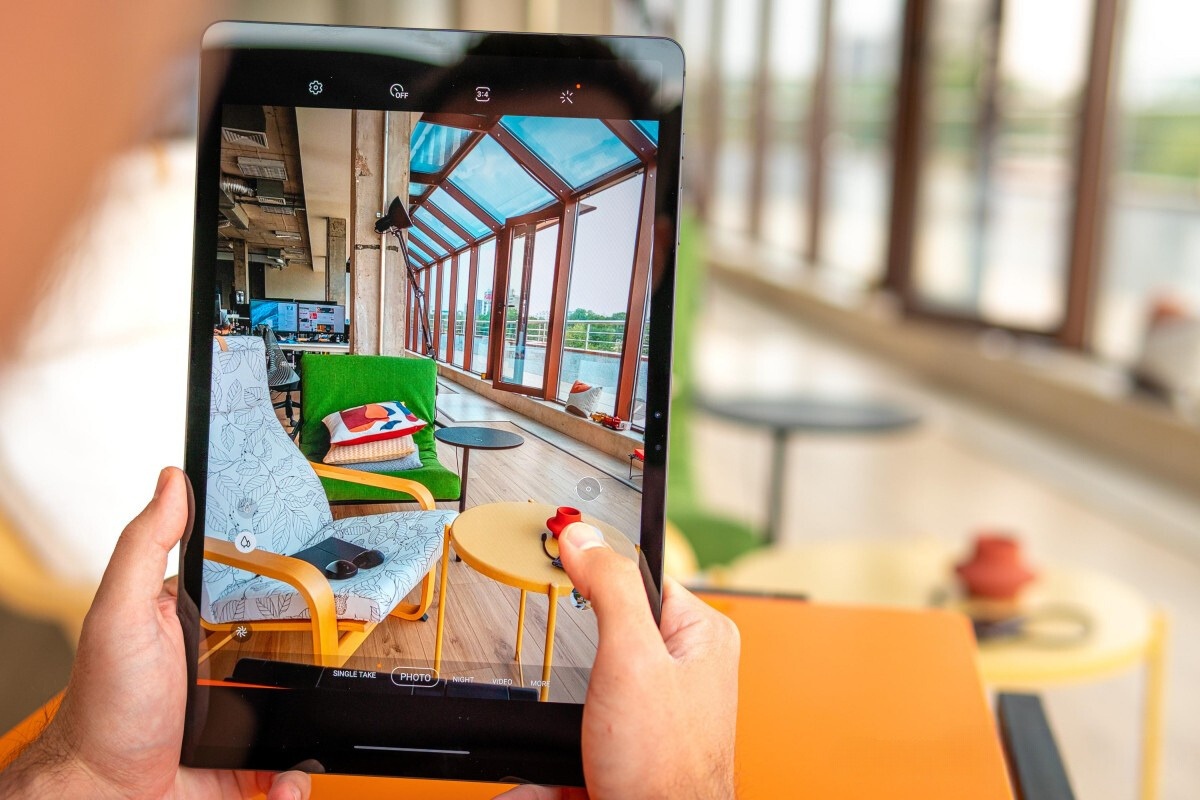
When you open the camera app, you will see a viewfinder display that shows the scene you are about to capture. The camera controls are usually located at the bottom or top of the screen, depending on the model of your tablet. These controls include the shutter button for taking photos, the switch to toggle between the front and rear cameras, and various settings options.
The camera app offers a user-friendly interface, making it easy for you to navigate through the different features. You can swipe left or right to access additional shooting modes, such as panorama, pro mode, or beauty mode. Each mode offers a unique set of options tailored to different photography needs.
Additionally, you can adjust camera settings such as photo resolution, focus mode, ISO, white balance, and exposure compensation. These settings allow you to customize your photos according to your preferences and the lighting conditions.
To capture a photo, simply frame your shot using the viewfinder and tap the shutter button. The camera app also supports touch autofocus, allowing you to tap on the screen to focus on a specific subject.
When it comes to recording videos, you can switch to video mode by swiping to the desired mode or selecting the video icon. From there, you can start and stop recording by tapping the video shutter button. The camera app also offers additional options like slow motion, time-lapse, and hyperlapse for more creative video capturing.
Understanding the camera app is the first step in mastering your Samsung tablet’s camera. Once you are familiar with its features and settings, you can start exploring different shooting modes, experimenting with various settings, and capturing stunning photos and videos.
Switching between Front and Rear Cameras
The camera app on your Samsung tablet allows you to switch between the front and rear cameras effortlessly, depending on whether you want to capture a selfie or a photo of your surrounding environment.
To switch to the front camera, which is often used for selfies, simply tap on the camera switch icon located on the screen. This icon usually looks like two arrows pointing in opposite directions or an icon representing a camera and a person. Tapping on it will toggle between the front and rear cameras.
Once you switch to the front camera, you will notice that the viewfinder displays your face or any subject in front of the tablet. This camera is equipped with features like beauty mode, which enhances your skin tone and applies subtle filters to give you a flattering selfie. You can also adjust the exposure and white balance to get the desired look.
On the other hand, switching back to the rear camera provides you with a wider perspective and allows you to capture the environment around you. The rear camera usually offers higher resolution and advanced features like panorama, pro mode, or even augmented reality (AR) capabilities.
Some Samsung tablet models also support dual-camera setups, which provide additional versatility in capturing photos. With dual cameras, you can create stunning portrait shots with a blurred background, wide-angle photos to capture more in the frame, or even 3D-like images using depth-sensing capabilities.
Switching between the front and rear cameras on your Samsung tablet is quick and straightforward, allowing you to capture selfies or breathtaking landscapes with ease. With the front camera, you can take stunning self-portraits, while the rear camera offers a range of features to explore and experiment with different photography techniques.
Adjusting Camera Settings
When using the camera app on your Samsung tablet, you have the flexibility to adjust various camera settings to enhance your photography experience and capture the best possible photos.
One of the key settings you can adjust is the photo resolution. Higher resolution settings result in larger file sizes but allow for more detailed images. You can change the resolution by accessing the camera settings menu, usually represented by an icon that looks like a gear or three vertical dots. From there, you can select the desired resolution from the available options.
Another important setting to consider is the focus mode. By default, the camera app uses autofocus, which automatically focuses on the subject in the frame. However, you can choose to enable manual focus mode, allowing you to control the focus point by tapping on the screen or using a slider. This is especially useful when you want to have a specific area in focus, such as in macro photography.
The ISO setting determines the sensitivity of the camera sensor to light. Choosing a higher ISO value can help in low-light situations, but it may introduce more noise or graininess in your photos. Conversely, a lower ISO value is ideal for well-lit scenes. Experimenting with different ISO settings can help you capture properly exposed photos in various lighting conditions.
White balance is another setting that affects the color temperature of your photos. It allows you to adjust the camera’s interpretation of white under different lighting conditions. You can choose from predefined white balance settings, such as daylight, cloudy, fluorescent, or you can manually set a custom white balance value. This can help ensure that the colors in your photos appear accurate and natural.
Exposure compensation is a useful setting for adjusting the overall brightness of your photos. If a photo appears too bright or too dark, you can use exposure compensation to make it lighter or darker. This setting is represented by a plus and minus icon, usually located in the camera settings menu or accessible by swiping up or down on the screen.
By exploring and adjusting these camera settings on your Samsung tablet, you can have more control over your photos and capture them to your desired specifications. Take the time to experiment with different settings in various lighting conditions to understand how they impact the final outcome of your photos.
Capturing Photos
The camera app on your Samsung tablet provides a straightforward and intuitive process for capturing photos. Whether you’re taking a quick snapshot or aiming for professional-quality shots, here’s how you can make the most of capturing photos on your tablet.
First, ensure that you have the camera app open and the desired mode selected. Frame your shot by looking through the viewfinder on your tablet’s screen. This will help you compose and align your subject within the frame.
When you’re ready to take the photo, tap on the shutter button, usually represented by a camera icon. Alternatively, you can use the volume button on the side of your tablet as a physical shutter button, which can provide better stability and reduce the chance of shaking the device as you press it.
If you want to focus on a specific subject or area within the frame, simply tap on that area of the screen. The camera app will adjust the focus and ensure that the subject is sharp and clear.
In addition to tapping on the screen to focus, many Samsung tablet camera apps also support touch and hold to enable continuous autofocus. This feature is especially helpful when capturing fast-moving subjects or situations where the distance between you and the subject changes.
Aside from autofocus, you can also experiment with different focus modes, such as macro mode for close-up shots or selective focus for creating a shallow depth of field and emphasizing your subject against a soft, blurred background.
After capturing a photo, take a moment to review it on your tablet’s screen. If you’re not satisfied with the result, you can retake the photo by tapping the reshoot icon or the back arrow icon. This allows you to make adjustments to your composition, focus, or other settings before capturing the final photo.
Remember, practice makes perfect. The more you experiment with capturing photos on your Samsung tablet, the better you’ll become at understanding lighting conditions, composition, and how to optimize the settings for different scenarios.
Don’t be afraid to try different angles, perspectives, and creative techniques to capture unique and visually captivating photos. With time and practice, you’ll be able to take photos that truly showcase your artistic vision.
Taking Videos
Not only can you capture stunning photos with your Samsung tablet, but you can also record high-quality videos. Whether you want to document memorable moments or create engaging video content, the camera app on your tablet provides the tools you need to take videos with ease.
To start recording a video, open the camera app and ensure that you are in video mode. This can usually be done by swiping to the right or selecting the video icon. Once in video mode, you will see a red record button on the screen. Simply tap the record button to start recording.
While recording, you can take advantage of various features to enhance your videos. For example, most Samsung tablet camera apps offer options like slow motion, time-lapse, or hyperlapse. These features allow you to experiment with different time scales and add creative effects to your videos.
To enable slow motion, tap on the respective option before recording. This feature captures more frames per second, resulting in a slowed-down playback when you view the video. This is especially useful when you want to highlight specific actions or capture detailed movements in your videos.
Time-lapse is another exciting feature that compresses longer periods of time into a shorter video. It’s perfect for capturing the beauty of a sunset, the hustle and bustle of a city, or the transformation of a scene over a period of hours or even days.
Hyperlapse is a variation of time-lapse, but with the added benefit of stabilization. It automatically enhances the video by smoothing out any shakiness, resulting in a more professional and cinematic look to your footage.
When recording videos, it’s important to keep your device steady to avoid shaky footage. If your tablet supports optical or electronic image stabilization, it’s recommended to enable it for smoother and more stable videos. Alternatively, you can use external stabilizers or tripods for added stability.
Once you’re done recording, tap the record button again to stop the recording. The camera app will automatically save the video to your tablet’s gallery, where you can access and view it at any time.
Remember to also consider the lighting conditions when recording videos. Natural light or well-lit environments generally produce better results, but you can also experiment with different lighting techniques to achieve a specific mood or effect.
With the ability to record videos on your Samsung tablet, you can unleash your creativity and capture memorable moments in motion. Practice and explore the different features and techniques available, and soon you’ll be creating captivating videos that tell your unique stories.
Using the Camera in Different Lighting Conditions
The camera app on your Samsung tablet is designed to adapt to different lighting conditions, enabling you to capture high-quality photos and videos in any environment. Whether you’re shooting in bright daylight, low light, or challenging lighting situations, understanding how to optimize the camera settings can make a significant difference in the quality of your captures.
When shooting in bright daylight, make sure to tap on the screen to ensure proper focus and exposure. The camera app will adjust the settings to prevent overexposure, resulting in washed-out and overly bright photos. Additionally, it’s advisable to position yourself and your subject, if applicable, in a way that minimizes harsh shadows or direct sunlight spoiling the shot.
In low-light conditions, such as indoor settings or during nighttime, the camera app may automatically increase the ISO, enabling it to capture more light. However, it’s essential to keep in mind that higher ISO values can introduce more noise or graininess to your photos. To mitigate this, try to stabilize your tablet by using a tripod or resting it on a steady surface. Additionally, make use of the available lighting sources, such as lamps or natural light from windows, to improve the overall exposure of your photos.
For challenging lighting scenarios, like backlit subjects, HDR (High Dynamic Range) mode can be incredibly useful. HDR mode takes multiple exposures of the same scene and combines them into a single photo, retaining details in both the shadowed and highlighted areas. This results in a photo with a better balance of light and dark elements, ensuring that no important details are lost.
Using the flash on your tablet can prove beneficial in certain situations. However, it’s important to use it sparingly and considerately. On some models, you can adjust the flash settings, such as turning it off, activating automatic flash, or using a specific flash mode like fill flash or slow-sync flash. This allows you to have more control over the lighting in your photos while avoiding overexposure or unnatural-looking images.
Experimenting with white balance settings can also help you achieve accurate and pleasing results in different lighting conditions. By selecting the appropriate white balance preset or using custom white balance, you can ensure that the colors in your photos remain true to life and free from unwanted color casts.
In summary, understanding how to utilize the camera app on your Samsung tablet in different lighting conditions is crucial for taking high-quality photos. Familiarize yourself with the various settings, such as focus, exposure, flash, white balance, and HDR mode, to adapt to the specific lighting conditions. With practice, you’ll gain the confidence and skills needed to capture stunning photos regardless of the lighting challenges presented to you.
Applying Filters and Effects
The camera app on your Samsung tablet offers a range of filters and effects that allow you to enhance the appearance of your photos and add a touch of creativity. These tools provide an opportunity to transform your images and give them a distinct vibe or mood.
Filters, also known as photo presets, apply specific color adjustments or effects to your photos with a single tap. They can alter the overall tone, saturation, contrast, and warmth of your images. Samsung tablets typically offer a variety of filters to choose from, including classic, vintage, black and white, and more. By applying different filters, you can instantly change the atmosphere and style of your photos.
To apply filters, open the camera app and navigate to the photo editing options. Look for the filter icon, usually located at the bottom or top of the screen, depending on the app’s design. Once selected, scroll through the available filters and tap on the one that appeals to you the most. The filter will be applied to the photo in real time, allowing you to see the effect before capturing the shot.
In addition to filters, you can also experiment with various built-in effects to add a creative touch to your photos. These effects can include vignettes, blurring, selective color, tilt-shift, and more. Each effect can bring a unique and eye-catching element to your photos, emphasizing certain areas or creating a sense of depth and focus.
Some camera apps on Samsung tablets even offer the ability to create double exposures or add stickers, text, and frames to your photos. These features provide an extra layer of customization and enable you to express yourself creatively.
Keep in mind that while filters and effects can enhance your photos, it’s important not to rely solely on them. Understanding the basics of composition, lighting, and exposure will always be fundamental to capturing compelling images. Filters and effects should be used as a complementary tool to further enhance and refine your creative vision.
Experiment with different filters and effects to find your preferred style and let your imagination guide you. Don’t be afraid to try new combinations and push the boundaries of your creativity. The camera app on your Samsung tablet offers a wide range of options to enhance your photos and make them truly unique.
Zooming In and Out
The camera app on your Samsung tablet features a zoom function that allows you to bring subjects closer or create a wider view of your surroundings. Zooming in and out is a valuable tool for framing your shots and capturing details from a distance.
To zoom in or out, you can use the pinch-to-zoom gesture on the touchscreen of your tablet. Place two fingers on the screen and spread them apart to zoom in, making the subject appear larger in the viewfinder. Conversely, pinch your fingers together to zoom out, expanding the field of view.
When zooming in, it’s important to consider the limitations of digital zoom, which is typically available on most Samsung tablet cameras. Digital zoom involves enlarging the image digitally, but it can result in a loss of image quality and detail. This is because digital zoom crops and magnifies the pixels rather than actually bringing the lens closer to the subject.
For higher-quality zooming capability, some Samsung tablet models offer an optical zoom feature. Optical zoom utilizes the physical movement of lens elements to adjust the focal length, allowing you to zoom in without sacrificing image quality. This is especially beneficial when capturing distant subjects, such as wildlife or sports events, where detail is essential.
Regardless of whether you’re using digital or optical zoom, it’s important to stabilize your tablet when zoomed in to avoid blurry photos. This can be achieved by using a tripod or bracing your tablet against a steady surface.
As a general guideline, it’s recommended to get closer to your subject physically whenever possible rather than relying solely on zoom. By getting closer, you can maintain better image quality and capture more detail. However, there are situations where zooming in is necessary or when it’s not feasible to physically approach the subject.
Zooming out, on the other hand, allows you to capture a wider perspective and include more of the surroundings in your frame. This can be useful when photographing landscapes, group shots, or trying to emphasize the sense of space in a scene.
Remember to experiment with different zoom levels, depending on the effect you want to achieve. Zooming in can help you capture intricate details, whereas zooming out allows you to create a more expansive composition.
Mastering the zoom function on your Samsung tablet’s camera app opens up new possibilities for capturing unique and interesting photos. By understanding the limits of digital zoom, utilizing optical zoom if available, and considering the advantages of physically getting closer to your subject, you can leverage zoom effectively to enhance your photography skills.
Using the Timer Feature
The camera app on your Samsung tablet includes a handy timer feature that allows you to capture photos with a delay. This feature is especially useful when you want to be in the photo yourself or when you need some time to set up your shot.
To use the timer feature, open the camera app and locate the timer icon, usually represented by a clock or a timer symbol. When you tap on the icon, a menu will appear with options for different timer durations, such as 2 seconds, 5 seconds, or 10 seconds.
Once you’ve selected the desired timer duration, position your tablet securely or mount it on a tripod to avoid any movement during the countdown. You can then press the shutter button to start the timer. After the designated time has passed, the camera will capture the photo automatically.
The timer feature is particularly helpful for group shots or self-portraits, allowing you to join the photo without rushing or needing someone else to take the picture. It gives you the opportunity to compose the shot, check the framing, and ensure that everyone is ready before the photo is taken.
Additionally, the timer feature is useful for capturing photos in low-light situations or when using longer shutter speeds. It helps reduce camera shake that could result from pressing the shutter button manually. By using the timer, you can give the tablet time to stabilize, resulting in sharper images.
When setting up a shot that requires precise timing or coordination, use the timer feature to ensure that everything is in place before the photo is taken. This way, you can concentrate on the composition, lighting, and other aspects without worrying about pressing the shutter button at the right moment.
Furthermore, the timer feature can be used creatively to capture unique and candid moments. For example, you can set a short timer and then trigger an action or movement while the countdown is in progress. This can result in dynamic and spontaneous photos that add an element of surprise and energy to your shots.
Take advantage of the timer feature on your Samsung tablet’s camera app to expand your photography possibilities. Experiment with different timer durations and explore how it can enhance the composition, creativity, and convenience of your photos.
Shooting in Burst Mode
The burst mode feature on your Samsung tablet’s camera app allows you to capture a series of photos in quick succession with just a single press and hold of the shutter button. This feature is particularly beneficial when you want to capture fast-moving subjects, continuous action, or fleeting moments that require precise timing.
To activate burst mode, open the camera app and locate the burst mode icon, typically represented by a stack of overlapping rectangles or a running person symbol. Once you’ve found the icon, simply tap and hold the shutter button to start capturing a rapid sequence of photos until you release the button.
Burst mode is particularly useful in situations where it’s challenging to capture the perfect shot with just one press of the shutter button. For example, while photographing sports events, wildlife, or children playing, burst mode allows you to capture multiple frames in quick succession, increasing the likelihood of getting a shot with the perfect timing or expression.
After capturing photos in burst mode, you can review the sequence in your tablet’s gallery and choose the best ones to keep. This gives you the opportunity to select photos with the best composition, focus, or expressions from the series of shots.
In addition to capturing fast action, burst mode is also handy when photographing in low-light conditions or situations where camera shake is a concern. By capturing multiple frames in quick succession, you increase the chances of getting a sharp and well-exposed photo.
An exciting feature often found in burst mode is the option to select and create an animated GIF or slideshow from the burst photos. This allows you to showcase the series of images as a dynamic presentation or share it as a fun and engaging GIF on social media platforms.
When using burst mode, it’s essential to consider the impact on your tablet’s storage. Burst mode captures a rapid sequence of photos, which can quickly fill up your device’s memory. Make sure you have sufficient space available or transfer the burst photos to an external storage device or cloud storage to free up space on your tablet.
Experiment with burst mode on your Samsung tablet’s camera app to unlock new creative possibilities and capture those decisive moments that might otherwise be missed. By harnessing the power of burst mode, you can elevate your photography skills and capture stunning images with speed, precision, and versatility.
Taking Panoramic Photos
The panoramic mode feature available on your Samsung tablet’s camera app allows you to capture wide-angle photos that span a larger field of view than a single photo could achieve. This feature is perfect for landscapes, cityscapes, or any scene where you want to capture the full breadth and scale of your surroundings.
To take a panoramic photo, open the camera app and swipe to the panoramic mode. The panoramic mode icon is usually represented by a mountain range or a wide-angle lens icon. Once in panoramic mode, you’ll see an on-screen guide or frame that helps you align and capture the panorama smoothly.
To start capturing the panorama, simply tap the shutter button and slowly pan the tablet from left to right or vice versa. Follow the on-screen guide to maintain a steady and consistent movement. The camera app will automatically stitch together multiple images as you pan, creating a seamless panoramic photo.
When capturing the panorama, it’s important to keep a few things in mind. First, make sure your tablet is held steady throughout the entire panning motion. Any sudden movements or shakes may result in misalignment, making it challenging to create a smooth and cohesive panorama.
Second, try to maintain a consistent speed as you pan the tablet. It’s more effective to move steadily instead of stopping or hesitating during the capture process. This helps ensure that the individual frames align properly and results in a more seamless panorama.
When shooting a panoramic photo, consider the composition and visual flow of the scene. Look for interesting elements or lines that can guide the viewer’s eye through the image. Panoramic photos are great for capturing sweeping landscapes, stunning skylines, or even architectural details that span a wide field of view.
It’s worth noting that some Samsung tablet camera apps offer vertical panoramic mode in addition to the traditional horizontal panorama. This allows you to capture tall structures or scenes with a vertical orientation, such as towering buildings or cascading waterfalls.
After capturing the panoramic photo, you can review and adjust the image in the camera app or your tablet’s gallery. Look for any inconsistencies or areas that may need cropping or adjustment to enhance the overall composition. Some camera apps also offer built-in editing tools specifically designed for panoramas, allowing you to fine-tune the alignment and appearance of the image.
Experimenting with the panoramic mode on your Samsung tablet’s camera app unlocks new creative possibilities and allows you to capture stunning wide-angle photos. Whether you’re capturing vast landscapes or intricate architectural details, panoramic photos offer a unique perspective and allow you to showcase the expansive beauty of your surroundings.
Using the AR Emoji Feature
The AR Emoji feature on your Samsung tablet’s camera app brings an element of fun and personalization to your photos and videos by creating virtual avatars that resemble you or animated characters. This innovative feature uses augmented reality (AR) technology to track your facial expressions and movements, allowing you to create and interact with virtual characters in real-time.
To use the AR Emoji feature, open the camera app and navigate to the AR Emoji mode. This mode is typically represented by a smiley face or emoji icon. Once you enter the mode, the camera will detect and map your facial features to create a virtual avatar that mirrors your expressions and movements.
You can choose to create an emoji that closely resembles your appearance or unleash your creativity by selecting from a variety of animated characters, animals, or even objects. The camera app guides you through the process of customizing your AR Emoji, allowing you to adjust features like hairstyle, eye color, skin tone, and accessories to create a personalized and unique avatar.
Once you’ve created your AR Emoji, you can start taking photos or recording videos with your virtual character. The camera app tracks your facial movements and expressions, animating the avatar accordingly. As you smile, blink, or tilt your head, your AR Emoji will mimic those gestures in real-time.
AR Emoji also offers a range of interactive features and expressions. You can choose from a variety of stickers, filters, and animations to apply to your photos and videos. For example, you could have your AR Emoji dance to a specific song, make funny faces, or interact with various virtual objects.
The AR Emoji feature is a great way to add an element of playfulness and creativity to your photos and videos. Whether you want to create amusing content or express yourself in a unique way, AR Emoji provides a new level of personalization and entertainment to your camera experience.
In addition to capturing photos and videos, you can share your AR Emoji creations with friends and family. Many social media platforms support AR Emoji, allowing you to share your animated avatar or create fun and engaging content to interact with others online.
It’s worth noting that the AR Emoji feature may vary slightly depending on the model of your Samsung tablet and the version of the camera app. Be sure to explore the available options and tips within the camera app to make the most of this exciting feature.
Have fun experimenting with the AR Emoji feature on your Samsung tablet’s camera app and let your creativity shine. Whether you’re creating virtual clones of yourself, transforming into animated characters, or simply enjoying the interactive elements, AR Emoji adds a touch of magic and imagination to your photos and videos.
Accessing and Managing Camera Gallery
The camera app on your Samsung tablet not only allows you to capture stunning photos and videos, but it also provides a convenient way to access and manage your camera gallery. The gallery is where all your captured media files are stored, allowing you to review, organize, and share your photos and videos with ease.
To access your camera gallery, open the camera app and look for the gallery icon, typically represented by a small thumbnail or a grid of photos. Tap on this icon, and it will take you directly to your camera gallery.
Once inside the camera gallery, you’ll see all your captured photos and videos neatly organized in chronological order or in customizable folders. You can swipe left or right to navigate through the different media files or use the scroll bar at the bottom of the screen for quicker browsing.
From the gallery, you have several options for managing your photos and videos. You can select individual files by tapping on them, enabling you to delete, edit, or share them. Many Samsung tablet models provide additional options, such as cropping, applying filters and effects, adjusting brightness and saturation, and adding text or stickers.
If you want to delete multiple files at once, there is often a batch selection option. This allows you to choose multiple files by selecting them individually or by using a select all button. Once you’ve made your selection, click on the delete button, usually represented by a trash bin icon, to remove them from your gallery.
Organizing your camera gallery is also important for easy retrieval and navigation. You can create custom folders to categorize your photos and videos based on events, locations, or any other criteria that make sense to you. To create a folder, tap on the manage folders option, usually found in the gallery settings menu or in the overflow menu represented by three vertical dots. From there, you can create a new folder, rename existing folders, or move files between folders.
Additionally, you can take advantage of advanced search features provided by some Samsung tablet camera gallery apps. These features allow you to search for specific photos or videos based on various criteria, such as date, location, or even facial recognition. This makes it easier to find specific files without scrolling through a large collection.
Sharing your photos and videos directly from the camera gallery is also straightforward. Simply select the file you want to share and tap on the share button, typically represented by an arrow pointing outwards. This will bring up a list of available sharing options, such as email, messaging apps, social media platforms, or cloud storage services.
Accessing and managing your camera gallery on your Samsung tablet ensures that your precious memories are organized, easily accessible, and ready to be shared with others. Take advantage of the various options and features available within the camera gallery to create a personalized and well-maintained collection of your photos and videos.
Editing and Sharing Photos
The camera app on your Samsung tablet offers a range of editing tools and features that allow you to enhance and customize your photos before sharing them with others. These editing options enable you to express your creativity and create stunning visuals that truly stand out.
After capturing a photo using the camera app, you can access the editing options by selecting the photo in your gallery and tapping on the edit button. This will open a range of editing tools and features that you can apply to your photo.
One of the basic editing tools available is cropping. This allows you to remove unwanted elements or adjust the composition of your photo. You can manually crop the image or select from predefined aspect ratios, such as square or panoramic, depending on your preference and the purpose of the photo.
Adjusting the brightness, contrast, saturation, and color temperature of the photo is another key editing feature. These tools help you fine-tune the exposure, vibrancy, and overall look of the image. You can make subtle adjustments or completely transform the mood of the photo based on your desired aesthetic.
Adding filters and effects is a popular editing feature that can instantly change the style and feel of your photo. Many Samsung tablet camera apps offer a variety of filters, including black and white, vintage, cinematic, or even artistic filters. These filters can enhance the colors, add texture, or create a specific atmosphere to your photo.
If you want to highlight specific areas or create a more professional look, you can explore the selective editing feature. This allows you to adjust the brightness, contrast, or color saturation of specific parts of the photo while leaving the rest untouched. This can be useful in situations where you want to emphasize a subject or make certain elements stand out.
In addition to editing tools, Samsung tablet camera apps often provide a range of creative options, such as adding text, stickers, or frames to your photos. These features enable you to personalize your photos and add an extra layer of creativity and storytelling.
After editing your photos to perfection, it’s time to share them with others. Samsung tablet camera apps offer a variety of sharing options, including direct sharing to social media platforms, messaging apps, email, or cloud storage services. With just a few taps, you can instantly share your edited photos with friends, family, or your online community.
Some Samsung tablet camera apps also support collaboration and synchronized editing features. This allows multiple users to work together on the same photo, making it easier to create collaborative projects or receive input and feedback from others.
Take advantage of the editing tools and sharing options available in your Samsung tablet’s camera app to bring your photos to life and showcase your creativity. Experiment with different editing techniques, apply personalized touches, and share your stunning visuals with the world.