Why Should You Upgrade Your RAM?
RAM, or Random Access Memory, is an essential component in a computer that plays a crucial role in its performance and overall speed. The more RAM you have, the more information your computer can store and access, resulting in faster multitasking and smoother performance.
If you find that your computer is running slow, freezing frequently, or struggling to handle multiple applications at once, upgrading your RAM can be a cost-effective solution. It can provide a significant boost in speed and responsiveness, allowing you to work more efficiently and enjoy a better user experience.
Upgrading your RAM is particularly beneficial in the following scenarios:
- Running resource-intensive applications: If you’re frequently using programs like video editing software, graphic design tools, or virtual machines, these applications can consume a significant amount of RAM. With more RAM, your computer can better handle the demands of these resource-intensive tasks, resulting in smoother performance and decreased loading times.
- Improving gaming performance: Gamers often require higher amounts of RAM due to the advanced graphics and processing requirements of modern video games. Upgrading your RAM can provide a noticeable improvement in game load times, graphics rendering, and overall gameplay experience.
- Enhancing multitasking capabilities: If you frequently find yourself juggling multiple applications simultaneously, such as a web browser, video conferencing software, and document editing tools, upgrading your RAM will allow your computer to handle these tasks more efficiently. You’ll experience reduced lag and improved responsiveness, making multitasking a breeze.
It’s important to note that not all computers can be upgraded in terms of RAM. Some laptops and budget PCs may have limited or non-upgradable RAM options. It’s recommended to check your computer’s specifications or consult a professional to determine if a RAM upgrade is possible.
In summary, upgrading your RAM can significantly enhance your computer’s performance, allowing for seamless multitasking, faster program loading times, and an overall smoother user experience. Whether you’re a professional who relies on resource-intensive applications, a enthusiast gamer, or a multitasker, investing in a RAM upgrade is a smart decision that can breathe new life into your computer.
Checking Compatibility
Before upgrading your RAM, it’s crucial to ensure compatibility with your computer’s hardware. Incompatible RAM modules can lead to system instability and malfunctioning. Here are the steps to check compatibility:
- Check the maximum capacity: Determine the maximum amount of RAM your computer’s motherboard can support. This information can usually be found in the computer’s manual or by searching the manufacturer’s website.
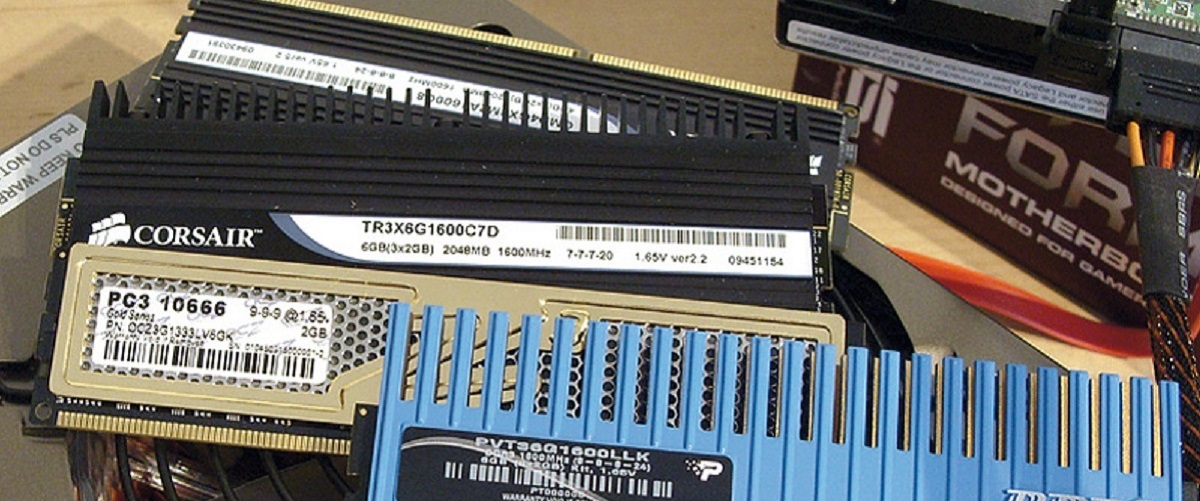
- Identify the RAM type: Different computers use different types of RAM, such as DDR3, DDR4, or DDR5. You need to identify the specific type of RAM that is compatible with your system. This information can also be found in the manual or manufacturer’s website.
- Check the memory speed: RAM modules have specific speed ratings, such as 2400MHz or 3200MHz. It’s important to buy RAM with a speed rating that is supported by your computer’s motherboard. Exceeding the maximum supported speed may result in compatibility issues.
- Consider the form factor: RAM modules come in different physical shapes and sizes, such as DIMM or SODIMM. Check the form factor supported by your computer to ensure that the RAM you purchase will fit in the available slots.
- Verify the number of memory slots: Determine the number of RAM slots available on your computer’s motherboard. This will help you determine how many RAM modules you can install and their capacities.
Once you have gathered all the necessary information, you can proceed to purchase compatible RAM modules for your computer. It’s recommended to buy RAM from reputable manufacturers and retailers to ensure quality and compatibility.
Remember to ground yourself properly and handle RAM modules with care to avoid static discharge and damage to the components. Install the RAM modules correctly by aligning the notches on the module with the slot and apply firm and even pressure until the module clicks into place.
In summary, checking compatibility is crucial before upgrading your RAM. Ensure that you know the maximum capacity, RAM type, memory speed, form factor, and number of memory slots supported by your computer. With this information, you can make an informed purchase and install the new RAM modules seamlessly, improving the overall performance of your computer.
How Much RAM Do You Need?
Determining the amount of RAM you need depends on your specific computer usage and requirements. Here are some factors to consider when deciding how much RAM to upgrade:
- Operating System Requirements: Start by checking the minimum RAM requirements of your operating system. While most modern operating systems recommend at least 4GB of RAM, it’s recommended to have a higher amount for optimal performance, especially if you’re using resource-intensive applications.
- Usage Scenarios: Consider your typical computer usage. If you mainly use your computer for web browsing, word processing, and light multitasking, 8GB of RAM should be sufficient. However, if you frequently work with demanding applications like photo/video editing software, 3D modeling, or virtual machines, consider upgrading to 16GB or even 32GB for smoother performance.
- Gaming Requirements: If you’re a gamer, the amount of RAM needed may vary depending on the specific games you play. Generally, 8GB of RAM is the minimum requirement for gaming, but many modern games recommend 16GB or more for optimal performance. Check the system requirements of your favorite games or consult online forums and communities for recommendations.
- Futureproofing: It’s advisable to consider future needs when upgrading your RAM. If you plan to keep your computer for several years or anticipate using more demanding applications in the future, investing in a higher RAM capacity now will ensure that your system remains capable and responsive in the long run.
- Budget: RAM prices can vary based on their capacity. Consider your budget and strike a balance between your desired RAM capacity and affordability.
Ultimately, the right amount of RAM for you will depend on your unique needs and budget. It’s always better to have more RAM than you think you’ll need to avoid potential performance bottlenecks and future upgrades.
To determine your current RAM usage, you can open the Task Manager (Ctrl + Shift + Esc on Windows) or Activity Monitor (in the Utilities folder on macOS). These tools will provide insights into your memory usage and can help you assess if your computer is experiencing slowdowns or running out of RAM.
In summary, consider your operating system requirements, usage scenarios, gaming needs, futureproofing, and budget when deciding how much RAM to upgrade. Striking the right balance will ensure that your computer performs optimally and handles your tasks and applications smoothly.
Purchasing RAM
When it comes to purchasing RAM for your computer upgrade, there are a few key factors to keep in mind to ensure you make the right choice:
- Compatibility: As mentioned earlier, ensuring compatibility is crucial. Verify that the RAM you are purchasing is compatible with your computer’s motherboard in terms of type, speed, form factor, and maximum capacity. Check the specifications of your computer or consult with the manufacturer or a professional if you are unsure.
- Brand and Quality: It’s important to invest in RAM modules from reputable brands known for their quality and reliability. Stick to well-known manufacturers that have a good track record for producing durable and high-performance RAM modules. Reading reviews and customer feedback can also help you make an informed decision.
- Capacity: Decide on the amount of RAM you need based on your system requirements and usage. Consider factors like the operating system requirements, the applications you regularly use, and whether you engage in resource-intensive tasks like gaming, video editing, or graphic design. Aim for a capacity that meets your current needs while also providing room for future growth.
- Budget: RAM prices can vary depending on the brand, capacity, and other factors. Set a budget and look for RAM options that offer a good balance between performance, capacity, and affordability.
- Warranty: Look for RAM modules that come with a warranty. This will provide you with peace of mind knowing that you are covered in case of any manufacturing defects or issues that may arise. Check the warranty length and the support provided by the manufacturer.
When purchasing RAM, it’s recommended to buy from reliable retailers, both online and offline, who have a good reputation for selling genuine products. Pay attention to customer reviews and ratings to ensure a positive buying experience.
Once you have chosen the right RAM modules, place your order or make your purchase. Wait for the RAM modules to arrive, ensuring they are accompanied by all the necessary documentation, such as installation instructions or warranty information.
In summary, when purchasing RAM, verify compatibility, choose reputable brands, consider the capacity needed, set a budget, and opt for RAM modules that come with a warranty. Taking these factors into account will help you select the right RAM for your computer, ensuring optimal performance and a smooth upgrade process.
Shutting Down Your Computer
Before you begin the process of upgrading your RAM, it’s important to shut down your computer properly to ensure the safety of your data and the components. Follow these steps to shut down your computer:
- Save your work: Make sure to save all your open documents, files, and projects. Close any running applications to avoid data loss or corruption.
- Close all programs: Ensure that all running programs are properly closed. This includes any background programs or system tray applications that may be running.
- Disconnect peripherals: Safely disconnect any external devices connected to your computer, such as USB drives, printers, or external hard drives. This ensures that the computer is not accessing any external devices during the shutdown process.
- Save your progress in games: If you are in the middle of a game or online multiplayer session, make sure to save your progress or exit the game properly to avoid any data loss or issues.
- Click on the Start Menu: On Windows, click the Start button in the bottom left corner of your screen. On Mac, click the Apple menu at the top left corner of your screen.
- Select Shutdown: In the Start Menu or Apple menu, you will find the Shutdown option. Click on it to begin the shutdown process.
- Wait for the shutdown process: The computer will begin the shutdown process, closing all programs and services. Wait for the computer to completely shut down before proceeding.
- Unplug the power cord: Once the computer has shut down, unplug the power cord from the power outlet. This will ensure that there is no power running through the computer, making it safe to work on the internal components.
It’s important to follow these steps to ensure that your computer is shut down properly and safely. Cutting off the power abruptly can lead to data corruption or damage to the internal components.
Once you have completed the shutdown process and the computer is safely powered off, you can proceed with the next steps of opening your computer case and upgrading your RAM.
In summary, shutting down your computer properly before upgrading your RAM is essential to protect your data and ensure the safety of the internal components. Follow the steps mentioned above to perform a safe and smooth shutdown.
Opening Your Computer Case
Before you can access the RAM slots to upgrade your computer’s memory, you will need to open the computer case. Follow these steps to open your computer case safely:
- Unplug the power cord: Ensure that your computer is completely powered off and unplugged from the power outlet. This eliminates the risk of electric shock or damage to components.
- Find the screws or latches: Depending on the type of computer case you have, you will need to locate the screws or latches that secure the case. These are usually located on the back or sides of the case.
- Use a screwdriver or release the latches: If your case has screws, use a screwdriver to remove them. If your case has latches, release them by pressing or sliding them as directed by your computer’s manual or case design.
- Slide or remove the case panel: Once the screws are removed or the latches are released, gently slide or remove the side panel of the computer case. Some cases may have a removable panel on both sides; in that case, remove the panel on the side that gives you access to the internal components.
- Ground yourself: It’s important to ground yourself to prevent static electricity discharge that can damage the delicate electronic components inside your computer. Use an anti-static wrist strap or touch a grounded metal surface to discharge any static electricity before handling the internal components.
Once you have successfully opened the computer case, you will have access to the internal components, including the RAM slots. It’s important to handle the components with care and avoid touching any exposed circuitry or sensitive parts.
Keep in mind that the specific steps and methods of opening the computer case may vary depending on the manufacturer and model of your computer. It’s recommended to consult the computer’s manual or visit the manufacturer’s website for detailed instructions.
In summary, make sure to unplug the power cord, locate the screws or latches, use a screwdriver or release the latches, slide or remove the case panel, and ground yourself before opening your computer case. Following these steps will ensure that you can access the internal components safely and proceed with the RAM upgrade.
Locating the RAM Slots
After opening your computer case, the next step is to locate the RAM slots where you will install the new memory modules. Here’s how you can find the RAM slots:
- Refer to the motherboard manual: Consult the manual that came with your computer or motherboard. The manual usually contains detailed information about the motherboard layout, including the location of the RAM slots.
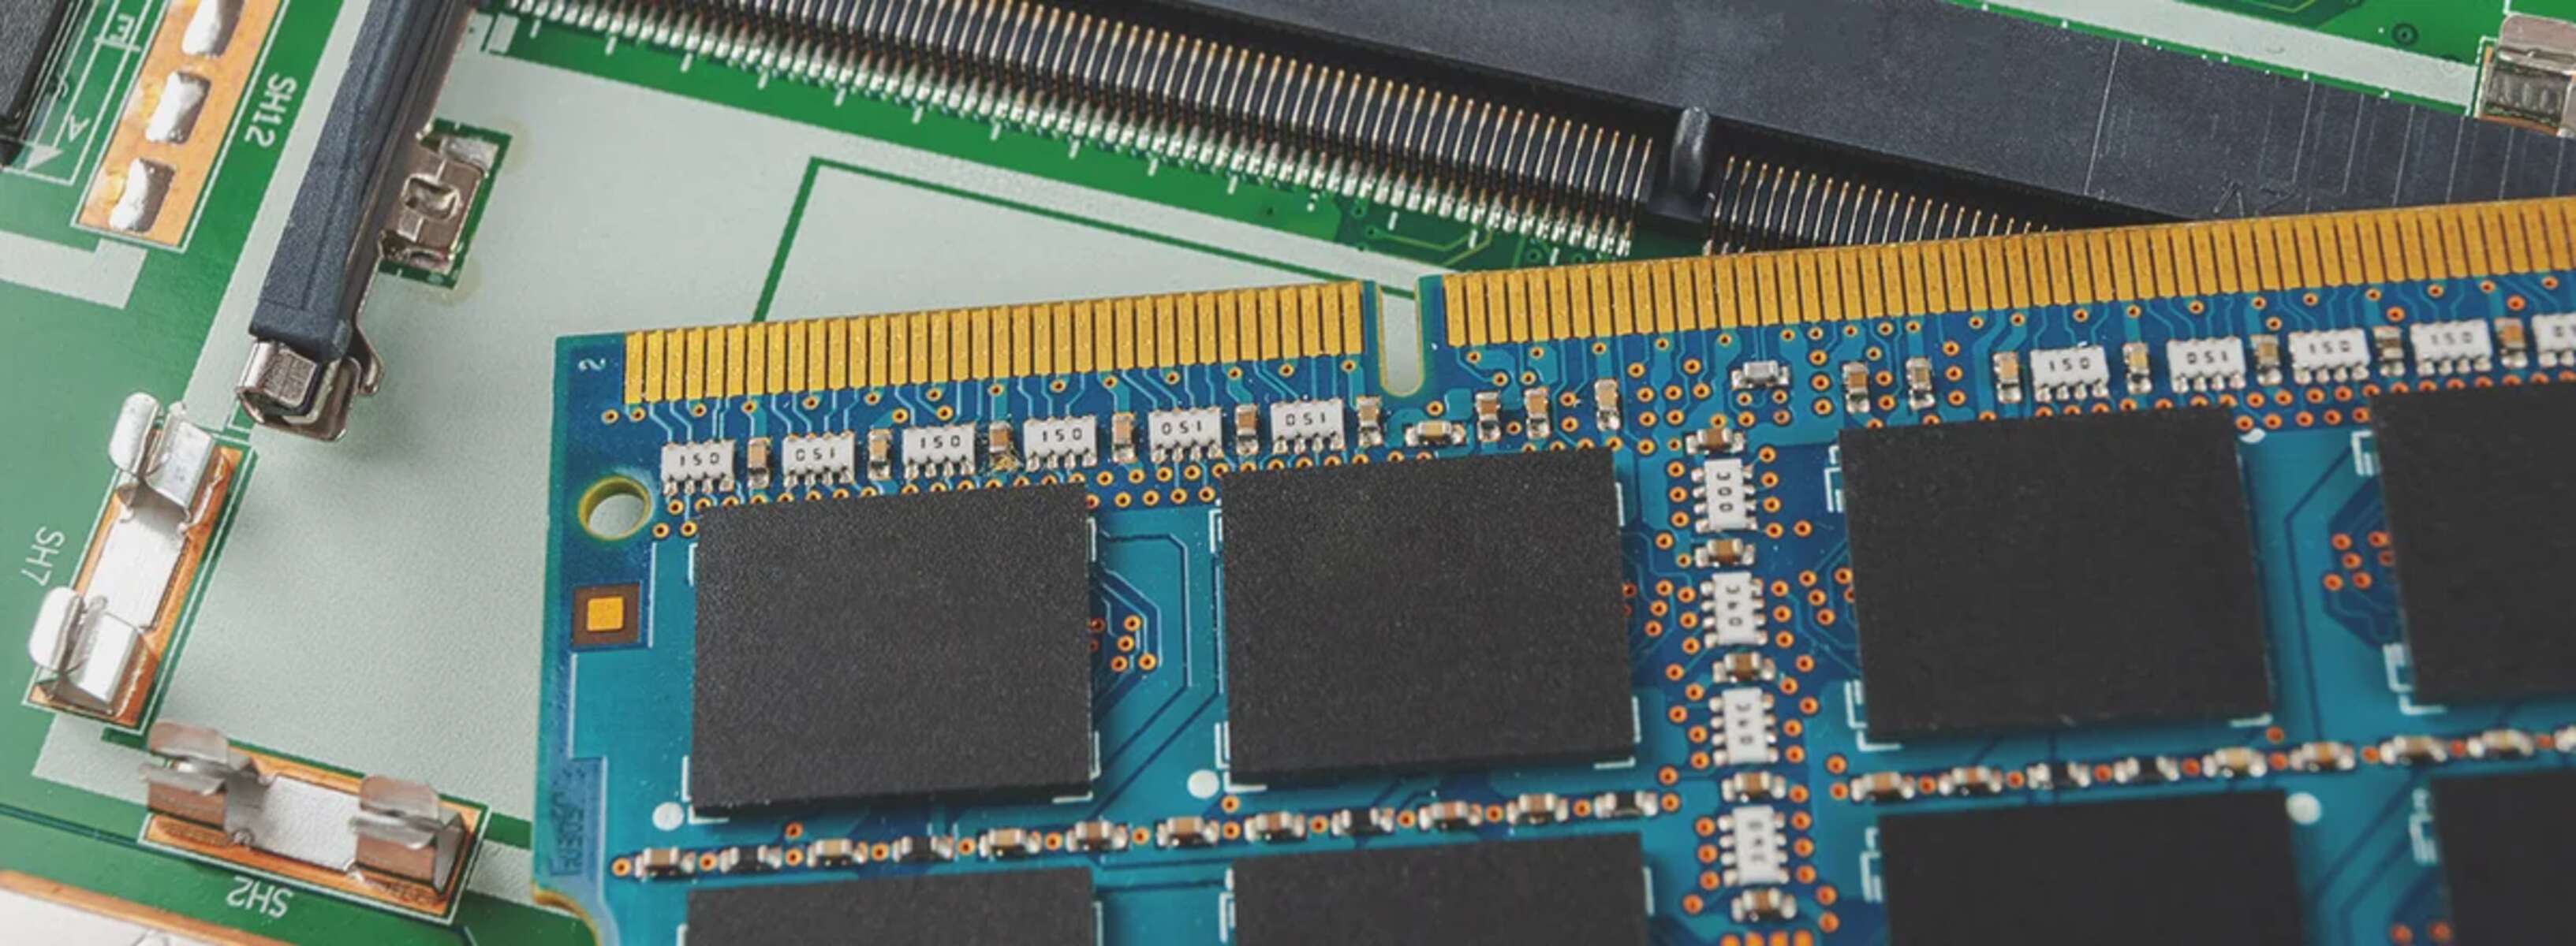
- Inspect the motherboard: Carefully examine the motherboard inside your computer case. Look for long and narrow slots with clips or levers. RAM slots are typically located near the CPU socket or along the edge of the motherboard.
- Count the RAM slots: Most motherboards have multiple RAM slots, typically two or four. Count the number of slots available to determine the maximum number of RAM modules you can install.
- Note any color-coding or labeling: Some motherboards color-code the RAM slots or label them with numbers or letters. These indicators can help you identify the proper slot configuration for dual-channel or quad-channel memory setups, if supported.
If you’re having difficulty locating the RAM slots, you can also search for your specific motherboard model online to find images or diagrams that illustrate the location of the RAM slots.
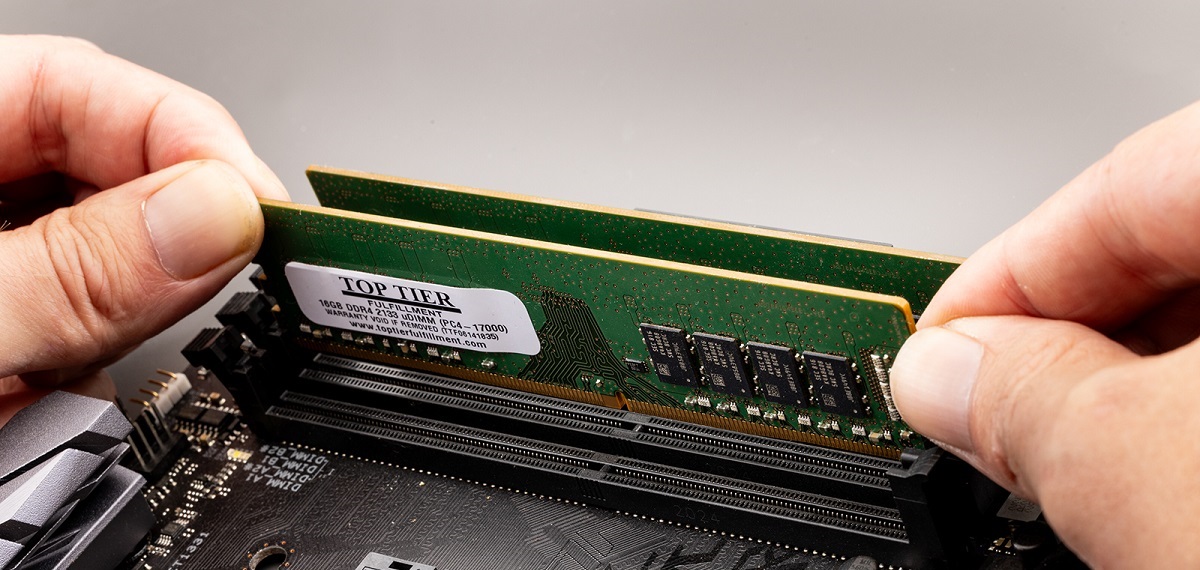
It’s important to handle the RAM modules properly during installation. Hold the modules by their edges, avoiding touching the gold contacts or any exposed circuitry. The slots have notches that align with tabs on the RAM modules, ensuring correct insertion. If you encounter resistance, double-check that the notch and tab alignment is correct before applying gentle, even pressure to seat the module in the slot.
Remember, each motherboard is unique, so the location and configuration of the RAM slots may vary. Take your time to identify the slots accurately to ensure a successful RAM upgrade.
In summary, to locate the RAM slots, refer to the motherboard manual, inspect the motherboard for long and narrow slots, count the number of slots available, and pay attention to any color-coding or labeling. Handling the RAM modules carefully and aligning them correctly in the slots will ensure a smooth and successful RAM upgrade.
Removing the Old RAM
Before installing the new RAM modules, you need to remove the old RAM modules from your computer. Here are the steps to remove the old RAM:
- Ensure your computer is powered off: Double-check that your computer is completely shut down and unplugged from the power source. This is crucial for your safety and to prevent any damage to the components.
- Ground yourself: Ground yourself by wearing an anti-static wrist strap or by touching a grounded metal surface. This helps ensure that any static electricity doesn’t harm the internal components.
- Locate the old RAM modules: Identify the RAM modules within the RAM slots. They will be mounted vertically in the slots and held in place by retaining clips on either side.
- Release the retaining clips: Gently push down or outward on the retaining clips at each end of the RAM module. This will unlock the module and cause it to pop up at an angle.
- Remove the old RAM module: Once the retaining clips are released, carefully slide the module out of the slot at an angle. Be cautious not to apply excessive force or bend the module.
- Repeat for additional modules: If you have multiple RAM modules to remove, repeat the process for each module, ensuring that you release the retaining clips for each one.
After removing the old RAM modules, it’s a good idea to inspect them for any visible damage or signs of wear. If you no longer need the old RAM modules, you can safely store or dispose of them following appropriate electronic waste disposal guidelines.
Remember to handle the RAM modules with care throughout the removal process to avoid damaging the modules or the RAM slots. Apply gentle and even pressure when releasing the retaining clips and sliding out the modules.
In summary, make sure your computer is powered off, ground yourself to prevent static discharge, locate the old RAM modules, release the retaining clips, remove the old RAM module at an angle, and repeat the process for any additional modules. By following these steps carefully, you can safely remove the old RAM modules in preparation for installing the new ones.
Inserting the New RAM
Now that you have removed the old RAM modules, it’s time to insert the new RAM modules in your computer. Follow these steps to insert the new RAM:
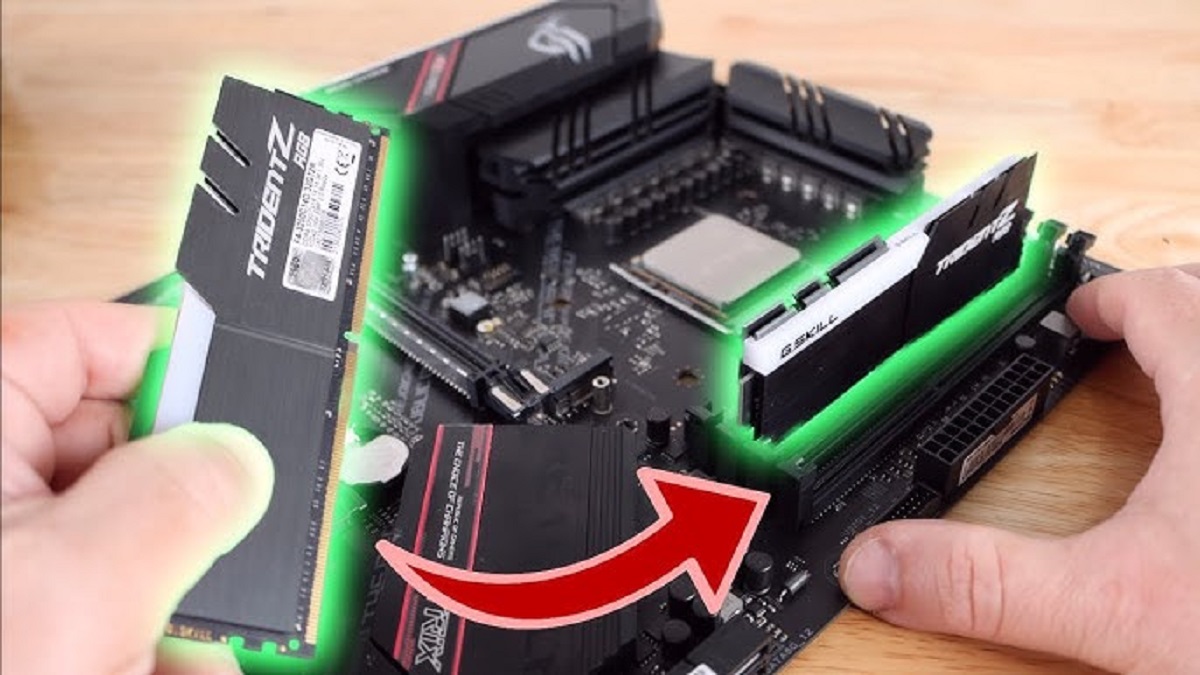
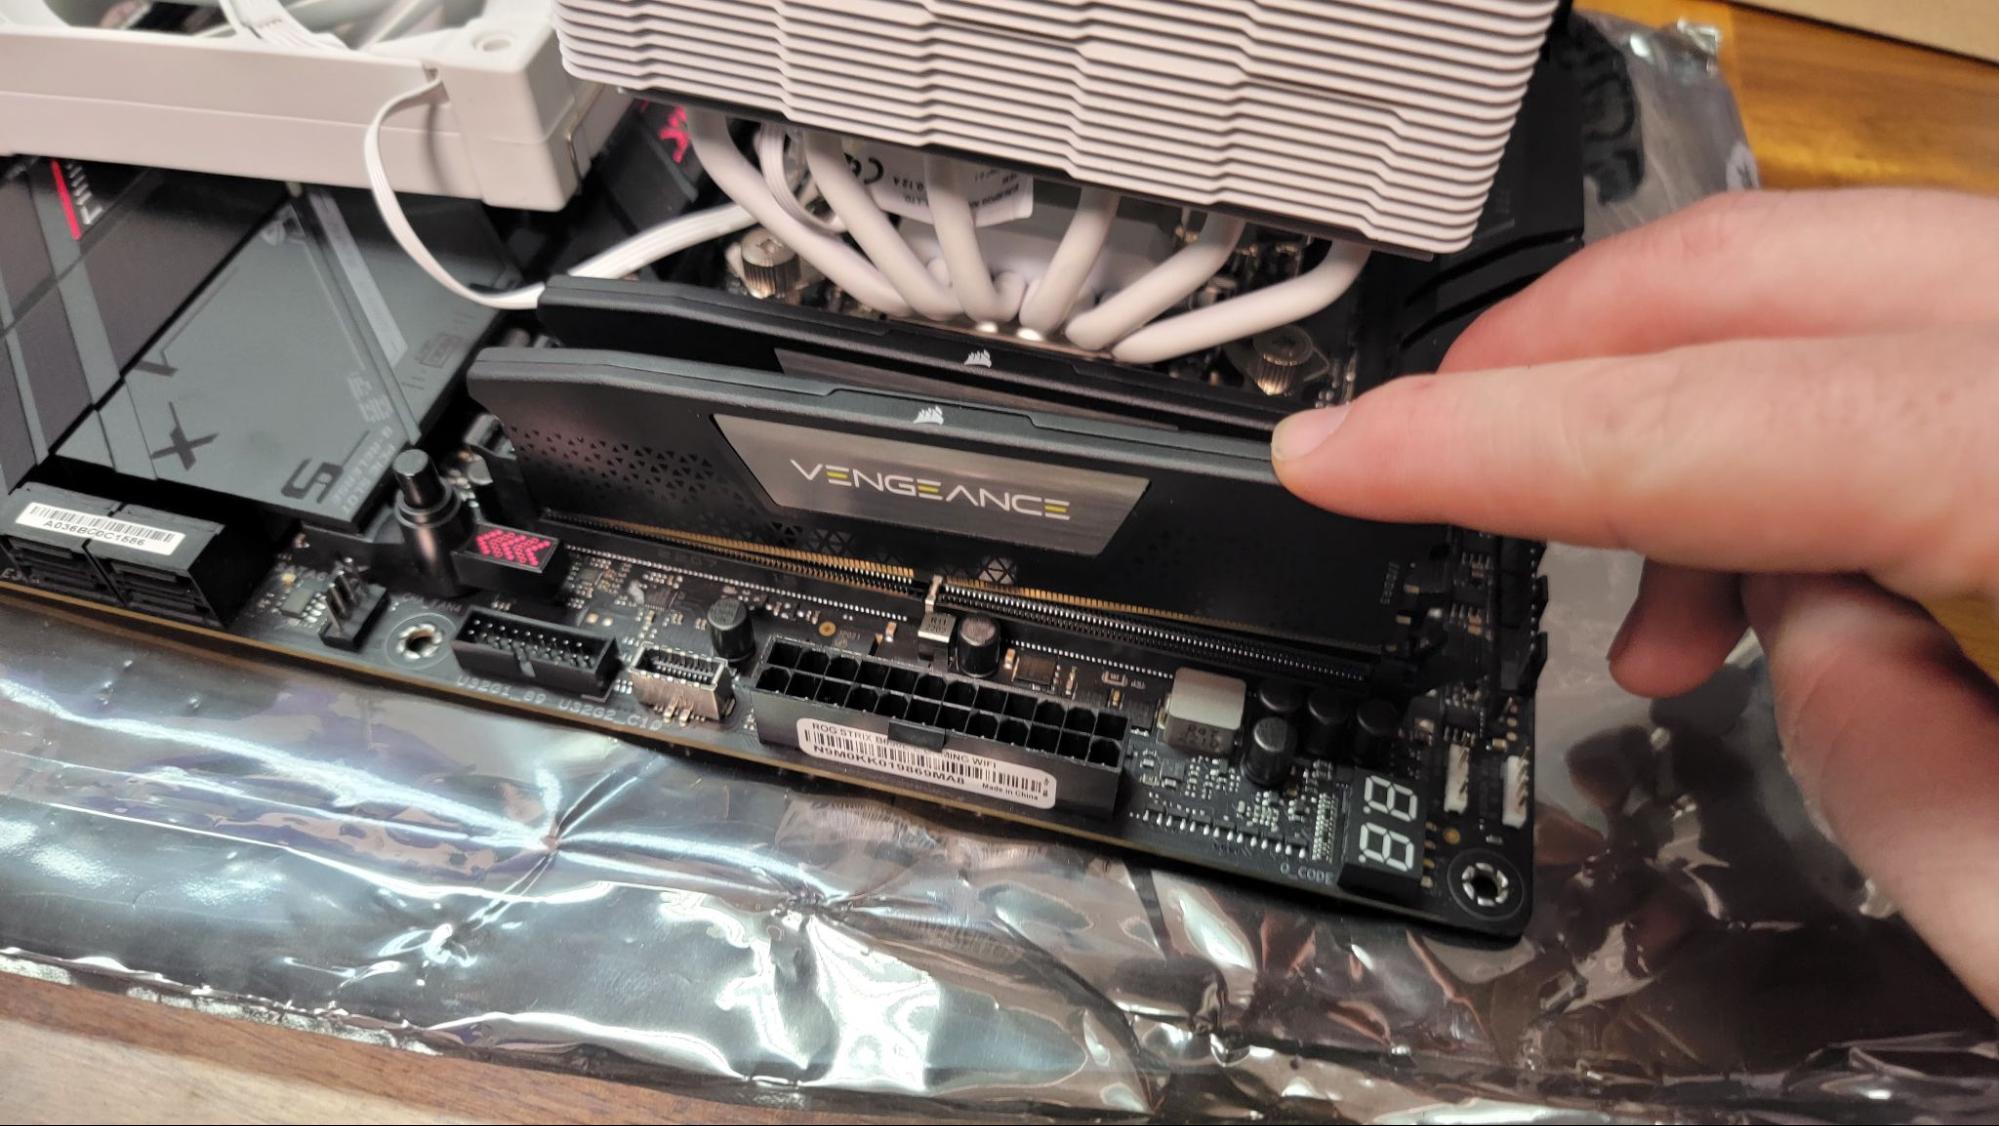
- Check the orientation: Ensure that the new RAM module is oriented correctly by aligning the notch on the module with the tab in the RAM slot. This ensures proper insertion and prevents damage to the module or slot.
- Insert the RAM module: Hold the RAM module by its edges and position it at a slight angle. Gently insert the module into the RAM slot, aligning the notch and tab, until it is fully seated. Apply even pressure on both ends of the module to ensure proper insertion.
- Secure the RAM module: Once the RAM module is fully inserted, it should automatically lock into place. You may hear a click or feel a slight resistance as the retaining clips engage with the module. Verify that the module is securely seated by gently tugging on it. It should not move or disconnect from the slot.
- Repeat for additional modules: If you have multiple RAM modules to install, follow the same procedure for each module, ensuring that you insert them into the appropriate slots and align them correctly.
- Close the computer case: After inserting the new RAM modules, carefully replace the side panel of the computer case and secure it with screws or latches according to your computer’s design.
It’s important to note that different computer motherboards may have varying methods for securing the RAM modules, such as different types of retaining clips or levers. Follow the instructions provided by your motherboard manufacturer if they differ from the general steps outlined here.
After inserting the new RAM modules, you can proceed to close the computer case and prepare to power on your computer for verification and testing.
In summary, check the orientation of the new RAM module, gently insert it at a slight angle, secure it until it clicks into place, repeat the process for additional modules, and close the computer case. Following these steps carefully will ensure that the new RAM is properly inserted and ready to enhance your computer’s performance.
Closing Your Computer Case
After successfully installing the new RAM modules, it’s important to properly close your computer case to ensure the components are protected and secure. Follow these steps to close your computer case:
- Ensure all cables are properly routed: Before closing the case, check that all cables inside your computer are properly organized and secured. Ensure that they are not blocking any fans or obstructing airflow within the case.
- Replace the side panel: Carefully position the side panel back onto the computer case. Align the edges of the panel with the corresponding edges of the case.
- Secure the side panel: If your case uses screws, insert them into the screw holes on the side panel and tighten them with a screwdriver. If your case uses latches, ensure they are engaged properly to secure the panel in place.
- Check for any loose components: Before finalizing the closure, inspect the interior of the case for any loose screws or components. Ensure that all components, including the new RAM modules, are securely seated and that there are no loose cables.
- Double-check everything: Take a moment to double-check that all components, cables, and the RAM modules are securely in place. This will help prevent any potential issues when you power on the computer.
Once you’ve completed these steps, you can proceed to reconnect the necessary peripherals, such as the monitor, keyboard, and mouse. Plug in the power cord and be ready to power on your computer.
It’s important to note that closing the computer case may vary depending on the case design and manufacturer. It’s always a good idea to consult your computer’s manual or refer to manufacturer documentation if you have any specific questions or concerns.
In summary, ensure all cables are properly routed, replace and secure the side panel of the computer case, check for any loose components, and double-check everything before closing the case. Taking these steps will ensure that your computer is properly sealed and ready for use after upgrading the RAM.
Turning On Your Computer
After successfully closing your computer case following the RAM upgrade, it’s time to power on your computer. Follow these steps to turn on your computer:
- Double-check all connections: Ensure that all cables, including the power cord, monitor cable, keyboard, mouse, and any other peripherals, are securely connected to the appropriate ports. Check that the RAM modules are properly seated in their slots.
- Plug in the power cord: Connect the power cord to the power outlet and to the back of your computer. Make sure the connection is secure.
- Power on the computer: Locate the power button on your computer case. Press the power button to turn on the computer. Depending on your computer, you may need to hold down the power button for a few seconds or press it briefly.
- Wait for the computer to start: After pressing the power button, you should see the computer starting up. The fans may spin, and you may hear the startup sounds. Depending on your computer’s configuration, you may also see the manufacturer’s logo on the screen.
- Watch for any error messages or prompts: As the computer starts up, pay attention to any error messages or prompts that may appear on the screen. This could indicate any issues with the RAM installation or any other components.
If your computer starts up without any issues and you see the familiar desktop or login screen, congratulations! The RAM upgrade was successful, and your computer now has increased memory to improve its performance.
However, if you encounter any error messages or the computer fails to start up, double-check that the RAM modules are securely installed in their slots. If necessary, power off your computer, open the case again, and ensure that the modules are properly seated. If the issue persists, consult your computer’s manual or seek assistance from a professional technician.
In summary, double-check all connections, plug in the power cord, press the power button to turn on the computer, wait for the startup process, and watch for any error messages or prompts. Following these steps will help you power on your computer after the RAM upgrade and ensure that everything is functioning correctly.
Verifying the RAM Upgrade
After turning on your computer following the RAM upgrade, it’s important to verify that the new RAM modules are recognized and functioning properly. Here are the steps to verify the RAM upgrade:
- Check the system information: Open the system information utility on your computer. On Windows, you can typically find it by right-clicking on the Start button and selecting “System” or by typing “system information” in the search bar. On Mac, click on the Apple menu, select “About This Mac,” and then click on “System Report.”
- Verify the installed RAM: In the system information utility, locate the section that displays the installed RAM. It should provide details such as the total amount of RAM installed and the number of RAM slots being used. Confirm that the information matches the new RAM modules you installed.
- Check the RAM speed: If the system information utility provides the option, check the RAM speed to ensure that it matches the speed of the new RAM modules you installed. Compare it to the specifications of the purchased RAM modules.
- Run a benchmark or diagnostic tool (optional): If you want to further verify the performance and stability of the new RAM, you can run benchmark or diagnostic tools designed for testing RAM. These tools can help identify any potential issues or errors associated with the new RAM.
- Test system stability: Use your computer normally for a period of time to assess the overall system stability. Perform tasks that previously caused slowdowns or bottlenecks and observe if the computer now performs better with the upgraded RAM.
If the system information accurately displays the new RAM modules, and your computer appears to be running smoothly and without any issues, it indicates a successful RAM upgrade. Enjoy the enhanced performance and improved multitasking capabilities that the additional RAM provides.
If you encounter any errors, instabilities, or if the system information does not reflect the correct RAM configuration, double-check that the RAM modules are correctly inserted and making proper contact with the slots. If problems persist, consult the manufacturer’s documentation or seek assistance from a professional technician.
In summary, verify the installed RAM through the system information utility, check the RAM speed, optionally run benchmark or diagnostic tools, and test the system stability by using your computer normally. These steps will help you ensure that the new RAM modules are correctly recognized and functioning as intended.
Troubleshooting Common Issues
While upgrading your RAM can significantly improve your computer’s performance, you may occasionally encounter issues. Here are some common problems that may arise during or after a RAM upgrade and their potential solutions:
- Computer not powering on: If your computer doesn’t turn on after the RAM upgrade, double-check that the RAM modules are securely inserted in their slots. Also, verify that all power connections are secure and that the power supply is functioning correctly.
- Blue screen or system crashes: If your computer experiences regular blue screens or crashes after the RAM upgrade, it could indicate compatibility or stability issues. Ensure that the new RAM modules are compatible with your motherboard and that you’ve installed the latest drivers and BIOS updates.
- System instability or freezes: If your system becomes unstable or freezes intermittently, it may be due to improperly seated RAM modules or modules that aren’t fully compatible. Try reseating the RAM modules and ensure they are securely locked in place. If the issue persists, consider testing the system with one RAM module at a time to identify a potentially faulty module.
- RAM not recognized: If the system information utility doesn’t display the correct amount of RAM or doesn’t recognize the new RAM modules, ensure that the modules are correctly inserted. Swap the modules between slots to rule out any faulty slots. If the problem persists, it could be due to compatibility issues or a faulty RAM module.
- System slowdown or no noticeable improvement: If you don’t experience any significant improvement in performance or notice a system slowdown after the RAM upgrade, there could be other factors affecting performance. Make sure your operating system, drivers, and other software are up to date. Additionally, verify that your computer meets the minimum system requirements for the tasks you’re performing.
If you encounter any issues during or after the RAM upgrade that you’re unable to resolve, it’s recommended to consult your computer’s manual or seek assistance from a professional technician. They can further diagnose the problem and provide specific guidance based on your computer’s configuration and setup.
In summary, common issues during and after a RAM upgrade include the computer not powering on, blue screens or system crashes, system instability or freezes, RAM not recognized, and system slowdown. Troubleshooting these issues by ensuring proper installation, checking compatibility, and seeking professional help if necessary will help resolve the problems and ensure smooth operation.
Final Thoughts
Upgrading your RAM can be a relatively simple and cost-effective way to improve your computer’s performance and enhance your overall computing experience. By increasing the amount of available memory, you can enjoy faster multitasking, smoother application performance, and improved responsiveness.
Throughout the RAM upgrade process, it’s important to follow the steps carefully, ensuring compatibility, proper installation, and system verification. Take the time to research and choose the right RAM modules for your computer’s specifications and your specific needs.
While upgrading your RAM can yield significant benefits, it’s important to consider other factors that may impact your computer’s performance. Factors such as the CPU, storage drive, and graphics card can also contribute to overall system speed and responsiveness. If you’re still experiencing performance issues after upgrading the RAM, it may be worth considering upgrades to these components as well.
Remember to properly handle and discharge static electricity when working with your computer’s internal components. Take precautions to avoid damaging any parts and ensure the safety of both yourself and the computer.
If you are unsure about the RAM upgrade process or encounter any difficulties, it’s always a good idea to consult the manufacturer’s documentation, seek assistance from professionals, or find online resources and forums for guidance.
By successfully upgrading your RAM and optimizing your computer’s performance, you can enjoy a smoother and more efficient computing experience, whether you’re a casual user, a professional, or a gamer.
In summary, upgrading your computer’s RAM can provide a noticeable boost to performance and speed. Follow the steps carefully, consider other potential upgrades, and consult resources as needed to ensure a successful RAM upgrade and an overall enhanced computing experience.