Introduction
Welcome to this guide on how to move apps to the SD card on the Samsung Galaxy S5. If you are a Galaxy S5 user, you might be familiar with the struggle of limited storage space on your device. As you download more apps and store media files, such as photos and videos, you may find that your internal storage is quickly reaching its capacity.
The Samsung Galaxy S5 was released in 2014 and featured internal storage options ranging from 16GB to 32GB. While this may have been sufficient at the time, as technology has advanced and app sizes have increased, it can be challenging to manage your storage effectively.
Thankfully, the Galaxy S5 provides an option to expand storage using a microSD card. By moving apps from your internal storage to the SD card, you can free up precious space for other apps, media files, and system updates.
However, it’s important to note that not all apps can be moved to the SD card. Some apps have restrictions imposed by their developers that prevent them from being relocated. But don’t worry; we’ll guide you through each step and help you determine if a particular app can be moved or not.
In this guide, we’ll walk you through the process of moving apps to the SD card on your Galaxy S5. We’ll provide step-by-step instructions, along with alternative methods for moving apps, and discuss the benefits and limitations associated with this process.
So, let’s get started and make the most of your Galaxy S5’s storage space by learning how to move apps to the SD card!
Overview of Galaxy S5 and its storage options
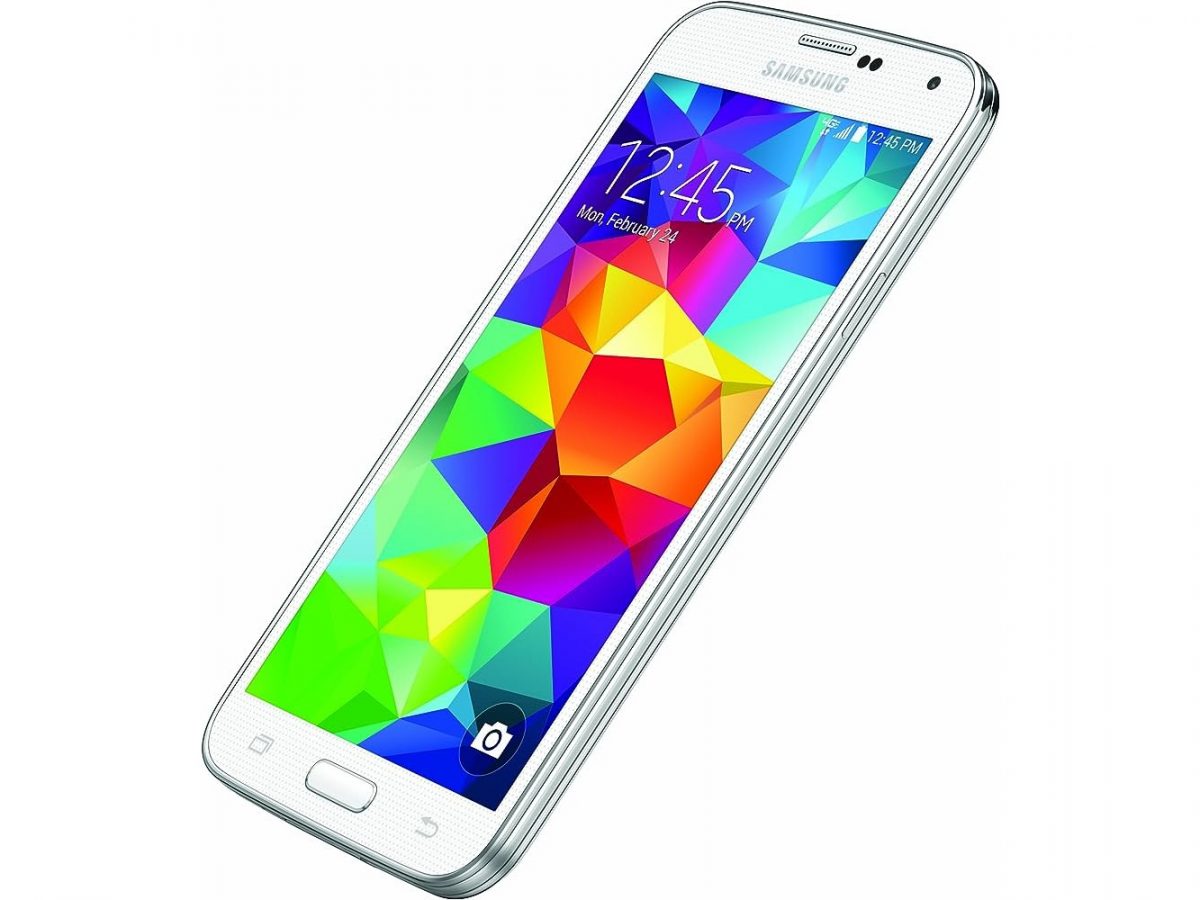
The Samsung Galaxy S5 was a flagship smartphone released by Samsung in 2014. It came with a 5.1-inch Super AMOLED display, a 16-megapixel camera, and an impressive set of features. One of the key considerations when choosing a smartphone is storage capacity, and the Galaxy S5 offered multiple options to meet users’ needs.
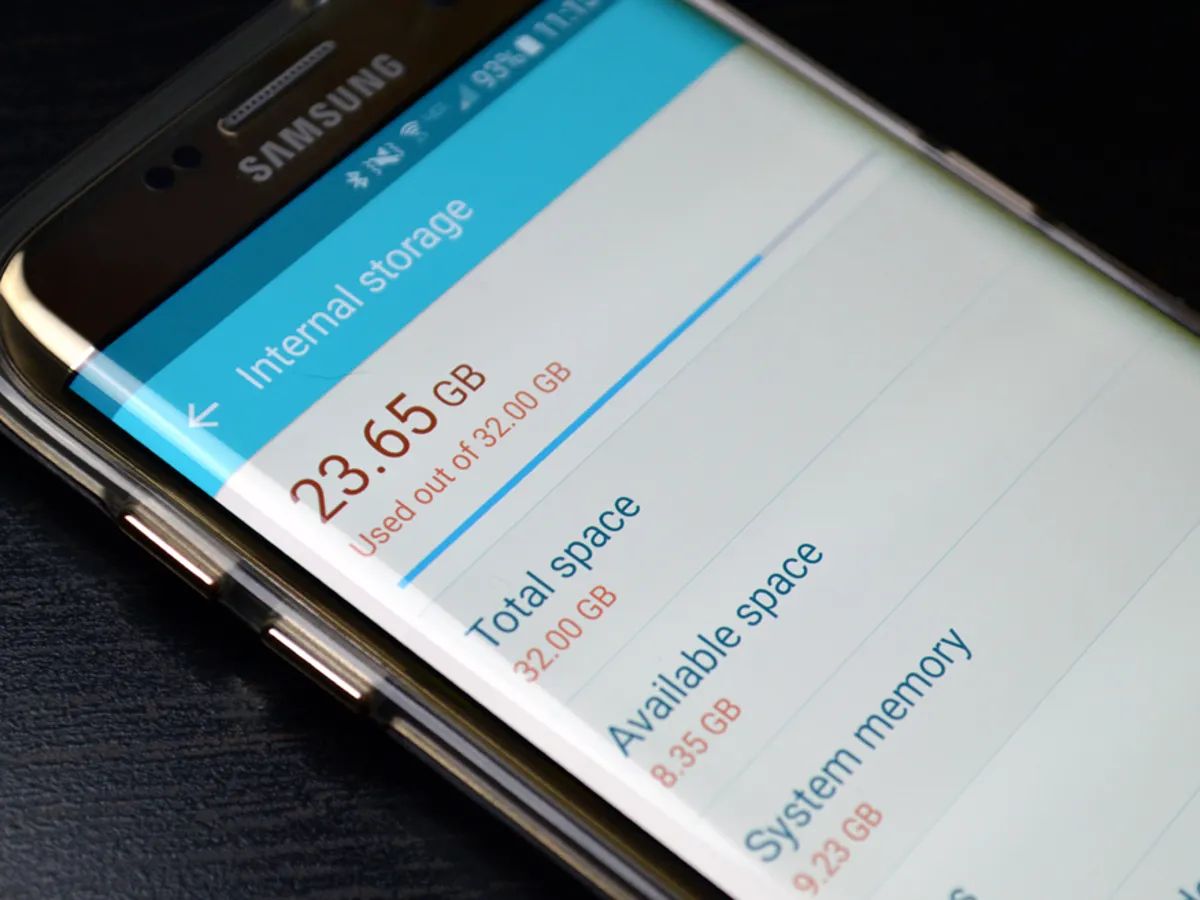
The Galaxy S5 was available in two storage variants: 16GB and 32GB. The base model featured 16GB of internal storage, while the higher-end model offered double the capacity with 32GB. However, it’s important to note that not all of this capacity was available for the user’s files and apps. The operating system and pre-installed apps took up a portion of the internal storage, leaving the user with less space to work with.
To address the limited storage concern, Samsung included a microSD card slot on the Galaxy S5. This allowed users to expand the storage capacity by inserting a microSD card. The device supported microSD cards of up to 128GB, which provided ample space for storing additional apps, media files, and documents.
The ability to insert a microSD card and expand the storage capacity was a significant advantage for Galaxy S5 users. It offered a cost-effective solution compared to purchasing a higher storage variant of the device while also providing flexibility in managing storage space.
With the availability of both internal storage and the option to insert a microSD card, users had the freedom to choose where to store their files and apps. By default, when apps were installed, they were stored in the internal storage. This could quickly fill up the available space, especially for users who downloaded numerous apps or stored a large collection of media files.
However, with the ability to move apps to the SD card, Galaxy S5 owners could optimize their internal storage usage. By relocating apps to the SD card, they could free up space on the internal storage for other purposes, such as storing media files or installing system updates.
In the following sections, we will guide you through the process of moving apps to the SD card on your Galaxy S5, allowing you to take full advantage of the available storage options on your device.
Why you might want to move apps to SD card
As an owner of the Samsung Galaxy S5, you may be wondering why you would want to go through the process of moving apps to the SD card. There are several compelling reasons why you might consider doing so:
1. Free up internal storage: The primary motivation for moving apps to the SD card is to free up space on your device’s internal storage. By doing so, you can reclaim valuable storage space for other apps, media files, or system updates. This is especially important if you have a limited internal storage capacity and find yourself constantly running out of space.
2. Install more apps: Moving apps to the SD card allows you to install and keep a larger number of apps on your device. With the ability to expand storage using a microSD card, you can enjoy a wider variety of applications without worrying about running out of internal storage space.
3. Store media files: If you enjoy taking photos, shooting videos, or downloading music, you know how quickly these media files can eat up your device’s storage. By moving apps to the SD card, you can free up the internal storage space for storing your precious memories and media files, ensuring that you always have space available.
4. Facilitate smoother device performance: When your Galaxy S5’s internal storage is nearing its limit, it can adversely affect the device’s performance, making it slower and less responsive. By moving apps to the SD card, you can alleviate the strain on the internal storage and potentially experience smoother performance.
5. Easy app management: Moving apps to the SD card provides you with better control and organization of your apps. By separating apps stored on the SD card from the internal storage, you can easily identify and manage your apps based on their location, allowing for more efficient app management.
While there are clear advantages to moving apps to the SD card, it’s important to note that there are certain limitations as well. Some apps, particularly system apps and those with specific restrictions imposed by developers, cannot be moved to the SD card. However, we will guide you through the steps and help you determine which apps are eligible for relocation.
Now that you understand the benefits of moving apps to the SD card, let’s dive into the step-by-step process of how to do it on your Samsung Galaxy S5.
Step 1: Check if your app can be moved to SD card
Before you proceed with moving any apps to the SD card on your Samsung Galaxy S5, it is important to determine whether a particular app is eligible for relocation. Not all apps can be moved, as some have restrictions set by their developers that prevent them from being stored on external storage.
Here’s how you can check if an app can be moved to the SD card:
1. Open the Settings app: Go to your device’s app drawer or swipe down from the top of the screen and tap on the gear-shaped “Settings” icon.
2. Navigate to the Application Manager: In the Settings menu, scroll down and select “Apps” or “Application Manager,” depending on your device’s version of Android.
3. View the list of installed apps: You will see a list of all the apps installed on your device. Swipe left or right to browse through the different categories or tabs, such as “Downloaded,” “Running,” or “Disabled.”
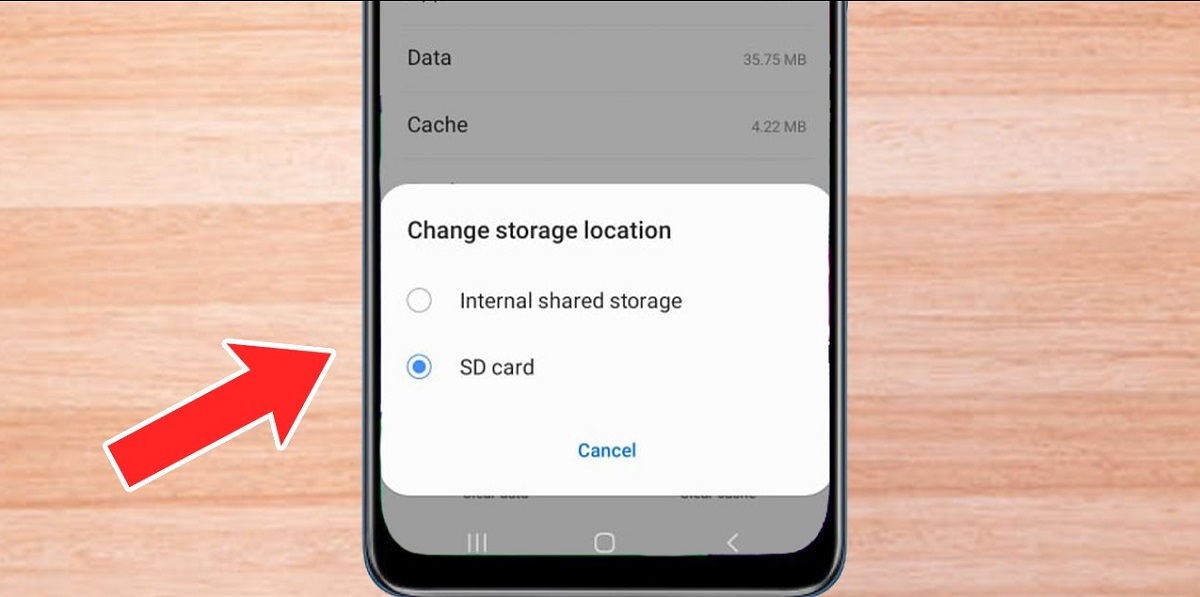
4. Check the app’s storage information: Tap on the app you want to move to open its App Info screen. Scroll down to “Storage” or “Storage used” to view the app’s storage details.
5. Look for the “Move to SD card” option: If the app can be moved to the SD card, you will see an option that says “Move to SD card.” This indicates that the app is eligible for relocation.
If you do not see the “Move to SD card” option, it means that the app is not compatible with being moved to external storage. Some system apps, essential services, or apps with specific restrictions set by their developers cannot be moved. In such cases, you will have to rely on other methods to optimize your device’s storage.
By checking if an app can be moved to the SD card before attempting to relocate it, you can avoid any disappointment or frustration of trying to move an app that is not eligible. This step will save you time and ensure that you focus only on the apps that can be freed from the internal storage.
Now that you know how to check if an app can be moved to the SD card, let’s proceed to the next step of inserting an SD card into your Galaxy S5.
Step 2: Insert an SD card into your Galaxy S5
To begin moving apps to the SD card on your Samsung Galaxy S5, you need to ensure that you have an SD card inserted in your device. The Galaxy S5 supports microSD cards of up to 128GB, providing ample space for storing your apps and media files. Here’s how you can insert an SD card into your Galaxy S5:
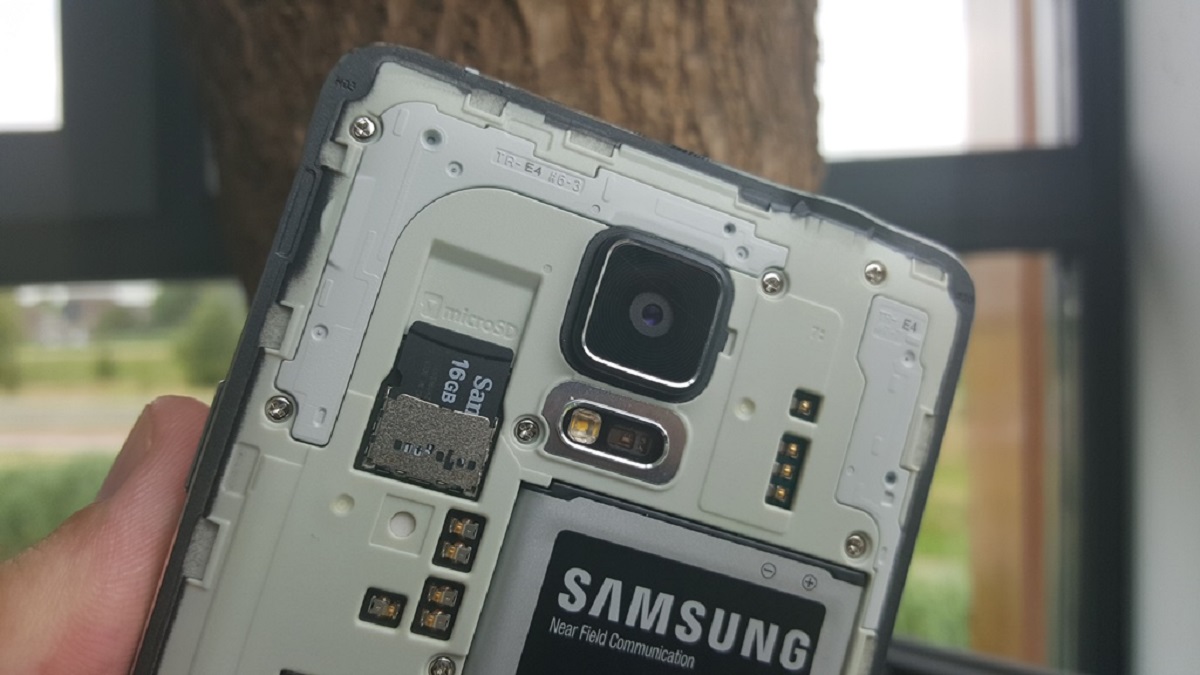
1. Locate the SD card slot: On the Galaxy S5, the SD card slot is located on the back of the device, beneath the back cover. The back cover can be removed by applying gentle pressure to the small gap at the top-left corner of the device and slowly peeling it off.
2. Remove the back cover: Once you have identified the location of the SD card slot, use your fingernail or a small, thin object to pry open the back cover. Start from the top-left corner and work your way around the edges until the entire back cover is loose.
3. Insert the SD card: With the back cover removed, you will be able to see the SD card slot located on the right side of the device. Take your microSD card and align its gold contacts with the contacts on the device’s SD card slot. Gently push the card into the slot until it clicks into place.
4. Replace the back cover: Once the SD card is securely inserted, place the back cover back onto the device. Start from the bottom and press the cover firmly until it snaps back into place. Ensure that all edges are properly aligned and flush with the device.
Congratulations! You have successfully inserted an SD card into your Samsung Galaxy S5. The SD card will now be recognized by your device, and you can proceed to the next step of moving apps to the SD card.
If you encounter any difficulties or have any concerns while inserting the SD card, refer to your device’s user manual or seek assistance from a professional. It’s important to handle the SD card and the device with care to avoid any damage.
Now that you have your SD card inserted, let’s move on to the next step of opening the Application Manager.
Step 3: Open the Application Manager
Now that you have successfully inserted an SD card into your Samsung Galaxy S5, it’s time to open the Application Manager. The Application Manager is the built-in tool in the Android operating system that allows you to manage, view, and control all the apps installed on your device. Here’s how you can access the Application Manager:
1. Open the Settings app: Locate and tap on the gear-shaped “Settings” icon in your device’s app drawer or swipe down from the top of the screen and tap on the gear-shaped icon in the notification panel.
2. Find and select “Apps” or “Application Manager”: In the Settings menu, scroll down until you see the “Apps” or “Application Manager” option. The name may vary slightly depending on your device’s version of Android or manufacturer.
3. View the list of installed apps: Once you are in the Application Manager, you will see a list of all the apps installed on your Galaxy S5. By default, the apps are categorized into different tabs, such as “Downloaded,” “Running,” or “All.” You can swipe left or right to navigate through these tabs.
4. Tap on the app you want to move: From the list of installed apps, find the app that you want to move to the SD card. Tap on its name to open the app’s details page.
The Application Manager provides you with various options and information about the selected app, such as storage usage, permissions, data usage, and more.
Now that you have successfully opened the Application Manager and selected the app you want to move, it’s time to proceed to the next step of tapping on the “Move to SD card” option.
Note: If you do not see the “Move to SD card” option for a particular app, it means that the app is not eligible for relocation. Some system apps, essential services, or apps with specific restrictions set by their developers cannot be moved. In such cases, you will have to explore alternative methods for optimizing your device’s storage.
With the Application Manager open and the desired app selected, let’s move on to the next step of tapping on the “Move to SD card” option to proceed with the app relocation process.
Step 4: Select the app you want to move
Now that you have opened the Application Manager on your Samsung Galaxy S5, it’s time to select the app that you want to move to the SD card. The Application Manager provides you with a list of all the installed apps on your device, categorized into different tabs. Here’s how you can select the app you want to move:
1. Open the Application Manager: Access the Application Manager by going to the Settings app, scrolling down, and selecting “Apps” or “Application Manager,” depending on your device’s version of Android.
2. Browse the list of installed apps: Once you are in the Application Manager, you will see a list of installed apps. Swipe left or right to navigate through different tabs, such as “Downloaded,” “Running,” or “All,” to find the app you want to move.
3. Tap on the desired app: Locate the app you want to move and tap on its name to open the app’s details page. Here, you will find information about the app, including its storage usage and other relevant details.
4. Check if the app can be moved: On the app’s details page, scroll down to find the “Storage” or “Storage used” option. Look for the “Move to SD card” option. If this option is available, it indicates that the app can be moved to the SD card.
It’s important to note that not all apps can be moved to the SD card. Some system apps, essential services, or apps with specific restrictions set by their developers cannot be relocated. If you don’t see the “Move to SD card” option for a particular app, it means that the app is not eligible for moving.
By selecting the app you want to move, you are one step closer to optimizing your device’s storage and freeing up valuable space on your Samsung Galaxy S5.
Now that you have selected the app you want to move, let’s move on to the next step of tapping on the “Move to SD card” option to initiate the app relocation process.
Step 5: Tap on the “Move to SD card” option
After selecting the specific app you want to move from the Application Manager on your Samsung Galaxy S5, it’s time to initiate the app relocation process by tapping on the “Move to SD card” option. Here’s how you can proceed:
1. Access the app’s details page: Open the Application Manager by going to the Settings app and selecting “Apps” or “Application Manager.” Browse through the available tabs, such as “Downloaded,” “Running,” or “All,” and tap on the desired app to open its details page.
2. Locate the “Move to SD card” option: On the app’s details page, scroll down to find the “Storage” or “Storage used” option. Look for the “Move to SD card” option. If this option is available, it indicates that the app is eligible for relocation.
3. Tap on the “Move to SD card” option: Once you have found the “Move to SD card” option, simply tap on it to initiate the app relocation process. Your Galaxy S5 will begin the process of moving the app and its associated data to the SD card.
Please note that the time taken for the app to be moved to the SD card may vary depending on the app’s size and the speed of your device. Larger apps or apps with a significant amount of data may take longer to transfer. It’s important to be patient and avoid interrupting the process to ensure a smooth and successful relocation.
During the app relocation process, it’s advisable to keep your Samsung Galaxy S5 connected to a stable power source to avoid any sudden interruptions that could potentially disrupt the process. Additionally, ensure that your SD card has sufficient storage space to accommodate the app and its data.
Once the app has been successfully moved to the SD card, you will free up valuable space on your device’s internal storage, allowing you to install more apps or store additional media files.
Congratulations! You have successfully tapped on the “Move to SD card” option and initiated the app relocation process on your Samsung Galaxy S5.
Now, let’s move on to the next step of confirming the app’s relocation in order to complete the process.
Step 6: Confirm the app’s relocation
After tapping on the “Move to SD card” option and initiating the app relocation process on your Samsung Galaxy S5, you need to confirm the app’s relocation to complete the process. Here’s how you can confirm the relocation:
1. Monitor the relocation progress: Once you tap on the “Move to SD card” option, your Galaxy S5 will begin the process of moving the app and its associated data to the SD card. Keep an eye on the screen to monitor the relocation progress. You may see a progress bar or indicator that shows the status of the transfer.
2. Wait for the relocation to complete: The time taken for the app to be moved to the SD card may vary depending on factors such as the app’s size and the speed of your device. Larger apps or apps with a significant amount of data may take longer to transfer. It’s important to be patient and avoid interrupting the process to ensure a successful relocation.
3. Check the app’s new location: Once the relocation process is complete, you can verify the app’s new location. In the Application Manager, you can go back to the app’s details page and check the “Storage” or “Storage used” option. The app should now indicate that it is stored on the SD card.
By confirming the relocation of the app, you have successfully freed up valuable space on your device’s internal storage and optimized your storage usage on the Samsung Galaxy S5.
It’s important to note that not all apps can be moved to the SD card. Some system apps, essential services, or apps with specific restrictions set by their developers cannot be relocated. If you do not see the “Move to SD card” option for a particular app in the Application Manager, it means that the app is not eligible for relocation.
Additionally, it’s advisable to regularly check your storage space and review the apps stored on your SD card. Some apps may continue to store certain data or cache files on the internal storage, even after being moved. You can use the Application Manager to clear cache or data for specific apps if needed.
Congratulations! You have successfully confirmed the relocation of the app to the SD card on your Samsung Galaxy S5.
Now, let’s move on to discuss an alternative method of moving apps to the SD card, which involves using a third-party app.
Alternative method: Using a third-party app
If you are unable to move certain apps to the SD card using the built-in Application Manager on your Samsung Galaxy S5, there is an alternative method available. This method involves utilizing a third-party app that specializes in app management and app-to-SD-card functionality. Here’s how you can use a third-party app to move apps to the SD card:
1. Choose a reliable app: Search for and choose a reputable app from the Google Play Store that offers app-to-SD-card functionality. Some popular options include “AppMgr III” (also known as “App 2 SD”), “Link2SD,” and “Move app to SD Card.”
2. Install and launch the app: Download and install the chosen app from the Google Play Store. Once installed, open the app on your Galaxy S5.
3. Grant necessary permissions: Follow the on-screen instructions provided by the app to grant any necessary permissions it requires to access your device’s storage and manage your apps.
4. Select the app you want to move: From within the third-party app’s interface, locate the app that you want to move to the SD card. Select the app by tapping on it.
5. Initiate the app relocation: Within the third-party app, you should find an option to move the selected app to the SD card. Tap on the appropriate button or menu option to initiate the relocation process.
6. Follow the prompts: The third-party app will guide you through the process of moving the app to the SD card. Follow the on-screen prompts to confirm and complete the relocation process.
Using a third-party app can be an effective solution when the built-in Application Manager does not provide the necessary functionality to move certain apps to the SD card. However, it is important to choose a reputable app from the Google Play Store to ensure the security and reliability of the app.
Keep in mind that the specific steps and options within the third-party app may vary depending on the app you choose to use. Additionally, be aware that not all apps may be compatible with third-party app-to-SD-card functionality, especially those with specific restrictions set by their developers.
By utilizing a third-party app, you can expand your options for moving apps to the SD card and optimize your device’s storage on the Samsung Galaxy S5.
Now that you are familiar with the alternative method of using a third-party app, let’s move on to discuss the benefits and limitations of moving apps to the SD card.
Benefits and limitations of moving apps to SD card
Moving apps to the SD card on your Samsung Galaxy S5 has several benefits and limitations that you should be aware of. By understanding both sides of the coin, you can make an informed decision about whether moving apps to the SD card is the right choice for you. Here are the benefits and limitations to consider:
Benefits:
1. Free up internal storage: Moving apps to the SD card helps free up valuable space on your device’s internal storage. This allows you to install more apps, store additional media files, and keep your device running smoothly.
2. Expand storage capacity: The ability to use a microSD card to expand storage capacity provides you with more flexibility and options. You can choose the storage capacity that suits your needs and easily swap out SD cards as needed.
3. Optimize device performance: When your internal storage is nearing its limit, it can negatively impact your device’s performance, making it slower and less responsive. By moving apps to the SD card, you can alleviate the strain on the internal storage and potentially experience smoother performance.
4. Efficient app organization: Moving apps to the SD card allows you to organize your apps more efficiently. You can separate apps stored on the SD card from those on the internal storage, making it easier to manage and locate specific apps.
Limitations:
1. App compatibility: Not all apps can be moved to the SD card. Some system apps, essential services, or apps with specific restrictions set by developers cannot be relocated. This limitation is set by the app itself and cannot be overcome.
2. Performance considerations: While moving apps to the SD card can free up internal storage, it’s important to note that there may be a slight decrease in app performance. Accessing apps from the SD card may take a bit longer compared to when they are stored on internal storage.
3. SD card limitations: SD cards have limitations in terms of read and write speeds. If you use a slower SD card, it may impact the overall performance of your apps or cause delays when accessing app data.
4. Potential data loss: In rare cases, when an SD card malfunctions or gets corrupted, there is a risk of potential data loss. It’s essential to have proper backup measures in place to protect your important data.
Considering the benefits and limitations, moving apps to the SD card can be a valuable solution for managing storage on your Samsung Galaxy S5. However, it’s important to weigh these factors against your specific needs and preferences before making a decision.
Now that you are aware of the benefits and limitations of moving apps to the SD card, you can make an informed choice about how to best optimize your device’s storage.
Conclusion
Optimizing storage space on your Samsung Galaxy S5 is crucial to ensure smooth device performance and accommodate your growing collection of apps and media files. Moving apps to the SD card is a practical solution that allows you to free up valuable internal storage and expand your storage capacity. By following the step-by-step instructions provided in this guide, you can easily move apps to the SD card and make the most of your device’s storage options.
We began by introducing the Galaxy S5 and its storage options, highlighting the benefits of expanding storage using a microSD card. Then, we explored various reasons why you might want to move apps to the SD card, such as freeing up internal storage, installing more apps, and facilitating smoother device performance.
Next, we walked through each step of the app relocation process. We showed you how to check if an app can be moved to the SD card, insert an SD card into your device, open the Application Manager, select the app you want to move, tap on the “Move to SD card” option, and confirm the app’s relocation.
In addition to the built-in Application Manager, we provided an alternative method that involves using a third-party app for moving apps to the SD card. This can be beneficial if you encounter limitations in the built-in functionality or require more control over app management.
Lastly, we discussed the benefits and limitations of moving apps to the SD card. While it can optimize storage and enhance device performance, certain app compatibility issues, performance considerations, and the limitations of SD cards should be taken into account.
With the information and instructions provided in this guide, you can confidently manage apps and storage on your Samsung Galaxy S5. Remember to regularly review your storage space and assess your app usage to maximize the benefits of moving apps to the SD card.
Now, you can enjoy a seamless user experience and ensure your device is always optimized for your needs.