Introduction
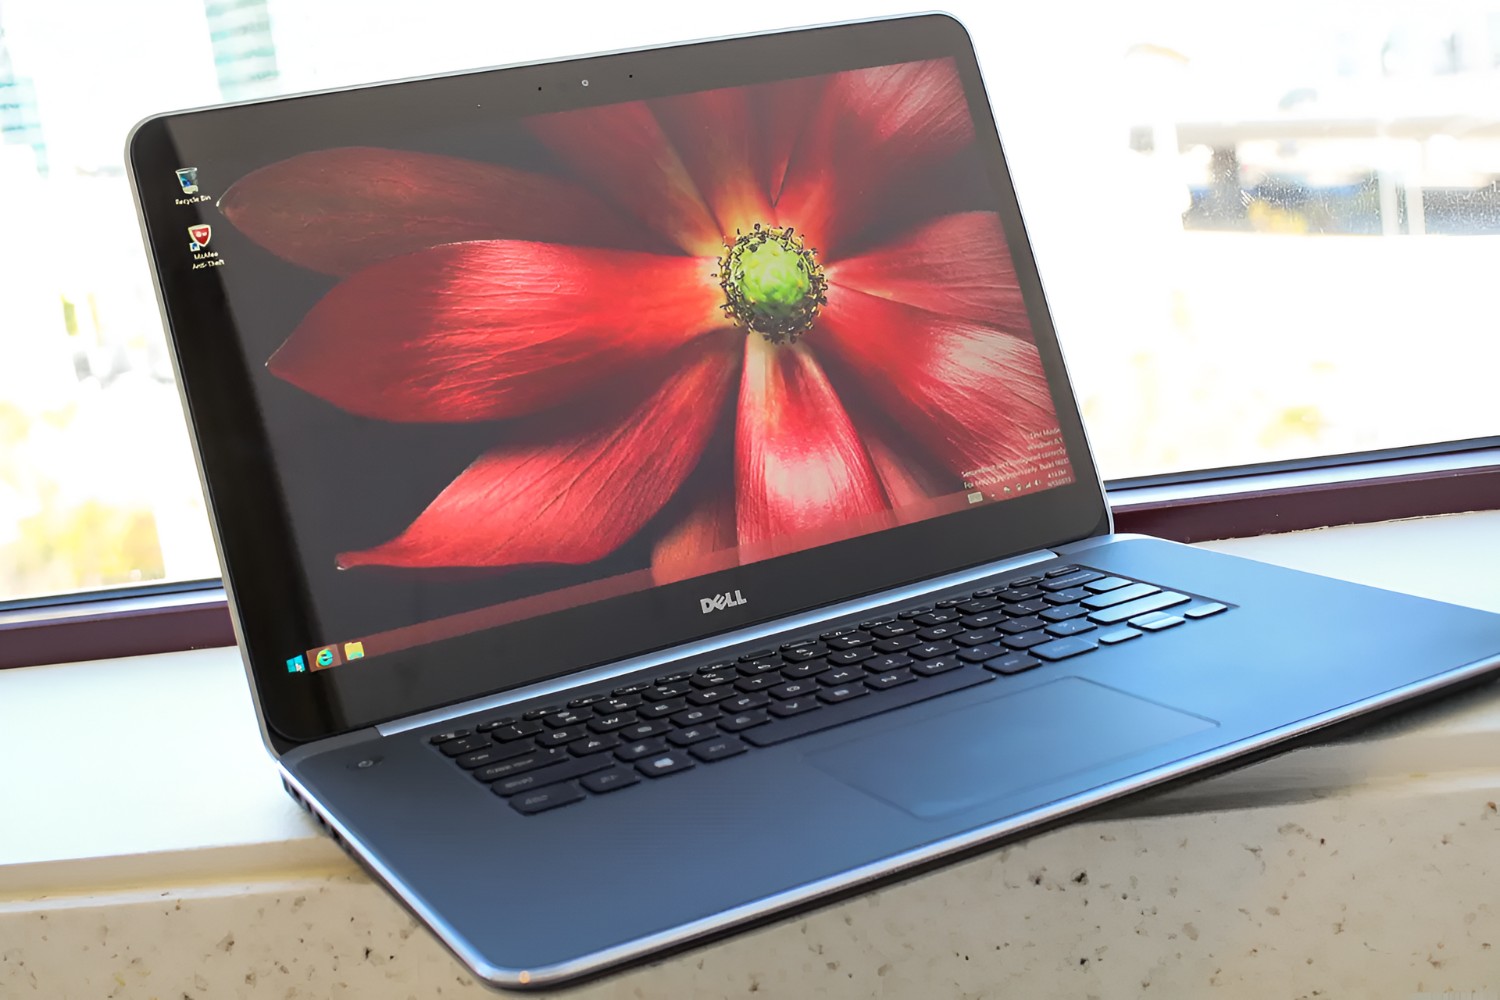
Welcome to the world of Dell Ultrabooks! These sleek and powerful laptops are known for their impressive performance, portability, and stunning screens. The high-quality display is a standout feature that sets Ultrabooks apart from other laptops on the market. However, you may find that the default screen settings don’t quite meet your preferences or needs.
In this article, we will explore various ways to enhance your Dell Ultrabook’s screen. Whether you want to adjust the display settings, change the screen resolution, customize the text and image size, or explore advanced features, we’ve got you covered. By making a few tweaks and utilizing some handy tools, you can make the most of your Ultrabook’s screen and optimize your viewing experience.
Throughout this guide, we will provide step-by-step instructions and tips to help you navigate the settings and features of your Dell Ultrabook with ease. Whether you’re a casual user, a creative professional, or a power user, there are options available to suit your needs. So, let’s get started and unlock the full potential of your Ultrabook’s screen!
Adjusting the Display Settings
One of the first steps to enhancing your Dell Ultrabook’s screen is to adjust the display settings. This allows you to customize the brightness, contrast, and other visual aspects according to your preferences. To begin, follow these steps:
- Click on the Start button and select the Settings gear icon.
- In the Settings window, click on “System” and then navigate to the “Display” tab.
- Here, you can adjust the brightness level by moving the slider left or right. Increase the brightness for a clearer and more vibrant display, or decrease it to reduce eye strain in low-light environments.
- Besides brightness, you can also fine-tune other display settings, such as contrast and color temperature. Experiment with these settings until you find the combination that suits your preferences.
- Additionally, you may want to enable the “Night light” feature, which reduces blue light emissions and helps reduce eye strain during nighttime usage. You can schedule when the Night light is activated or manually toggle it on and off.
By adjusting the display settings, you can create a more comfortable and visually appealing viewing experience on your Dell Ultrabook. Play around with the options to find the perfect balance that meets your needs.
Furthermore, Dell Ultrabooks offer advanced display options, such as HDR (High Dynamic Range) for improved contrast and color accuracy. If your Ultrabook supports HDR, you can enable it in the display settings for a more stunning and lifelike visual experience.
Remember to regularly check and adjust your display settings based on lighting conditions, as well as your specific tasks or preferences. By taking the time to customize these settings, you can significantly enhance the overall quality of your Ultrabook’s screen.
Changing the Screen Resolution
Another way to optimize your Dell Ultrabook’s screen is by adjusting the screen resolution. The screen resolution determines the number of pixels displayed on the screen, which directly affects the clarity and sharpness of the content. Here’s how you can change the screen resolution on your Dell Ultrabook:
- Go to the Start menu, click on the Settings gear icon, and select “System”.
- In the Settings window, navigate to the “Display” tab.
- Scroll down and find the “Resolution” drop-down menu.
- Click on the drop-down menu and choose the desired resolution from the available options.
- Once you’ve selected the new resolution, the screen will automatically adjust to the new settings. If you find that the new resolution doesn’t suit your needs, you can revert to the previous resolution or try a different one.
If you’re unsure which resolution to choose, keep in mind that higher resolutions offer more screen real estate, allowing you to fit more content on the screen. However, higher resolutions may also make text and icons smaller, so consider your eyesight and comfort level when making changes. You can also experiment with different resolutions to find the one that strikes the right balance between clarity and readability.
In addition to the built-in resolution options, some Dell Ultrabooks may support custom screen resolutions. If you have specific resolution requirements, you can create a custom resolution by following the instructions provided by Dell or referring to the user manual.
Changing the screen resolution can significantly impact your viewing experience, especially when working with detailed graphics, videos, or large amounts of text. Take some time to explore different resolutions and find the one that suits your needs and preferences best.
Adjusting the Text and Image Size
Having the ability to adjust the text and image size on your Dell Ultrabook can greatly enhance the readability and visibility of content. Whether you’re struggling with tiny text or want to fit more information on your screen, here’s how you can customize the text and image size:
- Open the Start menu and click on the Settings gear icon.
- In the Settings window, select “Ease of Access”.
- In the left-hand menu, click on “Display”.
- In the “Display” tab, you’ll find the option to change the size of text, apps, and other items. Move the slider to the left to decrease the size, or to the right to increase it.
- You can also enable the “Make everything bigger” toggle, which will scale up the size of all elements on the screen.
- Beneath the text scaling option, you’ll find a link to “Advanced scaling settings”. Click on it to access more granular customization options.
- In the advanced settings, you can adjust the scaling for specific displays or choose to override the default Windows scaling behavior. This is particularly useful if you have multiple monitors with varying resolutions.
- Furthermore, you can adjust the resolution of individual apps by right-clicking on their shortcut or executable file, selecting “Properties”, and navigating to the “Compatibility” tab. Under “Settings”, click on “Change high DPI settings” to make specific adjustments.
By customizing the text and image size, you can ensure that everything on your Dell Ultrabook’s screen is easy to read and visually appealing. Whether you have eyesight issues or simply prefer larger text and images, these settings allow you to create a comfortable viewing experience tailored to your needs.
Keep in mind that adjusting the text and image size may affect the layout and formatting of some applications and websites. If you notice any display abnormalities or issues, you can consider reverting to the default size settings or reaching out to the respective application’s support for further assistance.
Take advantage of the customizable text and image size options to improve readability and increase your productivity on your Dell Ultrabook.
Customizing the Display Orientation
One of the convenient features of Dell Ultrabooks is the ability to customize the display orientation. Whether you prefer a landscape or portrait orientation, you can easily switch between them to suit your needs. Here’s how you can customize the display orientation on your Dell Ultrabook:
- Right-click on the desktop and select “Display settings”.
- In the Display settings window, scroll down to the “Orientation” section.
- From the drop-down menu, choose the desired display orientation: Landscape, Portrait, Landscape (flipped), or Portrait (flipped).
- Once you’ve selected the desired orientation, the screen will automatically rotate to reflect the changes.
- If you have multiple displays connected, you can select the display you want to customize from the “Select and rearrange displays” section.
The ability to customize the display orientation can be particularly useful in certain scenarios. For example, if you’re working with long documents, a portrait orientation may provide a better viewing experience. Landscape orientation, on the other hand, is typically preferred for most general tasks, such as web browsing, word processing, and multimedia consumption.
Additionally, Dell Ultrabooks with touchscreens offer a convenient feature called “Auto-Rotate”. When enabled, the screen orientation will automatically adjust based on the device’s physical position. This feature is especially handy for when you’re using your Ultrabook in tablet mode or in a convertible form factor.
Customizing the display orientation on your Dell Ultrabook allows for greater flexibility and adaptability to different tasks and preferences. Whether you need a portrait mode for reading and editing long documents or a landscape mode for immersive multimedia experiences, Dell Ultrabooks provide the options to suit your needs.
Using Zooming and Magnification Features
Dell Ultrabooks offer built-in zooming and magnification features that can be incredibly useful for users who have visual impairments or simply want to get a closer look at specific content on their screens. Whether you need to zoom in on text, images, or entire web pages, here’s how you can utilize these features:
- Open the Start menu and click on the Settings gear icon.
- In the Settings window, select “Ease of Access”.
- In the left-hand menu, click on “Magnifier”.
- Toggle the “Magnifier” switch to enable the feature.
- You can choose between three magnification options: “Larger”, “Medium”, or “Smaller”. Select the size that suits your needs.
- Underneath the size options, you’ll find additional settings to customize the magnifier, such as turning on color inversion, smooth edges, or tracking the keyboard focus.
- When the magnifier is activated, you can use the keyboard shortcuts (Windows key + Plus sign) or (Windows key + Minus sign) to zoom in or out. Alternatively, you can use the magnifying glass icon in the system tray to adjust the zoom level.
In addition to the magnifier feature, many web browsers also offer zooming capabilities. You can use the following keyboard shortcuts to zoom in or out on web pages:
- Ctrl + Plus sign (or Ctrl + Scroll up) to zoom in.
- Ctrl + Minus sign (or Ctrl + Scroll down) to zoom out.
- Ctrl + 0 (or Ctrl + 0 Scroll) to reset the zoom level to the default.
The zooming and magnification features on Dell Ultrabooks provide a convenient way to customize the screen display according to your needs. Whether you require larger text for improved readability or want to focus on specific details within images or documents, these features make it possible.
Remember to adjust the zoom level or magnification setting as needed, depending on the content you’re viewing or working with. Experiment with the various options to find the zoom level that offers the best visibility and comfort for your specific requirements.
Utilizing External Displays
One of the advantages of using a Dell Ultrabook is the ability to connect and utilize external displays. This allows you to extend your screen real estate, boost productivity, and enjoy a more immersive viewing experience. Here’s how you can make the most of external displays with your Dell Ultrabook:
- Check the available ports on your Dell Ultrabook. Common ports for connecting external displays include HDMI, DisplayPort, and USB-C.
- Choose the appropriate cable or adapter to connect your Ultrabook to the external display. Ensure that both devices are turned off before making any connections.
- Connect one end of the cable to your Ultrabook’s video output port and the other end to the corresponding port on the external display.
- Power on both your Ultrabook and the external display. The display should automatically detect the connection and show your Ultrabook’s screen.
- If the external display doesn’t show anything, you may need to go to the display settings on your Ultrabook and select the appropriate display mode (e.g., “Extend” or “Duplicate”).
- Once connected, you can customize the settings for each display. Right-click on the desktop, select “Display settings”, and adjust the screen resolution, orientation, and other display preferences.
- In some cases, you might need to update your Ultrabook’s graphics drivers for optimal performance with the external display. Visit the Dell support website or use the Dell Update utility to ensure you have the latest drivers installed.
Utilizing external displays with your Dell Ultrabook can greatly expand your workspace and improve multitasking capabilities. You can have different applications open on each display, making it easier to work on multiple projects simultaneously or compare documents side by side.
External displays are also beneficial for professionals who require color accuracy, such as graphic designers, photographers, and video editors. You can connect high-resolution displays with enhanced color spaces to ensure accurate representation of your work.
Remember to adjust the display settings based on your preferences and the capabilities of the external display. You can fine-tune the resolution, orientation, and other settings to create a seamless and productive multi-monitor setup.
With the flexibility to connect and utilize external displays, your Dell Ultrabook becomes a versatile workstation that adapts to your specific needs and workflow.
Enhancing the Screen with Windows Ease of Access Features
Windows operating systems offer a range of built-in Ease of Access features that can further enhance your Dell Ultrabook’s screen. These features are designed to accommodate users with specific visual needs or preferences. Here’s how you can make use of these features to optimize your screen experience:
- Open the Start menu and click on the Settings gear icon.
- In the Settings window, select “Ease of Access”.
- Explore the various options available under the “Vision” section, such as Narrator, Magnifier, Color filters, High contrast, and more.
- For example, the Narrator feature can read aloud on-screen text and buttons, making it beneficial for those with visual impairments. You can customize its settings to adjust the speed, voice, and other preferences.
- The Magnifier feature, as mentioned earlier, offers a built-in zooming and magnification functionality.
- Color filters allow you to alter the screen’s color palette according to your specific needs. For example, you can enable a grayscale filter for better contrast or invert colors to reduce eye strain.
- The High contrast mode increases the contrast between text and background, making it easier to read for individuals with visual impairments.
- Explore other options available in the Ease of Access settings to discover features that can enhance your screen experience.
Windows Ease of Access features provide a valuable toolkit to customize your Dell Ultrabook’s screen based on your preferences and visual requirements. Whether you need assistance with reading, color differentiation, or general visibility, these features can make a significant difference in your user experience.
Additionally, certain third-party software and applications can further enhance your screen experience. For example, there are color calibration tools available that can help you fine-tune the color accuracy and vibrancy of your Dell Ultrabook’s screen, providing a more enjoyable visual experience for tasks such as photo editing or graphic design.
Take the time to explore and experiment with the various Ease of Access features and other available tools to find the combination that works best for you. By proactively customizing your screen experience, you can make your Dell Ultrabook more accessible and suited to your individual needs.
Improving the Screen Clarity with the Dell PremierColor Application
To further enhance the screen clarity and color accuracy on your Dell Ultrabook, you can leverage the Dell PremierColor application. This powerful software allows you to fine-tune various visual settings to achieve the best possible display quality. Here’s how you can use the Dell PremierColor application:
- Launch the Dell PremierColor application on your Ultrabook. If you don’t have it installed, you can download it from the Dell support website or use the Dell Update utility to check for the latest version.
- Upon opening the application, you’ll have access to a range of settings and configurations to optimize your screen’s performance.
- One of the key features of PremierColor is the ability to calibrate the screen to ensure accurate colors representation. This option is especially useful for professionals involved in graphics, photography, or video editing.
- By following the on-screen instructions, the application will guide you through the calibration process, allowing you to set the brightness, contrast, color temperature, and other parameters to achieve the desired visual output.
- Furthermore, the Dell PremierColor application offers various predefined display modes for specific uses, such as Multimedia, Reading, Gaming, and more. You can select the appropriate mode based on your activities to optimize the screen settings accordingly.
- If you prefer manual customization, the application also provides advanced settings that allow you to fine-tune the hue, saturation, sharpness, and other visual aspects to your liking.
- Additionally, some Dell Ultrabooks equipped with PremierColor may feature an UltraSharp or InfinityEdge display, which offers higher resolution, deeper colors, and enhanced clarity for a more immersive viewing experience.
The Dell PremierColor application empowers you to take full control of your Ultrabook’s screen, ensuring optimal color accuracy, vibrancy, and clarity. Whether you’re engaged in creative work, watching movies, or simply browsing the web, fine-tuning these settings can significantly enhance your visual experience.
Remember to periodically check for updates to the PremierColor application to ensure you have access to the latest features and improvements. Dell is committed to providing ongoing support and enhancements to user experience.
By harnessing the capabilities of the Dell PremierColor application, you can unlock the true potential of your Dell Ultrabook’s screen, enjoying vivid colors, precise details, and an immersive visual experience like never before.
Final Thoughts and Additional Tips
Optimizing your Dell Ultrabook’s screen can greatly enhance your overall computing experience. By following the tips and utilizing the features discussed in this article, you can tailor the display settings to meet your specific needs and preferences. As a final recap, here are some additional tips to consider:
- Regularly clean your Ultrabook’s screen to maintain its clarity and prevent dust or smudges from affecting your viewing experience. Use a soft, lint-free cloth and non-abrasive cleaning solutions to gently wipe the screen.
- Adjust the screen brightness according to the ambient lighting conditions. Lower the brightness in dimly lit environments to reduce eye strain, and increase it in well-lit areas for better visibility.
- Consider using a screen protector or privacy filter to not only protect your Ultrabook’s screen from scratches and fingerprints but also enhance privacy by narrowing the viewing angle.
- Experiment with different font types and sizes in applications to find the ones that are most comfortable and legible for you.
- If you work with color-critical tasks, consider investing in a color calibration device to ensure accurate and consistent color representation on your Dell Ultrabook’s screen.
- Take breaks and practice proper ergonomics while using your Ultrabook. Frequent breaks and maintaining a comfortable viewing angle can reduce eye strain and promote overall well-being.
Remember, every individual has different visual preferences and requirements. Take the time to customize and fine-tune the settings to create a screen experience that works best for you.
Lastly, stay updated with the latest software and firmware releases from Dell. These updates often bring performance improvements, new features, and bug fixes that can further enhance your Ultrabook’s screen functionality.
By implementing these tips and exploring the various options available, you can unlock the full potential of your Dell Ultrabook’s screen and enjoy a visually immersive computing experience.