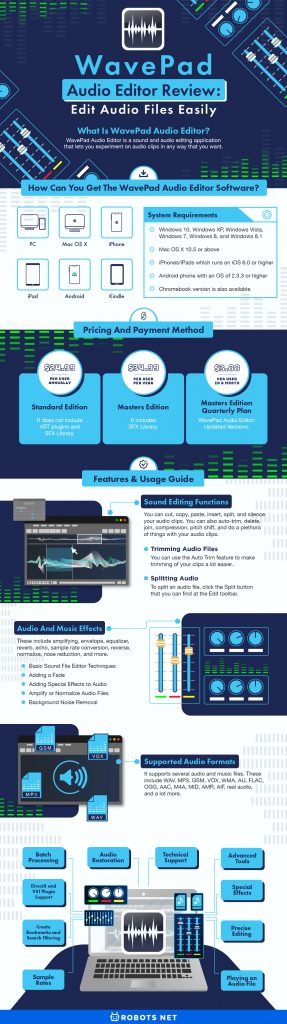
Everybody loves music. Most of us love to put some flavor into our music. How do we do that? We try to edit and add some effects to our favorite audio, sound, or music until we are satisfied with the outcome. This is one of the reasons why audio editors are becoming more and more popular to aspiring sound editors and hobbyists. One of the popular audio editors is the WavePad Audio Editor.
In this article, we will discuss what WavePad Audio Editor is, how we can have this, and the uses of some of its features. Moreover, we will discuss some of its competitors that can help music lovers everywhere.
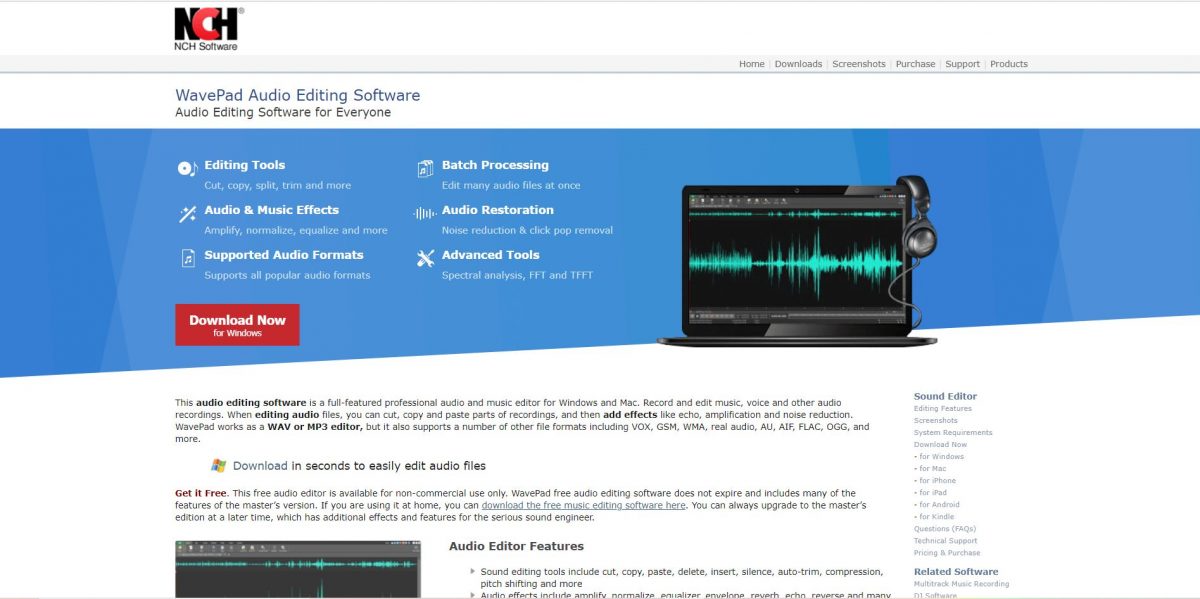
What is WavePad Audio Editor?
WavePad Audio Editor is a sound and audio editing application that lets you experiment on audio clips in any way that you want. Giving additional purpose to your audio clips is also possible thanks to this program. Moreover, it has a lot of features that you can use. You can record, add effects, and edit your favorite audio and save it for future use. However, you can also send your worked audio to yourself, so you can continue listening or editing it on another device. Also, you can share it with your friends for them to listen to.
A tweak and a twitch here and there can lead you to achieve an audio recording that is of high quality. Its advanced audio tools will help you customize your audio in any way that you want.
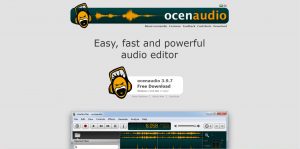
If you like what you’re reading, you might want to check out our reviews of Audacity and Ocenaudio.
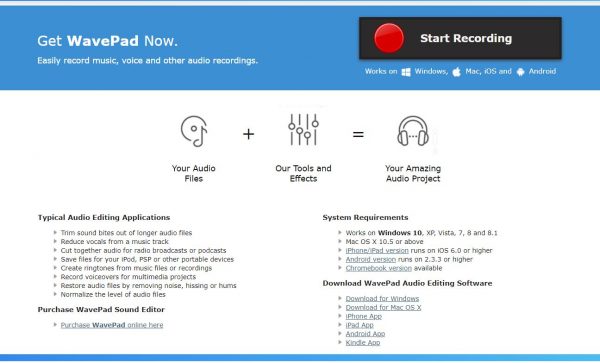
How Can You Get The WavePad Audio Editor Software?
WavePad Audio Editor: System Requirements
- Windows 10, Windows XP, Windows Vista, Windows 7, Windows 8, and Windows 8.1
- Mac OS X 10.5 or above
- iPhones/iPads which runs on iOS 6.0 or higher
- Android phone with an OS of 2.3.3 or higher
- Chromebook version is also available
WavePad Audio Editor: Pricing and Payment Method
You can get this audio editor for free. If you will just use it in the comfort of your home, you can have the free version and enjoy some of its features. You always have an option to upgrade if you want to have full access to its additional effects and features. The paid plans are the following:
Standard Edition
- This costs $24.99 per user annually.
- It does not include VST plugins and SFX Library.
Masters Edition
- This costs $34.99 per user per year.
- It includes SFX Library.
Masters Edition Quarterly Plan
- $3.88 per user in a month.
- You can use your Visa, Mastercard, or PayPal to pay for your preferred plan.
- WavePad Audio Editor: Updated Versions.
Features & Usage Guide
Sound Editing Functions
You can cut, copy, paste, insert, split, and silence your audio clips. You can also auto-trim, delete, join, compression, pitch shift, and do a plethora of things with your audio clips.
Trimming Audio Files
You can use the Auto Trim feature to make trimming of your clips a lot easier. You just have to click on the Trim button that you can find from the Edit toolbar. After that, select the “Auto Trim Silence from the start and end of the File.” You can also Trim Silences from your file. Clicking this option will open the Trim Silence window where you can set your preferred Silence Threshold and Length before trimming.
You can also trim everything before and after the current selection by selecting Trim on the Edit menu. On the other hand, place your cursor on your audio file then select the Trim option that you prefer to trim everything before and after your cursor.
Splitting Audio
Click on the Edit toolbar and choose Split. A list of different splitting options will then be displayed. These include Split at Cursor, Split Automatically, Split at Silences, Split at Bookmarks, Split into Component Channels, and Split into Equal Parts. You can use your cursor to choose the portion of the audio file that you want to split. The original file will not be affected. Remember that you have to save all the changes you’ve made.
To split an audio file, click the Split button that you can find at the Edit toolbar. This will show a list of options you can choose from. If you want to immediately split your audio file, you can choose between Split at Cursor or Split into Component Channels. However, if you choose the Split to Equal Parts option, a Split to Multiple Parts dialog will open. From there, click on the Split button to split your file.
Audio and Music Effects
These include amplifying, envelope, equalizer, reverb, echo, sample rate conversion, reverse, normalize, nose reduction, and more.
Basic Sound File Editor Techniques
Two tools are of great help when it comes to editing, and these are Undo and Redo. Undo lets you undo the last action that you did, and Redo lets you put back what you erased. You can use the Cut, Copy, and Paste buttons to move your selections on the audio file that you are working on. When you click on the Copy button, the selection will load on the clipboard, which lets you paste it anywhere. You need not worry because the original file will be preserved. Moreover, the selection will also load on the clipboard when you click on the Cut button. However, it will remove the selection from its original location.
After you Copy or Cut to load a selection to the clipboard, go to a new location. Click on the part where you want to add the selection that you copied or cut, then click on the Paste button. To delete a selection, just click the Delete option. You can also remove audio from the selection by selecting the Silence option. Don’t worry about the timing as it will just clear all audio from the selection.
Adding a Fade
When you fade in and out of audio, you will help the ear to become accustomed to the audio file. To Fade In, select the part you wish to start with. You can find the selection length in the details next to the Play control. To listen to your selected portion, click on the Play button and make your adjustments. Click on the Fade button on the Levels tab and select Fade In. On the other hand, to make a Fade Out, make a selection and click on the Fade button and click Fade Out. You can also choose Fade Out and Trim to remove the end of the audio file after the selected portion.
Adding Special Effects to Audio
You can choose from a wide range of effects that you want to apply to your audio files. To add effects, go to the Effects bar in the Toolbar and click on the Special Effects button. You will then see a list of effects that you can use on your audio file or a particular portion of your audio file. An example of this is the Echo feature which has different types to choose from. There are also sliders that you can configure as you’re using them.
Reverb, on the other hand, is similar to Echo. A reverb effect reflects the sound several times. You can also use the presets to copy the type of reverb that you want to use. Using the slider is also helpful: just adjust the sliders to your desired levels of reverb. You can always experiment with the effects that you will use on your audio file. Besides, you can use the Undo button if you are not satisfied with the effects that you applied, so you can try another one.
The Speed button lets you adjust the speed, pitch, or a combination of both. Choose your desired percentage, and click on the Play button to listen to the preview of your audio file. Use Reverse to make a selection of audio files play backward.
Amplify or Normalize Audio Files
The Amplify tool will help you make your audio file sound quieter or louder. To do this, go to the Levels tab then click Amplify. Doing this will select your entire audio file and open the Amplify dialogue box. If you want to amplify only a portion of your audio file, make a selection before you click Amplify. You can either enter your preferred Gain percentage or adjust the slider to make adjustments to your Gain. There is also the Presets list, which gives you readily made options to choose from. Click on the Play button to hear a preview.
Also, you can press the By-Pass button while your preview is playing. This will allow you to hear the unedited version of the audio. Once you’re satisfied, press the Apply button.
Normalizing the audio file helps to increase the volume of the loudest peak to the maximum level. This is usually the last step when working on an audio file. To normalize your audio file, click on the Normalize button. This feature is included in the Levels toolbar. This will then open a dialogue box where you can adjust the preset or enter your preferred values. When you are done with the settings, click the Apply button.
Background Noise Removal
There are different combinations of effects that you can use for background noise removal on an audio file. One of the basic methods is clicking on the Cleanup button from the Effects toolbar. After that, click on Noise Reduction and Audio Spectral Subtraction. You can enter your preferred percentage, or click on the presets to choose what best fits on the audio file that you are working on. Click on Reduce Noise afterward. You can listen to your audio file after completing the spectral subtraction. If there is still unwanted noise on your audio file, click Cleanup, Effects, and then “Multi-band noise gating.” Again, you can enter your preferred adjustments or click on the presets. After that, click Reduce Noise again. You can experiment more until you find what best suits your audio file.
Supported Audio Formats
It supports several audio and music files. These include WAV, MP3, GSM, VOX, WMA, AU, FLAC, OGG, AAC, M4A, MID, AMR, AIF, real audio, and a lot more.
Batch Processing
It allows you to create and work on many audio files all at once. You can also apply effects to your files without going through every single one. Moreover, you can convert thousands of your files into a single project.
DirectX and Integrated Virtual Studio Technology (VST) Plugin Support
It gives professionals access to its wide range of additional tools and effects.
Audio Restoration
It includes noise reduction and clicks pop removal.
Advanced Tools
These tools help in analyzing frequency and sound using spectral analysis, speech synthesis, voice changer, FFT, and TFFT.
Special Effects
These include reducing vocals, distortion, chorus, and many more.
Precise Editing
You can do this by scrubbing, searching, and bookmarking audio.
Create Bookmarks and Search Filtering
This will help to quickly and efficiently find, recall, and assemble segments for your long audio files. You can also set bookmarks with your multiple files as you work.
Sample Rates
The sample rates that this application supports range from 6 to 96kHz, stereo or mono, 8, 16, 24, or 32 bits.
Playing an Audio File
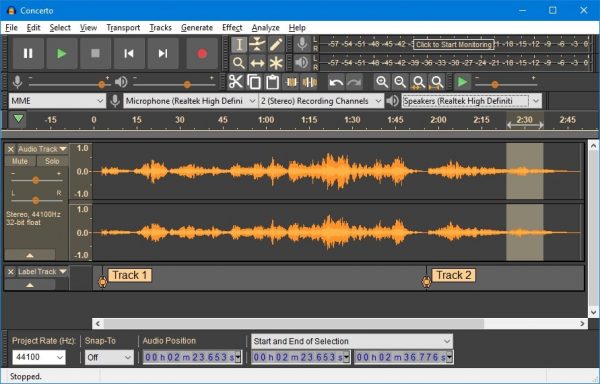
To play the active file, you just need to click on the Play button that you will see at the bottom of the screen. Click on Stop to pause the playback. You can use the rewind and fast forward buttons to navigate your audio file. To have control over your editing point, you can use the scrub tool. If you want to listen to just a part of your audio file, select the part that you want to hear, then click and drag your mouse. This way, you can highlight the waveform. To be able to listen to a specific part, just click on the waveform where you intend to start then click the Play button.
Saving and Converting Audio Files
After completing all the edits on your audio file, you can now save it. If you are saving a new audio file or new recording, click the Save button that you can find at the Home toolbar. You can also use the shortcut key Ctrl + S. Enter your desired file name for your audio, select your desired file type, and then click Save. However, clicking on the Save button will overwrite your old audio file. Make sure you are careful with your project if you want to keep your existing file. With that, you may need to choose Save File As from the drop-down arrow on the Save button.
You can always choose your preferred file type as you save your audio file. Different file types mean different audio files.
Creating and Opening Audio Files
Creating a new or opening your audio file is easy with WavePad. If you want to make a new blank project, click on the New icon on the Home tab. You can also use the shortcut key Ctrl + N. On the other hand, click the Open File icon or use the shortcut key Ctrl + O to open your file. You can then browse your file and then click on the file that you want to open. You can always work on different audio files simultaneously. To do that, minimize the window of the file that you are not yet working with and choose a new file to work on. To choose a file, just click on its filename that you will see at the bottom of the Project window. There are also options at the Menu window list that you can arrange.
Recording an Audio File
It is very easy to record an audio file using WavePad. You can record an audio file to create a new project by pressing the New option. After that, click on the Record button to start recording. Once finished, click the Stop button. You might want to play your recording to check if everything is up to your liking.
In case you have several microphones, just select the correct one. You can do this by clicking on the Options button at the upper right corner of the window and going to the Recording tab. Choose the correct microphone among the list of devices. You can also make adjustments to your settings on the Record Mixer. Select your microphone from the list and click on Properties. When you are done entering your preferred settings, click OK to save the changes. Return to WavePad then click OK to save your recordings.
Intuitive and Easy-to-Use User Interface
This helps you to easily and quickly edit your audio. With that, you can finish your editing in minutes.
Audio and Voice Recordings Adjustments
This is for easy adjustment on speed, pitch changes, voice change, noise reduction, and effects.
Lossless MP3 Editing
This feature helps to maintain the quality of your MP3 while editing the music.
Customizable Wave Editor
Allows you to adjust the audio, recording, UI appearance, playback, and settings of the short keys.
Technical Support
Tutorials and samples are provided. These will guide you with the features and tools usage.
Getting Started with WavePad Audio Editor
Navigating the Interface
WavePad’s layout provides quick access to the features that you will often use. At the top of your screen, you can find the Home tab, Edit tab, Levels tab, Effects tab, Tools tab, Suite tab, and the Custom tabs. At the Home tab, you will see all the tools needed, most especially by beginners. For you to attain a much more advanced audio editing, you will need to use all the tabs available.
You may also make use of the custom tab if you prefer effortless editing. With that, you may need to use and put all your favorite tools in one place. This is possible by clicking on the Customize tab. After that, click on the tabs that you want to see on the display.
In addition to this, you will see the Play button, file information, and the play clock at the bottom of the screen. Also, the volume level meter and the zoom controls are along with them. When there are multiple files open, you will see them on the section above the Play button section. If you are going to work on a particular file, just click on its filename. At the bottom of the project window, there are the buttons for sample edit modes, waves, and channel display modes, spectrograph of the frequency, and zoom controls. There is also the Help icon that you will find in the upper-right corner. You can find the manuals and the tutorials that you need there.
Pros and Cons of WavePad Audio Editor
Pros
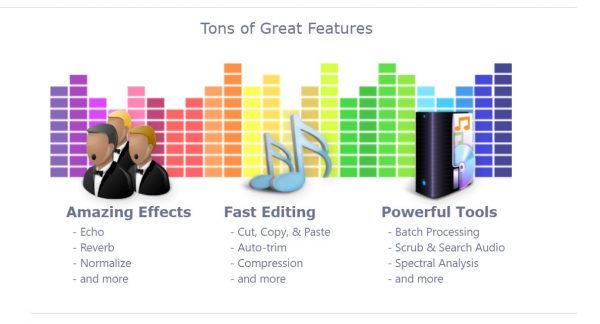
- Amazing effects
- Fast editing
- Customizable and helpful toolbar
- Powerful tools
- Easy-to-use interface
- VST plugin support
- Batch processing
Cons
- Audio restoration may take a while
WavePad Audio Editor Competitors
Audacity
It is an easy-to-use and versatile multi-track audio editor. It provides a wide range of tools that are of great help in editing audio files. With these tools, you’ll be able to create all kinds of music. Moreover, it is an ideal choice for everyone who is into podcasting or music recording. Aside from its amazing tools, it supports a majority of audio formats.
Adobe Audition
This is a comprehensive toolset that is perfect for mixing and mastering audio content. It provides the best audio cleanup and is designed to speed up the workflows on video production and audio finishing as well. Moreover, it helps to deliver refined audio content all the time. It also supports a wide range of audio file formats, which you can easily manage through its interactive interface.
Pro Tools
This is a standard cross-platform solution that can be used by students, musicians, podcasters, and filmmakers. It provides an easy-to-use interface, which makes it an ideal tool for beginners. Moreover, the improvements made and its amazing features will help you to better showcase your creativity. With that, you’ll be able to create a powerful audio file.
Final Thoughts on WavePad Audio Editor
People are always into doing something new and creative. They want to become different about their favorites. As for editing and making recordings, people have different preferences as to what platform they are going to use. WavePad Audio Editor is one of the best options when it comes to audio editing. Its flexible interface makes it an ideal choice for amateur and professional editors. Moreover, it provides a lot of amazing features and powerful tools, which can help you to bring out the creativity in you. This editing application is one of the best audio editors available today.