Introduction
When it comes to browsing the internet, security is of paramount importance. Antivirus software and built-in browser protection play a crucial role in safeguarding our online activities from potential threats. However, there are instances when you may need to temporarily disable the antivirus features on your Chrome browser. Whether it's for troubleshooting purposes, compatibility issues, or specific tasks that require the antivirus to be turned off, knowing how to do so can be invaluable.
In this comprehensive guide, we will explore various methods to turn off antivirus on Chrome. From disabling Chrome's built-in antivirus to managing antivirus extensions and temporarily deactivating antivirus software on your computer, we will cover everything you need to know. By understanding these methods, you can navigate the process with confidence and ensure a seamless browsing experience while addressing your specific needs.
So, if you've ever wondered how to disable antivirus on Chrome or encountered situations where it became necessary, you're in the right place. Let's delve into the step-by-step processes and gain the knowledge to manage antivirus settings effectively, empowering you to make informed decisions about your online security while using the Chrome browser.
Method 1: Disabling Chrome's Built-in Antivirus
Google Chrome, one of the most popular web browsers, comes equipped with a robust built-in security feature designed to protect users from malicious websites and downloads. This feature, known as Safe Browsing, actively scans web pages and files for potential threats, providing a layer of defense against harmful content. However, there are scenarios where you may need to disable this built-in antivirus temporarily.
Here's how you can disable Chrome's built-in antivirus:
-
Open Google Chrome: Launch the Chrome browser on your computer by clicking on its icon in the taskbar or desktop.
-
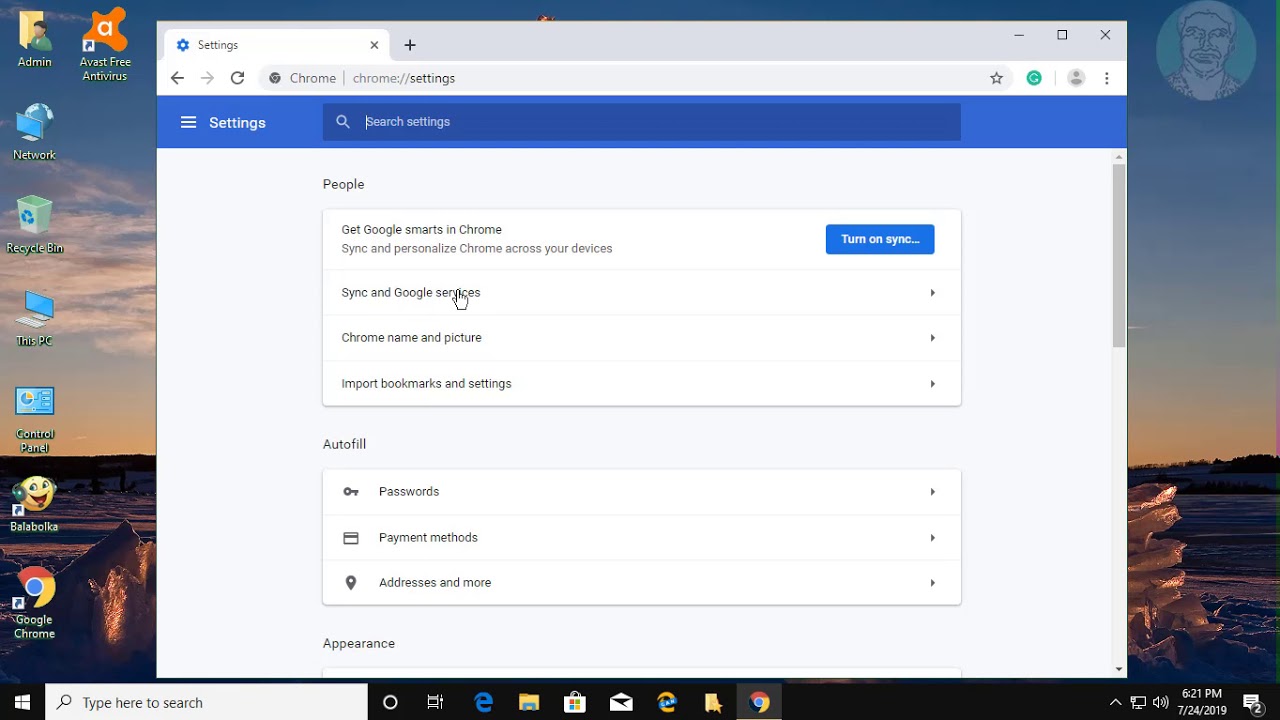
Access Settings: Once Chrome is open, click on the three-dot menu icon located in the top-right corner of the browser window. From the dropdown menu, select "Settings."
-
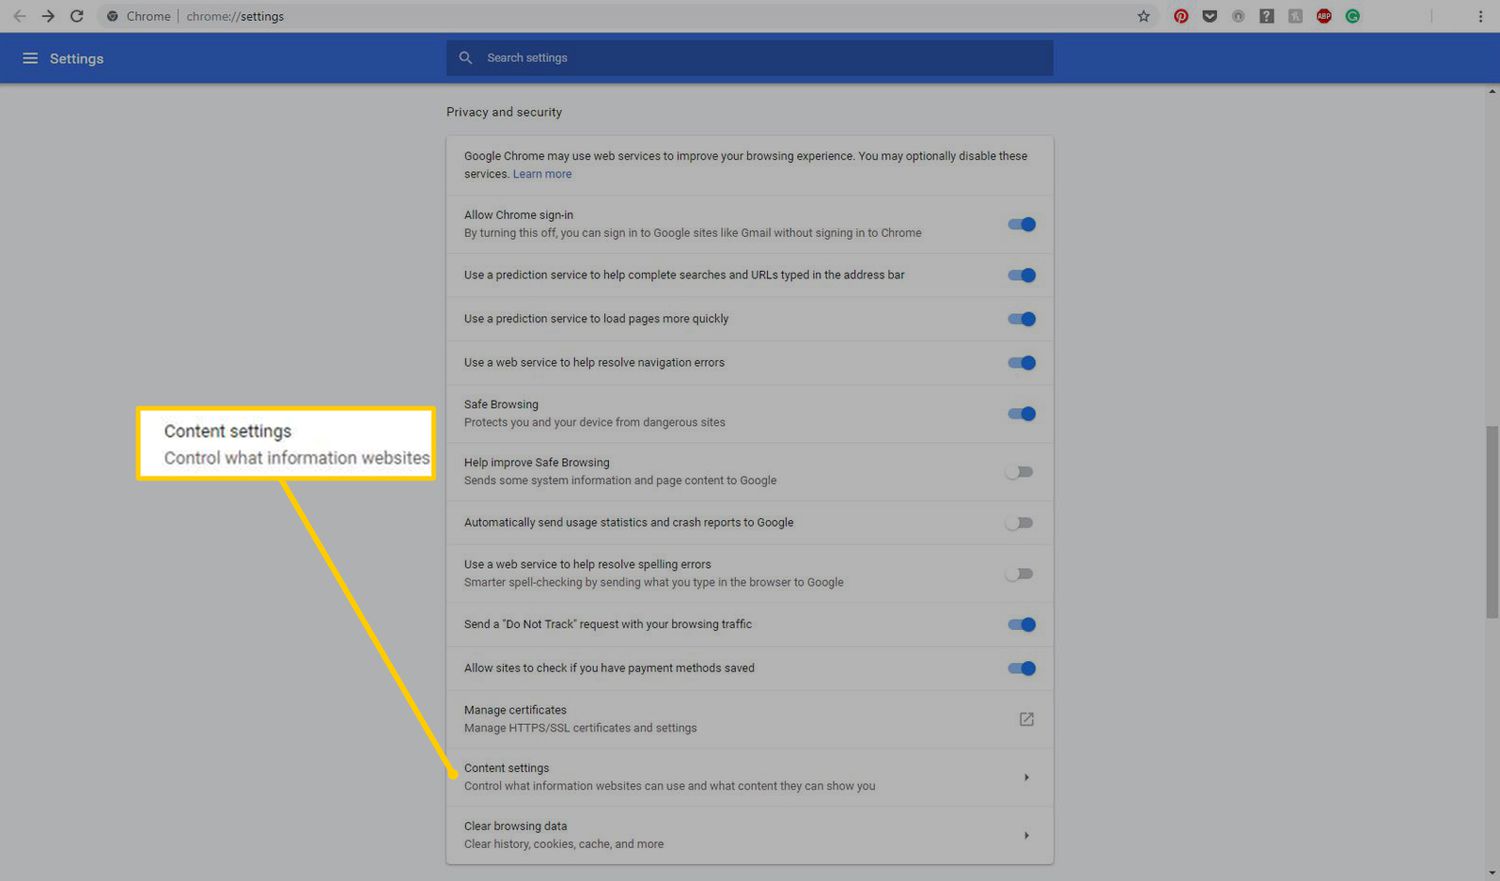
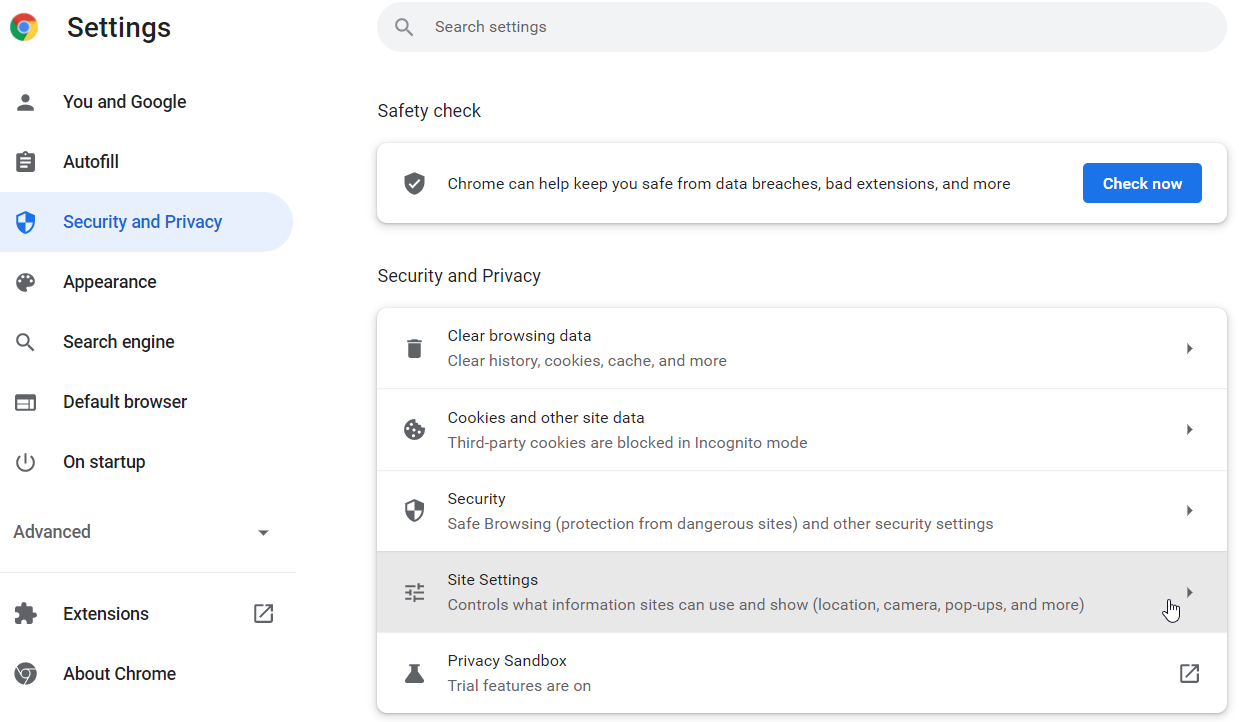
Navigate to Privacy and Security: In the Settings menu, scroll down and click on "Privacy and security" in the left-hand sidebar.
-
Disable Safe Browsing: Under the "Security" section, you will find the "Safe Browsing" option. Click on it to access the settings.
-
Turn Off Safe Browsing: Within the Safe Browsing settings, you will see the option to "Protect you and your device from dangerous sites." To disable Chrome's built-in antivirus, toggle off this feature.
By following these steps, you can effectively disable Chrome's built-in antivirus, allowing you to proceed with tasks that may require its temporary deactivation. It's important to note that while this action can be useful in specific situations, it's essential to exercise caution and re-enable the antivirus feature once the intended task is completed.
Understanding how to manage Chrome's built-in antivirus empowers users to navigate their browsing experience with flexibility and control. Whether it's for troubleshooting website access or addressing compatibility issues, the ability to disable and enable this feature ensures that users can tailor their security settings to suit their individual needs.
By mastering the process of disabling Chrome's built-in antivirus, users can harness the full potential of the browser while maintaining a proactive approach to online security. This knowledge not only enhances the user experience but also contributes to a more informed and empowered online community.
Method 2: Disabling Antivirus Extensions
In addition to Chrome's built-in antivirus features, users often rely on antivirus extensions to bolster their online security. These extensions, designed to provide an extra layer of protection against various online threats, can be valuable assets in safeguarding browsing activities. However, there are instances when it becomes necessary to disable these antivirus extensions, whether for troubleshooting purposes, compatibility concerns, or specific browsing requirements.
Here's how you can disable antivirus extensions in Chrome:
-
Access Chrome Extensions: Start by opening Google Chrome on your computer. Once the browser is open, click on the three-dot menu icon in the top-right corner of the window. From the dropdown menu, navigate to "More tools" and select "Extensions."
-
Locate Antivirus Extensions: In the Extensions menu, you will find a list of installed extensions, including antivirus tools. Identify the specific antivirus extensions that you intend to disable.
-
Disable Antivirus Extensions: To disable an antivirus extension, locate the toggle switch next to the extension's name or icon. Simply click on the toggle switch to turn off the antivirus extension. Once disabled, the extension will no longer actively protect your browsing activities.
By following these steps, you can effectively disable antivirus extensions in Chrome, providing the flexibility to manage your browser's security features based on your specific needs. It's important to exercise caution when disabling antivirus extensions, ensuring that you understand the implications of temporarily deactivating these protective tools.
Understanding how to manage antivirus extensions empowers users to navigate their browsing experience with control and adaptability. Whether it's addressing compatibility issues with certain websites or troubleshooting extension-related conflicts, the ability to disable and enable antivirus extensions ensures that users can tailor their browsing security to suit their individual requirements.
By mastering the process of disabling antivirus extensions, users can optimize their browsing experience while maintaining a proactive approach to online security. This knowledge not only enhances the user experience but also contributes to a more informed and empowered online community.
Method 3: Disabling Antivirus Software on Your Computer
In certain situations, you may find it necessary to disable the antivirus software installed on your computer, especially when troubleshooting compatibility issues, performing specific tasks that require the antivirus to be turned off, or addressing conflicts with browser functionality. While antivirus software is essential for protecting your system from various online threats, knowing how to temporarily deactivate it can be valuable.
Here's a detailed guide on how to disable antivirus software on your computer:
-
Identify Your Antivirus Software: The first step is to identify the specific antivirus software installed on your computer. Common antivirus programs include Norton, McAfee, Avast, AVG, Kaspersky, and Windows Defender, among others.
-
Access the Antivirus Program: Locate the antivirus software's icon in the system tray or taskbar. Right-click on the icon to access the program's options and settings. Alternatively, you can open the antivirus software from the Start menu or desktop shortcut.
-
Navigate to Settings or Options: Once the antivirus program is open, look for settings or options that allow you to manage the software's functionalities. This may be labeled as "Settings," "Options," "Preferences," or a similar term, depending on the specific antivirus software.
-
Disable Real-Time Protection: Within the settings or options menu, locate the section related to real-time protection or active scanning. This feature continuously monitors your system for potential threats. To disable the antivirus software temporarily, find the option to turn off real-time protection and follow the prompts to confirm the action.
-
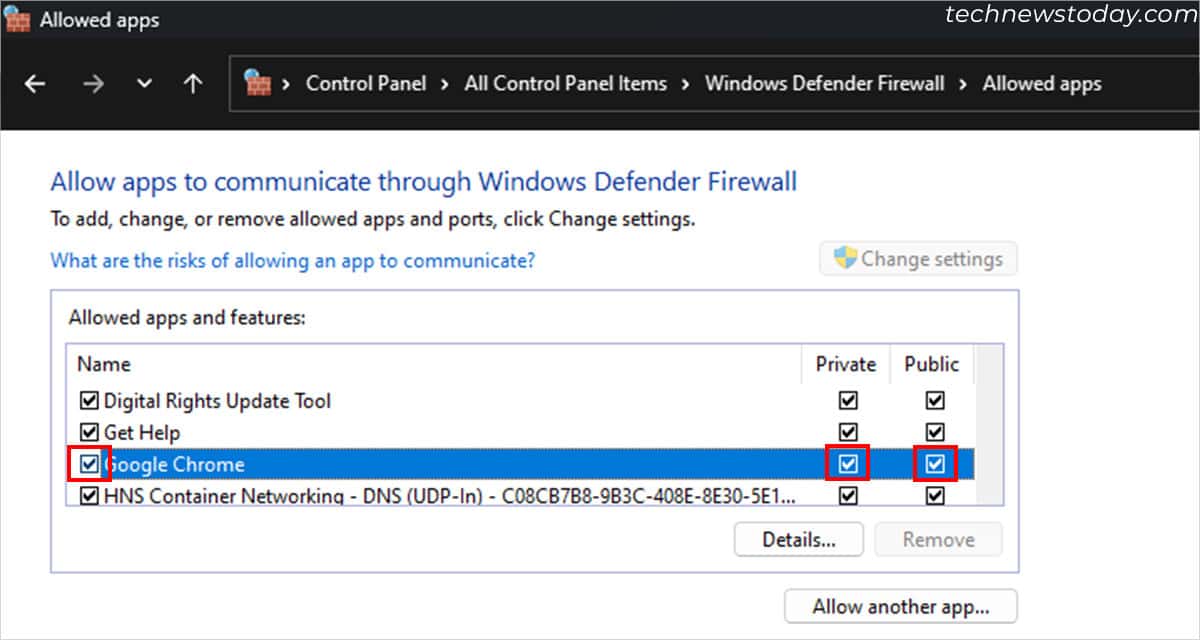
Turn Off Firewall (If Applicable): Some antivirus programs include a firewall component that regulates network traffic and provides an additional layer of security. If your antivirus software includes a firewall, you may need to disable it as well. Look for firewall settings within the antivirus program and follow the steps to turn it off.
-
Confirm the Deactivation: After disabling real-time protection and, if applicable, the firewall, the antivirus software should be temporarily deactivated. It's essential to confirm that the software is no longer actively protecting your system by checking for any indicators or status messages within the program.
By following these steps, you can effectively disable the antivirus software on your computer, allowing you to address specific tasks or troubleshoot compatibility issues with your browser. It's important to exercise caution when disabling antivirus software and to re-enable it once the intended tasks are completed to ensure the ongoing security of your system.
Understanding how to manage antivirus software on your computer empowers you to navigate potential challenges related to browser functionality, compatibility, and specific tasks that may require the temporary deactivation of antivirus protection. By mastering the process of disabling antivirus software, you can optimize your browsing experience while maintaining a proactive approach to online security. This knowledge not only enhances your ability to address technical issues effectively but also contributes to a more informed and empowered digital experience.
Conclusion
In conclusion, understanding how to turn off antivirus on Chrome is a valuable skill that empowers users to navigate their browsing experience with flexibility, control, and informed decision-making. By exploring the methods to disable Chrome's built-in antivirus, manage antivirus extensions, and temporarily deactivate antivirus software on the computer, users gain the knowledge to address specific tasks, troubleshoot compatibility issues, and tailor their online security settings to suit their individual needs.
The ability to disable Chrome's built-in antivirus provides users with the flexibility to address compatibility concerns, troubleshoot website access issues, and perform tasks that may require the temporary deactivation of this security feature. By following the step-by-step process to turn off Safe Browsing, users can ensure a seamless browsing experience while maintaining a proactive approach to online security.
Furthermore, the method of disabling antivirus extensions in Chrome equips users with the adaptability to manage their browser's security features based on their specific requirements. Whether it's addressing compatibility issues with certain websites or troubleshooting extension-related conflicts, the knowledge of how to disable and enable antivirus extensions enhances the user's control over their browsing security.
Additionally, the detailed guide on disabling antivirus software on the computer provides users with the necessary steps to address specific tasks, troubleshoot compatibility issues, and navigate challenges related to browser functionality. By understanding how to temporarily deactivate antivirus protection, users can optimize their browsing experience while ensuring the ongoing security of their systems.
Overall, mastering the processes outlined in this guide not only enhances the user experience but also contributes to a more informed and empowered online community. By gaining the knowledge to manage antivirus settings effectively, users can make informed decisions about their online security while using the Chrome browser, ultimately fostering a safer and more tailored browsing experience for all.