Introduction
Safari, Apple's sleek and intuitive web browser, offers a customizable browsing experience that allows users to tailor their interface to suit their preferences and needs. One of the key features that users can personalize is the Safari bar, located at the top of the browser window. This versatile toolbar provides quick access to essential functions and tools, enhancing the overall browsing efficiency and convenience.
Customizing the Safari bar enables users to streamline their workflow, making it easier to access frequently used features and commands with just a click. Whether you're a casual user seeking a more user-friendly browsing experience or a power user aiming to optimize productivity, customizing the Safari bar can significantly enhance your browsing experience.
In this guide, we will explore the step-by-step process of customizing the Safari bar to suit your specific requirements. From adding essential buttons to rearranging items for optimal accessibility, you'll learn how to make the most of this versatile feature. By the end of this tutorial, you'll have a personalized Safari bar that aligns perfectly with your browsing habits and preferences, empowering you to navigate the web with ease and efficiency.
Now, let's dive into the details and embark on the journey of transforming your Safari browsing experience by customizing the Safari bar to your liking. Whether you're looking to streamline your workflow, boost productivity, or simply enhance the visual appeal of your browsing interface, the ability to customize the Safari bar puts the power in your hands, allowing you to create a browsing environment that caters to your unique needs and preferences.
Step 1: Open Safari
To begin customizing the Safari bar, the first step is to open the Safari web browser on your Mac or iOS device. Safari is the default web browser for Apple devices, offering a seamless and intuitive browsing experience. Whether you're using a Mac computer, MacBook, iPhone, or iPad, launching Safari is the initial step towards personalizing your browsing interface.
On a Mac, you can open Safari by clicking on the Safari icon located in the Dock or by accessing it from the Applications folder. Alternatively, you can use Spotlight Search by pressing Command + Space and typing "Safari" to quickly locate and open the browser.
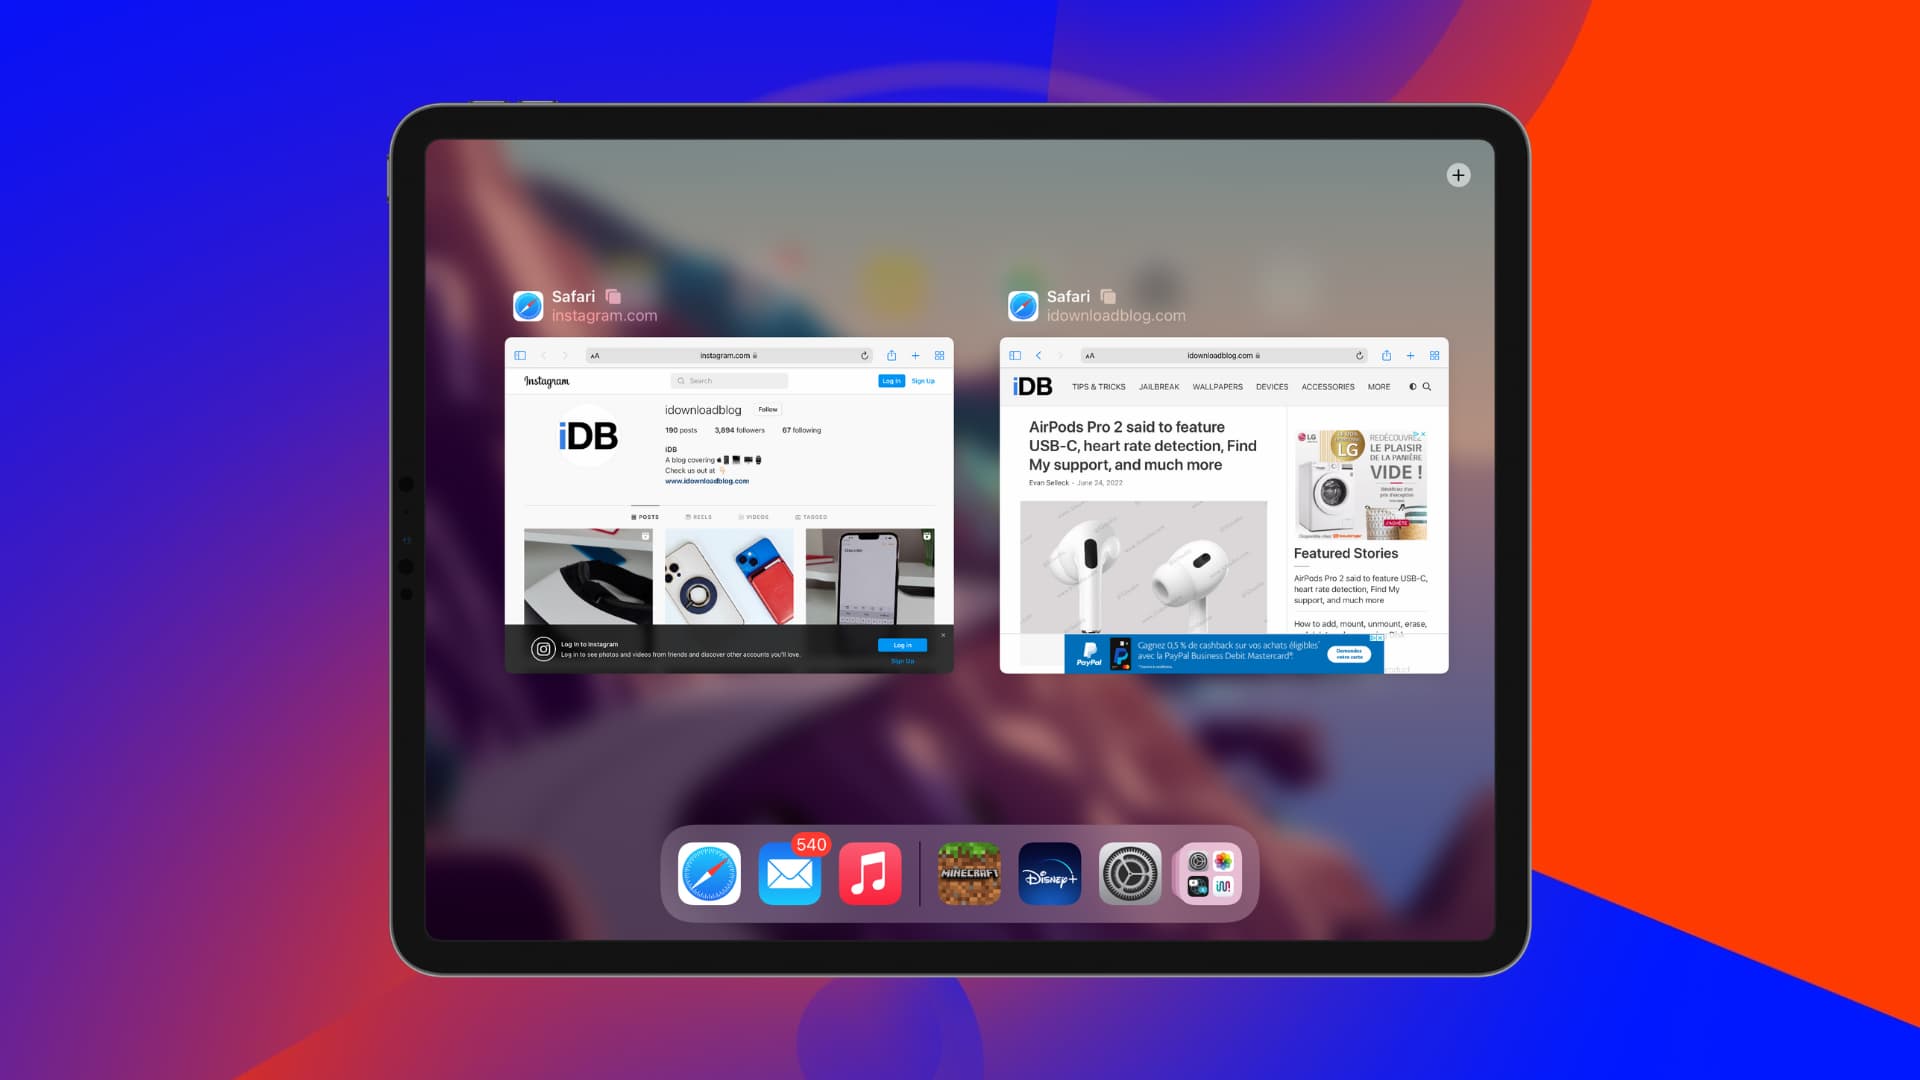
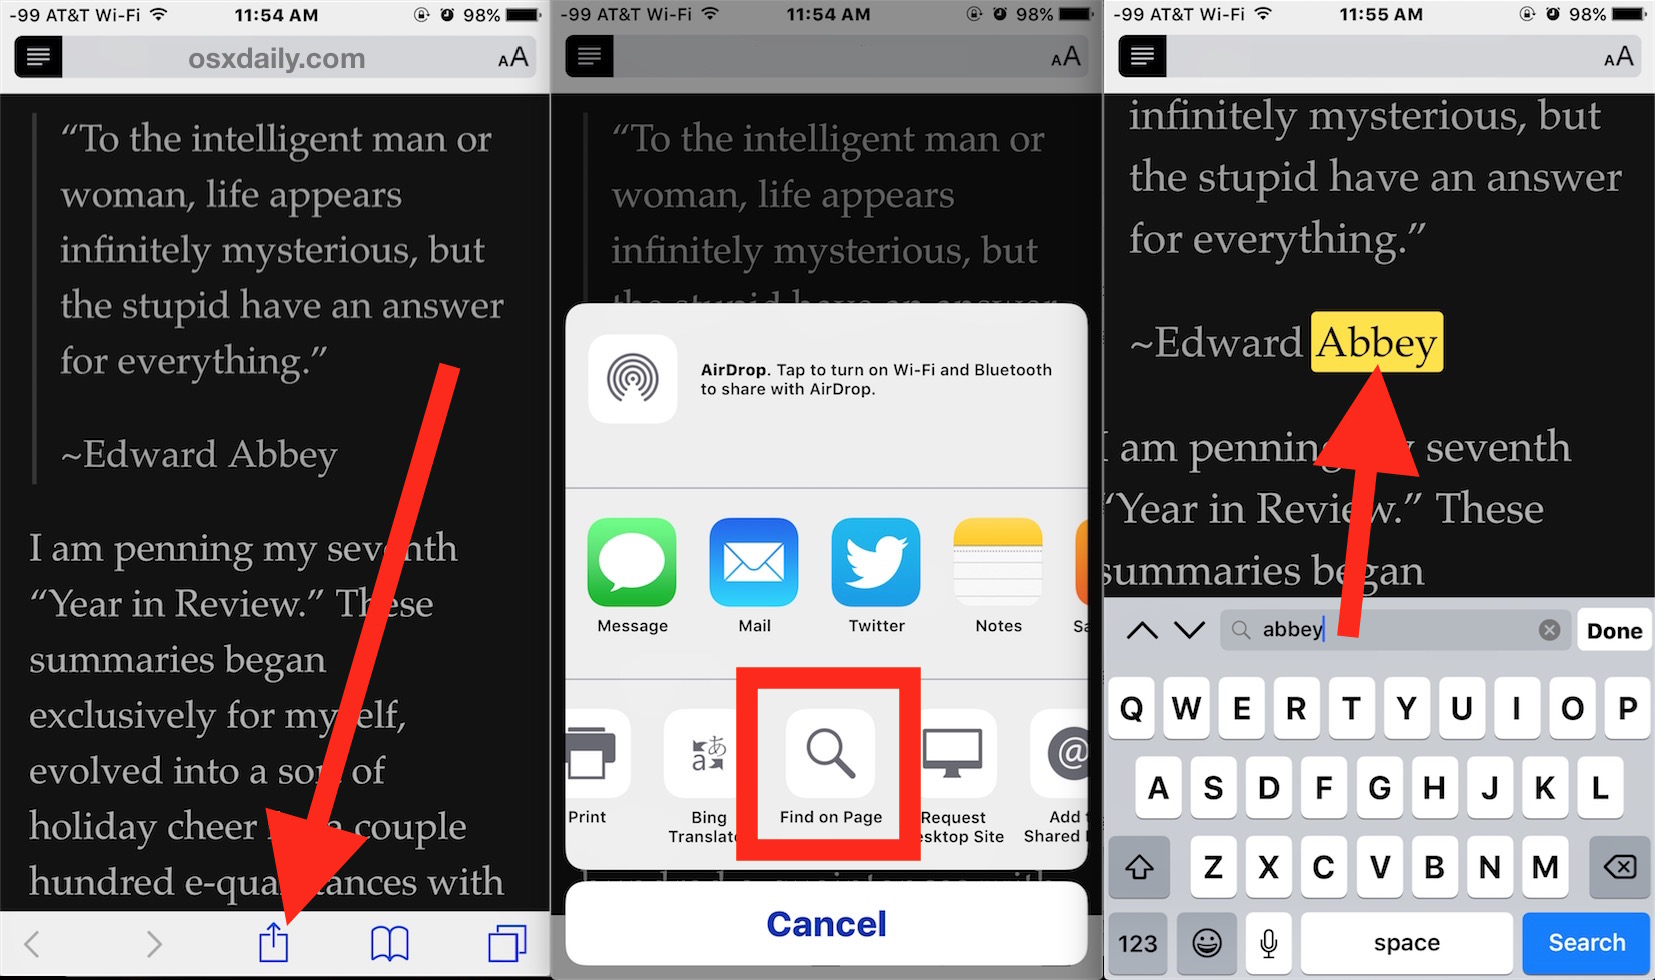
For iOS devices such as iPhone or iPad, simply locate the Safari icon on your home screen and tap to launch the browser. Safari's mobile version provides a user-friendly interface optimized for touch interactions, ensuring a smooth and responsive browsing experience on the go.
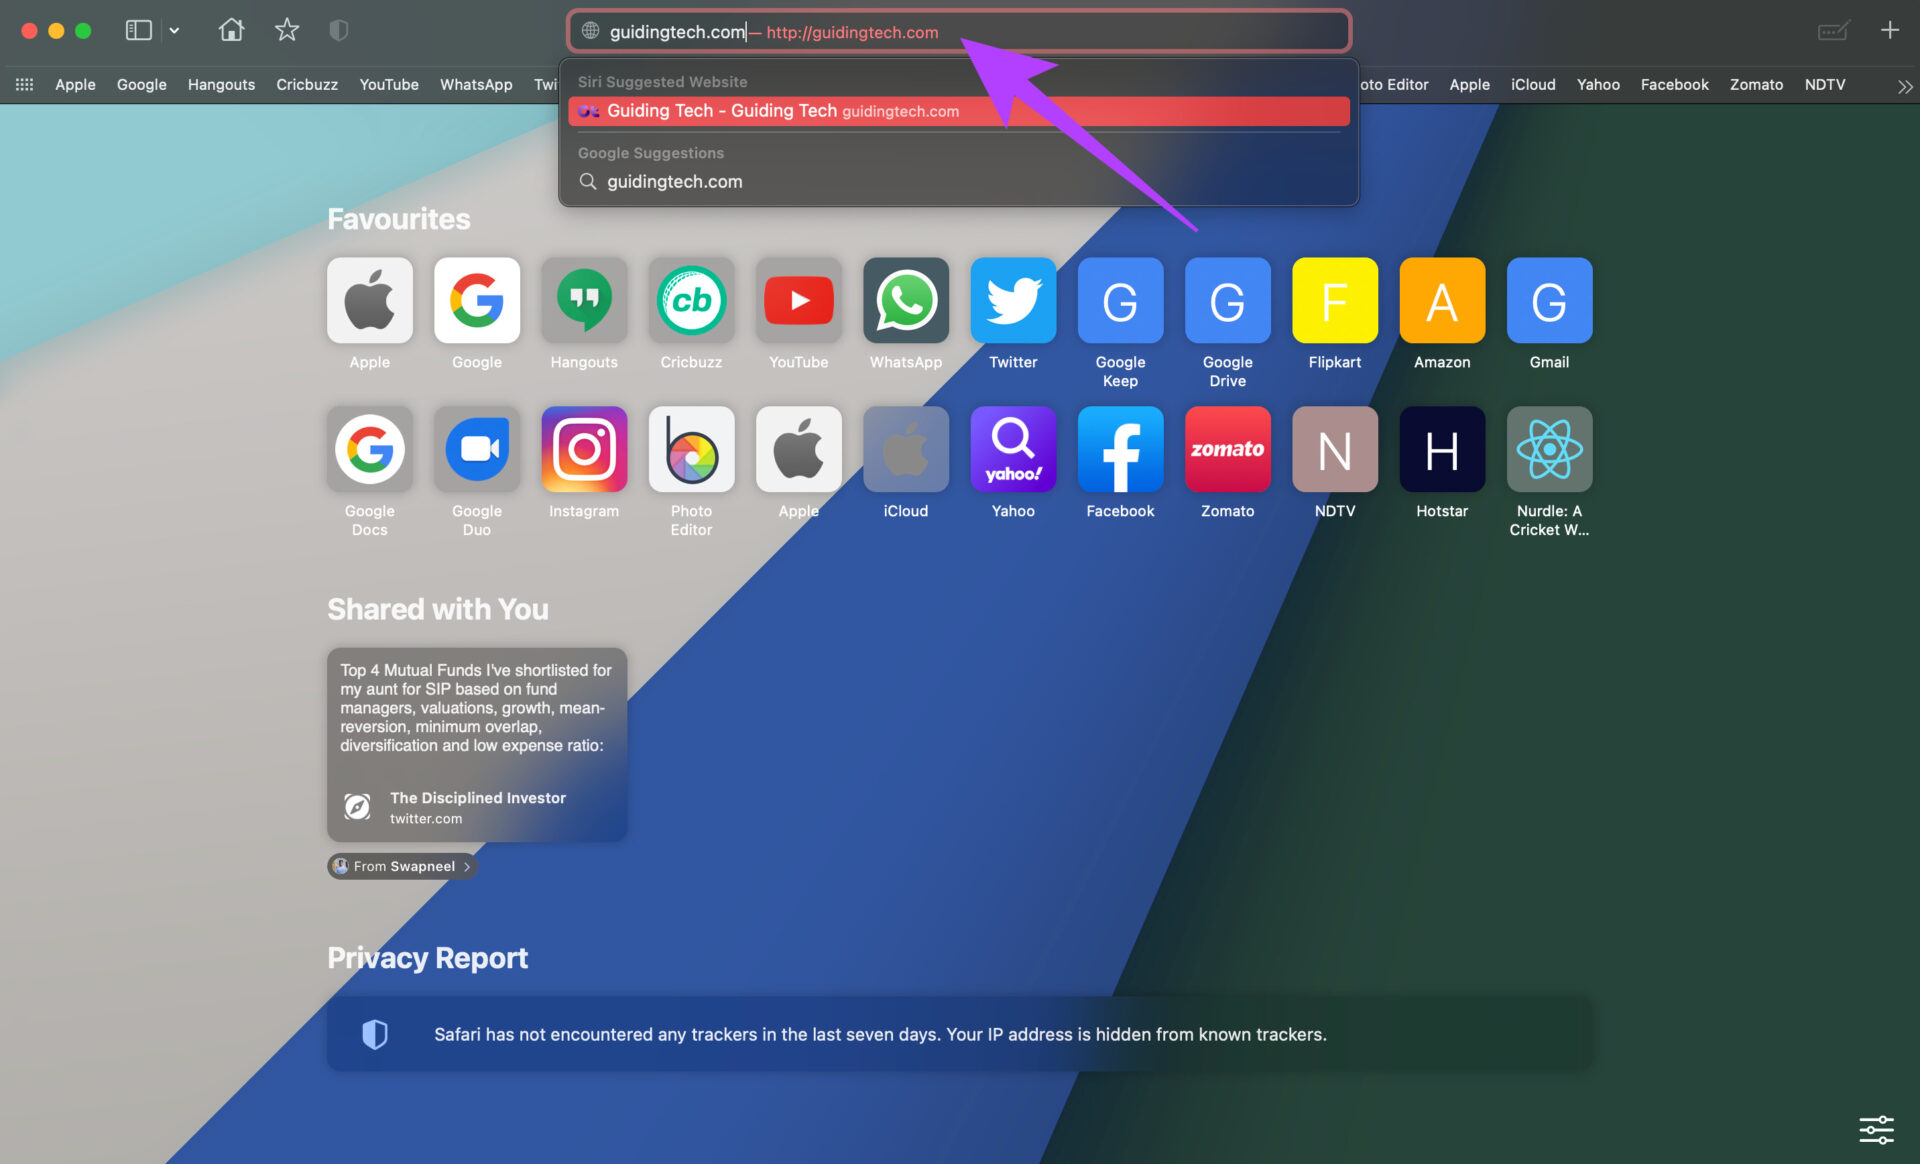
Once Safari is launched, you'll be greeted by the familiar interface, featuring the address bar, tabs, and the Safari bar at the top of the window. This is where the customization magic begins, allowing you to tailor the Safari bar to your specific preferences and browsing habits.
With Safari now open and ready for customization, you're one step closer to creating a personalized browsing environment that aligns perfectly with your needs and enhances your overall browsing experience. The next steps will guide you through the process of customizing the Safari bar, empowering you to add essential buttons, rearrange items, and optimize the toolbar to suit your unique requirements.
Now that Safari is open and awaiting your personal touch, let's move on to the next step and delve into the process of customizing the Safari bar to transform your browsing experience.
Step 2: Go to Preferences
To embark on the journey of customizing the Safari bar, the next step is to access the Preferences menu within the Safari browser. The Preferences menu serves as the gateway to a wide array of customization options, allowing users to fine-tune various aspects of their browsing experience, including the Safari bar.
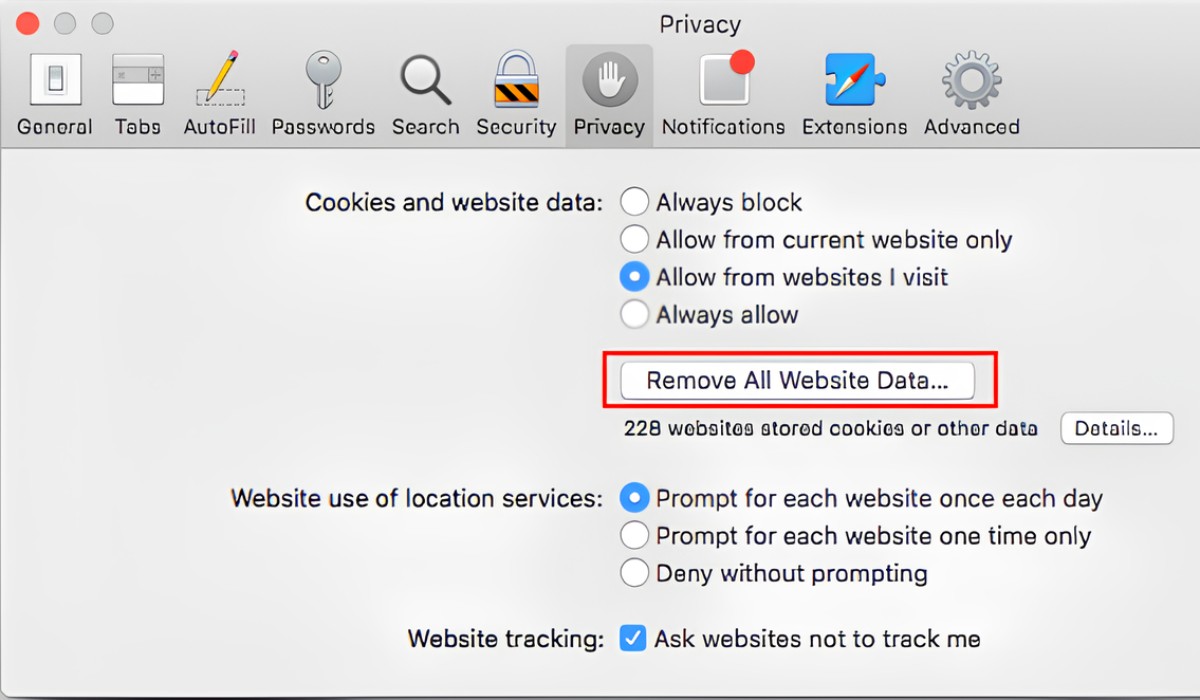
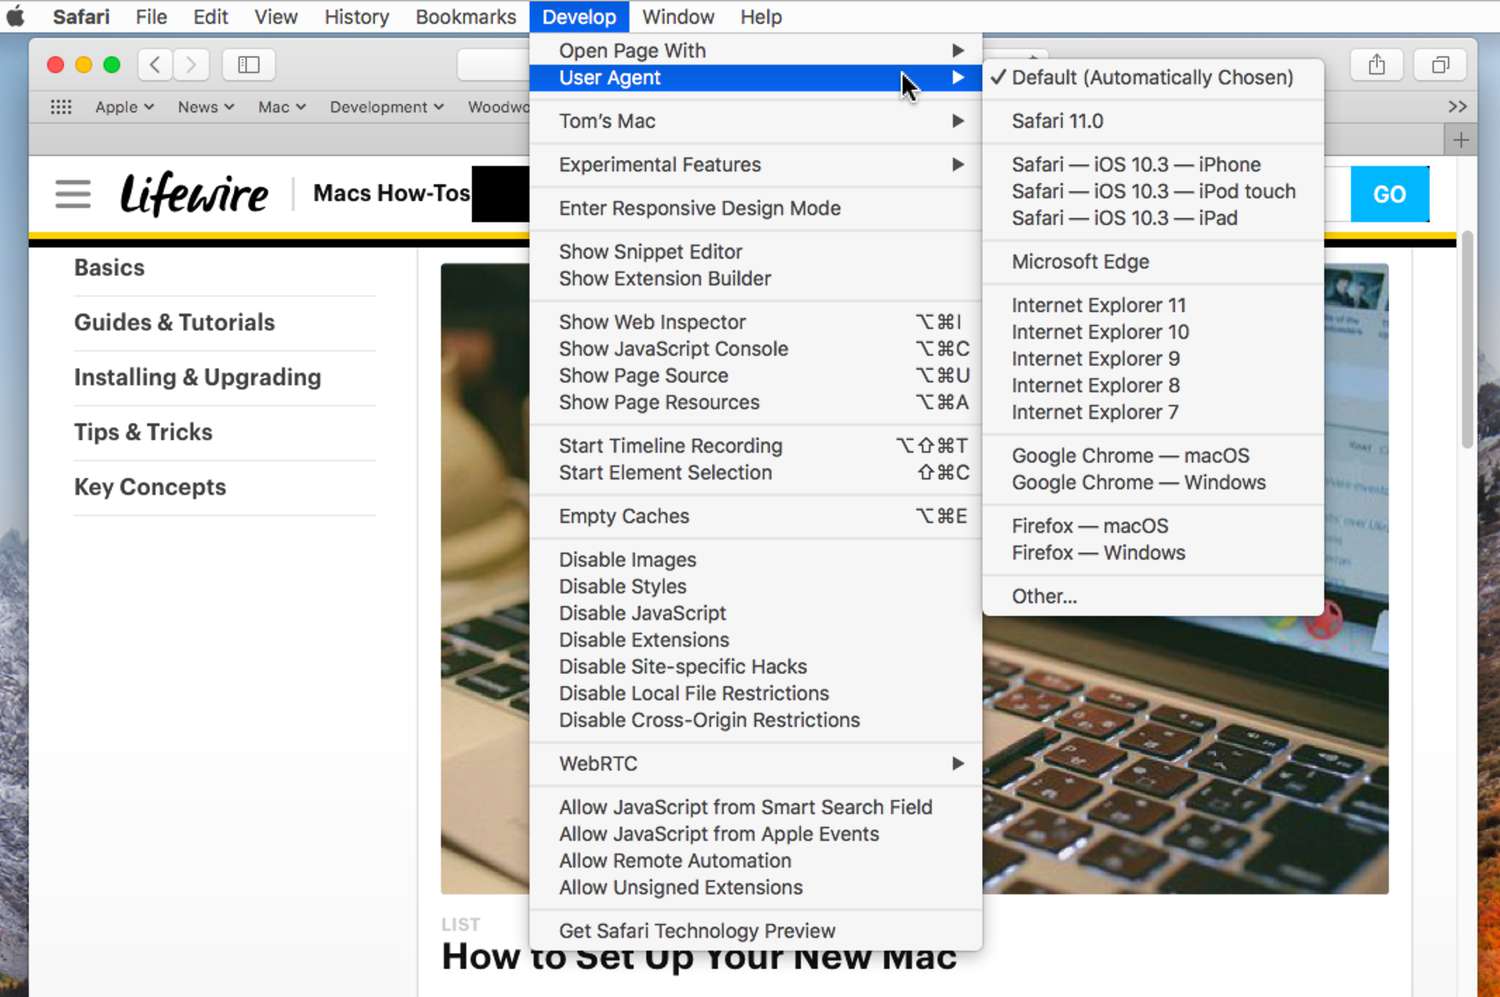
On a Mac, you can access the Preferences menu by clicking on "Safari" in the top menu bar and selecting "Preferences" from the dropdown menu. Alternatively, you can use the keyboard shortcut Command + Comma (,). This will open the Preferences window, presenting a range of tabs and settings that enable you to personalize your Safari browsing environment.
Within the Preferences window, navigate to the "Toolbar" tab to access the customization options specifically tailored to the Safari bar. Here, you'll find a collection of buttons and controls that can be added to the Safari bar, empowering you to tailor the toolbar to your specific needs and browsing habits.
The Toolbar tab provides a visual representation of the Safari bar, displaying a selection of available buttons that can be added to the toolbar for quick access. From essential functions such as Back, Forward, and Reload to specialized features like Reading List and Sidebar, the Toolbar tab offers a comprehensive overview of the available customization options.
In addition to adding and removing buttons, the Toolbar tab also allows you to rearrange the position of items on the Safari bar, providing flexibility in organizing the toolbar to maximize efficiency and accessibility. This level of customization ensures that the Safari bar aligns perfectly with your browsing habits, placing essential tools and functions within easy reach for seamless navigation.
By accessing the Preferences menu and navigating to the Toolbar tab, you gain the ability to personalize the Safari bar according to your preferences, transforming it into a tailored interface that enhances your browsing experience. The customization options available within the Preferences window empower you to curate a Safari bar that reflects your unique needs and browsing style, setting the stage for a more intuitive and efficient browsing experience.
With the Preferences window at your disposal, you're poised to embark on the next phase of customizing the Safari bar, adding essential buttons and fine-tuning the toolbar to create a browsing environment that caters to your specific requirements. As you delve deeper into the customization process, you'll discover the power of personalization in shaping a browsing interface that seamlessly integrates with your workflow and browsing habits.
Step 3: Select "Show Toolbar"
In the process of customizing the Safari bar, the pivotal next step is to select the "Show Toolbar" option within the Safari browser. This fundamental action lays the groundwork for unveiling the Safari bar, setting the stage for further customization and personalization.
Upon accessing the Preferences window and navigating to the Toolbar tab, you'll encounter the "Show Toolbar" option, which serves as the gateway to revealing the Safari bar within the browser interface. By selecting this option, you effectively enable the display of the Safari bar, bringing it into view and unlocking its potential as a customizable and versatile toolbar.
The "Show Toolbar" option is designed to provide users with the flexibility to toggle the visibility of the Safari bar, allowing for a seamless transition between a streamlined browsing interface and a feature-rich toolbar. When the Safari bar is hidden, the browser interface adopts a minimalist aesthetic, maximizing the available screen space for content while maintaining essential navigation and control functions within easy reach.
By selecting "Show Toolbar," you unleash the full potential of the Safari bar, bringing it to the forefront of the browsing experience and opening the door to a wealth of customization possibilities. This action marks the beginning of a transformative journey, empowering you to tailor the Safari bar to your specific needs and preferences, ultimately enhancing your browsing efficiency and convenience.
The ability to toggle the visibility of the Safari bar provides a dynamic approach to browsing, allowing you to adapt the interface to suit different tasks and workflows. Whether you prefer a clean and uncluttered browsing environment or require quick access to essential tools and functions, the "Show Toolbar" option puts the power in your hands, enabling you to shape the Safari bar according to your unique browsing habits and preferences.
With the Safari bar now revealed and ready for customization, you're poised to embark on the next phase of personalizing the toolbar, adding essential buttons, rearranging items, and fine-tuning the interface to align perfectly with your browsing style. The "Show Toolbar" option serves as the catalyst for a tailored browsing experience, setting the stage for a seamless and intuitive interface that caters to your specific requirements.
As you proceed with the customization process, the Safari bar becomes more than just a toolbar – it transforms into a reflection of your browsing habits, workflow, and preferences, elevating your overall browsing experience to new heights. With the Safari bar now visible, the stage is set for further customization, empowering you to curate a browsing environment that aligns perfectly with your unique needs and enhances your productivity and enjoyment of the web.
The selection of "Show Toolbar" marks a pivotal moment in the customization journey, unlocking the potential of the Safari bar and paving the way for a personalized browsing experience that seamlessly integrates with your workflow and browsing habits. As you move forward with the customization process, the Safari bar becomes a canvas for self-expression, allowing you to shape the browsing interface according to your preferences and needs, ultimately enhancing your efficiency and enjoyment of the web.
With the Safari bar now revealed and awaiting your personal touch, you're ready to delve deeper into the customization process, adding essential buttons, rearranging items, and fine-tuning the toolbar to create a browsing environment that caters to your specific requirements. The journey of customization continues, and the Safari bar stands as a testament to the power of personalization in shaping a browsing interface that seamlessly integrates with your workflow and browsing habits.
Step 4: Customize Toolbar
Customizing the toolbar in Safari empowers users to tailor their browsing experience to align perfectly with their specific needs and preferences. This pivotal step allows for the addition of essential buttons and controls to the Safari bar, transforming it into a personalized interface that enhances browsing efficiency and convenience.
Upon accessing the Preferences window and navigating to the Toolbar tab, users are presented with a diverse array of buttons and controls that can be added to the Safari bar. From fundamental navigation functions such as Back, Forward, and Reload to specialized features like Reading List and Sidebar, the customization options cater to a wide range of browsing habits and preferences.
Adding buttons to the Safari bar is a straightforward process that begins with selecting the desired items from the available options and dragging them onto the toolbar. This intuitive drag-and-drop functionality enables users to curate a collection of essential tools and functions within easy reach, streamlining the browsing experience and enhancing accessibility.
In addition to adding buttons, users have the flexibility to rearrange the position of items on the Safari bar, allowing for a customized layout that aligns with their preferred workflow. This level of customization ensures that essential tools and functions are strategically positioned for seamless navigation, optimizing the browsing experience.
The ability to customize the toolbar in Safari extends beyond mere functionality, offering a platform for self-expression and personalization. By curating a collection of buttons that reflect their unique browsing habits and preferences, users transform the Safari bar into a tailored interface that seamlessly integrates with their workflow.
As users delve into the process of customizing the toolbar, they discover the power of personalization in shaping a browsing environment that caters to their specific requirements. Whether it's adding essential navigation controls, integrating specialized features, or rearranging items for optimal accessibility, the customization process empowers users to create a browsing interface that aligns perfectly with their browsing style.
With the Safari bar now adorned with essential buttons and controls tailored to their needs, users are poised to experience a browsing environment that reflects their individuality and enhances their overall efficiency and enjoyment of the web. The customized toolbar stands as a testament to the transformative power of personalization, elevating the browsing experience to new heights.
As users proceed with the customization process, the Safari bar evolves into a personalized interface that seamlessly integrates with their workflow and browsing habits, setting the stage for a more intuitive and efficient browsing experience. The journey of customization continues, and the Safari bar becomes a canvas for self-expression, allowing users to shape the browsing interface according to their preferences and needs, ultimately enhancing their productivity and enjoyment of the web.
Step 5: Add items to the Safari bar
Adding items to the Safari bar is a pivotal step in the customization process, empowering users to curate a collection of essential tools and functions within easy reach. This strategic enhancement transforms the Safari bar into a personalized interface that aligns perfectly with individual browsing habits and preferences, ultimately enhancing the overall browsing efficiency and convenience.
The process of adding items to the Safari bar begins within the Preferences window, specifically within the Toolbar tab. Here, users are presented with a diverse array of buttons and controls that can be seamlessly integrated into the Safari bar. From fundamental navigation functions such as Back, Forward, and Reload to specialized features like Reading List and Sidebar, the customization options cater to a wide range of browsing habits and preferences.
To add items to the Safari bar, users can simply select the desired buttons from the available options and drag them onto the toolbar. This intuitive drag-and-drop functionality streamlines the customization process, allowing users to curate a personalized collection of essential tools and functions within the Safari bar. Whether it's quick access to frequently used commands or specialized features tailored to specific browsing activities, the ability to add items to the Safari bar empowers users to shape a browsing interface that seamlessly integrates with their workflow.
By strategically adding items to the Safari bar, users optimize the accessibility of essential tools and functions, streamlining the browsing experience and enhancing overall efficiency. The customized toolbar becomes a reflection of individual browsing habits and preferences, setting the stage for a more intuitive and personalized browsing experience.
As users proceed with the process of adding items to the Safari bar, they discover the transformative power of personalization in shaping a browsing environment that caters to their specific requirements. Whether it's integrating essential navigation controls, specialized features, or productivity-enhancing tools, the customization process empowers users to create a tailored interface that aligns perfectly with their browsing style.
With the Safari bar now adorned with essential buttons and controls tailored to their needs, users are poised to experience a browsing environment that reflects their individuality and enhances their overall efficiency and enjoyment of the web. The customized toolbar stands as a testament to the power of personalization, elevating the browsing experience to new heights.
The ability to add items to the Safari bar represents a pivotal moment in the customization journey, unlocking the potential for a personalized browsing experience that seamlessly integrates with individual workflow and browsing habits. As users continue to shape the Safari bar according to their preferences and needs, they embark on a transformative journey that enhances their productivity and enjoyment of the web.
Step 6: Rearrange items on the Safari bar
Rearranging items on the Safari bar is a pivotal aspect of the customization process, offering users the flexibility to fine-tune the layout of essential tools and functions for optimal accessibility. This strategic adjustment empowers users to curate a personalized browsing interface that aligns seamlessly with their workflow and browsing habits, ultimately enhancing the overall efficiency and convenience of their browsing experience.
Within the Preferences window, specifically within the Toolbar tab, users gain access to a visual representation of the Safari bar, showcasing the collection of buttons and controls that have been added to the toolbar. This visual overview serves as the canvas for rearranging items, providing users with the freedom to reposition essential tools and functions according to their preferences.
The intuitive drag-and-drop functionality enables users to effortlessly rearrange items on the Safari bar, allowing for a customized layout that optimizes accessibility and streamlines the browsing experience. Whether it's reordering navigation controls for quick access or strategically positioning specialized features for specific browsing activities, the ability to rearrange items empowers users to shape the Safari bar to suit their unique requirements.
By fine-tuning the layout of items on the Safari bar, users create a browsing interface that reflects their individual browsing habits and preferences, setting the stage for a more intuitive and personalized browsing experience. The strategic rearrangement of items ensures that essential tools and functions are positioned within easy reach, enhancing overall efficiency and convenience.
As users proceed with the process of rearranging items on the Safari bar, they discover the transformative power of personalization in shaping a browsing environment that seamlessly integrates with their workflow. The customized toolbar becomes a reflection of their unique browsing style, enhancing their overall productivity and enjoyment of the web.
With the Safari bar now adorned with essential buttons and controls tailored to their needs, users are poised to experience a browsing environment that reflects their individuality and enhances their overall efficiency and enjoyment of the web. The customized toolbar stands as a testament to the power of personalization, elevating the browsing experience to new heights.
The ability to rearrange items on the Safari bar represents a pivotal moment in the customization journey, unlocking the potential for a personalized browsing experience that seamlessly integrates with individual workflow and browsing habits. As users continue to fine-tune the Safari bar according to their preferences and needs, they embark on a transformative journey that enhances their productivity and enjoyment of the web.
Step 7: Save changes
After customizing the Safari bar to align perfectly with your browsing habits and preferences, the final step is to save the changes you've made. This crucial action ensures that your personalized Safari bar configuration is preserved, allowing you to enjoy a tailored browsing interface that reflects your individuality and enhances your overall efficiency and convenience.
Upon completing the customization process, it's essential to save the changes to solidify your personalized Safari bar layout. This ensures that the added buttons, rearranged items, and tailored interface remain intact, providing a consistent browsing experience that seamlessly integrates with your workflow and browsing habits.
Saving the changes made to the Safari bar is a straightforward process that ensures your personalized configuration is retained across browsing sessions. Once you've finalized the layout of the Safari bar, including the addition of essential buttons, rearrangement of items, and fine-tuning of the toolbar, the next step is to exit the Preferences window.
As you exit the Preferences window, you'll be prompted to confirm the changes made to the Safari bar. By selecting the "Save" or "Done" option, you effectively preserve your customized Safari bar configuration, ensuring that it remains in place for future browsing sessions.
The act of saving the changes made to the Safari bar marks the culmination of the customization journey, solidifying your personalized browsing interface and setting the stage for a seamless and intuitive browsing experience. Whether it's quick access to essential tools and functions, a strategically arranged layout for optimal accessibility, or specialized features tailored to specific browsing activities, the saved changes ensure that your personalized Safari bar remains a reflection of your unique browsing style.
By saving the changes to the Safari bar, you establish a consistent browsing environment that caters to your specific requirements, enhancing your overall productivity and enjoyment of the web. The preserved customization ensures that your browsing interface seamlessly integrates with your workflow, empowering you to navigate the web with ease and efficiency.
With the changes saved, you can embark on your browsing journey with the confidence that your personalized Safari bar configuration will enhance your overall browsing experience, providing quick access to essential tools and functions while reflecting your individuality and preferences. The act of saving the changes ensures that your tailored browsing interface remains a steadfast companion as you explore the web, empowering you to navigate with ease and efficiency.
As the changes to the Safari bar are saved, you can embrace a browsing experience that aligns perfectly with your unique needs and browsing habits, setting the stage for a more intuitive and personalized interaction with the web. The act of saving the changes solidifies your personalized browsing environment, ensuring that your tailored Safari bar configuration remains a reflection of your individuality and enhances your overall efficiency and enjoyment of the web.