Introduction
Welcome to the world of Linux Mint, a powerful and versatile operating system that offers a wide range of features and customization options. If you're an avid user of Google Chrome and have recently made the switch to Linux Mint, you might be wondering how to install your favorite web browser on this platform. Fortunately, the process is straightforward and can be accomplished with just a few simple steps.
In this guide, we'll walk you through the process of installing Google Chrome on Linux Mint, ensuring that you can seamlessly transition to using your preferred browser on this operating system. Whether you're a seasoned Linux user or a newcomer to the platform, this step-by-step tutorial will equip you with the knowledge and confidence to set up Google Chrome on your Linux Mint system.
So, without further ado, let's dive into the installation process and get you up and running with Google Chrome on Linux Mint. Whether you're looking to explore the latest web content, streamline your productivity with powerful extensions, or simply enjoy a seamless browsing experience, having Google Chrome at your fingertips will undoubtedly enhance your Linux Mint journey. Let's embark on this installation adventure together and unlock the full potential of your browsing experience on Linux Mint.
Step 1: Open the Terminal
To begin the process of installing Google Chrome on your Linux Mint system, the first step is to open the terminal. The terminal is a powerful tool that allows you to interact with your operating system through text commands. It provides a direct line of communication to execute various tasks, including software installations, system updates, and file management.
Here's how to open the terminal on Linux Mint:
-
Using the Keyboard Shortcut: You can quickly access the terminal by pressing
Ctrl + Alt + Ton your keyboard. This keyboard shortcut is a convenient way to launch the terminal without navigating through menus or desktop icons. -
Using the Application Menu: Alternatively, you can open the terminal by clicking on the application menu located in the bottom-left corner of the screen. Once the menu is open, simply type "terminal" in the search bar, and the terminal application will appear. Click on it to launch the terminal window.
-
Using the Run Command: Another method to open the terminal is by using the "Run" command. Press
Alt + F2to bring up the "Run a command" dialog, then type "gnome-terminal" and press Enter. This will open the terminal window for you to proceed with the installation process.
Upon successfully opening the terminal, you will be greeted with a command-line interface, ready to execute the necessary commands to install Google Chrome on your Linux Mint system. With the terminal now at your disposal, you're one step closer to bringing the power and versatility of Google Chrome to your Linux Mint environment.
Now that the terminal is open, we can move on to the next step of adding the Google Chrome repository to your system. This will pave the way for a seamless installation process, allowing you to enjoy the full capabilities of Google Chrome on your Linux Mint operating system.
Step 2: Add Google Chrome Repository
Adding the Google Chrome repository to your Linux Mint system is a crucial step in preparing for the installation of the browser. By adding the repository, you will ensure that your system can access the necessary files and updates required to install and maintain Google Chrome seamlessly.
Here's a detailed guide on how to add the Google Chrome repository to your Linux Mint system:
-
Open the Terminal: As mentioned in the previous step, ensure that the terminal is open and ready for the subsequent commands.
-
Add the Google Chrome Repository Key: To begin, you'll need to add the repository key to your system. This key is essential for verifying the authenticity of the Google Chrome repository. Enter the following command in the terminal to add the key:
wget -q -O – https://dl-ssl.google.com/linux/linux_signing_key.pub | sudo apt-key add –
This command retrieves the repository key from the specified URL and adds it to your system, allowing for secure access to the Google Chrome repository.
-
Add the Google Chrome Repository: With the repository key in place, the next step is to add the Google Chrome repository to your system's list of software sources. Execute the following command in the terminal to add the repository:
sudo sh -c 'echo "deb [arch=amd64] http://dl.google.com/linux/chrome/deb/ stable main" >> /etc/apt/sources.list.d/google-chrome.list'
By running this command, you are appending the Google Chrome repository information to the list of software sources used by your system. This ensures that your Linux Mint environment recognizes the Google Chrome repository as a valid source for software installations and updates.
-
Update the Package List: After adding the repository, it's essential to update the package list to reflect the changes made to the software sources. Use the following command to update the package list:
sudo apt update
This command instructs your system to refresh the list of available packages, including those from the newly added Google Chrome repository.
By following these steps, you have successfully added the Google Chrome repository to your Linux Mint system. This sets the stage for the subsequent installation of Google Chrome, allowing you to harness the full potential of this popular web browser on your Linux Mint environment. With the repository in place, you're now ready to proceed to the next step and bring Google Chrome to life on your system.
Step 3: Update the Package List
Updating the package list is a critical task in the process of installing Google Chrome on your Linux Mint system. This step ensures that your system is aware of the latest software packages and updates available from the newly added Google Chrome repository. By refreshing the package list, you enable your system to recognize and access the Google Chrome installation files and dependencies, paving the way for a seamless and successful installation process.
When you execute the command to update the package list, your system communicates with the software repositories specified in its configuration. It checks for any new or updated packages, including those from the Google Chrome repository, and retrieves the relevant information to reflect the current state of available software.
The command 'sudo apt update' serves as the gateway to this essential update process. By prefixing the command with 'sudo', you ensure that the update operation is executed with administrative privileges, allowing your system to make the necessary changes to the package list.
Upon entering the command in the terminal and providing your administrative password when prompted, your system initiates the package list update process. It reaches out to the configured repositories, including the newly added Google Chrome repository, and retrieves the latest information about available packages and updates.
During this update process, your system compares the package list with the repositories, identifying any new packages, updated versions of existing packages, or changes to package dependencies. By synchronizing the package list with the repositories, your system gains awareness of the software resources available for installation and maintenance.
The update process also ensures that your system's package manager, in this case, the Advanced Package Tool (APT), has the most current information about available software. This is crucial for a successful installation, as it allows the package manager to resolve dependencies, manage software versions, and facilitate the installation of Google Chrome and its associated components.
By updating the package list, you are equipping your Linux Mint system with the latest information from the Google Chrome repository, setting the stage for a smooth and efficient installation process. With the package list now refreshed and synchronized with the repositories, you are ready to proceed to the next step and bring Google Chrome to life on your Linux Mint environment.
Step 4: Install Google Chrome
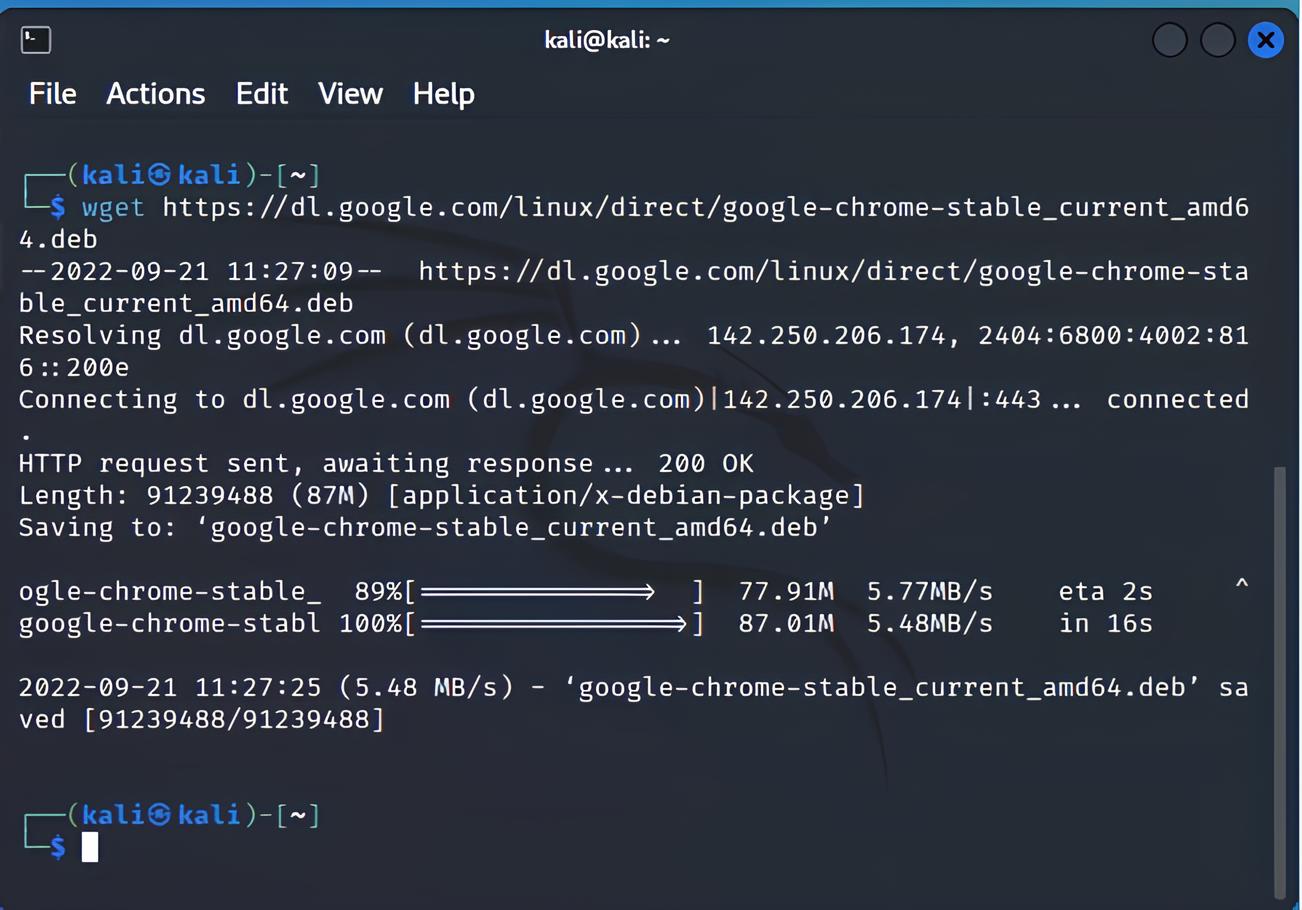
With the Google Chrome repository added and the package list updated, you are now poised to install Google Chrome on your Linux Mint system. The installation process involves leveraging the power of the terminal to execute the necessary commands, allowing you to bring the renowned web browser to life on your Linux Mint environment.
To install Google Chrome, follow these steps:
-
Open the Terminal: Ensure that the terminal is open and ready to execute the installation commands. If the terminal is not already open, use the keyboard shortcut Ctrl + Alt + T or access it through the application menu.
-
Execute the Installation Command: In the terminal, enter the following command to initiate the installation of Google Chrome:
sudo apt install google-chrome-stable
This command instructs your system to use the Advanced Package Tool (APT) to install the stable version of Google Chrome. By prefixing the command with sudo, you ensure that the installation process is carried out with administrative privileges, allowing your system to make the necessary changes to install Google Chrome seamlessly.
-
Confirm the Installation: After entering the installation command, your system will prompt you to confirm the installation by entering your administrative password. Once you provide the password and press Enter, the installation process will commence.
-
Wait for the Installation to Complete: As the installation progresses, your system will download the necessary files from the Google Chrome repository and configure the browser for use on your Linux Mint system. The duration of the installation process may vary based on your system's internet speed and hardware capabilities.
-
Launch Google Chrome: Upon successful installation, you can launch Google Chrome by accessing it through the application menu or by entering "google-chrome" in the terminal. Once launched, you can begin exploring the web, accessing your favorite websites, and leveraging the powerful features offered by Google Chrome.
By following these steps, you have successfully installed Google Chrome on your Linux Mint system. With the installation complete, you can now enjoy a seamless browsing experience, access a myriad of web-based applications, and leverage the robust capabilities of Google Chrome within your Linux Mint environment.
Step 5: Launch Google Chrome
After successfully installing Google Chrome on your Linux Mint system, the next step is to launch the browser and immerse yourself in its feature-rich environment. Launching Google Chrome is a straightforward process that allows you to access the web, explore your favorite websites, and leverage the browser's powerful capabilities within your Linux Mint environment.
To launch Google Chrome, follow these simple steps:
-
Access Google Chrome Through the Application Menu: One of the most common methods to launch Google Chrome is by accessing it through the application menu. Located in the bottom-left corner of the screen, the application menu provides a convenient way to access installed applications. Simply click on the menu, navigate to the "Internet" or "Web Browser" category, and select Google Chrome from the list of available applications. Upon selection, Google Chrome will launch, presenting you with its familiar interface and a blank tab ready for your browsing adventures.
-
Use the Terminal: If you prefer using the terminal to launch Google Chrome, you can do so by entering the command "google-chrome" in the terminal window. This command instructs your system to launch Google Chrome, allowing you to access the browser directly from the command-line interface. Whether you're a fan of terminal-based interactions or simply enjoy the efficiency of executing commands, launching Google Chrome via the terminal provides a seamless and direct approach to accessing the browser.
-
Create a Desktop Shortcut: For added convenience, you can create a desktop shortcut for Google Chrome, providing quick and easy access to the browser directly from your desktop. To create a desktop shortcut, right-click on the desktop, select "Create a new launcher here," and fill in the necessary details, such as the application name (Google Chrome) and the command to launch the browser ("google-chrome"). Once created, you can simply double-click the desktop shortcut to launch Google Chrome without the need to navigate through menus or the terminal.
Upon launching Google Chrome, you are greeted with its intuitive interface, featuring a clean and user-friendly design. From here, you can start exploring the web, accessing your favorite websites, managing tabs, and leveraging the extensive range of features and extensions offered by Google Chrome. Whether you're engaging in productive work, staying informed with the latest news, or enjoying multimedia content, Google Chrome empowers you to navigate the web with speed, security, and flexibility.
With Google Chrome successfully launched on your Linux Mint system, you are now ready to embrace a seamless and enriching browsing experience, harnessing the full potential of this renowned web browser within your Linux environment.
Conclusion
Congratulations! You've successfully navigated the installation process and brought Google Chrome to life on your Linux Mint system. By following the step-by-step guide outlined in this tutorial, you've gained the ability to seamlessly access the powerful features and versatility of Google Chrome within your Linux environment.
As you conclude this installation journey, it's essential to reflect on the significance of having Google Chrome at your fingertips. With its robust performance, extensive library of extensions, and seamless synchronization across devices, Google Chrome empowers you to explore the web, enhance productivity, and stay connected with the latest online content.
By leveraging the terminal and executing the necessary commands, you've not only installed Google Chrome but also expanded your proficiency in managing software installations on Linux Mint. This hands-on experience with the terminal reinforces your understanding of the command-line interface and equips you with valuable skills for future system customization and maintenance tasks.
With Google Chrome now integrated into your Linux Mint environment, you have unlocked a world of possibilities. Whether you're engaging in research, collaborating on projects, or simply enjoying leisurely browsing, Google Chrome serves as a reliable and feature-rich companion, offering a seamless and intuitive web browsing experience.
As you embark on your journey with Google Chrome on Linux Mint, consider exploring its vast array of extensions, customizing its settings to suit your preferences, and tapping into its synchronization capabilities to seamlessly access your browsing data across devices. Additionally, stay informed about the latest updates and features introduced by Google Chrome, ensuring that you continually optimize your browsing experience.
In conclusion, the successful installation of Google Chrome on your Linux Mint system marks a significant milestone in your exploration of the Linux environment. Embrace the power, speed, and versatility of Google Chrome as you navigate the web, manage your online activities, and unlock new opportunities for productivity and entertainment. With Google Chrome as your trusted companion, your Linux Mint experience is poised to reach new heights, offering a seamless and enriching browsing journey.
As you continue to immerse yourself in the world of Linux Mint and Google Chrome, remember that your newfound knowledge and skills in software installation and system customization will serve as valuable assets in your Linux journey. Embrace the possibilities, stay curious, and let the seamless integration of Google Chrome elevate your browsing experience within the Linux Mint ecosystem.


