Introduction
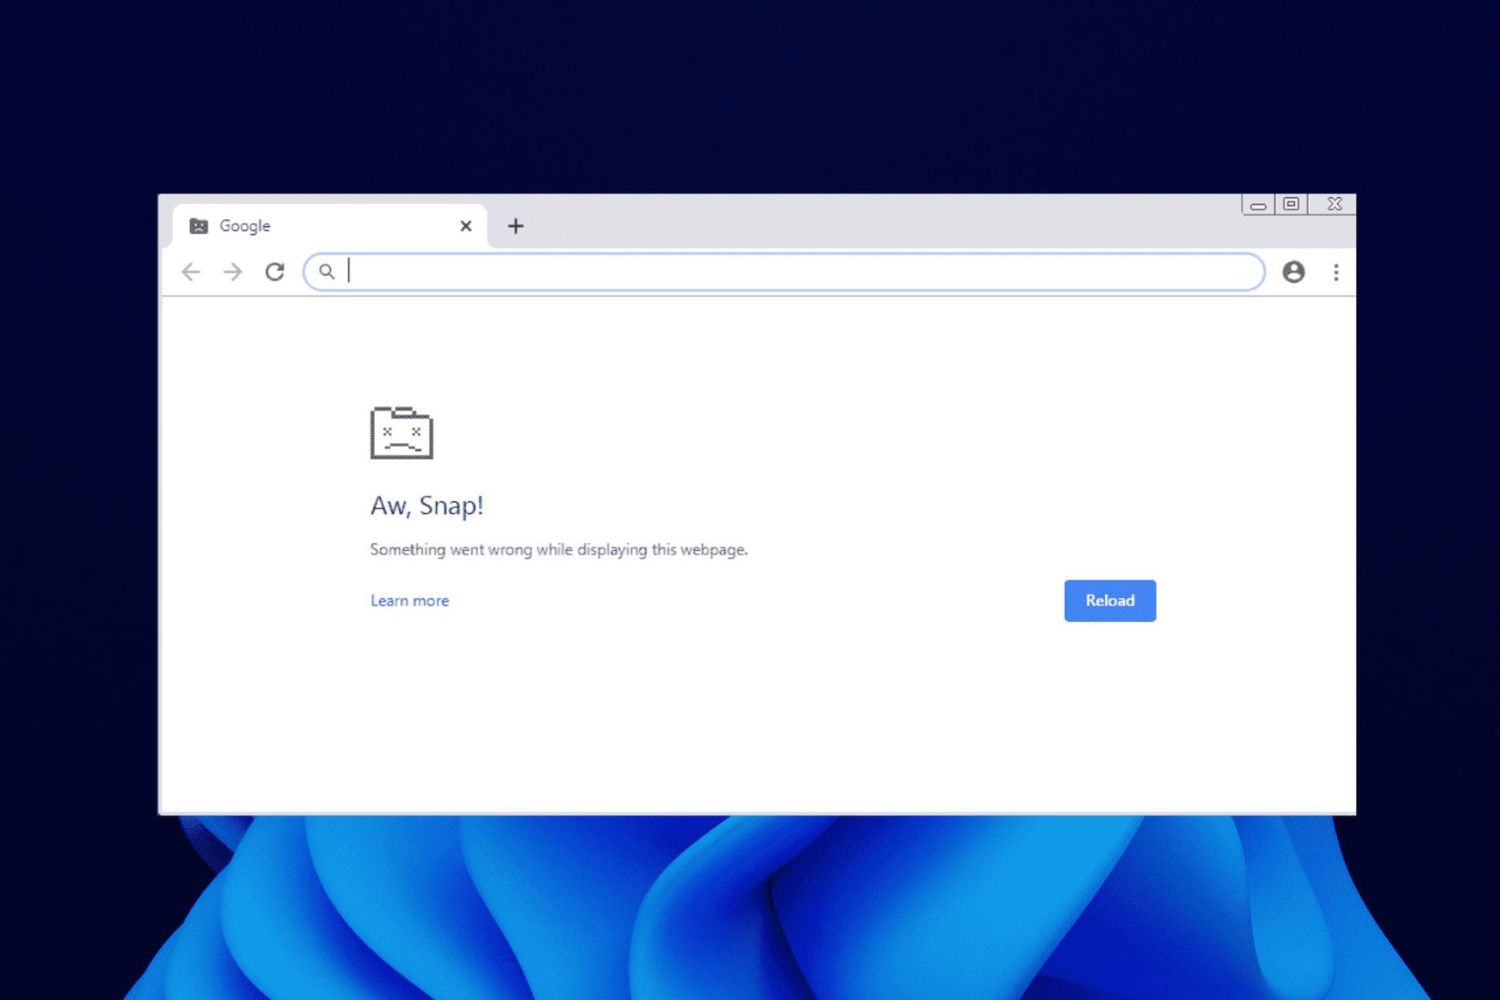
Encountering the "Aw, Snap!" error message while browsing the web can be a frustrating experience for many Windows 10 users. This error, often associated with Google Chrome, indicates that the browser has encountered an issue that prevents it from displaying the requested webpage. The error message, with its playful yet exasperating tone, can leave users feeling puzzled and seeking a quick resolution.
Understanding the potential causes of this error is essential to effectively addressing it. From issues with browser extensions to conflicts with system settings, the "Aw, Snap!" error can stem from various sources. Fortunately, there are several troubleshooting steps that can be taken to resolve this issue and restore seamless browsing experiences.
In this comprehensive guide, we will explore practical solutions to fix the "Aw, Snap!" error in Chrome on Windows 10. By following these step-by-step instructions, users can regain control of their browsing experience and bid farewell to the vexing error message. Whether it's clearing browsing data, disabling troublesome extensions, updating Chrome, or checking for malware, this guide will equip users with the knowledge and tools needed to address the "Aw, Snap!" error effectively.
So, if you've been encountering the "Aw, Snap!" error and are eager to browse the web without interruptions, join us as we delve into the troubleshooting methods that can help you resolve this issue once and for all. Let's embark on this journey to banish the "Aw, Snap!" error from your Chrome browser and restore seamless browsing on your Windows 10 device.
Clear Browsing Data
Clearing browsing data is a fundamental troubleshooting step that can help resolve the "Aw, Snap!" error in Chrome on Windows 10. Over time, accumulated browsing data such as cookies, cached images and files, and browsing history can impact the browser's performance, potentially leading to errors and disruptions in webpage loading. By clearing this data, users can effectively refresh their browsing environment and eliminate potential sources of the error.
To clear browsing data in Chrome, users can follow these simple steps:
-
Accessing Chrome Settings: Start by opening the Chrome browser on your Windows 10 device. Click on the three-dot menu icon located in the top-right corner of the browser window to access the main menu.
-
Navigating to Settings: From the menu, select "Settings" to access the browser's settings and customization options.
-
Clearing Browsing Data: Within the Settings menu, scroll down and click on "Privacy and security" in the left-hand navigation pane. Then, select "Clear browsing data" to open the data clearing options.
-
Selecting Data Types: Chrome provides users with the flexibility to choose the types of data they want to clear. Common options include browsing history, cookies and other site data, cached images and files, and more. Users can select the desired data types based on their preferences.
-
Choosing Time Range: Chrome also offers the option to clear data from a specific time range, such as the past hour, day, week, or all time. Users can select the appropriate time range based on their browsing habits and the duration over which the error has been occurring.
-
Initiating Data Clearing: Once the desired data types and time range have been selected, users can click on the "Clear data" button to initiate the clearing process.
By following these steps to clear browsing data in Chrome, users can effectively refresh their browsing environment and potentially resolve the "Aw, Snap!" error. This process can help eliminate corrupted or outdated data that may be contributing to the browser's instability, allowing for a cleaner and more optimized browsing experience.
In the quest to address the "Aw, Snap!" error, clearing browsing data serves as a foundational step in troubleshooting browser-related issues. With a refreshed browsing environment, users can proceed to explore additional troubleshooting methods to further address the error and restore seamless browsing on their Windows 10 device.
Disable Extensions
Disabling extensions is a crucial step in troubleshooting the "Aw, Snap!" error in Chrome on Windows 10. Browser extensions, while offering additional functionality and customization options, can sometimes conflict with the browser's core processes, leading to errors and disruptions in webpage loading. By temporarily disabling extensions, users can identify if any of these add-ons are contributing to the "Aw, Snap!" error and take appropriate action to address the issue.
To disable extensions in Chrome, users can follow these straightforward steps:
-
Accessing Chrome Extensions: Begin by opening the Chrome browser on your Windows 10 device. In the top-right corner of the browser window, click on the three-dot menu icon to access the main menu. From the menu, navigate to "More tools" and then select "Extensions" to access the list of installed extensions.
-
Disabling Extensions: Within the Extensions menu, users will find a list of all installed extensions, each accompanied by a toggle switch. To disable an extension, simply toggle the switch to the off position. Users can choose to disable one extension at a time or opt for a blanket approach by disabling all extensions simultaneously.
-
Testing Browsing Experience: After disabling the extensions, users can proceed to test their browsing experience to see if the "Aw, Snap!" error persists. By temporarily removing the influence of extensions, users can determine if any of these add-ons are contributing to the error.
-
Identifying Problematic Extensions: If the error is resolved after disabling extensions, users can systematically re-enable each extension one at a time while testing the browsing experience after each re-enablement. This process can help identify the specific extension causing the error, allowing users to take targeted action, such as updating, removing, or replacing the problematic extension.
By following these steps to disable extensions in Chrome, users can effectively isolate the influence of add-ons on the browsing experience and identify potential sources of the "Aw, Snap!" error. This method empowers users to take control of their browsing environment and address the error with precision, ensuring a smoother and more reliable browsing experience on their Windows 10 device.
In the pursuit of resolving the "Aw, Snap!" error, the process of disabling extensions serves as a pivotal troubleshooting step. By systematically managing extensions and their impact on the browser, users can gain valuable insights into the underlying causes of the error and take targeted measures to restore seamless browsing on their Windows 10 device.
Update Chrome
Ensuring that Google Chrome is up to date is a critical step in addressing the "Aw, Snap!" error on Windows 10. Outdated browser versions can contain bugs, security vulnerabilities, and compatibility issues that may contribute to browsing errors, including the frustrating "Aw, Snap!" message. By updating Chrome to the latest version, users can benefit from bug fixes, performance enhancements, and security patches that can potentially resolve the error and improve the overall browsing experience.
To update Chrome on Windows 10, users can follow these straightforward steps:
-
Accessing Chrome Settings: Open the Chrome browser on your Windows 10 device and click on the three-dot menu icon in the top-right corner of the browser window to access the main menu.
-
Navigating to Help: From the menu, hover over the "Help" option and then select "About Google Chrome" from the submenu. This action will open a new tab displaying information about the current version of Chrome and whether an update is available.
-
Checking for Updates: Upon accessing the "About Chrome" page, the browser will automatically check for available updates. If an update is available, Chrome will begin downloading and installing the latest version in the background.
-
Relaunching Chrome: Once the update is successfully installed, users will be prompted to relaunch the browser to apply the changes. Click on the "Relaunch" button to restart Chrome with the updated version.
By following these steps to update Chrome, users can ensure that they are running the latest version of the browser, equipped with the most recent improvements and fixes. This proactive approach to keeping Chrome up to date can help mitigate potential issues, including the "Aw, Snap!" error, and provide users with a more stable and secure browsing environment on their Windows 10 device.
In the quest to address the "Aw, Snap!" error, updating Chrome stands as a fundamental step in maintaining a healthy and optimized browsing experience. By staying current with the latest browser updates, users can leverage the advancements and enhancements introduced by Google to enhance the stability and performance of Chrome, ultimately reducing the likelihood of encountering browsing errors and disruptions.
Reset Chrome Settings
Resetting Chrome settings can serve as a powerful troubleshooting tool to address the persistent "Aw, Snap!" error in Chrome on Windows 10. Over time, accumulated settings, preferences, and customizations within the browser can lead to conflicts and instabilities, potentially contributing to browsing errors. By resetting Chrome settings, users can effectively restore the browser to its default state, eliminating problematic configurations and paving the way for a more stable and reliable browsing experience.
To reset Chrome settings on Windows 10, users can follow these step-by-step instructions:
-
Accessing Chrome Settings: Open the Chrome browser on your Windows 10 device and click on the three-dot menu icon in the top-right corner of the browser window to access the main menu.
-
Navigating to Settings: From the menu, select "Settings" to access the browser's settings and customization options.
-
Scrolling to Advanced: Within the Settings menu, scroll down and click on "Advanced" to reveal additional configuration options.
-
Resetting Settings: Under the "Reset and clean up" section, select "Restore settings to their original defaults." This action will open a prompt detailing the changes that will occur when resetting Chrome settings.
-
Confirming the Reset: Review the implications of resetting Chrome settings, including the loss of customizations and preferences, and click on the "Reset settings" button to proceed with the reset.
Upon completing these steps, Chrome will revert to its default settings, effectively clearing out potentially problematic configurations and preferences that may have contributed to the "Aw, Snap!" error. This process can help eliminate underlying issues within the browser, providing users with a fresh and optimized browsing environment.
In the pursuit of resolving the "Aw, Snap!" error, resetting Chrome settings offers a comprehensive approach to addressing potential configuration conflicts and instabilities. By returning the browser to its default state, users can effectively eliminate problematic settings and pave the way for a more seamless and error-free browsing experience on their Windows 10 device.
Resetting Chrome settings represents a proactive and impactful measure in troubleshooting browsing errors, empowering users to take control of their browser's configuration and restore optimal performance. By leveraging this method, users can address the "Aw, Snap!" error with precision, ultimately enhancing their browsing experience and minimizing disruptions during web exploration.
Check for Malware
Checking for malware is a crucial step in addressing the persistent "Aw, Snap!" error in Chrome on Windows 10. Malicious software, including viruses, adware, and other forms of malware, can infiltrate the system and impact the browser's performance, leading to errors and disruptions during web browsing. By conducting a thorough malware scan, users can identify and eliminate potential security threats that may be contributing to the "Aw, Snap!" error, ultimately restoring a safer and more reliable browsing experience.
To check for malware on Windows 10, users can leverage reputable antivirus and antimalware software to perform comprehensive system scans. These security tools are designed to detect and remove a wide range of malware, safeguarding the system from potential threats and vulnerabilities. Users can follow these essential steps to check for malware and mitigate the risk of encountering the "Aw, Snap!" error:
-
Selecting a Trusted Security Software: Begin by ensuring that a reputable antivirus or antimalware software is installed on the Windows 10 device. If no security software is currently in place, users should consider installing a trusted security solution from a recognized provider.
-
Initiating a Full System Scan: Once the security software is in place, users can initiate a full system scan to thoroughly examine the system for any signs of malware. This comprehensive scan will encompass all files, programs, and system components, providing a comprehensive assessment of the system's security status.
-
Reviewing Scan Results: After the scan is complete, users should review the scan results to identify any detected malware or suspicious files. If the security software identifies potential threats, users should follow the recommended actions to quarantine or remove the detected malware from the system.
-
Updating Security Definitions: It is essential to ensure that the security software's virus and malware definitions are up to date. Regularly updating these definitions enables the security software to effectively identify and address the latest security threats, enhancing the overall protection of the system.
By conducting a thorough malware scan and addressing any identified security threats, users can significantly reduce the risk of encountering the "Aw, Snap!" error in Chrome. This proactive approach to system security not only helps in resolving the immediate browsing issues but also contributes to maintaining a secure and resilient computing environment on Windows 10.
In the pursuit of addressing the "Aw, Snap!" error, checking for malware represents a fundamental aspect of system maintenance and security. By fortifying the system against potential security threats, users can enjoy a more secure and uninterrupted browsing experience, free from the disruptions caused by malware-related issues.
By following these steps to check for malware and bolster system security, users can proactively mitigate the risk of encountering the "Aw, Snap!" error and ensure a safer and more reliable browsing experience on their Windows 10 device.
Reinstall Chrome
Reinstalling Chrome can serve as a definitive solution to address persistent issues, including the stubborn "Aw, Snap!" error in Chrome on Windows 10. When other troubleshooting methods have been exhausted and the error continues to disrupt the browsing experience, reinstalling Chrome can provide a fresh start, eliminating potential underlying issues and restoring the browser to a pristine state.
To reinstall Chrome on Windows 10, users can follow these comprehensive steps:
-
Uninstalling Chrome: Begin by uninstalling the existing installation of Chrome from the Windows 10 device. This can be done by accessing the "Apps & features" section in the Windows Settings, locating Google Chrome in the list of installed applications, and selecting the option to uninstall the browser.
-
Downloading the Latest Version: After successfully uninstalling Chrome, users should navigate to the official Chrome website or another trusted source to download the latest version of the browser. It is essential to obtain the installation package from a reputable source to ensure the integrity and security of the software.
-
Installing Chrome: Once the installation package is downloaded, users can proceed to install Chrome on their Windows 10 device. The installation process typically involves running the setup file, following the on-screen prompts, and allowing the browser to be installed with default settings.
-
Customizing Chrome (Optional): Upon reinstalling Chrome, users have the option to customize the browser settings, import bookmarks and browsing data, and configure preferences according to their preferences. This step allows users to tailor the browsing experience to their liking, ensuring a personalized and optimized environment.
By reinstalling Chrome, users can effectively reset the browser to its default state, eliminating potential issues that may have contributed to the persistent "Aw, Snap!" error. This method provides a clean slate for the browser, allowing users to start afresh and potentially resolve the error that has been disrupting their browsing activities.
In the pursuit of addressing the "Aw, Snap!" error, reinstalling Chrome represents a proactive and comprehensive approach to troubleshooting. By embracing this method, users can leverage the benefits of a fresh installation, potentially resolving persistent browsing issues and restoring a seamless and uninterrupted browsing experience on their Windows 10 device.