Introduction
Safari, the default web browser on iPad, offers a seamless browsing experience with its user-friendly interface and robust features. However, there are instances when users may want to disable Safari on their iPad, either to limit access to certain websites or to prevent unauthorized browsing. Fortunately, there are several methods to achieve this, each catering to different user preferences and needs.
In this article, we will explore three effective methods to disable Safari on your iPad. Whether you prefer using built-in features like Screen Time and Restrictions or leveraging the flexibility of Guided Access, you'll find a suitable approach to meet your specific requirements. By understanding these methods, you can gain greater control over your browsing experience and ensure a safer and more tailored usage of your iPad.
Now, let's delve into the step-by-step instructions for each method, empowering you to make informed decisions about managing Safari on your iPad. Whether you're a concerned parent, a diligent employer, or simply seeking to enhance your digital well-being, these methods will equip you with the tools to customize your browsing accessibility and security on your iPad.
Method 1: Using Screen Time
Screen Time, a powerful feature introduced in iOS 12, empowers users to manage and monitor their device usage effectively. By utilizing Screen Time, you can not only gain insights into your digital habits but also exert control over various aspects of your iPad, including the ability to disable Safari.
Step 1: Accessing Screen Time
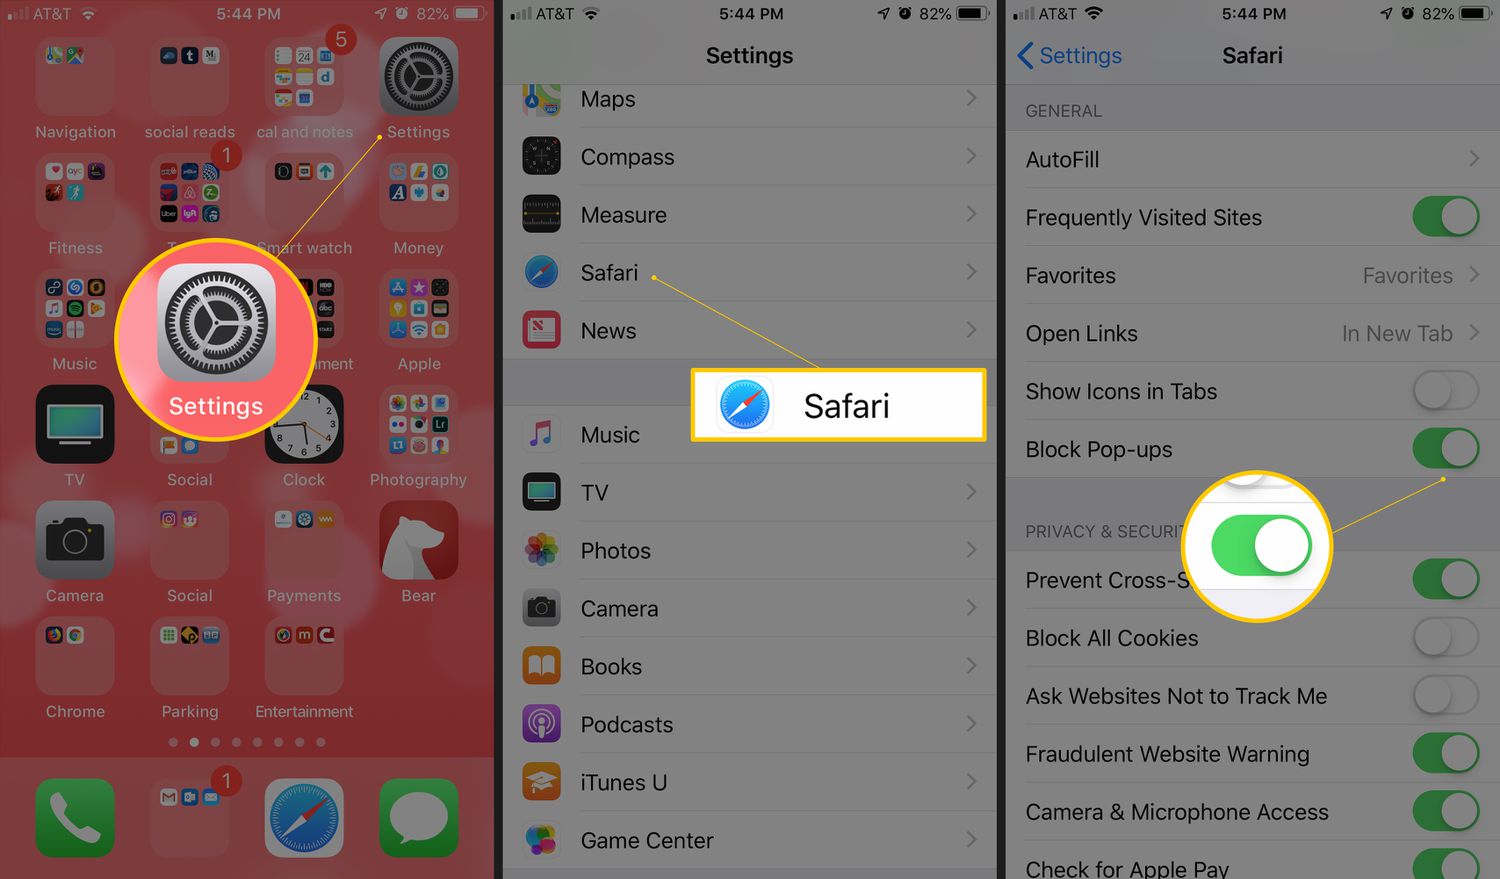
To initiate the process, navigate to the "Settings" app on your iPad and tap on "Screen Time." Once inside the Screen Time menu, you will find a plethora of options to regulate your device usage and set specific restrictions.
Step 2: Enabling Content & Privacy Restrictions
Under the Screen Time settings, select "Content & Privacy Restrictions" to proceed with customizing the restrictions on your iPad. This section allows you to manage access to various apps and features, including Safari.
Step 3: Disabling Safari
Within the Content & Privacy Restrictions menu, tap on "Allowed Apps" and then toggle off the switch next to Safari. By doing so, you effectively disable Safari on your iPad, preventing its access and usage.
Step 4: Setting a Screen Time Passcode
For added security and control, consider setting a Screen Time passcode. This passcode ensures that only authorized users can modify the Screen Time settings, including the restrictions placed on Safari.
By following these steps, you can effectively disable Safari on your iPad using the Screen Time feature. Whether you're managing your own browsing habits or overseeing the device usage of others, Screen Time provides a convenient and intuitive method to tailor the accessibility of Safari to your specific needs.
Utilizing Screen Time to disable Safari not only promotes a safer browsing environment but also enables you to cultivate healthier digital habits. With the flexibility and control offered by Screen Time, you can seamlessly customize your iPad experience, ensuring that it aligns with your preferences and requirements.
Method 2: Using Restrictions
When it comes to managing the accessibility of various features and apps on your iPad, the Restrictions settings offer a comprehensive array of options. By leveraging Restrictions, you can effectively disable Safari, providing a tailored browsing experience that aligns with your specific requirements.
Step 1: Accessing Restrictions
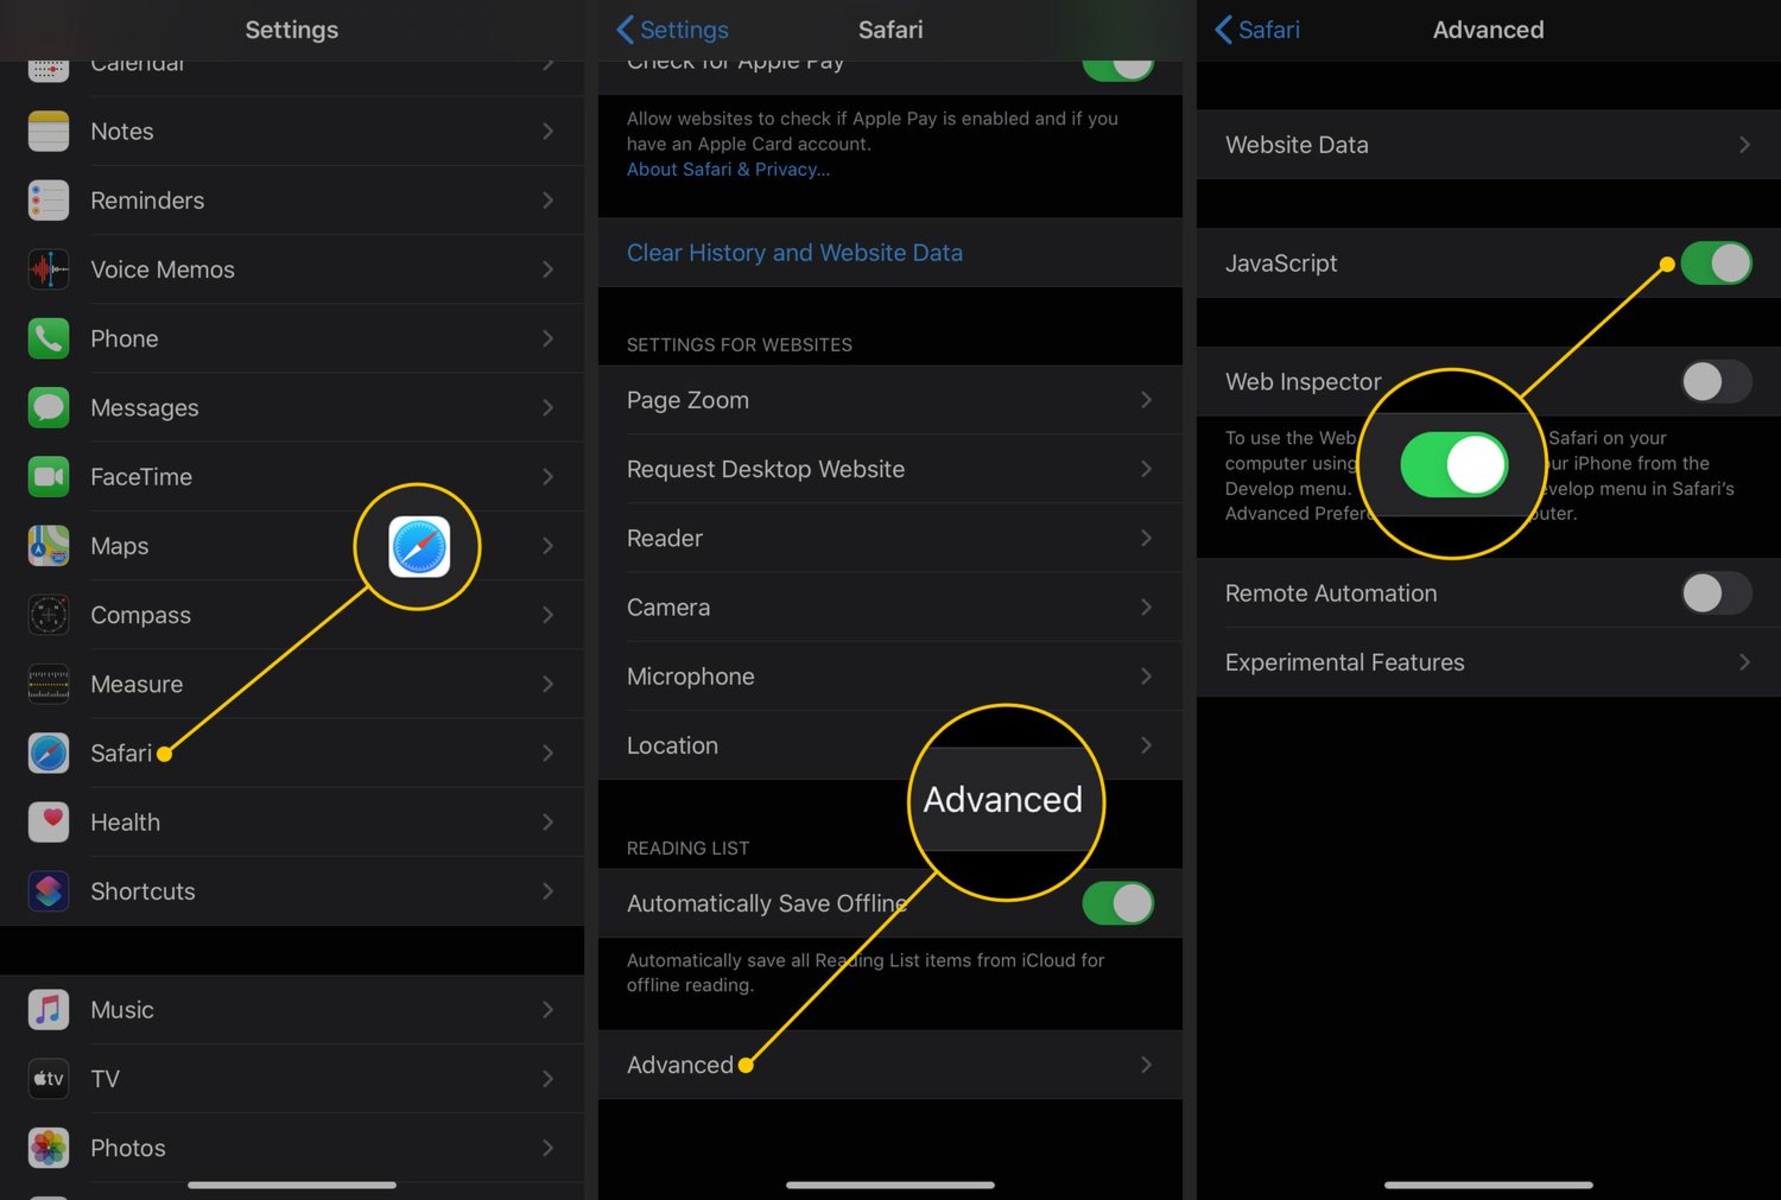
To initiate the process, navigate to the "Settings" app on your iPad and tap on "Screen Time." From there, select "Content & Privacy Restrictions" and proceed to "Allowed Apps." Here, you will find the option to disable Safari by toggling off its switch.
Step 2: Disabling Safari
Once inside the "Allowed Apps" section, simply toggle off the switch next to Safari. This action effectively disables Safari on your iPad, preventing its access and usage. By implementing this restriction, you can ensure a more controlled and focused browsing environment, whether for personal use or when managing the device usage of others.
Step 3: Customizing Additional Restrictions
In addition to disabling Safari, the Restrictions settings offer a myriad of customization options to tailor the iPad experience. You can set specific limitations on web content, app installations, and other functionalities, further enhancing the control and security of the device.
Step 4: Setting a Restrictions Passcode
For added security and oversight, consider setting a Restrictions passcode. This passcode ensures that only authorized users can modify the Restrictions settings, including the disabled status of Safari. By implementing this additional layer of security, you can maintain greater control over the browsing accessibility on your iPad.
By following these steps, you can effectively disable Safari on your iPad using the Restrictions feature. Whether you're seeking to limit access to certain websites, create a more focused browsing environment, or manage the device usage of others, Restrictions provide a robust and versatile method to customize the accessibility of Safari to suit your specific needs.
Utilizing Restrictions to disable Safari not only fosters a more controlled browsing experience but also empowers you to establish tailored usage guidelines for your iPad. With the flexibility and customization offered by Restrictions, you can effectively shape the digital environment of your iPad, ensuring that it aligns with your preferences and promotes a safer and more focused browsing experience.
Method 3: Using Guided Access
Guided Access is a versatile feature that empowers iPad users to restrict the functionality of the device to a single app and control which features are available within that app. This functionality extends to Safari, allowing users to effectively disable the browser and create a more focused and controlled browsing environment.
Step 1: Enabling Guided Access
To initiate the process, navigate to the "Settings" app on your iPad and tap on "Accessibility." From there, select "Guided Access" and toggle the switch to enable this feature. Once enabled, you can proceed to customize the settings for Guided Access, including the specific restrictions you wish to impose on Safari.
Step 2: Initiating Guided Access for Safari
After enabling Guided Access, open the Safari app on your iPad. Triple-click the Home button (or the Side button, depending on your iPad model) to activate Guided Access. This action locks the iPad into the Safari app and prevents users from exiting to access other features or apps.
Step 3: Customizing Guided Access Settings
Within Guided Access, you have the flexibility to customize the restrictions and control various aspects of Safari. You can disable specific areas of the screen, restrict touch input on certain elements, and even set time limits for the Guided Access session. These settings allow you to tailor the browsing experience within Safari to align with your specific requirements.
Step 4: Exiting Guided Access
To exit Guided Access and return to the normal functionality of your iPad, triple-click the Home button (or the Side button) again and enter the passcode you set for Guided Access. This action seamlessly transitions the iPad back to its standard mode, providing access to all apps and features.
By following these steps, you can effectively utilize Guided Access to disable Safari on your iPad. Whether you're managing the browsing experience for yourself, your children, or other users, Guided Access offers a powerful and intuitive method to create a more controlled and focused environment within the Safari browser.
Utilizing Guided Access to disable Safari not only promotes a safer and more tailored browsing experience but also empowers users to establish clear usage guidelines for the iPad. With the flexibility and control offered by Guided Access, you can effectively shape the digital environment of your iPad, ensuring that it aligns with your preferences and promotes a more secure and focused browsing experience.
Conclusion
In conclusion, the ability to disable Safari on your iPad provides a valuable means of customizing and managing the browsing experience to align with specific needs and preferences. By exploring the three methods outlined in this article, users can gain a deeper understanding of the versatile features available for controlling Safari accessibility. Whether it's leveraging Screen Time, Restrictions, or Guided Access, each method offers a unique approach to tailoring the browsing environment on the iPad.
By utilizing Screen Time, users can not only disable Safari but also gain insights into their digital habits and exert control over various aspects of their iPad usage. This feature serves as a comprehensive tool for managing screen time and app access, promoting a healthier and more balanced digital lifestyle.
Similarly, the Restrictions settings provide a robust array of options to disable Safari and customize the browsing experience. With the ability to set specific limitations on web content and app installations, users can create a more controlled and secure environment on their iPad, whether for personal use or when managing the device usage of others.
Guided Access, with its versatile functionality, empowers users to restrict the iPad's functionality to a single app and control which features are available within that app. This feature offers a powerful method to disable Safari and create a more focused and controlled browsing environment, catering to the diverse needs of users seeking a tailored browsing experience.
In essence, the ability to disable Safari on the iPad not only promotes a safer and more tailored browsing experience but also empowers users to establish clear usage guidelines for the device. Whether it's for personal usage management, parental controls, or creating a more focused browsing environment, the methods outlined in this article offer valuable tools to shape the digital environment of the iPad.
By understanding and implementing these methods, users can effectively customize their browsing accessibility, ensuring that it aligns with their preferences and promotes a more secure and focused browsing experience. Ultimately, the flexibility and control offered by these features enable users to cultivate healthier digital habits and tailor their iPad experience to suit their specific needs.